

Halloween parties for kids often call for food that is simple to make and fun to eat. Many parents look for recipes that use basic ingredients and do not take much time. These ideas focus on treats that hold up well at a gathering and appeal to younger guests. You can pick and choose based on what you already have on hand. Here are 10 practical options to consider for your next event.
Helpful Tips Before You Start
A little planning keeps the food simple and the kids happy at the party.
Pick Shapes That Are Easy to Handle
Use cookie cutters or molds that create small pieces kids can pick up with their fingers. Avoid anything too delicate that might break before it reaches the table.
Check for Allergies Ahead of Time
Ask parents about common issues like nuts or dairy so you can swap ingredients where needed. Keep a few plain options ready as backups.
Make Items the Day Before
Assemble bases or cut shapes in advance and store them in the fridge. This leaves only quick finishing steps on the day of the party.
Set Up a Simple Assembly Station
Lay out toppings and tools in one spot so kids can help with safe tasks like sprinkling or placing eyes on treats. Keep sharp tools out of reach.
Mummy Hot Dog Wraps with Mustard Dip
These mummy hot dog wraps bring a simple, playful touch to kids’ Halloween parties. The flaky dough wraps around savory hot dogs to create a fun shape that little ones enjoy picking up. The mustard dip on the side adds a tangy contrast that balances the warm, soft texture of the baked wraps.
This recipe works well as a quick party snack because it uses basic ingredients and comes together with minimal steps. It fits right into a spread of finger foods without needing fancy tools or long prep.
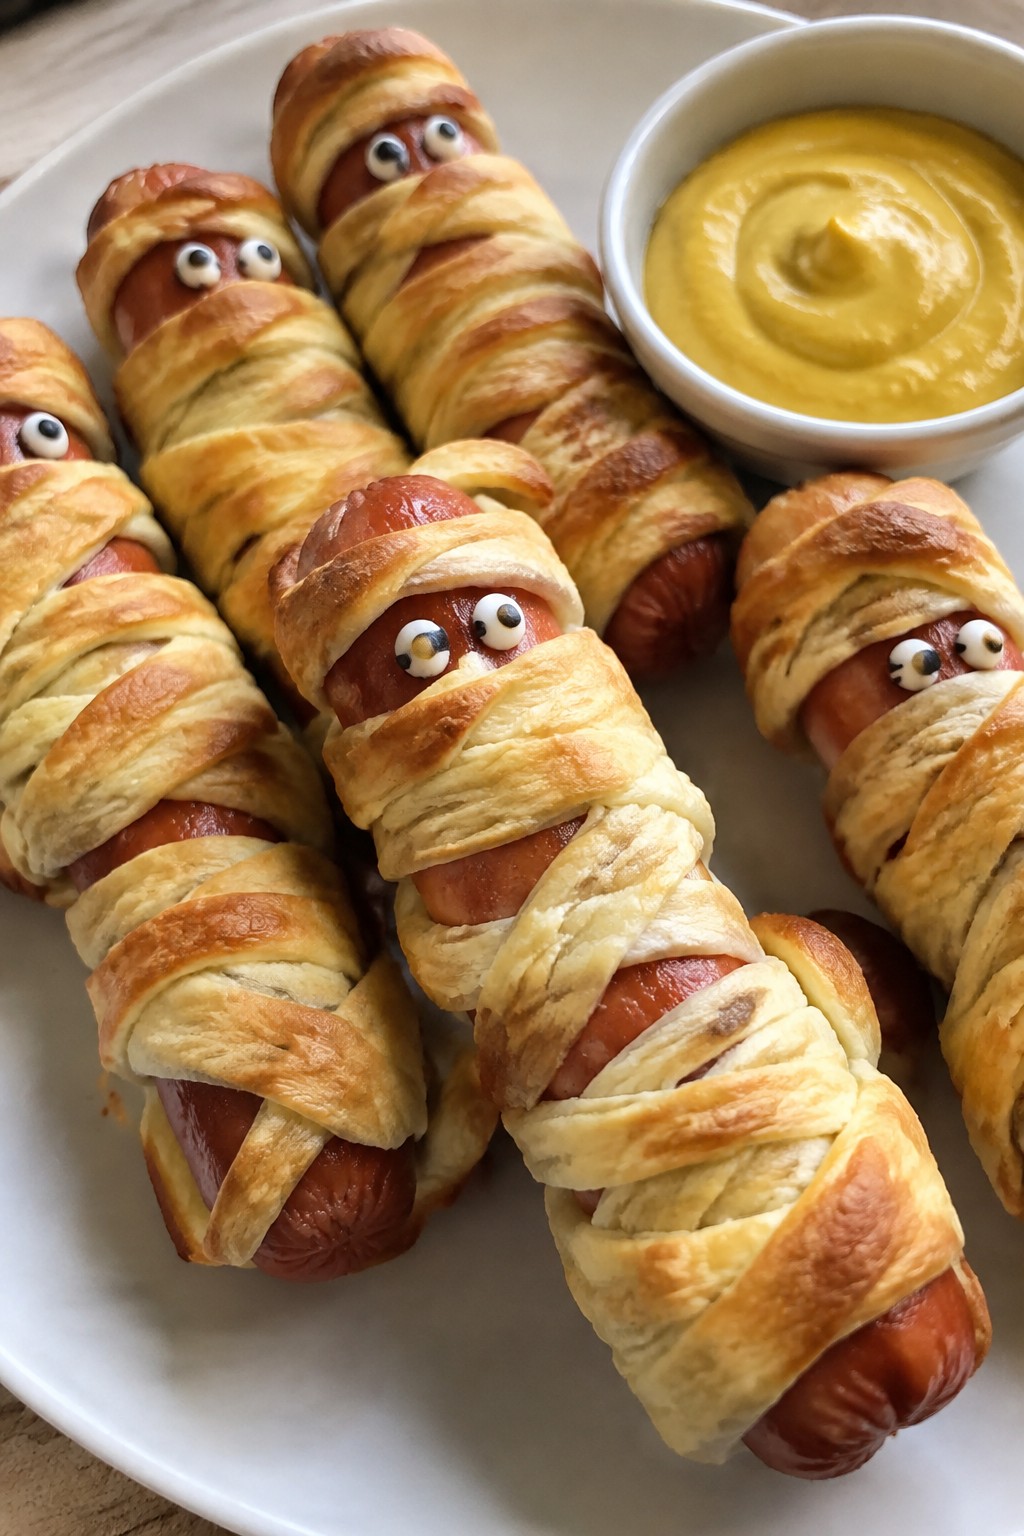
Serves 4 people.
Ingredients
- 8 hot dogs
- 1 can (8-count) refrigerated crescent roll dough
- 1/4 cup yellow mustard
- 2 tablespoons mayonnaise
- 1 teaspoon honey
Instructions
- Preheat the oven to 375°F and line a baking sheet with parchment paper.
- Open the crescent roll dough and separate it into triangles. Cut each triangle into thin strips.
- Wrap the dough strips around each hot dog, leaving small gaps near the top for the face area.
- Place the wrapped hot dogs on the prepared baking sheet.
- Bake until the dough turns golden brown and the hot dogs are heated through.
- While the wraps bake, combine the yellow mustard, mayonnaise, and honey in a small bowl and stir until smooth.
- Serve the warm wraps with the mustard dip on the side.
Extra Tips
Use a small dab of the mustard dip to dot on eyes after baking if you want extra detail. Reduce the honey slightly for a sharper dip or add a pinch more for a milder version that suits younger kids. These wraps reheat best in a low oven to keep the dough crisp. Course: Appetizer Cuisine: American Equipment: Baking Sheet, Mixing Bowl
Ghostly Cheese-Stuffed Mushrooms
These Ghostly Cheese-Stuffed Mushrooms bring a simple spooky touch to kids’ Halloween parties. The white cheese filling stands out against the dark mushroom caps and gives the bites a playful ghost look.
They work well as a warm finger food that kids can grab easily from a party table. The mild cheese and soft mushroom texture keep the flavor gentle and familiar.

Serves 4 people.
Ingredients
- 16 large white button mushrooms
- 8 ounces cream cheese, softened
- 1 cup shredded mozzarella cheese
- 2 cloves garlic, minced
- 1/4 cup grated Parmesan cheese
- 1/2 teaspoon dried oregano
- 1/4 teaspoon salt
- 1/4 teaspoon black pepper
- 2 tablespoons olive oil
- 8 black olives, sliced into rounds
Instructions
- Preheat the oven to 375 degrees F and line a baking sheet with parchment paper.
- Wipe the mushrooms clean with a damp cloth and remove the stems.
- In a mixing bowl, stir together the cream cheese, mozzarella cheese, Parmesan cheese, garlic, oregano, salt, and pepper until evenly combined.
- Brush the outside of each mushroom cap with olive oil.
- Spoon the cheese mixture into the mushroom cavities and set them on the prepared baking sheet.
- Bake for 18 to 20 minutes until the cheese is melted and lightly golden.
- Remove the mushrooms from the oven and immediately press two olive slices into the cheese on each one to form eyes.
Extra Tips
Add the olive eyes while the cheese is still warm so they stick without sliding. If the cream cheese is cold, let it sit out for 20 minutes before mixing to avoid lumps. Leftovers reheat best in a 350-degree oven for five minutes to keep the filling creamy. Course: Appetizer Cuisine: American Equipment: Baking sheet, Mixing bowl, Pastry brush
Spiderweb Black Bean Quesadillas
These spiderweb black bean quesadillas bring a simple Halloween detail to a kid-friendly meal. The black beans and cheese create a hearty filling, while sour cream forms the web design on top. They suit party platters because they hold up well at room temperature and offer a mild, cheesy taste that most children enjoy.
The outside turns crisp after cooking in a skillet, and the inside stays soft with melted cheese. This version keeps the focus on easy assembly so parents can prepare several at once without extra steps.
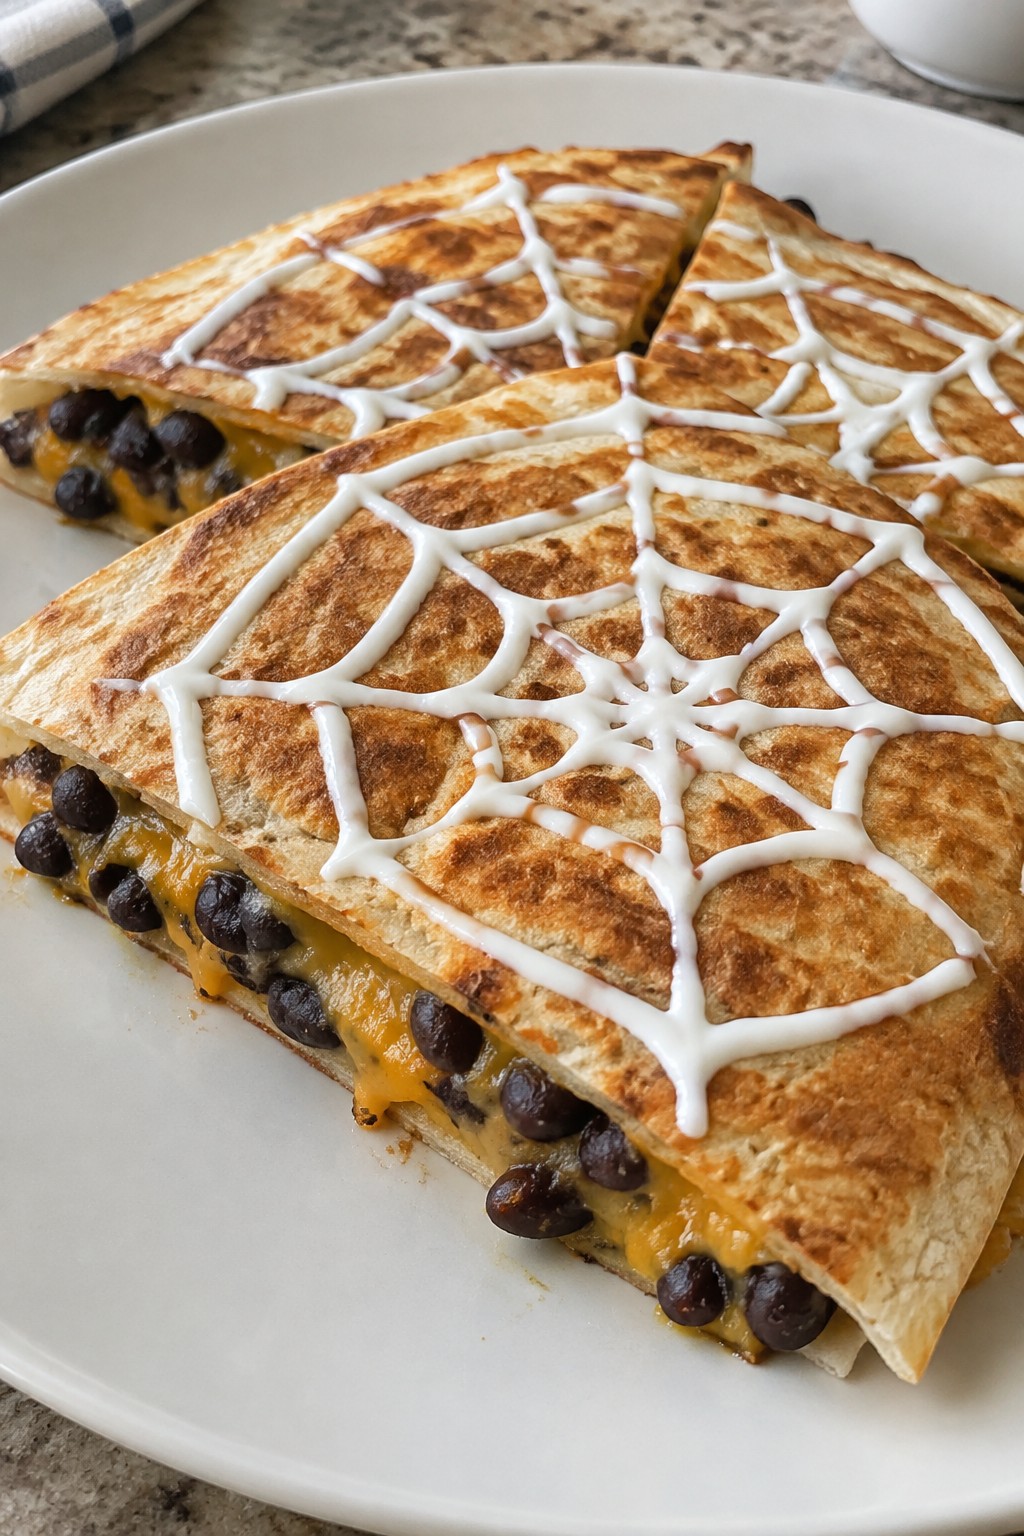
Serves 4 people.
Ingredients
- 8 large flour tortillas
- 1 (15 oz) can black beans, rinsed and drained
- 2 cups shredded cheddar cheese
- 1 teaspoon ground cumin
- 1/2 teaspoon chili powder
- 1/4 teaspoon salt
- 1/2 cup sour cream
Instructions
- In a medium bowl, combine the black beans, cumin, chili powder, and salt. Mash the mixture lightly with a fork so it holds together but still has some texture.
- Lay four tortillas on a clean surface. Sprinkle 1/4 cup of cheese on each tortilla, then divide the bean mixture evenly among them and spread it out. Top with the remaining cheese and place the second tortilla on each stack.
- Heat a large skillet over medium heat. Cook each quesadilla for 2 to 3 minutes per side until the tortillas are golden and the cheese has melted. Remove to a cutting board.
- Spoon the sour cream into a small zip-top bag and snip off one corner. Pipe concentric circles on top of each quesadilla, then drag a knife from the center outward in several lines to create the web pattern.
- Slice each quesadilla into wedges before serving.
Extra Tips
Pipe the sour cream right before serving so the lines stay sharp. If the sour cream is too thick, stir in a teaspoon of milk to make it easier to pipe. Leftovers reheat well in a skillet over low heat to restore crispness without softening the web design. Course: Appetizer Cuisine: Mexican Equipment: Large Skillet, Medium Bowl, Cutting Board
Pumpkin Patch Deviled Eggs
These deviled eggs bring a playful touch to kids’ Halloween parties by turning a classic snack into a mini pumpkin patch. The orange-tinted filling and chive stems give each egg a simple pumpkin shape that fits right in with other themed bites on the table. Kids enjoy the mild, creamy taste while adults appreciate how easy the dish is to prepare ahead.
The texture stays smooth and light thanks to the mayo and mustard blend, with just enough paprika to add color and a gentle smoky note without overpowering young palates.
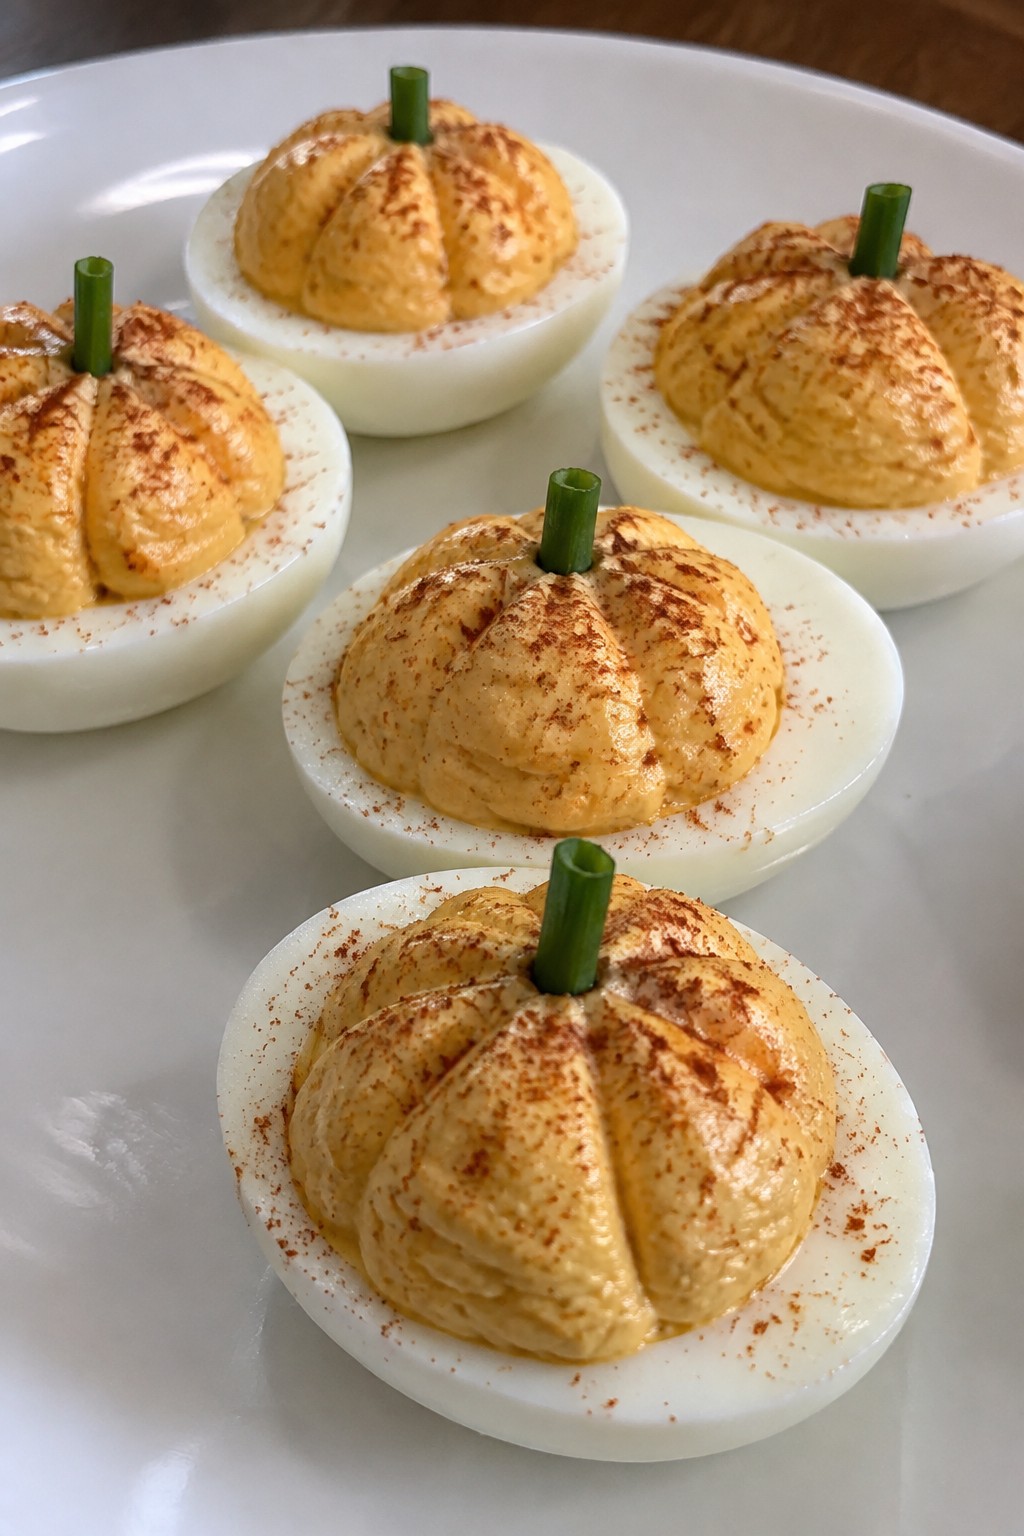
Serves 4 people.
Ingredients
- 6 large eggs
- 3 tablespoons mayonnaise
- 1 teaspoon yellow mustard
- 1 teaspoon paprika
- 1/4 teaspoon salt
- 1/4 teaspoon black pepper
- 2 tablespoons chopped fresh chives
Instructions
- Place the eggs in a large pot and cover them with cold water. Bring the water to a boil over medium-high heat, then remove the pot from the heat, cover it, and let the eggs sit for 12 minutes.
- Drain the hot water and run the eggs under cold water until they are cool enough to handle. Peel the eggs and slice each one in half lengthwise.
- Scoop the yolks into a mixing bowl. Add the mayonnaise, yellow mustard, paprika, salt, and black pepper. Mash everything together until the mixture is smooth.
- Spoon or pipe the yolk mixture back into the egg white halves. Sprinkle the chopped chives over the tops so each egg looks like it has a small stem.
Extra Tips
Chill the filled eggs for at least 30 minutes before serving so the filling firms up and the flavors settle. If the paprika does not give enough orange color for your liking, stir in a tiny pinch more before filling the whites. Store leftovers in an airtight container in the fridge for up to two days. Course: Appetizer Cuisine: American Equipment: Large pot, Mixing bowl, Knife
Bat Wing Chicken Skewers with BBQ Glaze
These skewers give chicken a fun bat wing shape that fits right into a kids’ Halloween party spread. The chicken stays tender while the glaze adds a sweet and smoky coating that most children enjoy.
The recipe works well for a main bite at the table or as finger food during games and crafts. It delivers a simple savory flavor with a bit of sticky texture from the barbecue glaze.
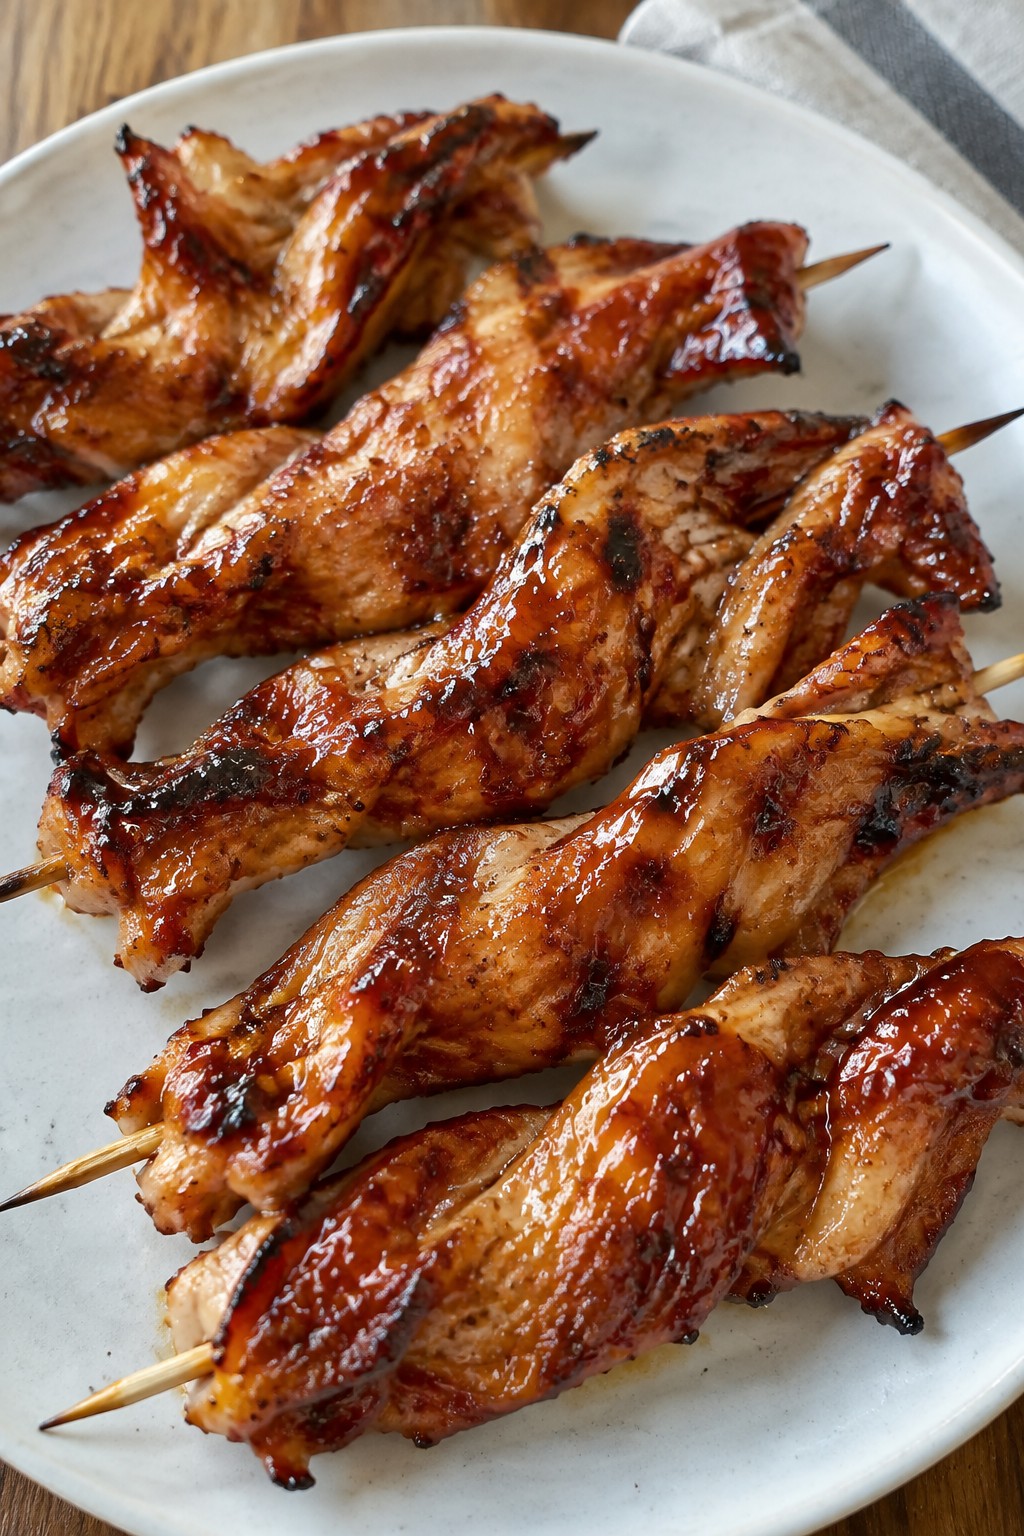
Serves 4 people.
Ingredients
- 1 pound boneless skinless chicken thighs, cut into thin strips
- 8 wooden skewers, soaked in water for 20 minutes
- 1 cup barbecue sauce
- 2 tablespoons honey
- 1 tablespoon olive oil
- 1 teaspoon smoked paprika
- 1/2 teaspoon garlic powder
- 1/2 teaspoon salt
- 1/4 teaspoon black pepper
Instructions
- Soak the wooden skewers in water for 20 minutes to prevent burning during cooking.
- In a bowl, stir together the olive oil, smoked paprika, garlic powder, salt, and black pepper.
- Add the chicken strips to the bowl and toss until each piece is evenly coated.
- Thread the chicken strips onto the soaked skewers in a slightly fanned shape to resemble bat wings.
- Mix the barbecue sauce and honey in a small bowl to create the glaze.
- Place the skewers on a baking sheet and brush them lightly with half of the glaze.
- Bake at 400 degrees Fahrenheit for 15 minutes, then flip the skewers and brush with the remaining glaze.
- Bake for another 10 minutes until the chicken reaches an internal temperature of 165 degrees Fahrenheit and the glaze looks sticky.
Extra Tips
Soak the skewers well ahead so they do not char in the oven. Brush the glaze on in two stages to build a thicker coating without burning. Serve the skewers with small bowls of extra barbecue sauce for dipping. Leftovers keep in the fridge for two days and reheat best in a 350 degree oven for five minutes to restore the sticky texture. Course: Appetizer Cuisine: American Equipment: Mixing Bowl, Baking Sheet, Basting Brush
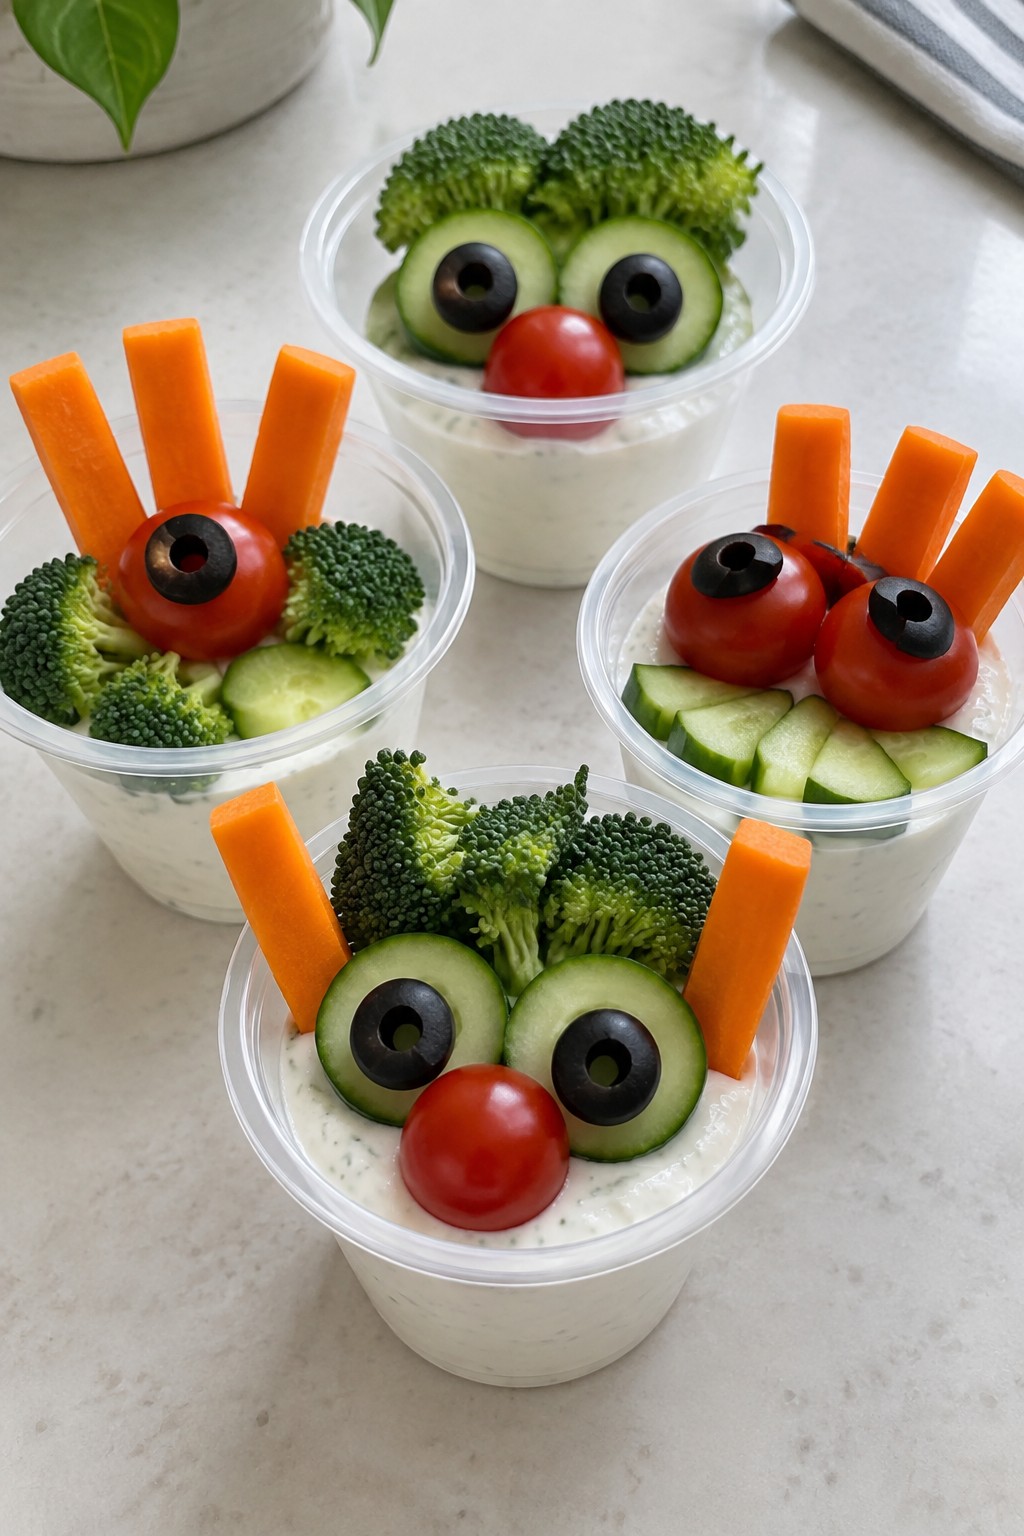
Monster Mash Veggie Cups with Ranch
These veggie cups bring a playful Halloween twist to snack time at kids’ parties. Colorful vegetables stand in for monster features while ranch sits at the base for easy dipping. The result is a crunchy, creamy bite that feels festive without extra fuss.
The recipe shines when you need a make-ahead option that still looks fresh on the table. Crisp vegetables hold their texture next to the cool ranch, and the simple monster details keep little hands busy.
Serves 4 people.
Ingredients
- 1 cup ranch dressing
- 4 small clear cups
- 1 large carrot, cut into sticks
- 1 cucumber, sliced into rounds
- 1 cup cherry tomatoes
- 1 cup broccoli florets
- 8 black olives, halved
Instructions
- Spoon 1/4 cup of ranch dressing into the bottom of each clear cup.
- Divide the carrot sticks, cucumber rounds, cherry tomatoes, and broccoli florets evenly among the four cups, standing some pieces upright for height.
- Press two olive halves onto the front of each cup or onto a tomato to form monster eyes.
- Arrange any remaining vegetable pieces around the olives to finish the faces.
Extra Tips
Cut the vegetables into similar sizes so they fit neatly in the cups and stay easy for kids to grab. If you prep the components earlier in the day, keep the ranch separate until serving to preserve the crunch. Swap in bell pepper strips if broccoli is not a favorite, but keep the olives for the eyes since they provide the needed contrast. Course: Appetizer Cuisine: American Equipment: Cutting board, Knife, Small cups
Witch Hat Brownie Bites
These witch hat brownie bites add a playful touch to kids’ Halloween parties. They come together with basic pantry items and turn out looking festive on a dessert table.
Each one starts with a chewy brownie base and finishes with a pointed chocolate cone that mimics a witch hat. The chocolate shell adds a light crunch while the brownie stays soft and rich.

Serves 4 people.
Ingredients
- 1/2 cup unsalted butter
- 1 cup semisweet chocolate chips
- 3/4 cup granulated sugar
- 2 large eggs
- 1/2 cup all-purpose flour
- 1/4 teaspoon salt
- 12 sugar ice cream cones
- 1 cup chocolate candy melts
- 2 tablespoons orange sprinkles
Instructions
- Preheat the oven to 350°F and grease a 12-cup mini muffin tin.
- Melt the butter and semisweet chocolate chips together in a microwave-safe bowl, stirring until smooth.
- Stir in the sugar, then beat in the eggs one at a time.
- Mix in the flour and salt until just combined.
- Divide the batter evenly among the 12 mini muffin cups.
- Bake for 12 to 14 minutes until the tops look set. Let the brownie bites cool in the tin for 10 minutes, then remove them to a wire rack.
- Melt the chocolate candy melts in a microwave-safe bowl until smooth.
- Dip the open end of each sugar cone into the melted chocolate and press it onto a brownie bite.
- Add a small ring of melted chocolate around the base of the cone if needed to help it stay in place, then scatter orange sprinkles over the chocolate while it is still wet.
- Let the hats set at room temperature for 20 minutes before serving.
Extra Tips
Work quickly when attaching the cones so the chocolate stays soft enough to hold the sprinkles. If the cones feel wobbly, add a bit more melted chocolate at the base before the final sprinkle step. Store leftovers in an airtight container at room temperature for up to two days. Course: Dessert Cuisine: American Equipment: Mixing bowl, Mini muffin tin, Microwave safe bowl, Wire rack
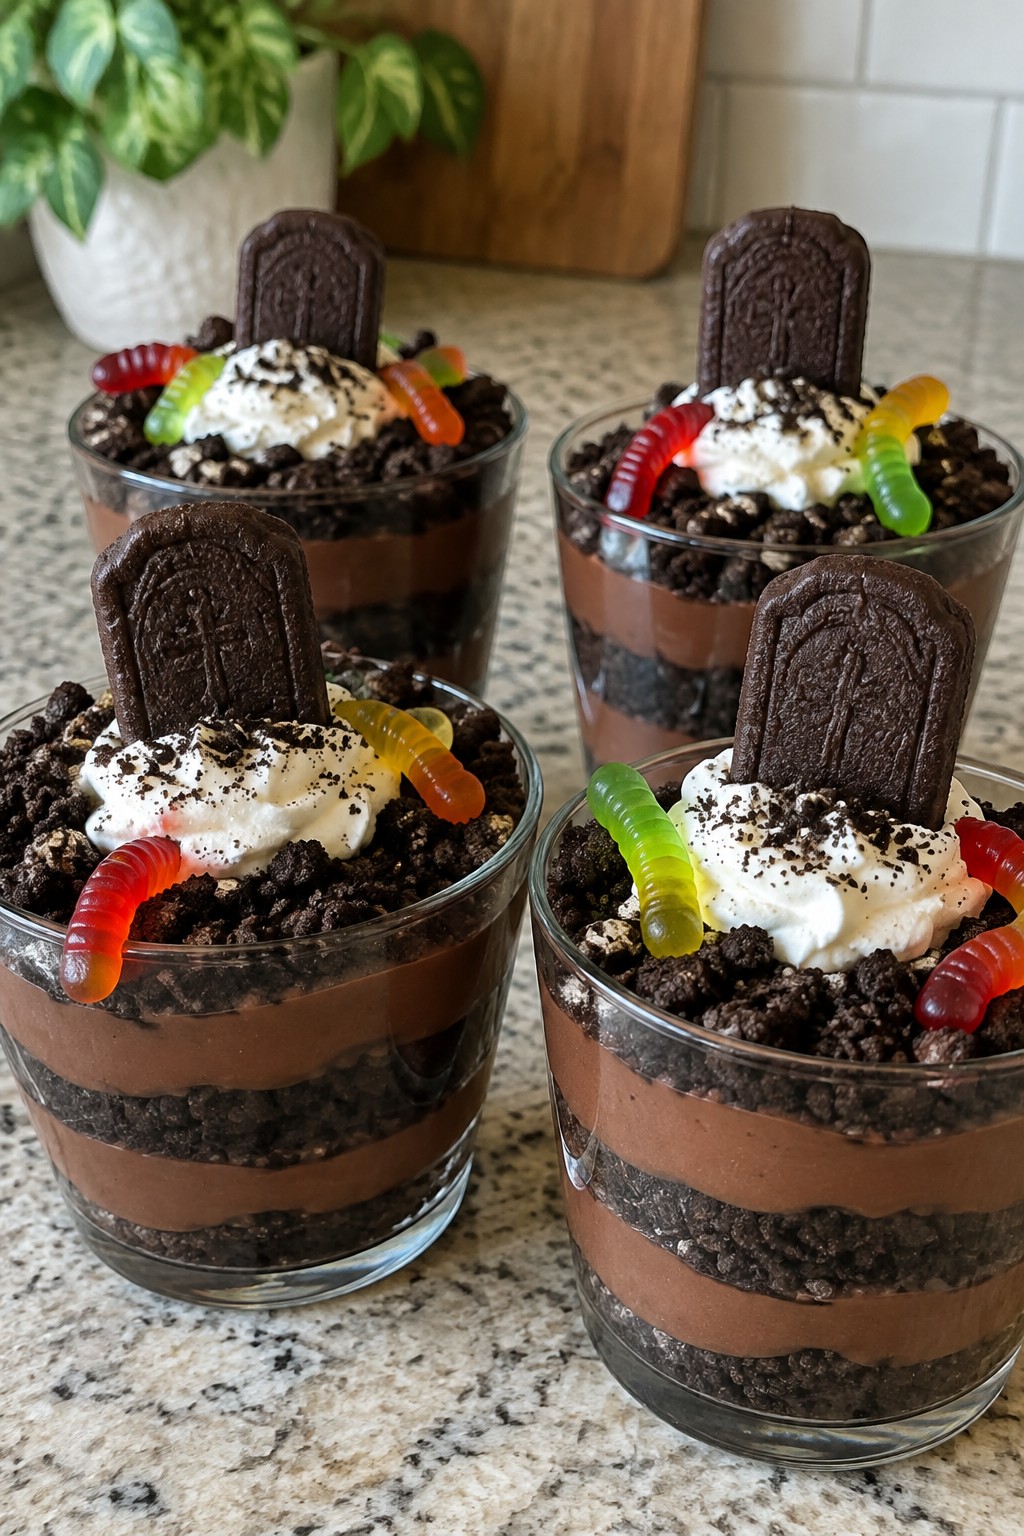
Graveyard Dirt Pudding Parfaits
These parfaits turn classic chocolate pudding into a fun graveyard scene that fits right into a kids’ Halloween party. Creamy pudding layers with crunchy cookie crumbs create a simple contrast that feels festive without much effort. The result is a cool, rich dessert with a bit of chew from the gummy accents on top.
This recipe serves 4 people.
Serves 4 people.
Ingredients
- 1 (3.9 oz) package instant chocolate pudding mix
- 2 cups cold milk
- 15 Oreo cookies, crushed
- 1 cup whipped topping
- 8 gummy worms
- 4 rectangular chocolate cookies
Instructions
- Pour the instant chocolate pudding mix and cold milk into a mixing bowl. Whisk for two minutes until the mixture thickens.
- Let the pudding sit for five minutes to set fully.
- Spoon a layer of pudding into the bottom of each of four glasses or small jars.
- Sprinkle a layer of crushed Oreo cookies over the pudding in each glass.
- Repeat with another layer of pudding, then another layer of crushed cookies, dividing the remaining amounts evenly.
- Top each parfait with a dollop of whipped topping.
- Press two gummy worms into the top cookie layer of each glass so they look like they are emerging from the dirt.
- Stand one rectangular chocolate cookie upright in the back of each parfait to act as a gravestone.
Extra Tips
Crush the Oreos just before assembling so they stay crisp against the pudding. If you prepare the parfaits ahead, add the gummy worms and rectangular cookies right before serving to keep them from softening. Swap the whipped topping for extra pudding if you want a thicker top layer. Course: Dessert Cuisine: American Equipment: Mixing bowl, whisk, parfait glasses, spoon
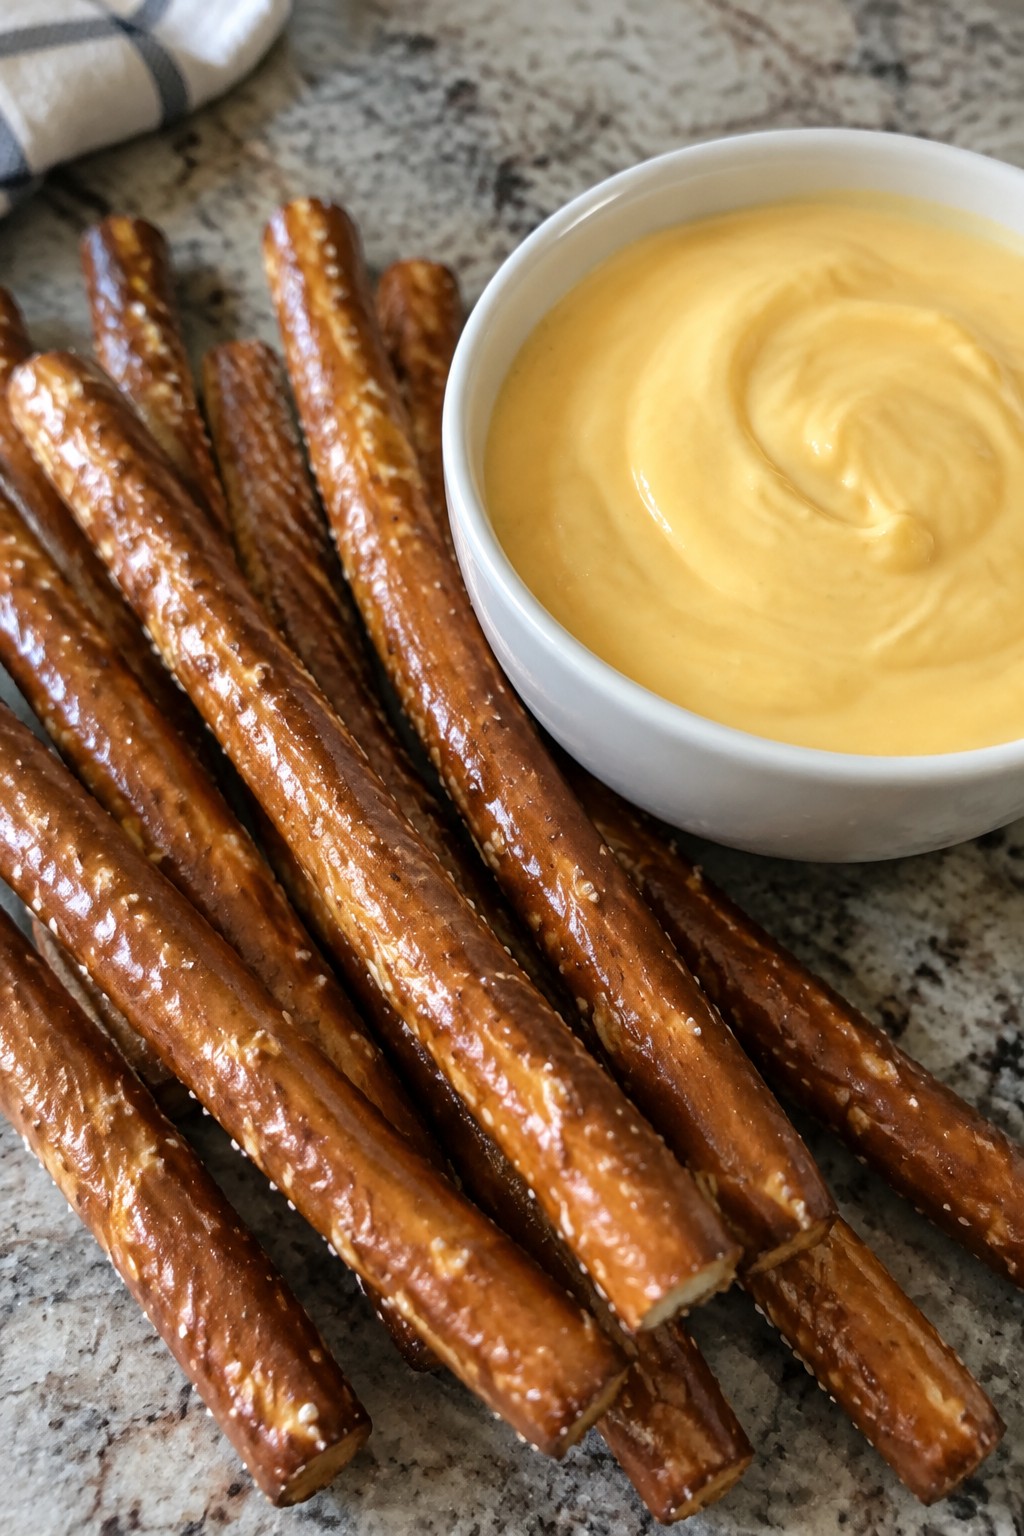
Skeleton Bone Pretzel Rods with Cheese Dip
These pretzel rods stand in as skeleton bones for a simple Halloween snack that fits right into a kids’ party spread. They pair a crunchy, salty base with a warm cheese dip that feels like a treat without extra fuss. The combination gives a nice contrast of textures that holds up well on a buffet table.
This recipe works best when served fresh so the dip stays smooth and the pretzels stay crisp. Kids enjoy the bone shape and the mild cheese flavor that does not overwhelm younger palates.
Serves 4 people.
Ingredients
- 12 large pretzel rods
- 8 ounces shredded cheddar cheese
- 1 cup whole milk
- 2 tablespoons unsalted butter
- 2 tablespoons all-purpose flour
- 1/4 teaspoon salt
Instructions
- Melt the butter in a small saucepan over medium heat.
- Whisk in the flour and cook for one minute until the mixture bubbles.
- Slowly pour in the milk while whisking to avoid lumps.
- Continue stirring until the sauce thickens, about two to three minutes.
- Lower the heat and add the shredded cheddar cheese a handful at a time, stirring until fully melted.
- Stir in the salt, then remove the pan from the heat.
- Arrange the pretzel rods on a serving plate and set the warm cheese dip in a bowl beside them.
Extra Tips
Keep the cheese dip warm by placing the saucepan in a larger bowl of hot water if the party runs long. Stir the dip occasionally to maintain its smooth texture. If the sauce thickens too much, add a splash of milk to loosen it before serving. Course: Appetizer Cuisine: American Equipment: Small saucepan, Whisk, Serving plate, Bowl
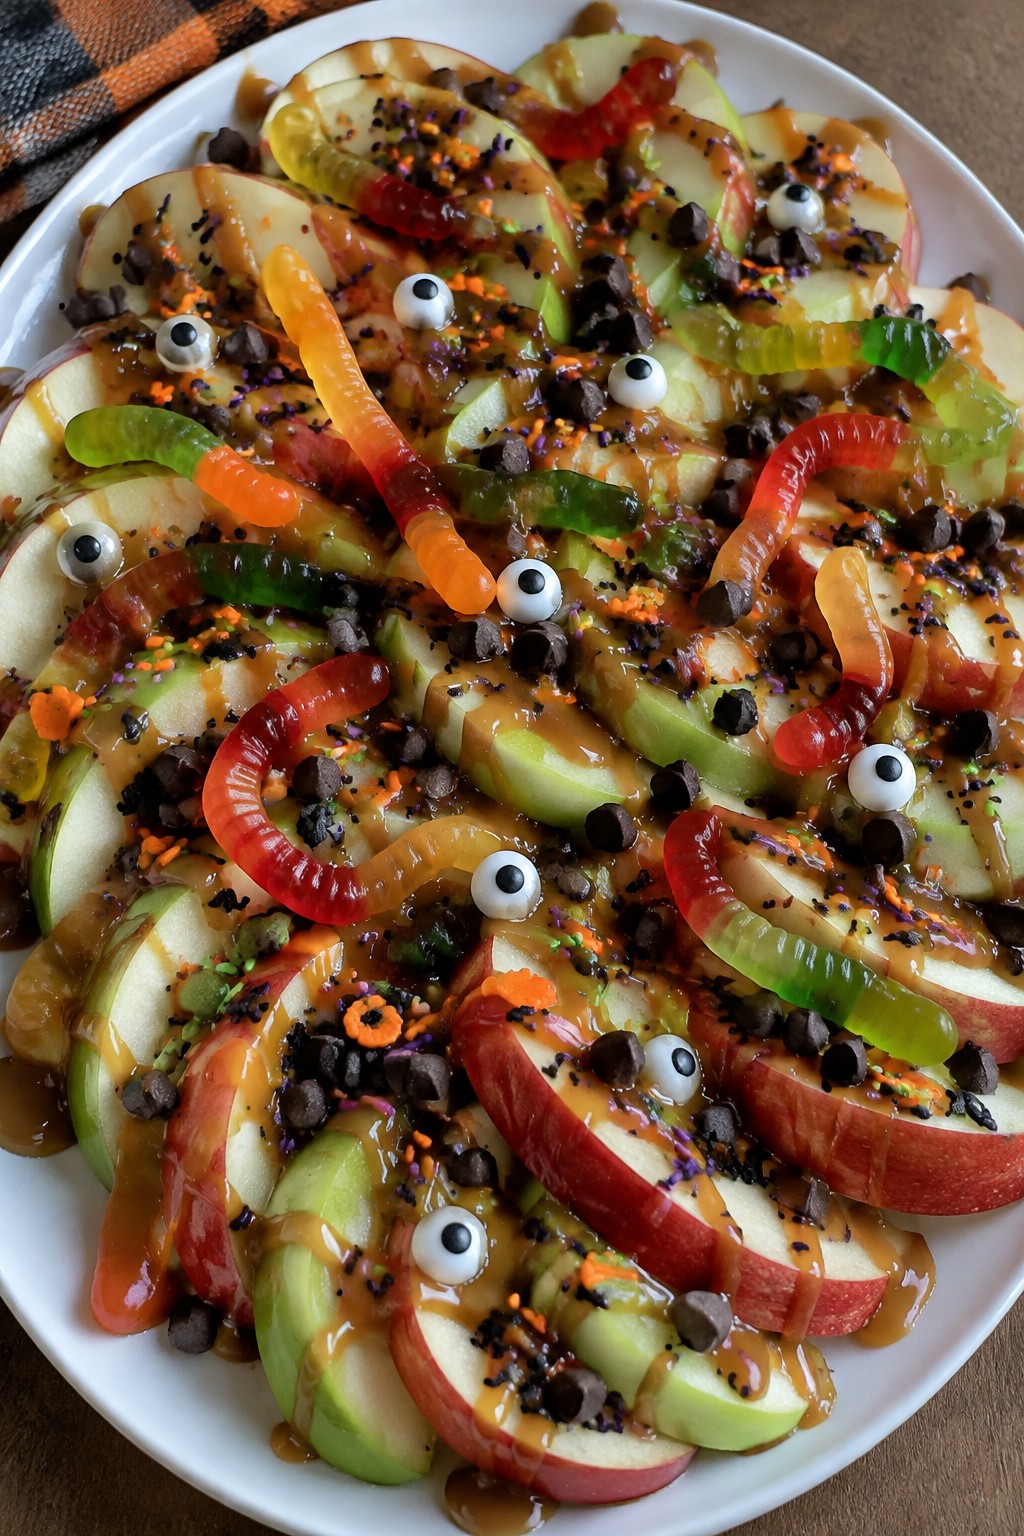
Creepy Crawler Apple Nachos with Caramel and Candy Toppings
This no-bake treat turns crisp apple slices into a shareable platter that fits right into a kids’ Halloween party spread. The mix of tart fruit, sticky caramel, and chewy candy gives it a balance of sweet and fresh that children enjoy without feeling too heavy.
It works well as a quick activity station or a make-ahead snack that can sit out during games and crafts.
Serves 4 people.
Ingredients
- 4 medium apples
- 1/2 cup caramel sauce
- 1/4 cup gummy worms
- 1/4 cup mini chocolate chips
- 2 tablespoons candy eyes
- 1/4 cup Halloween sprinkles
Instructions
- Core the apples and cut them into thin wedges. This creates the chip-like base for the nachos.
- Arrange the apple wedges in a single layer on a large serving platter, overlapping them slightly so every piece is easy to grab.
- Drizzle the caramel sauce evenly over the apple slices, letting it run into the gaps between the wedges.
- Scatter the gummy worms across the top so they appear to crawl over the apples.
- Sprinkle the mini chocolate chips and Halloween sprinkles over everything.
- Add the candy eyes last, pressing a few gently into the caramel so they stick in place.
Extra Tips
Tart apple varieties hold up better under the caramel and keep the overall flavor from becoming overly sweet. If the caramel is too thick to drizzle, warm it briefly in the microwave for a few seconds. Leftovers can be stored in an airtight container in the fridge for up to one day, though the apples will soften. Course: Snack Cuisine: American Equipment: Sharp knife, Cutting board, Serving platter
