
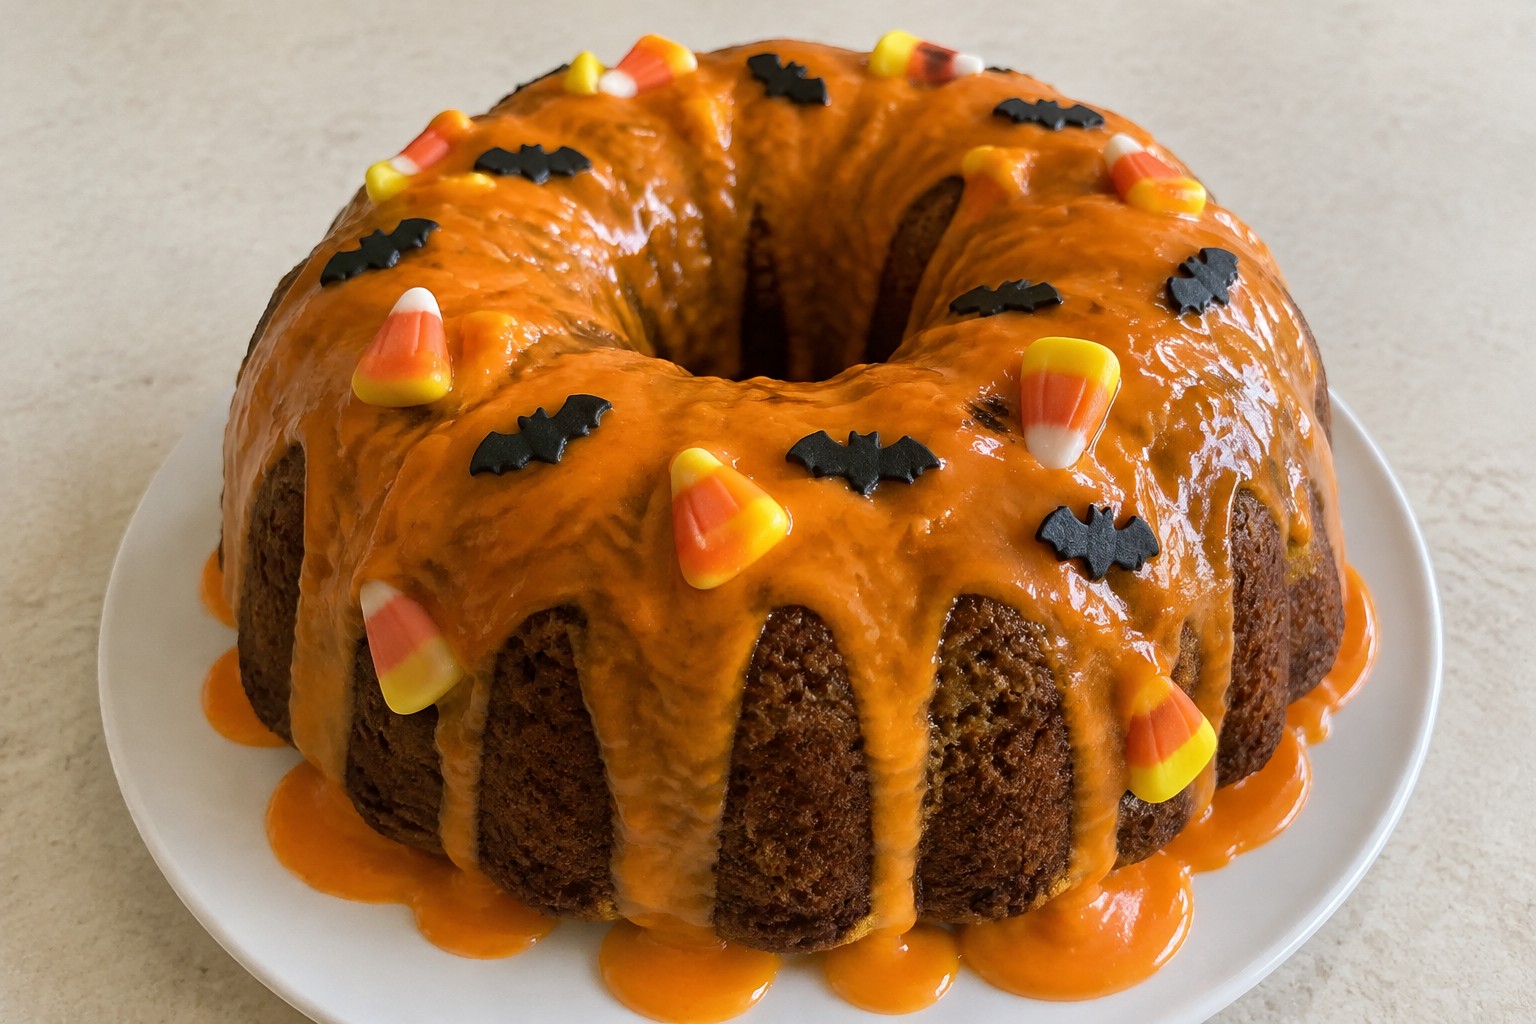
Halloween is a good time to try desserts with a festive twist. These recipes use ingredients that are easy to find and steps that fit into a busy schedule. You will see ideas that work for parties or just a treat at home. Each one includes tips to help the desserts turn out well every time. They give you options to make the holiday feel a bit more special.
Helpful Tips Before You Start
These tips will help your Halloween desserts come together smoothly.
Recommended Products

11.31 oz Complete Decorating Kit – Everything you need in one box: 3 squeeze frosting tubes (3 oz each in Orange, Black, White), 4 decorating nozzles, and a 2 oz Halloween sprinkle mix with candy eyeballs.

Halloween Candy Eyeballs: Edible eye decorations make it easy to create spooky monsters, ghosts, creatures, and playful characters on your favorite Halloween treats.

Package included: Includes 45pcs edible cupcake toppers with a box,very lightweight, portable and easy to store and carry.Sufficient quantity can meet your different decoration needs.The size is 1.77inch. It is completely edible but not delicious,so pretty tasteless (Not Sweet)
Use Gel Food Coloring
Gel colors give strong shades without thinning batters or frostings. Start with small amounts and add more as needed.
Prep Decorations Early
Cut out fondant shapes or pipe royal icing eyes the day before. This keeps assembly quick on the day of your event.
Stock Basic Halloween Supplies
Keep black cocoa, orange sprinkles, and candy eyes on hand. They work across many recipes and save last minute runs.
Chill Doughs and Fillings
Many cookie and truffle recipes need time in the fridge. Plan for this so shapes hold during baking or dipping.
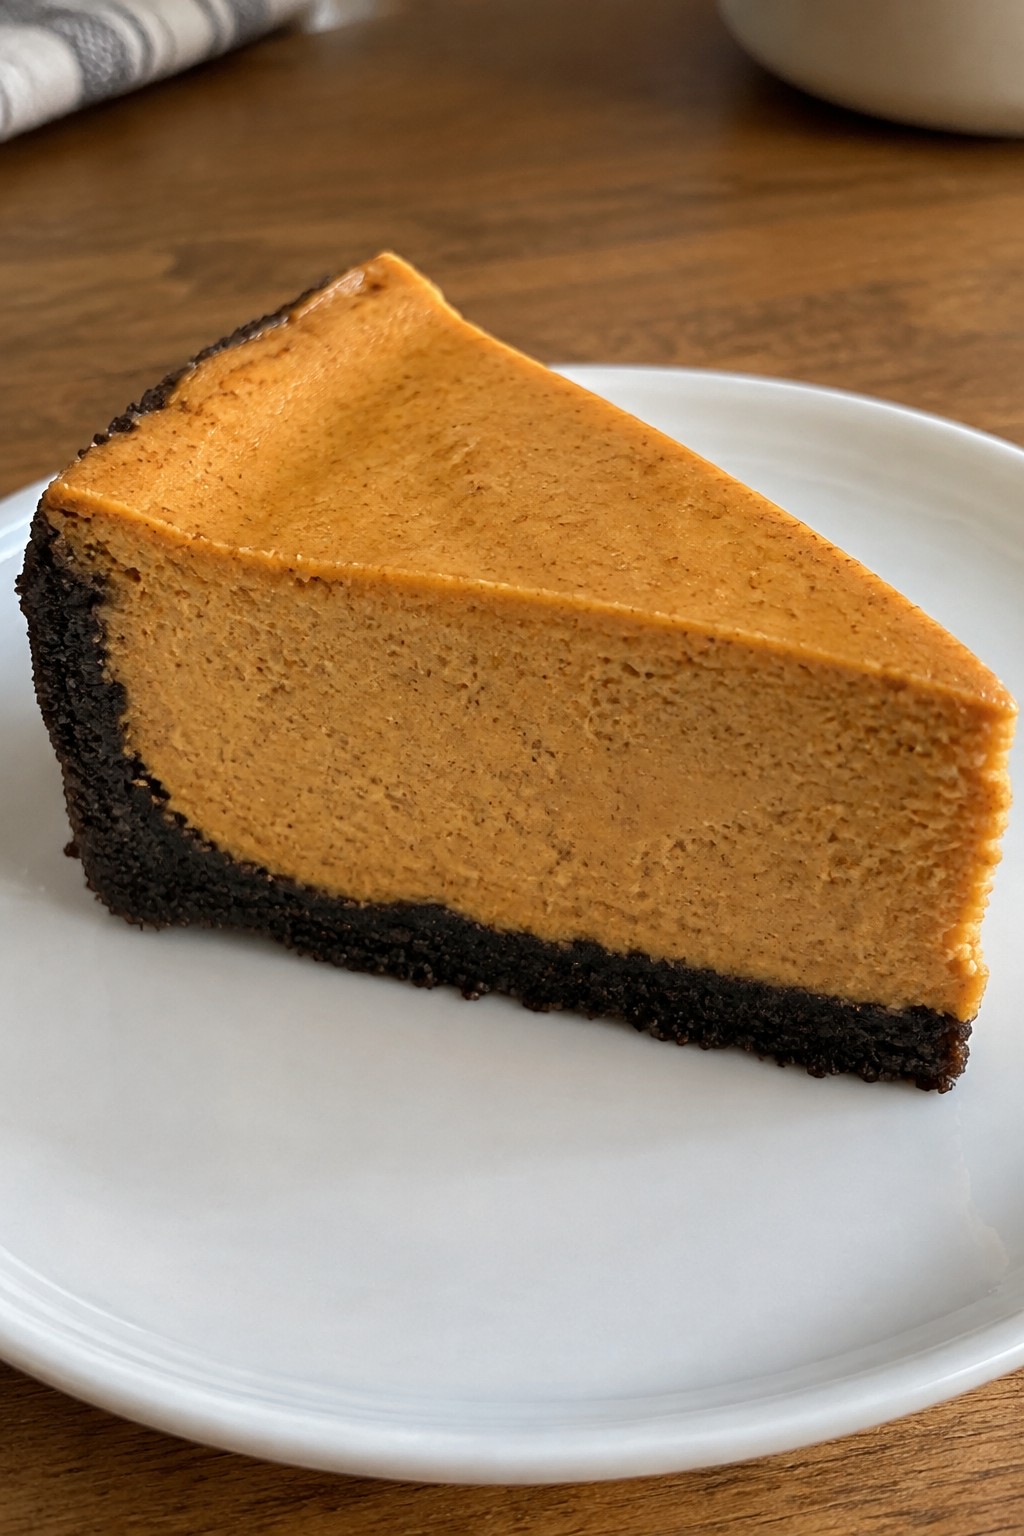
Pumpkin Cheesecake with Black Cocoa Crust
This cheesecake stands out with its dark, cocoa-rich crust that contrasts against the spiced pumpkin filling. It suits Halloween parties or fall dinners when you want a dessert that feels festive without extra decoration. The result is a creamy slice with a firm base and warm notes from the pumpkin spices.
The black cocoa gives the crust a deep color and subtle chocolate flavor that pairs well with the smooth filling. It holds up nicely after chilling and slices cleanly for serving.
Serves 4 people.
Ingredients
- 1 cup graham cracker crumbs
- 3 tablespoons black cocoa powder
- 3 tablespoons unsalted butter, melted
- 2 tablespoons granulated sugar
- 8 ounces cream cheese, softened
- 1/2 cup pumpkin puree
- 1/4 cup granulated sugar
- 1 large egg
- 1 teaspoon vanilla extract
- 1 teaspoon pumpkin pie spice
Instructions
- Preheat the oven to 325 degrees. Combine the graham cracker crumbs, black cocoa powder, melted butter, and 2 tablespoons granulated sugar in a bowl until the mixture holds together when pressed.
- Press the crust mixture firmly into the bottom of a 6-inch springform pan. Bake for 8 minutes, then set aside to cool while you prepare the filling.
- Beat the softened cream cheese with the remaining 1/4 cup granulated sugar until smooth. Add the pumpkin puree, egg, vanilla extract, and pumpkin pie spice, and mix until fully combined and uniform in color.
- Pour the filling over the cooled crust and smooth the top. Bake for 35 minutes until the edges are set but the center still has a slight jiggle.
- Turn off the oven, crack the door open, and let the cheesecake cool inside for 30 minutes. Remove and refrigerate for at least 3 hours before serving.
Extra Tips
Chill the cheesecake fully before slicing to keep the black cocoa crust from crumbling. If the pumpkin filling seems too loose after mixing, add an extra minute of beating to incorporate air and improve the final texture. Store leftovers covered in the fridge for up to three days. Course: Dessert Cuisine: American Equipment: Mixing Bowl, Springform Pan, Electric Mixer, Oven
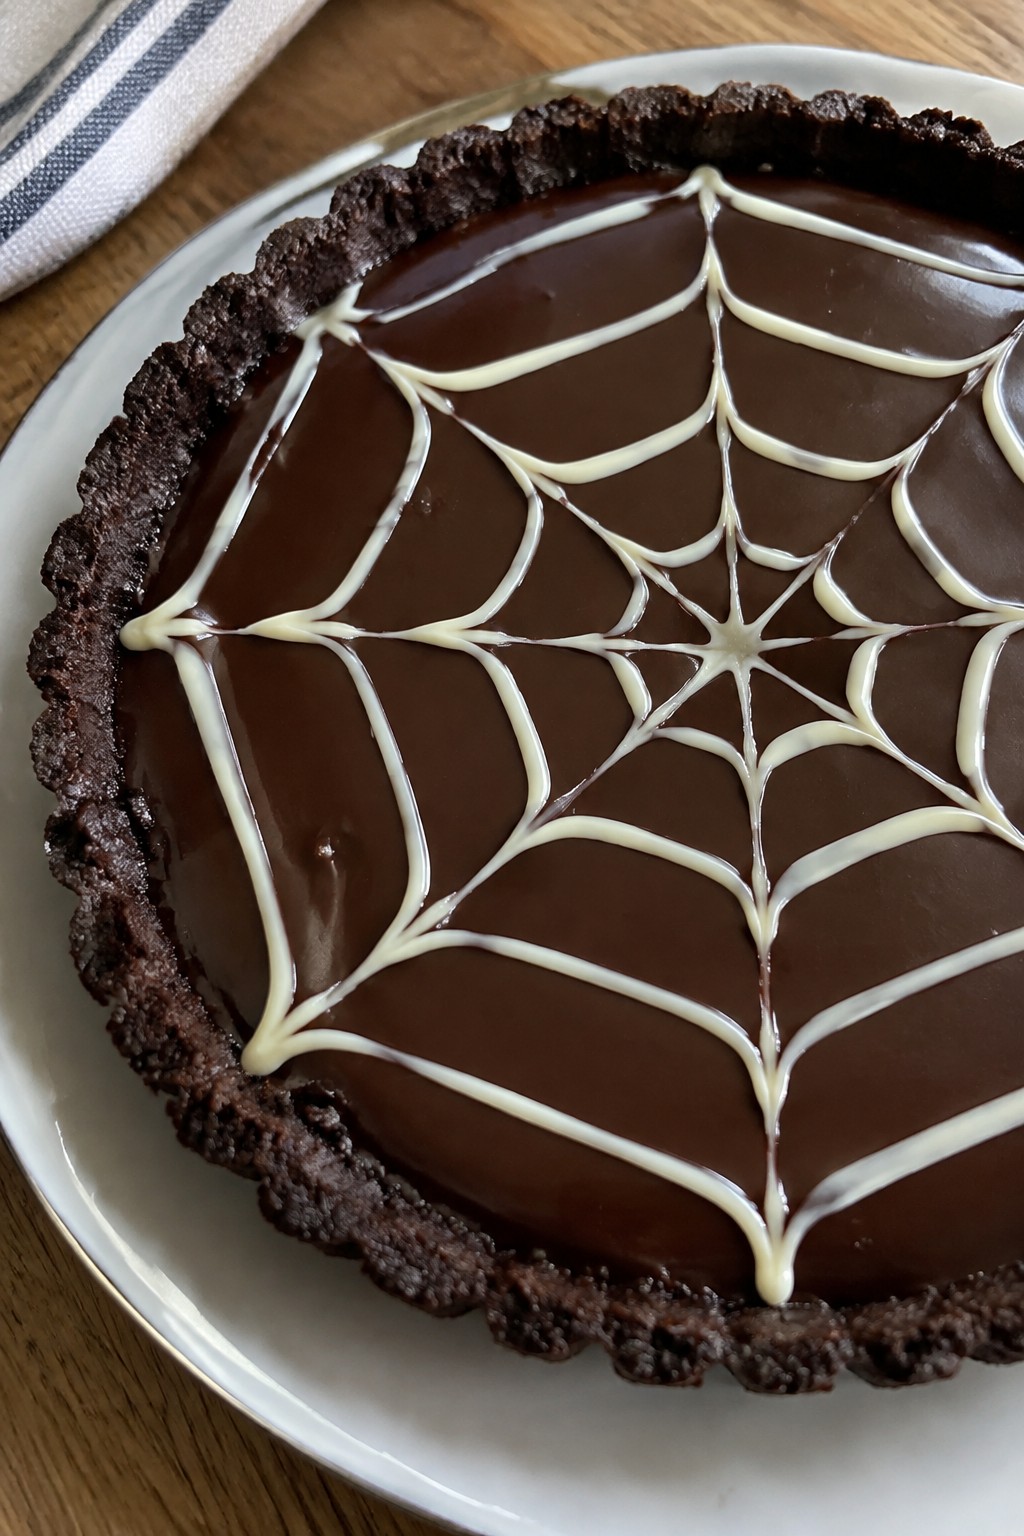
Chocolate Spiderweb Tart
This Chocolate Spiderweb Tart offers a simple way to add a Halloween touch to dessert. The cookie crust holds a smooth chocolate filling, while the piped web on top creates a clear seasonal detail that stands out on a party table.
The tart combines a crisp base with a creamy, rich center. It works well for small gatherings or as one of several desserts since it slices cleanly and holds its shape after chilling.
Serves 4 people.
Recommended Products

10 cookies to a kit

Small Halloween Gingerbread Cookie House Kit- Finished product measures approximately 2.75 L x 2.75 W x 3 H inches

Halloween Cookie Decorating Kit: All-in-one Halloween activity includes 8 premade cookies plus frosting, icing, sprinkles, and candy eyeballs for decorating spooky treats.
Ingredients
- 1 1/2 cups crushed chocolate sandwich cookies
- 4 tablespoons unsalted butter, melted
- 8 ounces chopped dark chocolate
- 3/4 cup heavy cream
- 2 ounces chopped white chocolate
Instructions
- Combine the crushed chocolate sandwich cookies with the melted butter in a bowl until the mixture resembles wet sand.
- Press the mixture firmly into the bottom and sides of a small tart pan. Place the pan in the refrigerator to set while you prepare the filling.
- Place the chopped dark chocolate in a heatproof bowl. Heat the heavy cream in a small saucepan until it just begins to simmer, then pour it over the dark chocolate. Let it sit for one minute before stirring until smooth.
- Pour the chocolate ganache into the chilled crust and spread it evenly. Return the tart to the refrigerator for 30 minutes to firm up.
- Melt the chopped white chocolate in the microwave in short bursts, stirring between each. Spoon it into a small zip-top bag, snip off a tiny corner, and pipe concentric circles on the surface of the tart. Use a toothpick to drag lines from the center outward to form the web pattern. Chill again until ready to serve.
Extra Tips
Chill the tart for at least two hours total before slicing so the ganache sets firmly and the web lines stay sharp. If the white chocolate thickens while piping, warm the bag briefly between your hands. Store leftovers covered in the refrigerator for up to two days. Course: Dessert Cuisine: American Equipment: Tart pan, Mixing bowls, Saucepan, Zip-top bag, Toothpick
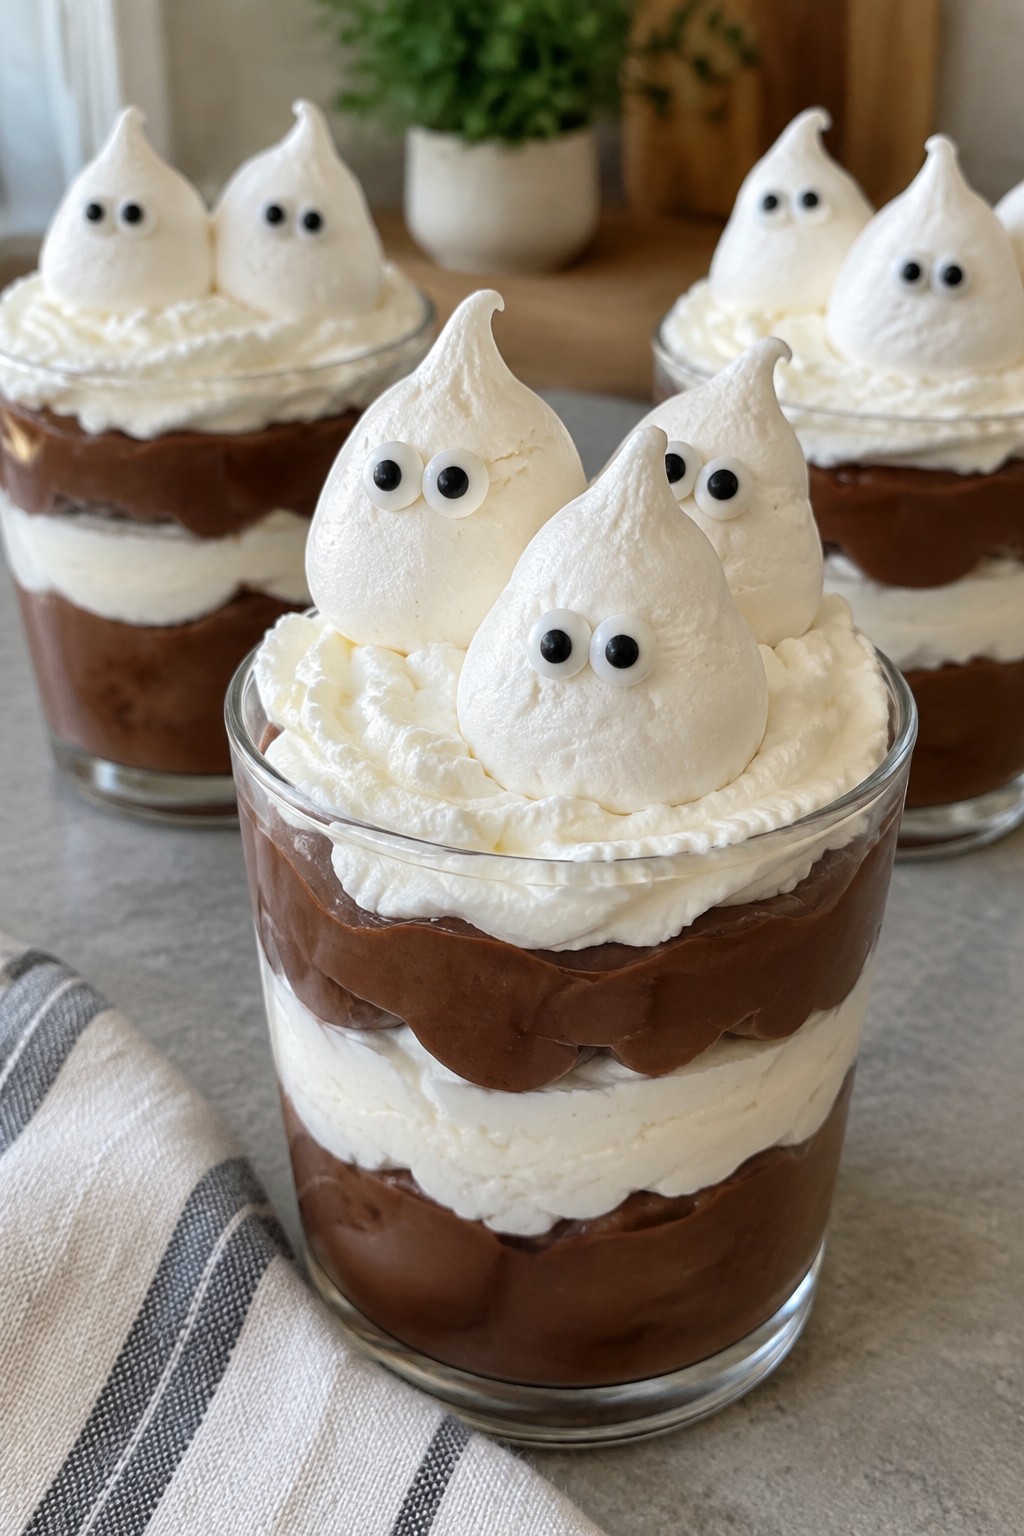
Ghostly Meringue Parfaits
These light meringue ghosts sit on top of simple chocolate parfaits and add a fun Halloween touch without much fuss. They work well for parties or a family dessert night when you want something sweet but not heavy. The meringue bakes up crisp on the outside and soft inside, pairing nicely with the creamy layers below.
Serves 4 people.
Recommended Products

Mini Witch Hats size: 2.6x2.6inches. Mini Witch broom size: 3.5x1.2inches. Add festival atmosphere and bring fun to your party, make you more attractive and catch other people's eyes in the party.

What You Get: You will get 7pcs of small craft brooms and 7pcs of mini witch hat, 14pcs in total. Nice combination to meet your party decoration needs and enough quantity for you to share with friends

Halloween Cupcake Decorations: The set of 8 violet witch hats cupcake toppers and 8 black. It's perfect for your Halloween party Dessert
Ingredients
- 4 large egg whites
- 1 cup granulated sugar
- 1/2 teaspoon cream of tartar
- 1 teaspoon vanilla extract
- 2 cups chocolate pudding
- 1 cup whipped cream
- 8 candy eyes
Instructions
- Preheat the oven to 200 degrees F and line a baking sheet with parchment paper. In a large mixing bowl, beat the egg whites and cream of tartar on medium speed until soft peaks form. Gradually add the sugar while beating on high speed until stiff, glossy peaks develop. Mix in the vanilla extract. Spoon the meringue into a piping bag fitted with a round tip and pipe four ghost shapes onto the prepared baking sheet. Bake for 2 hours, then turn off the oven and let the ghosts cool inside with the door closed for 1 hour. To assemble, divide the chocolate pudding among four parfait glasses. Add a layer of whipped cream to each glass. Place one cooled meringue ghost on top of each parfait and press two candy eyes onto the front of each ghost.
Extra Tips
Make the meringue ghosts a day ahead and store them in an airtight container at room temperature so they stay crisp. If the ghosts soften slightly, a quick 10 minutes in a low oven will restore their texture. Use store-bought pudding to keep prep short, or swap in vanilla pudding if you prefer a milder base flavor. Course: Dessert Cuisine: American Equipment: Mixing Bowl, Electric Mixer, Piping Bag, Baking Sheet, Parfait Glasses
Caramel Apple Crumble Bars
These bars capture the classic taste of caramel apples in an easy handheld form. They work well for Halloween gatherings because the flavors feel seasonal without needing fancy decorating skills. The soft baked apples sit between a buttery oat base and a golden crumble topping, finished with a caramel drizzle for extra richness.
The texture stays balanced with tender fruit, crisp oat layers, and a chewy caramel note throughout. Serve them slightly warm so the caramel stays gooey.
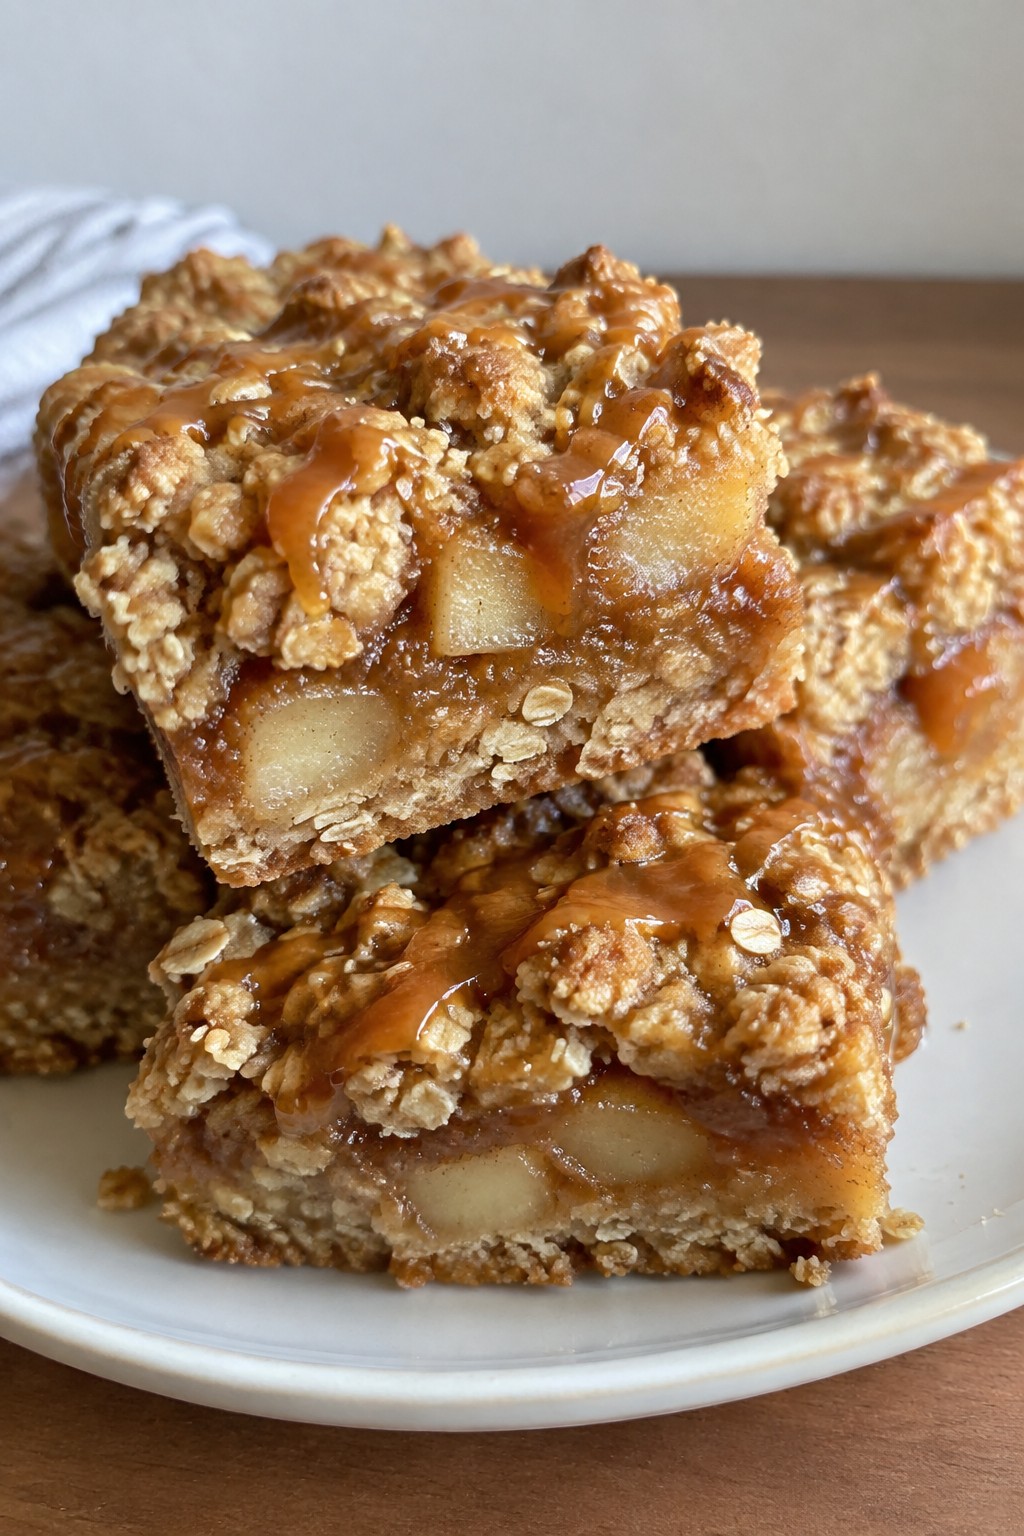
Serves 4 people.
Ingredients
- 2 medium apples, peeled and chopped
- 1/2 cup caramel sauce, divided
- 3/4 cup all-purpose flour
- 1/2 cup old-fashioned oats
- 1/3 cup brown sugar
- 4 tablespoons unsalted butter, melted
- 1 teaspoon ground cinnamon
- 1/4 teaspoon salt
Instructions
- Preheat the oven to 350 degrees and line an 8×8 inch pan with parchment paper.
- In a mixing bowl, stir together the flour, oats, brown sugar, cinnamon, and salt. Pour in the melted butter and mix until the mixture forms clumps.
- Press two-thirds of the oat mixture into the bottom of the prepared pan to create the base.
- Toss the chopped apples with 2 tablespoons of the caramel sauce and spread them evenly over the base.
- Sprinkle the remaining oat mixture over the apples to form the crumble topping.
- Bake for 25 to 30 minutes until the topping turns golden.
- Remove from the oven and drizzle the remaining caramel sauce over the warm bars. Let them cool before cutting into squares.
Extra Tips
Use firm apples so they hold their shape during baking. If the caramel sauce is thick, warm it slightly before drizzling so it spreads evenly. Store leftovers in an airtight container at room temperature for up to two days to keep the crumble crisp. Course: Dessert Cuisine: American Equipment: Mixing Bowl, 8×8 Inch Baking Pan, Knife
Red Velvet Whoopie Pies with Cream Cheese Filling
These whoopie pies bring bold red color to any Halloween spread. The soft cocoa cakes pair with a tangy cream cheese filling for a treat that feels festive without extra fuss. They work well for parties or a simple night at home when you want something handheld and fun.
The texture stays cakey on the outside with a smooth, creamy center. The red hue stands out on a dessert table next to darker treats.
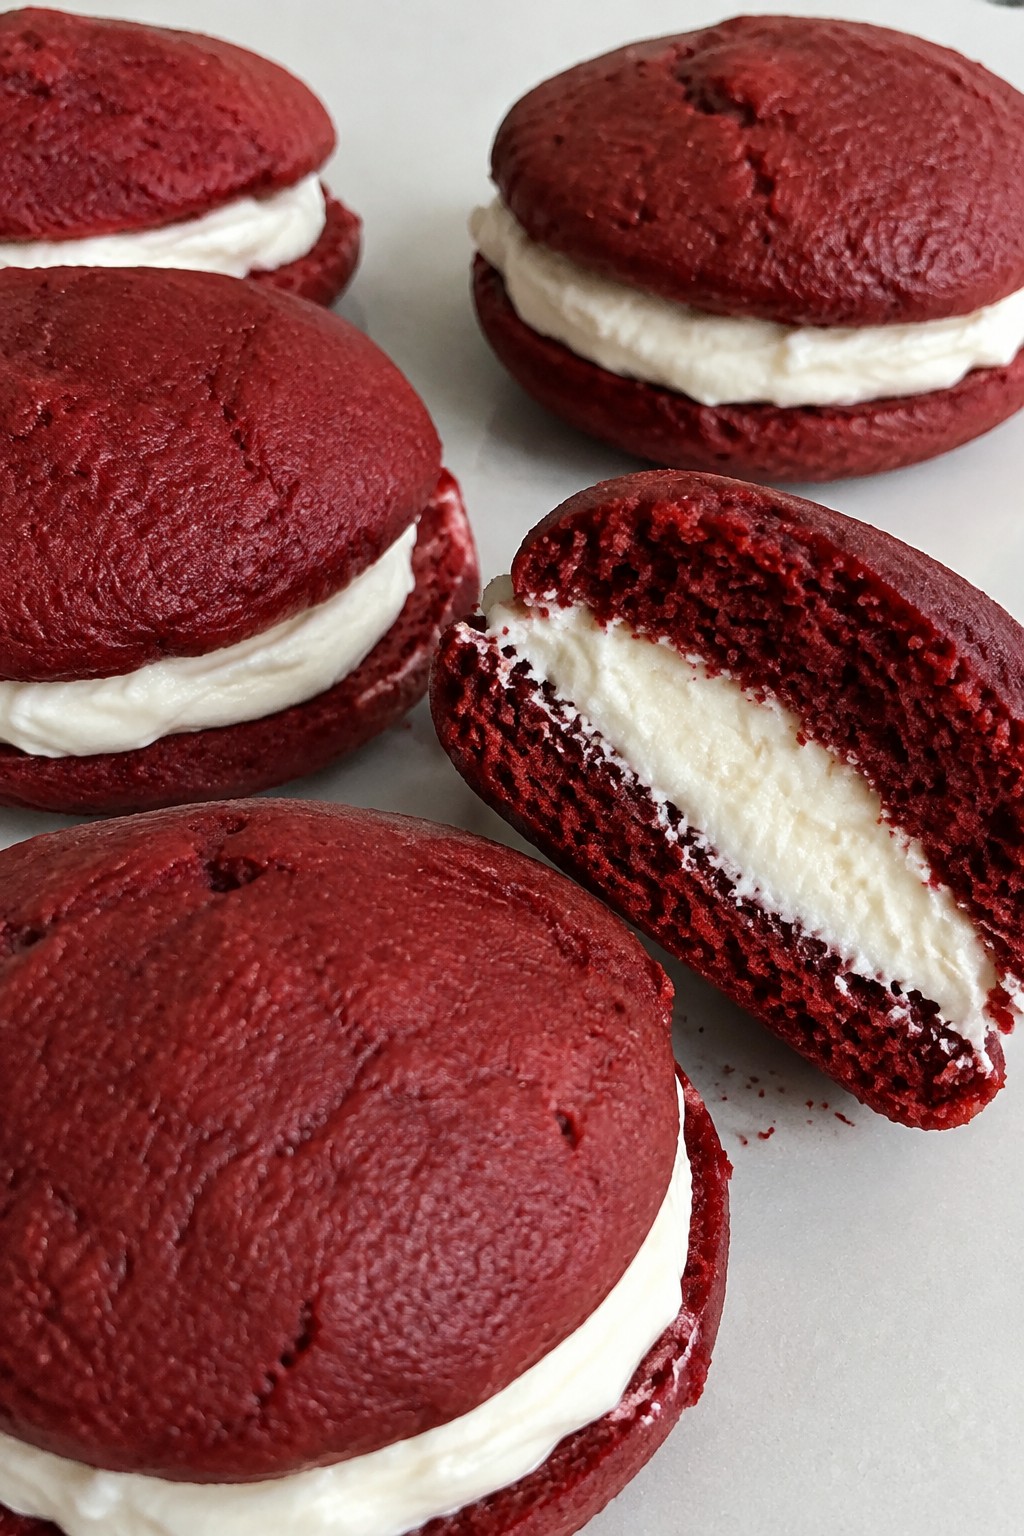
Serves 4 people.
Ingredients
- 1 cup all-purpose flour
- 2 tablespoons unsweetened cocoa powder
- 1/2 teaspoon baking soda
- 1/4 teaspoon salt
- 1/2 cup granulated sugar
- 1/4 cup unsalted butter, softened
- 1 large egg
- 1/4 cup buttermilk
- 1 tablespoon red food coloring
- 1 teaspoon vanilla extract
- 4 ounces cream cheese, softened
- 2 tablespoons unsalted butter, softened
- 1 cup powdered sugar
Instructions
- Preheat the oven to 350 degrees and line two baking sheets with parchment paper.
- Whisk the flour, cocoa powder, baking soda, and salt in a medium bowl.
- In a separate bowl, beat the granulated sugar and 1/4 cup butter until light. Add the egg, buttermilk, red food coloring, and vanilla extract. Mix until smooth.
- Stir the dry ingredients into the wet mixture until just combined.
- Drop rounded tablespoons of batter onto the baking sheets, spacing them 2 inches apart. Bake for 10 to 12 minutes until the tops spring back when touched. Cool completely on a wire rack.
- Beat the cream cheese, 2 tablespoons butter, powdered sugar, and remaining 1/2 teaspoon vanilla extract until creamy.
- Spread filling on the flat side of half the cooled cakes and top with the remaining cakes to form sandwiches.
Extra Tips
Chill the assembled whoopie pies for 30 minutes before serving so the filling sets and the cakes stay neat. Store leftovers in an airtight container in the fridge for up to three days. Bring them to room temperature for 10 minutes before eating to soften the cakes again. If the red color looks pale after baking, add an extra teaspoon of food coloring to the next batch. Course: Dessert Cuisine: American Equipment: Mixing bowls, baking sheets, parchment paper, electric mixer, wire rack
Witch Hat Macarons
Witch Hat Macarons turn a classic French cookie into a simple Halloween dessert. Crisp almond shells hold a thick chocolate ganache that forms the pointed top of each hat. The black color keeps the look festive while the rich filling gives a smooth bite.
These macarons suit a party table or an after-dinner treat with coffee. They offer a light crunch on the outside and a creamy center that balances the dark chocolate flavor.
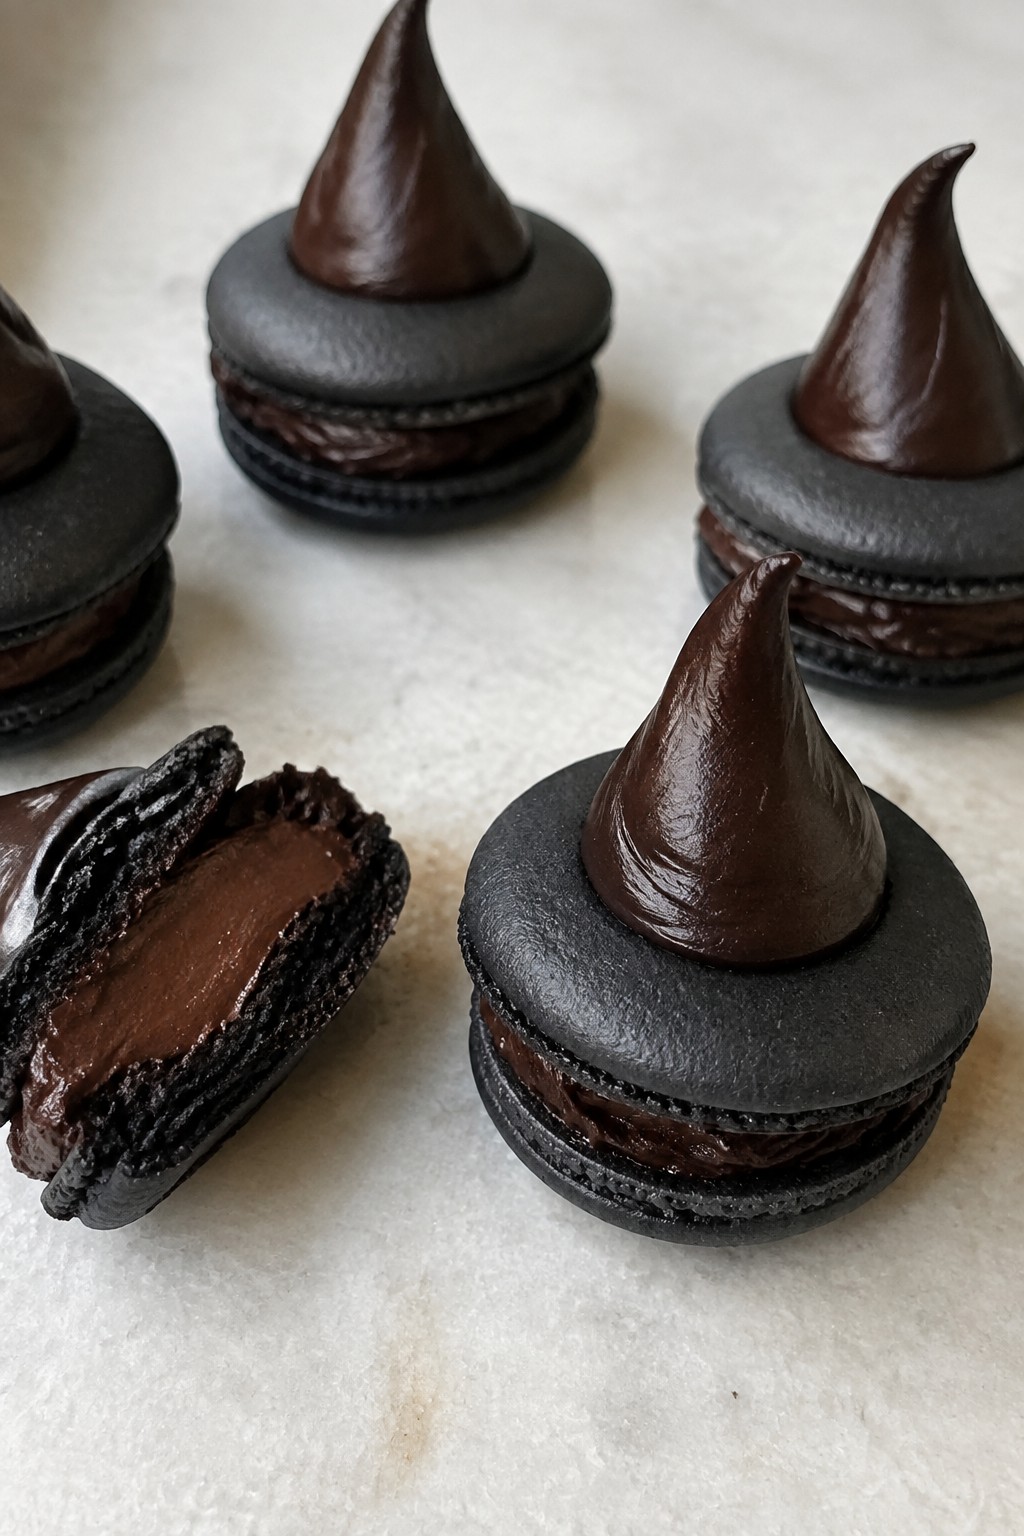
Serves 4 people.
Ingredients
- 1 cup almond flour
- 1 3/4 cups powdered sugar
- 3 egg whites
- 1/4 cup granulated sugar
- 1 teaspoon black food coloring
- 8 ounces dark chocolate, chopped
- 1/2 cup heavy cream
Instructions
- Sift the almond flour and powdered sugar into a large bowl and set aside.
- In a clean mixing bowl, whip the egg whites until foamy, then slowly add the granulated sugar and continue whipping until stiff peaks form.
- Add the black food coloring to the egg whites and whip briefly to combine.
- Fold the dry ingredients into the egg whites in two additions until the batter flows smoothly off the spatula.
- Transfer the batter to a piping bag fitted with a round tip and pipe 2-inch rounds onto lined baking sheets.
- Let the shells rest at room temperature until a skin forms on top, about 30 minutes.
- Bake the shells at 300°F for 15 minutes, then cool completely on the sheets.
- Heat the heavy cream until steaming, pour it over the chopped dark chocolate, and stir until smooth to make the ganache.
- Pipe a thick layer of ganache onto half the shells, then top each with a second shell.
- Use the remaining ganache to pipe a small point on top of each assembled macaron to create the hat shape.
Extra Tips
Pipe the ganache point while it is still warm so it holds its shape without spreading. Store the finished macarons in an airtight container in the fridge for up to two days and bring them to room temperature before serving. If the shells crack during baking, the batter may have been overmixed, so stop folding as soon as it reaches the correct flow. Course: Dessert Cuisine: French Equipment: Mixing bowls, Electric mixer, Piping bags, Baking sheets, Oven
Graveyard Brownie Trifle
This trifle layers fudgy brownies with chocolate pudding and cookie crumbs to create a simple graveyard scene. It works well for Halloween gatherings because it can be assembled in advance and served in clear glasses.
The result offers creamy pudding, soft brownie pieces, and a crunchy cookie topping with a mild chocolate flavor throughout.
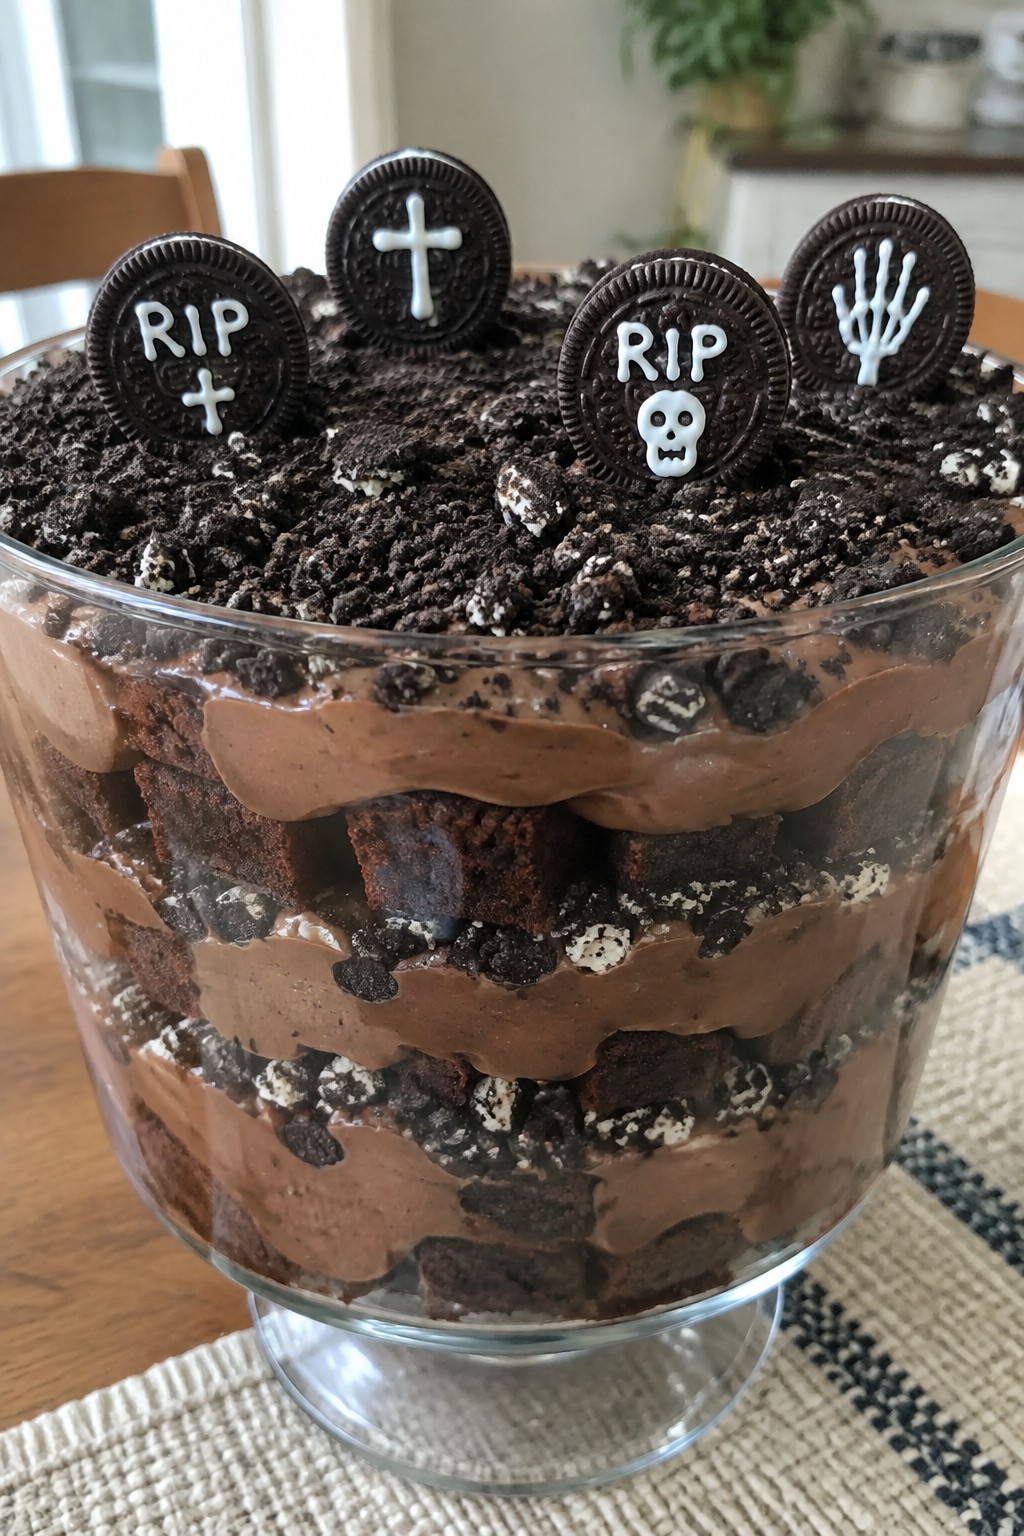
Serves 4 people.
Ingredients
- 4 cups cubed brownies
- 2 cups chocolate pudding
- 1 1/2 cups crushed chocolate sandwich cookies, divided
- 1 cup whipped topping
- 4 whole chocolate sandwich cookies
- 2 tablespoons white icing
Instructions
- Place 1/2 cup brownie cubes into the bottom of each of four clear glasses.
- Spoon 1/4 cup chocolate pudding over the brownies in each glass and spread evenly.
- Sprinkle 2 tablespoons crushed chocolate sandwich cookies over the pudding in each glass.
- Add another 1/2 cup brownie cubes on top of the crumbs in each glass.
- Spoon the remaining 1/4 cup pudding into each glass and smooth the surface.
- Top each serving with 1/4 cup whipped topping.
- Scatter the remaining crushed cookies over the whipped topping to form the dirt layer.
- Press one whole chocolate sandwich cookie upright into the topping of each glass to act as a tombstone.
- Pipe a small amount of white icing onto each whole cookie to write simple letters.
Extra Tips
Assemble the trifles up to four hours ahead and keep them chilled so the layers stay neat. If the cookie tombstones soften, replace them just before serving. Use store-bought brownies to save time or homemade ones if preferred. Course: Dessert Cuisine: American Equipment: Mixing bowl, Spoon, 4 clear glasses
Candy Corn Layered Pudding Cups
These pudding cups bring the bright stripes of candy corn into a simple layered dessert. They suit Halloween gatherings or any fall get-together where you want a light, colorful treat that kids and adults both reach for first.
The vanilla base keeps the flavor familiar and smooth, while the colored layers create a clear visual nod to the classic candy without extra steps. Clear cups show off the stripes best.
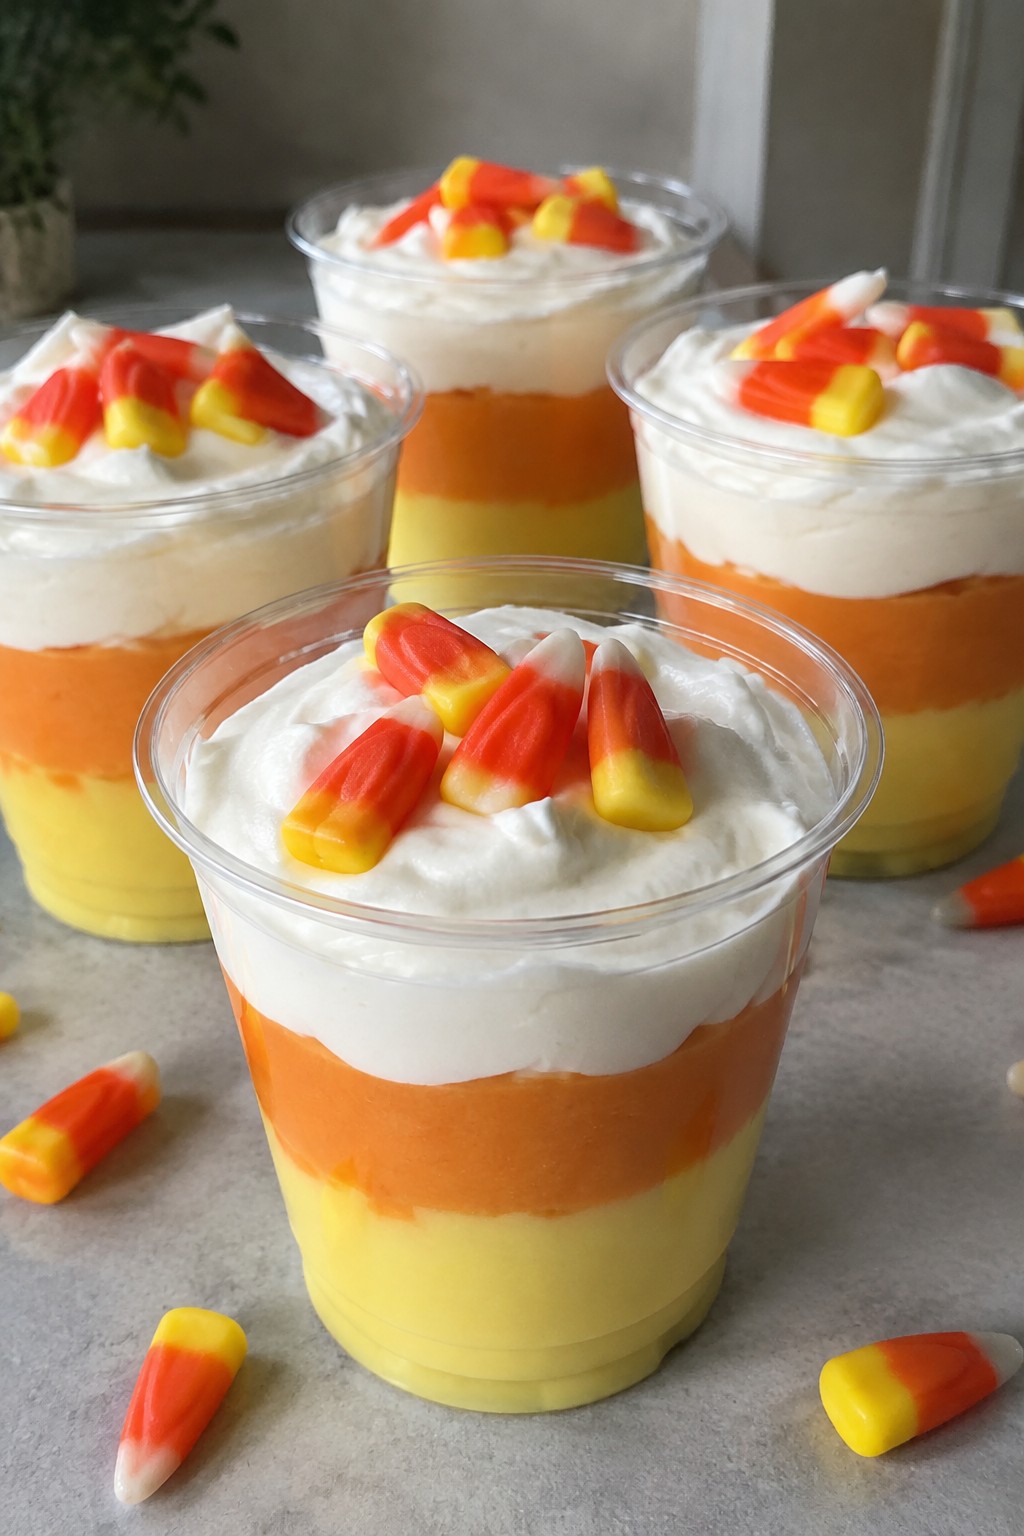
Serves 4 people.
Ingredients
- 2 packages (3.4 oz each) instant vanilla pudding mix
- 4 cups cold milk
- Yellow gel food coloring
- Orange gel food coloring
- 1 cup whipped topping
- 20 candy corn pieces
Instructions
- Whisk both packages of pudding mix with the cold milk in a large bowl until the mixture thickens, about two minutes.
- Divide the pudding evenly into three smaller bowls.
- Add several drops of yellow gel food coloring to the first bowl and stir until the color is uniform.
- Add several drops of orange gel food coloring to the second bowl and stir until the color is uniform. Leave the third bowl plain.
- Spoon the yellow pudding into the bottom of four clear cups, followed by a layer of the orange pudding, then the plain pudding on top.
- Finish each cup with a dollop of whipped topping and three candy corn pieces placed on the surface.
Extra Tips
Spoon the layers slowly and tap each cup gently on the counter after adding a color so the stripes stay even. Use clear plastic or glass cups to display the candy corn stripes. The dessert holds well in the refrigerator for up to four hours before serving if you add the candy corn right before guests arrive. Course: Dessert Cuisine: American Equipment: Mixing Bowls, Whisk, Clear Cups
Spiced Pumpkin Roll Cake
This spiced pumpkin roll cake turns classic fall flavors into a neat, sliceable dessert that fits right into a Halloween spread. The sponge stays light while the spices add warmth, and the cream cheese filling keeps every bite smooth and balanced. It works well for parties or a simple night in when you want something that looks put together without much fuss.
The roll holds its shape after a quick chill, making it easy to slice and serve. The pumpkin comes through clearly against the sweet filling, and a light dusting of sugar on top gives it a finished look.
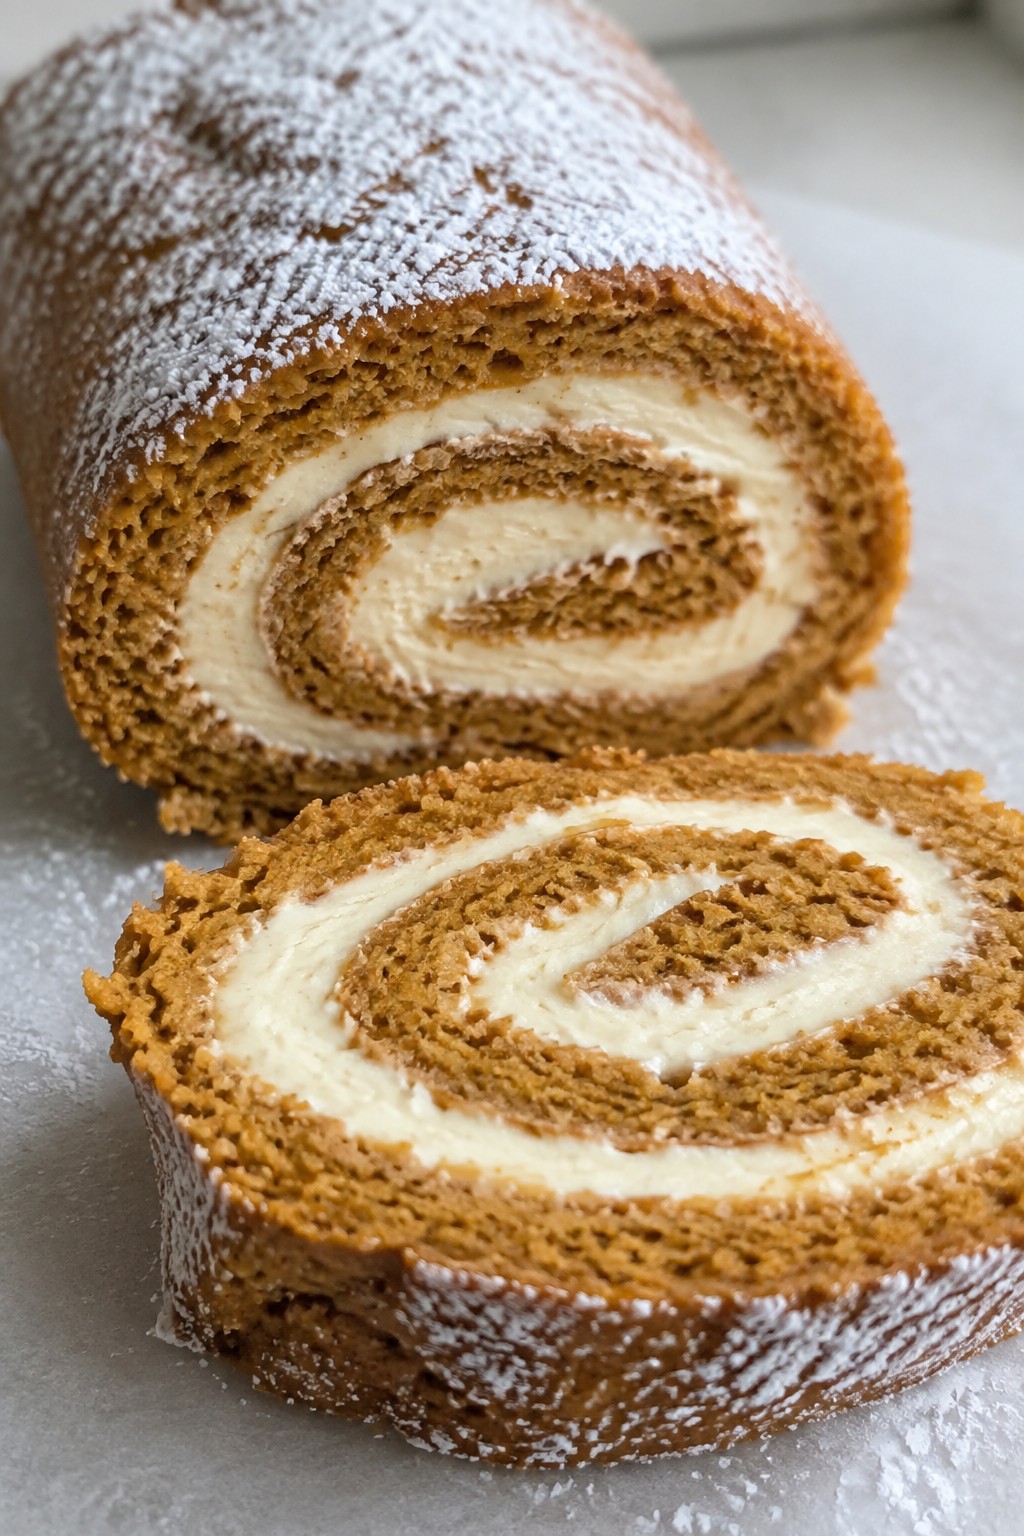
Serves 4 people.
Ingredients
- 3/4 cup pumpkin puree
- 3 large eggs
- 2/3 cup granulated sugar
- 3/4 cup all-purpose flour
- 1 teaspoon baking powder
- 1 teaspoon ground cinnamon
- 1/2 teaspoon ground nutmeg
- 1/2 teaspoon ground ginger
- 8 ounces cream cheese, softened
- 1/4 cup unsalted butter, softened
- 1 cup powdered sugar
- 1 teaspoon vanilla extract
- 2 tablespoons powdered sugar (for dusting)
Instructions
- Preheat the oven to 375°F and line a rimmed baking sheet with parchment paper.
- In a large bowl, beat the eggs and granulated sugar until pale and thick. Stir in the pumpkin puree until smooth.
- In a separate bowl, whisk together the flour, baking powder, cinnamon, nutmeg, and ginger. Fold the dry mixture into the pumpkin batter until no streaks remain.
- Spread the batter evenly on the prepared baking sheet and bake for 12 to 14 minutes, until the cake springs back when touched.
- Lay a clean kitchen towel on the counter and dust it with 1 tablespoon of the powdered sugar. Turn the hot cake out onto the towel, peel off the parchment, and roll the cake up with the towel from one short end. Let it cool completely.
- In a medium bowl, beat the cream cheese, butter, remaining powdered sugar, and vanilla until creamy and lump-free.
- Unroll the cooled cake, spread the filling evenly over the surface, and roll it back up without the towel. Wrap tightly and chill for at least 30 minutes.
- Dust the top with the remaining tablespoon of powdered sugar before slicing.
Extra Tips
Chill the rolled cake well before slicing so the filling stays firm and the slices hold their shape. If the sponge feels too dry after baking, cover it loosely with the towel while it cools to keep moisture in. The spices can be increased slightly if you prefer a bolder flavor, but stick to the listed amounts for the first try. Course: Dessert Cuisine: American Equipment: Mixing Bowl, Baking Sheet, Electric Mixer, Parchment Paper
Monster Eyeball Truffles
These truffles bring a fun twist to chocolate treats with their creepy eyeball design. They work well for Halloween parties or family gatherings where you want something easy to portion and serve. The rich chocolate center pairs with a smooth white coating for a creamy bite that feels festive without extra fuss.
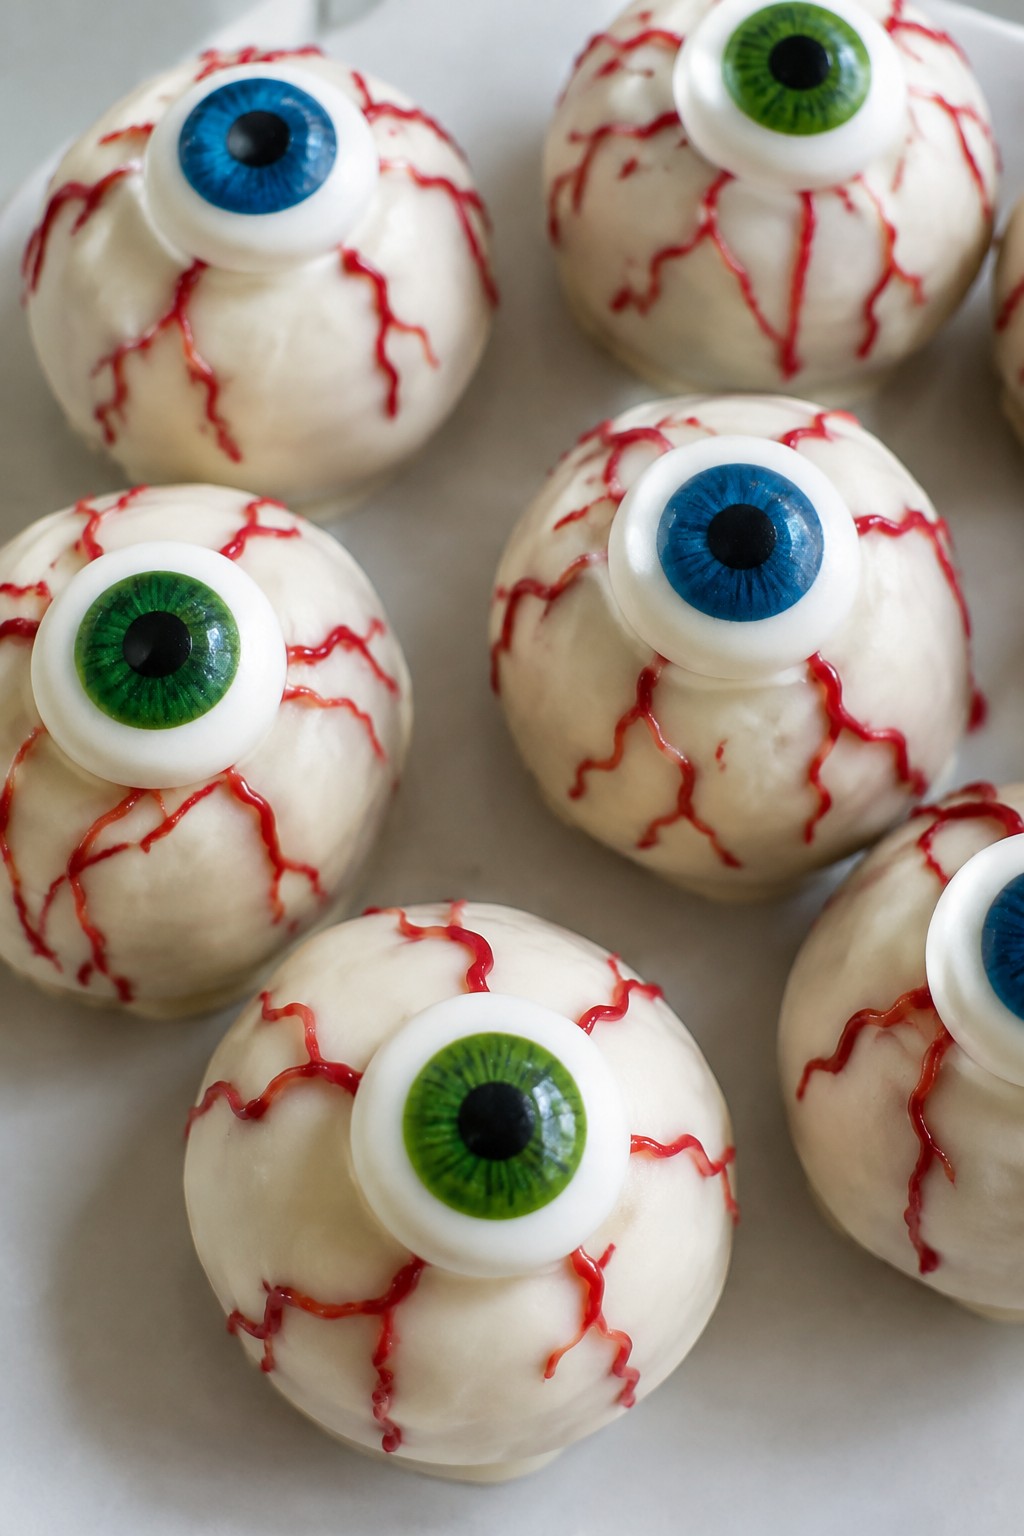
Serves 4 people.
Ingredients
- 8 ounces semisweet chocolate chips
- 1/2 cup heavy cream
- 1 teaspoon vanilla extract
- 8 ounces white chocolate melting wafers
- Red decorating gel
- 12 candy eyeballs
Instructions
- Place the semisweet chocolate chips in a mixing bowl. Heat the heavy cream in a small saucepan until it just starts to simmer, then pour it over the chips and let it sit for one minute.
- Stir the chocolate and cream together until smooth, then mix in the vanilla extract. Cover the bowl and chill the ganache for two hours until firm.
- Scoop the chilled ganache into twelve equal portions and roll them into smooth balls with your hands. Place the balls on a baking sheet lined with parchment paper.
- Melt the white chocolate melting wafers in a microwave-safe bowl in short bursts, stirring between each one until fully smooth. Dip each ganache ball into the melted white chocolate to coat it evenly, then return it to the baking sheet.
- While the coating is still wet, use the red decorating gel to draw thin lines across the surface for a veined look. Press one candy eyeball onto each truffle before the coating sets.
Extra Tips
Work quickly when adding the red gel and eyeballs so they stick to the white coating without sliding. If the ganache feels too soft to roll, chill it for another thirty minutes. Store finished truffles in an airtight container in the fridge for up to three days and let them sit at room temperature for ten minutes before serving. Course: Dessert Cuisine: American Equipment: Mixing Bowl, Baking Sheet, Microwave-Safe Bowl
Black Cat Sugar Cookies with Royal Icing
These black cat sugar cookies add a fun, festive element to Halloween parties or family gatherings. The simple dough produces cookies with a light vanilla flavor and a balance of crisp edges and soft centers that hold up well under icing.
Royal icing sets with a smooth, matte finish that lets you create clear cat outlines and features. The result is a sweet treat that looks striking without needing complicated techniques.
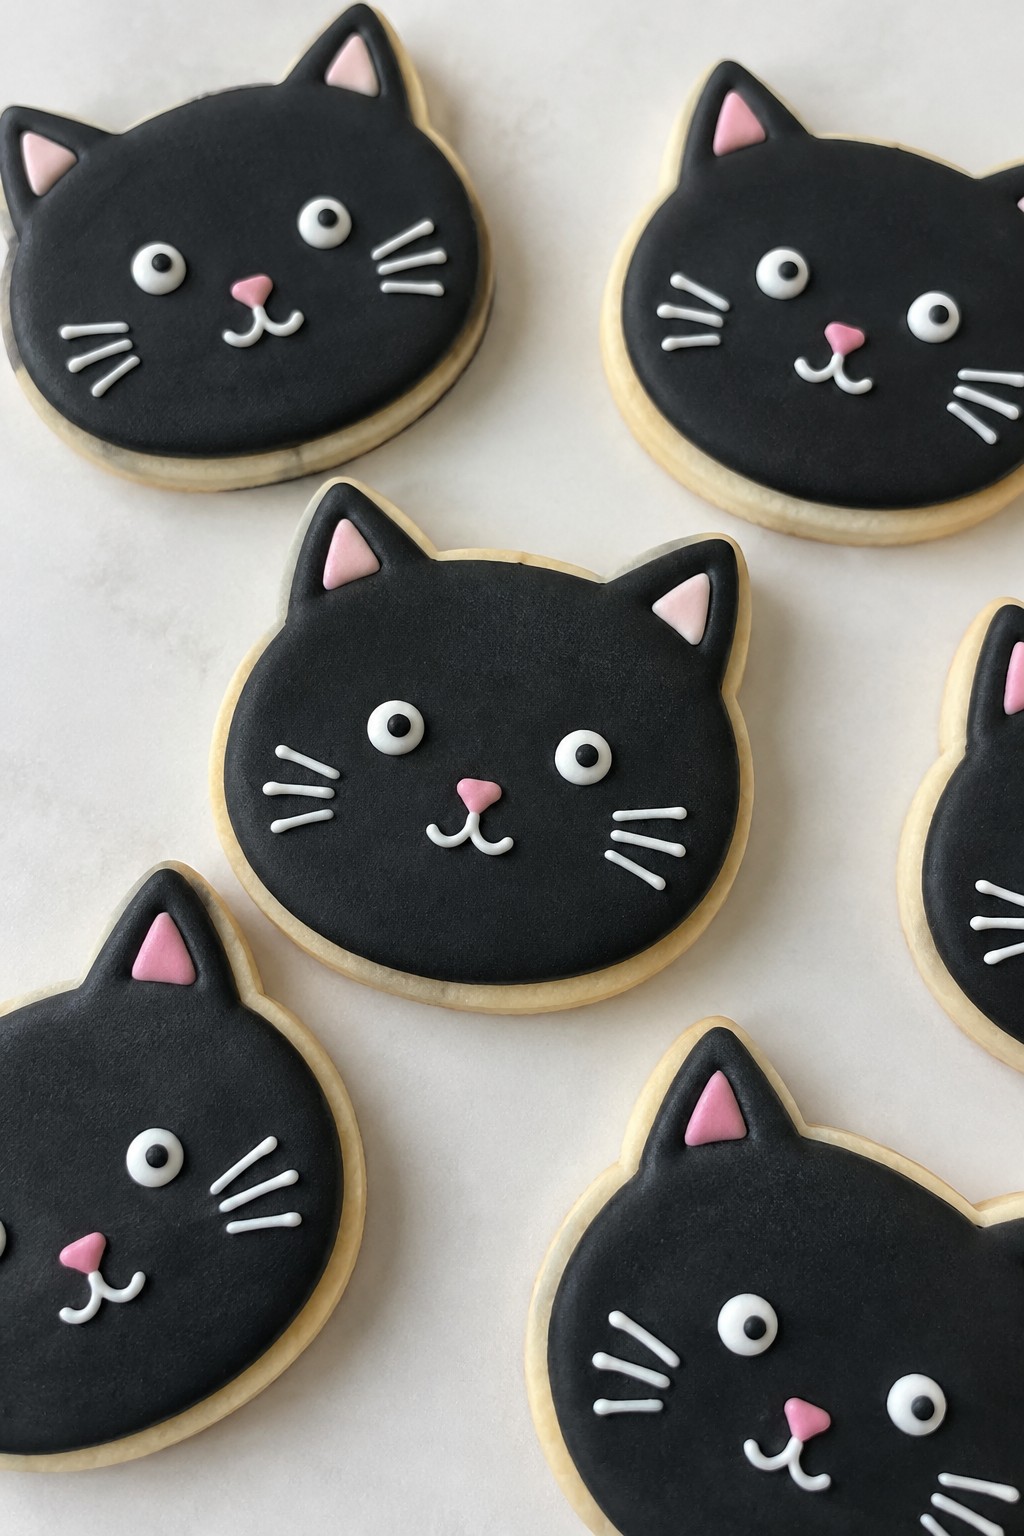
Serves 4 people.
Ingredients
- 1 1/2 cups all-purpose flour
- 1/2 teaspoon baking powder
- 1/4 teaspoon salt
- 1/2 cup unsalted butter, softened
- 2/3 cup granulated sugar
- 1 large egg
- 1 teaspoon vanilla extract
- 2 cups powdered sugar
- 2 tablespoons meringue powder
- 3-4 tablespoons water
- Black gel food coloring
Instructions
- Preheat the oven to 350°F and line two baking sheets with parchment paper. Whisk together the flour, baking powder, and salt in a medium bowl.
- In a large bowl, beat the softened butter and granulated sugar until light and fluffy. Add the egg and vanilla extract, then mix until combined.
- Gradually stir the dry ingredients into the butter mixture until a dough forms. Divide the dough in half, wrap each portion, and chill for 30 minutes.
- Roll one portion of dough to 1/4-inch thickness on a lightly floured surface. Cut out cat shapes with a cookie cutter and place them on the prepared baking sheets.
- Bake for 8 to 10 minutes until the edges are lightly golden. Cool the cookies completely on the baking sheets before decorating.
- For the royal icing, whisk the powdered sugar and meringue powder in a clean bowl. Add water one tablespoon at a time until the icing reaches a pipeable consistency.
- Tint the icing black with gel food coloring. Pipe cat faces and outlines onto the cooled cookies and let the icing set at room temperature.
Extra Tips
Chill the dough thoroughly so the cat shapes keep their definition during baking. Adjust the icing thickness with small amounts of water if it spreads too much on the cookie surface. Store finished cookies in a single layer in an airtight container to prevent the icing from softening. Course: Dessert Cuisine: American Equipment: Mixing bowls, Electric mixer, Rolling pin, Cookie cutters, Baking sheets, Piping bags
Skeleton Bone White Chocolate Bark
This white chocolate bark turns a simple treat into a fun Halloween project. The creamy base holds crunchy pretzel rods that stand in as skeleton bones, making it easy to serve at parties or pack into lunch boxes for spooky season. It comes together fast and gives a nice mix of sweet and salty in every piece.
The texture stays smooth from the chocolate with just enough snap from the pretzels. It works well for movie nights or as a last-minute dessert when you want something that looks planned but takes little effort.
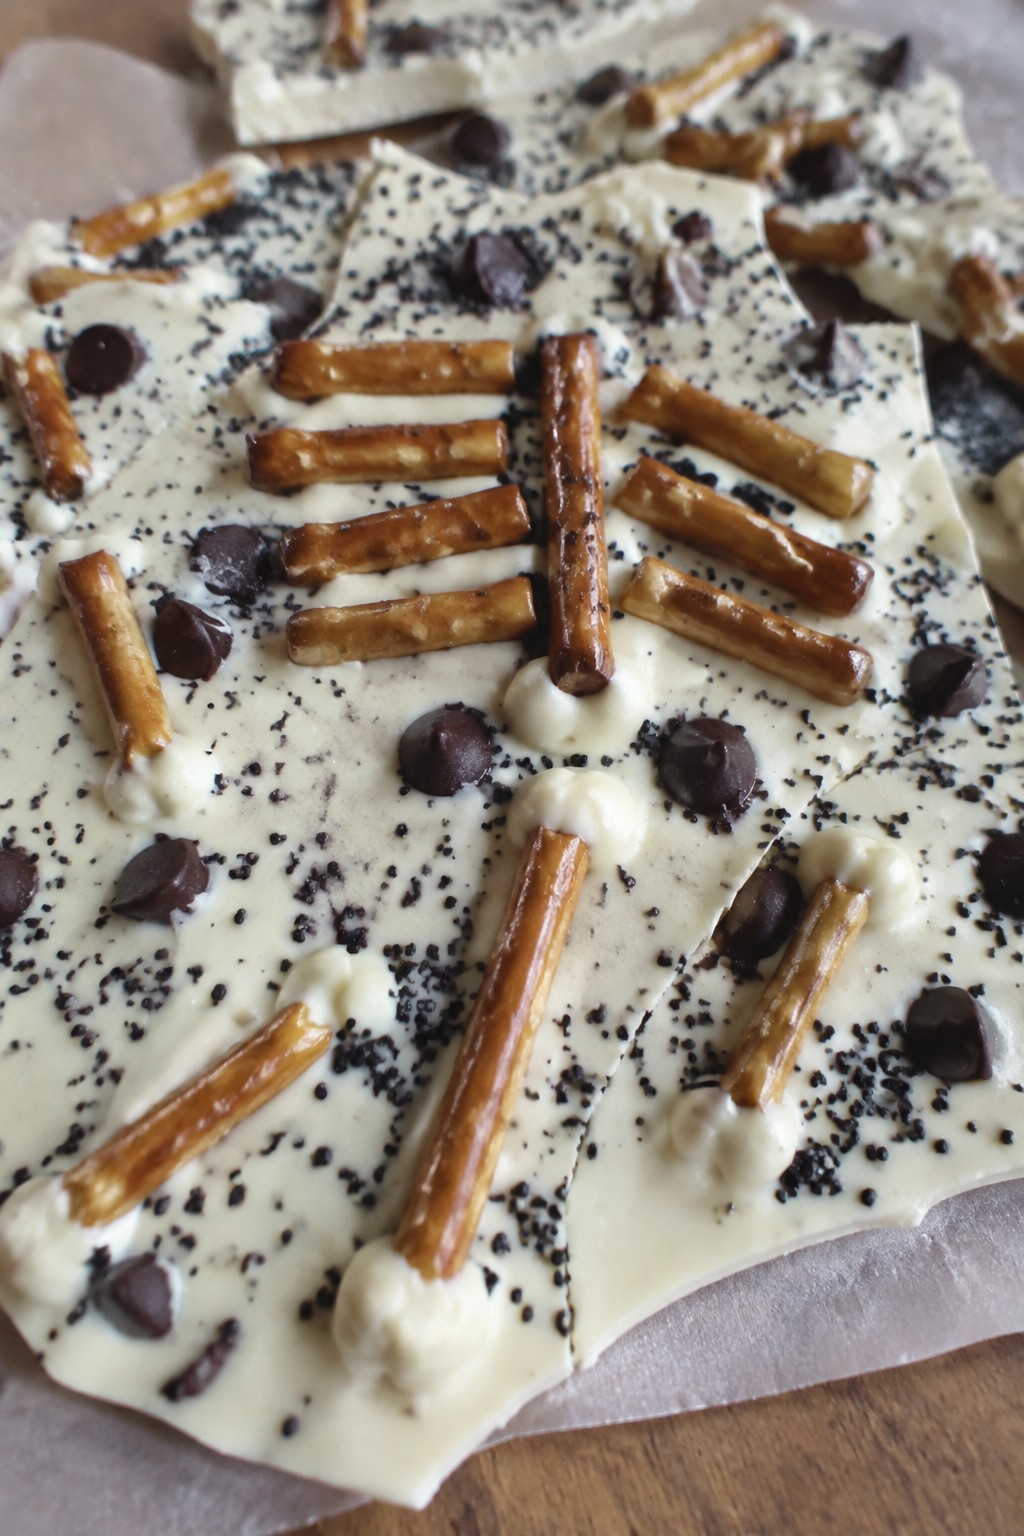
Serves 4 people.
Ingredients
- 12 ounces white chocolate chips
- 20 pretzel rods
- 1/4 cup dark chocolate chips
- 1 tablespoon black sanding sugar
Instructions
- Line a baking sheet with parchment paper and set it aside.
- Place the white chocolate chips in a microwave-safe bowl and heat in 30-second bursts, stirring after each, until fully melted and smooth.
- Pour the melted white chocolate onto the prepared baking sheet and spread it into an even layer about 1/4 inch thick.
- Press the pretzel rods gently into the chocolate so they resemble bones scattered across the surface.
- Melt the dark chocolate chips in a small bowl using the same microwave method, then drizzle thin lines over the white chocolate to add skeleton details.
- Sprinkle the black sanding sugar evenly across the top while the chocolate is still soft.
- Let the bark sit at room temperature until fully set, then break it into pieces along the pretzel lines.
Extra Tips
Arrange the pretzel rods at different angles before the chocolate sets so the bones look scattered rather than lined up. If the dark chocolate drizzle feels too thick, add a drop of neutral oil to loosen it. Store the finished bark in an airtight container in a cool spot to keep the white chocolate from blooming. Course: Dessert Cuisine: American Equipment: Microwave-safe bowl, Baking sheet, Parchment paper
