

Halloween is a fun time to bake cookies that fit the season. These recipes focus on simple ideas that still look festive. You will find options using chocolate, sprinkles, and other easy add ins. Many use ingredients you likely have on hand already. Each one includes clear steps to help you get good results.
Helpful Tips Before You Start
These tips will help your Halloween cookies bake evenly and look festive.
Use Gel Food Coloring
Gel colors mix into dough without adding extra liquid. They create bright shades that hold up after baking.
Chill the Dough
Chill cutout dough for at least 30 minutes before baking. This keeps shapes sharp and stops edges from spreading.
Set Up Decorations First
Measure sprinkles, icing, and candy eyes into small bowls ahead of time. Ready supplies make decorating faster once cookies cool.
Bake on Parchment
Line sheets with parchment paper for easy release and even browning. It also cuts down on cleanup between batches.
Pumpkin Spice Crinkle Cookies
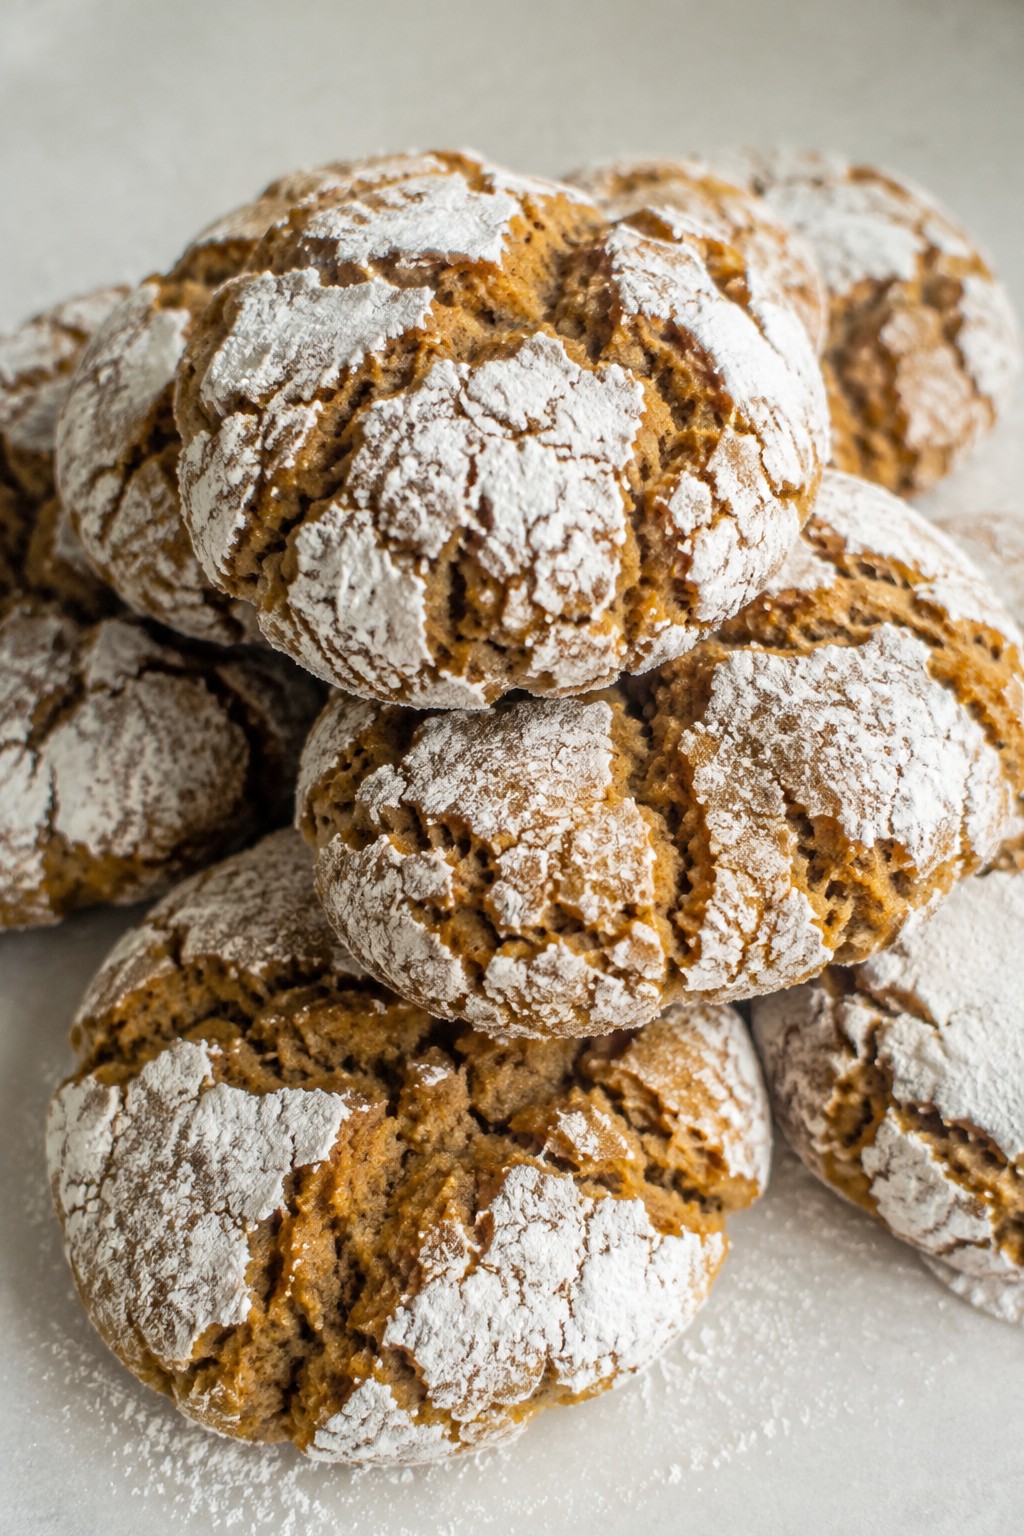
These cookies bring warm pumpkin spice flavor to your Halloween spread. The crinkle texture comes from a powdered sugar coating that cracks as they bake. They work well for cookie swaps or as a simple treat to share with family.
The soft centers pair nicely with the spiced coating. Serve them at fall gatherings or pack them for school events.
Serves 4 people.
Ingredients
- 1 cup all-purpose flour
- 1/2 cup canned pumpkin puree
- 1/4 cup unsalted butter, softened
- 1/2 cup granulated sugar
- 1/4 cup brown sugar
- 1 large egg
- 1 1/2 teaspoons pumpkin pie spice
- 1 teaspoon baking powder
- 1/2 teaspoon vanilla extract
- 1/4 teaspoon salt
- 1/2 cup powdered sugar
Instructions
- Preheat the oven to 350 degrees and line a baking sheet with parchment paper.
- In a mixing bowl, cream the softened butter with the granulated sugar and brown sugar until smooth.
- Add the pumpkin puree, egg, and vanilla extract to the bowl. Mix until fully combined.
- In a separate bowl, whisk together the flour, pumpkin pie spice, baking powder, and salt.
- Gradually stir the dry ingredients into the wet mixture until a soft dough forms.
- Scoop the dough into small balls and roll each one in powdered sugar until fully coated.
- Place the coated balls on the baking sheet and bake for 12 to 14 minutes.
- Let the cookies cool on the sheet for 5 minutes before moving them to a wire rack.
Extra Tips
Chill the dough for 30 minutes if it feels too sticky to roll. Use a cookie scoop for even sizes. Store cooled cookies in an airtight container at room temperature for up to three days. Course: Dessert Cuisine: American Equipment: Mixing Bowl, Baking Sheet, Whisk
Dark Chocolate Spiderweb Cookies
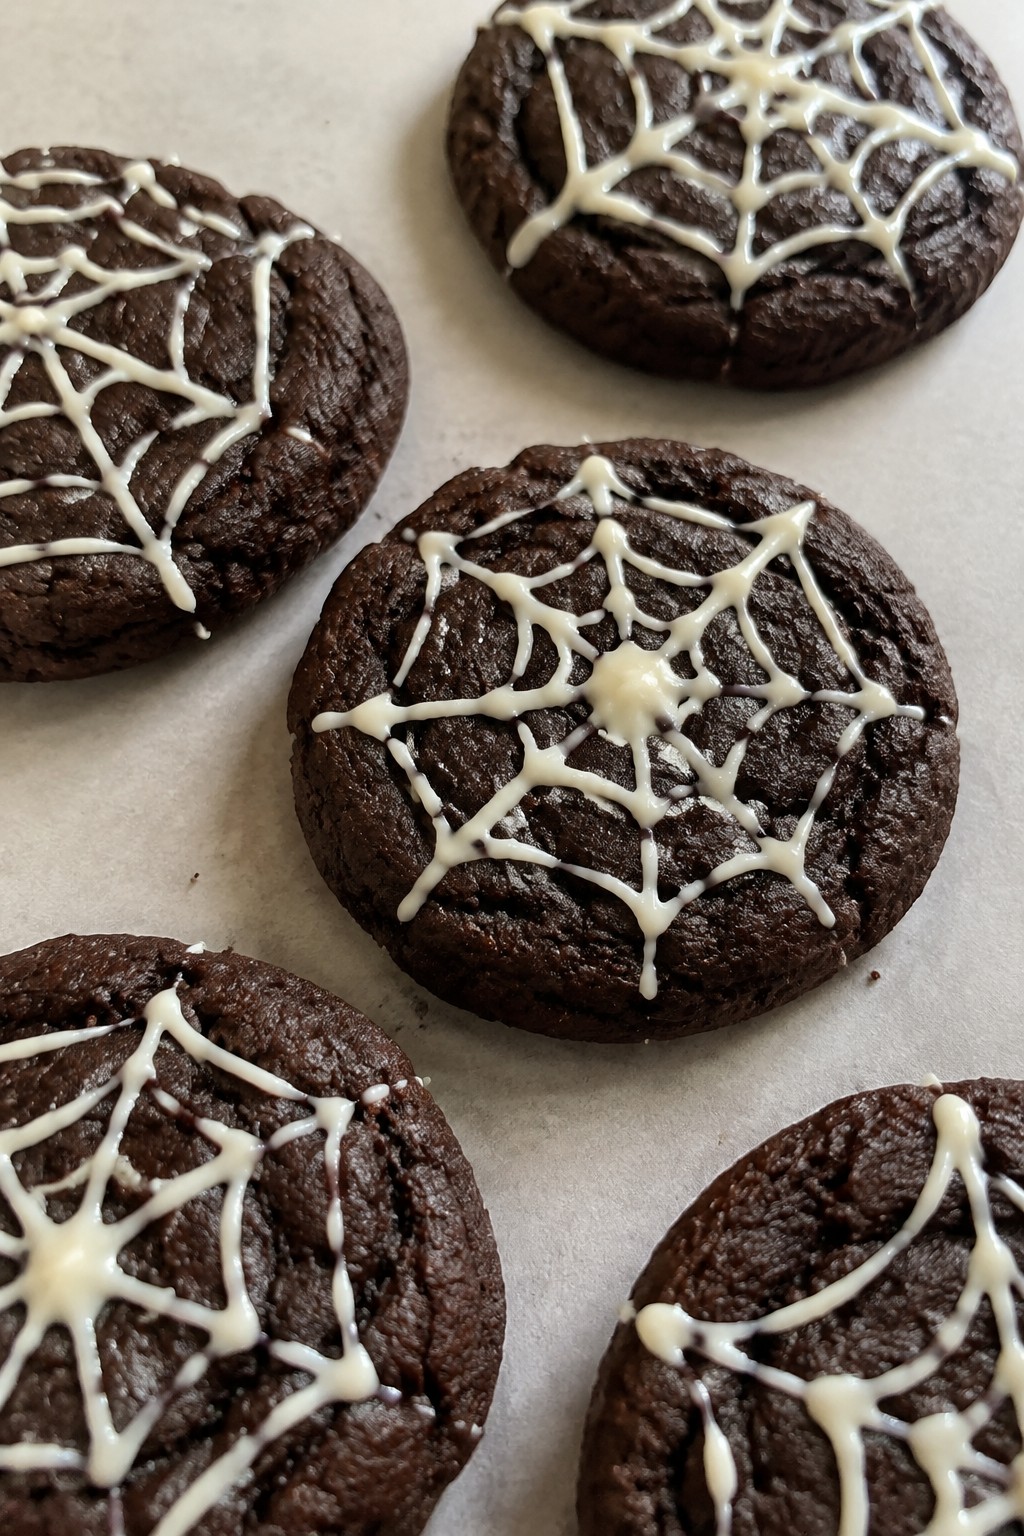
These cookies bring a simple Halloween touch to any gathering. The dark chocolate base pairs with delicate white chocolate webs for a treat that looks festive without extra fuss. They work well for parties or as a quick bake to share with family.
The flavor is rich and slightly bittersweet from the cocoa, while the texture stays crisp at the edges with a soft center. The white chocolate adds a mild sweetness that balances each bite.
Serves 4 people.
Ingredients
- 1 cup all-purpose flour
- 1/2 cup unsweetened cocoa powder
- 1/2 teaspoon baking soda
- 1/4 teaspoon salt
- 1/2 cup unsalted butter, softened
- 1/2 cup granulated sugar
- 1 large egg
- 1 teaspoon vanilla extract
- 4 ounces white chocolate
Instructions
- Preheat the oven to 350 degrees and line a baking sheet with parchment paper.
- Whisk together the flour, cocoa powder, baking soda, and salt in a medium bowl.
- In a separate bowl, beat the butter and sugar until light and fluffy.
- Add the egg and vanilla extract to the butter mixture and mix until combined.
- Stir the dry ingredients into the wet ingredients until a dough forms.
- Scoop tablespoon-sized portions of dough, roll into balls, and place on the baking sheet. Flatten each slightly with your hand.
- Bake for 8 to 10 minutes until the edges are set. Let the cookies cool completely on the sheet.
- Melt the white chocolate in a microwave-safe bowl in 20-second bursts, stirring between each.
- Spoon the melted white chocolate into a piping bag or zip-top bag with one corner snipped off.
- Pipe concentric circles on each cooled cookie, then drag a toothpick from the center outward to create a web pattern.
Extra Tips
Pipe the webs while the white chocolate is still warm but not hot so it sets cleanly on the cookies. If the chocolate thickens during piping, warm it briefly again. Store cooled cookies in an airtight container at room temperature for up to three days to keep the webs intact. Course: Dessert Cuisine: American Equipment: Mixing bowls, Baking sheet, Piping bag, Toothpick
Caramel Apple Oatmeal Cookies
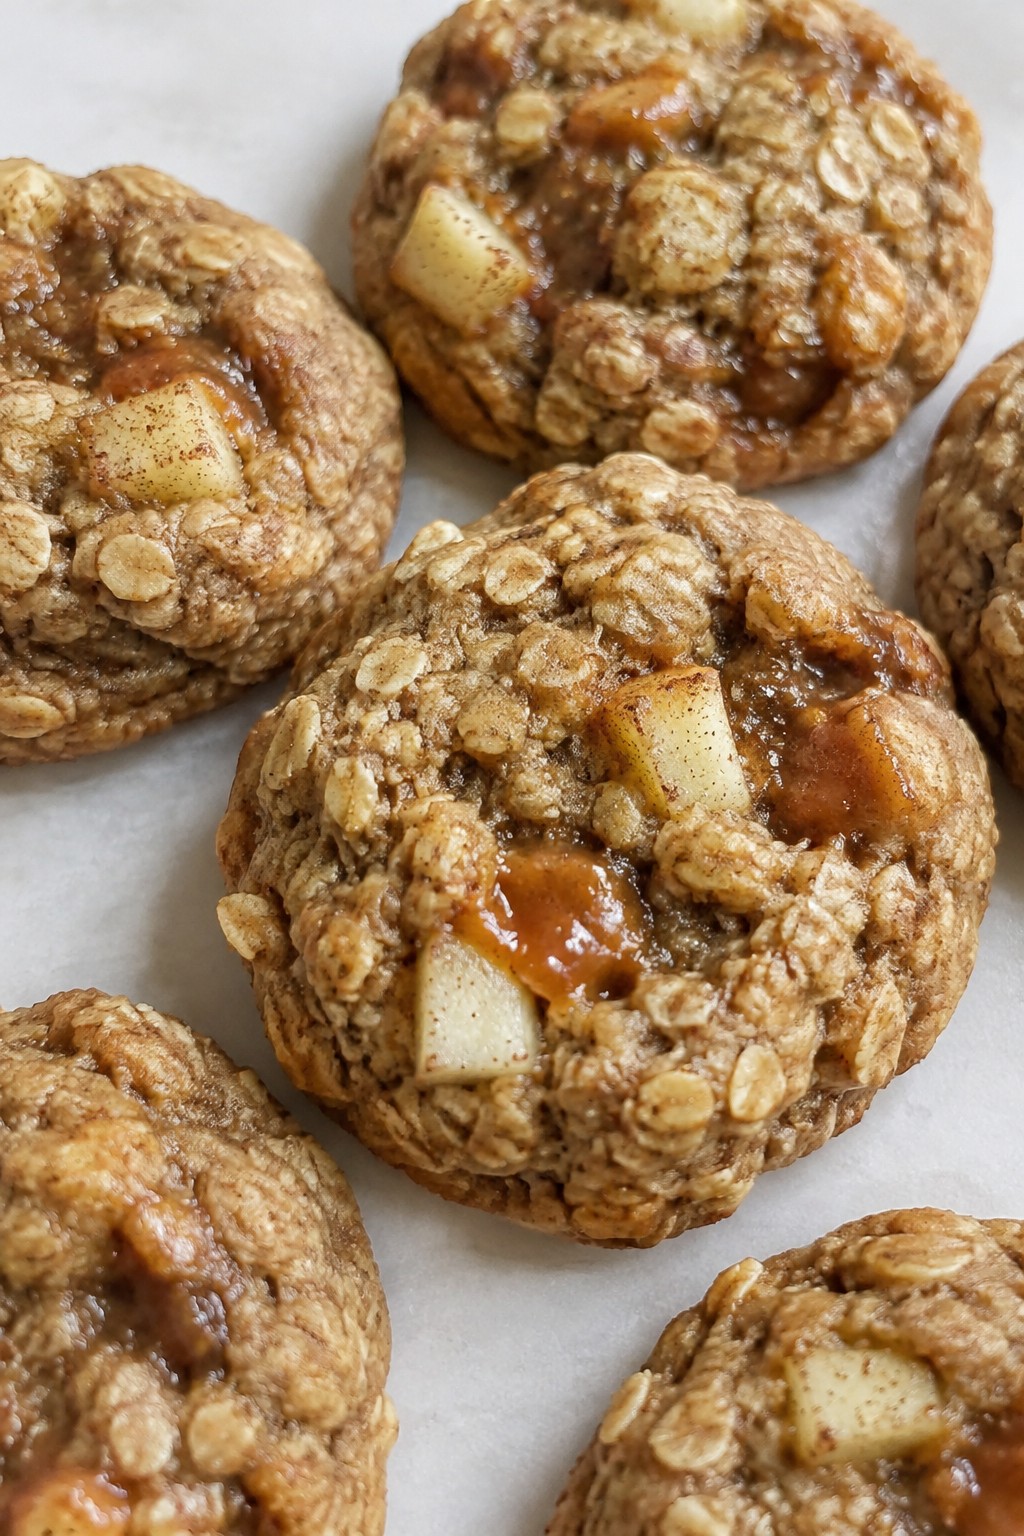
These Caramel Apple Oatmeal Cookies combine chewy oats with tender apple pieces and gooey caramel for a treat that fits right into fall gatherings. They suit Halloween parties, school events, or a simple weekend bake when you want something seasonal without much fuss.
The cookies have a hearty texture from the oats, balanced by soft apple bites and pockets of melted caramel. Cinnamon gives a light spice that pairs well with the sweetness.
Serves 4 people.
Ingredients
- 1 cup old-fashioned oats
- 3/4 cup all-purpose flour
- 1/2 cup unsalted butter, softened
- 1/3 cup brown sugar
- 1/4 cup granulated sugar
- 1 large egg
- 1 teaspoon vanilla extract
- 1/2 teaspoon baking soda
- 1 teaspoon ground cinnamon
- 1/4 teaspoon salt
- 3/4 cup peeled and diced apples
- 1/2 cup caramel chips
Instructions
- Preheat the oven to 350 degrees and line a baking sheet with parchment paper.
- In a mixing bowl, beat the softened butter with the brown sugar and granulated sugar until smooth and creamy.
- Add the egg and vanilla extract to the butter mixture and stir until fully combined.
- In a separate bowl, whisk together the oats, flour, baking soda, cinnamon, and salt.
- Gradually mix the dry ingredients into the wet ingredients until a dough forms.
- Fold in the diced apples and caramel chips until evenly distributed.
- Scoop rounded tablespoons of dough onto the prepared baking sheet, spacing them a couple inches apart.
- Bake for 12 to 14 minutes until the edges turn golden. Let the cookies cool on the sheet for a few minutes before moving them to a rack.
Extra Tips
Use firm apples like Granny Smith so the pieces stay intact and do not release too much moisture. If the caramel chips start to stick to your scoop, lightly coat it with flour. Store cooled cookies in an airtight container at room temperature for up to three days, or warm one briefly in the microwave to soften the caramel again. Course: Dessert Cuisine: American Equipment: Mixing Bowl, Baking Sheet
Blood Orange Shortbread Cookies
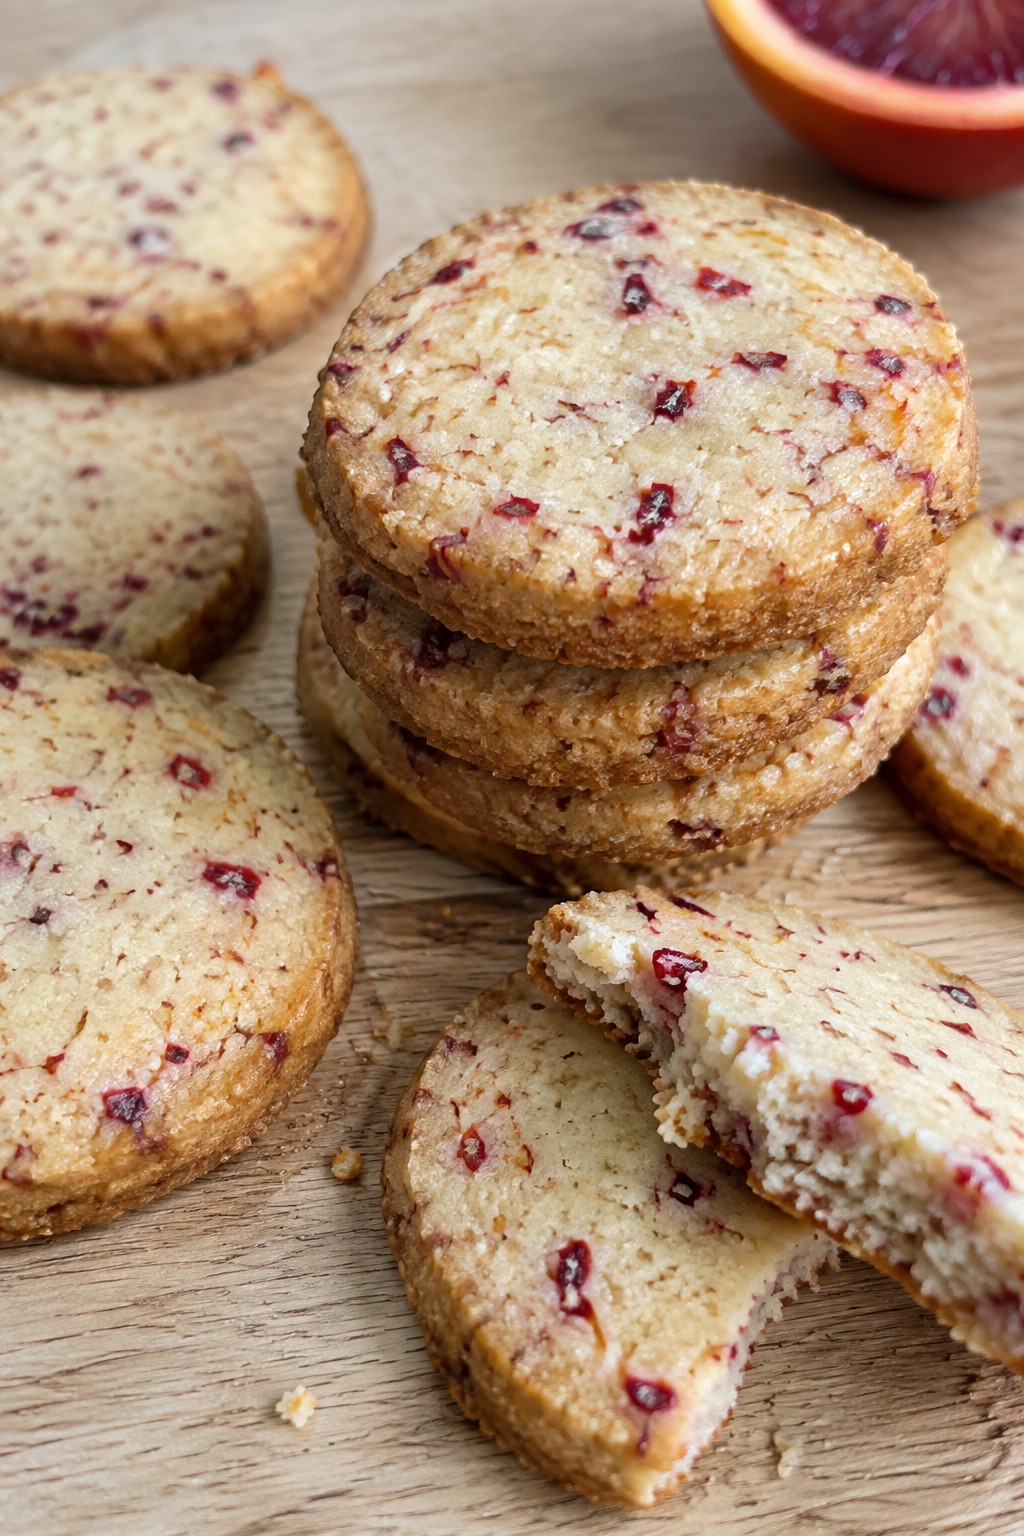
Blood orange shortbread cookies bring a bright citrus note to a classic buttery base. The deep red flecks from the zest give these treats a seasonal look that suits a Halloween spread without any extra coloring. They bake up crisp at the edges and tender in the center, making them easy to pack for parties or enjoy with coffee on a cool evening.
The flavor stays balanced between sweet shortbread and tart orange, so they feel festive yet not overly sweet. Serve them on a platter with other simple cookies for a quick dessert table that still feels special.
Serves 4 people.
Ingredients
- 1/2 cup unsalted butter, softened
- 1/4 cup granulated sugar
- Zest and juice from 1 blood orange
- 1 cup all-purpose flour
- 1/4 teaspoon salt
Instructions
- Heat the oven to 350 degrees and line a baking sheet with parchment paper.
- In a mixing bowl, beat the softened butter and sugar together until light and creamy.
- Stir in the blood orange zest and 2 tablespoons of the juice until evenly combined.
- Add the flour and salt to the bowl. Mix just until a soft dough forms and no dry streaks remain.
- Turn the dough out onto a lightly floured surface and pat it into a 1/2-inch thick rectangle. Cut into small squares or rounds.
- Place the cut cookies on the prepared baking sheet and bake for 12 to 15 minutes until the edges turn lightly golden.
- Cool the cookies on the sheet for 5 minutes before moving them to a wire rack.
Extra Tips
The blood orange juice adds just enough moisture to keep the dough workable without chilling, but if your kitchen runs warm, a 15-minute rest in the fridge firms it up for cleaner cuts. Dust the cooled cookies lightly with powdered sugar only if you want extra sweetness, and store them in an airtight container at room temperature for up to three days to maintain their crisp edges. Course: Dessert Cuisine: American Equipment: Mixing Bowl, Baking Sheet, Zester
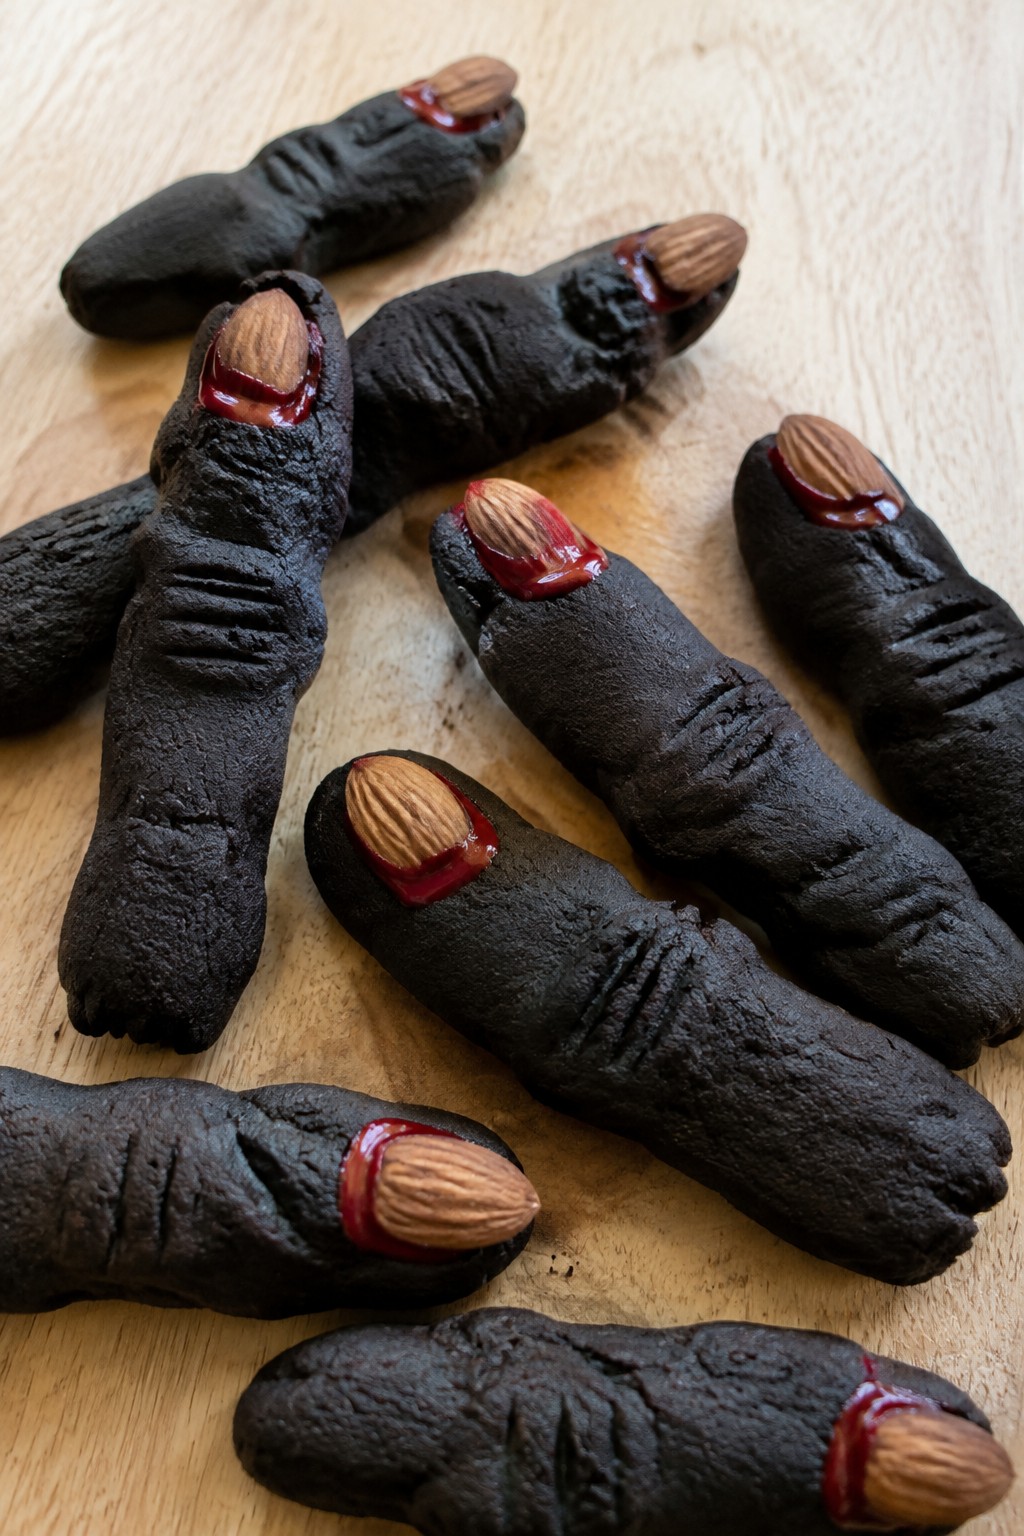
Black Cocoa Witch Finger Cookies
These black cocoa witch finger cookies add a fun Halloween touch to any cookie tray. The dark cocoa creates a striking black color that looks like real witch fingers, while the simple dough comes together quickly for last-minute baking needs. They suit parties, school events, or an afternoon activity with family.
The finished cookies taste rich and chocolatey with a slight crunch from the almond fingernails. The texture stays tender inside with crisp edges after baking.
Serves 4 people.
Ingredients
- 1/2 cup unsalted butter, softened
- 1/2 cup granulated sugar
- 1 large egg
- 1 teaspoon vanilla extract
- 1 1/4 cups all-purpose flour
- 1/4 cup black cocoa powder
- 1/2 teaspoon baking powder
- 1/4 teaspoon salt
- 12 whole almonds
- Red gel food coloring
Instructions
- Heat the oven to 350 degrees and line a baking sheet with parchment paper.
- Beat the butter and sugar in a mixing bowl until light and fluffy.
- Mix in the egg and vanilla extract until smooth.
- Stir together the flour, black cocoa powder, baking powder, and salt in a separate bowl.
- Add the dry mixture to the wet ingredients and stir until a dough forms.
- Scoop out 12 portions of dough and roll each into a thin log about 4 inches long.
- Place the logs on the baking sheet and press an almond into one end of each to form a fingernail.
- Use a knife to score two or three lines across the middle of each log for knuckles.
- Dab a small amount of red gel food coloring around the base of each almond and into the scored lines.
- Bake for 10 to 12 minutes until the edges look set.
- Cool the cookies on the baking sheet for 5 minutes before moving them to a wire rack.
Extra Tips
Chill the shaped dough logs for 10 minutes before baking if the kitchen feels warm, as this helps the fingers keep their shape. Store cooled cookies in an airtight container at room temperature for up to four days. Skip the red gel if you prefer a simpler look, or swap in sliced almonds if whole ones are unavailable. Course: Dessert Cuisine: American Equipment: Mixing Bowl, Baking Sheet, Parchment Paper
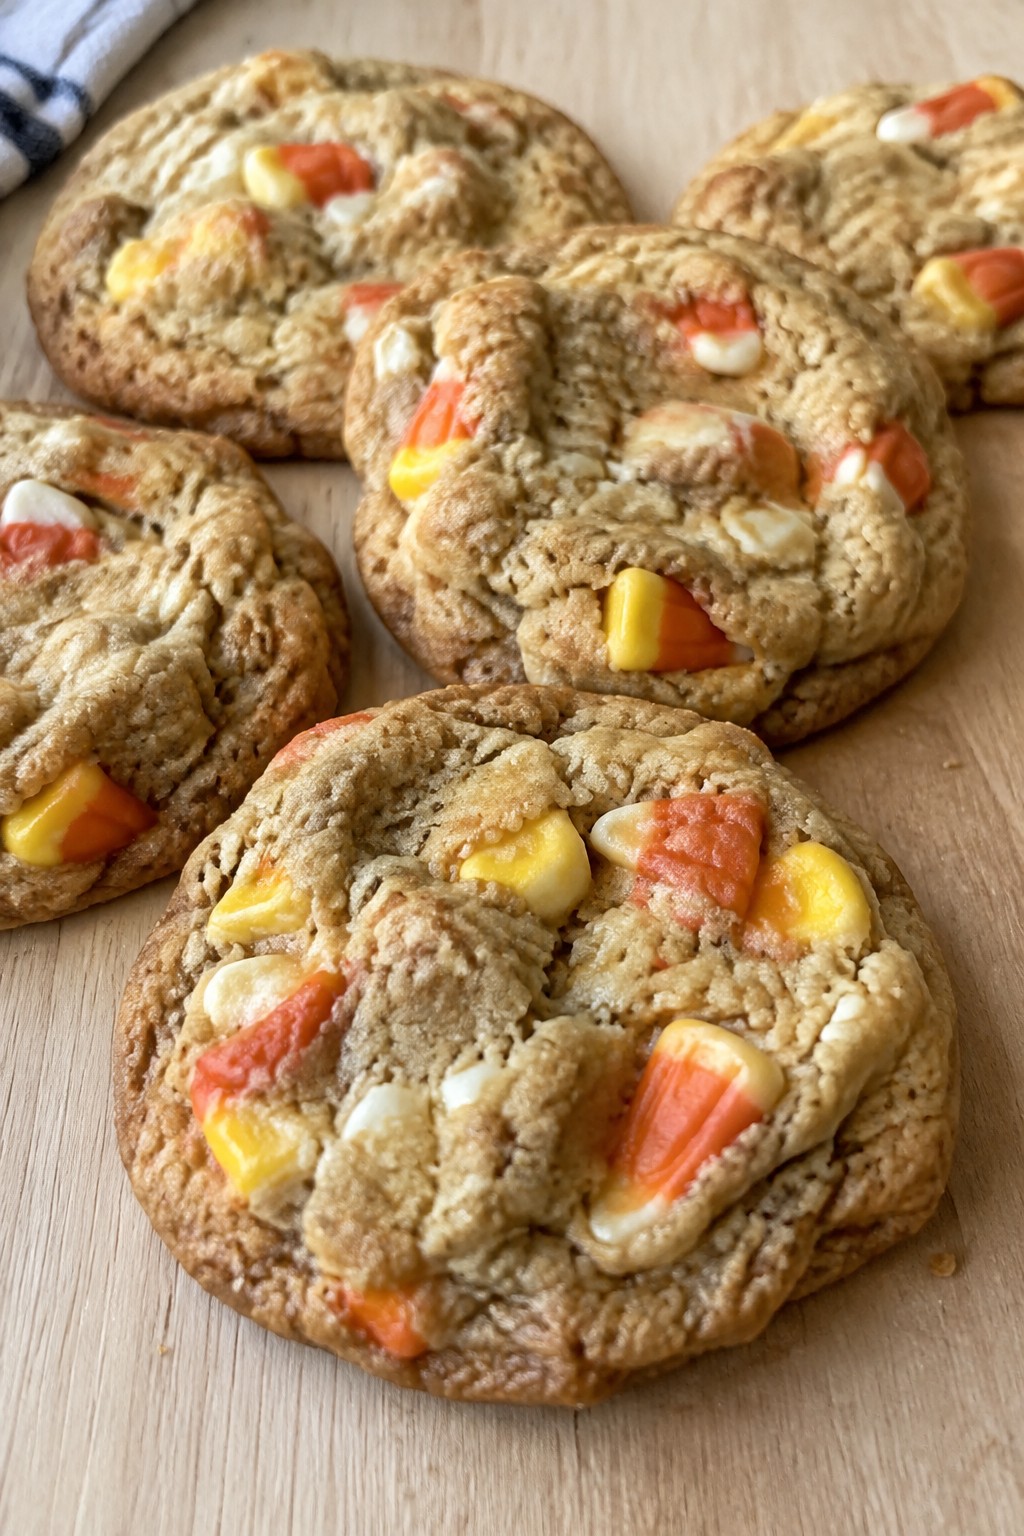
Candy Corn Blondie Cookies
These Candy Corn Blondie Cookies combine a chewy blondie base with sweet candy corn pieces for a simple Halloween treat. They work well for after-school snacks or casual fall parties when you want something quick that still feels seasonal.
The brown sugar dough bakes into soft cookies with slightly crisp edges. Candy corn adds chewy spots throughout each bite without needing extra decorations.
Serves 4 people.
Ingredients
- 1/4 cup unsalted butter, melted
- 1/2 cup packed brown sugar
- 1 large egg
- 1 teaspoon vanilla extract
- 3/4 cup all-purpose flour
- 1/2 teaspoon baking powder
- 1/4 teaspoon salt
- 2/3 cup candy corn
Instructions
- Preheat the oven to 350 degrees and line a baking sheet with parchment paper.
- In a mixing bowl, stir together the melted butter and brown sugar until smooth.
- Add the egg and vanilla extract, then mix until fully combined.
- Whisk in the flour, baking powder, and salt until no dry streaks remain.
- Fold the candy corn into the dough.
- Scoop the dough into 8 portions and place them on the prepared baking sheet, spacing them a few inches apart.
- Bake for 10 to 12 minutes until the edges turn golden.
- Cool the cookies on the sheet for 5 minutes before moving them to a wire rack.
Extra Tips
Press a few extra candy corn pieces onto the tops of the cookies right after baking so they stick without melting. Store cooled cookies in an airtight container at room temperature for up to three days. If the dough feels too soft to scoop, chill it for 15 minutes first to make portioning easier. Course: Dessert Cuisine: American Equipment: Mixing Bowl, Baking Sheet, Oven
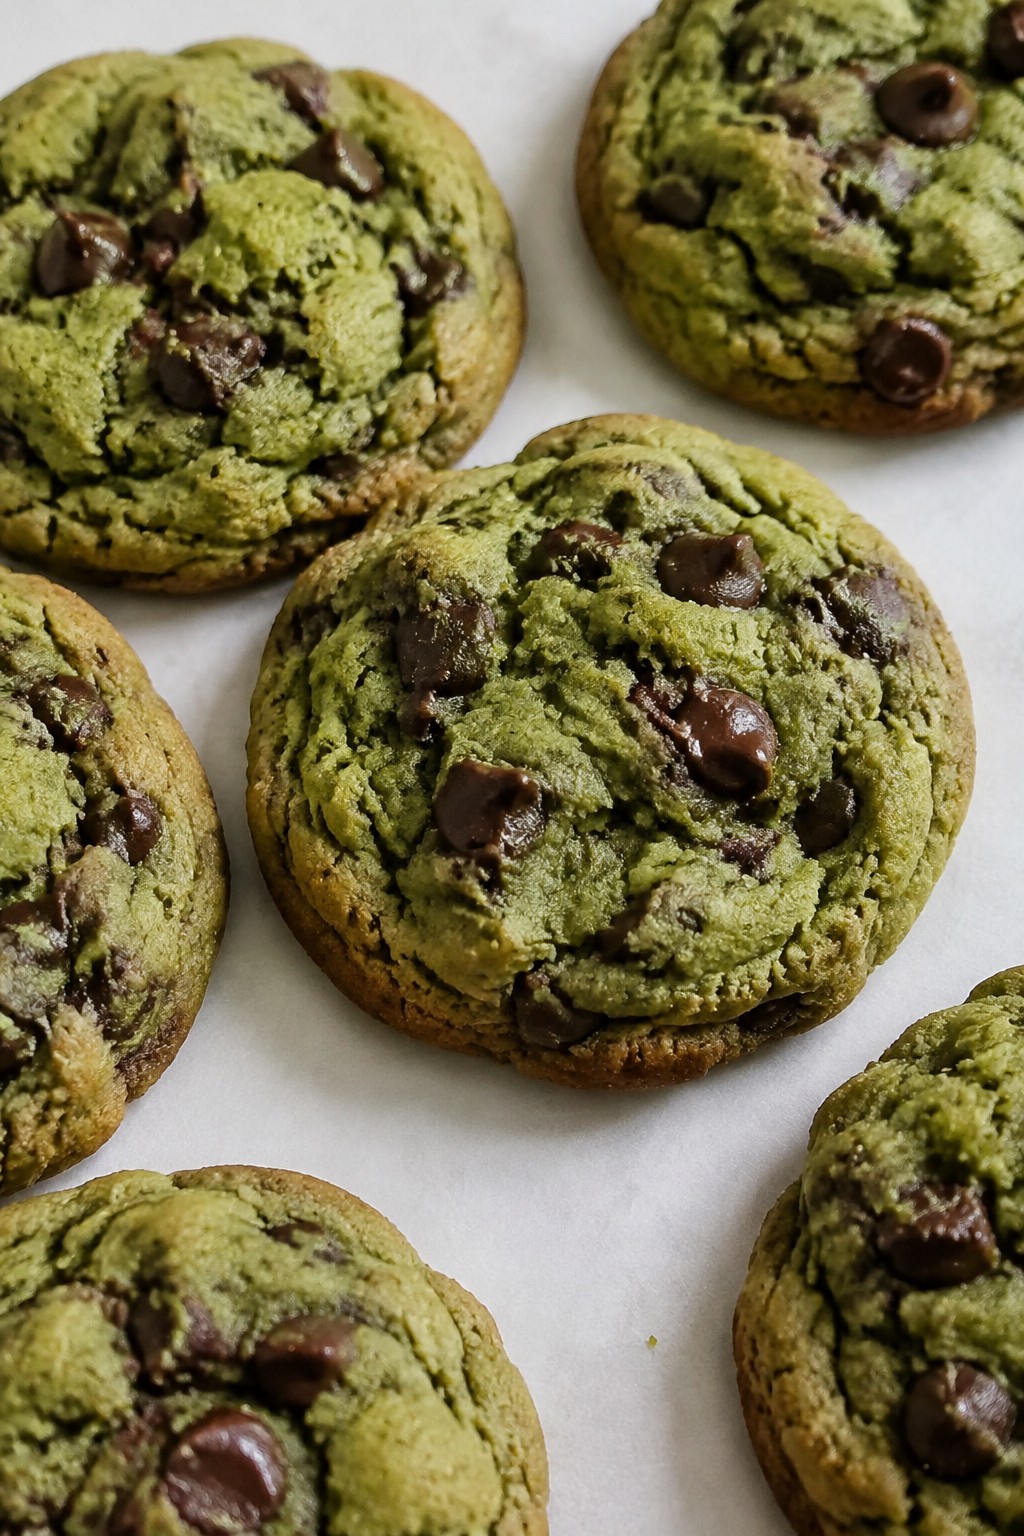
Monster Matcha Chocolate Chip Cookies
These Monster Matcha Chocolate Chip Cookies bring a bright green color to your Halloween spread. The matcha gives them a fun monster look that fits right in with other festive treats.
The cookies bake up chewy in the center with crisp edges. Matcha adds an earthy flavor that balances the sweet chocolate chips scattered throughout.
Serves 4 people.
Ingredients
- 1 1/4 cups all-purpose flour
- 1 1/2 tablespoons matcha powder
- 1/2 teaspoon baking soda
- 1/4 teaspoon salt
- 1/2 cup unsalted butter, softened
- 1/3 cup granulated sugar
- 1/3 cup brown sugar
- 1 large egg
- 1 teaspoon vanilla extract
- 3/4 cup chocolate chips
Instructions
- Preheat the oven to 350 degrees and line a baking sheet with parchment paper.
- Whisk together the flour, matcha powder, baking soda, and salt in a medium bowl.
- In a large bowl, beat the softened butter with the granulated sugar and brown sugar until light and fluffy.
- Add the egg and vanilla extract to the butter mixture and mix until smooth.
- Gradually stir the dry ingredients into the wet ingredients until a dough forms.
- Fold the chocolate chips into the dough until evenly distributed.
- Scoop rounded tablespoons of dough onto the prepared baking sheet, spacing them a few inches apart.
- Bake for 10 to 12 minutes until the edges are set but the centers still look slightly soft.
- Let the cookies cool on the baking sheet for 5 minutes before moving them to a wire rack.
Extra Tips
Matcha can taste slightly bitter if the cookies overbake, so pull them out as soon as the edges firm up. Press a few extra chocolate chips on top right after baking for a better look. Store cooled cookies in an airtight container at room temperature for up to three days to keep them chewy. These pair well with a glass of cold milk. Course: Dessert Cuisine: American Equipment: Mixing Bowl, Whisk, Baking Sheet, Parchment Paper
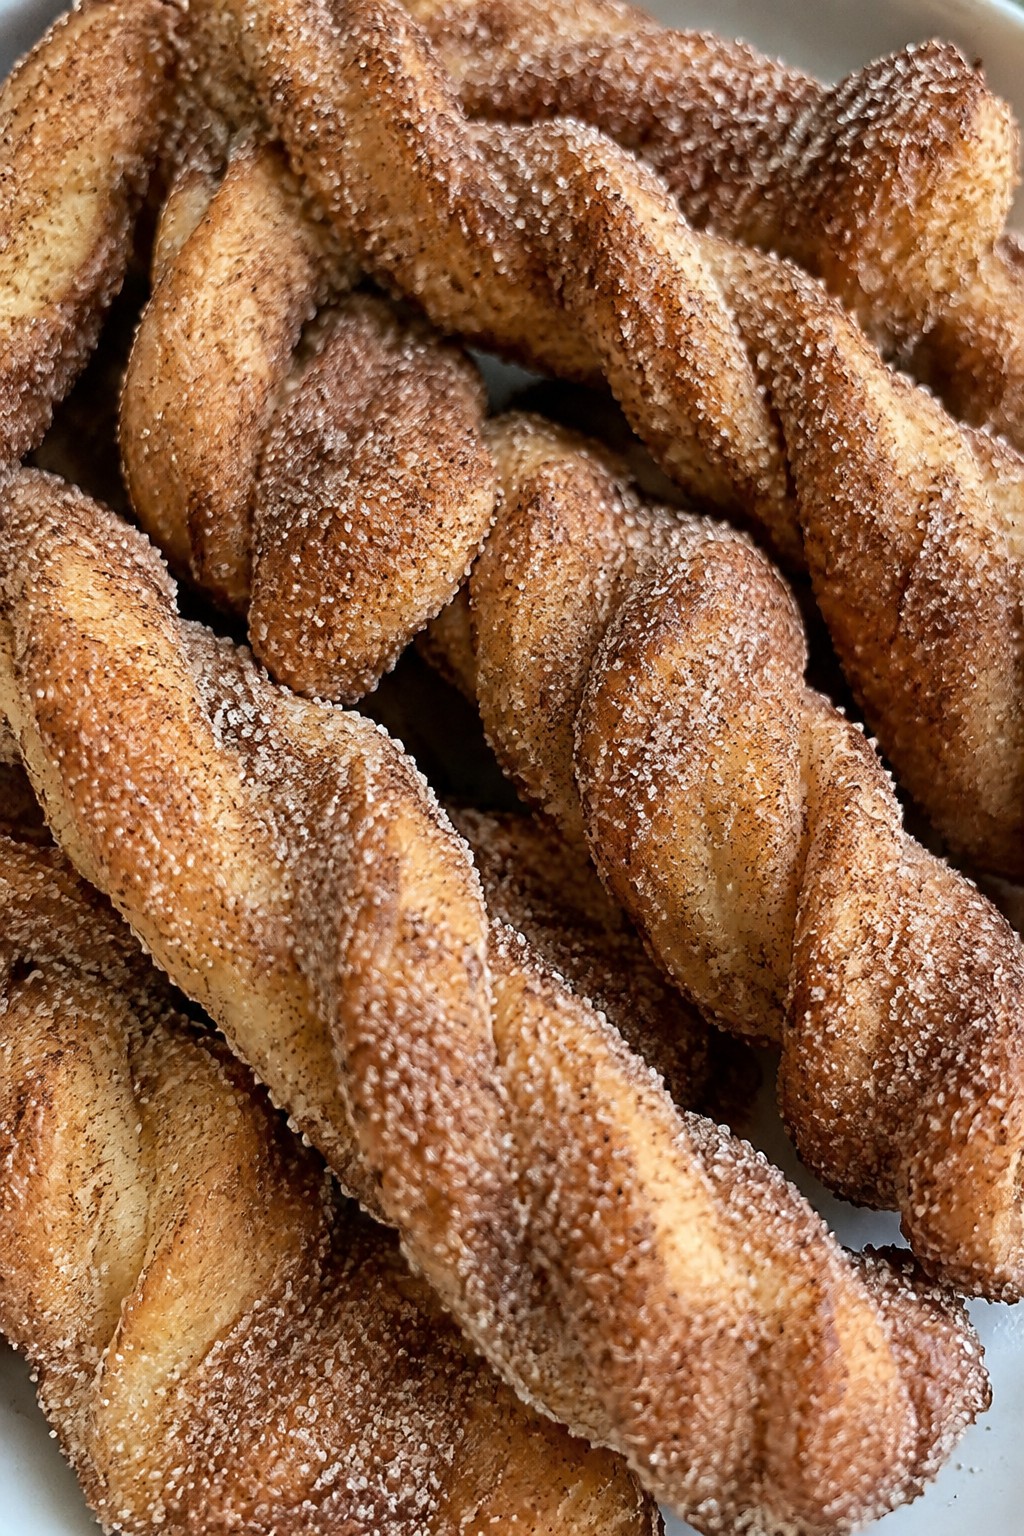
Cinnamon Sugar Churro Cookies
These cinnamon sugar churro cookies capture the fried dough taste of churros in a simple baked form. The cookies come out with crisp edges and a soft middle, all rolled in a generous coating of cinnamon sugar for that familiar sweet spice.
They fit right into Halloween spreads because the warm flavors match the season and the twisted shapes add a playful touch to dessert tables. Serve them at parties or pack a few for trick-or-treat nights.
Serves 4 people.
Ingredients
- 1/2 cup unsalted butter, softened
- 1/2 cup granulated sugar
- 1 large egg
- 1 teaspoon vanilla extract
- 1 1/4 cups all-purpose flour
- 1/2 teaspoon baking powder
- 1/4 teaspoon salt
- 2 tablespoons granulated sugar
- 1 tablespoon ground cinnamon
Instructions
- Heat the oven to 350 degrees and line a baking sheet with parchment paper.
- Beat the butter and 1/2 cup sugar in a mixing bowl until light and fluffy.
- Add the egg and vanilla extract, then mix until combined.
- Stir in the flour, baking powder, and salt until a soft dough forms.
- Scoop out portions of dough and roll each into a 4-inch rope, then twist the ropes lightly.
- Mix the remaining 2 tablespoons sugar with the cinnamon in a shallow dish.
- Roll each twisted rope in the cinnamon sugar mixture to coat all sides.
- Place the cookies on the prepared baking sheet and bake for 10 to 12 minutes until the edges turn golden.
- Cool the cookies on the sheet for 5 minutes before moving them to a wire rack.
Extra Tips
Twist the dough ropes gently so they hold their shape without cracking during baking. For extra crunch, roll the cookies a second time in the cinnamon sugar right after they come out of the oven while still warm. Course: Dessert Cuisine: Mexican Equipment: Mixing Bowl, Baking Sheet, Wire Rack
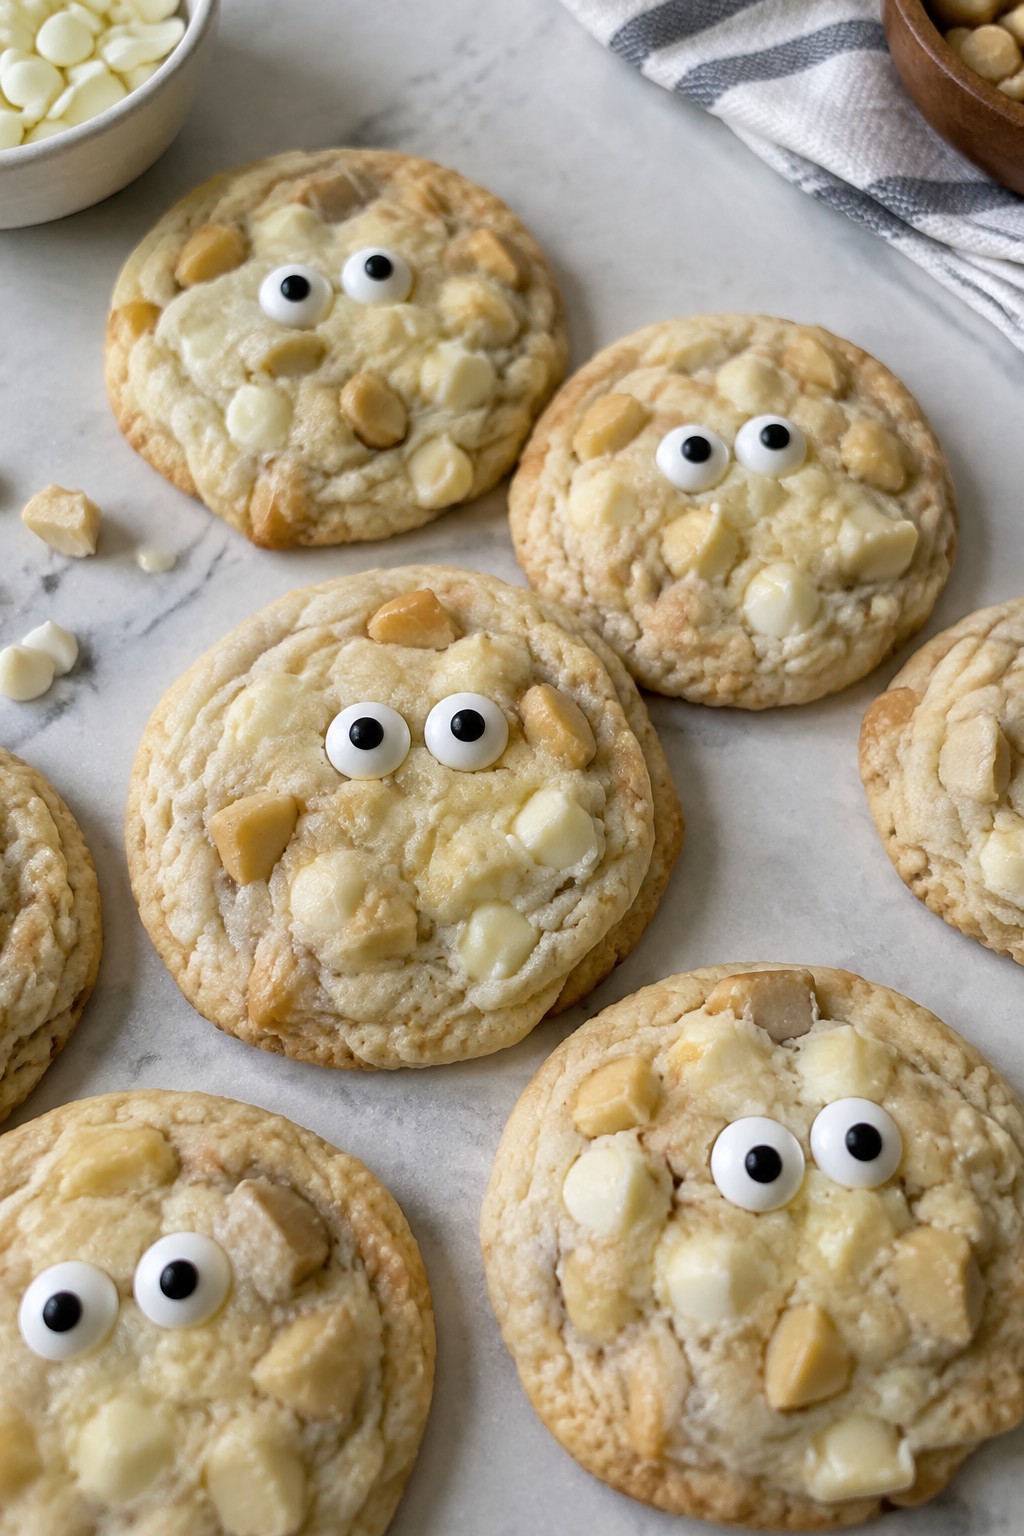
Ghostly White Chocolate Macadamia Cookies
These cookies stand out with their pale color and rich white chocolate flavor. They bake up soft in the center with crisp edges and a pleasant crunch from the macadamia nuts. They work well for Halloween parties or as a simple treat to share with family.
The dough comes together quickly and needs only a short chill before baking. Once cooled, a few candy eyes turn each cookie into a friendly ghost without much extra effort.
Serves 4 people.
Ingredients
- 1 1/4 cups all-purpose flour
- 1/2 teaspoon baking soda
- 1/4 teaspoon salt
- 1/2 cup unsalted butter, softened
- 1/3 cup granulated sugar
- 1/3 cup brown sugar
- 1 large egg
- 1 teaspoon vanilla extract
- 3/4 cup white chocolate chips
- 1/2 cup macadamia nuts, chopped
- 12 candy eyes
Instructions
- Preheat the oven to 350 degrees F and line a baking sheet with parchment paper.
- Whisk together the flour, baking soda, and salt in a medium bowl.
- In a separate bowl, beat the softened butter with both sugars until light and creamy.
- Add the egg and vanilla extract to the butter mixture and mix until smooth.
- Stir the dry ingredients into the wet ingredients until just combined.
- Fold in 1/2 cup of the white chocolate chips and all the chopped macadamia nuts.
- Scoop rounded tablespoons of dough onto the prepared baking sheet, spacing them a few inches apart.
- Bake for 10 to 12 minutes until the edges turn lightly golden.
- Remove the cookies from the oven and immediately press two candy eyes onto each one while they are still soft.
- Melt the remaining 1/4 cup white chocolate chips in a microwave in 20-second bursts, then drizzle lightly over the cookies for extra ghostly detail.
Extra Tips
Press the candy eyes on right after baking so they stick without extra icing. If the white chocolate drizzle sets too quickly, warm it again for a few seconds. Store cooled cookies in an airtight container at room temperature for up to three days.
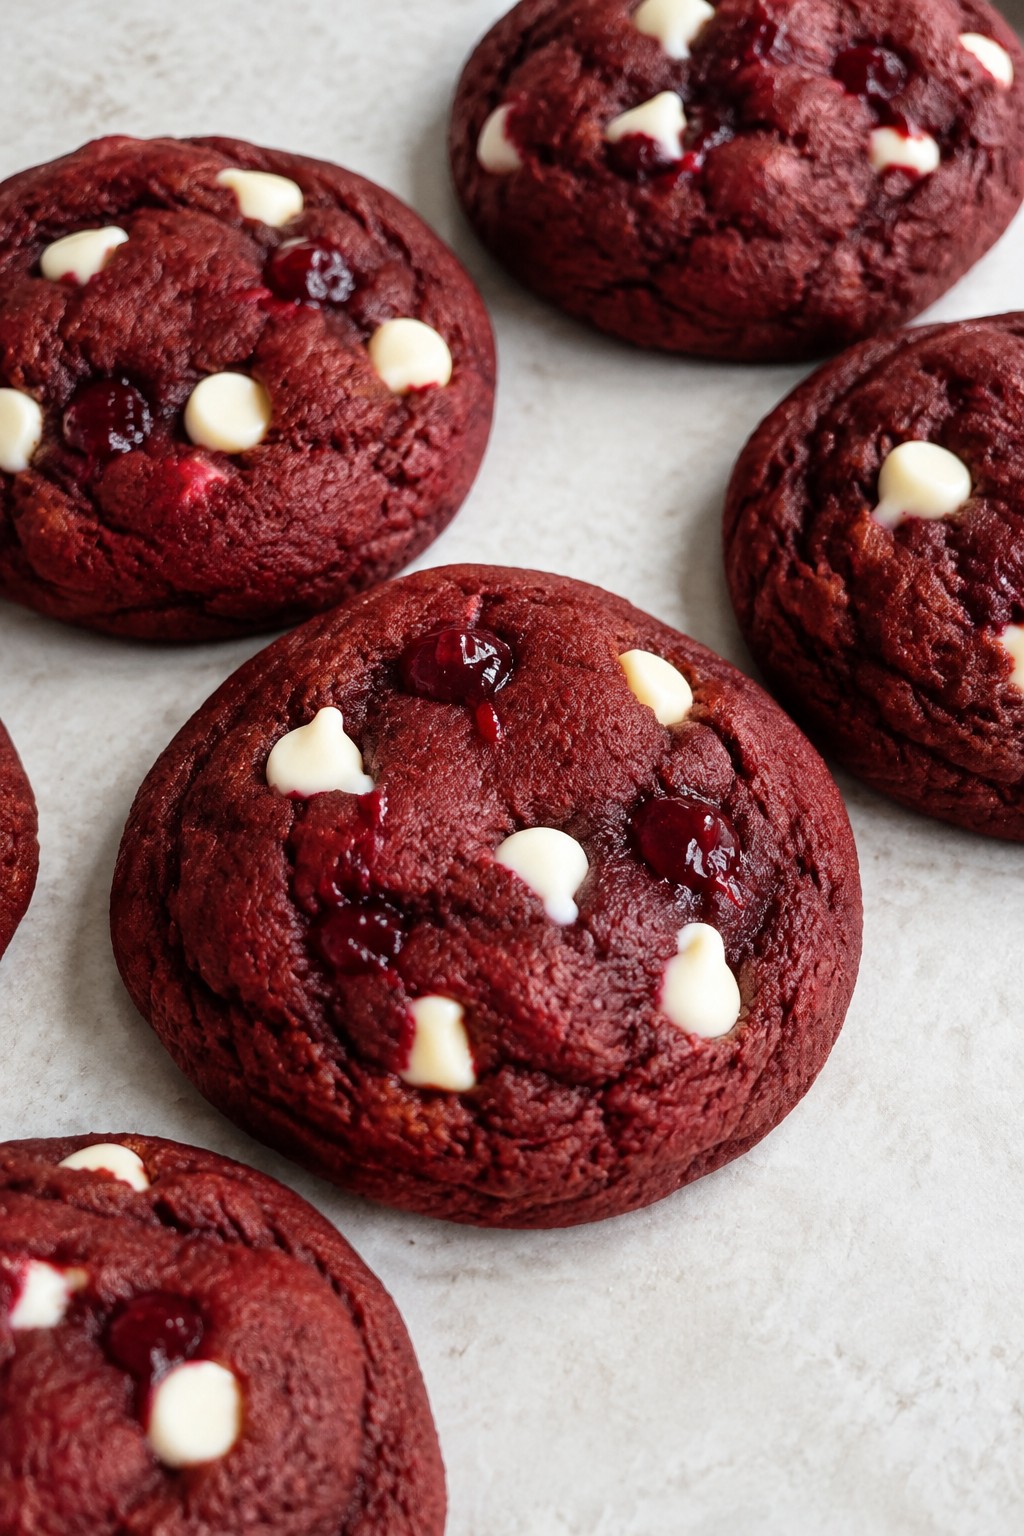
Course: Dessert Cuisine: American Equipment: Mixing Bowl, Baking Sheet, WhiskRed Velvet Vampire Bite Cookies
These red velvet vampire bite cookies add a simple Halloween touch to a classic red velvet base. They suit cookie swaps, school parties, or an easy weekend bake when you want something festive without extra fuss. The cookies turn out soft and chewy with mild chocolate notes, scattered white chocolate chips, and small red jam dots that give the vampire bite look.
The color shows up well against neutral platters and the jam keeps the flavor bright. They hold their shape nicely once cooled and travel well if you pack them in a single layer.
Serves 4 people.
Ingredients
- 1 1/4 cups all-purpose flour
- 2 tablespoons unsweetened cocoa powder
- 1/2 teaspoon baking soda
- 1/4 teaspoon salt
- 1/2 cup unsalted butter, softened
- 3/4 cup granulated sugar
- 1 large egg
- 1 tablespoon red food coloring
- 1 teaspoon vanilla extract
- 1/2 cup white chocolate chips
- 1/4 cup red raspberry jam
Instructions
- Heat the oven to 350°F and line a baking sheet with parchment paper.
- Whisk the flour, cocoa powder, baking soda, and salt in a medium bowl until evenly mixed.
- In a separate bowl, beat the softened butter and sugar until smooth and creamy. Add the egg, red food coloring, and vanilla extract and mix until the color is uniform.
- Stir the dry ingredients into the wet mixture until no flour streaks remain. Fold in the white chocolate chips.
- Scoop rounded tablespoons of dough onto the prepared baking sheet, spacing them a few inches apart. Bake for 10 to 12 minutes until the edges are set.
- Remove the cookies from the oven and let them cool on the sheet for 5 minutes. Transfer to a wire rack. Once fully cool, place two small dots of raspberry jam near the edge of each cookie to form the bite marks.
Extra Tips
Warm the raspberry jam for a few seconds in the microwave so it pipes or spoons cleanly without tearing the cookie surface. If you want a stronger red velvet taste, add an extra teaspoon of cocoa next time. Keep leftovers in an airtight container at room temperature for up to three days. Course: Dessert Cuisine: American Equipment: Mixing Bowl, Baking Sheet, Whisk, Electric Mixer
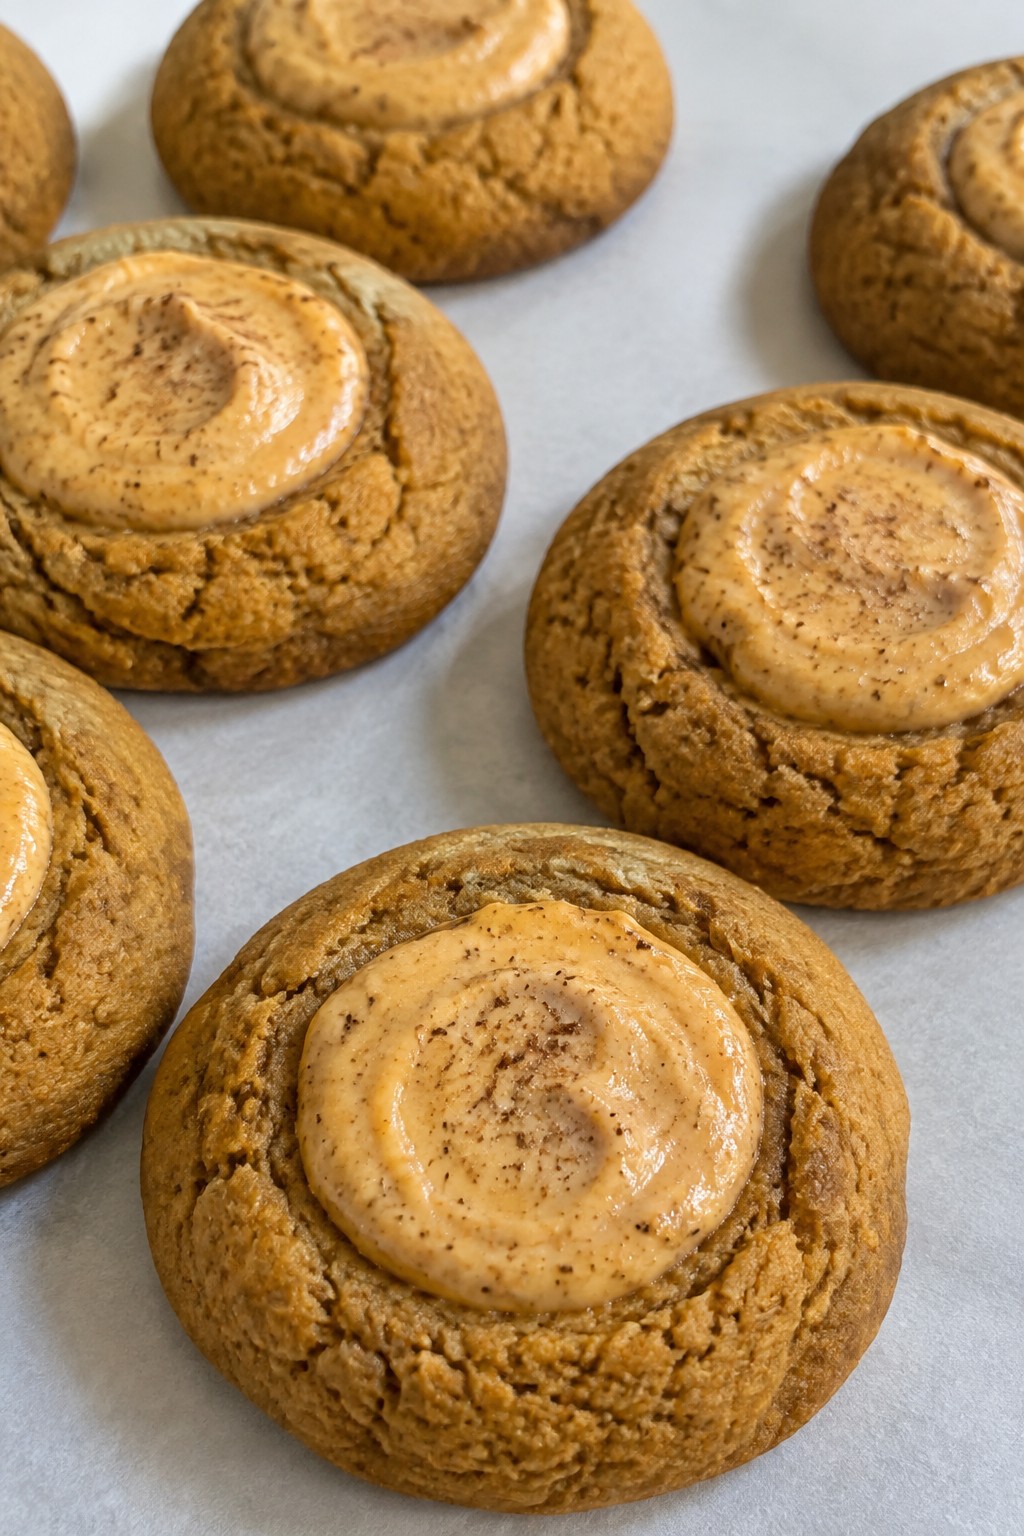
Pumpkin Cheesecake Thumbprint Cookies
These cookies bring together a soft spiced base with a creamy pumpkin cheesecake center. They work well for Halloween gatherings or as a simple fall dessert to share with family. The result is a tender cookie with a smooth, lightly spiced filling that balances sweetness and pumpkin flavor.
Serves 4 people.
Ingredients
- 1 cup all-purpose flour
- 1/2 cup unsalted butter, softened
- 1/4 cup granulated sugar
- 1/2 teaspoon vanilla extract
- 4 ounces cream cheese, softened
- 1/4 cup pumpkin puree
- 2 tablespoons powdered sugar
- 1/2 teaspoon pumpkin pie spice
Instructions
- Preheat the oven to 350 degrees and line a baking sheet with parchment paper.
- In a mixing bowl, cream the butter and granulated sugar until light. Add the vanilla extract and stir to combine.
- Mix in the flour until a soft dough forms. Roll the dough into 12 small balls and place them on the baking sheet.
- Use your thumb to press a shallow indent into the center of each ball.
- In a separate bowl, beat the cream cheese, pumpkin puree, powdered sugar, and pumpkin pie spice until smooth.
- Spoon the filling into the indent of each cookie.
- Bake for 12 to 14 minutes until the edges are lightly golden. Cool on the baking sheet before serving.
Extra Tips
Chill the dough for 20 minutes if it feels too soft to hold its shape. The filling sets as the cookies cool, so avoid moving them too soon after baking. Store leftovers in an airtight container in the refrigerator for up to three days. Course: Dessert Cuisine: American Equipment: Mixing Bowls, Baking Sheet, Whisk
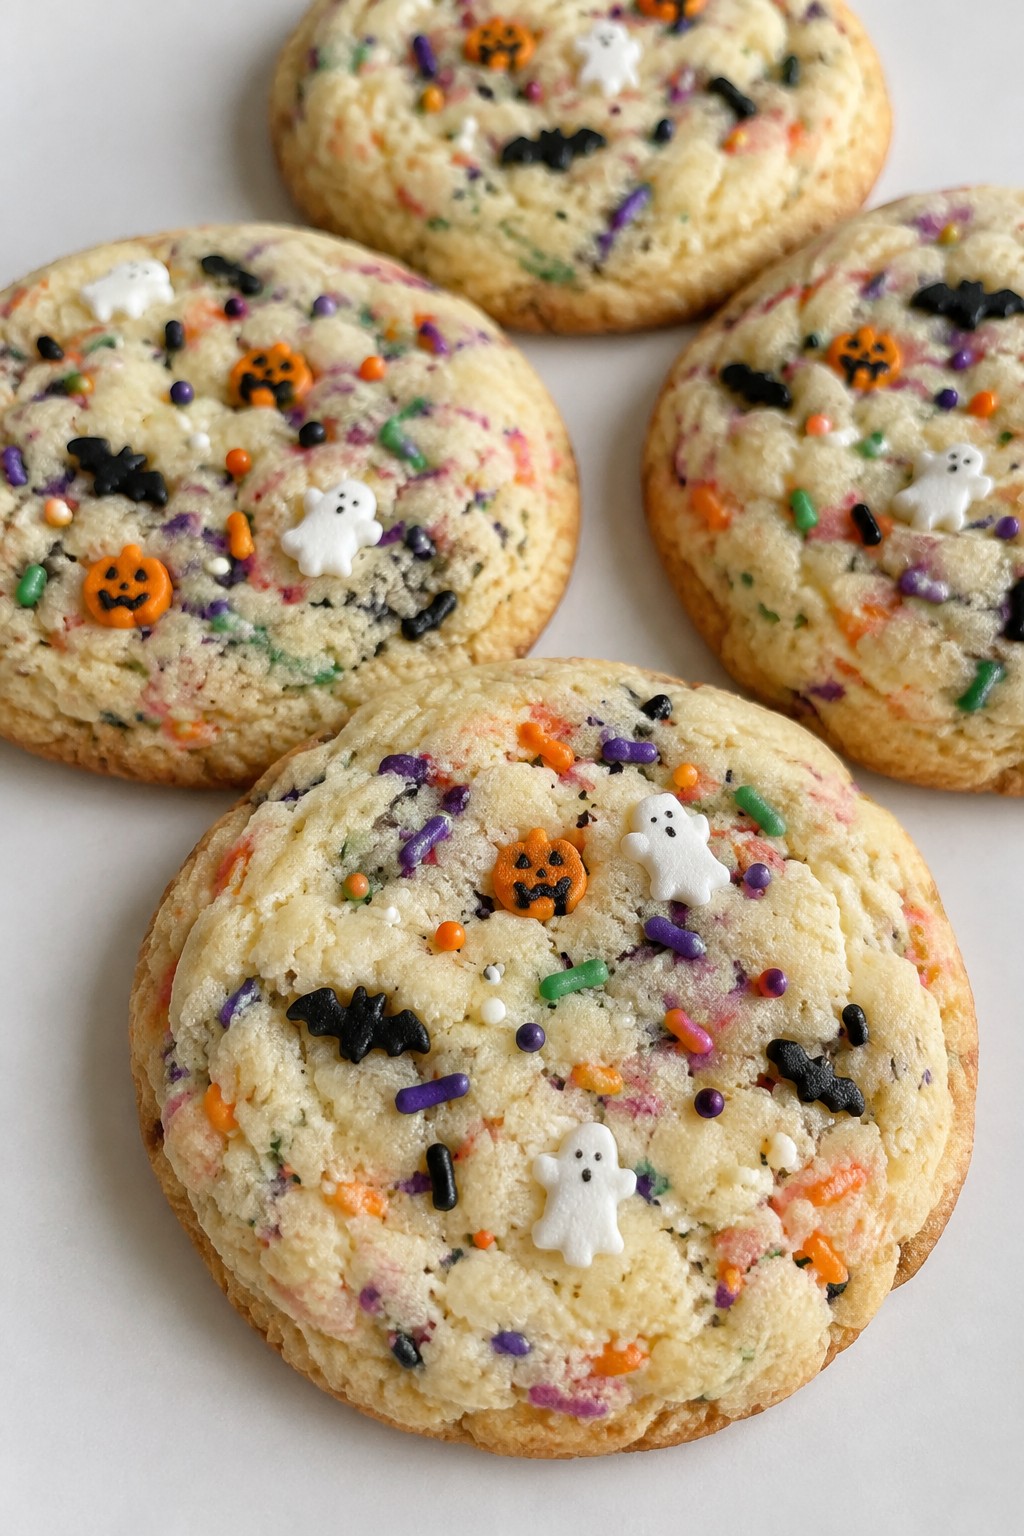
Spooky Sprinkle Funfetti Sugar Cookies
These cookies pack bright funfetti sprinkles into every bite for a cheerful Halloween treat. The dough bakes up soft with slightly crisp edges and a mild vanilla taste that pairs well with the sweet crunch of the sprinkles.
They suit after-school snacks or small Halloween gatherings when you want something simple yet themed. The spooky sprinkles on top add color without extra steps.
Serves 4 people.
Ingredients
- 1/2 cup unsalted butter, softened
- 1/2 cup granulated sugar
- 1 large egg
- 1 teaspoon vanilla extract
- 1 3/4 cups all-purpose flour
- 1/2 teaspoon baking powder
- 1/4 teaspoon salt
- 1/3 cup funfetti sprinkles
- 2 tablespoons spooky sprinkles
Instructions
- Heat the oven to 350 degrees and line a baking sheet with parchment paper.
- In a mixing bowl, beat the softened butter and sugar until light and creamy.
- Add the egg and vanilla extract to the bowl and mix until fully combined.
- Stir in the flour, baking powder, and salt until a dough forms.
- Fold the funfetti sprinkles into the dough until evenly distributed.
- Scoop rounded tablespoons of dough onto the baking sheet and press a few spooky sprinkles onto the top of each cookie.
- Bake for 10 to 12 minutes until the edges turn lightly golden.
- Cool the cookies on the baking sheet for 5 minutes before moving them to a wire rack.
Extra Tips
Press the spooky sprinkles firmly onto the dough before baking so they stay in place once the cookies cool. If the dough feels too soft to handle, chill it for 15 minutes. Store cooled cookies in an airtight container at room temperature for up to three days. Course: Dessert Cuisine: American Equipment: Mixing Bowl, Baking Sheet, Oven
