

Planning a kids Halloween party means you need food that is simple to make and fun to eat.
These recipes focus on easy steps and ingredients you can find at the store.
You will find a mix of sweet and savory options that work for a group.
Each idea is written out fully so you can follow it from start to finish.
Helpful Tips Before You Start
A little planning keeps the focus on fun instead of stress when making Halloween treats for kids.
Involve the Kids Early
Let children pick shapes or add simple toppings like candy eyes. This reduces your workload and gets them excited about the food.
Make Items Ahead of Time
Prepare most snacks the day before the party. Store them in airtight containers so you only need quick assembly on the day.
Choose Bite-Sized Portions
Cut foods into small pieces that fit easily in little hands. Kids can try several options without making a big mess.
Check for Allergies First
Ask parents about any restrictions before shopping. Having one or two safe options ready avoids last-minute changes.
Mummy Hot Dogs in Crescent Rolls
These mummy hot dogs turn a simple package of crescent rolls into a fun Halloween snack that kids spot right away. The flaky dough wraps around the hot dogs and bakes up golden while the hot dogs stay juicy inside. They work well for a kids party because they are easy to pick up and eat without much mess.
The finished mummies have a crisp outside and a savory, slightly smoky bite from the hot dogs. A small dot of mustard gives each one eyes, which adds to the playful look without extra work.

Serves 4 people.
Ingredients
- 8 hot dogs
- 1 package (8 oz) refrigerated crescent rolls
- Yellow mustard
Instructions
- Heat the oven to 375 degrees and line a baking sheet with parchment paper.
- Unroll the crescent dough on a cutting board and press the seams together to form one sheet.
- Cut the dough into thin strips about half an inch wide.
- Wrap the strips around each hot dog in a crisscross pattern, leaving a small gap near the top for the face.
- Place the wrapped hot dogs on the baking sheet and bake for 12 to 15 minutes until the dough is golden brown.
- Remove from the oven and let them cool for two minutes.
- Add two small dots of mustard in the open space on each hot dog to create eyes.
Extra Tips
Let the hot dogs cool just enough so the mustard stays in place when kids grab them. If you want a milder flavor, swap the mustard for a small piece of cheese cut into circles. These are best served the same day, but you can reheat leftovers in a 300-degree oven for five minutes to bring back the crisp texture. Course: Appetizer Cuisine: American Equipment: Baking sheet, Parchment paper, Knife, Cutting board
Spiderweb Black Bean Quesadillas
These Spiderweb Black Bean Quesadillas bring a simple spooky element to a kids Halloween party spread. The black bean filling stays mild and hearty while melted cheese holds everything together inside golden tortillas. The sour cream spiderweb on top gives them a playful look that fits right in with other themed snacks.
They work well as a filling snack or light main during the party. The texture stays crisp outside with a soft, cheesy center, and the flavor stays kid-friendly with just a touch of cumin.
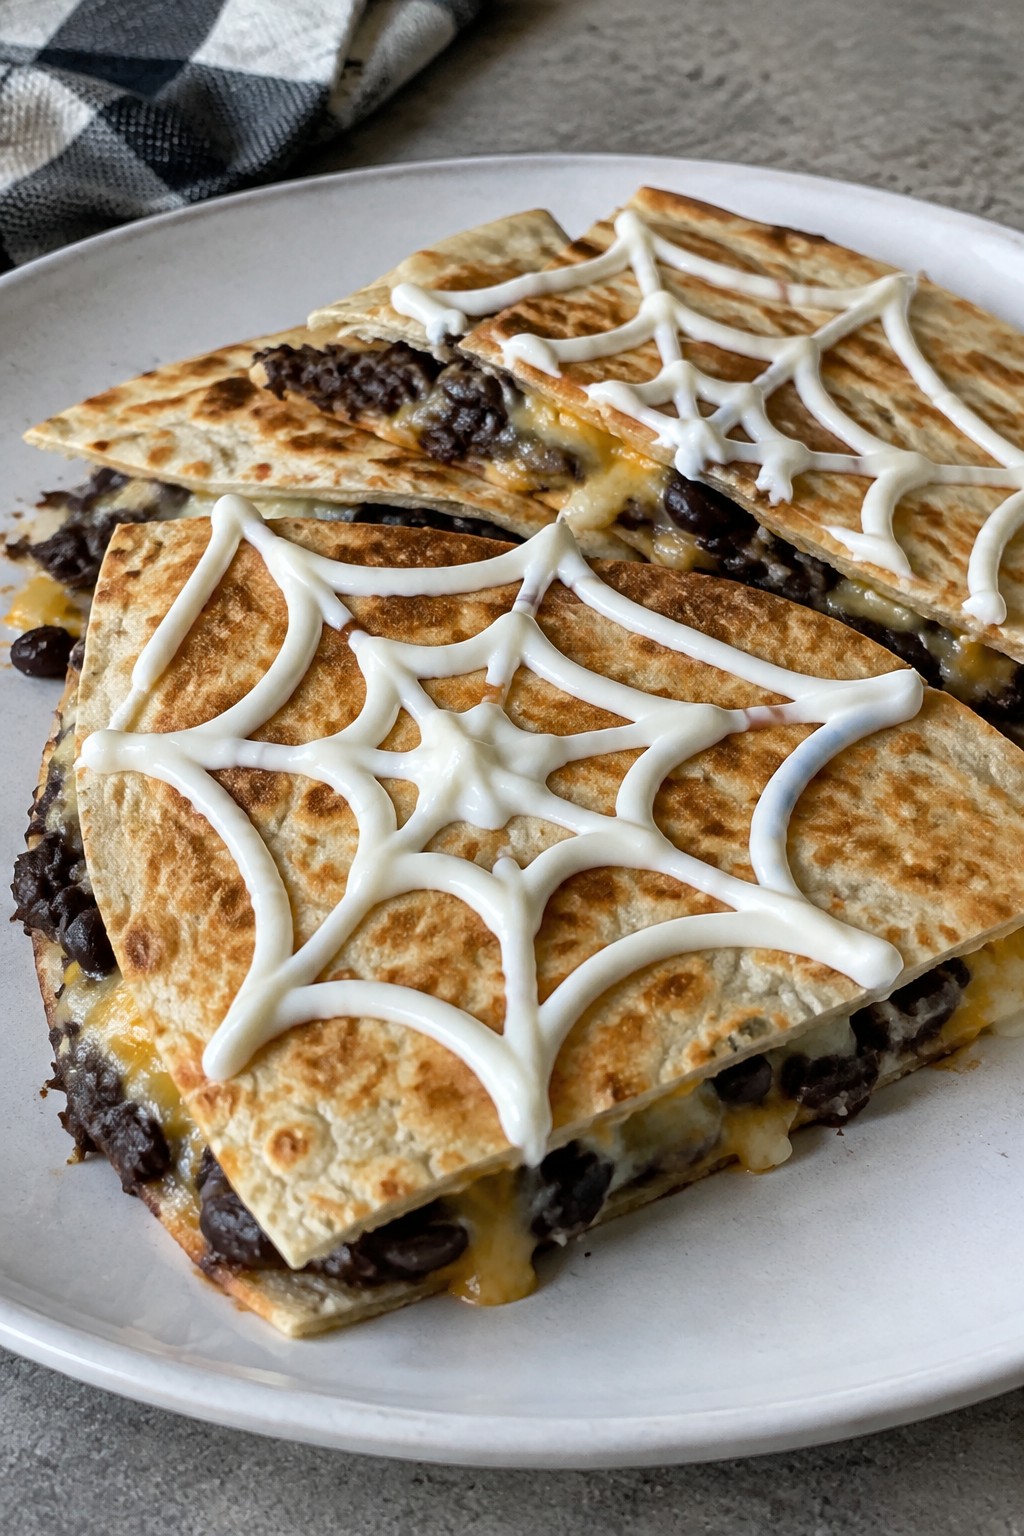
Serves 4 people.
Ingredients
- 8 medium flour tortillas
- 1 (15-ounce) can black beans, drained and rinsed
- 2 cups shredded Mexican cheese blend
- ½ cup sour cream
- 2 tablespoons olive oil
- 1 teaspoon ground cumin
- ½ teaspoon garlic powder
- Salt to taste
Instructions
- Place the black beans in a bowl and mash them with a fork. Stir in the cumin, garlic powder, and a pinch of salt until evenly mixed.
- Heat ½ tablespoon olive oil in a large skillet over medium heat. Lay one tortilla in the skillet, spread about ¼ of the bean mixture over it, sprinkle ½ cup cheese on top, and cover with a second tortilla. Cook for 2 to 3 minutes until the bottom turns golden.
- Flip the quesadilla and cook another 2 minutes until the second side is golden and the cheese melts. Move it to a plate and repeat with the remaining tortillas, beans, and cheese, adding more oil as needed.
- Spoon the sour cream into a small zip-top bag and snip off one corner. Pipe concentric circles on each quesadilla, then draw lines from the center outward to create a spiderweb pattern. Slice into wedges and serve.
Extra Tips
Pipe the sour cream right before serving so the lines stay sharp. If you make the quesadillas ahead, reheat them in a 350°F oven for a few minutes to restore crispness before adding the sour cream design. Course: Appetizer Cuisine: Mexican Equipment: Large Skillet, Mixing Bowl, Zip-top Bag
Ghost Banana Yogurt Pops
These frozen treats turn simple bananas into playful ghosts that kids love to spot on the party table. They work well as a lighter dessert option during a busy Halloween gathering because they can be made ahead and require little hands-on time once assembled.
The banana stays soft inside while the yogurt coating firms up into a creamy shell. A few chocolate chip faces give each pop its ghost personality without any extra decorating steps.
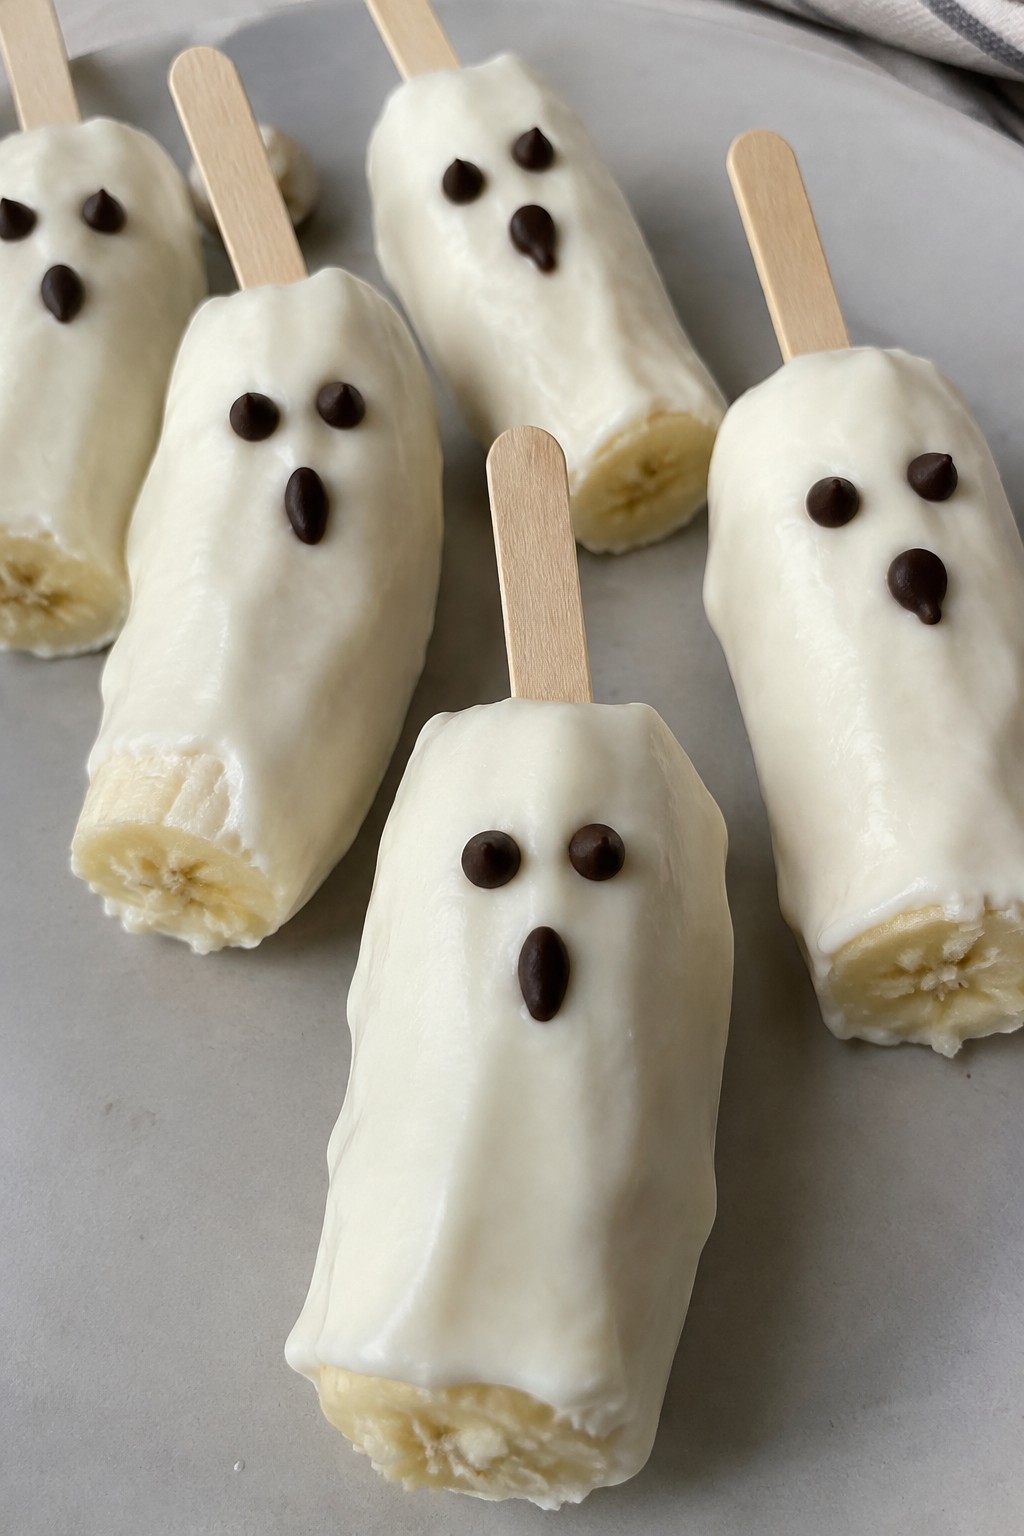
Serves 4 people.
Ingredients
- 4 medium bananas
- 2 cups vanilla Greek yogurt
- 4 popsicle sticks
- 1/4 cup mini chocolate chips
Instructions
- Peel the bananas and trim a small slice off the bottom of each so they stand upright later. Insert one popsicle stick into the cut end of each banana, pushing it about halfway up.
- Spoon the vanilla Greek yogurt into a tall glass or deep bowl. Dip each banana into the yogurt, turning to coat all sides and leaving a small section near the stick uncovered. Let excess yogurt drip back into the bowl.
- Place the coated bananas on a parchment-lined baking sheet. Press two mini chocolate chips into the yogurt near the top for eyes and one or two more lower down for a mouth on each pop.
- Transfer the baking sheet to the freezer and leave the pops until the yogurt coating is fully firm, about three hours.
Extra Tips
If the yogurt starts to slide off during dipping, return the bananas to the freezer for ten minutes first to firm them up. Store finished pops in a freezer bag for up to one week. For a milder sweetness, use plain Greek yogurt mixed with a teaspoon of honey before coating. Course: Dessert Cuisine: American Equipment: Baking sheet, Parchment paper, Mixing bowl, Popsicle sticks
Pumpkin-Shaped Cheese Ball Platter
This cheese ball turns a simple mix of cheeses into a fun centerpiece for a kids Halloween party. The bright orange color and pumpkin shape make it stand out on the table while staying mild enough for young guests to enjoy.
It works well as an easy appetizer that kids can help shape and decorate. The creamy texture pairs nicely with crunchy dippers for a balanced bite.
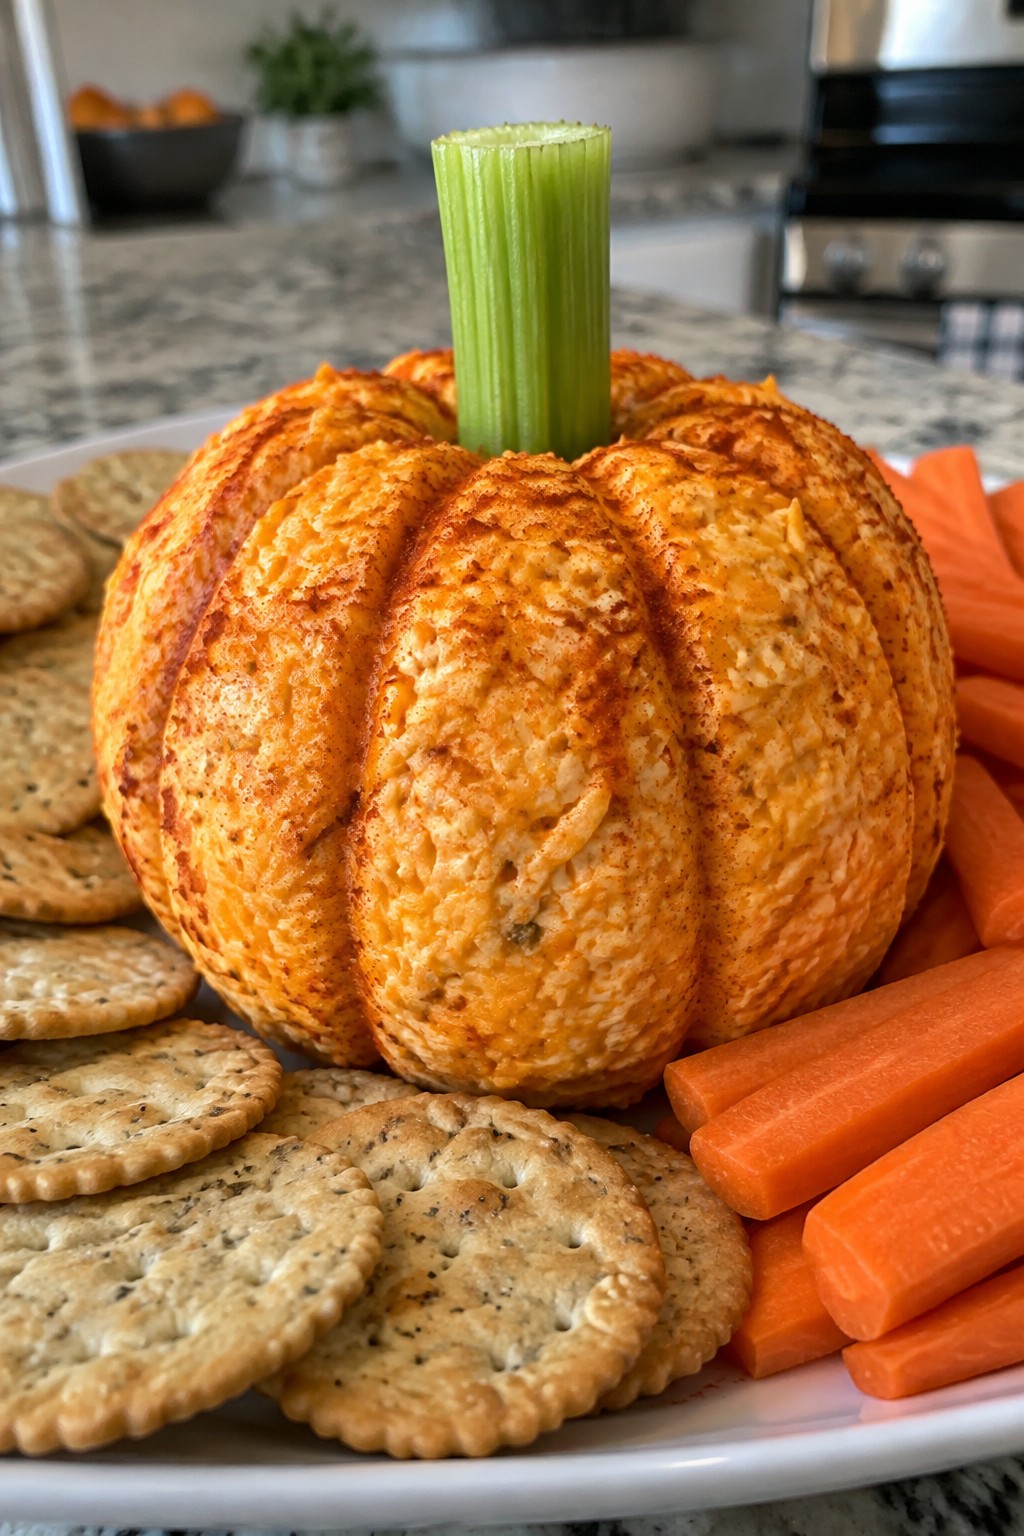
Serves 4 people.
Ingredients
- 8 ounces cream cheese, softened
- 2 cups shredded orange cheddar cheese
- 1 packet ranch seasoning mix
- 1 teaspoon paprika
- 1 celery stalk
- Crackers and carrot sticks for serving
Instructions
- Place the softened cream cheese, shredded cheddar cheese, ranch seasoning mix, and paprika in a mixing bowl.
- Stir everything together until the mixture is smooth and evenly colored.
- Scoop the mixture onto a sheet of plastic wrap and shape it into a round ball.
- Use the edge of a spoon to press gentle vertical lines around the ball to create a pumpkin look.
- Cut the celery stalk into a short piece and press it into the top of the ball as a stem.
- Wrap the cheese ball and place it in the refrigerator for at least one hour to firm up.
- Arrange the cheese ball on a platter with crackers and carrot sticks around the edges for serving.
Extra Tips
Press the lines into the cheese ball right after shaping so they hold their form once chilled. The ranch seasoning keeps the flavor kid-friendly without extra spices. If the mixture feels too soft to shape, chill it for 15 minutes before forming the pumpkin. Course: Appetizer Cuisine: American Equipment: Mixing Bowl, Plastic Wrap
Witch Finger Pretzel Rods with Dip
These witch finger pretzel rods bring a playful touch to a kids Halloween party. The green coating turns ordinary pretzels into spooky fingers, and the sweet dip makes them easy to enjoy by the handful.
The recipe works well as a quick activity or make-ahead item. Each rod stays crisp under the candy coating while the dip adds a smooth contrast.
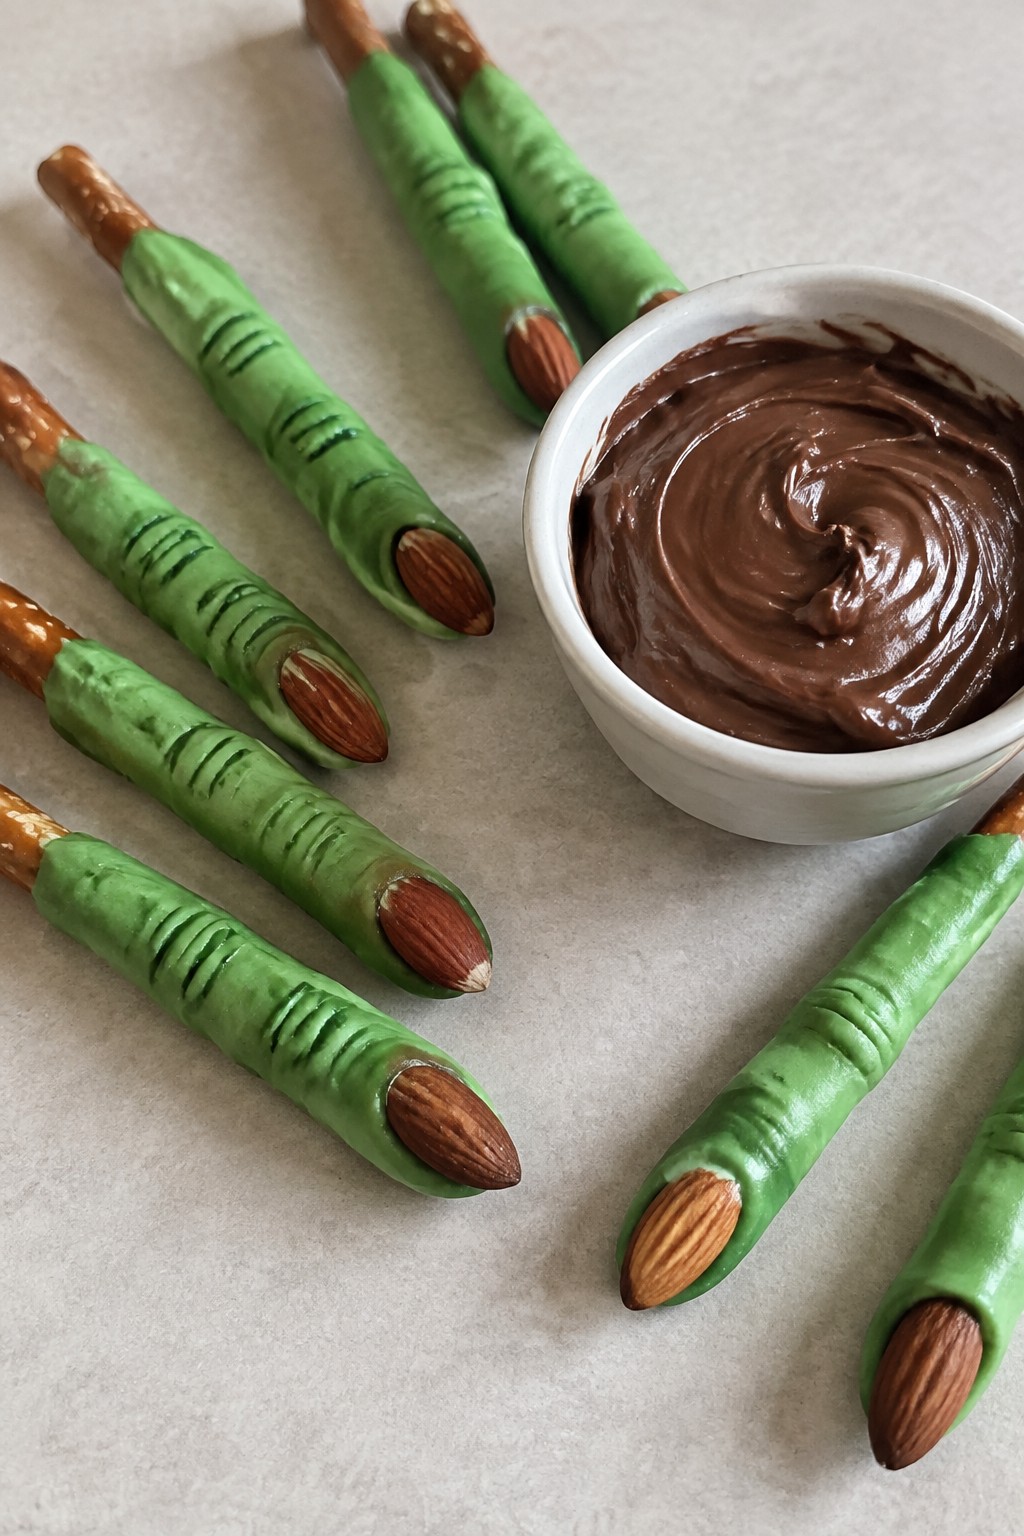
Serves 4 people.
Ingredients
- 12 pretzel rods
- 1 cup green candy melts
- 12 whole almonds
- ½ cup chocolate hazelnut spread
Instructions
- Line a baking sheet with parchment paper and set it aside.
- Place the green candy melts in a microwave-safe bowl and heat in 30-second bursts, stirring between each round until fully melted and smooth.
- Dip the bottom two-thirds of each pretzel rod into the melted candy, leaving the top third uncovered to resemble a finger.
- Lay the coated pretzel on the prepared baking sheet and press one almond onto the dipped end to create a fingernail.
- Repeat with the remaining pretzels, then let them sit at room temperature until the coating hardens.
- Spoon the chocolate hazelnut spread into a small bowl and serve it alongside the finished pretzel rods.
Extra Tips
Melt the candy in short bursts to avoid overheating and keep the color bright. If the chocolate hazelnut spread is too thick for dipping, stir in a teaspoon of milk to loosen it. Store any leftovers in an airtight container at room temperature to maintain the pretzel crunch. Course: Snack Cuisine: American Equipment: Microwave-safe bowl, Baking sheet, Parchment paper
Skeleton Veggie Crudité Board
This skeleton veggie crudité board turns fresh vegetables into a playful centerpiece for a kids Halloween party. The arrangement forms a simple skeleton shape that draws children in, while the crisp textures and mild flavors keep them reaching for seconds. It works well as an early afternoon snack or a light starter before the main treats.
It delivers cool crunch from the vegetables paired with creamy hummus for dipping. The design stays simple enough for parents to put together quickly yet looks festive on the table.

Serves 4 people.
Ingredients
- 4 carrots, peeled and cut into sticks
- 6 celery stalks, cut into sticks
- 1 cucumber, sliced into rounds
- 2 red bell peppers, cut into strips
- 2 cups broccoli florets
- 1 cup cauliflower florets
- 12 cherry tomatoes
- 1 1/2 cups hummus
- 4 black olives
Instructions
- Place a large round serving platter on the counter. Spoon the hummus into an oval shape near the top to form the skull.
- Press two black olives into the hummus to create eyes. Add a small curved slice of red bell pepper below them for a mouth.
- Arrange carrot sticks in two parallel rows down the center of the platter to form the spine and ribs.
- Set celery sticks on either side of the carrot ribs to extend the rib cage.
- Place cucumber rounds at the bottom of the platter to create hip bones and leg outlines.
- Scatter broccoli and cauliflower florets around the edges to fill out the arms and add extra crunch.
- Tuck the remaining red bell pepper strips and cherry tomatoes into open spaces for color and to complete the skeleton look.
Extra Tips
Prep the vegetables the night before and store them in water-filled containers in the fridge so they stay crisp. Swap in yellow bell peppers if red ones are too strong for younger kids. Keep the hummus in a sealed bowl until right before serving to prevent it from drying out on the edges. Course: Appetizer Cuisine: American Equipment: Cutting board, Sharp knife, Large serving platter
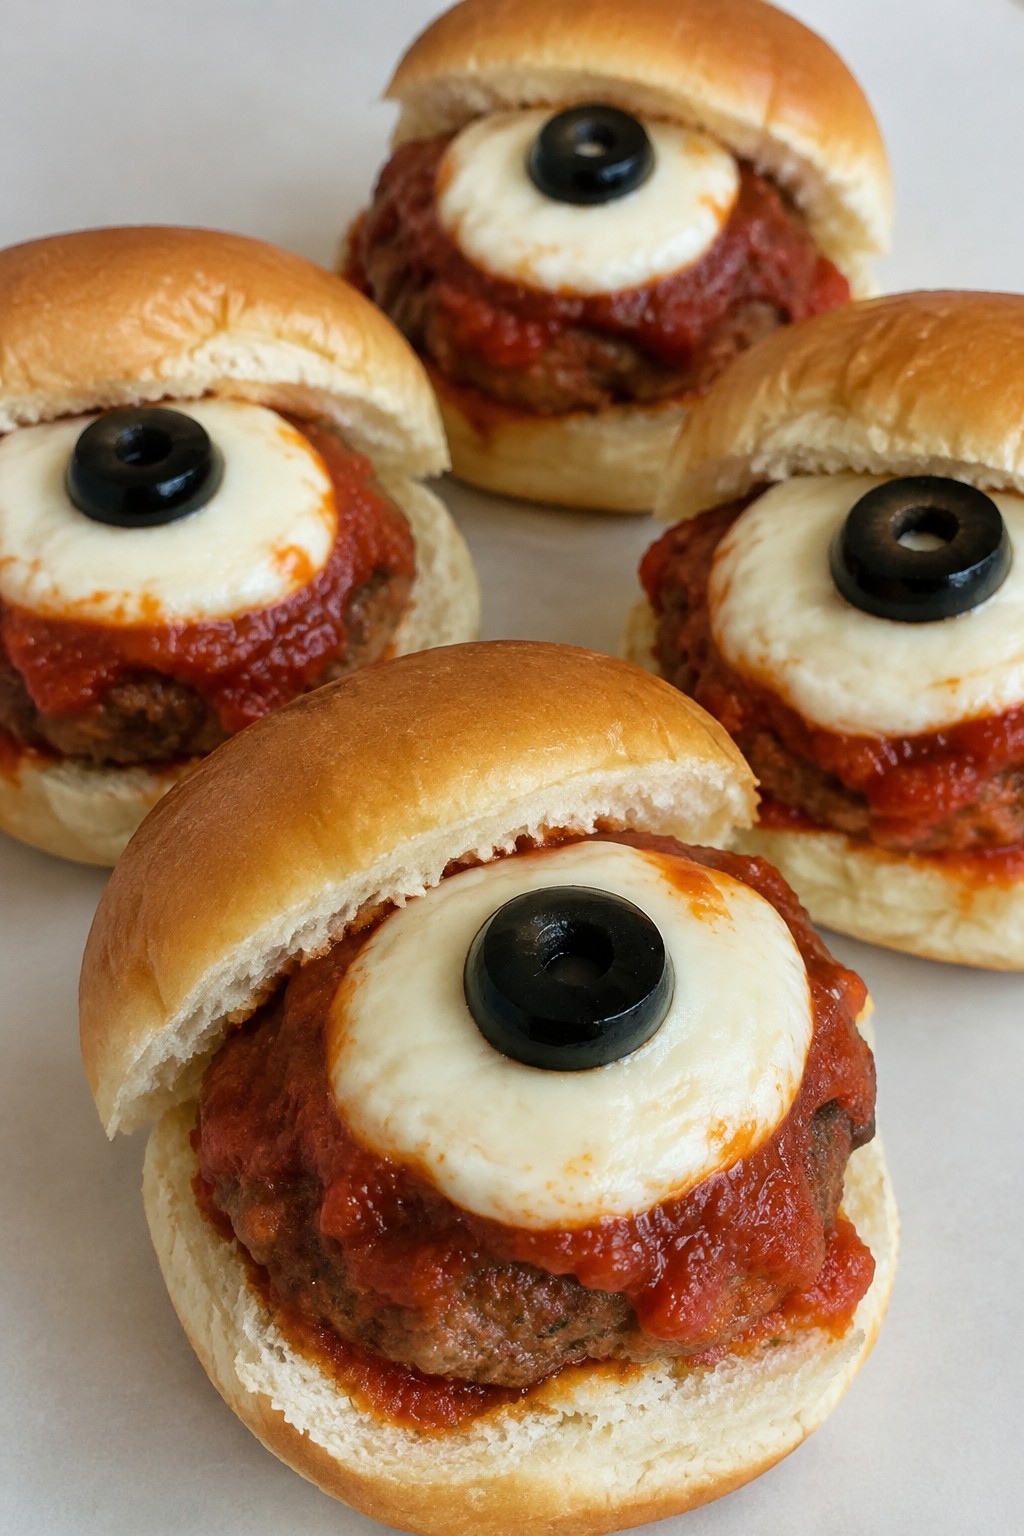
Monster Eyeball Meatball Sliders
These sliders turn ordinary meatballs into fun monster eyes that kids enjoy at a Halloween party. The meatballs sit in soft buns with a bit of sauce and a cheese topping that creates the eyeball effect. They taste savory and juicy with a mild tomato flavor that most children accept without fuss.
The recipe keeps portions small so little hands can manage them easily. You can prepare the meatballs ahead and assemble just before serving.
Serves 4 people.
Ingredients
- 1 pound ground beef
- 1/2 cup breadcrumbs
- 1 large egg
- 1 teaspoon garlic powder
- 1/2 teaspoon salt
- 1/4 teaspoon black pepper
- 1 cup marinara sauce
- 8 slider buns
- 8 slices fresh mozzarella
- 8 black olives
Instructions
- Preheat the oven to 400 degrees. Line a baking sheet with parchment paper.
- In a mixing bowl, combine the ground beef, breadcrumbs, egg, garlic powder, salt, and black pepper. Mix with your hands until the ingredients are evenly distributed.
- Form the mixture into 8 meatballs of equal size and place them on the prepared baking sheet.
- Bake the meatballs for 18 minutes until they reach an internal temperature of 160 degrees.
- While the meatballs bake, warm the marinara sauce in a small skillet over low heat.
- Split the slider buns and place one meatball on each bottom half. Spoon a small amount of sauce over each meatball.
- Top each meatball with a slice of mozzarella and one black olive slice to create the eyeball look.
- Place the assembled sliders under the broiler for 1 minute until the cheese just melts. Add the top buns and serve.
Extra Tips
Make the meatballs a day ahead and store them in the fridge, then reheat in the oven before adding the cheese and olives. Use pre-sliced mozzarella rounds if you want the eye to sit flat. Skip the broiler step if the cheese is already soft from the hot meatballs. Course: Appetizer Cuisine: American Equipment: Mixing Bowl, Baking Sheet, Skillet
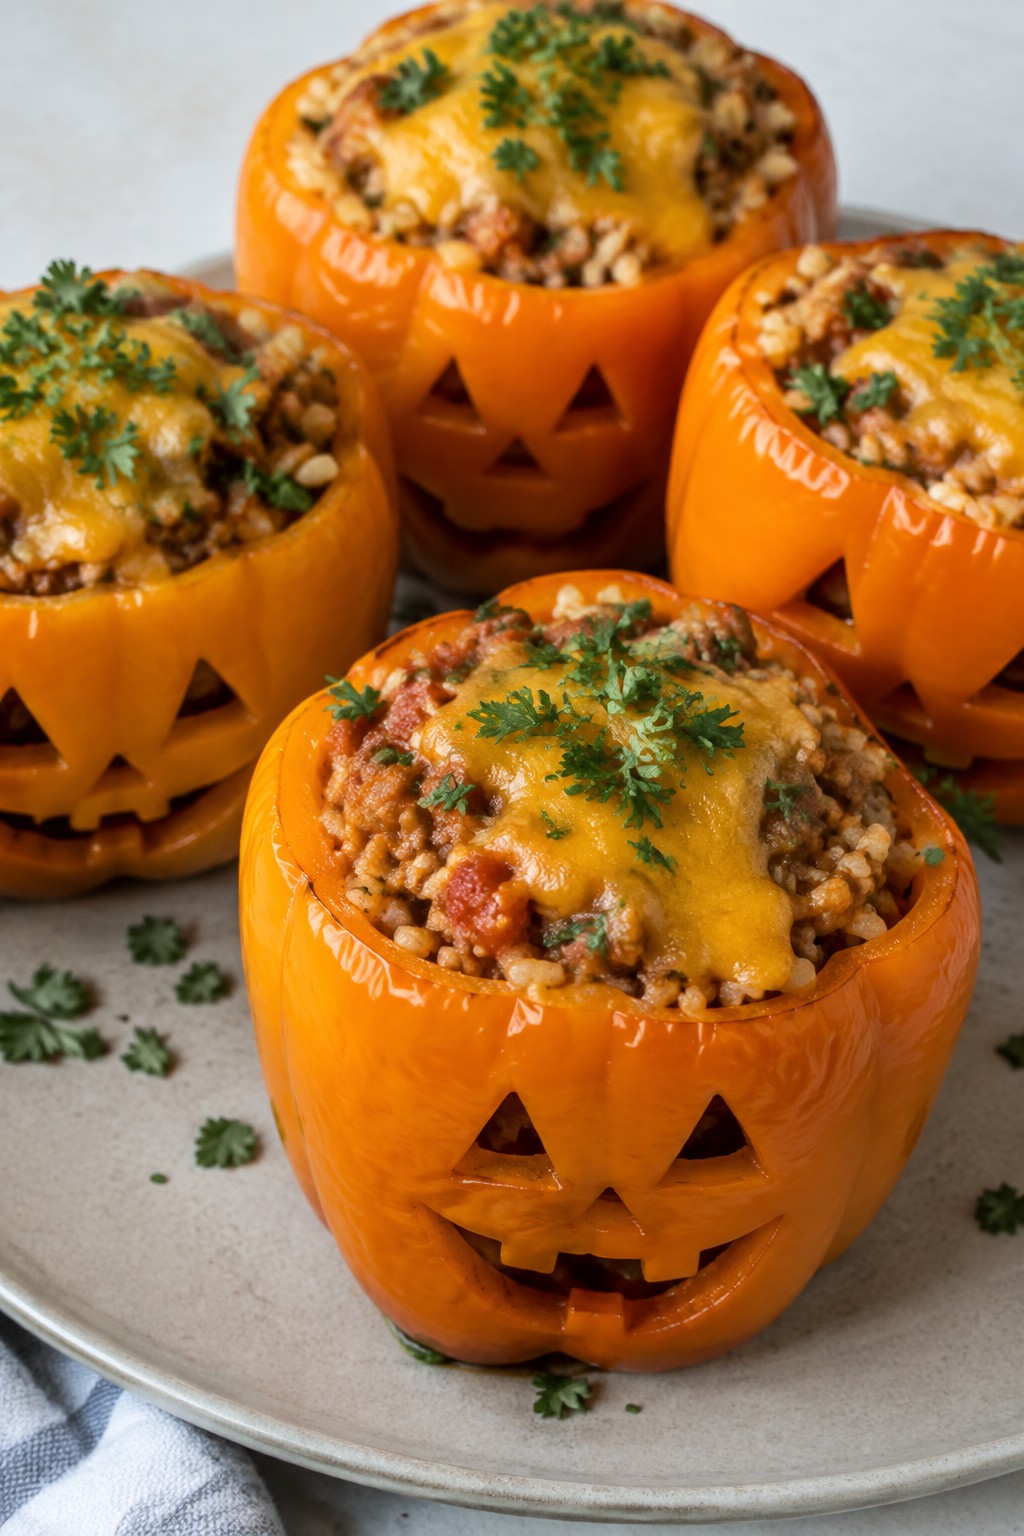
Jack-o’-Lantern Stuffed Bell Peppers
These stuffed peppers bring a playful Halloween touch to any kids party. Carving simple faces into orange bell peppers turns a basic meal into something festive that children will enjoy making and eating. The result is a mild, cheesy filling inside soft peppers that holds up well on a buffet table.
This recipe works best when you need a hands-on activity or a colorful main dish that feels special without being complicated. The savory turkey and rice mixture stays kid-friendly while the melted cheese adds a comforting texture.
Serves 4 people.
Ingredients
- 4 large orange bell peppers
- 1 pound ground turkey
- 1 small onion, diced
- 2 cloves garlic, minced
- 1 cup cooked rice
- 1/2 cup tomato sauce
- 1 cup shredded cheddar cheese
- Salt and pepper to taste
- Fresh parsley for garnish
Instructions
- Preheat the oven to 375 degrees F. Cut the tops off each bell pepper and remove the seeds and membranes. Use a small knife to carve jack-o-lantern faces into the sides of the peppers.
- Place the carved peppers in a baking dish. Set the tops aside if you want to use them for serving.
- In a large skillet over medium heat, cook the ground turkey with the diced onion and minced garlic until the turkey is browned and the onion is soft. Drain any excess liquid.
- Stir the cooked rice, tomato sauce, and half of the shredded cheddar cheese into the turkey mixture. Add salt and pepper to taste and cook for 2 minutes until everything is heated through.
- Spoon the filling evenly into each carved pepper. Sprinkle the remaining cheese on top of the filling.
- Bake for 25 to 30 minutes until the peppers are tender and the cheese is melted. Garnish with fresh parsley before serving.
Extra Tips
Carve the faces after removing the seeds so the peppers stay sturdy during baking. You can prepare the filling a day ahead and store it in the fridge, then stuff and bake the peppers right before the party. If the peppers tip over in the dish, slice a thin layer off the bottom to help them stand flat. Course: Main Course Cuisine: American Equipment: Baking dish, Large skillet, Knife
Candy Corn Fruit and Yogurt Parfaits
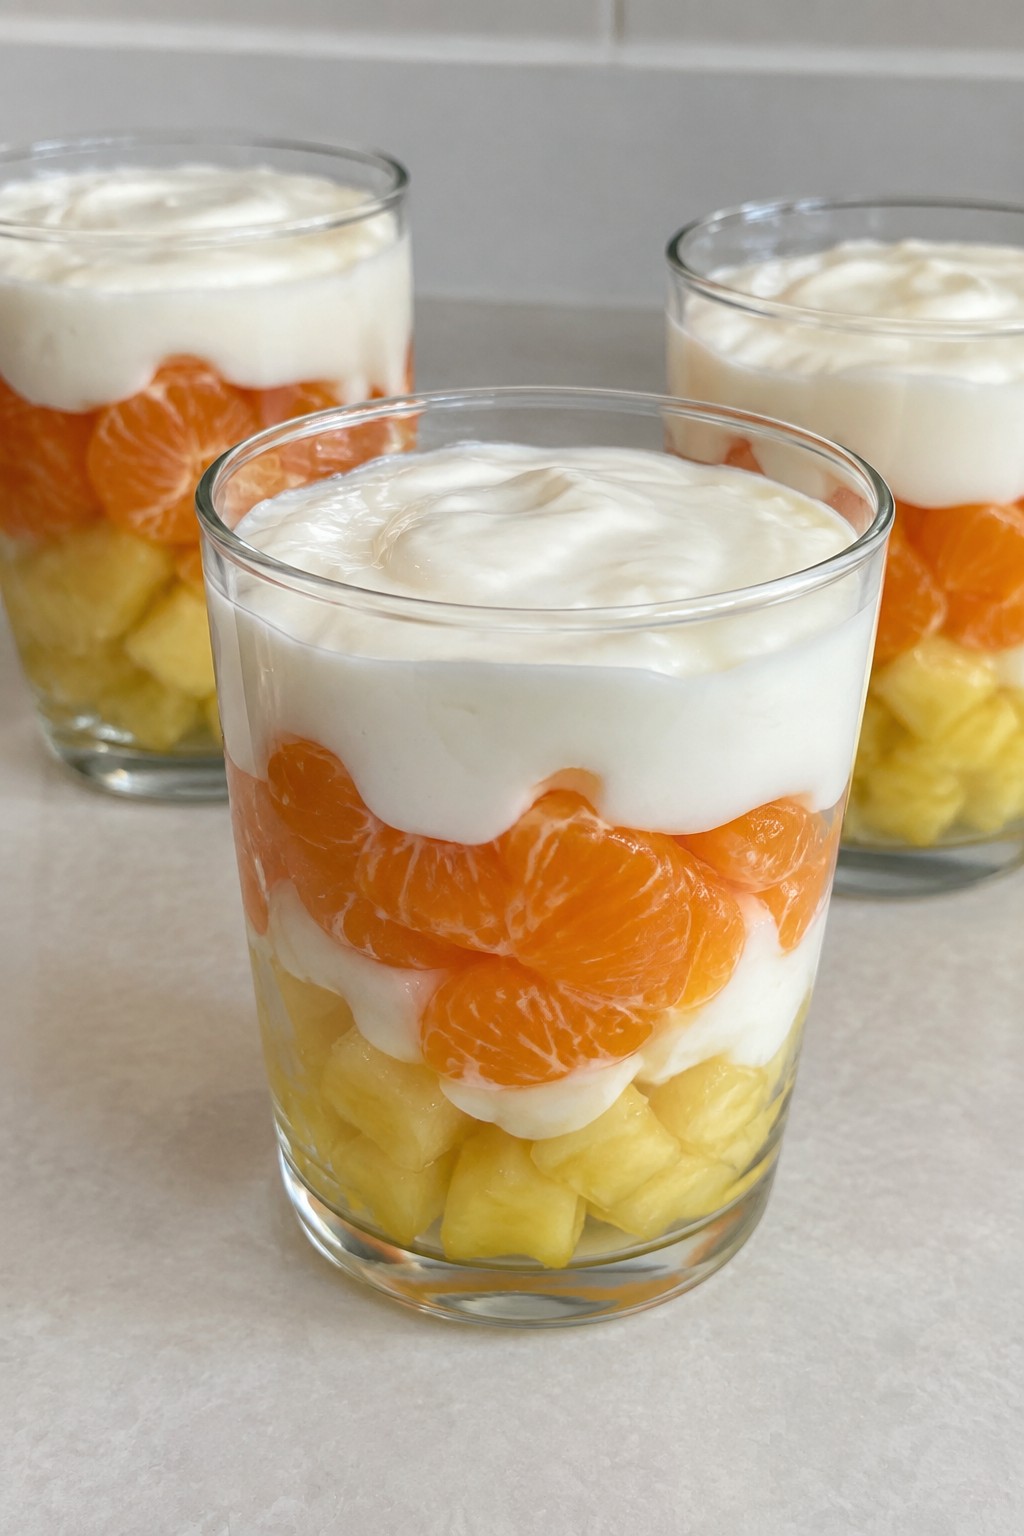
These parfaits bring a bright candy corn look to a kids party table without any candy. The layers of yellow pineapple, orange citrus, and creamy yogurt create a fun striped effect in clear glasses that kids spot right away. They taste light and fresh with a mix of juicy fruit and smooth vanilla flavor.
This recipe works well as a make-ahead option for busy party prep. It keeps the focus on simple fruit and yogurt while fitting the Halloween theme through color rather than sugar.
Serves 4 people.
Ingredients
- 2 cups vanilla yogurt
- 1 1/2 cups pineapple chunks
- 1 1/2 cups mandarin orange segments
Instructions
- Set out four clear glasses or small jars so the layers will show.
- Spoon 3 tablespoons of pineapple chunks into the bottom of each glass to form the yellow layer.
- Add 3 tablespoons of mandarin orange segments on top of the pineapple in each glass to create the orange layer.
- Divide the vanilla yogurt evenly among the glasses, spooning it gently over the fruit to finish with the white layer.
Extra Tips
Use clear glasses so the three colors stand out when kids pick their serving. The parfaits can be assembled up to two hours ahead and kept in the fridge. If the yogurt seems too thick, stir it briefly before layering to help it settle evenly over the fruit.
Course: Snack Cuisine: American Equipment: Clear glasses, SpoonBat Wing Chicken Tenders with Ranch
These chicken tenders get a dark, savory coating that gives them a bat wing look for a Halloween kids party. They work well as a main bite on the table because they are simple to grab and dip while the rest of the food stays fun and light.
The result is tender chicken with a salty, slightly sweet garlic flavor and a crisp edge from baking. Ranch on the side keeps things familiar for young guests.

Serves 4 people.
Ingredients
- 1 pound chicken tenders
- 1/4 cup soy sauce
- 2 tablespoons honey
- 1 teaspoon garlic powder
- 1 teaspoon smoked paprika
- 1/2 teaspoon salt
- 1/2 teaspoon black pepper
- 1 cup ranch dressing
Instructions
- Preheat the oven to 400 degrees and line a baking sheet with parchment paper.
- In a large bowl, stir together the soy sauce, honey, garlic powder, smoked paprika, salt, and black pepper until the honey dissolves.
- Add the chicken tenders to the bowl and turn them until each piece is fully coated in the mixture.
- Place the coated tenders on the prepared baking sheet in a single layer.
- Bake for 18 to 20 minutes, flipping once halfway through, until the chicken is cooked through and the edges look dark and slightly crisp.
- Remove from the oven and let the tenders rest for 2 minutes before serving with the ranch dressing on the side for dipping.
Extra Tips
For the darkest color that best fits the bat wing theme, let the tenders sit in the soy mixture for 15 minutes before baking. If the honey makes the coating too sticky on your hands, use tongs to move the chicken to the baking sheet. Leftovers reheat well in a 350 degree oven for 8 minutes to keep the edges crisp instead of using a microwave. Course: Appetizer Cuisine: American Equipment: Mixing bowl, Baking sheet, Parchment paper
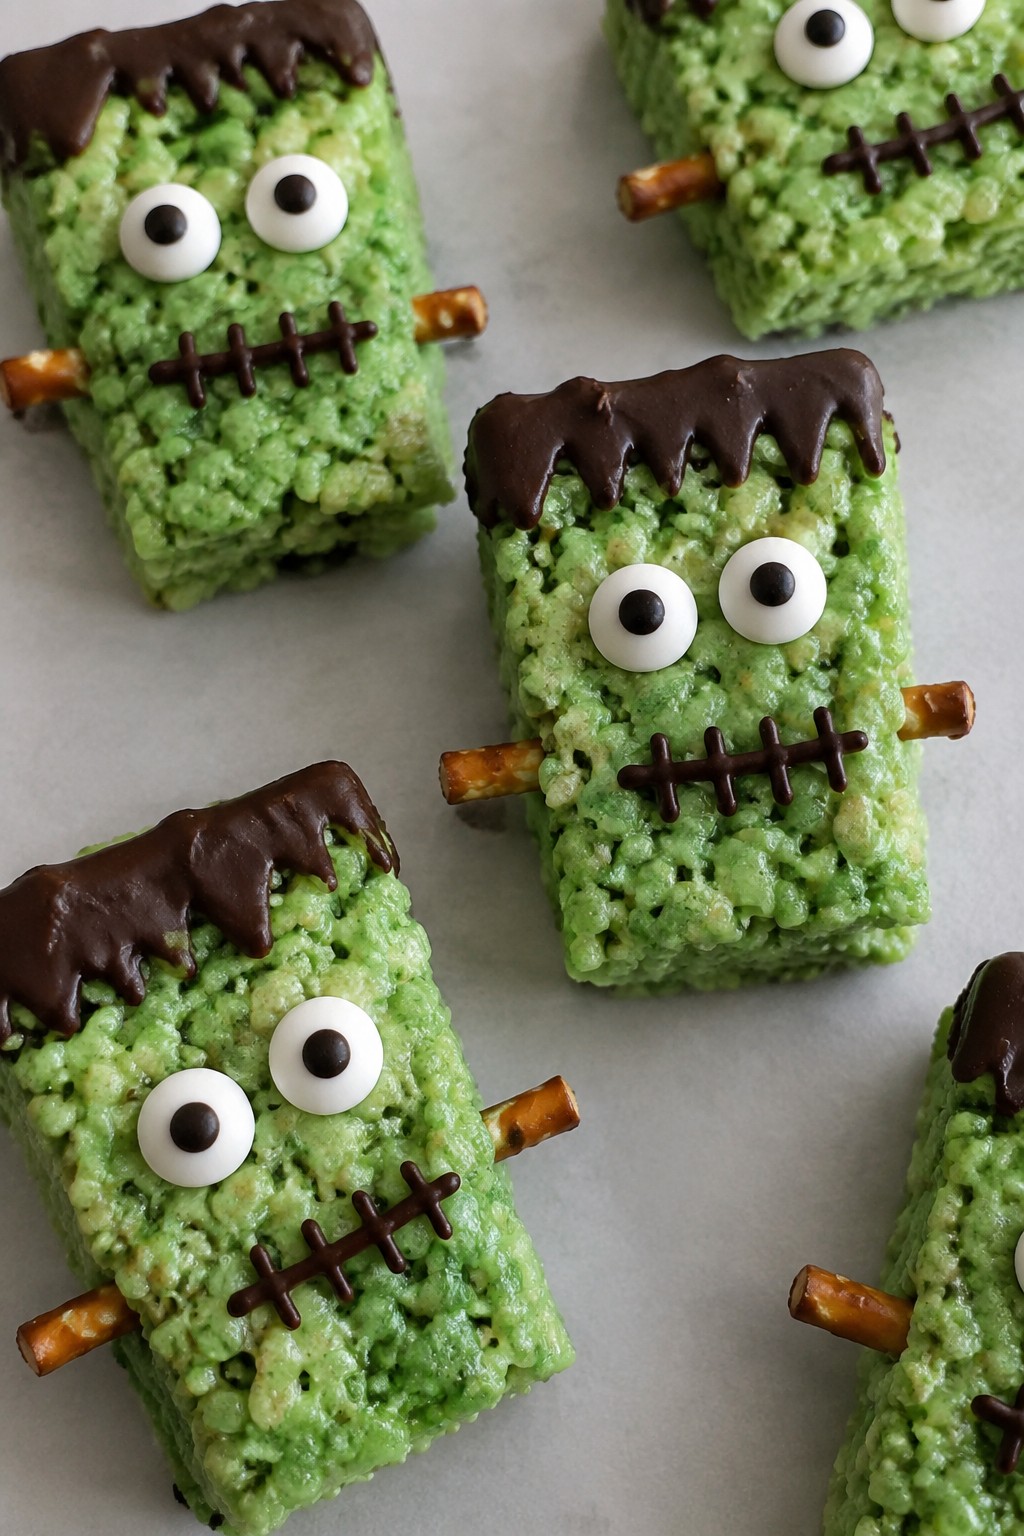
Frankenstein Rice Krispies Treats
These Frankenstein Rice Krispies Treats add a simple, hands-on element to a kids Halloween party. Children enjoy pressing the warm mixture into shapes and adding the faces, which keeps them busy before the main activities start.
The treats stay chewy from the marshmallows and crisp from the cereal. Green coloring gives them a bold look, while the chocolate and candy details create the monster effect without extra fuss.
Serves 4 people.
Ingredients
- 3 tablespoons unsalted butter
- 4 cups mini marshmallows
- 6 cups Rice Krispies cereal
- 8 drops green food coloring
- 8 candy eyes
- 2 ounces semisweet chocolate
- 4 pretzel sticks
Instructions
- Melt the butter in a large saucepan over medium heat. Add the mini marshmallows and stir until fully melted and smooth.
- Remove the pan from heat and stir in the green food coloring until the mixture turns an even green color.
- Add the Rice Krispies cereal to the marshmallow mixture and stir until every piece is coated.
- Let the mixture cool for two minutes until it is safe to handle but still pliable. Divide it into four portions and press each one into a rectangle shape on a parchment-lined surface.
- Melt the semisweet chocolate in a microwave-safe bowl in 20-second bursts, stirring between each burst. Use a spoon to drizzle or spread a small amount on top of each rectangle to form hair.
- Press two candy eyes onto each treat. Break the pretzel sticks in half and push two halves into the sides of each treat to form bolts.
Extra Tips
Shape the rectangles while the mixture is still warm so the eyes and pretzels stick without sliding. If the chocolate sets too quickly, warm it again for a few seconds before adding the final details. Store any leftovers in an airtight container at room temperature for up to two days to keep the cereal crisp. Course: Dessert Cuisine: American Equipment: Large saucepan, Wooden spoon, Microwave-safe bowl, Parchment paper
Spooky Popcorn Snack Mix with Gummies
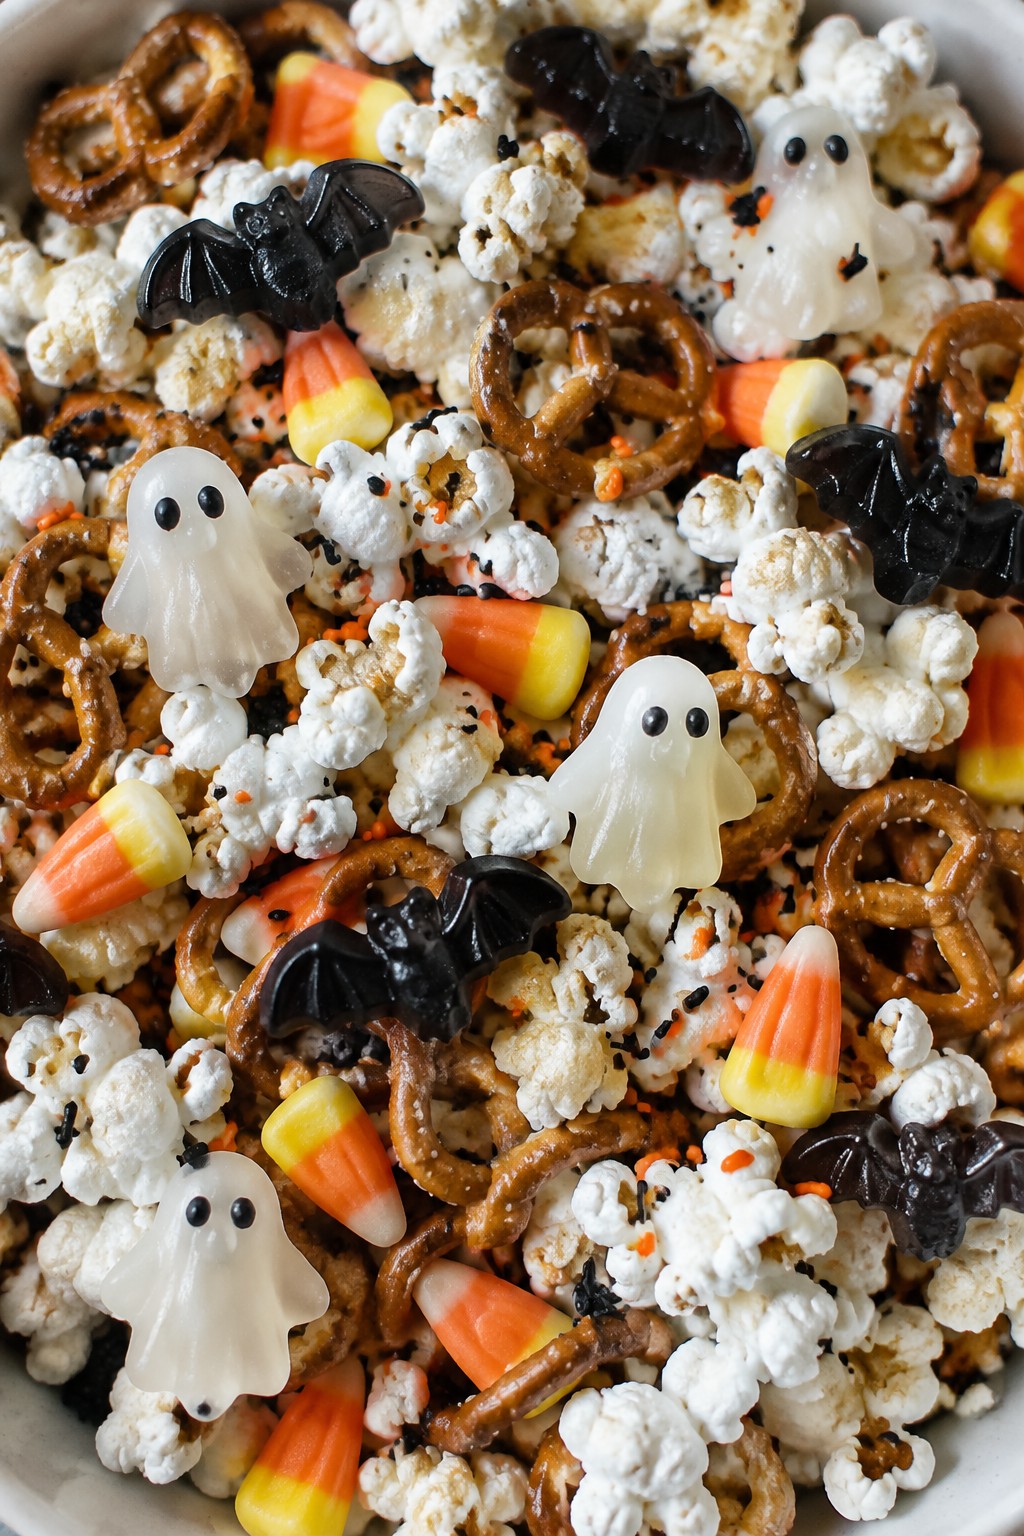
This snack mix brings together crunchy popcorn and chewy gummies for an easy Halloween treat that kids can enjoy at a party. It works well as a table snack during crafts or a quick bite between games. The mix offers sweet and salty flavors with a range of textures from light popcorn to sticky gummies.
Serves 4 people.
Ingredients
- 8 cups popped popcorn
- 2 cups spooky gummy candies
- 1 cup mini pretzels
- 1/2 cup candy corn
- 1/4 cup black and orange sprinkles
Instructions
- Place the popped popcorn in a large bowl. Break up any large clusters with your hands so the pieces are loose.
- Add the spooky gummy candies, mini pretzels, and candy corn to the bowl. Toss gently with a spoon until the ingredients are evenly distributed.
- Sprinkle the black and orange sprinkles over the top. Give the mix one more light toss to coat the pieces without crushing the gummies.
Extra Tips
Store leftovers in an airtight container at room temperature for up to two days to keep the popcorn crisp. If the gummies start to stick together, separate them with a fork before serving again. For a less sweet version, reduce the candy corn by half and add more pretzels. Course: Snack Cuisine: American Equipment: Large bowl, Measuring cups
