
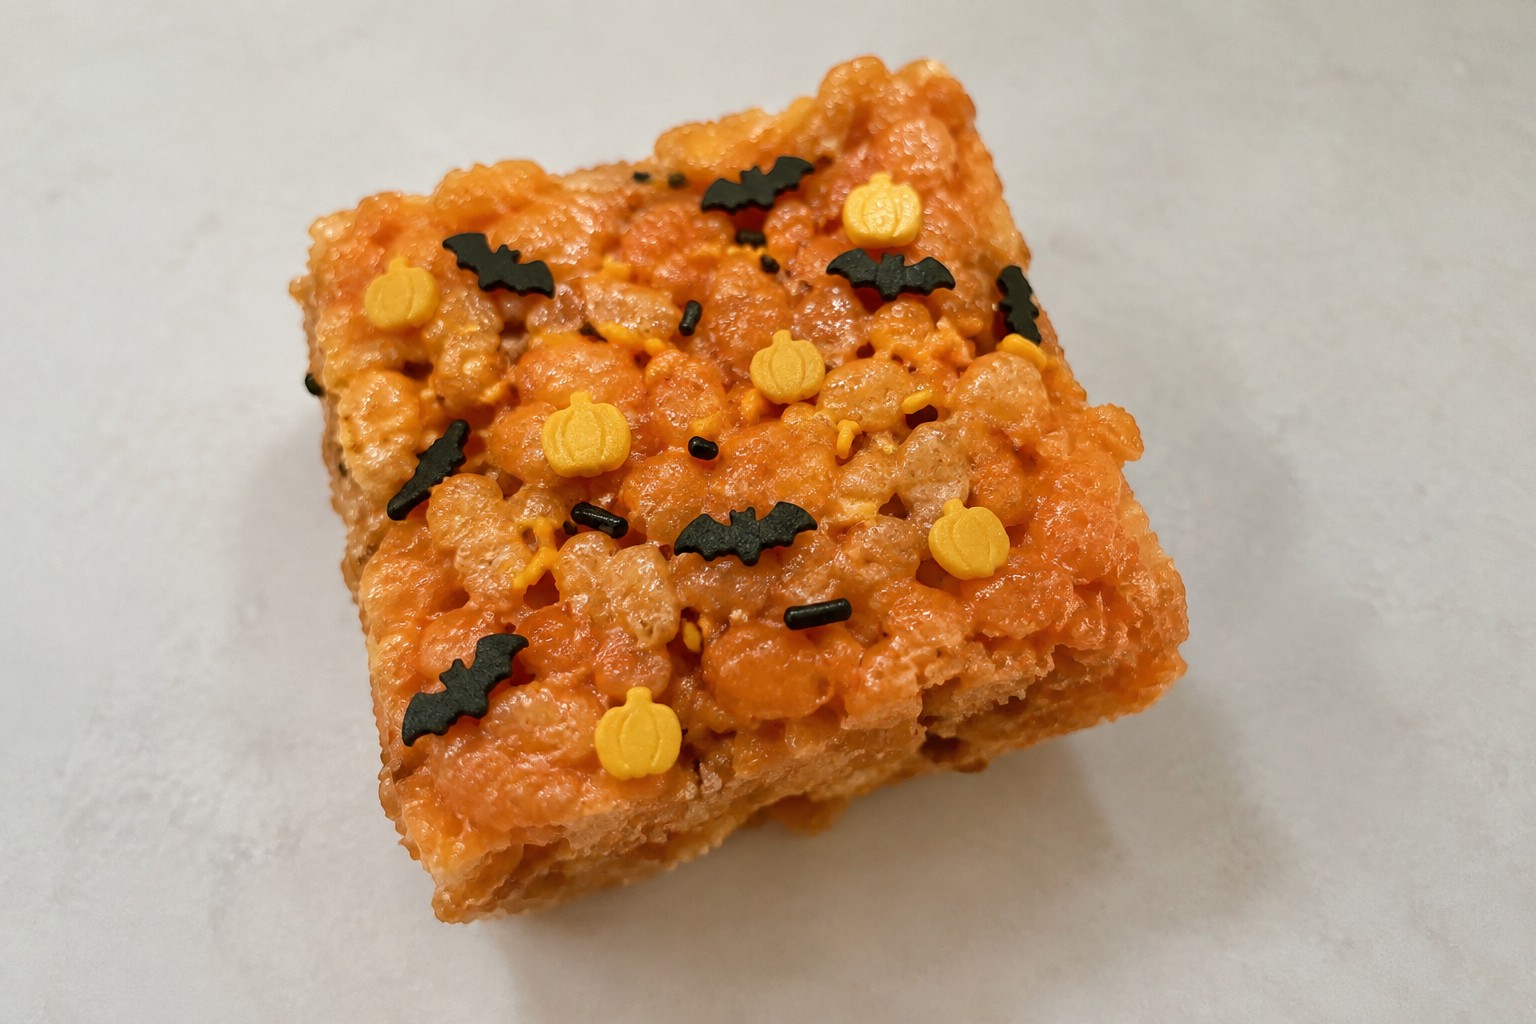
Halloween treats do not need to take a lot of time. This list has 12 ideas that focus on simple steps and common ingredients. You can pick ones that fit your schedule and what you have on hand. Each recipe aims to make the process straightforward.
Helpful Tips Before You Start
These tips will help you move through the recipes faster and with less mess.
Check Your Pantry First
Pull out all the ingredients you need before you begin. This keeps you from stopping mid recipe to hunt for supplies.
Pick No Bake Options When Possible
Many treats set in the fridge instead of the oven. They free up time and reduce dishes.
Use Store Bought Bases
Start with pre made cookie dough, brownie mix, or candy melts. They cut prep steps without losing the Halloween look.
Batch Similar Treats
Make two or three recipes that share the same chocolate or sprinkles at once. Cleanup stays quick and simple.
No-Bake Ghost Marshmallow Pops
These no-bake ghost marshmallow pops bring a simple spooky element to any Halloween gathering. They require no oven and come together quickly with basic pantry items, making them ideal for busy afternoons or last-minute party prep.
Each pop has a soft, chewy marshmallow base covered in a smooth white chocolate shell. The mini chocolate chip faces add a playful touch without extra work.
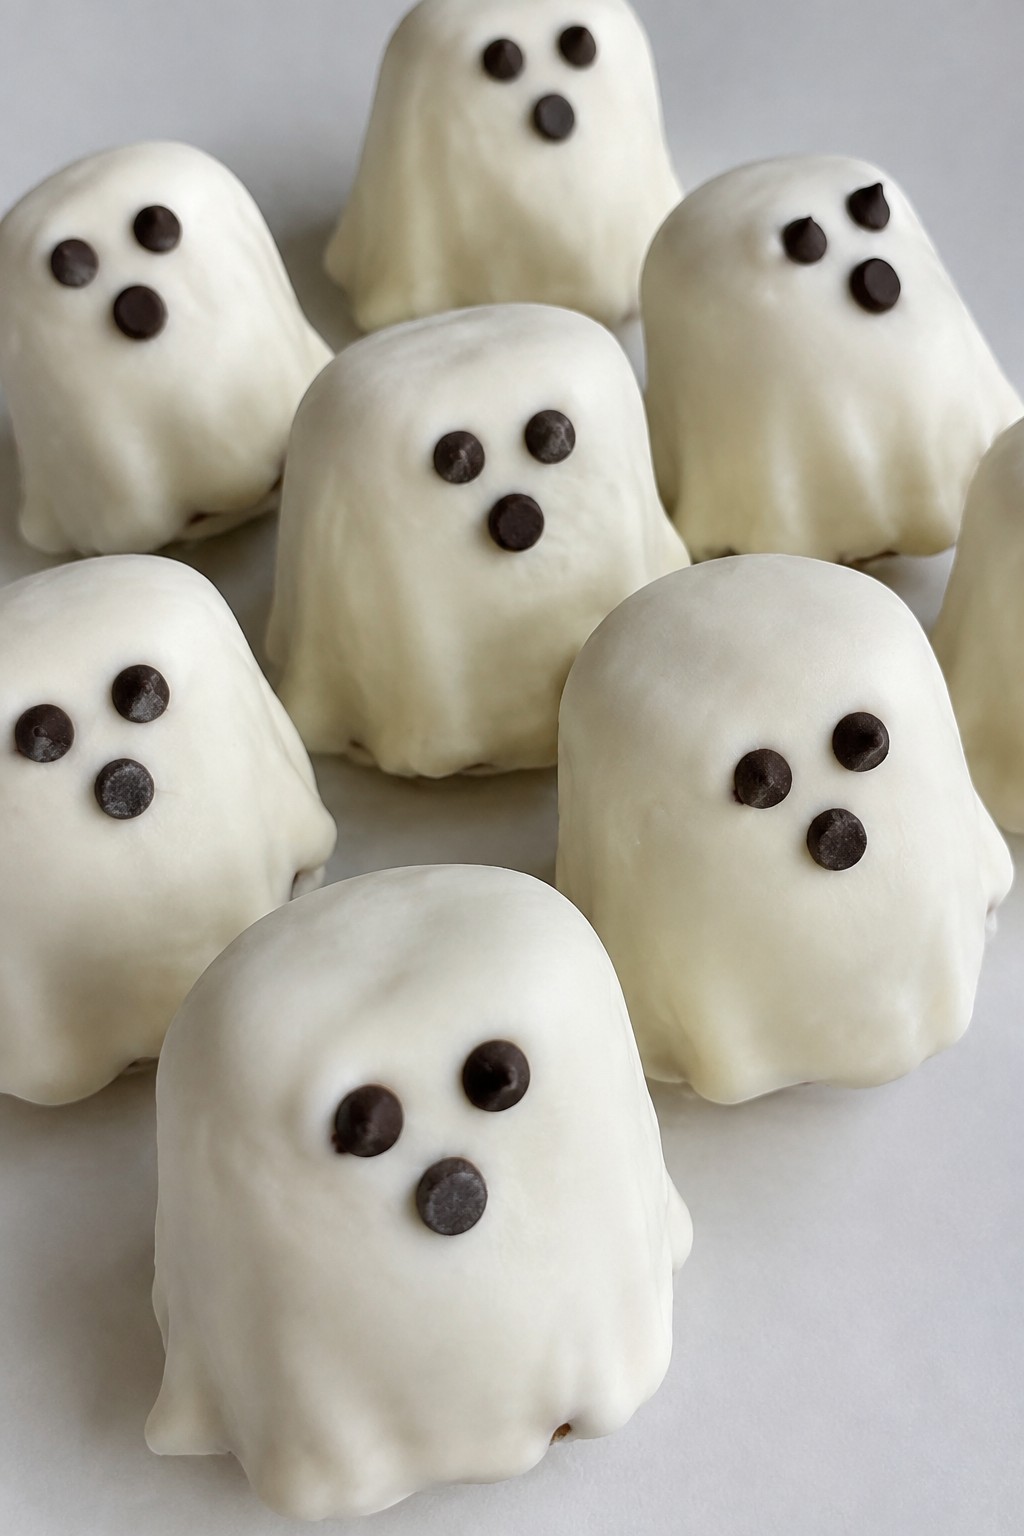
Serves 4 people.
Recommended Products

Food-Grade Safe Material: Crafted from food grade plastic, these clear boxes ensure the safe storage and display of your delectable treats while maintaining their freshness and flavor. Their transparent design allows the contents to shine through, enticing customers or your guests with a clear view of your delicious creations

Halloween Themed Treats: Original marshmallow Rice Krispies Treats featuring festive Halloween packaging, perfect for seasonal celebrations, trick-or-treaters, and holiday gatherings throughout the spooky season

70 Individually Wrapped Treats – Includes 70 crispy marshmallow snack bars in festive Halloween wrappers, making it easy to hand out individually or fill a large party snack bowl.
Ingredients
- 12 large marshmallows
- 12 lollipop sticks
- 1 cup white chocolate candy melts
- 24 mini chocolate chips
Instructions
- Insert one lollipop stick into the base of each marshmallow, pushing it about halfway through.
- Place the white chocolate candy melts in a microwave-safe bowl and heat in 30-second intervals, stirring between each, until fully melted and smooth.
- Dip each marshmallow into the melted chocolate, turning to coat evenly and allowing excess to drip back into the bowl.
- Set the coated pops on a parchment-lined baking sheet and press two mini chocolate chips onto each one to form eyes while the chocolate is still soft.
- Let the pops sit at room temperature until the chocolate hardens completely.
Extra Tips
Work in small batches when dipping so the chocolate stays smooth. Store the finished pops in an airtight container at room temperature for up to three days. If the candy melts thicken while you work, stir in a tiny bit of neutral oil to loosen it again. Course: Dessert Cuisine: American Equipment: Microwave-safe bowl, Baking sheet, Lollipop sticks
Quick Mummy Pretzel Rods
These Quick Mummy Pretzel Rods bring a fun Halloween twist to a simple snack. They work well for last-minute parties or after-school treats because they come together fast with little effort. The result is a salty crunch from the pretzels paired with a sweet white chocolate coating and a playful mummy look.
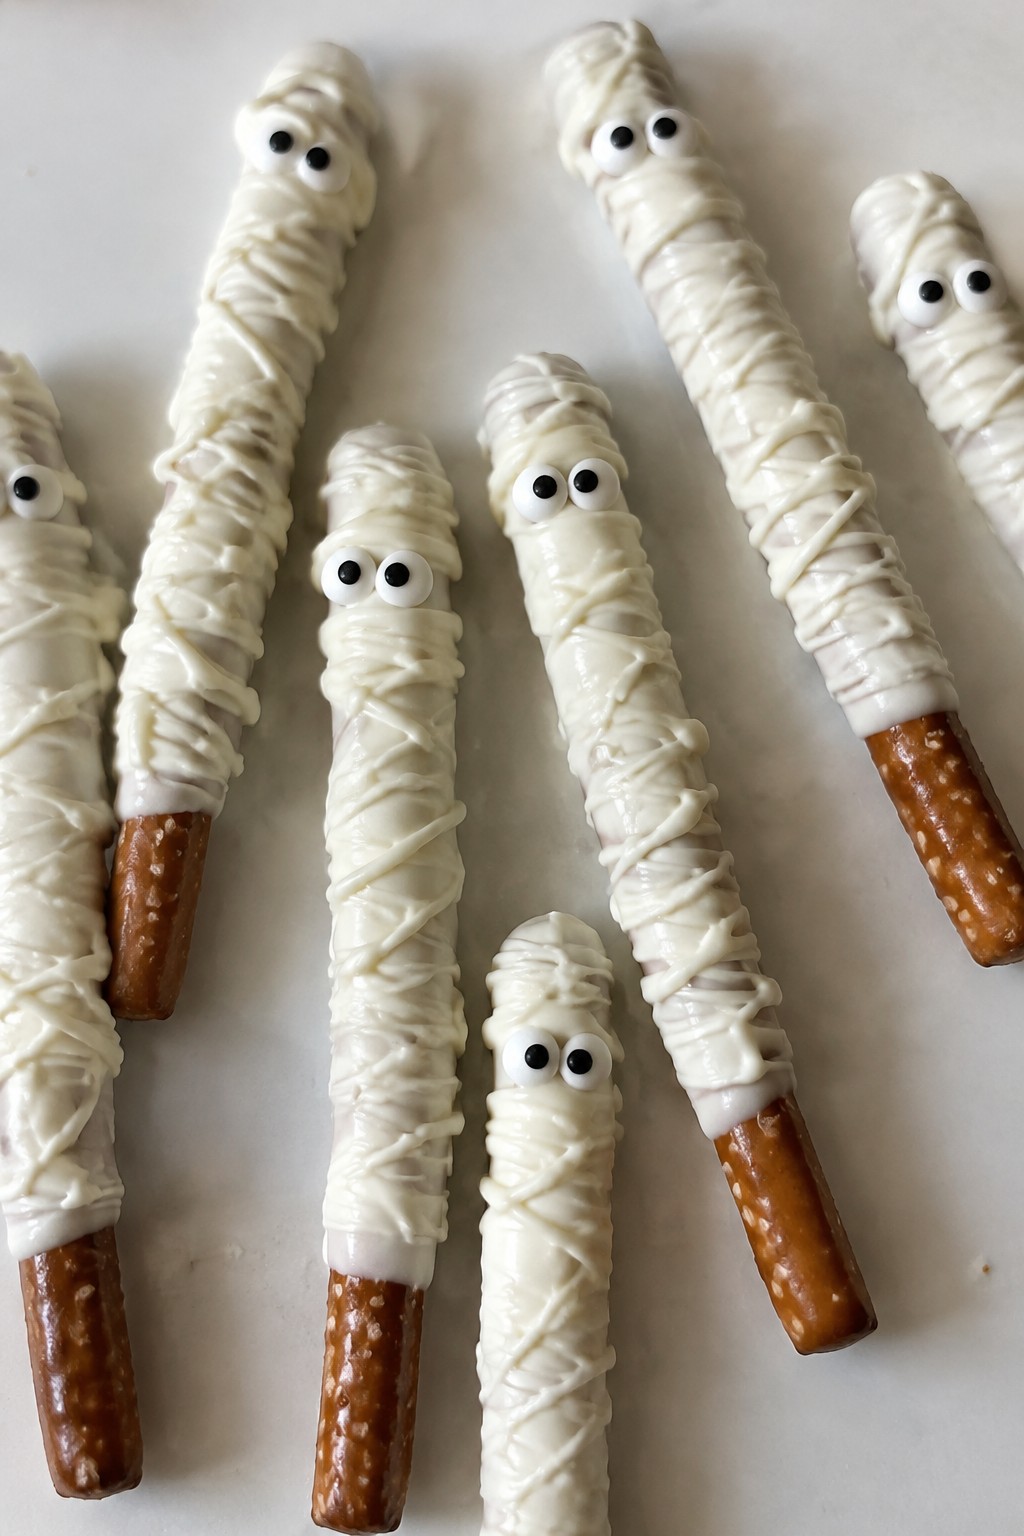
Serves 4 people.
Recommended Products
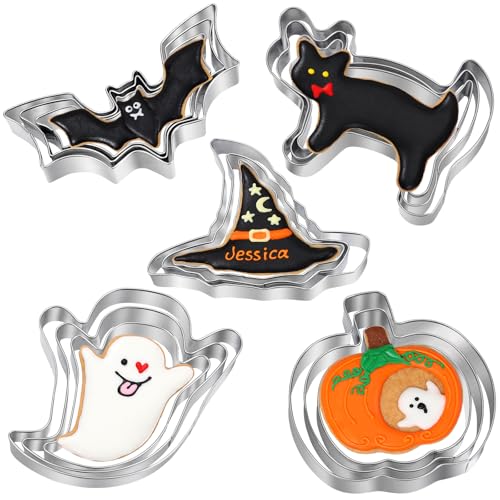
15-Piece Halloween Cookie Cutter Set (Baking & Decorating Kit): If you are looking for some Halloween cookie cutters, and this set of cookie molds basically meets all your needs, their size and details are good, you can make delicious Halloween cookies and then have a great holiday with your family.
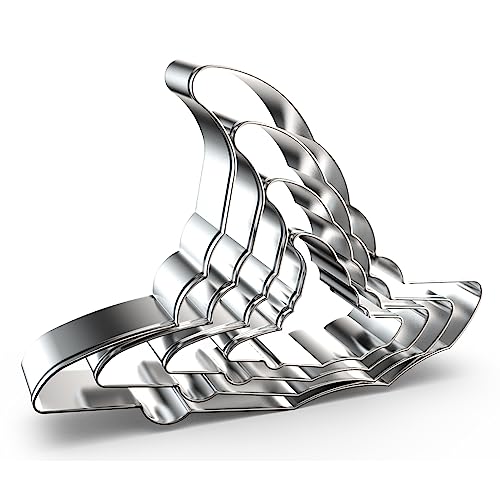
Witch's Hat Cookie Cutter Set: Show our wizard hat cookie cutters shapes in 4 different sizes. This set is perfect for a Halloween themed party.

[Design and Size]: The witch hat cookie cutter measures approximately 2.72 x 2.17 inches / 6.9 x 5.5 cm. Our cookie cutter is designed to help you create the perfect holiday cookies.
Ingredients
- 12 pretzel rods
- 10 ounces white chocolate candy melts
- 24 candy eyeballs
Instructions
- Line a baking sheet with parchment paper and set it aside. This keeps the finished rods from sticking.
- Place the white chocolate candy melts in a microwave-safe bowl. Heat them in 30-second intervals, stirring between each, until fully melted and smooth.
- Hold one pretzel rod at the end and drizzle the melted white chocolate over the rod in back-and-forth motions to create a wrapped mummy effect. Leave a small section at the bottom uncovered for the handle.
- Immediately press two candy eyeballs onto the chocolate near the top of the rod before it sets. Repeat with the remaining rods.
- Place the rods on the prepared baking sheet and let them sit at room temperature until the chocolate hardens.
Extra Tips
Work in small batches when drizzling so the chocolate stays workable. If the melted candy thickens, give it a quick 10-second warm-up in the microwave. Store the finished rods in an airtight container at room temperature for up to three days.
Course: Snack Cuisine: American Equipment: Microwave-safe bowl, Baking sheetPumpkin Spice Cookie Dough Truffles
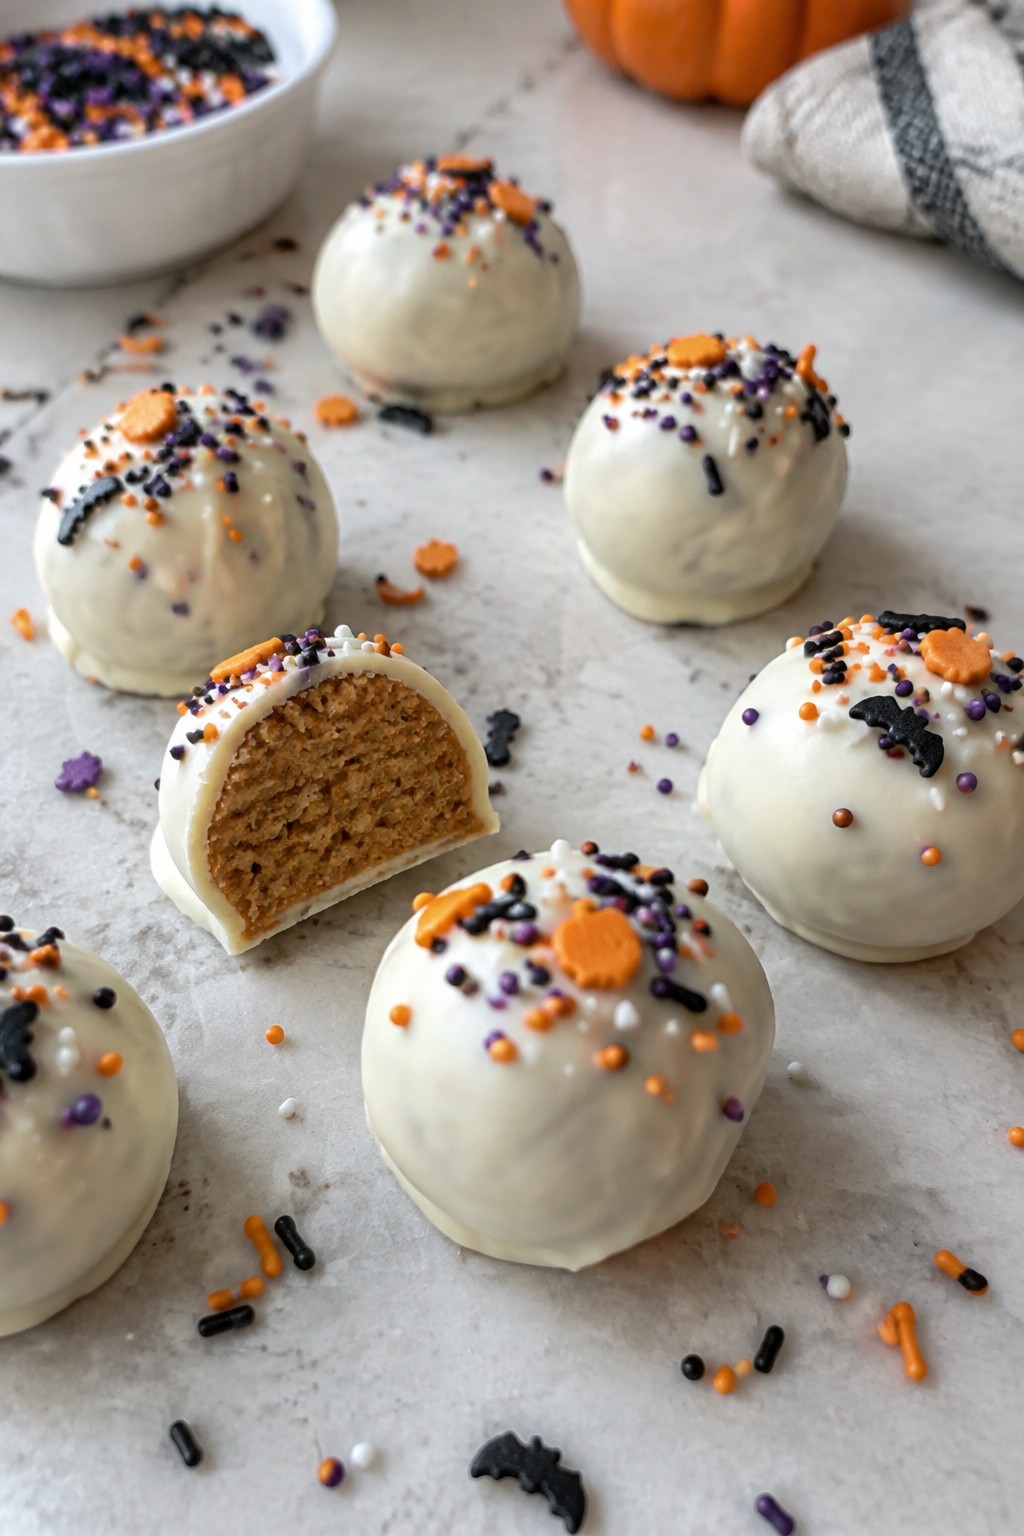
These no-bake truffles bring the warm flavors of pumpkin spice into an easy treat that fits right into a busy Halloween schedule. They come together quickly with simple mixing and chilling, making them handy for last-minute parties or school events. The inside has a soft, cookie-dough texture while the outside adds a smooth chocolate shell.
This recipe serves 4 people. – 1/2 cup unsalted butter, softened – 1/4 cup brown sugar – 1 teaspoon pumpkin pie spice – 1 teaspoon vanilla extract – 1 cup all-purpose flour – 1/4 cup mini chocolate chips – 8 ounces white chocolate, chopped – Halloween sprinkles
### Instructions 1. Cream the softened butter and brown sugar in a mixing bowl until smooth. 2. Stir in the pumpkin pie spice and vanilla extract until evenly combined. 3. Add the flour and mix until a soft dough forms. 4. Fold in the mini chocolate chips. 5. Scoop the dough into small balls and place them on a lined baking sheet. 6. Chill the balls in the refrigerator for 20 minutes to firm up. 7. Melt the white chocolate in the microwave in short bursts, stirring between each. 8. Dip each chilled ball into the melted white chocolate and return it to the baking sheet. 9. Add Halloween sprinkles on top before the coating sets. 10. Chill again for 10 minutes until the coating is firm.
### Extra Tips Keep the dough balls small so they coat evenly and set faster. If the white chocolate thickens while dipping, stir in a tiny bit of coconut oil to loosen it. Store the finished truffles in an airtight container in the fridge for up to four days.
Course: Dessert Cuisine: American Equipment: Mixing Bowl, Baking Sheet, Microwave
Serves 4 people.
Instructions
- Cream the softened butter and brown sugar in a mixing bowl until smooth.
- Stir in the pumpkin pie spice and vanilla extract until evenly combined.
- Add the flour and mix until a soft dough forms.
- Fold in the mini chocolate chips.
- Scoop the dough into small balls and place them on a lined baking sheet.
- Chill the balls in the refrigerator for 20 minutes to firm up.
- Melt the white chocolate in the microwave in short bursts, stirring between each.
- Dip each chilled ball into the melted white chocolate and return it to the baking sheet.
- Add Halloween sprinkles on top before the coating sets.
- Chill again for 10 minutes until the coating is firm.
Extra Tips
Keep the dough balls small so they coat evenly and set faster. If the white chocolate thickens while dipping, stir in a tiny bit of coconut oil to loosen it. Store the finished truffles in an airtight container in the fridge for up to four days. Course: Dessert Cuisine: American Equipment: Mixing Bowl, Baking Sheet, Microwave
Chocolate Spiderweb Bark
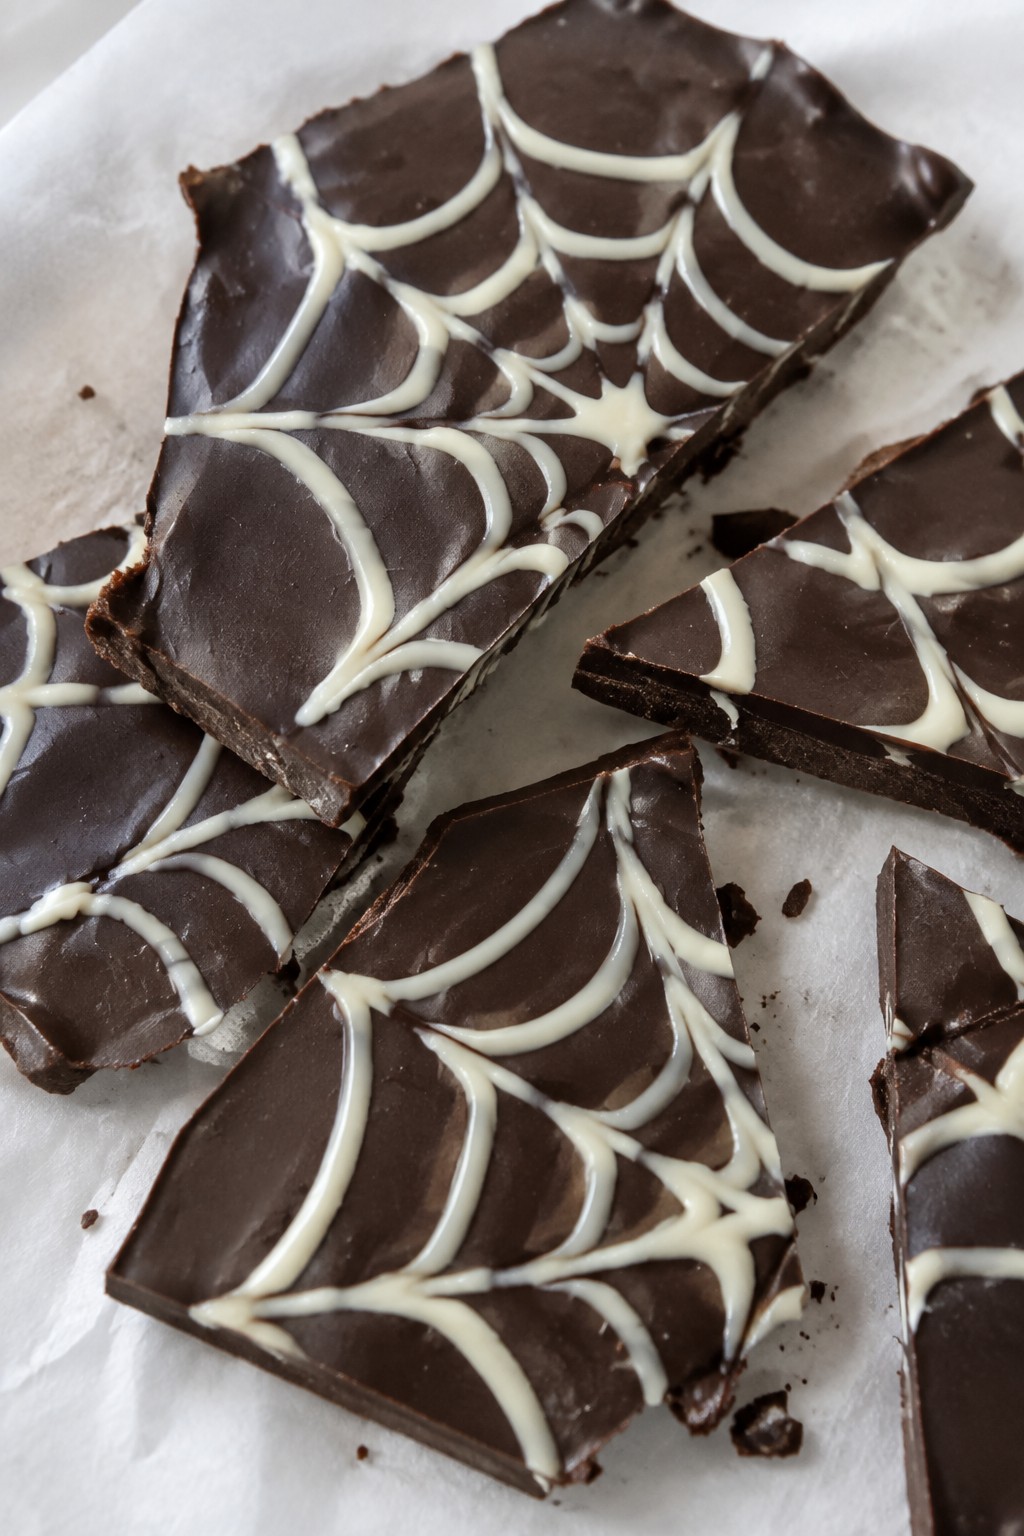
This chocolate spiderweb bark comes together fast with melted chocolate and a simple design trick. It works well for quick Halloween prep when you need a treat that looks festive without much effort. The result is a rich chocolate base with smooth white lines that form a web pattern and a satisfying snap when broken.
Serves 4 people.
Ingredients
- 8 ounces semisweet chocolate chips
- 2 ounces white chocolate chips
- 1/2 teaspoon vegetable oil
Instructions
- Line a baking sheet with parchment paper and set it aside.
- Place the semisweet chocolate chips and vegetable oil in a microwave-safe bowl. Heat in 30-second bursts, stirring after each, until fully melted and smooth.
- Pour the melted semisweet chocolate onto the parchment paper. Use a spatula to spread it into a thin, even layer about 1/4 inch thick.
- Place the white chocolate chips in a separate microwave-safe bowl. Heat in 20-second bursts, stirring after each, until melted and smooth.
- Spoon the melted white chocolate into a small zip-top bag and snip off one corner. Pipe thin circles across the dark chocolate layer, spacing them evenly.
- Drag a toothpick from the center of each circle outward in straight lines to create the web design. Let the bark sit at room temperature until fully set, then break it into pieces.
Extra Tips
Melt the white chocolate just until smooth to keep it thick enough for clean piping lines. If the bark softens while you work, chill it briefly in the fridge before breaking. Store pieces in an airtight container at room temperature for up to three days. Course: Dessert Cuisine: American Equipment: Microwave-safe bowls, Baking sheet, Parchment paper, Spatula, Toothpick
Candy Corn Popcorn Balls
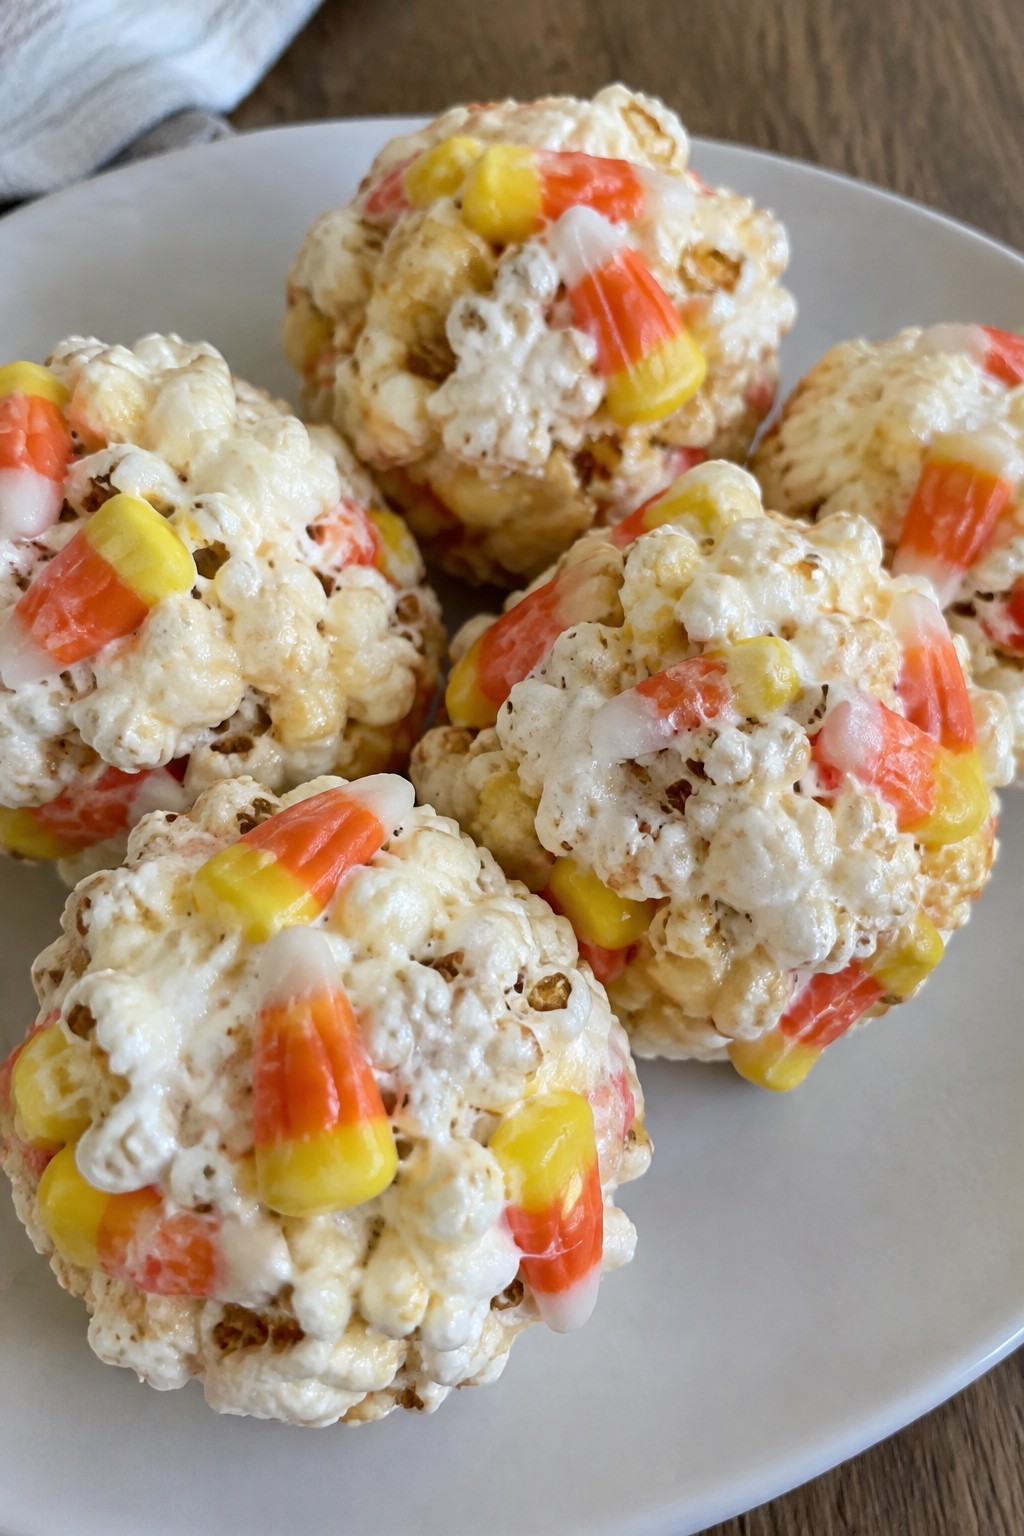
These popcorn balls combine classic Halloween candy with a quick stovetop method. They come together fast for parties or after-school snacks and require only a handful of ingredients. Kids enjoy helping shape them, and the finished treats hold up well for gifting or lunchboxes.
The result is chewy popcorn coated in marshmallow with sweet, slightly firm candy corn pieces mixed throughout. The texture stays light rather than dense, and the colors give an instant festive look without extra decorating.
Serves 4 people.
Recommended Products

Includes 6 brownie bars

PROTEIN + COLLAGEN: Packed with flavor and nutrition, each low-sugar Prime Bites Brownie has 19 grams of protein and 5 grams of collagen. This delicious treat is handcrafted with premium whey protein rather than wheat protein, giving you a full punch of amino acids.

Ingredients
- 6 cups popped popcorn
- 1 cup candy corn
- 3 tablespoons butter
- 20 large marshmallows
- 1/2 teaspoon vanilla extract
- 1/4 teaspoon salt
Instructions
- Place the popped popcorn and candy corn in a large mixing bowl and set aside.
- Melt the butter in a medium saucepan over medium heat. Add the marshmallows and stir until fully melted and smooth.
- Remove the pan from the heat and stir in the vanilla extract and salt.
- Pour the marshmallow mixture over the popcorn and candy corn. Stir gently with a spatula until everything is evenly coated.
- Lightly butter your hands and shape the mixture into four balls, pressing just firmly enough to hold together.
Extra Tips
Work quickly while the mixture is still warm so the balls form easily without crumbling. If the mixture starts to stiffen, warm it for 10 seconds in the microwave to soften it again. Store the finished balls in an airtight container at room temperature for up to two days. Course: Dessert Cuisine: American Equipment: Large Mixing Bowl, Medium Saucepan, Spatula
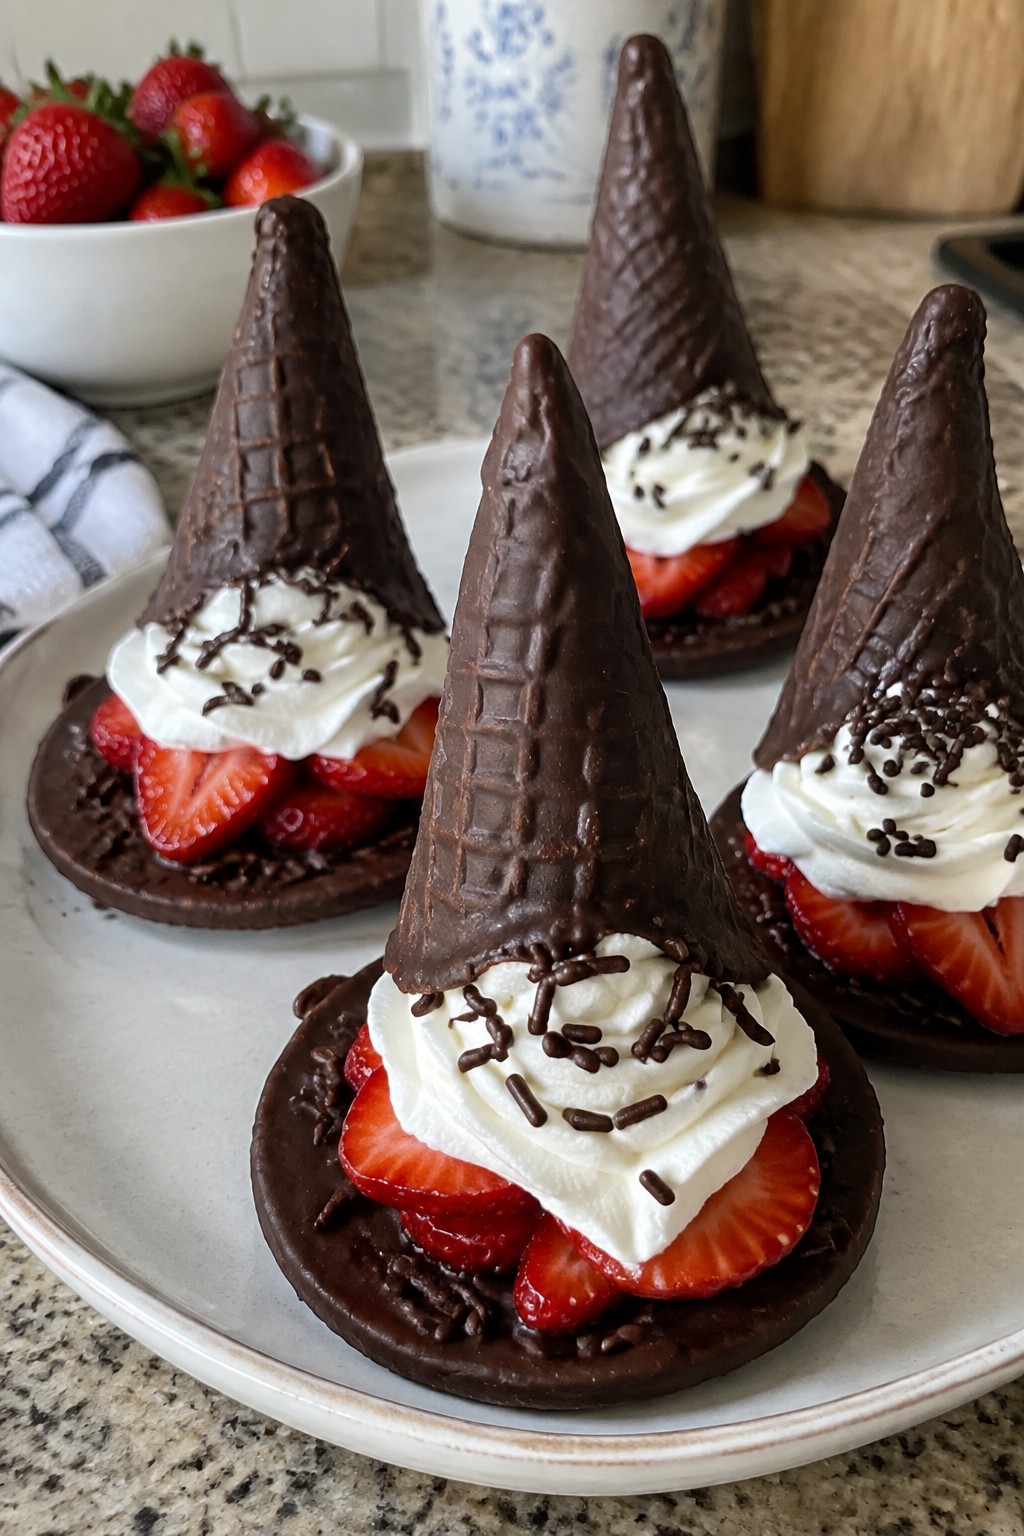
Witch Hat Strawberry Cones
These cones turn into quick witch hats with a chocolate coating and fresh berry filling. They work well for Halloween parties or after-school snacks when you need something fun without much effort. The crisp cone pairs with juicy strawberries and a light creamy finish.
The flavor stays balanced with sweet chocolate and tart berries, while the texture offers crunch from the cone and smoothness from the topping.
Serves 4 people.
Ingredients
- 4 sugar cones
- 1 cup dark chocolate chips
- 2 cups fresh strawberries, hulled and sliced
- 1 cup whipped topping
- 2 tablespoons chocolate sprinkles
Instructions
- Place the dark chocolate chips in a microwave-safe bowl and heat in 30-second bursts until fully melted, stirring between each burst.
- Dip the top rim of each sugar cone into the melted chocolate, then immediately roll the rim in chocolate sprinkles. Set the cones upright on a plate to let the coating firm up.
- Fill each cone halfway with sliced strawberries.
- Spoon whipped topping over the strawberries to fill the rest of the cone.
- Add a few extra strawberry slices on top of the whipped topping for garnish.
Extra Tips
Melt the chocolate slowly to avoid scorching, and work with one cone at a time so the sprinkles stick before the coating sets. Use firm strawberries to keep the filling from turning the cone soggy too quickly. If making ahead, assemble the chocolate rims first and add the fruit and topping right before serving. Course: Dessert Cuisine: American Equipment: Microwave-safe bowl, Plate
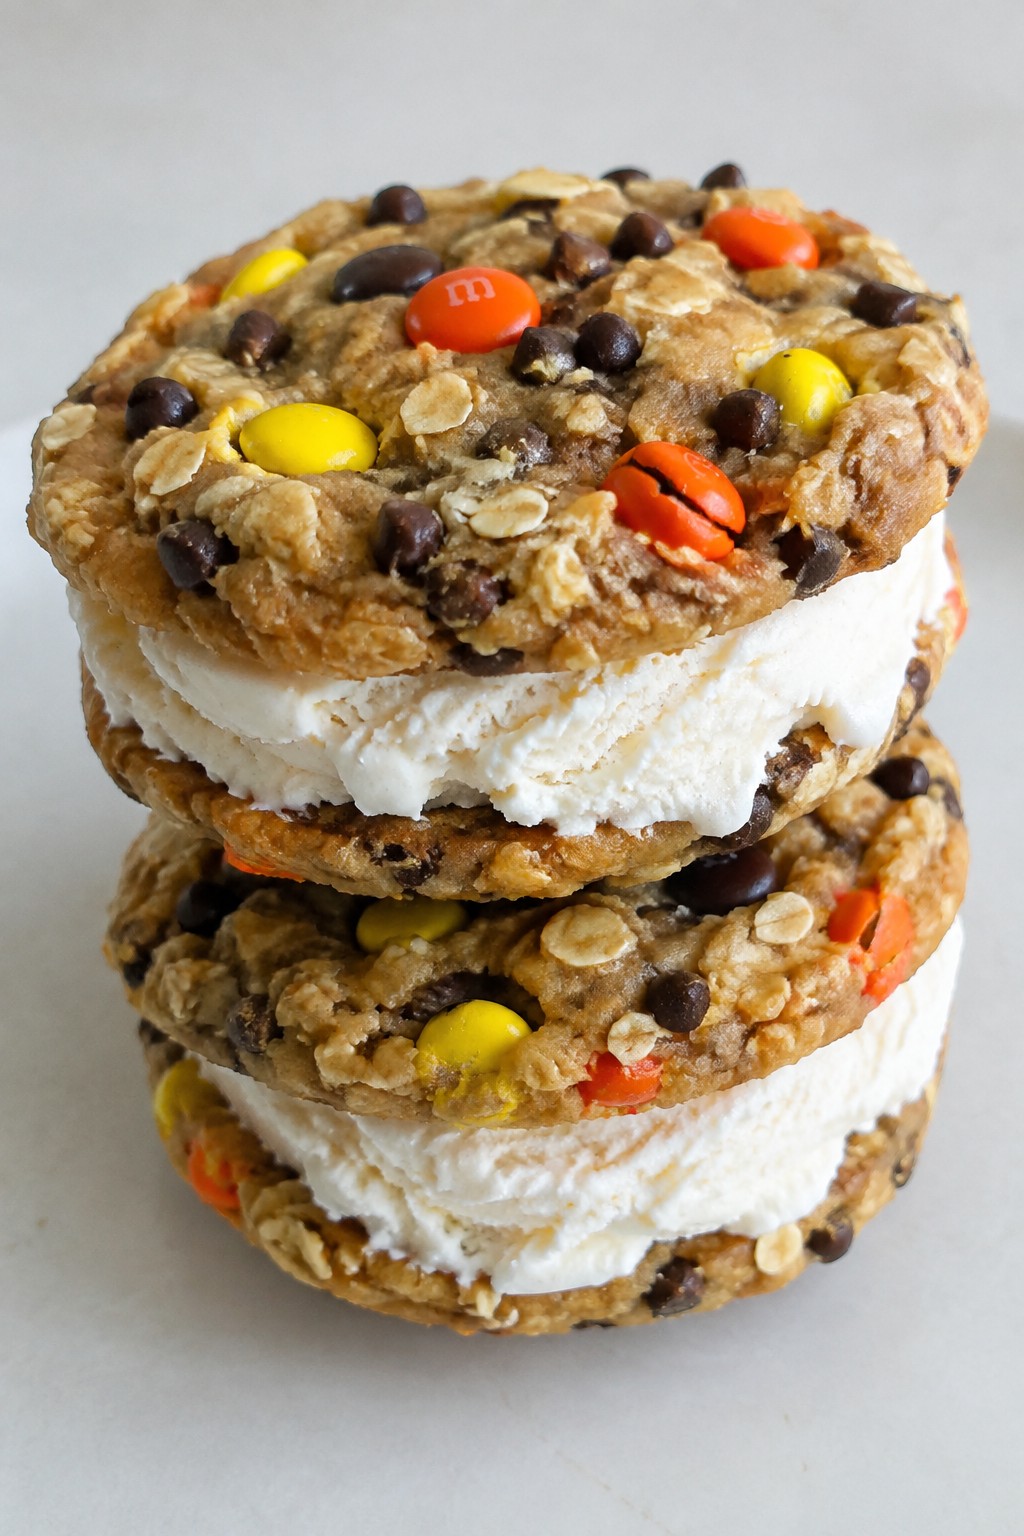
Easy Monster Cookie Ice Cream Sandwiches
These ice cream sandwiches combine soft peanut butter oat cookies with colorful candy pieces and a creamy vanilla filling. They come together fast for last-minute Halloween fun or after-school snacks without much hands-on work.
The cookies bake in one bowl and stay chewy, while the ice cream adds a cool contrast that kids and adults both enjoy. You can have the full batch ready in under an hour.
Serves 4 people.
Ingredients
- 1 cup creamy peanut butter
- 1/2 cup granulated sugar
- 1 large egg
- 1 cup rolled oats
- 1/2 cup mini chocolate chips
- 1/2 cup Halloween M&Ms
- 2 cups vanilla ice cream
Instructions
- Preheat the oven to 350 degrees and line a baking sheet with parchment paper.
- Stir the peanut butter, sugar, and egg together in a mixing bowl until smooth.
- Mix in the oats, chocolate chips, and M&Ms until evenly combined.
- Scoop eight portions of dough onto the baking sheet and flatten each one slightly with a fork.
- Bake for 10 to 12 minutes until the edges turn golden, then let the cookies cool completely on the sheet.
- Soften the ice cream for a few minutes at room temperature, then scoop about 1/2 cup between two cookies to form each sandwich.
- Press gently to spread the ice cream to the edges and place the finished sandwiches in the freezer for 15 minutes to firm up.
Extra Tips
Let the cookies cool fully before adding ice cream or the filling will melt too quickly. Swap vanilla ice cream for chocolate if you want a richer flavor, and store any extras in a sealed container in the freezer for up to three days. Course: Dessert Cuisine: American Equipment: Mixing Bowl, Baking Sheet, Parchment Paper
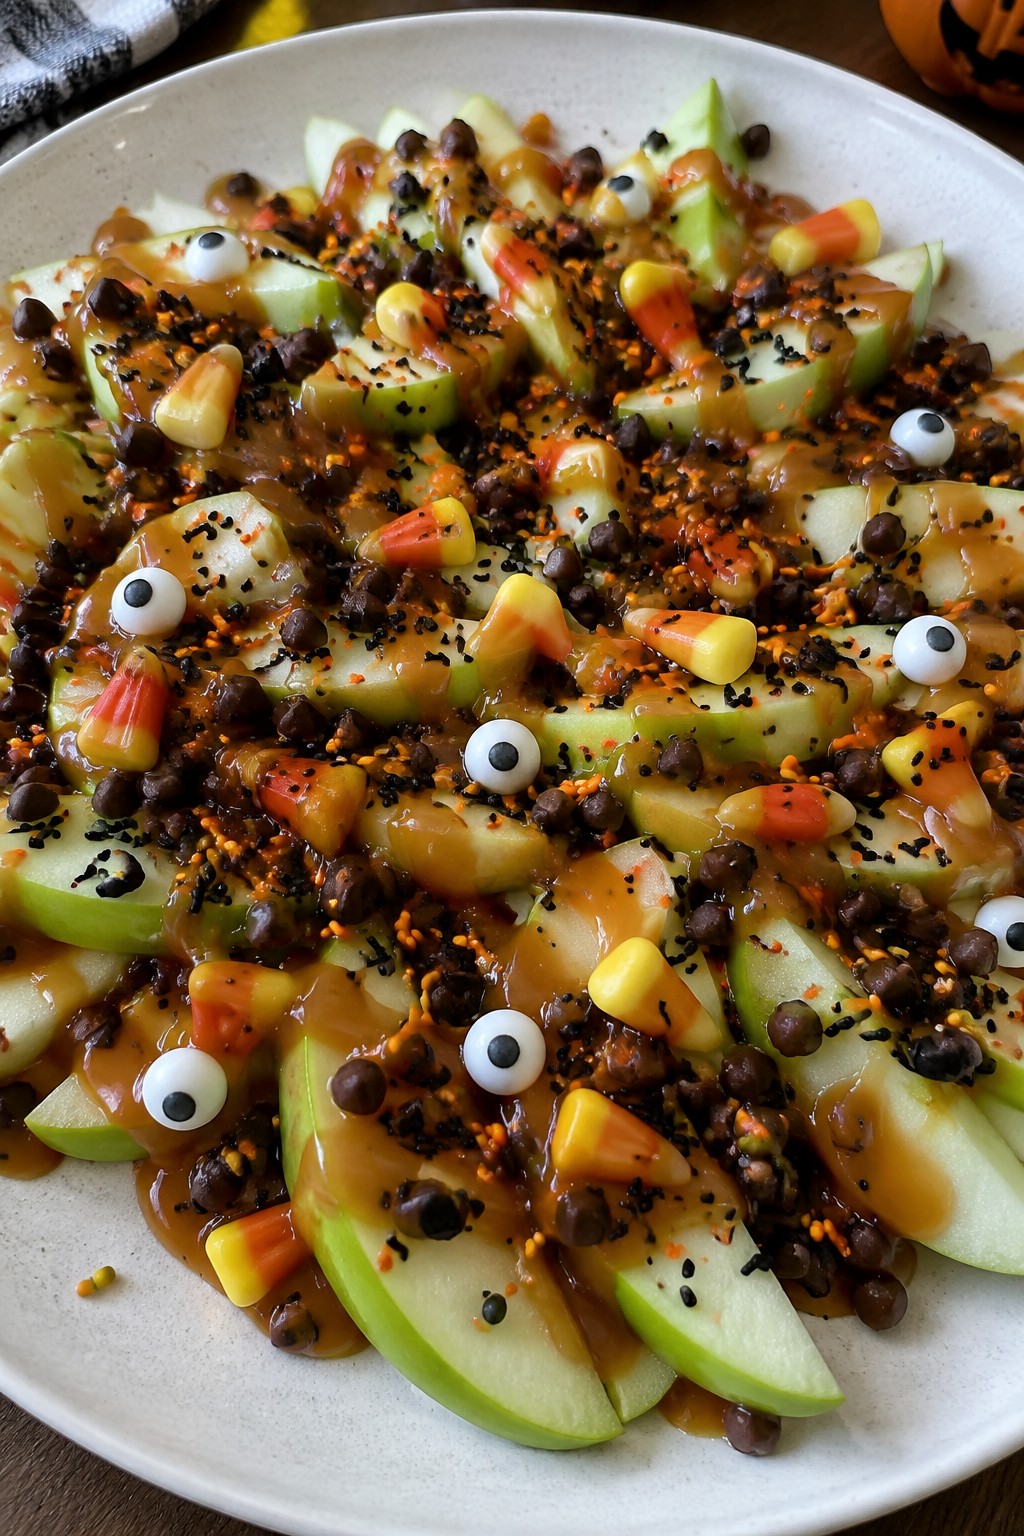
Spooky Caramel Apple Nachos
These caramel apple nachos turn a classic fall flavor into a quick, shareable treat that fits right into busy Halloween prep. Thin apple slices stand in for tortilla chips, and a few store-bought toppings create a festive look without any baking or long steps. The result is a crisp, sweet snack that feels special but takes almost no time.
The mix of tart apple, gooey caramel, and crunchy candy gives a nice balance of textures in every bite. It works well for last-minute parties, after-school snacks, or a simple dessert when you want something fun without extra dishes.
Serves 4 people.
Ingredients
- 4 large Granny Smith apples
- 1/2 cup store-bought caramel sauce
- 1/4 cup mini chocolate chips
- 2 tablespoons black and orange sprinkles
- 1/4 cup candy corn
- 12 candy eyeballs
Instructions
- Core the apples and cut them into thin wedges so they resemble nacho chips.
- Arrange the apple wedges in a single layer on a large serving platter.
- Warm the caramel sauce in the microwave for 10 to 15 seconds until it is pourable, then drizzle it evenly over the apples.
- Scatter the mini chocolate chips, sprinkles, candy corn, and candy eyeballs across the top.
Extra Tips
Warm the caramel just enough to drizzle without making the apples soggy. Serve the nachos right after assembling so the apples stay crisp. If you need to make it ahead, keep the toppings in separate bowls and add them only when you are ready to serve. Course: Dessert Cuisine: American Equipment: Cutting board, Sharp knife, Microwave-safe bowl, Serving platter
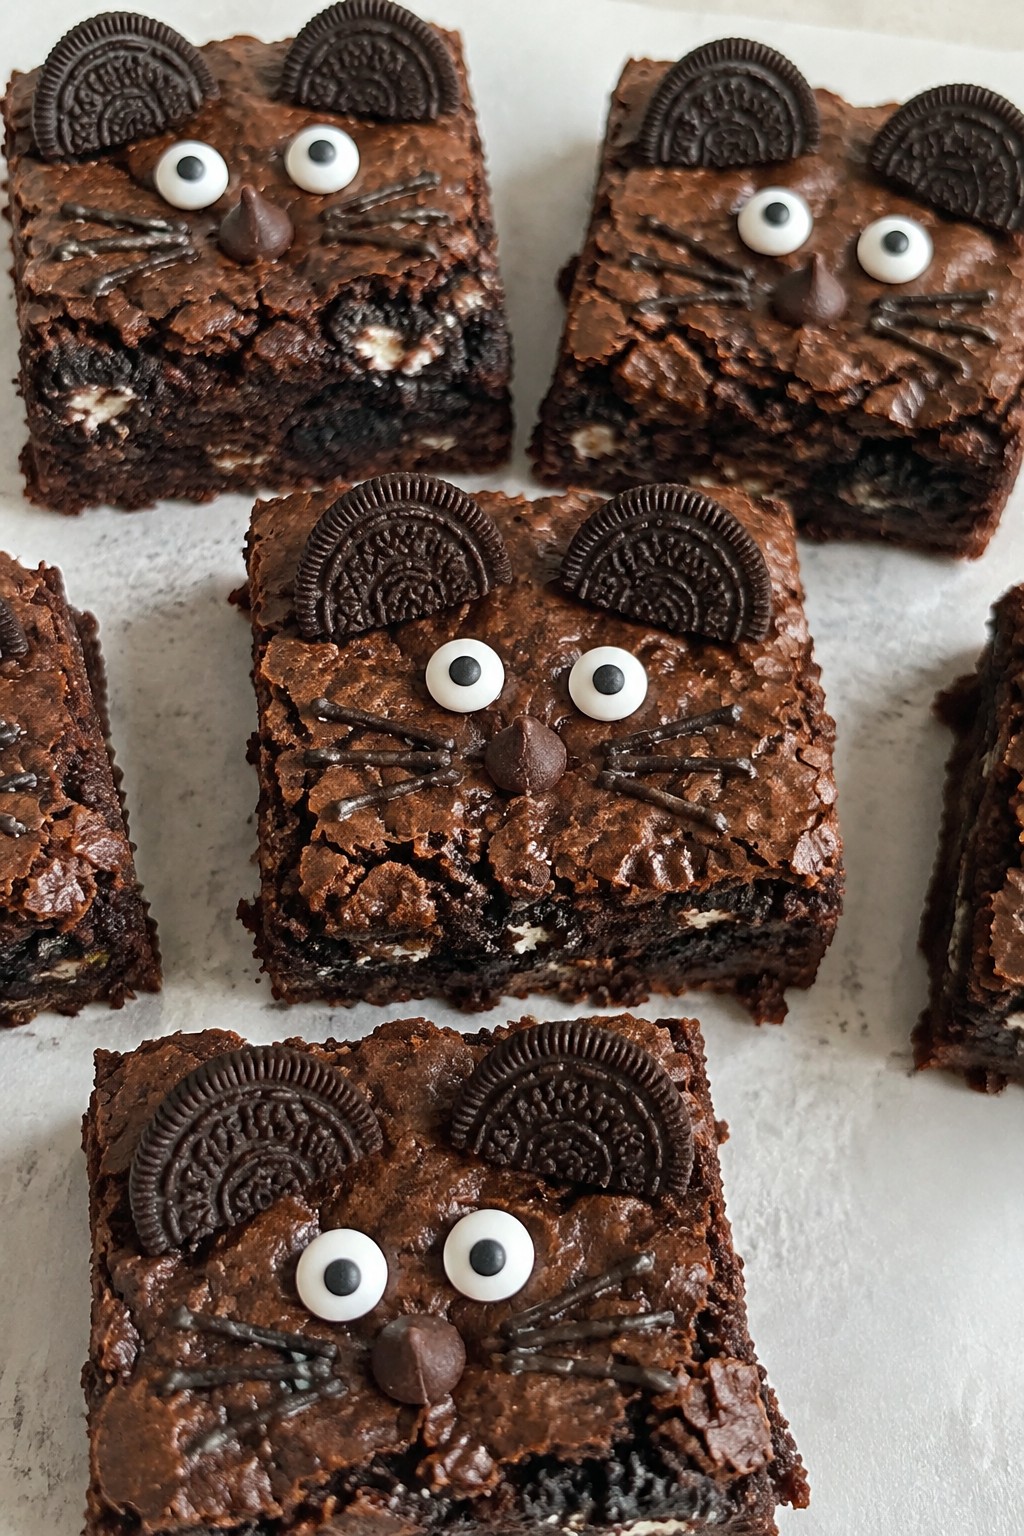
Black Cat Oreo Brownies
These Black Cat Oreo Brownies turn a simple boxed mix into a playful Halloween treat. They work well for quick after-school snacks or last-minute party trays when you need something festive without extra effort.
The brownies bake up fudgy with bits of Oreo mixed in for crunch. Each square gets topped with Oreo ears, candy eyes, and a chocolate nose to create a black cat face that holds up well at room temperature.
Serves 4 people.
Ingredients
- 1 box (18 oz) brownie mix
- ½ cup vegetable oil
- ¼ cup water
- 2 large eggs
- 12 Oreo cookies
- 8 candy eyes
- ¼ cup chocolate chips
Instructions
- Preheat the oven to 350°F and line an 8×8 baking pan with parchment paper.
- In a mixing bowl, combine the brownie mix, vegetable oil, water, and eggs until smooth.
- Crush 4 Oreo cookies into small pieces and stir them into the batter.
- Pour the batter into the prepared pan and bake for 25 minutes, or until a toothpick comes out with moist crumbs.
- Let the brownies cool completely in the pan.
- Cut the cooled brownies into 4 squares.
- Press two Oreo cookie halves into the top of each brownie to form ears.
- Add two candy eyes and one chocolate chip nose to each brownie to finish the cat faces.
Extra Tips
Break the remaining Oreos cleanly in half before decorating so the ears sit flat. If the chocolate chips feel too firm to stick, warm them slightly between your fingers first. Store any leftovers in an airtight container at room temperature for up to two days to keep the Oreo pieces crisp. Course: Dessert Cuisine: American Equipment: Mixing Bowl, 8×8 Baking Pan, Oven
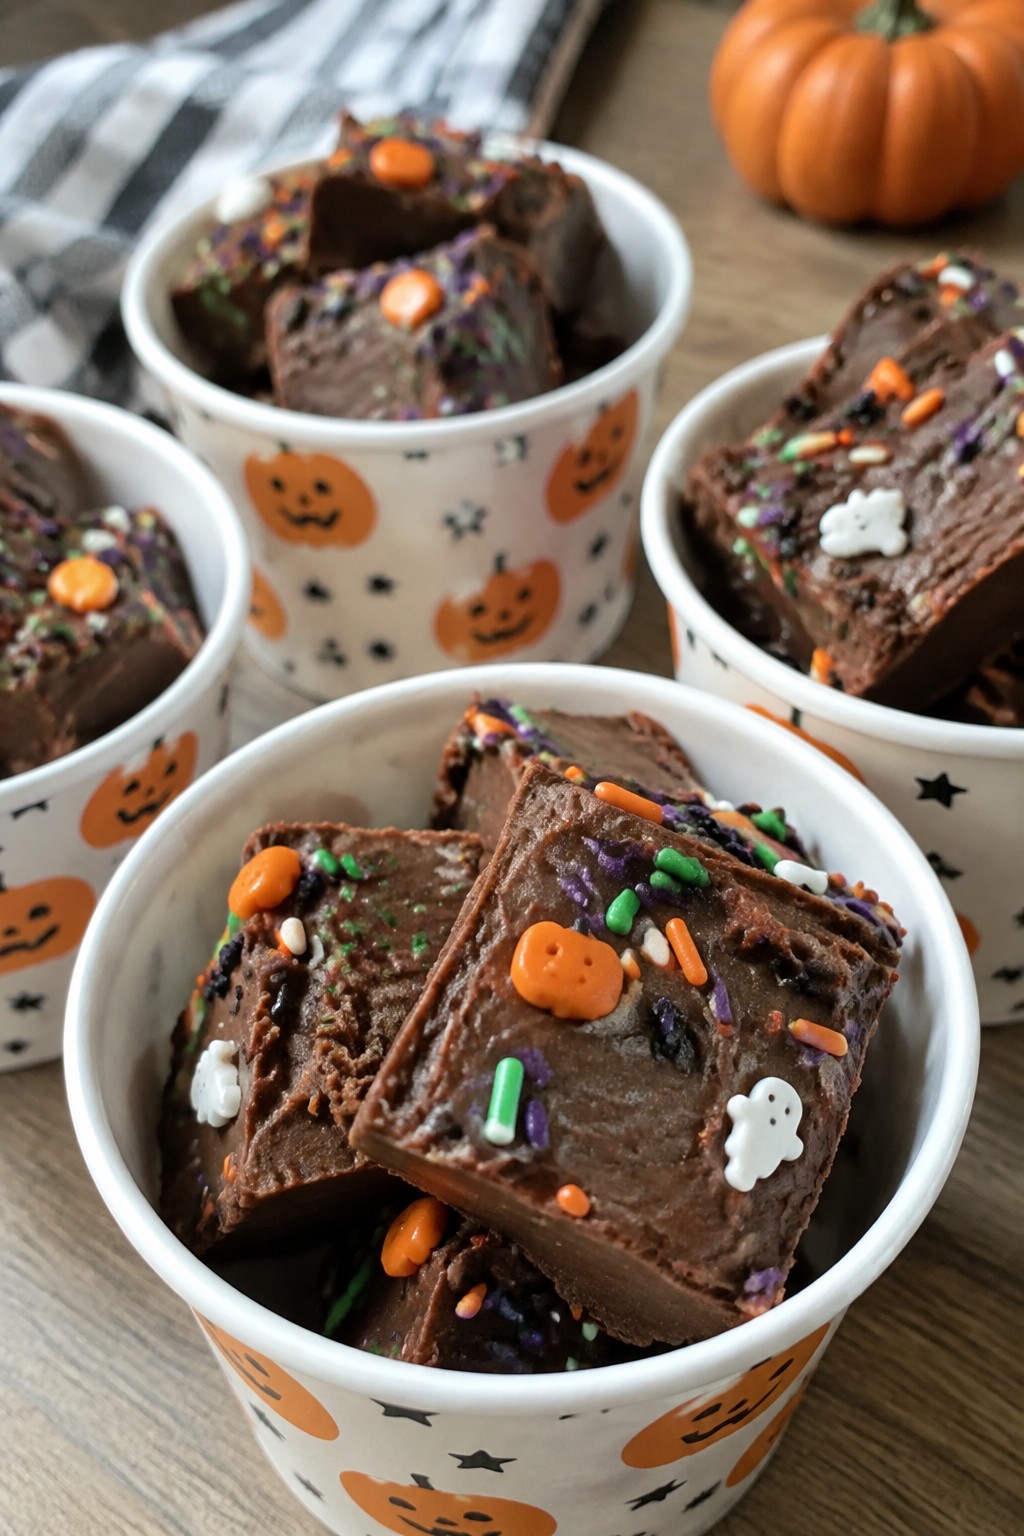
Halloween Sprinkle Fudge Cups
These fudge cups come together fast with just a few pantry staples. They give you a creamy chocolate base dotted with colorful sprinkles that fit right into any Halloween spread. Kids and adults both reach for them because the texture stays soft and the colors pop without extra work.
The recipe works well when you need a last-minute treat for a party or school event. Each cup holds a small serving of rich fudge that sets up in the fridge while you handle other tasks.
Serves 4 people.
Ingredients
- 1 1/2 cups semi-sweet chocolate chips
- 1/2 cup sweetened condensed milk
- 1 teaspoon vanilla extract
- 1/4 cup Halloween sprinkles
- 4 small paper cups or silicone cupcake liners
Instructions
- Place the chocolate chips and sweetened condensed milk in a microwave-safe bowl. Heat in 30-second bursts, stirring after each one, until the mixture melts into a smooth paste.
- Stir in the vanilla extract until it blends evenly through the fudge base.
- Add most of the Halloween sprinkles and fold gently so the colors stay bright and do not bleed.
- Spoon the mixture into the four paper cups or silicone liners, filling each one about three-quarters full.
- Scatter the remaining sprinkles over the tops of the cups for extra color.
- Place the cups in the fridge for at least one hour until the fudge firms up.
Extra Tips
Chill the cups on a small tray so they stay level while setting. If the sprinkles start to sink during mixing, let the fudge cool for two minutes before adding them. Store leftovers in an airtight container in the fridge for up to four days. These cups travel well in a lunch box or picnic basket because the paper liners double as wrappers. Course: Dessert Cuisine: American Equipment: Microwave-safe bowl, Spoon, Small tray
Bat Wing Rice Krispie Treats
These Bat Wing Rice Krispie Treats turn a familiar snack into a quick Halloween option. They come together in one pan with minimal steps, which helps when you need something festive without extra time. The base stays soft and chewy while the chocolate coating adds a crisp layer that holds the wing shape.
The treats work well for small gatherings or after-school snacks during October. Dark chocolate gives them a bold look that fits the theme without needing fancy tools.

Serves 4 people.
Ingredients
- 3 tablespoons butter
- 4 cups mini marshmallows
- 6 cups Rice Krispies cereal
- 1 cup dark chocolate chips
Instructions
- Melt the butter in a large saucepan over low heat. Add the mini marshmallows and stir until fully melted and smooth.
- Remove the pan from heat and pour in the Rice Krispies cereal. Stir quickly until the cereal is evenly coated.
- Press the mixture into a greased 9×9 inch pan and let it cool for 15 minutes until firm.
- Cut the cooled slab into eight triangles to form wing shapes.
- Place the dark chocolate chips in a microwave-safe bowl and heat in 20-second bursts, stirring between each, until melted.
- Dip the edge of each triangle into the melted chocolate to create the wing effect. Set on parchment paper to harden.
Extra Tips
Press the mixture firmly into the pan so the triangles hold their shape after cutting. If the chocolate thickens while dipping, warm it for a few more seconds. Store leftovers in an airtight container at room temperature for up to two days to keep the texture chewy. Course: Dessert Cuisine: American Equipment: Large saucepan, 9×9 inch pan, Microwave-safe bowl
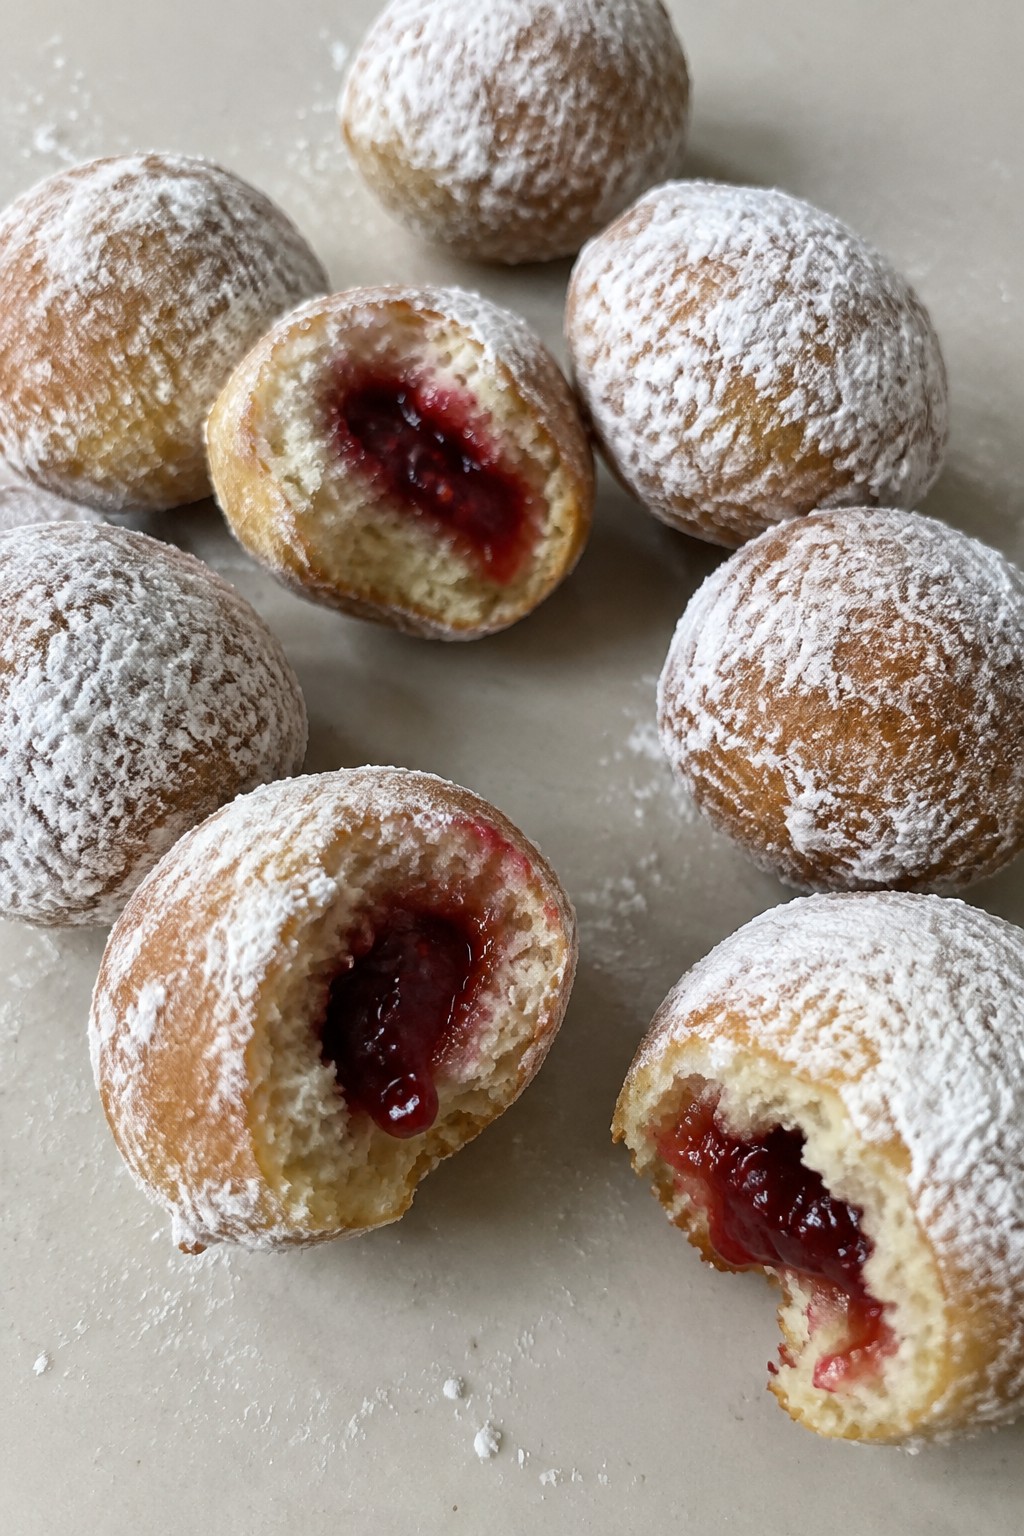
Vampire Bite Donut Holes
These donut holes come together fast with store-bought bases and a quick filling step. They work well for last-minute Halloween parties or after-school snacks when you need something themed but simple. Each bite delivers a soft, cakey texture with a sweet-tart jam center that gives the vampire effect.
Serves 4 people.
Ingredients
- 16 plain donut holes
- 1/2 cup raspberry preserves
- 2 tablespoons powdered sugar
Instructions
- Warm the raspberry preserves in a small microwave-safe bowl for 20 seconds to make it easier to pipe.
- Transfer the warmed preserves to a piping bag fitted with a small tip.
- Insert the tip into the side of each donut hole and squeeze in a small amount of preserves until you feel slight resistance.
- Place the filled donut holes on a plate and dust them lightly with powdered sugar.
Extra Tips
Fill the donut holes right before serving so the powdered sugar stays visible and does not absorb into the jam. If the preserves are too thick, stir in a teaspoon of water after warming. Leftovers keep in an airtight container at room temperature for one day. Course: Dessert Cuisine: American Equipment: Piping bag, Small bowl, Microwave
