
Hosting a Halloween party calls for snacks that taste good and look the part. Here are 15 savory options that stand out but stay easy to prepare. They use common ingredients and straightforward methods. These recipes help you put together a spread without spending hours in the kitchen. You will find ideas from dips to bites that everyone can enjoy.
Helpful Tips Before You Start
These tips will help your savory snacks look festive and hold up well at a party.
Use sturdy bases
Choose items like puff pastry squares or thick crackers. They support toppings without getting soggy during the event.
Shape with simple tools
Press cookie cutters into cheese slices or dough before baking. This creates quick Halloween shapes without extra effort.
Make components ahead
Prepare fillings and dips the day before. Store them covered in the fridge so assembly stays quick on party day.
Boost savory seasoning
Taste and adjust salt, herbs, and spices before serving. Strong flavors stand out better when snacks sit out for a while.
Spooky Sausage Mummy Pastries
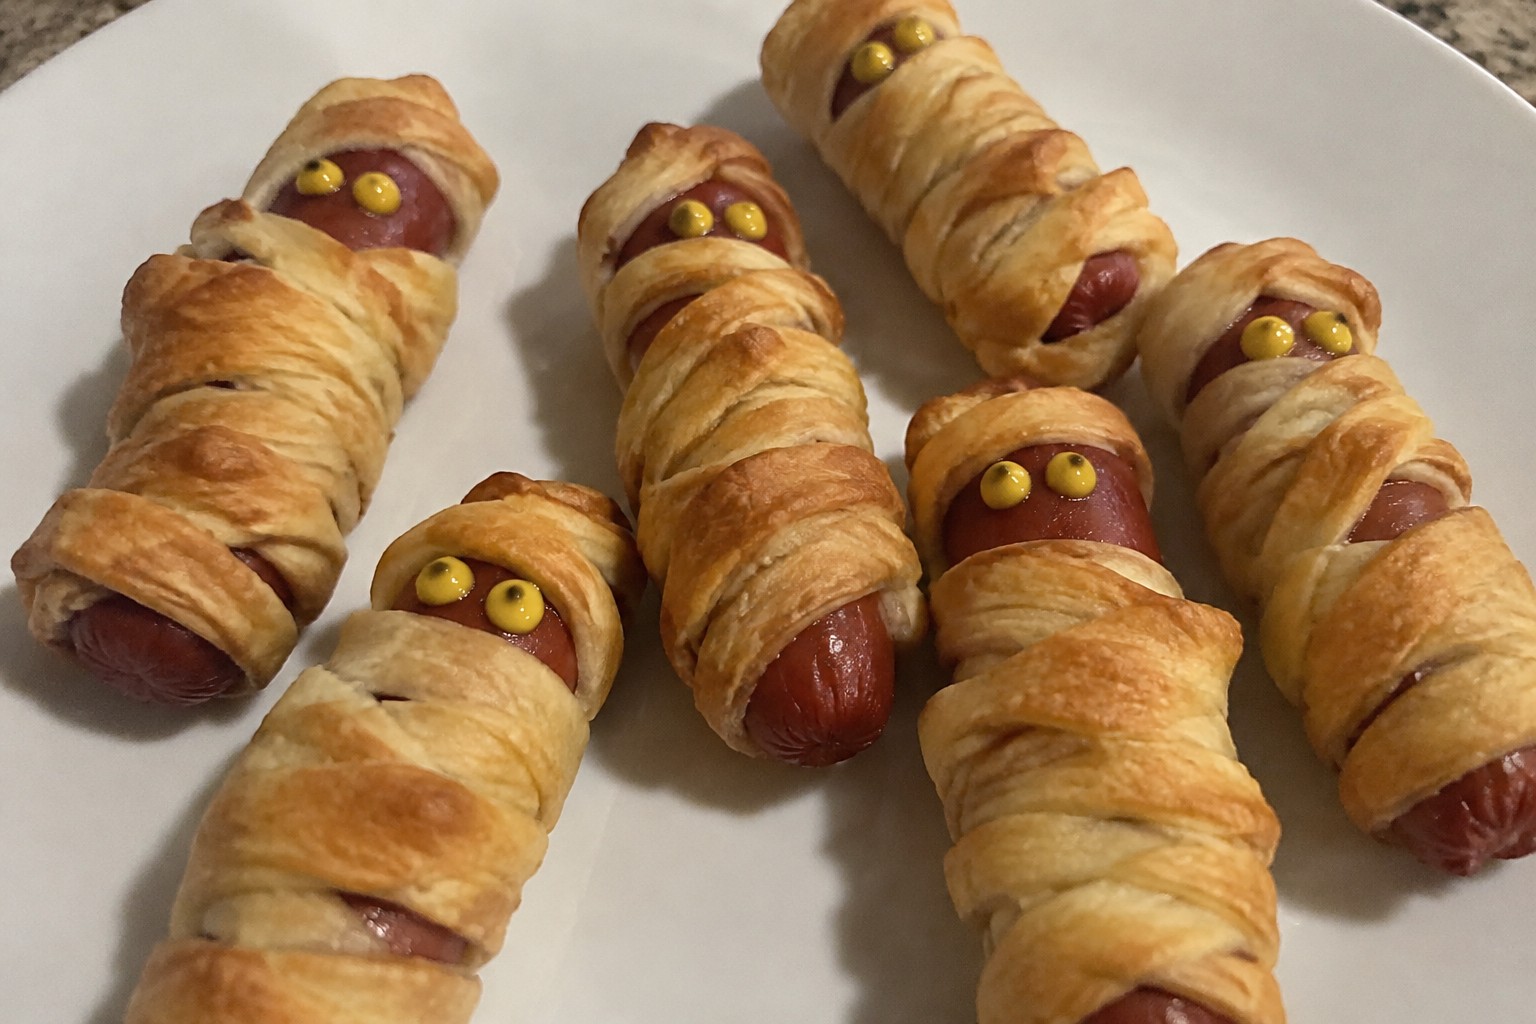
These sausage mummies give a fun twist to classic pigs in a blanket. They work well as a party snack because guests can grab them easily while the flaky pastry and juicy sausage hold up at room temperature. The finished bites taste savory with a crisp outside and tender meat inside.

Serves 4 people.
Ingredients
- 8 link sausages
- 1 sheet frozen puff pastry, thawed
- 1 large egg
- 2 tablespoons water
- Prepared mustard
Instructions
- Preheat the oven to 400 degrees F and line a baking sheet with parchment paper.
- Cut the thawed puff pastry sheet into thin strips about half an inch wide.
- Wrap the pastry strips around each sausage in an overlapping pattern to resemble bandages, leaving a small gap near one end for the face.
- Place the wrapped sausages on the prepared baking sheet.
- Beat the egg with the water in a small bowl to make an egg wash, then brush it lightly over the pastry on each sausage.
- Bake for 15 to 18 minutes until the pastry turns golden brown and the sausages are heated through.
- Let the mummies cool for a few minutes, then add two small dots of mustard in the gap to create eyes.
Extra Tips
Wrap the pastry strips with slight overlaps so they stay in place during baking and keep the mummy look intact. Serve them warm with a side of extra mustard for dipping. Leftovers reheat well in a 350 degree F oven for five minutes to restore crispness. Course: Appetizer Cuisine: American Equipment: Baking sheet, Parchment paper, Knife, Small bowl, Pastry brush
Black Olive Spider Deviled Eggs
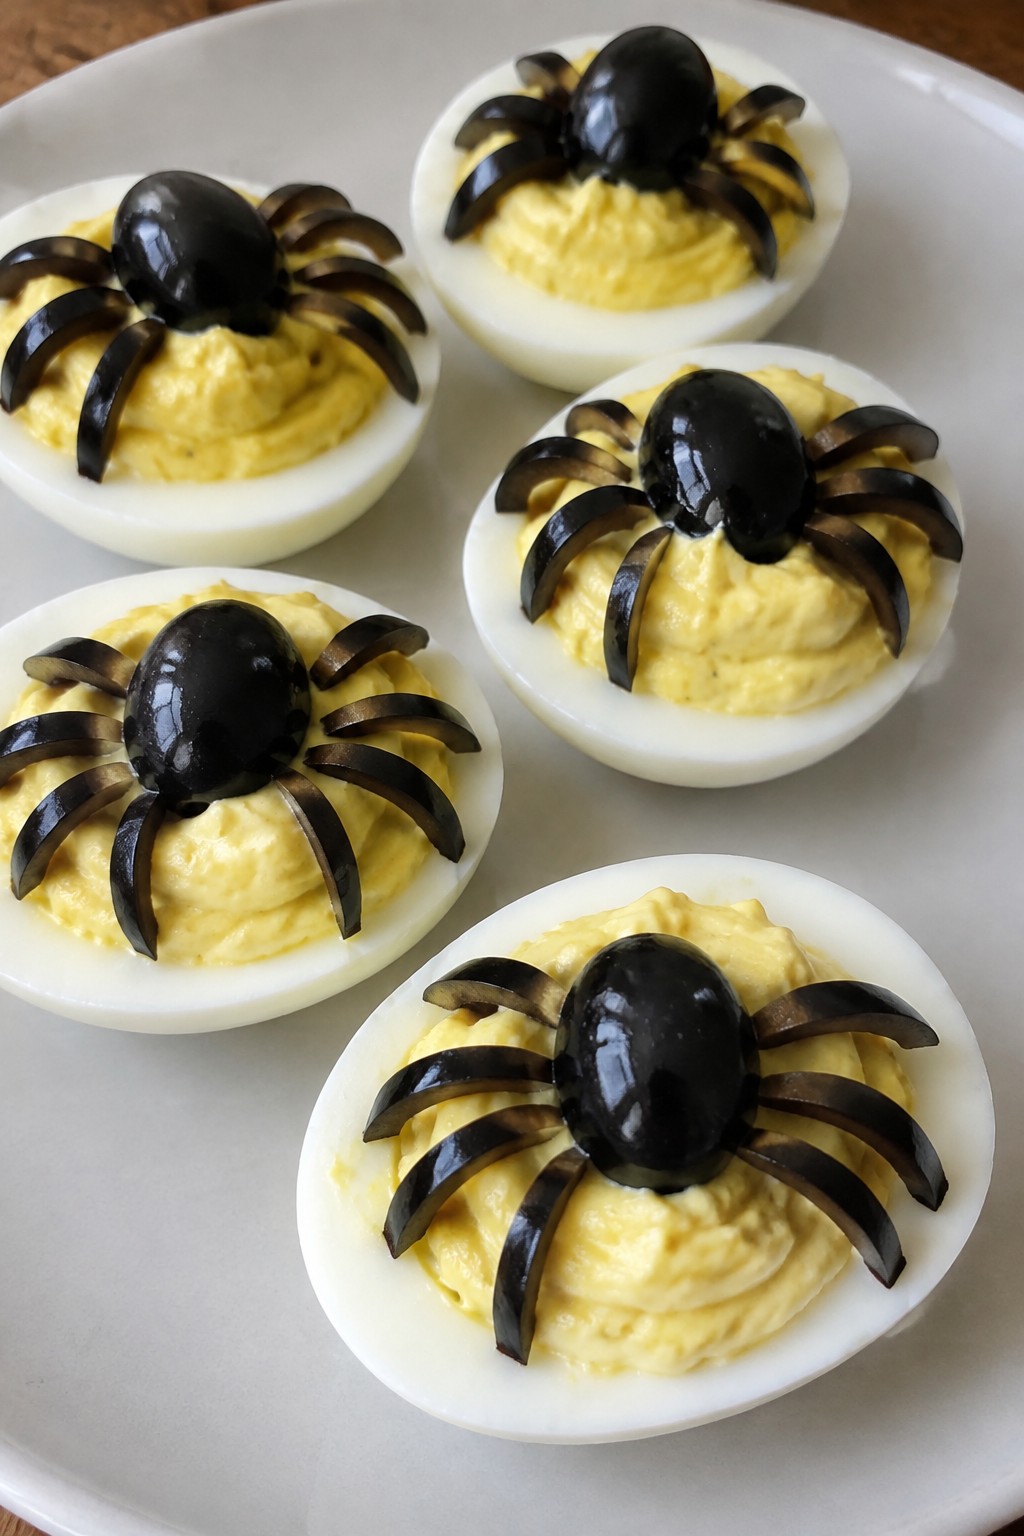
These deviled eggs turn a classic party bite into something fun for Halloween. The black olive spiders add a playful touch while the creamy filling keeps things savory and satisfying. They work well on a snack table because they hold up at room temperature and give guests an easy handheld option.
The flavor stays balanced with tangy mustard and rich mayonnaise against the briny olives. The texture combines smooth filling with firm egg whites and a slight crunch from the olive pieces.
Serves 4 people.
Ingredients
- 6 large eggs
- 1/4 cup mayonnaise
- 1 teaspoon yellow mustard
- 1/4 teaspoon salt
- 1/4 teaspoon black pepper
- 6 black olives
Instructions
- Place the eggs in a pot and cover with cold water. Bring the water to a boil over medium heat, then remove the pot from the heat, cover, and let the eggs sit for 12 minutes.
- Drain the hot water and run cold water over the eggs until they cool. Peel the eggs and slice each one in half lengthwise. Scoop the yolks into a mixing bowl.
- Add the mayonnaise, yellow mustard, salt, and black pepper to the yolks. Mash everything together until the mixture is smooth.
- Spoon or pipe the filling back into the egg white halves. Slice each black olive in half lengthwise to form the spider bodies. Cut thin strips from the remaining olive pieces to create eight legs per spider. Place one olive half on each filled egg and arrange the strips around it to look like legs.
Extra Tips
Pipe the filling with a small plastic bag for cleaner results. Make the olive legs very thin so they stay in place on the smooth filling. Prepare the eggs a day ahead and add the olive spiders right before serving to keep the legs from softening. Course: Appetizer Cuisine: American Equipment: Large Pot, Mixing Bowl, Sharp Knife
Jalapeño Popper Mummies with Crispy Bacon
These jalapeño popper mummies wrap creamy, bacon-filled peppers in strips of dough to create a fun Halloween shape that still delivers big flavor. The combination of roasted jalapeño heat, rich cream cheese, and crunchy bacon makes them a reliable choice for party platters where guests want something savory and handheld.
They work especially well for casual gatherings or potlucks because they hold their shape after baking and stay tasty at room temperature for a couple of hours. The crispy bacon adds texture contrast to the soft filling and tender dough wrap.

Serves 4 people.
Ingredients
- 4 large jalapeños
- 4 ounces cream cheese, softened
- 4 slices bacon
- 1 can (8 ounces) refrigerated crescent roll dough
Instructions
- Preheat the oven to 375°F and line a baking sheet with parchment paper.
- Cook the bacon in a skillet over medium heat until crisp, then drain on paper towels and crumble into small pieces.
- Halve the jalapeños lengthwise and remove the seeds and membranes.
- Mix the softened cream cheese with the crumbled bacon in a bowl until evenly combined.
- Spoon the cream cheese mixture into each jalapeño half, filling them level with the edges.
- Unroll the crescent dough and cut it into thin strips. Wrap the strips around each stuffed jalapeño half in a crisscross pattern to resemble mummy bandages, leaving a small gap near one end for the face.
- Place the wrapped jalapeños on the prepared baking sheet and bake for 12 to 15 minutes until the dough is golden and the peppers are tender.
- Remove from the oven and let cool for a few minutes before serving.
Extra Tips
Cook the bacon until it is fully crisp so the pieces stay crunchy inside the filling rather than turning chewy. If you want a milder version, soak the halved jalapeños in ice water for 10 minutes before stuffing. These are best eaten the same day, but leftovers can be reheated in a 350°F oven for 5 minutes to restore crispness to the dough. Course: Appetizer Cuisine: American Equipment: Baking Sheet, Oven, Skillet, Mixing Bowl
Smoky BBQ Bat Wings with Ranch Dip
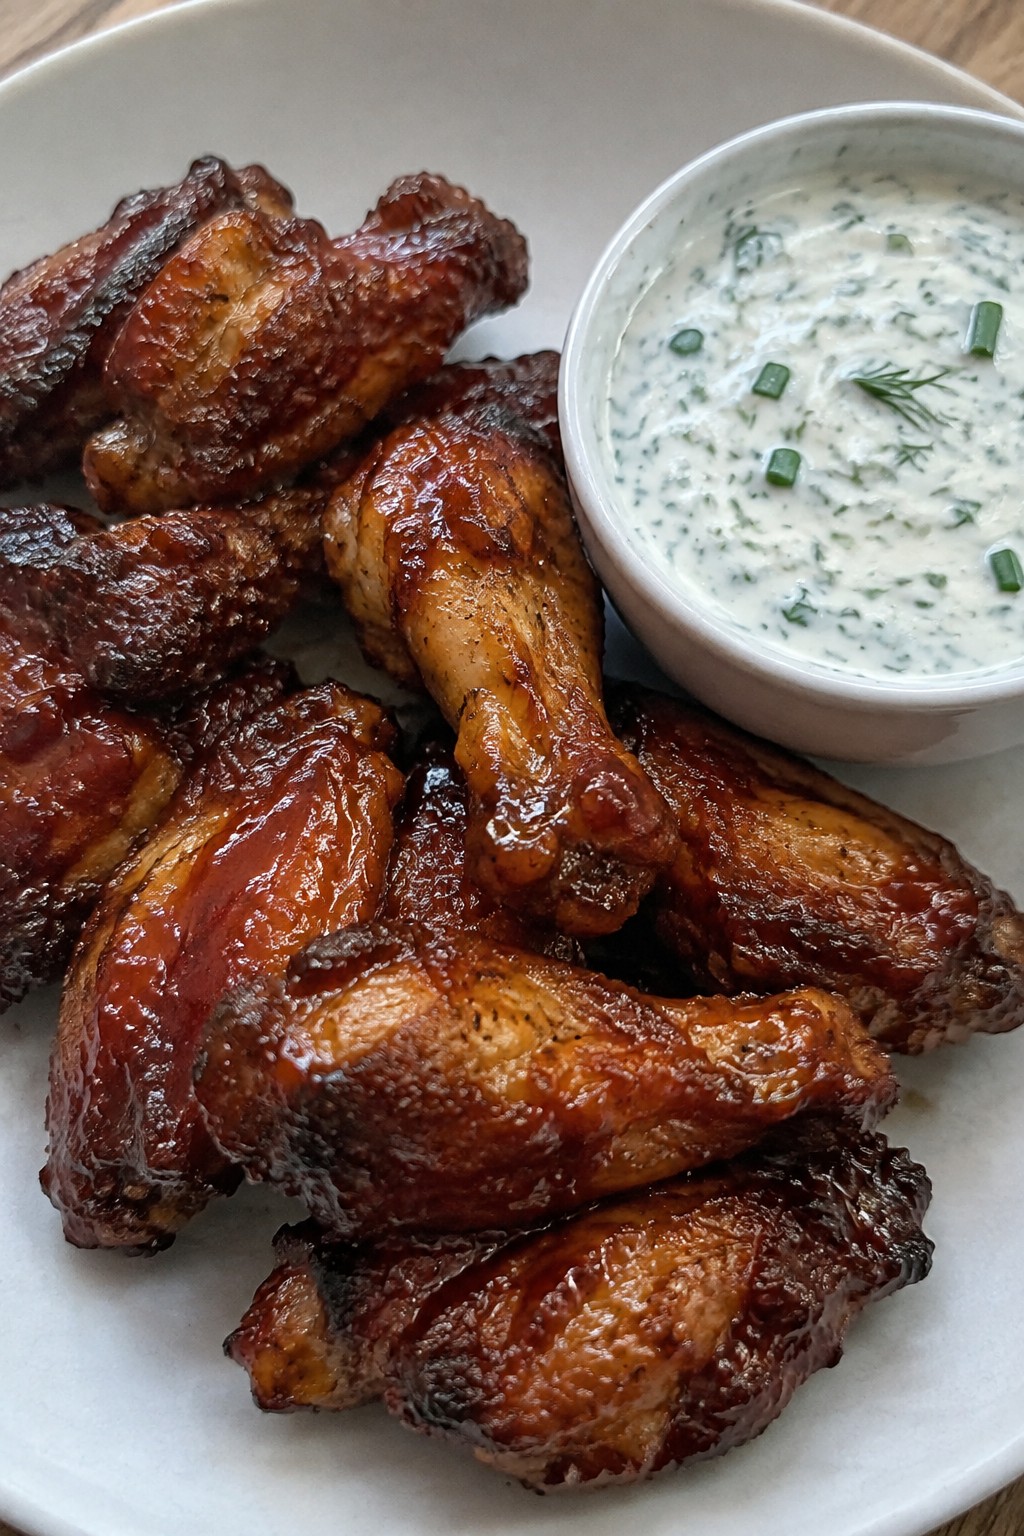
These bat wings give a playful Halloween touch to a classic party snack. Crispy baked chicken wings get coated in smoky barbecue sauce and come with a simple ranch dip for cooling contrast. The result is a savory bite that fits right into any spooky spread.
The wings work well for casual gatherings where guests want something easy to pick up. They deliver a balance of tangy smoke from the sauce and fresh herb flavor from the dip, with a crisp texture that holds up during the party.
Serves 4 people.
Ingredients
- 2 pounds chicken wings
- 2 tablespoons olive oil
- 1 tablespoon smoked paprika
- 1 teaspoon garlic powder
- 1 teaspoon onion powder
- 1 teaspoon salt
- 1/2 teaspoon black pepper
- 3/4 cup smoky BBQ sauce
- 1/2 cup mayonnaise
- 1/2 cup sour cream
- 1/4 cup buttermilk
- 1 tablespoon chopped fresh dill
- 1 tablespoon chopped fresh chives
Instructions
- Preheat the oven to 400 degrees F and line a baking sheet with parchment paper. Pat the chicken wings dry with paper towels.
- In a large bowl, toss the wings with the olive oil, smoked paprika, garlic powder, onion powder, salt, and black pepper until evenly coated.
- Spread the wings in a single layer on the prepared baking sheet. Bake for 40 minutes, turning once halfway through, until the skin is golden and crisp.
- Remove the wings from the oven and transfer them to a clean bowl. Pour the smoky BBQ sauce over the wings and toss to coat completely.
- In a small bowl, stir together the mayonnaise, sour cream, buttermilk, dill, and chives until smooth. Serve the wings warm with the ranch dip on the side.
Extra Tips
Pat the wings very dry before seasoning to help the skin crisp in the oven. If the barbecue sauce is thick, warm it slightly so it coats evenly without clumping. The dip can be made a few hours ahead and kept in the refrigerator to let the herbs soften. Course: Appetizer Cuisine: American Equipment: Baking sheet, Large bowl, Small bowl
Caprese Ghost Skewers with Balsamic Drizzle
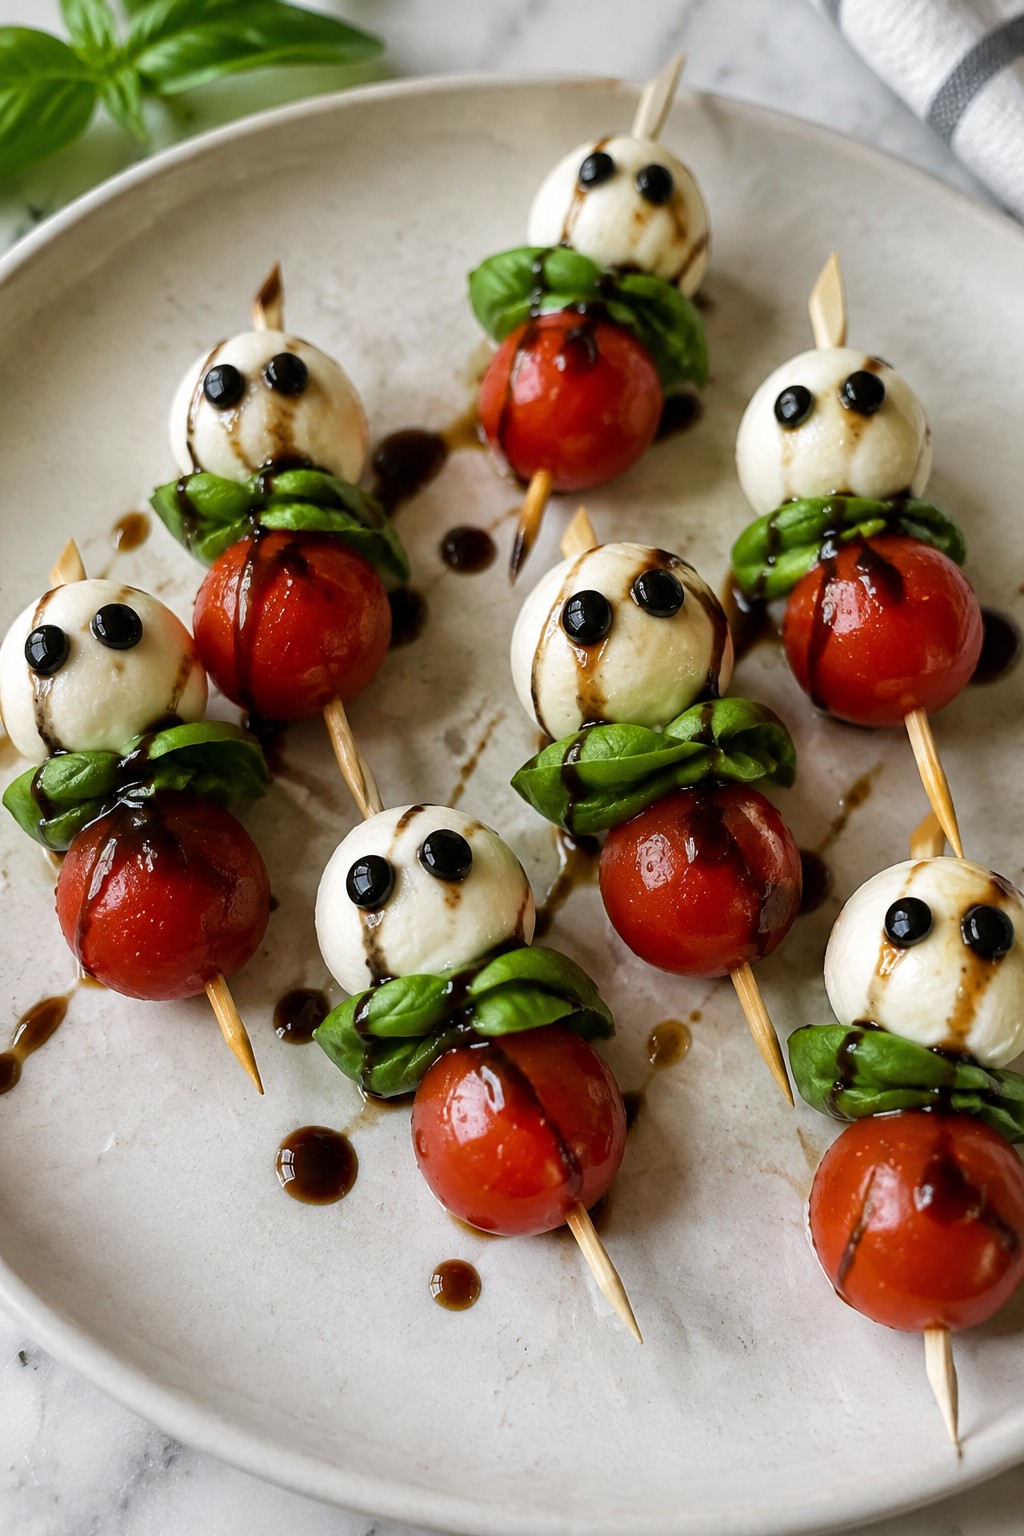
These skewers turn a classic Caprese salad into a playful Halloween snack. Small mozzarella balls stand in as ghosts with simple olive eyes. The result is a fresh bite that balances juicy tomato, creamy cheese, and herbal notes without overpowering the table spread.
They suit appetizer trays at costume parties or casual fall gatherings. The balsamic drizzle adds a sweet-tangy finish that ties the flavors together while keeping the focus on easy assembly.
Serves 4 people.
Ingredients
- 12 cherry tomatoes
- 12 small fresh mozzarella balls
- 1/4 cup sliced black olives
- 12 fresh basil leaves
- 3 tablespoons balsamic glaze
- 12 wooden skewers
Instructions
- Cut the sliced black olives into 24 small pieces to use as eyes.
- Press two olive pieces into each mozzarella ball to create ghost faces.
- Thread one cherry tomato onto each wooden skewer, followed by one basil leaf and one mozzarella ghost.
- Arrange the finished skewers on a serving plate.
- Drizzle the balsamic glaze evenly over the skewers just before serving.
Extra Tips
Assemble the skewers up to two hours ahead and keep them covered in the fridge, then add the balsamic glaze right before guests arrive to avoid sogginess. Use a thick store-bought balsamic glaze so it clings well without running. If fresh basil leaves are large, tear them in half so they fit neatly on the skewer. Course: Appetizer Cuisine: Italian Equipment: Wooden Skewers, Knife
Herb-Crusted Witch Finger Breadsticks
These breadsticks bring a fun shape to any Halloween spread without extra fuss. They work well for parties because they hold up at room temperature and pair easily with dips. The crust carries a savory mix of herbs and cheese while the inside stays soft.
The finger shape comes from simple rolling and a single almond at the tip. Olive oil helps the herbs stick and adds a light crunch after baking.

Serves 4 people.
Ingredients
- 1 pound pizza dough
- 3 tablespoons olive oil, divided
- 2 garlic cloves, minced
- 1 tablespoon chopped fresh rosemary
- 1 tablespoon chopped fresh thyme
- 1 teaspoon dried oregano
- 1/4 cup grated Parmesan cheese
- 12 whole almonds
- 1/2 teaspoon salt
- 1/4 teaspoon black pepper
Instructions
- Heat the oven to 400 degrees and line a baking sheet with parchment paper.
- Divide the pizza dough into 12 equal pieces. Roll each piece into a thin log about 6 inches long to form the finger shape.
- Press one almond into the tip of each log to create the fingernail. Use a knife to make two light indentations for knuckles.
- Stir together 2 tablespoons olive oil, minced garlic, rosemary, thyme, oregano, salt, and pepper in a small bowl.
- Brush the herb oil over each shaped breadstick. Sprinkle Parmesan cheese on top.
- Place the breadsticks on the prepared baking sheet and bake for 12 to 15 minutes until golden.
- Remove from the oven and brush with the remaining tablespoon of olive oil while still warm.
Extra Tips
Let the breadsticks cool for five minutes before moving them so the almonds stay in place. If you want a stronger herb flavor, add an extra pinch of rosemary to the oil before brushing. These taste best the same day but can be rewarmed in a 300-degree oven for three minutes to restore crisp edges. Course: Appetizer Cuisine: American Equipment: Baking Sheet, Mixing Bowl, Pastry Brush
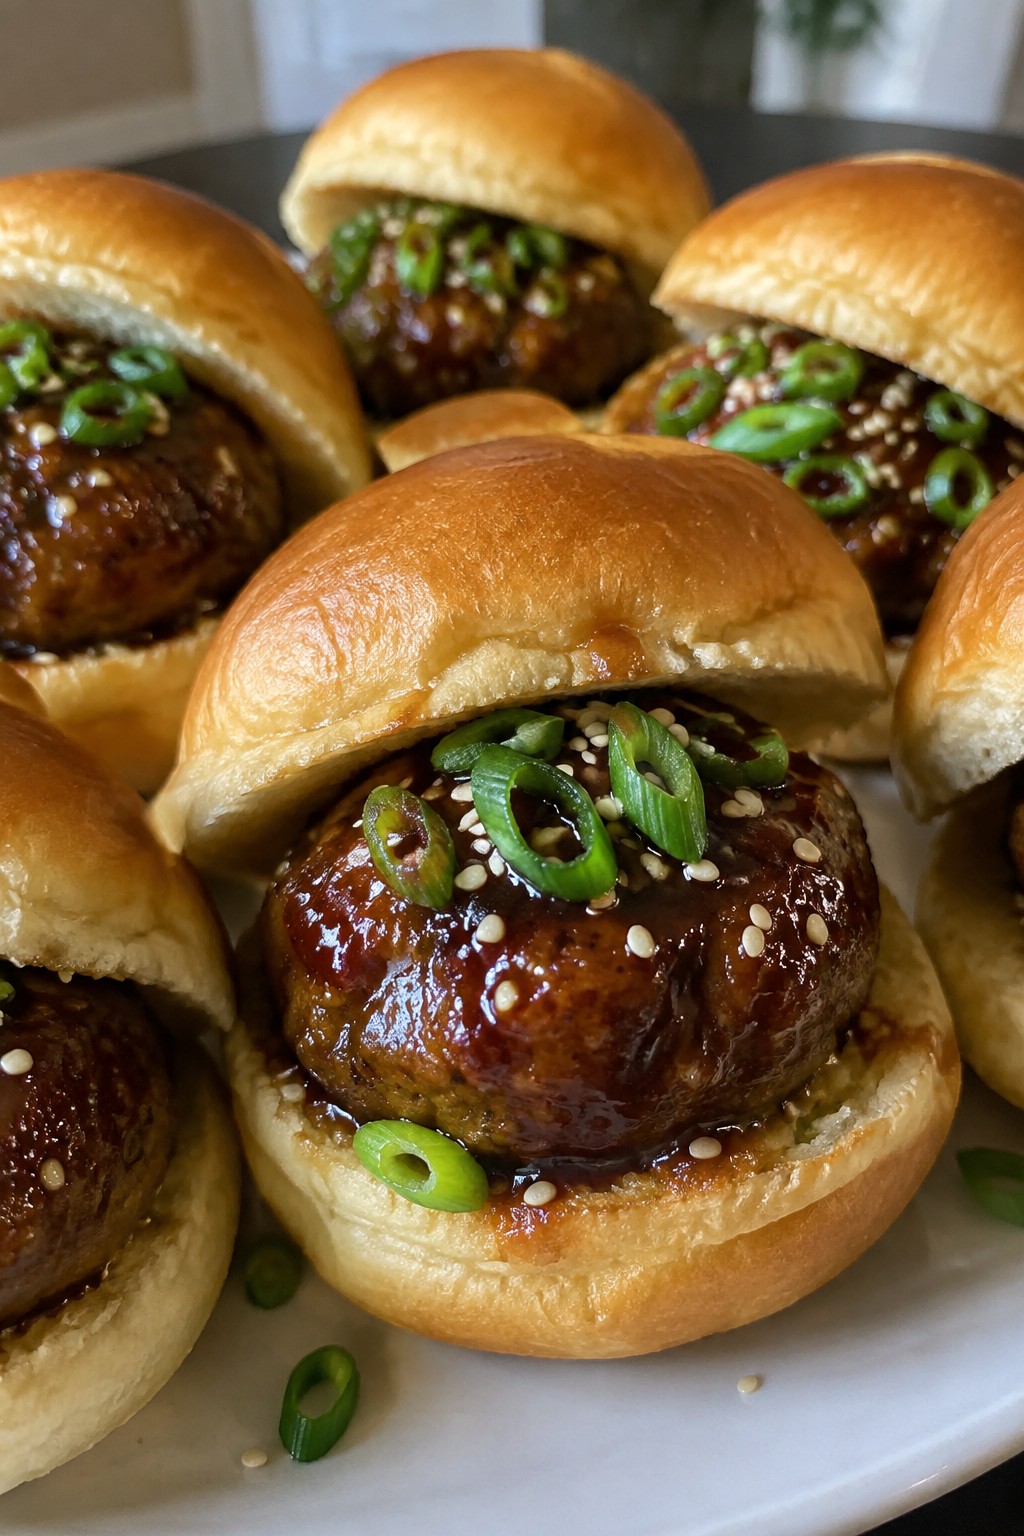
Teriyaki Meatball Sliders on Mini Buns
These sliders bring sweet and savory teriyaki flavors to your party spread. The juicy meatballs pair well with soft mini buns for easy grabbing at gatherings.
They work well for Halloween events because they are bite-sized and simple to serve. The sticky glaze adds shine and bold taste that stands out on a snack table.
Serves 4 people.
Ingredients
- 1 pound ground beef
- 1/4 cup panko breadcrumbs
- 1 large egg
- 1/2 cup teriyaki sauce, divided
- 8 mini slider buns
- 2 tablespoons sliced green onions
- 1 teaspoon sesame seeds
Instructions
- Combine the ground beef, panko breadcrumbs, egg, and 2 tablespoons of the teriyaki sauce in a mixing bowl until evenly mixed.
- Shape the mixture into 8 meatballs of equal size.
- Heat a large skillet over medium heat and cook the meatballs until browned on all sides and cooked through.
- Pour the remaining teriyaki sauce into the skillet and simmer the meatballs for 2 to 3 minutes, turning them to coat evenly.
- Place one meatball into each mini slider bun and sprinkle with sliced green onions and sesame seeds before serving.
Extra Tips
Form the meatballs ahead and store them in the fridge until you are ready to cook. If serving at a party, keep the cooked meatballs warm in a slow cooker on low with a little extra sauce to prevent drying. Course: Appetizer Cuisine: Asian Equipment: Mixing bowl, Large skillet
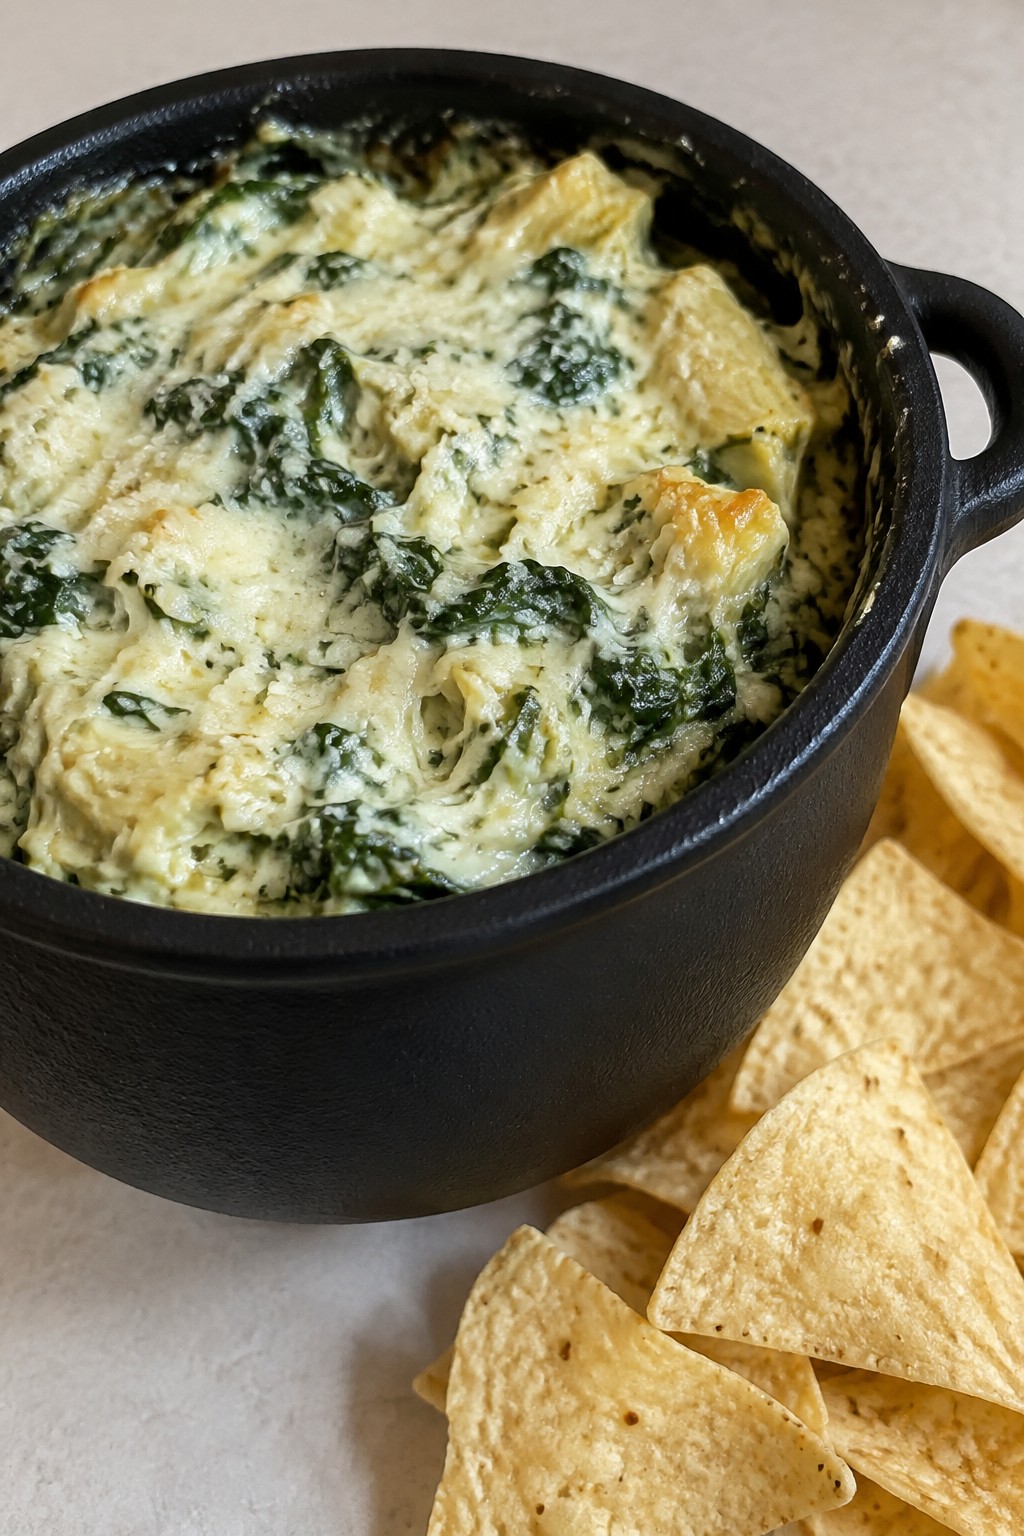
Spinach Artichoke Cauldron Dip with Tortilla Chips
This dip gives guests a warm, cheesy option that fits right into a Halloween party spread. It works well when set out early so people can scoop as they mingle. The flavor stays savory and familiar while the presentation adds a simple seasonal touch.
The dip turns out creamy with soft pieces of spinach and artichoke throughout. It holds its texture when served warm and pairs cleanly with the crunch of tortilla chips.
Serves 4 people.
Ingredients
- 10 ounces frozen spinach, thawed and drained
- 1 (14-ounce) can artichoke hearts, drained and chopped
- 8 ounces cream cheese, softened
- 1/2 cup sour cream
- 1 cup shredded mozzarella cheese
- 1/2 cup grated Parmesan cheese
- 2 garlic cloves, minced
- 1/4 teaspoon salt
- 1/4 teaspoon black pepper
- Tortilla chips, for serving
Instructions
- Heat the oven to 375°F.
- Place the spinach, artichoke hearts, cream cheese, sour cream, mozzarella, Parmesan, garlic, salt, and pepper in a mixing bowl. Stir until the mixture is evenly combined.
- Spoon the mixture into a small oven-safe dish and smooth the top.
- Bake for 20 to 25 minutes until the surface is lightly browned and the center is hot.
- Remove from the oven and serve right away with tortilla chips on the side.
Extra Tips
Choose a round, dark-colored bowl for serving to give the dip a cauldron look without extra tools. The dip can be mixed the day before, covered, and refrigerated, then baked just before guests arrive. If it thickens after cooling, stir in a spoonful of sour cream while it is still warm to loosen the texture again. Course: Appetizer Cuisine: American Equipment: Mixing Bowl, Oven-safe Dish, Oven
Roasted Red Pepper Hummus with Pumpkin-Shaped Veggie Dippers
This hummus brings a smoky flavor from the roasted red peppers and pairs it with crisp veggie dippers cut into pumpkin shapes. It works well for Halloween parties where you want something savory that still feels festive without any sweets.
The texture stays creamy and smooth from the blended chickpeas while the fresh vegetables add a satisfying crunch. Guests can scoop and dip right at the table.

Serves 4 people.
Ingredients
- 1 (15 oz) can chickpeas, drained and rinsed
- 1/2 cup roasted red peppers, drained
- 3 tablespoons tahini
- 2 tablespoons olive oil
- 1 garlic clove, peeled
- 1 lemon, juiced
- 1/2 teaspoon salt
- 1/4 teaspoon cumin
- 3 large carrots
- 1 cucumber
- 1 yellow bell pepper
Instructions
- Add the chickpeas, roasted red peppers, tahini, olive oil, garlic clove, lemon juice, salt, and cumin to a food processor.
- Blend the mixture until it becomes smooth and creamy. Stop to scrape down the sides if needed.
- Transfer the hummus to a serving bowl and set it aside.
- Slice the carrots into rounds about 1/4 inch thick. Use a small pumpkin-shaped cookie cutter to press shapes out of each round.
- Cut the cucumber into sticks and slice the yellow bell pepper into strips that can also be shaped if desired.
- Arrange the pumpkin-shaped carrot pieces along with the cucumber and bell pepper pieces around the bowl of hummus for dipping.
Extra Tips
Make the hummus a day ahead and store it in the fridge so the flavors have time to settle. Use a sharp cookie cutter and press firmly on the carrot slices to keep the pumpkin shapes clean. If the hummus feels too thick after blending, add a teaspoon of water at a time until it reaches the right consistency for dipping. Course: Appetizer Cuisine: Mediterranean Equipment: Food processor, Cutting board, Sharp knife, Small cookie cutter
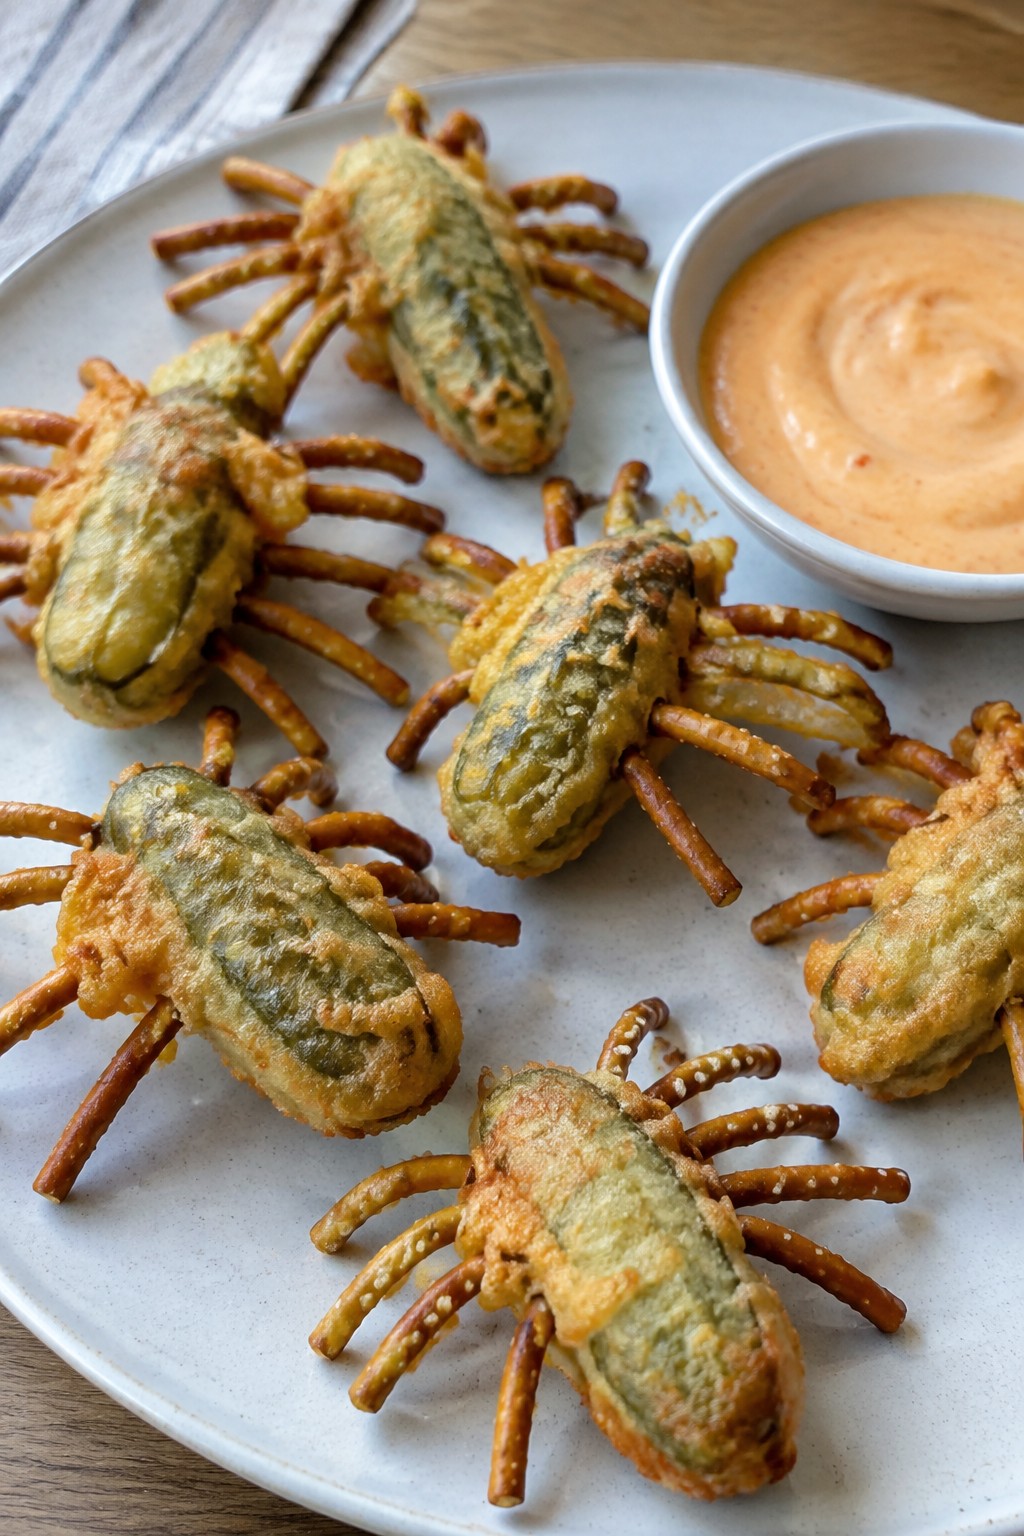
Crispy Fried Pickle Spiders with Sriracha Mayo
These fried pickle spiders bring a fun, crunchy bite to any Halloween spread. The pickles stay tangy inside a light crispy coating while the pretzel legs add extra crunch and a playful shape that guests notice right away. The sriracha mayo on the side gives a creamy, spicy dip that balances the salt and sourness.
They work well as a make-ahead party starter that you can fry in batches and serve warm. The spider design stays simple yet stands out on a platter without extra decoration.
Serves 4 people.
Ingredients
- 8 small whole dill pickles
- 64 thin pretzel sticks
- 1 cup all-purpose flour
- 1 teaspoon baking powder
- 1 teaspoon paprika
- 1/2 teaspoon salt
- 1 cup cold sparkling water
- Vegetable oil for frying
- 1/2 cup mayonnaise
- 3 tablespoons sriracha
Instructions
- Pat the dill pickles dry with paper towels. Insert 8 pretzel sticks into each pickle to form the spider legs, spacing them evenly around the center.
- In a medium bowl, whisk together the flour, baking powder, paprika, and salt. Slowly pour in the sparkling water while stirring until the batter is smooth and slightly thick.
- Heat 2 inches of vegetable oil in a deep pot or fryer to 375°F. Work in batches so the oil temperature stays steady.
- Dip each prepared pickle spider into the batter, letting excess drip off, then lower it carefully into the hot oil. Fry for 2 to 3 minutes until the coating turns golden and crisp.
- Remove the spiders with a slotted spoon and drain on a wire rack or paper towels. Lightly sprinkle with a pinch of salt while hot.
- Stir the mayonnaise and sriracha together in a small bowl until smooth. Serve the warm spiders with the sriracha mayo on the side for dipping.
Extra Tips
Fry the spiders just before guests arrive so the coating stays crisp. If you need to hold them briefly, keep them on a rack in a 200°F oven. Use small, firm pickles so the pretzel legs stay attached during frying. Adjust the sriracha amount in the mayo if you want less heat. Course: Appetizer Cuisine: American Equipment: Deep pot or fryer, Mixing bowls, Wire rack, Slotted spoon
Prosciutto-Wrapped Asparagus Witch Brooms
These prosciutto-wrapped asparagus witch brooms give a simple appetizer a playful Halloween shape. The prosciutto forms the broom bristles around the lower part of each spear while the top stays exposed like a handle. They fit right into a party spread without needing much space or time.
The flavor stays light and savory. Fresh asparagus keeps a slight crunch while the prosciutto adds salt and a crisp edge after baking. They work well as finger food that guests can grab easily.

Serves 4 people.
Ingredients
- 12 asparagus spears, ends trimmed
- 6 slices prosciutto, halved crosswise
- 1 tablespoon olive oil
- 1/2 teaspoon black pepper
Instructions
- Preheat the oven to 400 degrees F and line a baking sheet with parchment paper.
- Wrap the bottom third of each asparagus spear with one halved prosciutto slice so the meat fans out like broom bristles.
- Arrange all wrapped spears on the prepared baking sheet with space between them.
- Drizzle the olive oil over the asparagus and sprinkle evenly with black pepper.
- Bake for 10 to 12 minutes until the asparagus turns tender and the prosciutto edges crisp.
Extra Tips
Wrap the asparagus ahead of time and keep the tray covered in the fridge until you are ready to bake. Use spears of similar thickness so they cook at the same rate. Serve them right off the tray while the prosciutto stays crisp. Course: Appetizer Cuisine: Italian Equipment: Baking Sheet, Oven, Knife
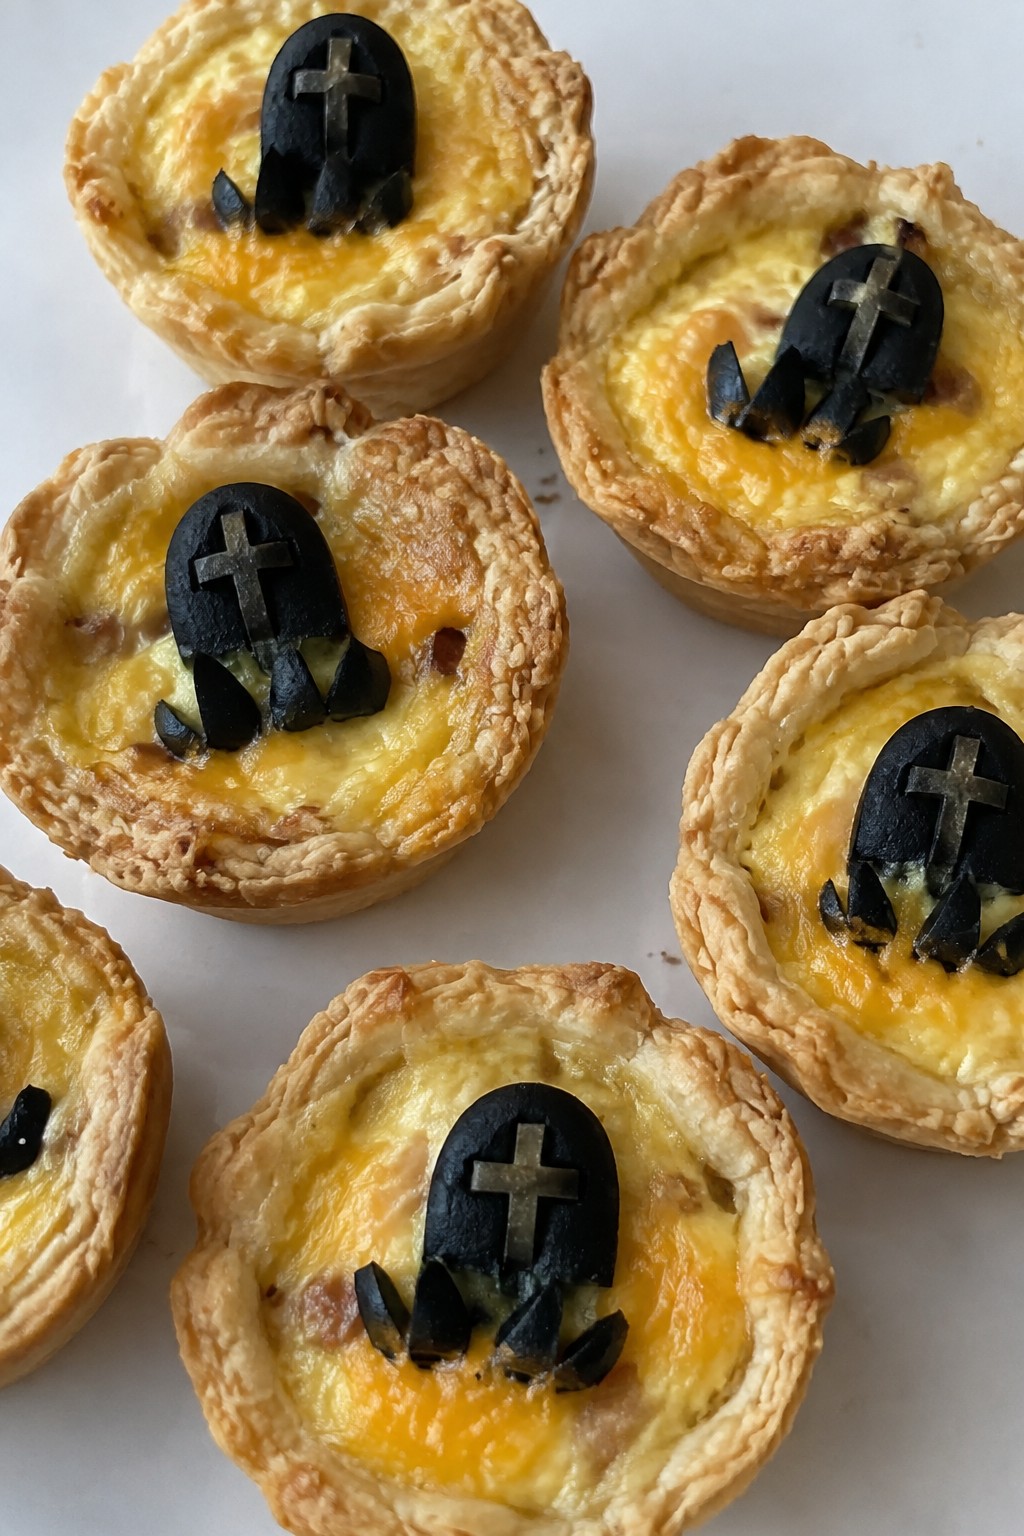
Mini Quiche Bites Topped with Olive Tombstones
These mini quiche bites bring a playful Halloween touch to any party spread. The flaky crust holds a creamy egg filling while sliced black olives form simple tombstone shapes on top. They work well for casual gatherings where guests want something savory without much fuss.
The texture stays light with a golden crust and soft center. The olives add a salty bite that pairs nicely with the mild cheese flavor.
Serves 4 people.
Ingredients
- 1 sheet refrigerated pie crust
- 4 large eggs
- 1/2 cup milk
- 1 cup shredded cheddar cheese
- 1/2 teaspoon salt
- 1/4 teaspoon black pepper
- 8 pitted black olives
Instructions
- Preheat the oven to 375 degrees and lightly grease a mini muffin tin.
- Roll out the pie crust on a lightly floured surface and cut out 12 small circles using a round cutter or glass rim. Press each circle into the muffin cups.
- In a mixing bowl, whisk together the eggs, milk, salt, and black pepper until smooth. Stir in the shredded cheddar cheese.
- Spoon the egg mixture evenly into each crust-lined cup, filling them about three-quarters full.
- Bake for 18 to 20 minutes until the centers are set and the edges turn golden.
- While the quiches cool slightly, slice each black olive lengthwise into tombstone shapes. Place one slice on top of each quiche bite before serving.
Extra Tips
Cut the olives into rectangles with a small notch at the top to create a clearer tombstone look. These bites taste best warm but can be made a few hours ahead and reheated briefly in the oven to restore crisp crust edges. Course: Appetizer Cuisine: American Equipment: Mini Muffin Tin, Mixing Bowl, Whisk, Oven
Buffalo Cauliflower Skulls with Blue Cheese Drizzle
These buffalo cauliflower skulls add a spicy, crispy bite to any Halloween party table. The roasted florets pick up bold buffalo flavor while staying tender inside, and the cool blue cheese drizzle balances the heat without overpowering it. They fit well as a make-ahead snack that guests can grab easily while mingling.
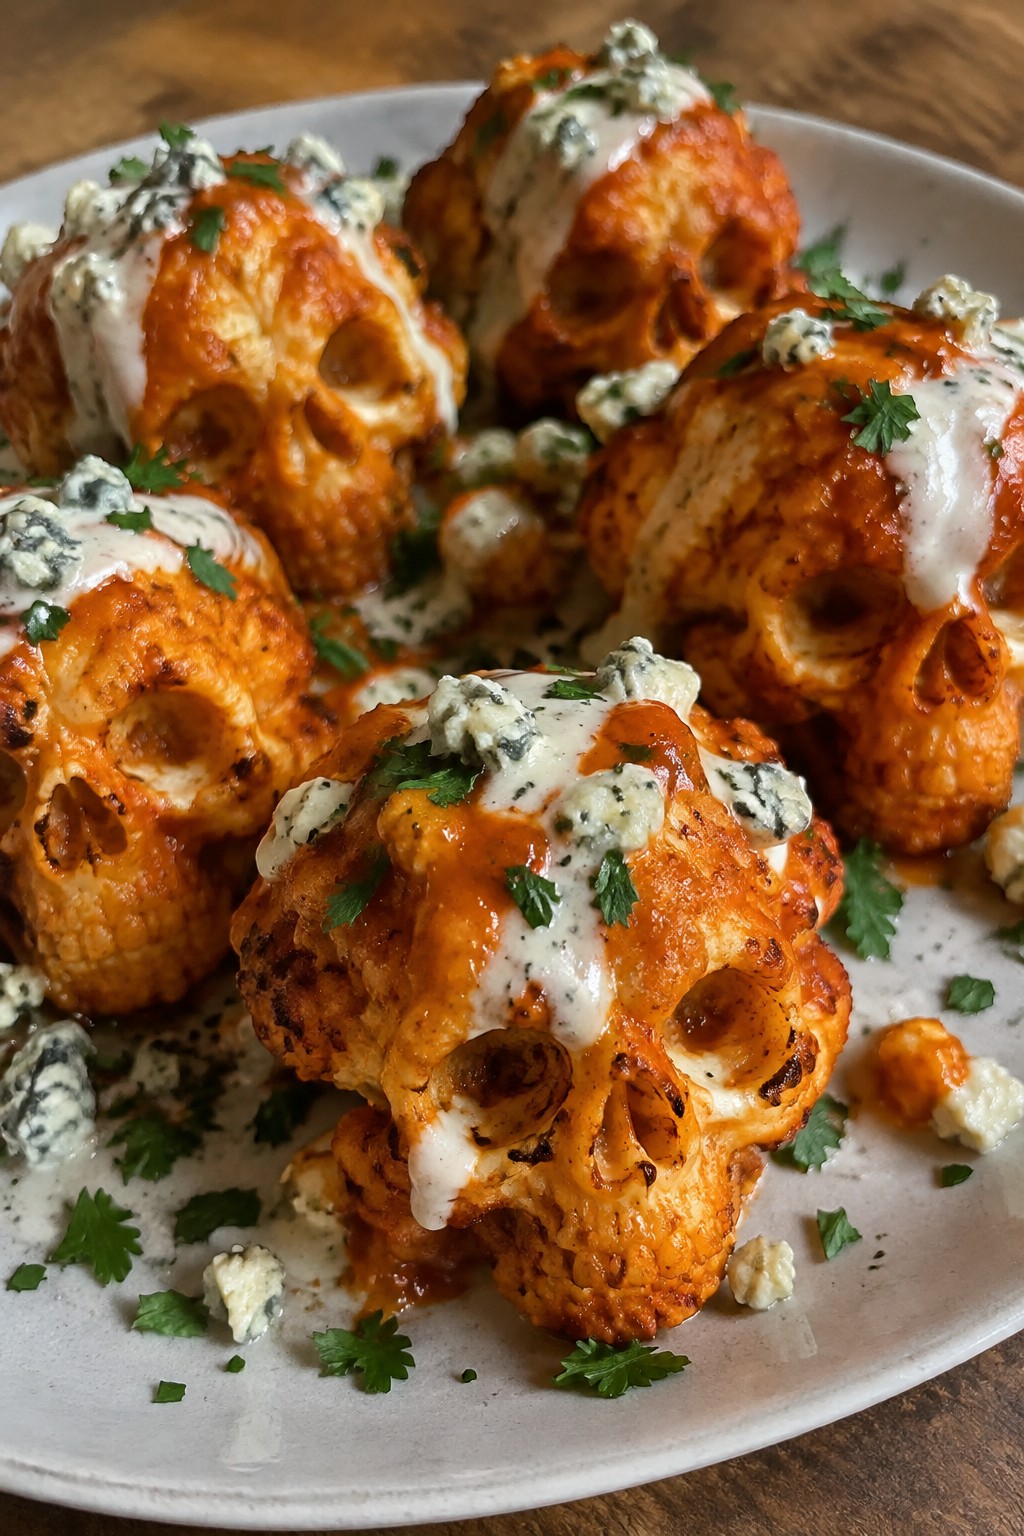
Serves 4 people.
Ingredients
- 1 large head cauliflower, cut into florets
- 2 tablespoons olive oil
- 1/2 teaspoon garlic powder
- 1/2 teaspoon salt
- 1/2 cup buffalo sauce
- 2 tablespoons butter, melted
- 1/2 cup blue cheese crumbles
- 1/4 cup heavy cream
- 1 tablespoon chopped parsley
Instructions
- Preheat the oven to 425°F. In a large bowl, toss the cauliflower florets with olive oil, garlic powder, and salt until evenly coated.
- Spread the florets in a single layer on a baking sheet. Roast for 20 minutes, turning once halfway through, until the edges turn golden and crisp.
- Stir the buffalo sauce and melted butter together in a bowl. Remove the cauliflower from the oven, pour the sauce over the florets, and toss gently to coat. Return to the oven for 5 more minutes.
- While the cauliflower finishes roasting, whisk the blue cheese crumbles and heavy cream in a small bowl until mostly smooth with some small chunks remaining.
- Transfer the cauliflower to a serving plate. Drizzle the blue cheese mixture over the top and finish with chopped parsley.
Extra Tips
Roast the cauliflower in a single layer so it stays crisp instead of steaming. If the blue cheese drizzle thickens too much while sitting, add a splash more cream and stir again before serving. Leftovers reheat best in a 350°F oven for a few minutes to restore texture rather than the microwave. Course: Appetizer Cuisine: American Equipment: Baking sheet, Large bowl, Small bowl, Whisk
Smoked Salmon Eyeball Canapés on Cucumber Rounds
These canapés bring a simple yet striking touch to a Halloween spread. The cool cucumber base pairs with rich smoked salmon and a creamy topping, while the caper center gives each piece an easy eyeball shape. They work well for parties because they require no cooking and can be assembled quickly before guests arrive.
The flavor stays light and savory with a hint of citrus. The texture combines crisp cucumber with smooth cream cheese and tender salmon. This keeps the focus on fresh ingredients that feel festive without extra fuss.
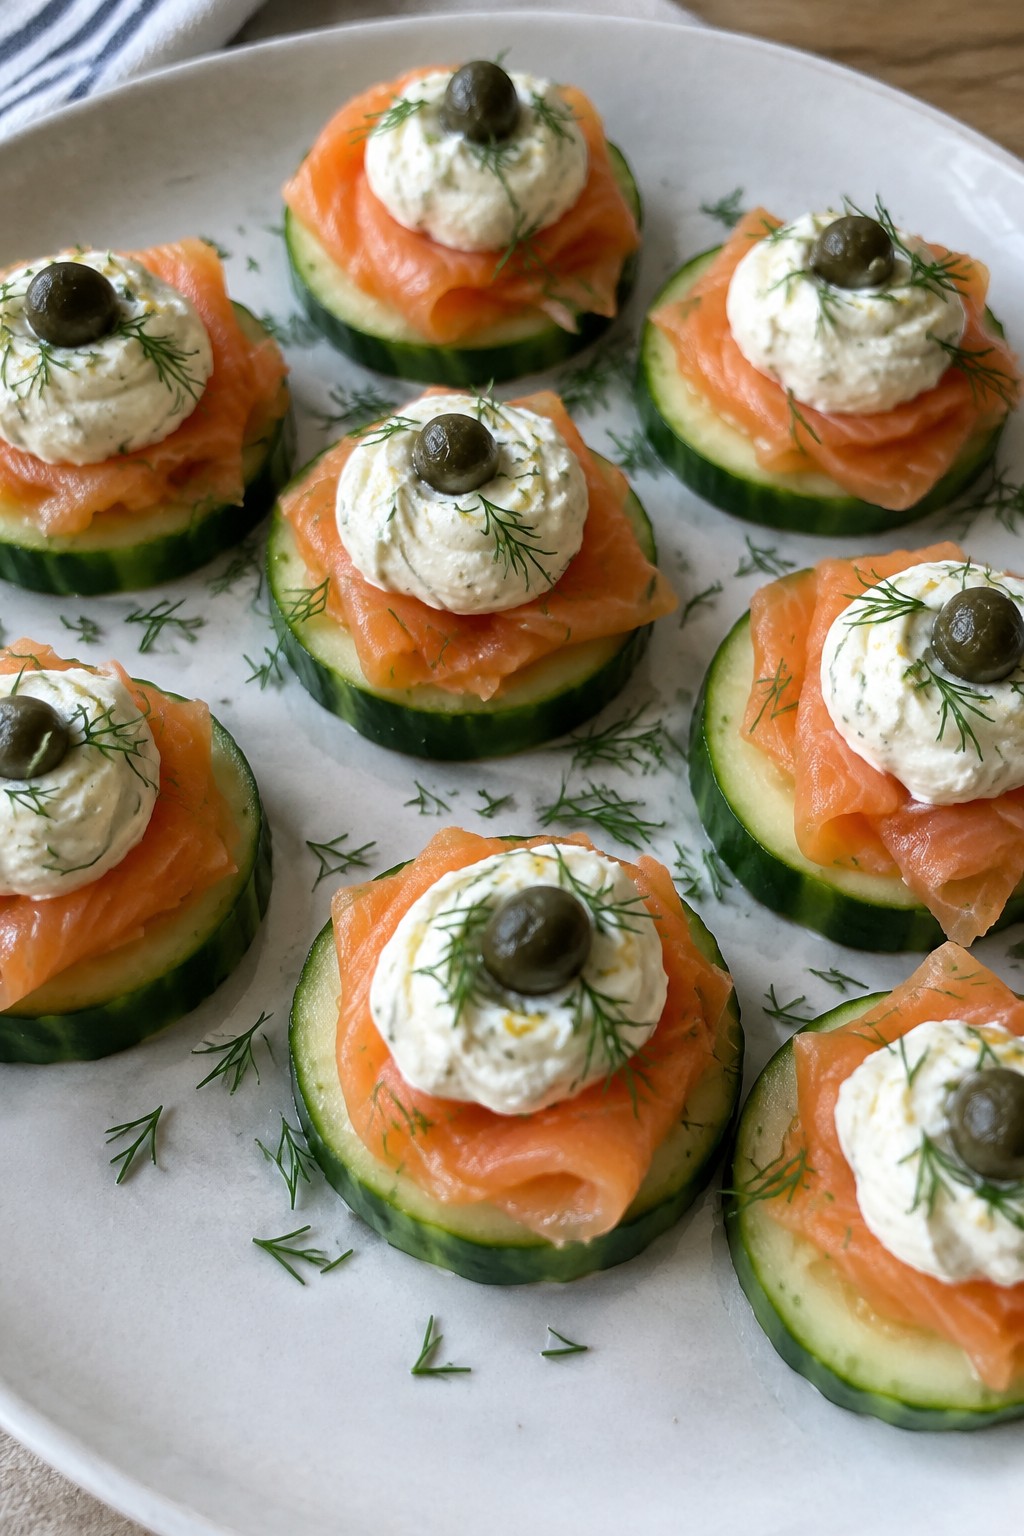
Serves 4 people.
Ingredients
- 1 large English cucumber
- 6 ounces smoked salmon
- 4 ounces cream cheese, softened
- 1 tablespoon lemon juice
- 12 capers
- 2 tablespoons fresh dill, chopped
Instructions
- Slice the cucumber into 12 even rounds and pat them dry with a paper towel. Place the rounds on a serving tray.
- Mix the cream cheese with the lemon juice in a small bowl until smooth. Spread a thin layer of the mixture on each cucumber round.
- Cut the smoked salmon into 12 small pieces sized to fit the cucumber rounds. Lay one piece of salmon over the cream cheese on each round.
- Place one caper in the center of the salmon on each canapé to form the pupil. Sprinkle the chopped dill lightly around the capers for added color.
Extra Tips
Prepare the cucumber slices and cream cheese mixture up to two hours ahead, then assemble just before serving to keep the base crisp. If you need a dairy-free option, swap the cream cheese for a thick cashew spread while keeping the lemon juice for brightness. Avoid storing assembled canapés longer than a few hours, as the cucumber releases moisture. Course: Appetizer Cuisine: American Equipment: Mixing bowl, Knife, Serving tray
Loaded Potato Skin Jack-o’-Lanterns with Sour Cream Filling
These potato skins bring a fun Halloween twist to a classic party snack. The skins get carved with simple faces before the final bake, turning each one into a mini jack-o’-lantern. They deliver crispy edges, melted cheese, and a cool sour cream filling that balances the savory toppings.
This version works well for a buffet table or as a make-ahead starter for a small gathering. The texture stays crisp on the outside while the filling stays creamy inside.

Serves 4 people.
Ingredients
- 4 medium russet potatoes
- 2 tablespoons olive oil
- 1/2 teaspoon salt
- 1/2 teaspoon black pepper
- 1 cup shredded cheddar cheese
- 6 slices bacon, cooked and crumbled
- 3/4 cup sour cream
- 2 green onions, sliced
Instructions
- Heat the oven to 400°F. Scrub the potatoes clean, rub them with 1 tablespoon of olive oil, and sprinkle with salt. Place them on a baking sheet and bake for 45 minutes until tender.
- Let the potatoes cool slightly, then cut each one in half lengthwise. Scoop out most of the flesh, leaving a 1/4-inch shell. Reserve the scooped potato for another use.
- Brush the inside and outside of each skin with the remaining tablespoon of olive oil and season with pepper. Use a small sharp knife to carve simple jack-o’-lantern faces into the skin side of each half.
- Return the skins to the baking sheet, face side up, and bake for 10 minutes to crisp.
- Remove the sheet from the oven. Fill each skin with shredded cheddar cheese and crumbled bacon. Bake for another 5 minutes until the cheese melts.
- Let the skins cool for 2 minutes, then spoon sour cream into each one. Sprinkle with sliced green onions before serving.
Extra Tips
Carve the faces right after scooping so the skins hold their shape during the second bake. If you want less bacon flavor, cut the amount in half and add an extra tablespoon of green onion. These taste best served within an hour of filling so the sour cream stays cold against the warm skins. Course: Appetizer Cuisine: American Equipment: Baking sheet, Oven, Sharp knife, Spoon, Mixing bowl
