
Halloween parties with kids need snacks that are simple to put together. These appetizers focus on safe ingredients and easy steps that work for busy days. You can make most of them with items already in your kitchen. Each one aims to look fun while keeping things practical for little hands. Here are 12 ideas to use this year.
Helpful Tips Before You Start
These quick checks will help your Halloween appetizers stay fun while reducing common risks for kids.
Cut Items Into Small Pieces
Slice fruits, cheese, and veggies into bite-sized portions. Small pieces lower choking risks for younger children.
Skip Hard or Round Foods
Avoid whole grapes, nuts, or popcorn. These items can be hard to chew and pose safety issues.
Use Cookie Cutters for Shapes
Press cutters into bread, cheese, or melon slices. Simple shapes make the food more appealing without extra effort.
Check for Allergens
Label any appetizers that contain common triggers like dairy or gluten. Clear labels help parents serve safely.
Cool Everything Before Serving
Let hot items reach room temperature first. This prevents burns when kids grab food quickly.
Ghostly Cheese and Cracker Bites
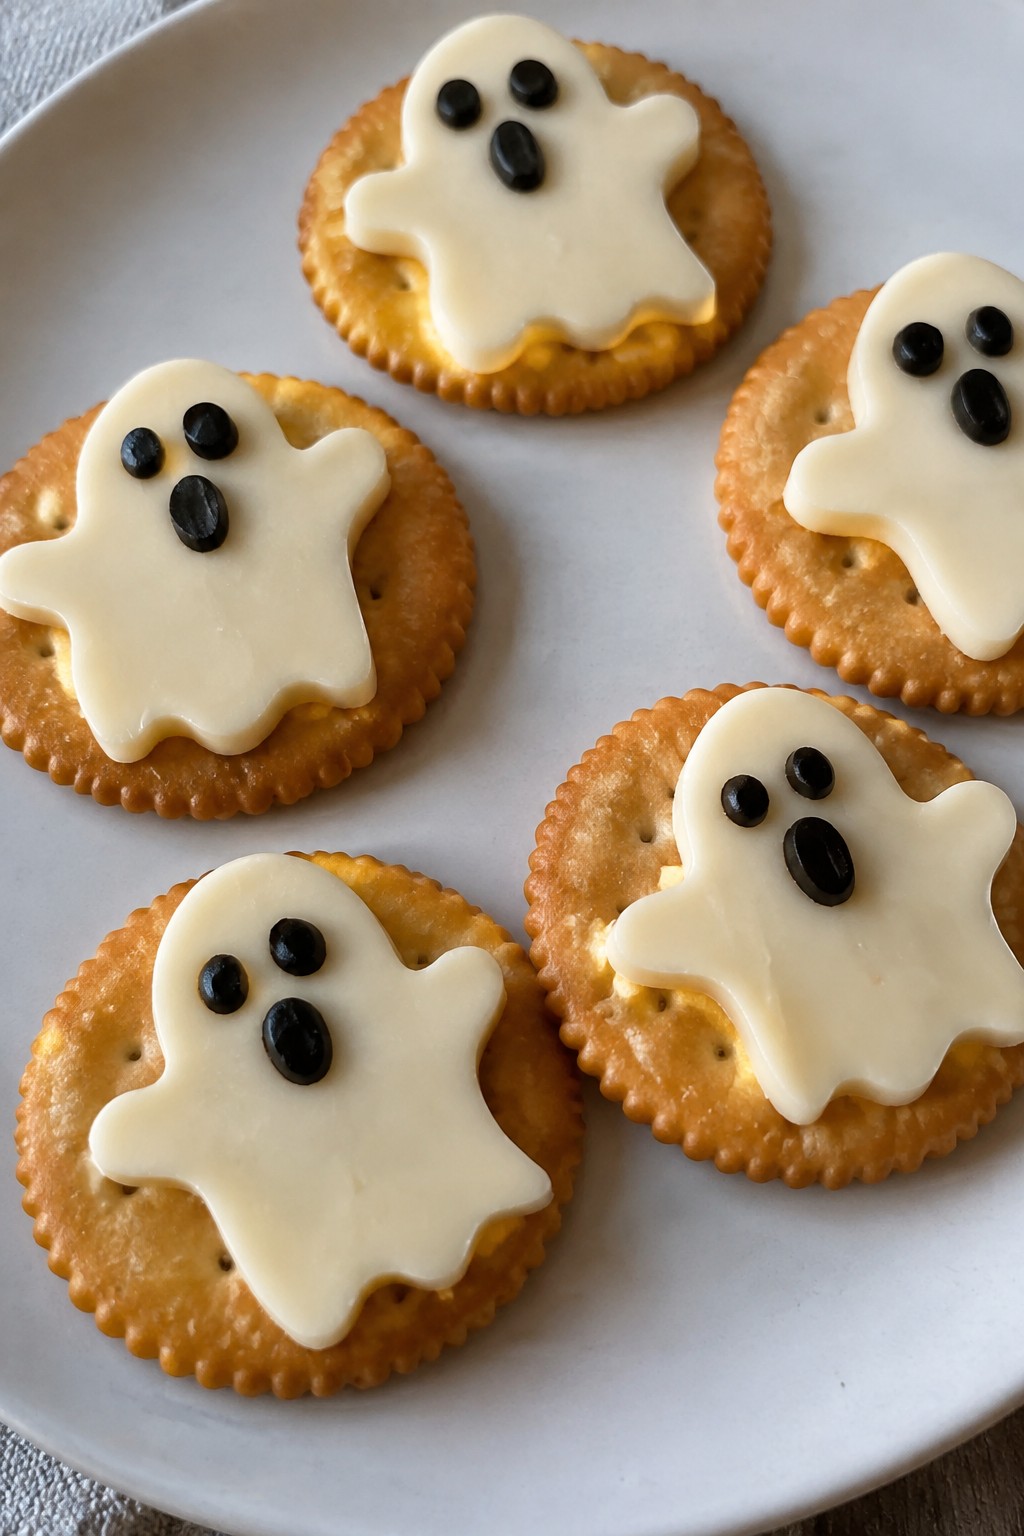
These Ghostly Cheese and Cracker Bites turn basic crackers and cheese into a light Halloween snack. Kids like spotting the ghost shapes and adding the faces themselves. The result is a mild, creamy bite with a crisp base that feels festive without extra effort.
They suit after-school snacks, class parties, or quick pre-trick-or-treat nibbles. White cheese keeps the ghost look clear while the olives add just enough contrast for the faces.
Serves 4 people.
Ingredients
- 16 round crackers
- 8 slices white cheddar cheese
- 4 pitted black olives
Instructions
- Lay the crackers out on a clean work surface.
- Press a small ghost-shaped cookie cutter into each cheese slice to cut out 16 ghost shapes.
- Set one cheese ghost on top of each cracker.
- Slice the black olives into small rounds, then cut those rounds into tiny pieces.
- Place two olive pieces on each cheese ghost as eyes and one smaller piece as a mouth.
Extra Tips
Cut the cheese ghosts a few hours ahead and store them in a covered container in the fridge so assembly stays quick. If you run out of olives, use a single drop of dark food coloring on a toothpick to mark the faces instead. Keep the finished bites at room temperature no longer than two hours before serving. Course: Appetizer Cuisine: American Equipment: Ghost-shaped cookie cutter, Knife, Serving plate
Mummy-Wrapped Mini Hot Dogs
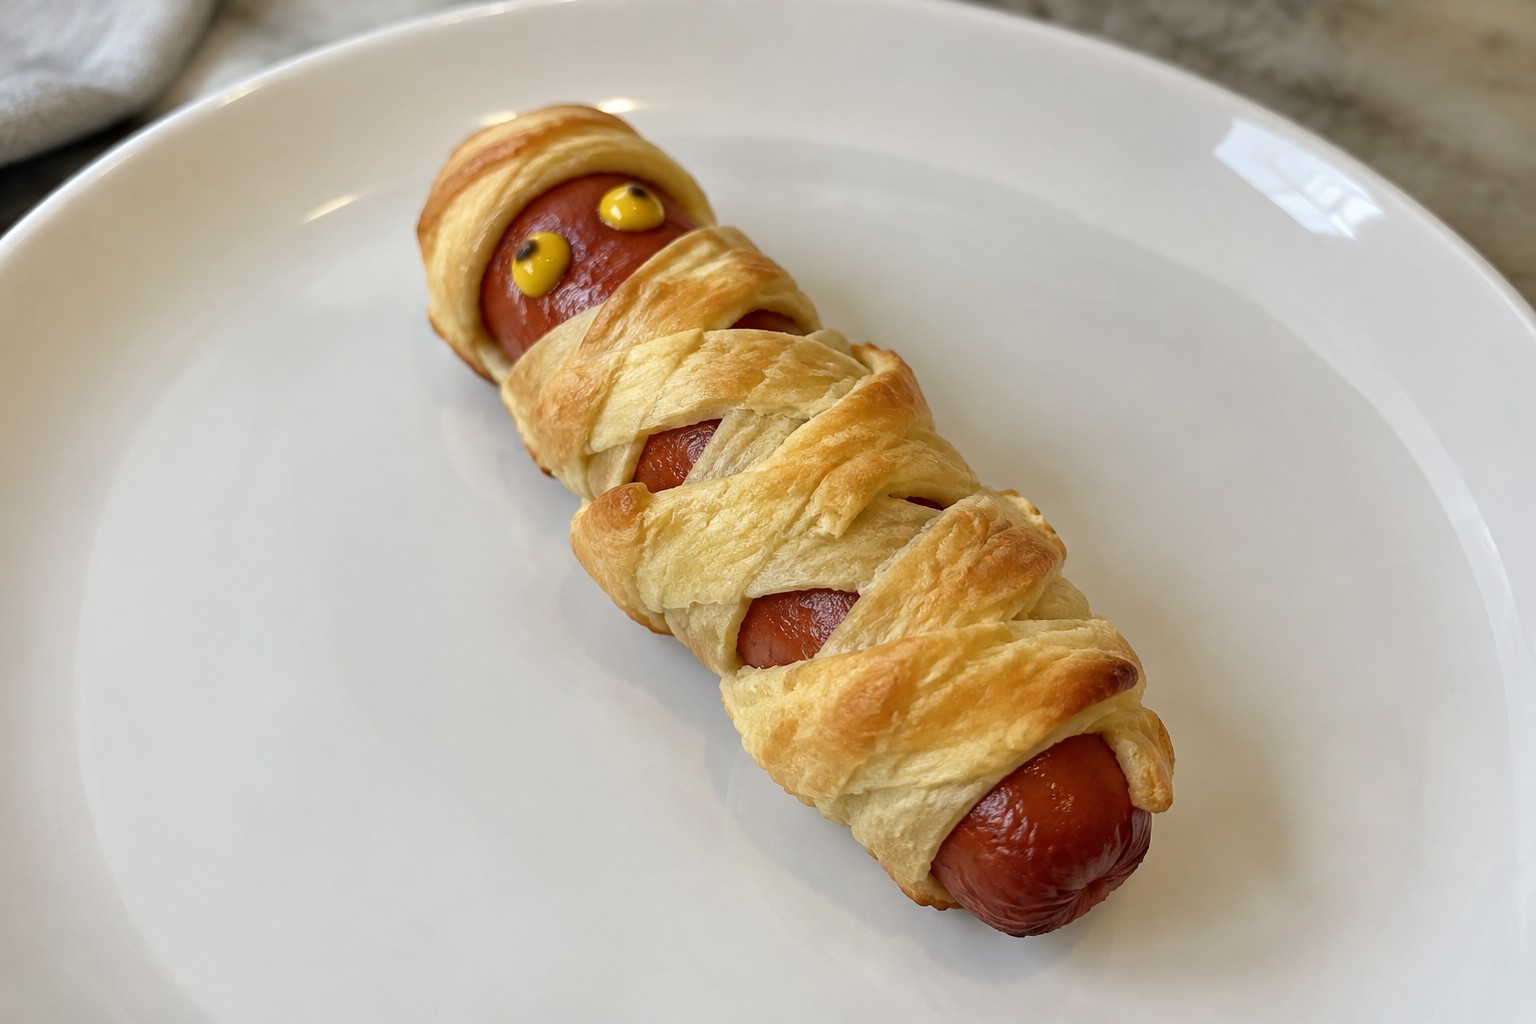
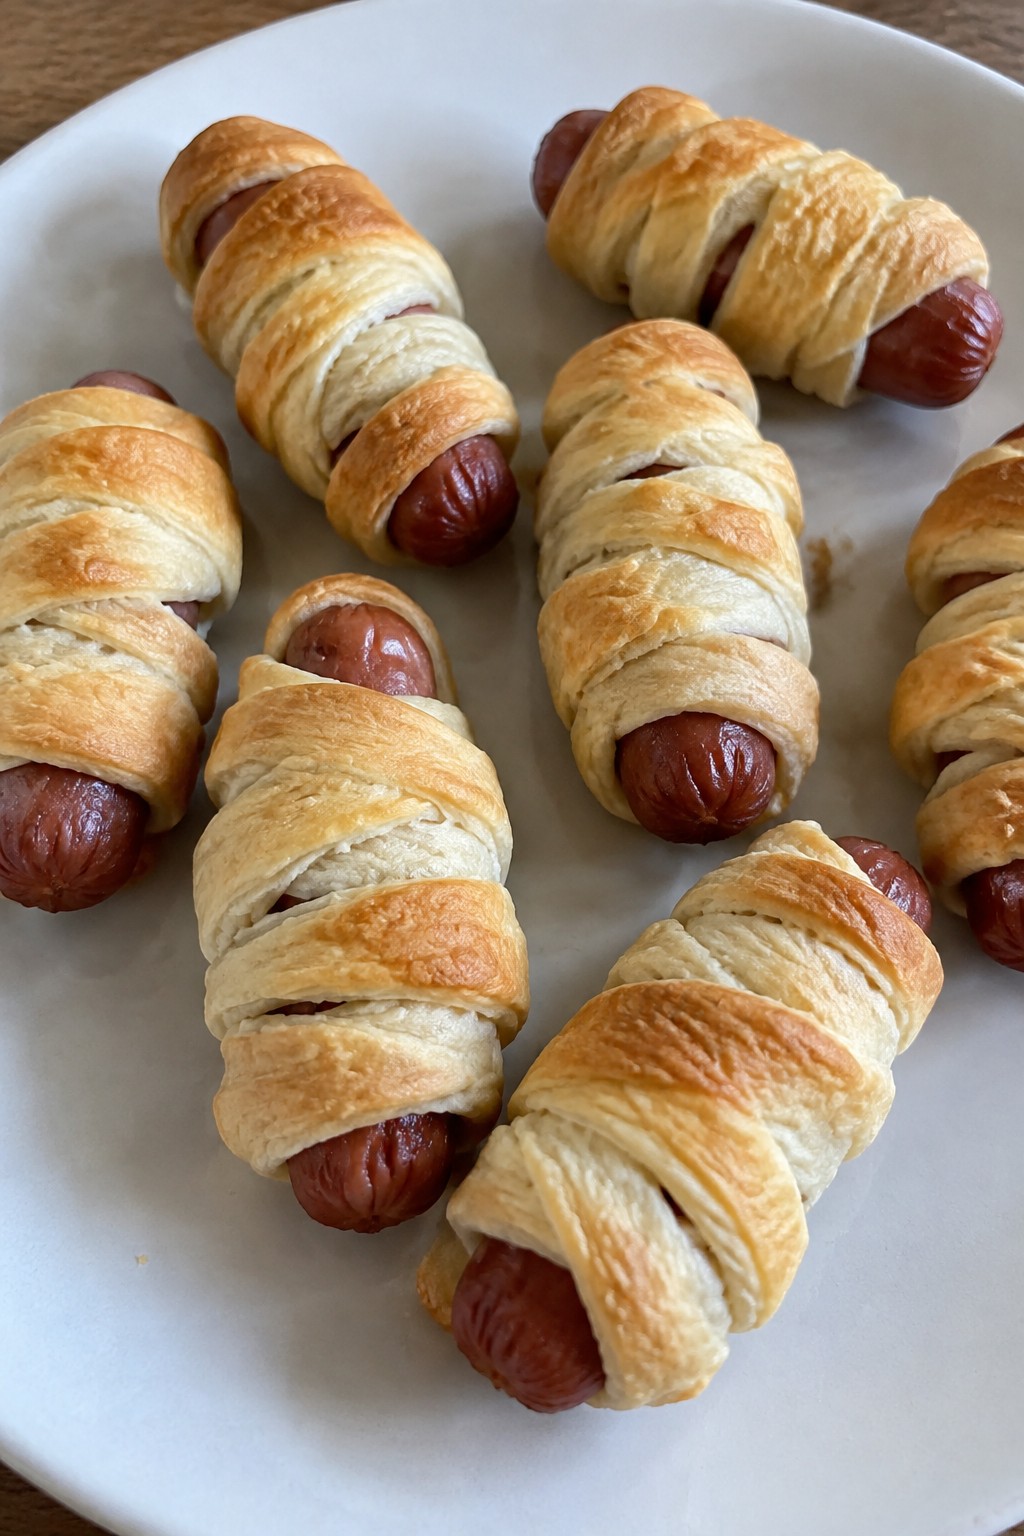
These mummy-wrapped mini hot dogs add a lighthearted touch to Halloween gatherings. Strips of dough wrap around each small hot dog to create a simple bandage look. The result offers a flaky outer layer with a warm, savory bite inside that most kids recognize and enjoy.
The recipe suits after-school snacks or party trays when you want something quick and familiar. It stays mild in flavor and easy to handle for small hands.
Serves 4 people.
Ingredients
- 12 mini hot dogs
- 1 can (8 ounces) crescent roll dough
- Yellow mustard
Instructions
- Preheat the oven to 375 degrees F. Unroll the crescent roll dough on a clean surface.
- Cut the dough into thin strips about half an inch wide.
- Wrap each strip around a mini hot dog, leaving a small open space near one end for the face. Overlap the strips slightly as you go.
- Place the wrapped hot dogs on a baking sheet with the seam side down.
- Bake for 12 to 15 minutes until the dough turns golden brown.
- Remove from the oven and let them cool for two minutes. Use a small amount of yellow mustard to draw two eyes in the open space on each hot dog.
Extra Tips
Cut the dough strips as evenly as possible so the wraps bake at the same rate and look tidy. Add the mustard eyes only after a short cooling period to keep the lines from spreading. Leftovers reheat well in a 300 degree F oven for five minutes to restore crispness. Course: Appetizer Cuisine: American Equipment: Baking sheet, Oven, Knife
Jack-o’-Lantern Veggie Cups
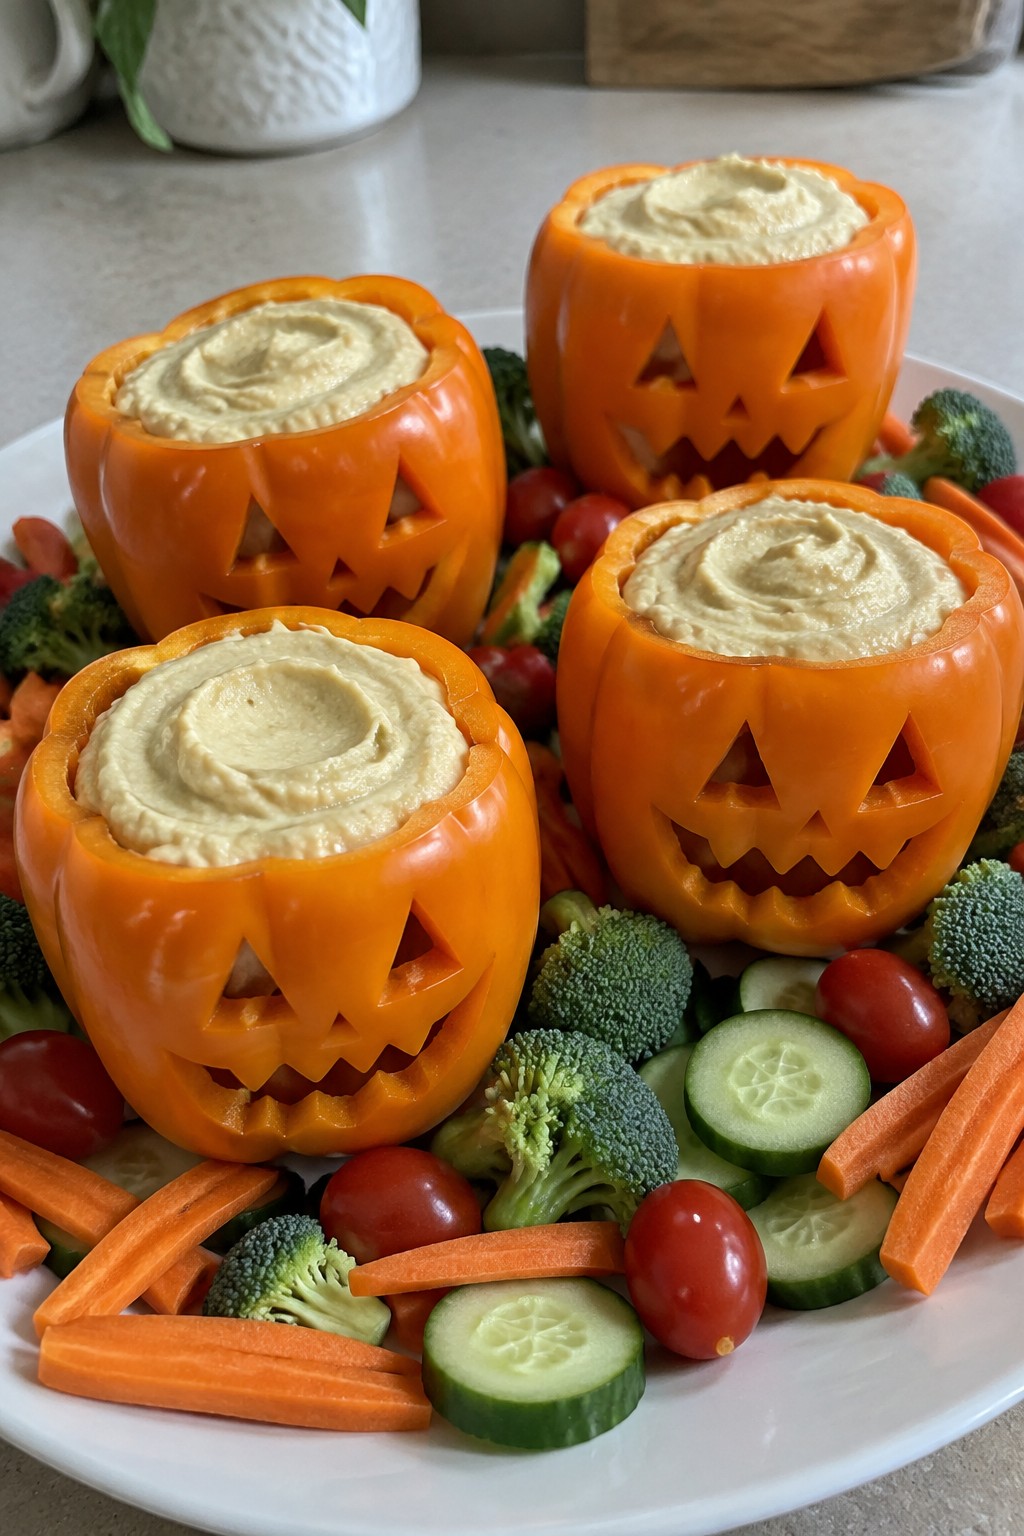
These Jack-o’-Lantern Veggie Cups turn bell peppers into simple Halloween shapes that kids can recognize right away. They work well at parties because the peppers act as both the container and the fun element without any extra decorations.
The cups hold a mild hummus base with crisp vegetables for dipping. This combination gives a fresh crunch paired with a creamy texture that most children accept without hesitation.
Serves 4 people.
Ingredients
- 4 orange bell peppers
- 1 cup hummus
- 2 large carrots, cut into thin sticks
- 1 cucumber, cut into rounds
- 8 cherry tomatoes
- 1 cup broccoli florets
Instructions
- Slice the tops off each orange bell pepper and scoop out the seeds and membranes with a spoon.
- Use a small knife to cut simple jack-o’-lantern faces into the front of each pepper.
- Spoon about 1/4 cup of hummus into the bottom of each carved pepper.
- Place the carrot sticks, cucumber rounds, cherry tomatoes, and broccoli florets on a platter around the filled peppers so kids can dip them into the hummus.
Extra Tips
Cut the faces with basic shapes like triangles and circles so the pepper walls stay sturdy. Keep the cut vegetables in cold water until serving time to maintain their crunch. If a child dislikes broccoli, swap it for extra cucumber rounds without changing the rest of the recipe. Course: Appetizer Cuisine: American Equipment: Sharp knife, Cutting board, Spoon
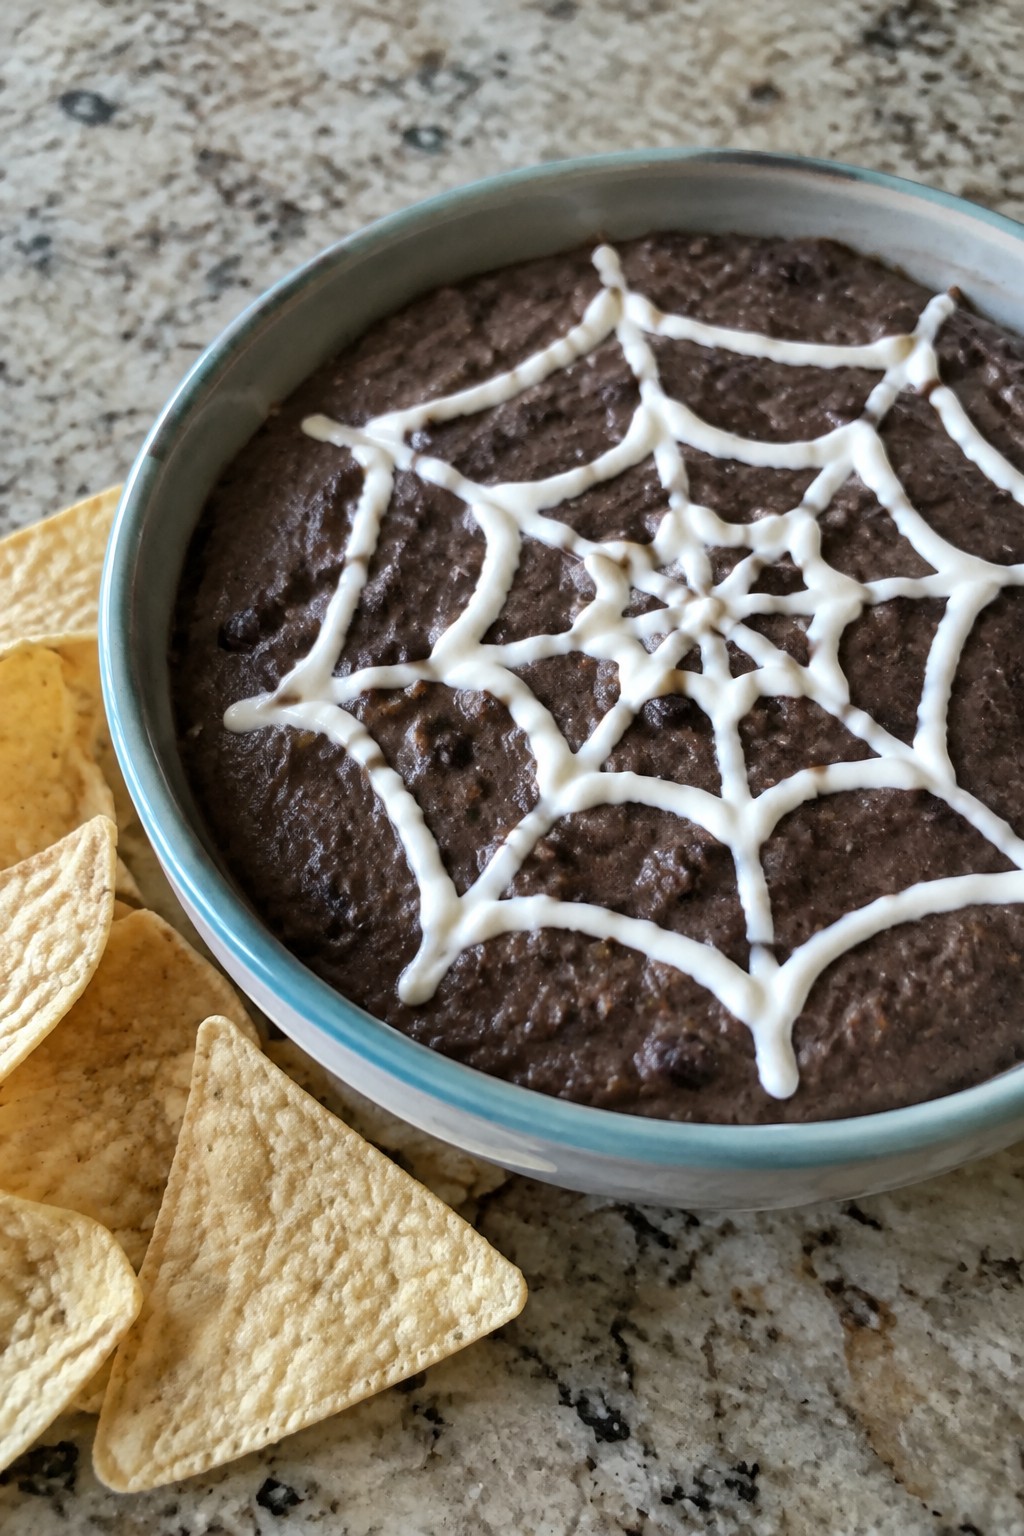
Spiderweb Black Bean Dip with Tortilla Chips
This black bean dip gets a kid-friendly Halloween twist with a simple sour cream spiderweb on top. It works well for classroom parties or family gatherings because it stays mild and creamy while the tortilla chips add crunch.
The dip blends soft beans with gentle spices for easy eating. Kids can help drizzle the web design before serving.
Serves 4 people.
Ingredients
- 2 cans (15 oz each) black beans, drained and rinsed
- 1 tablespoon olive oil
- 1 small onion, finely chopped
- 2 cloves garlic, minced
- 1 teaspoon ground cumin
- 1/2 teaspoon salt
- 2 tablespoons lime juice
- 1/4 cup sour cream
- Tortilla chips, for serving
Instructions
- Heat the olive oil in a skillet over medium heat. Add the onion and cook for 3 minutes until soft.
- Stir in the garlic and cook for 1 more minute.
- Add the black beans, cumin, and salt to the skillet. Cook for 5 minutes, stirring often.
- Remove from heat and mash the mixture with a fork or potato masher until mostly smooth.
- Stir in the lime juice, then transfer the dip to a serving bowl.
- Place the sour cream in a small zip-top bag and snip off one corner. Pipe four circles on top of the dip, starting from the center and working outward.
- Drag a toothpick from the center through each circle to form the spiderweb pattern.
- Serve with tortilla chips on the side.
Extra Tips
Make the spiderweb right before serving so the sour cream stays bright white against the dark dip. If the beans seem too thick after mashing, add a splash of water to loosen them. Leftovers keep in the fridge for two days and reheat gently on the stove with a little extra lime juice stirred in. Course: Appetizer Cuisine: Mexican Equipment: Skillet, Fork or Potato Masher, Zip-top Bag, Serving Bowl
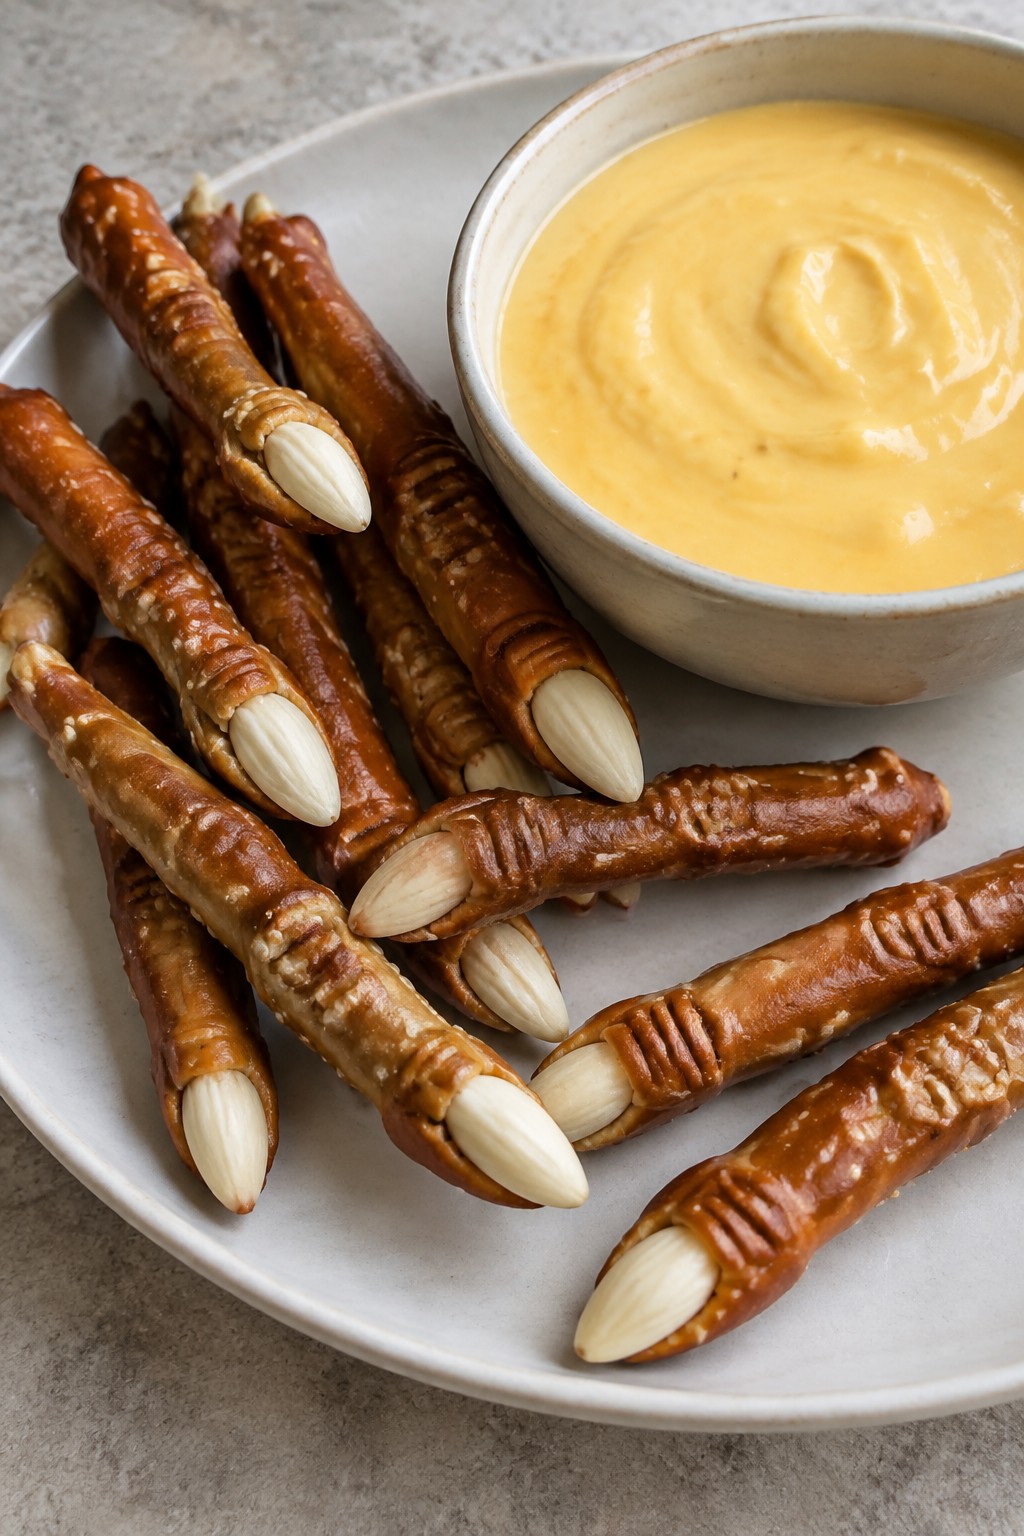
Witch Finger Pretzel Rods with Cheese Dip
These pretzel rods turn into witch fingers with a simple almond nail on each one. Kids enjoy the playful shape while the warm cheese dip makes them easy to eat as a snack before trick-or-treating.
The rods stay crisp and salty, and the dip adds a smooth, mild cheese flavor that balances the crunch. This works well for small Halloween gatherings or after-school snacks when you want something quick and hands-on.
Serves 4 people.
Ingredients
- 12 pretzel rods
- 12 whole blanched almonds
- 2 tablespoons cream cheese
- 1 cup shredded cheddar cheese
- 1/2 cup milk
- 1 tablespoon butter
- 1 teaspoon Dijon mustard
- Pinch of salt
Instructions
- Place the pretzel rods on a baking sheet. Use a small dab of cream cheese to attach one almond to the end of each rod as a fingernail.
- In a small saucepan, combine the shredded cheddar cheese, milk, butter, Dijon mustard, and salt.
- Heat the mixture over medium-low heat, stirring often until the cheese melts and the dip becomes smooth.
- Remove the saucepan from the heat and pour the cheese dip into a serving bowl.
- Arrange the finished witch finger pretzel rods on a plate and serve them with the warm cheese dip.
Extra Tips
Make the cheese dip just before serving so it stays smooth. If it thickens while sitting, stir in a splash of milk to loosen it. You can prepare the pretzel rods a few hours ahead and keep them covered at room temperature. Course: Appetizer Cuisine: American Equipment: Baking Sheet, Saucepan, Small Bowl
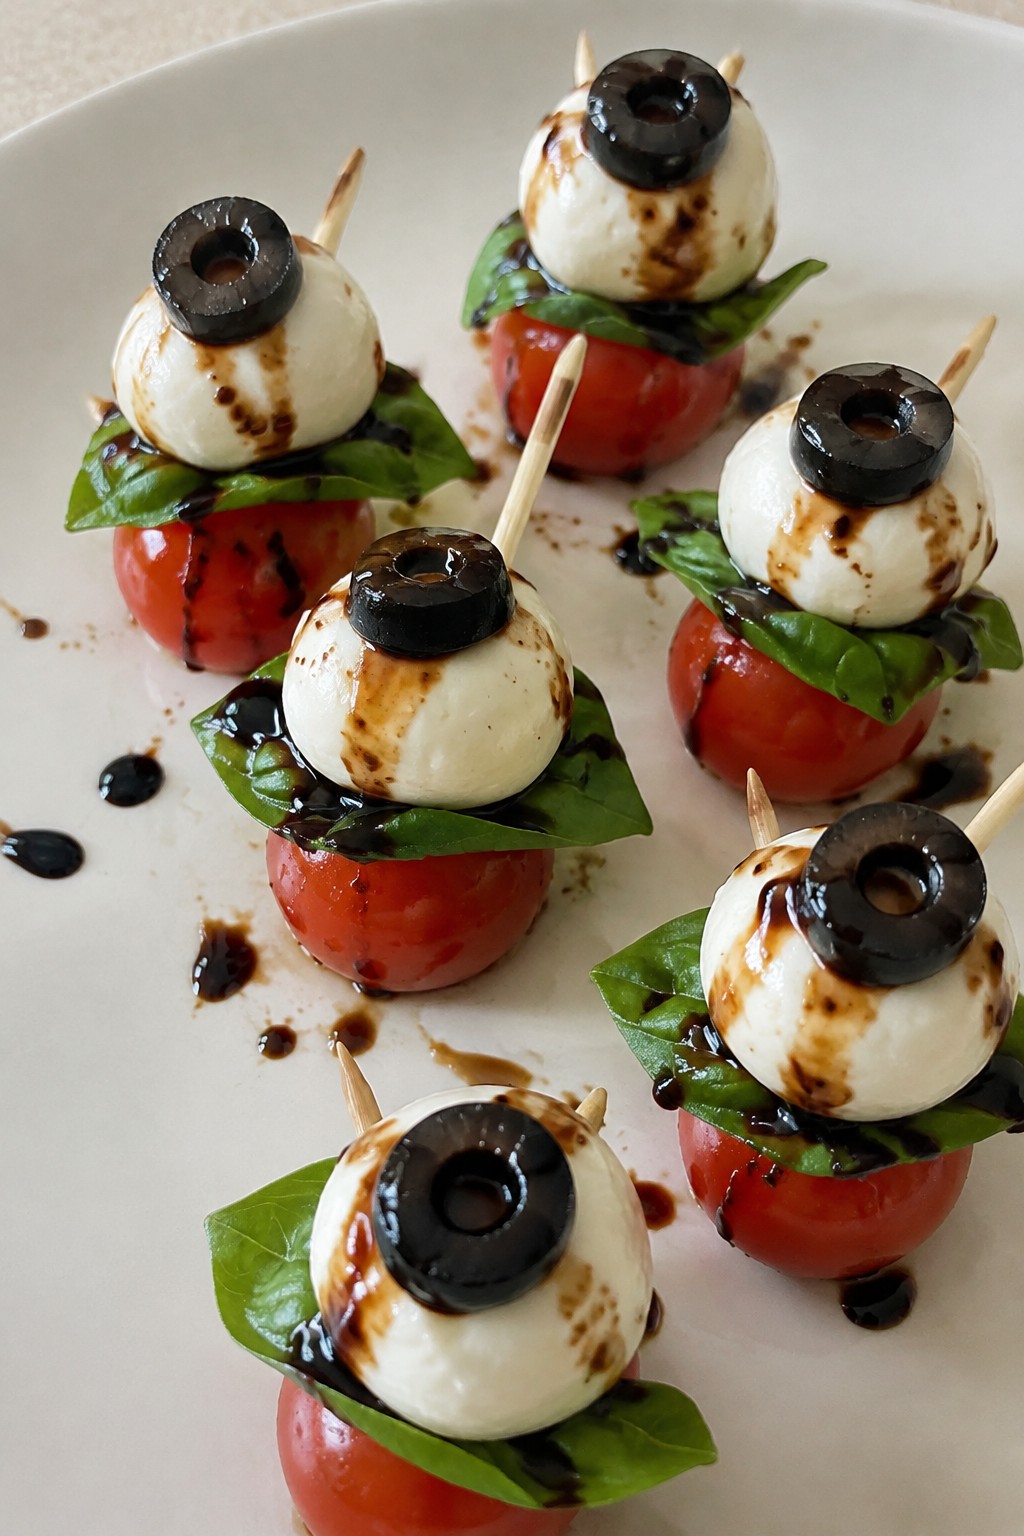
Monster Eyeball Caprese Skewers
These skewers give the classic Caprese combination a playful Halloween twist that kids can help build. The mozzarella balls become eyeballs with olive pupils, which makes them stand out on a snack table while staying mild and familiar in taste.
They suit after-school snacks, classroom parties, or small Halloween gatherings. Each bite combines juicy tomato, creamy mozzarella, and fresh basil with a light balsamic finish.
Serves 4 people.
Ingredients
- 12 cherry tomatoes
- 12 bocconcini mozzarella balls
- 12 fresh basil leaves
- 4 black olives, sliced into thin rings
- 12 short wooden skewers
- 2 tablespoons balsamic glaze
Instructions
- Place one olive ring on top of each mozzarella ball and press gently so it stays in place as the pupil.
- Thread one cherry tomato onto a skewer, followed by one basil leaf and one prepared mozzarella ball.
- Repeat the tomato-basil-mozzarella sequence on each of the remaining skewers until all ingredients are used.
- Arrange the finished skewers on a platter and drizzle the balsamic glaze lightly over the tops just before serving.
Extra Tips
Press the olive rings on the mozzarella right before assembling so they stay centered. If the skewers feel too long for small hands, trim them shorter with kitchen scissors. The balsamic glaze can be swapped for a small dish of olive oil for dipping if any kids prefer a milder flavor.
Course: Appetizer Cuisine: Italian Equipment: Wooden skewers, Small knife, Serving platterPumpkin Patch Deviled Eggs
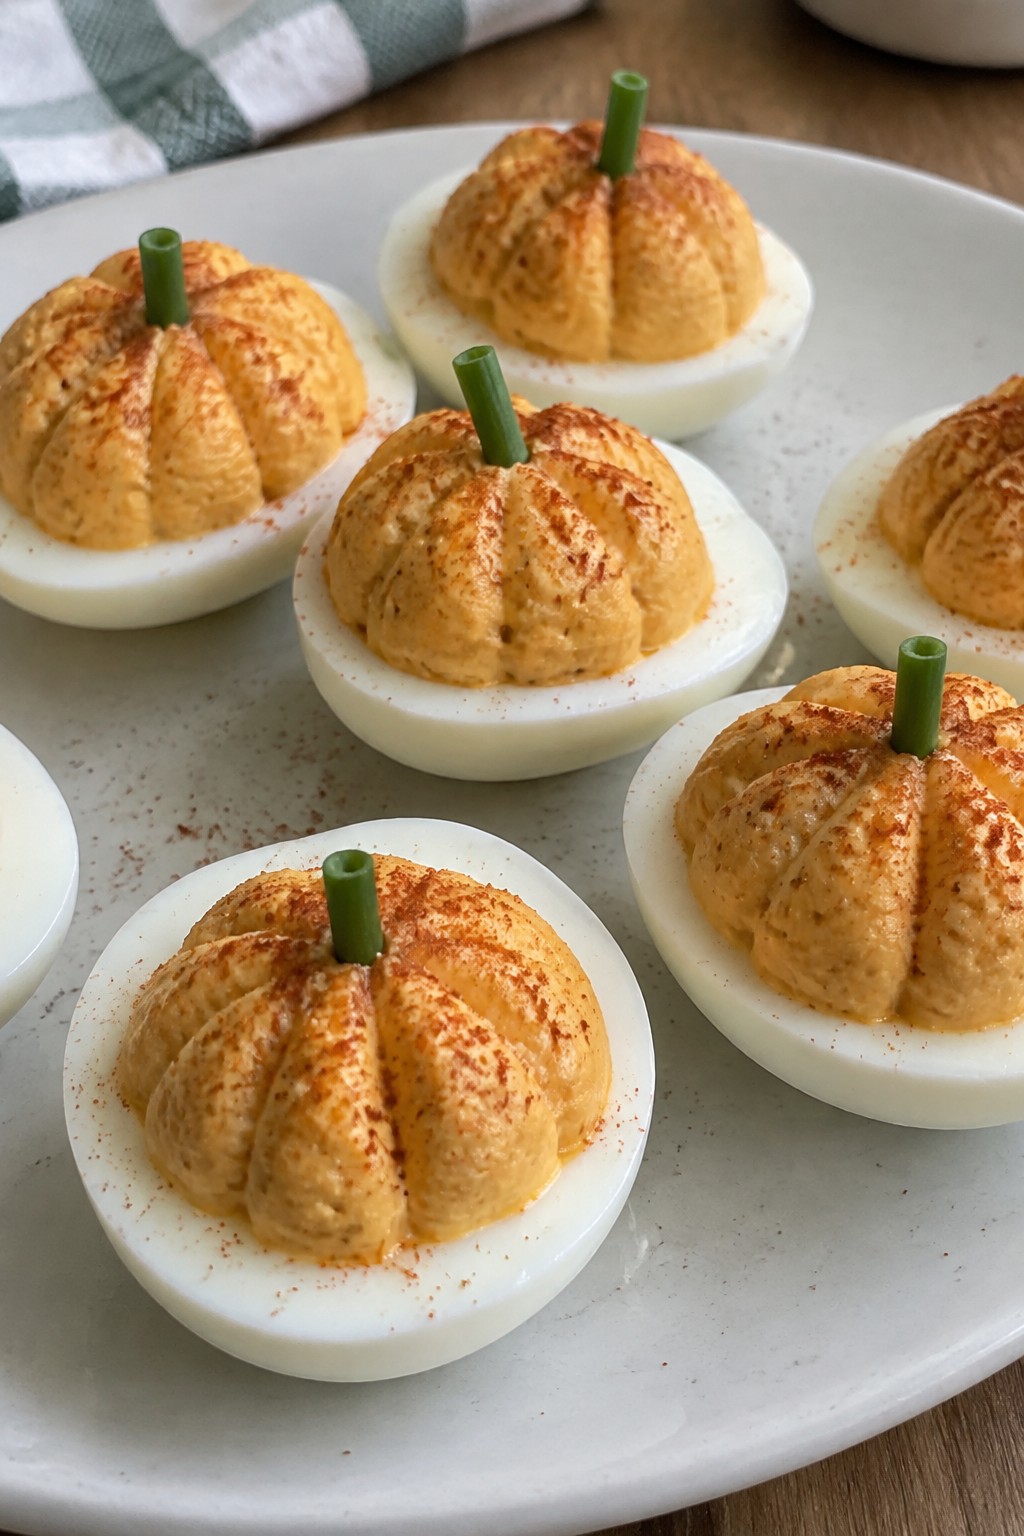
These deviled eggs turn a classic into a playful Halloween bite. The yolks get tinted orange with paprika so each half looks like a tiny pumpkin, and a chive stem finishes the look. Kids enjoy the familiar creamy taste while the simple decoration makes them feel festive without any complicated steps.
The texture stays smooth and light, with just enough tang from mustard to balance the richness. They work well on a snack table or as a starter before trick-or-treating because they hold up at room temperature for a short time and require no utensils.
Serves 4 people.
Ingredients
- 4 large eggs
- 3 tablespoons mayonnaise
- 1 teaspoon yellow mustard
- 1 teaspoon paprika
- 1/4 teaspoon salt
- 1/8 teaspoon black pepper
- 8 fresh chives, cut into 1-inch pieces
Instructions
- Place the eggs in a saucepan and cover with cold water by one inch. Bring the water to a boil over medium-high heat, then remove the pan from the heat, cover, and let the eggs sit for 12 minutes.
- Drain the hot water and transfer the eggs to a bowl of ice water. Let them cool for 5 minutes, then peel under cool running water.
- Slice each egg in half lengthwise and gently pop the yolks into a mixing bowl. Arrange the empty whites on a serving plate.
- Add the mayonnaise, mustard, paprika, salt, and pepper to the yolks. Mash with a fork until the mixture is smooth and evenly orange.
- Spoon or pipe the yolk mixture back into the egg white halves, mounding it slightly to resemble a pumpkin shape.
- Lay one chive piece across the top center of each filled egg to create a stem.
Extra Tips
Paprika provides both the orange color and a mild smoky note, so taste the filling before adding extra salt. If the mixture feels too thick, stir in half a teaspoon more mayonnaise. Arrange the finished eggs on a bed of parsley to suggest a patch without adding extra ingredients. Course: Appetizer Cuisine: American Equipment: Saucepan, Mixing Bowl, Knife
Bat-Shaped Mini Pizzas
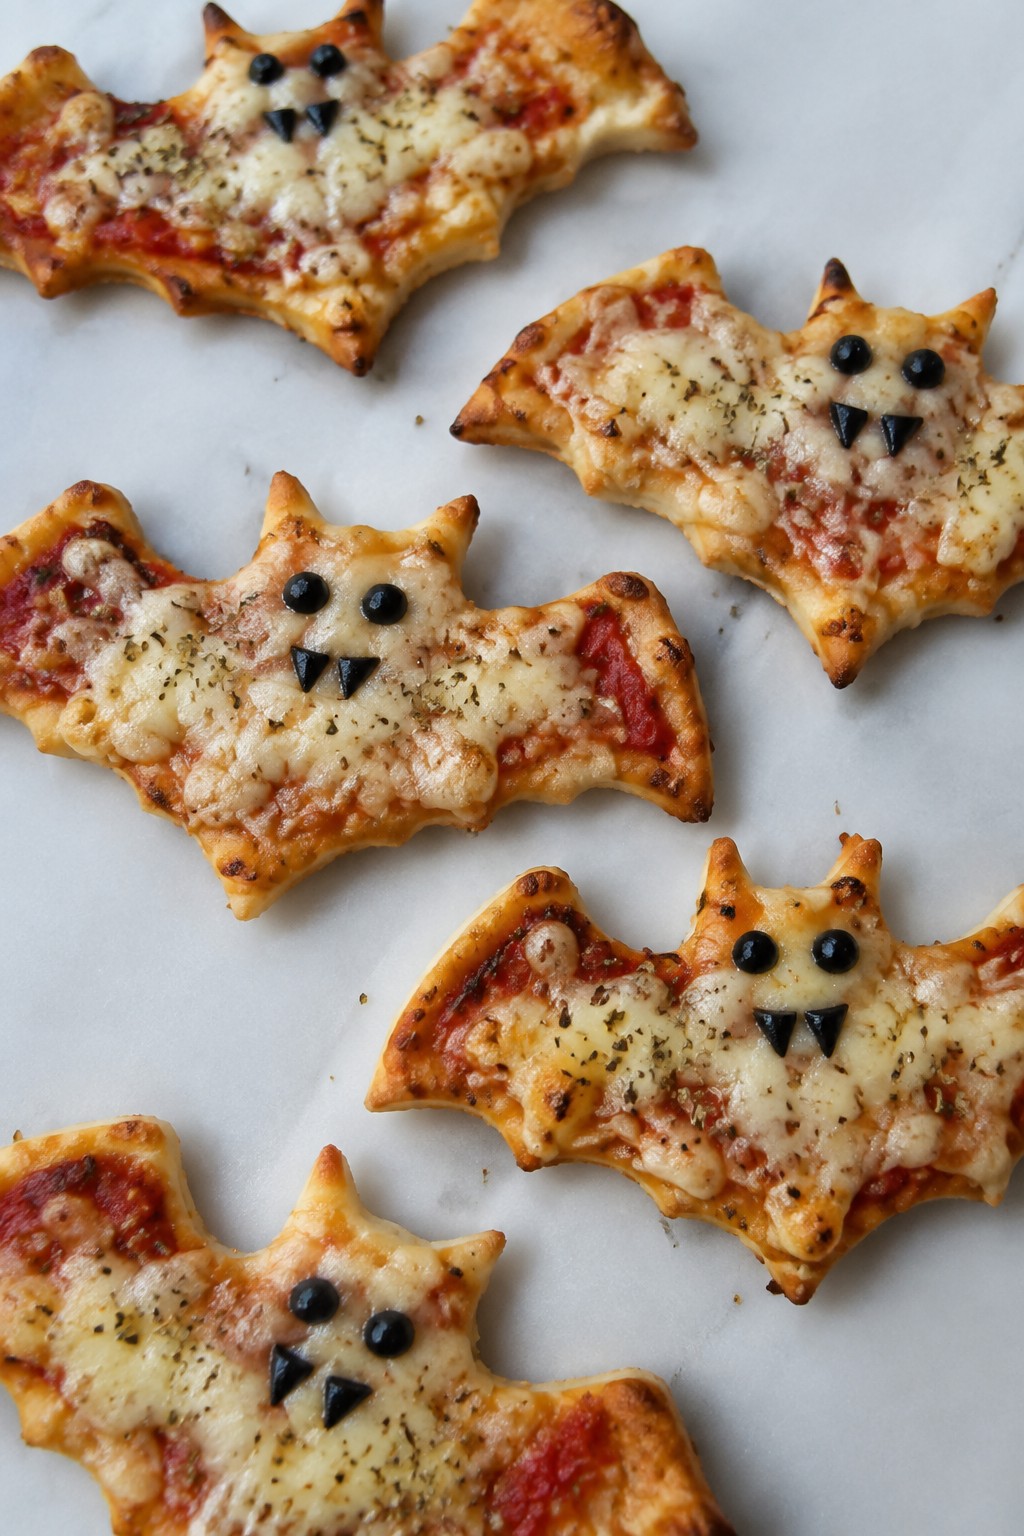
These bat-shaped mini pizzas turn a classic favorite into a playful Halloween treat. Children can help cut the shapes and add toppings with supervision. The result is a crisp crust with tangy sauce and melted cheese that stays mild enough for young palates.
They suit after-school snacks or small party spreads before evening activities. The simple assembly keeps the focus on fun without extra steps.
Serves 4 people.
Ingredients
- 1 pound pizza dough
- ½ cup pizza sauce
- 1 ½ cups shredded mozzarella cheese
- 12 black olives
- 1 teaspoon dried oregano
Instructions
- Preheat the oven to 425°F and line a baking sheet with parchment paper.
- Roll the pizza dough to about ¼-inch thickness on a lightly floured surface.
- Cut the dough into 8 bat shapes using a bat cookie cutter or by tracing a template with a knife.
- Place the shapes on the prepared baking sheet and spread a thin layer of pizza sauce over each one.
- Sprinkle mozzarella cheese evenly across the tops, then add two olive slices to each pizza as eyes.
- Dust the pizzas lightly with dried oregano.
- Bake for 10 to 12 minutes until the edges turn golden and the cheese melts.
Extra Tips
Roll the dough evenly so the bat wings do not tear during cutting. The black olives give a mild salty note that pairs well with the cheese. Leftovers reheat best in a 350°F oven for five minutes to restore crispness. Course: Appetizer Cuisine: Italian Equipment: Baking Sheet, Rolling Pin, Cookie Cutter
Skeleton Bone Breadsticks with Marinara
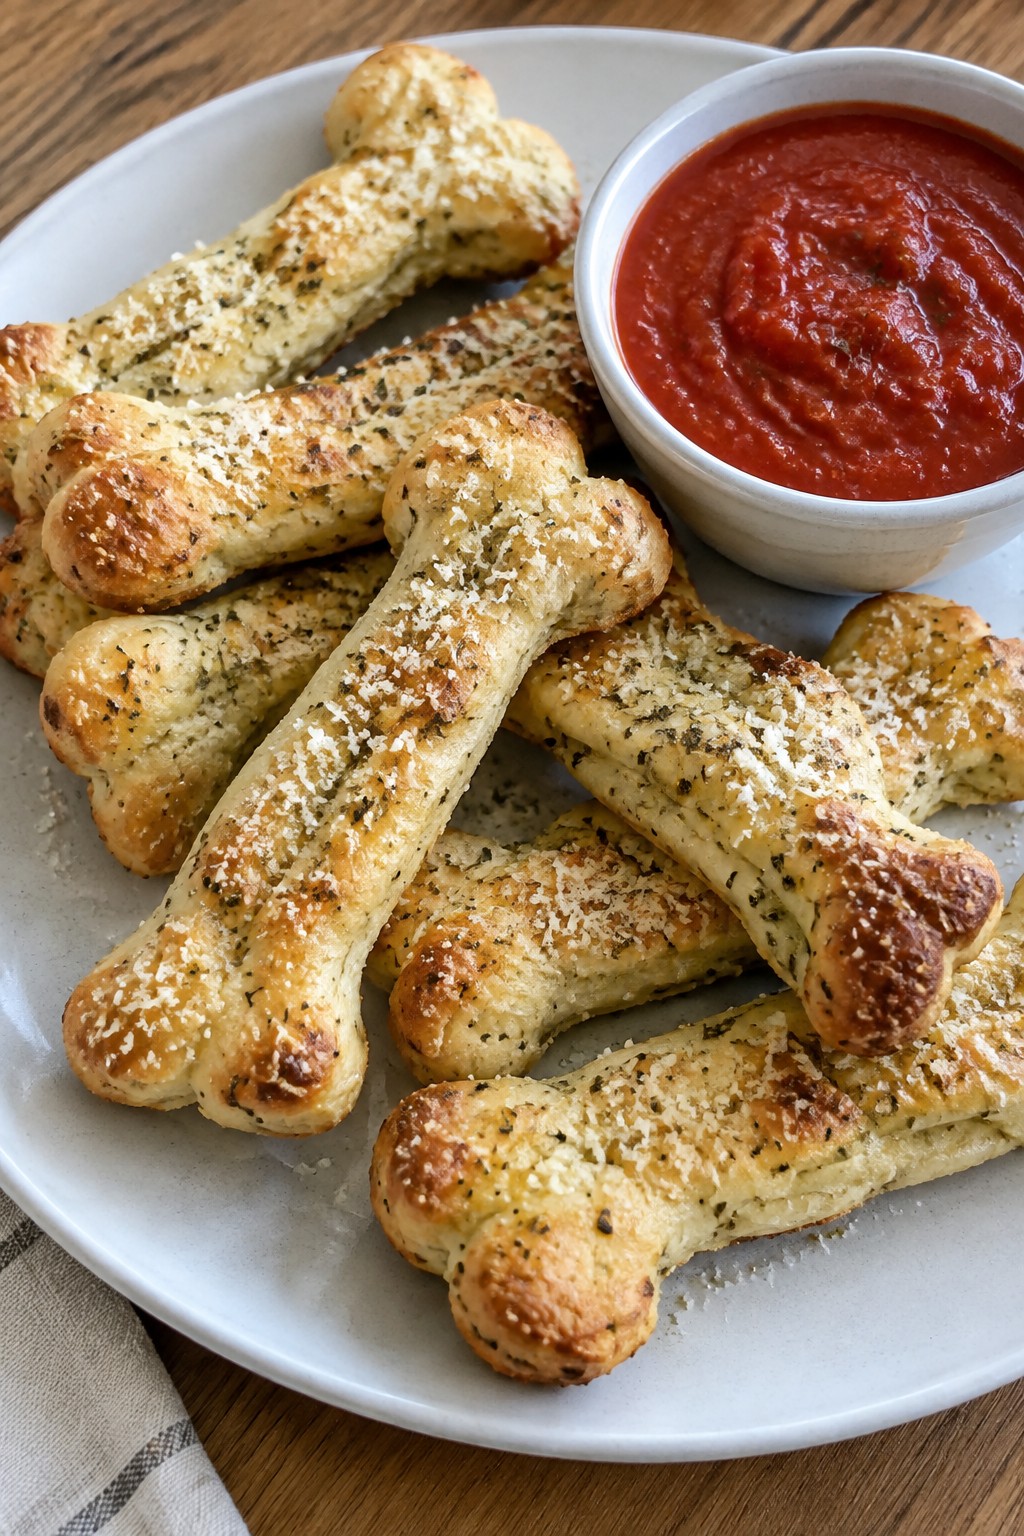
These breadsticks turn plain dough into a simple Halloween snack. Kids like the bone shapes and the chance to dip them in marinara sauce at parties or after-school gatherings.
The finished breadsticks come out lightly crisp on the outside and soft inside. Garlic and cheese give them a mild savory taste that works well with the warm tomato sauce.
Serves 4 people.
Ingredients
- 1 pound pizza dough
- 2 tablespoons butter, melted
- 1 teaspoon garlic powder
- 1/4 cup grated Parmesan cheese
- 1 cup marinara sauce
Instructions
- Heat the oven to 400°F and line a baking sheet with parchment paper.
- Divide the pizza dough into 8 equal pieces on a lightly floured surface.
- Roll each piece into a 6-inch rope, then press the ends slightly wider to form bone shapes.
- Place the shaped dough on the baking sheet and brush each piece with melted butter.
- Sprinkle the garlic powder evenly over the buttered dough, then top with the grated Parmesan cheese.
- Bake for 12 to 15 minutes until the breadsticks turn golden brown.
- Warm the marinara sauce in a small saucepan or microwave and serve it alongside the breadsticks for dipping.
Extra Tips
Roll the dough ropes a little thicker at the ends so the bone shape holds after baking. If the Parmesan browns too quickly, tent the baking sheet loosely with foil for the last few minutes. Leftovers reheat best in a 350°F oven for five minutes to restore crispness.
Course: Appetizer Cuisine: American Equipment: Baking sheet, Parchment paper, Small saucepanCandy Corn Fruit and Cheese Stacks
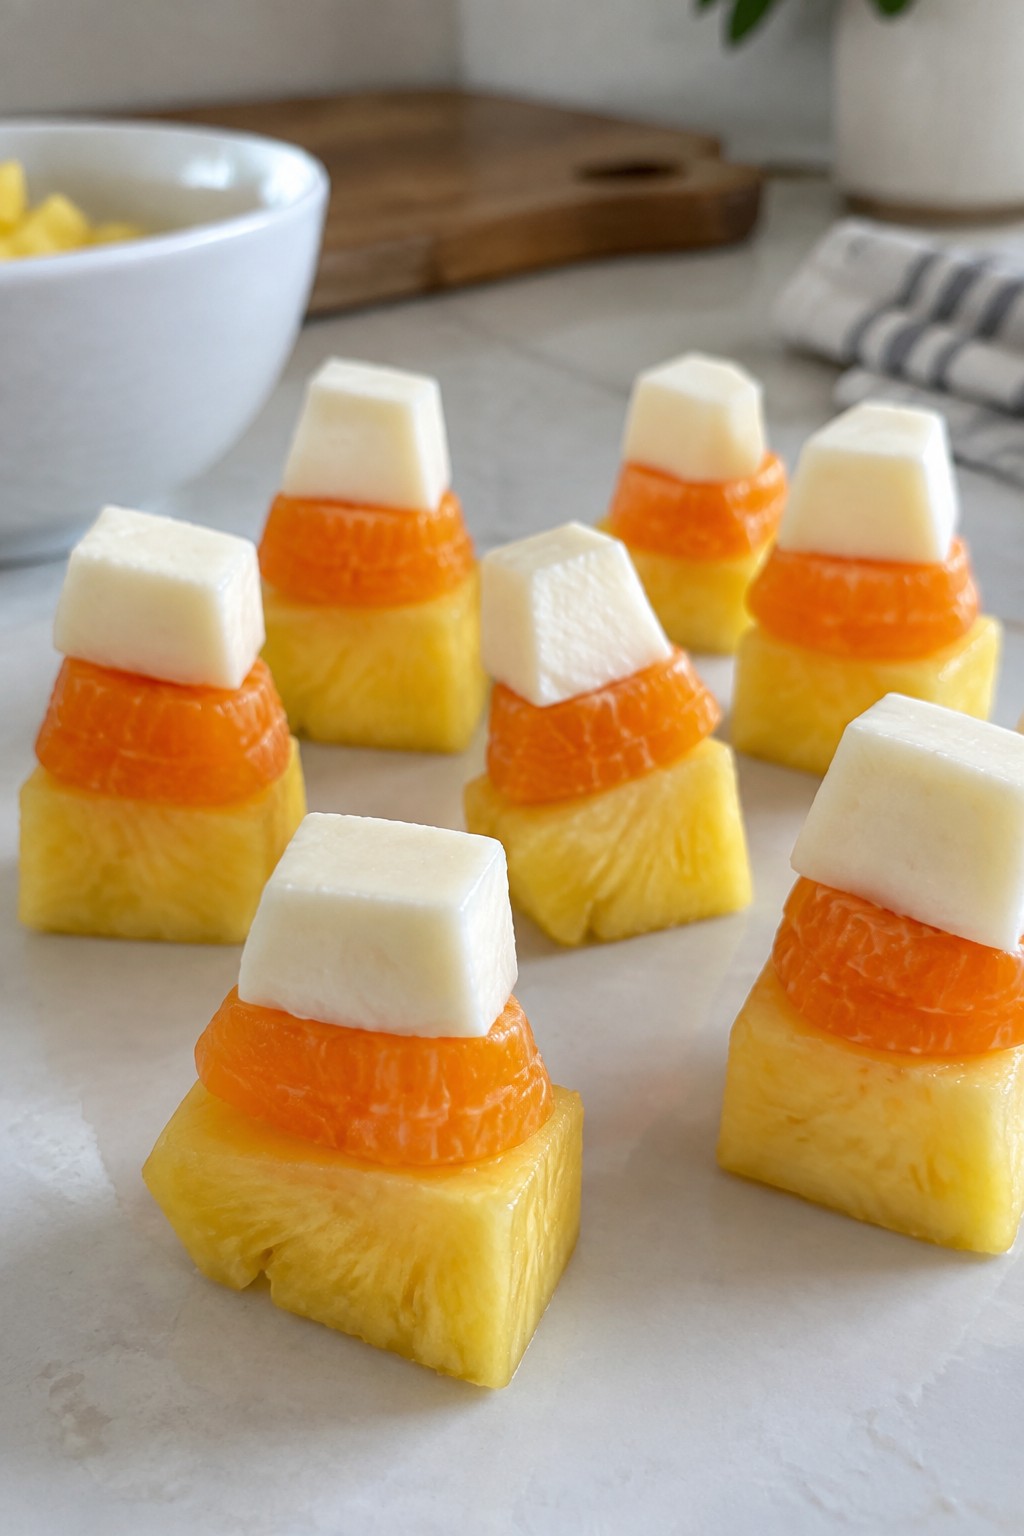
These stacks turn simple fruit and cheese into a playful Halloween bite that kids can recognize right away. The layers copy the look of candy corn without any candy, giving a mix of juicy sweetness and mild cheese that feels like a treat but stays easy to eat. They work well for a quick snack table or as part of a larger spread before trick-or-treating.
The flavor stays light and fresh, with the pineapple adding brightness, the oranges bringing a soft tang, and the cheese rounding it out with creaminess. No oven or stove is needed, so they stay safe for little helpers to assemble.
Serves 4 people.
Ingredients
- 1 cup pineapple chunks
- 1 cup mandarin orange segments
- 1 cup mozzarella cheese cubes
Instructions
- Set out four small plates. Place four pineapple chunks on each plate to form the bottom layer.
- Add four mandarin orange segments on top of the pineapple on each plate to create the middle layer.
- Finish each stack with four mozzarella cheese cubes placed on the oranges to complete the top layer.
- Repeat the stacking process until all the ingredients are used and each plate has even stacks.
Extra Tips
Cut the pineapple and cheese into similar sizes so the stacks stand steady and kids can pick them up easily. If the mozzarella seems too firm, let it sit at room temperature for a few minutes before assembling to keep the layers from sliding. These stacks taste best right after they are made, so prepare them close to serving time. Course: Appetizer Cuisine: American Equipment: Knife, Cutting board, Plates
Frankenstein Avocado Toast Triangles
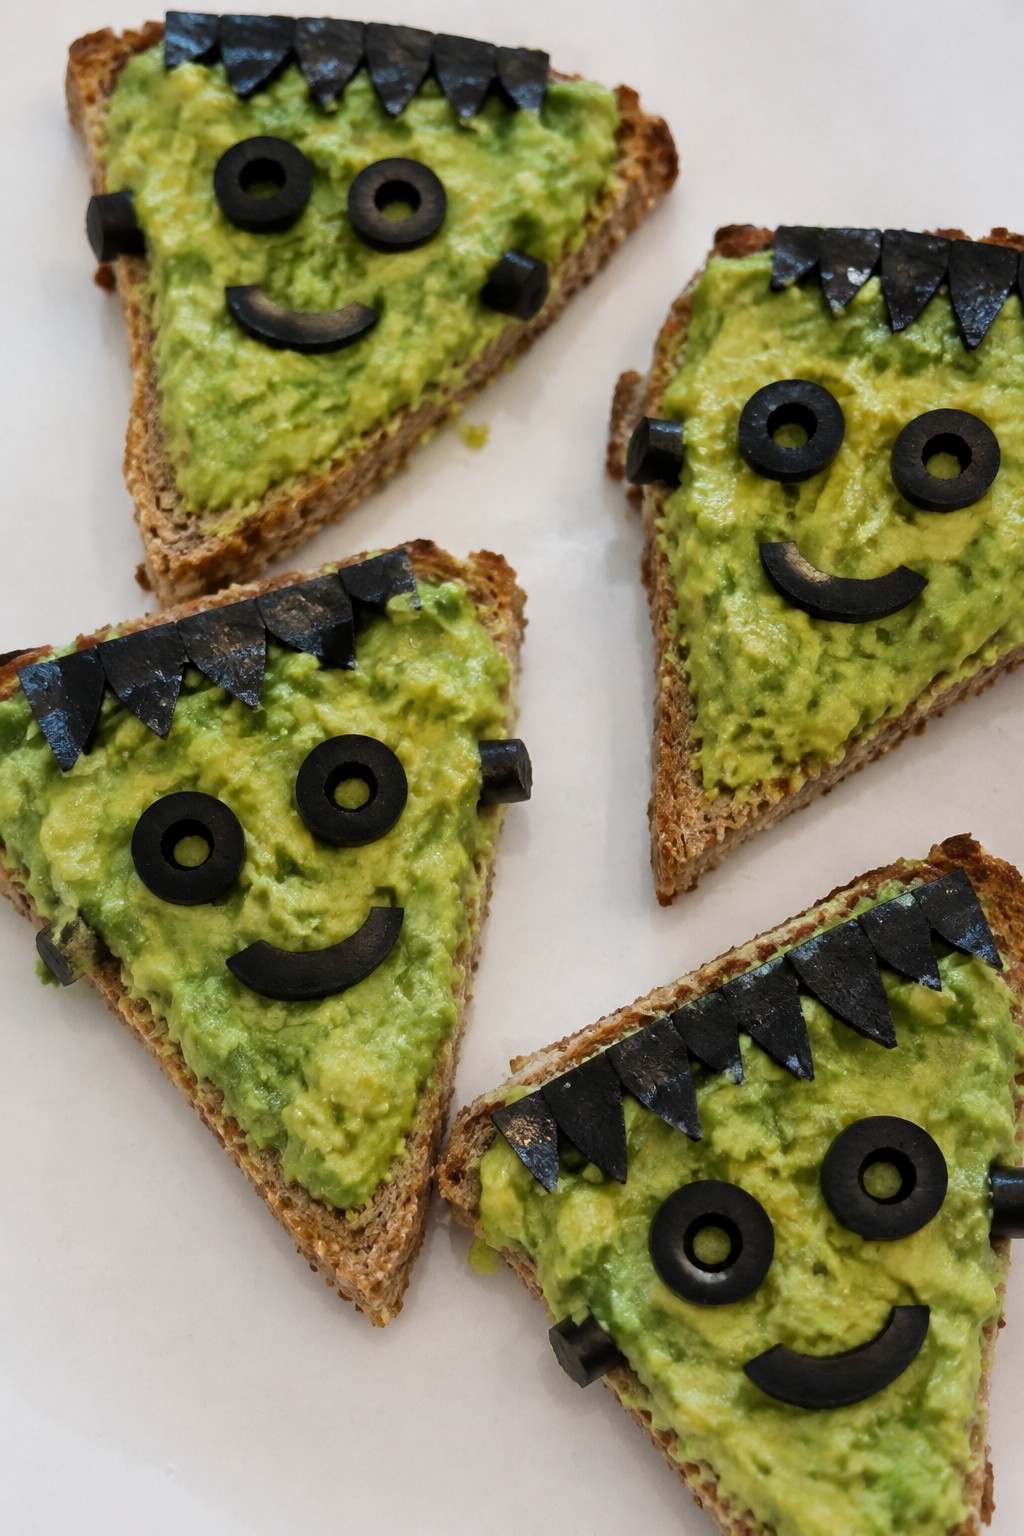
These Frankenstein Avocado Toast Triangles turn a simple snack into a hands-on Halloween activity. Kids can join in by adding the olive details that turn each piece into a friendly green monster face. The recipe works well for after-school snacks or a quick party starter before trick-or-treating.
The toast stays crisp while the avocado layer stays creamy. Lime juice keeps the flavor bright and prevents browning so the triangles look fresh on the table.
Serves 4 people.
Ingredients
- 4 slices whole wheat bread
- 2 ripe avocados
- 1 tablespoon lime juice
- 1/4 teaspoon salt
- 8 black olives, sliced
Instructions
- Place the bread slices in a toaster and toast until golden and firm.
- Cut each avocado in half, remove the pits, and scoop the flesh into a mixing bowl.
- Add the lime juice and salt to the avocado. Mash with a fork until mostly smooth with a few small chunks remaining.
- Spread the mashed avocado evenly over each slice of toast.
- Use a sharp knife to cut each slice into two triangles.
- Arrange the sliced olives on top of each triangle to form eyes, a mouth, and side bolts for the Frankenstein faces.
Extra Tips
Cut the toast while it is still warm so the triangles hold their shape without crumbling. If the avocado mixture starts to brown before serving, press plastic wrap directly on the surface. For a milder taste, reduce the lime juice to one teaspoon and taste before spreading. Course: Appetizer Cuisine: American Equipment: Toaster, Mixing bowl, Sharp knife
Creepy Crawly Apple and Peanut Butter Nachos
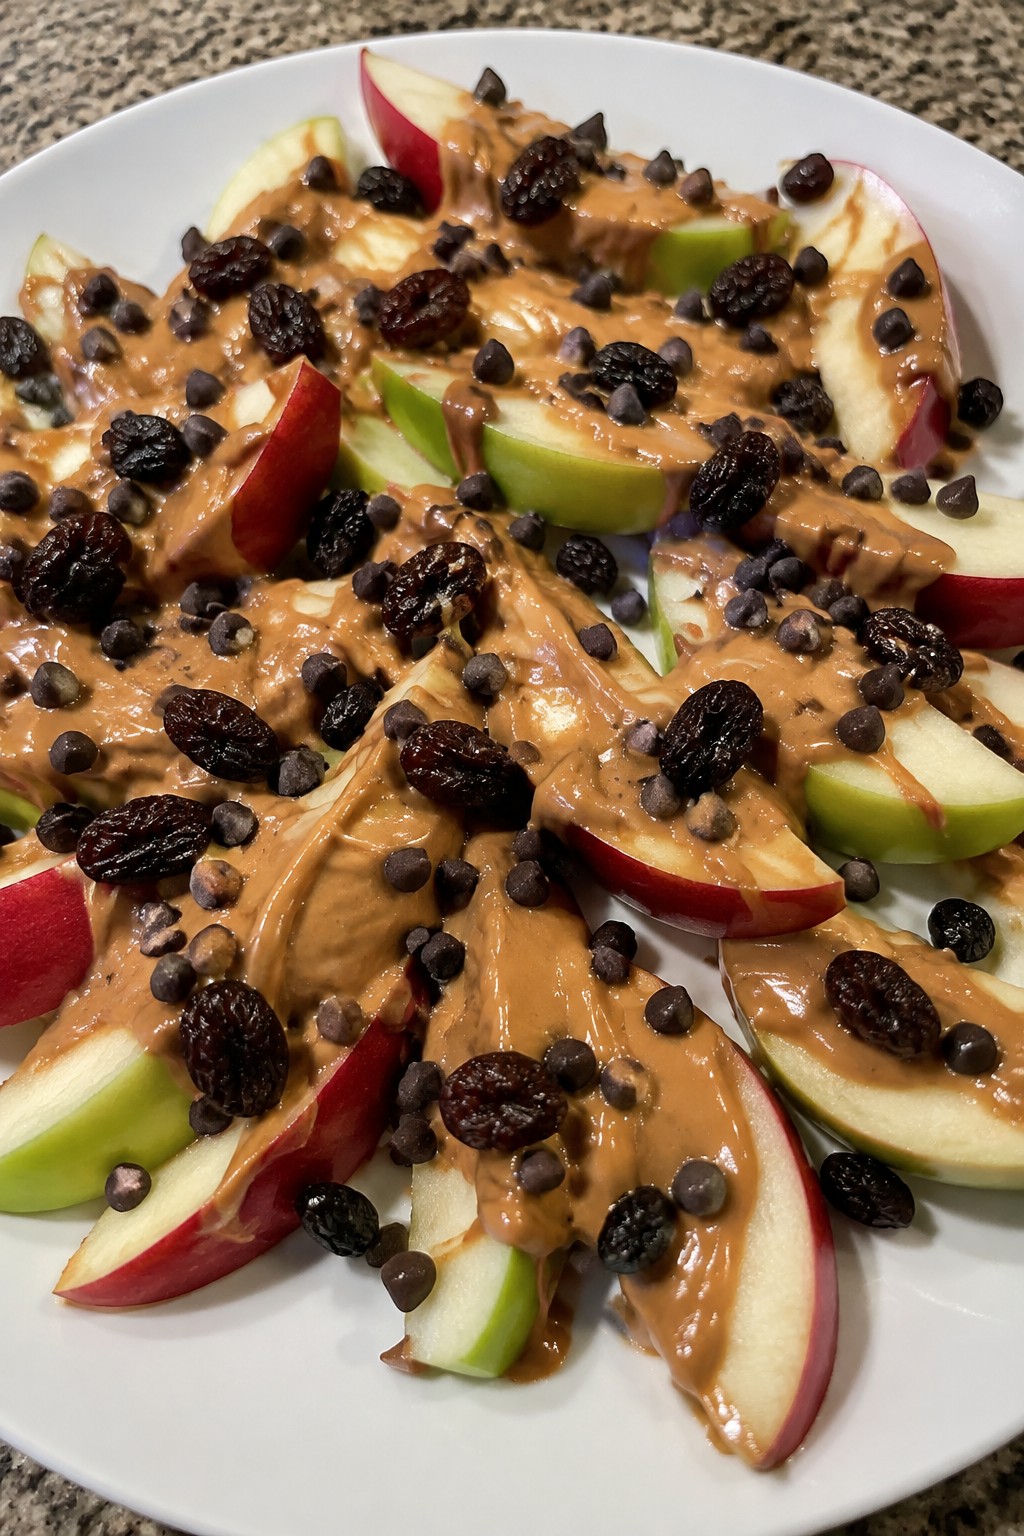
This recipe turns crisp apple slices into a playful snack by spreading them with peanut butter and adding raisins that look like tiny bugs crawling across the plate. It works well for Halloween parties or after-school snacks because it needs no oven and comes together in minutes.
The result has a fresh crunch from the apples, a creamy layer of peanut butter, and chewy spots from the raisins along with a touch of chocolate. Kids can help arrange the slices and add the toppings themselves.
Serves 4 people.
Ingredients
- 4 medium apples
- 1/2 cup peanut butter
- 1/4 cup raisins
- 1/4 cup mini chocolate chips
Instructions
- Core the apples and cut them into thin wedges.
- Arrange the apple wedges in a single overlapping layer on a serving platter.
- Place the peanut butter in a microwave-safe bowl and warm it for 10 seconds to loosen it. Drizzle the warmed peanut butter evenly over the apple slices.
- Scatter the raisins and mini chocolate chips across the top so they land in the peanut butter.
Extra Tips
Warm the peanut butter just enough to drizzle smoothly without making it too thin. Use firm apples so the slices stay sturdy under the toppings. Serve the nachos right after assembling to keep the apples crisp. Course: Appetizer Cuisine: American Equipment: Knife, Microwave, Serving platter
