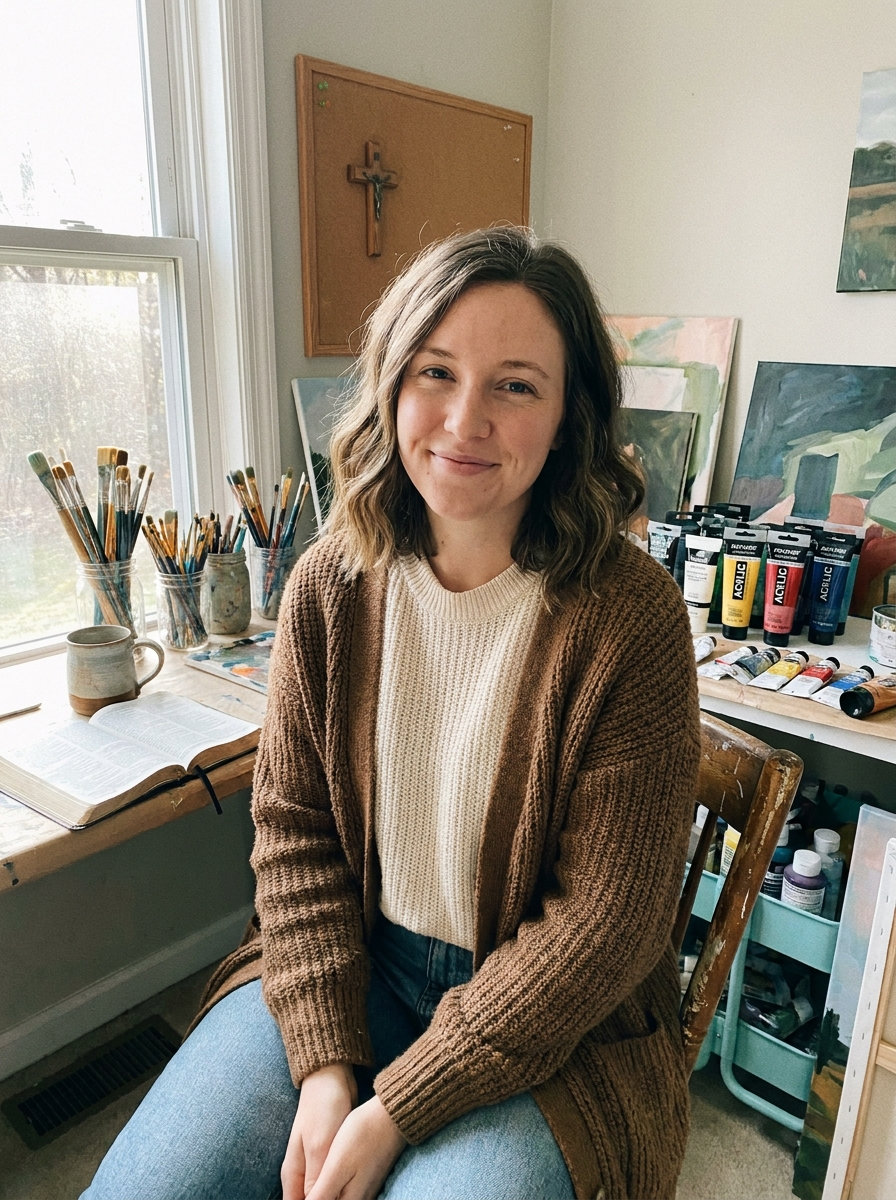
I started painting rocks last year as a way to unwind after work and angel themes ended up being easier than I expected.
Some of my early attempts were pretty basic but they still turned out nice enough to keep around the house.
Over time I collected a handful of designs that do not require much skill or special supplies.
These are the ones I come back to when I want something quick and light to work on.
They might help if you are just getting started with this kind of project.
Simple Angel Rock with Pastel Wings
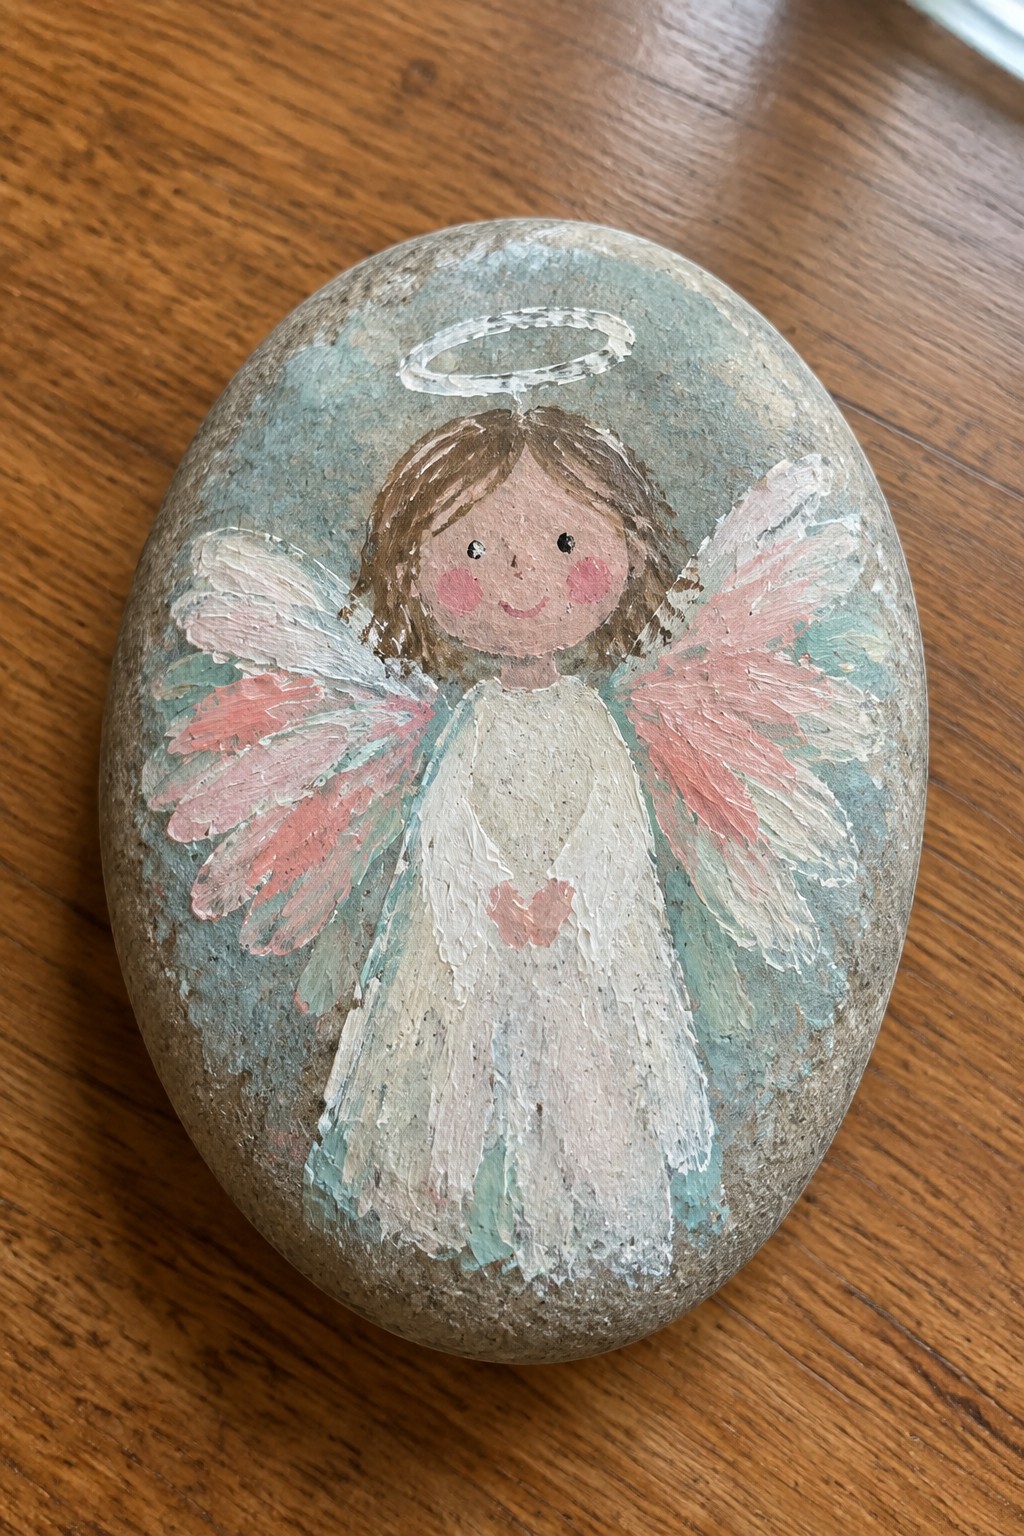
A centered angel figure on an oval stone makes an effective rock painting idea because the natural shape frames the body and wings without extra planning. The design uses basic shapes for the dress and layered wing strokes in pink and white, with a light blue-green background wash that keeps the focus on the figure. This approach fits cute decorative art that relies on soft color blending and minimal details like the small heart accent.
The color palette makes this easy to adapt since the pinks and muted greens can shift to other soft tones for different seasons or themes. What makes this idea useful is how the wings and dress can be simplified with fewer strokes or expanded with more texture depending on the rock size. For practice or small gifts, this kind of subject stands out on Pinterest because the heart detail gives it a personal note while staying quick to paint.
Angel Family Rock Painting Set

Painting angels on rocks of three graduated sizes creates a single grouped piece where the rocks themselves form the figures. The idea relies on repeating the same wing and halo shapes across all three while adjusting robe colors and scale to match each rock’s shape. This approach belongs to decorative rock art that uses the natural form of the stones rather than treating them as flat canvases.
The composition does a lot of the work here by letting the size differences suggest a family without extra props or backgrounds. You can adapt it by changing the robe colors to match a room or season or by starting with just two rocks if larger stones are hard to find. The simple face details and repeated wing pattern make it easy to personalize while keeping the set cohesive. For gifts or shelf decor, the nesting arrangement displays well in a bowl or on a tray.
Angel Figure with Patterned Wings on an Oval Rock
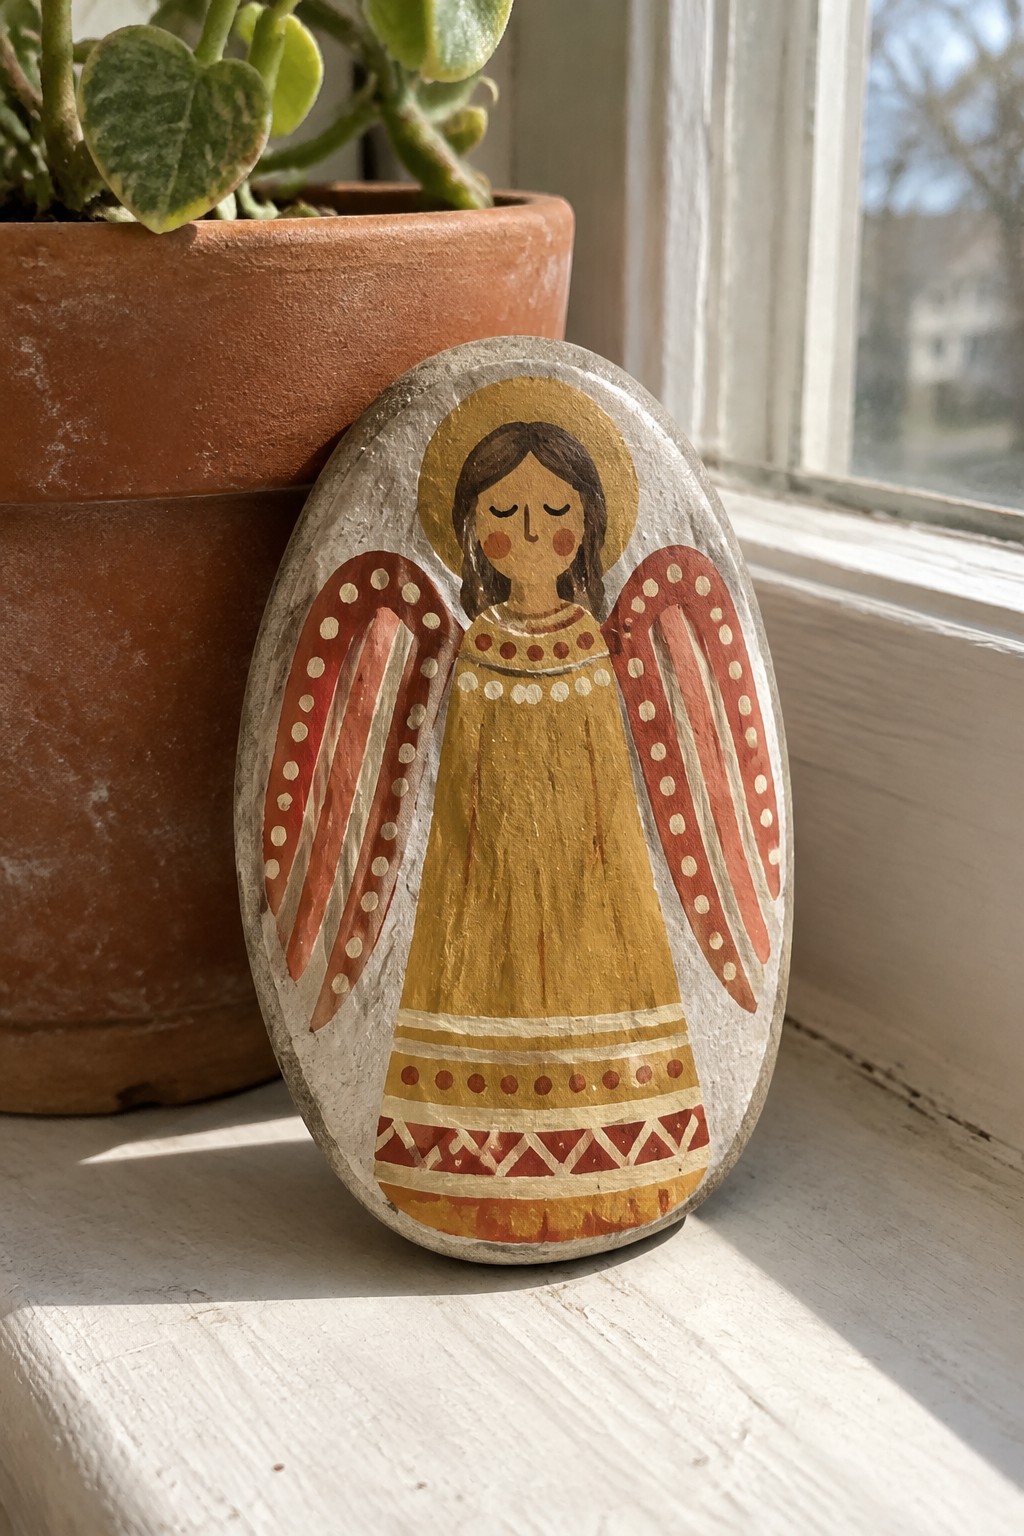
A centered angel on an oval rock uses the stone shape to frame the body and wings without extra background elements. The design relies on a mustard yellow robe, terracotta wings, and a gold halo, with rows of dots creating the wing texture and dress trim. This keeps the painting idea focused on flat shapes and repeating patterns rather than shading or fine lines.
What makes this idea useful is how the wing layout and dot pattern can be adjusted for smaller or larger rocks without changing the overall structure. The color choices stay simple to mix and can be swapped for other warm tones or holiday accents. For practice, this kind of subject works well because the main forms are blocked in first, then details are added with the same dot technique.
Starry Dress Angel on an Oval Rock
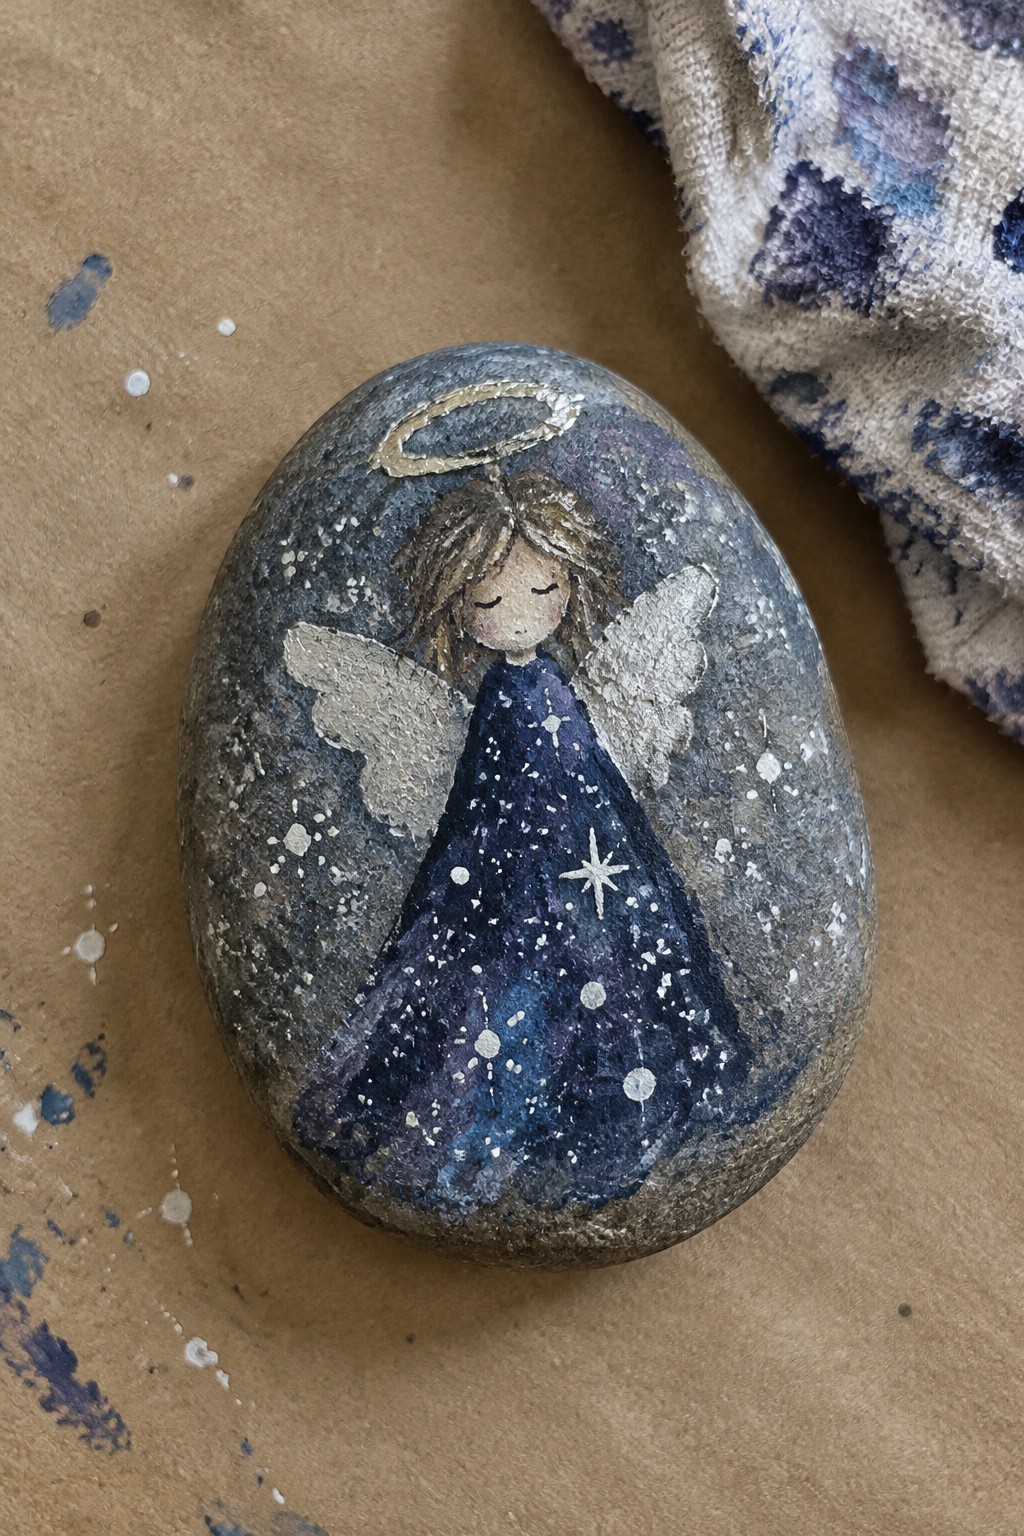
This rock painting idea centers on an angel figure wearing a deep blue dress covered in scattered white dots and thin lines that form simple star shapes and constellations. The design uses the rock’s natural oval form to hold the full figure, with a dark speckled background that fades into the stone and a thin gold halo placed above the head. The wings stay minimal and flat, keeping the main focus on the dress pattern and the centered pose.
What makes this idea useful is how the constellation dots can be adjusted to any rock size or color without losing the effect, and the dark base helps cover surface flaws. The centered layout works on most smooth oval stones and leaves room to change the dress color or star density for different seasons. For practice, this subject builds skill with layering light details over a dark wash while staying simple enough to finish in one session.
Pastel Angels Holding Hearts on Stones
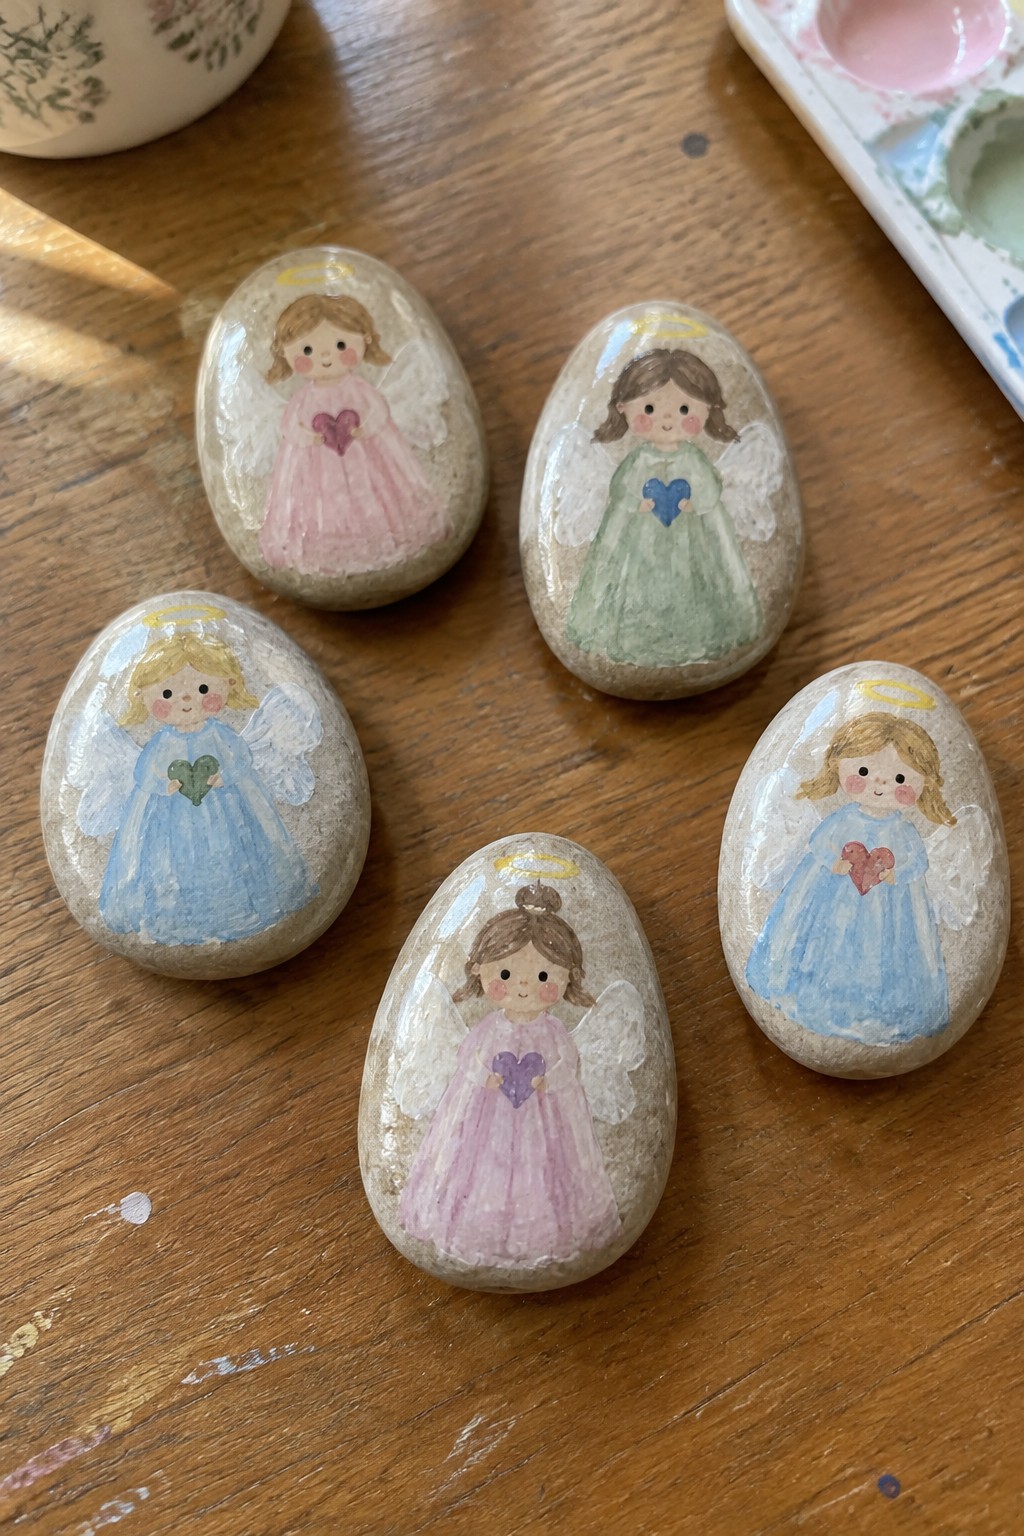
Painting small angel figures on smooth oval rocks uses soft pastel washes for the dresses in pink, green, blue, and purple, each topped with a simple yellow halo and a colored heart held at the chest. The idea centers on centering the figure to fit the rock’s shape, with light layers that suggest dress folds without heavy outlines. This approach belongs to cute decorative rock art and works through repeated character placement with color variation.
What makes this idea useful is the small scale that lets you practice basic figure placement and color mixing without needing large surfaces. You can adapt it by swapping dress colors or heart shades to fit different seasons or gift themes while keeping the same pose. The oval rock shape already frames the subject, so no extra background work is required. For practice, this format helps build consistency across multiple pieces that can be displayed together.
Simple Angel Face Rock with Gold Halo Accents

A painted rock with a basic angel face uses clean line work to create a small decorative piece. The design focuses on a centered face with closed eyes and soft hair lines, finished with a gold halo and matching gold patches on the wings. This keeps the look balanced by placing the metallic elements only on the top and sides, which draws attention without crowding the surface.
What makes this idea useful is how the limited color choices and open space around the face let you adjust the size easily for different rocks. You can keep the gold or swap it for another accent color depending on what paints you already have. For practice, this subject helps with steady line control and simple layering before trying busier designs.
Beach Angel Rock Painting
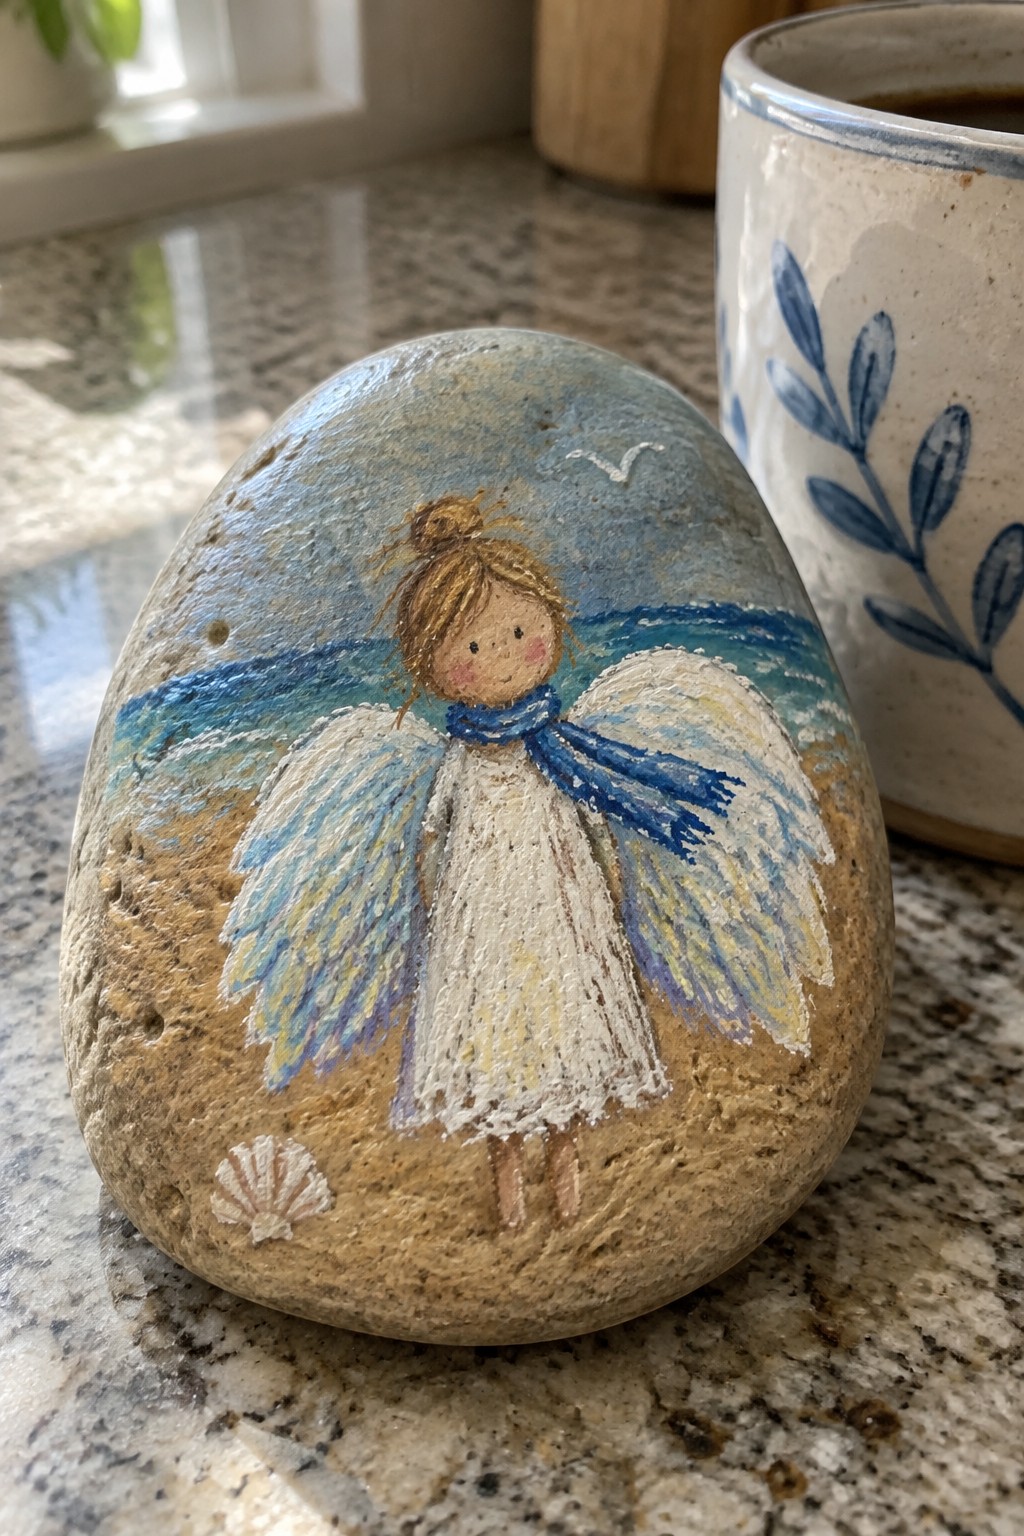
An angel figure standing on sand serves as the main subject in this rock painting idea. The composition centers the figure against a horizontal sea and sky, using layered strokes on the wings and water to add depth without overcrowding the surface. Earthy sand tones paired with blue accents keep the focus on the figure while fitting the decorative angel category.
The horizon line does most of the layout work here, so the idea adapts easily to rocks of varying shapes and sizes. You can drop the small shell or bird if you want fewer details, or shift the wing colors to whatever paints you already have on hand. This approach stands out for gifts or shelf decor because the beach setting gives the angel a clear theme without extra props.
Two-Rock Angel with Dotted Gown and Wings
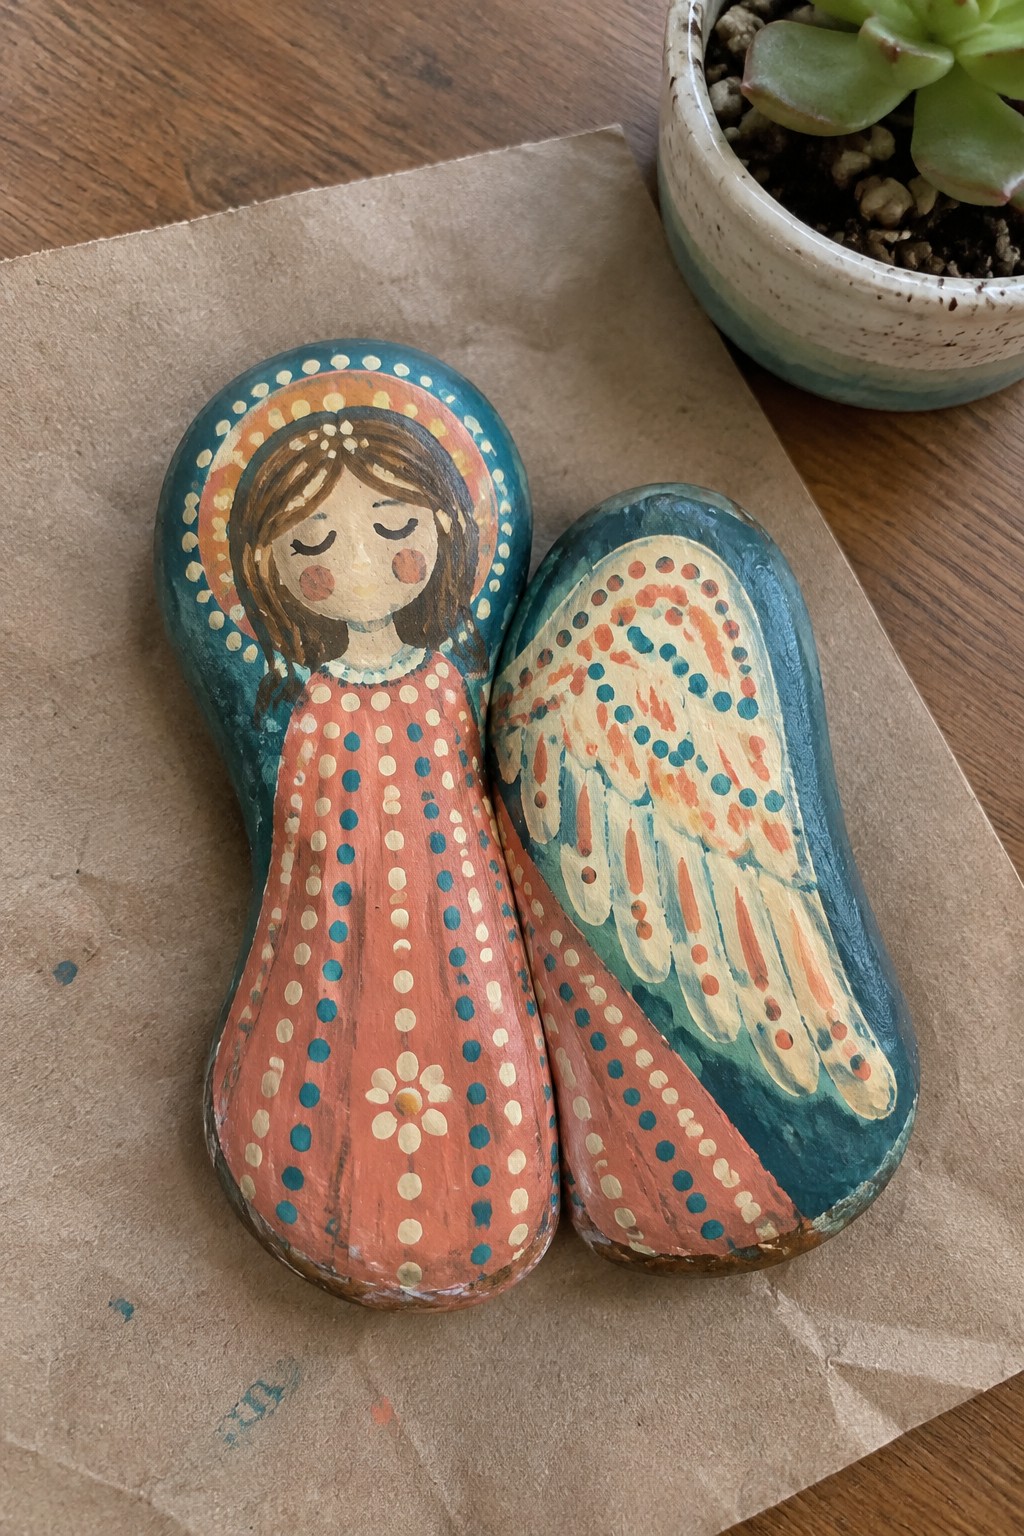
An angel painted across two rocks lets the left stone carry the body, head, and halo while the right stone holds the wing. The gown uses a coral base with scattered teal and white dots plus one small flower near the bottom, and the wing builds texture through rows of dots and short strokes in matching colors. This keeps the design focused on pattern and color blocks rather than tiny facial details or shading.
What makes this idea useful is how the paired rocks naturally create a wider shape that single stones rarely allow. The dot work on both the gown and wing can be adjusted in size or spacing to fit different rock surfaces or to match other colors you already have. A painting like this works especially well for shelf displays or gifts because the split layout gives it more presence than a standard single-rock figure.
Full Body Angel with Flower Crown on Stone
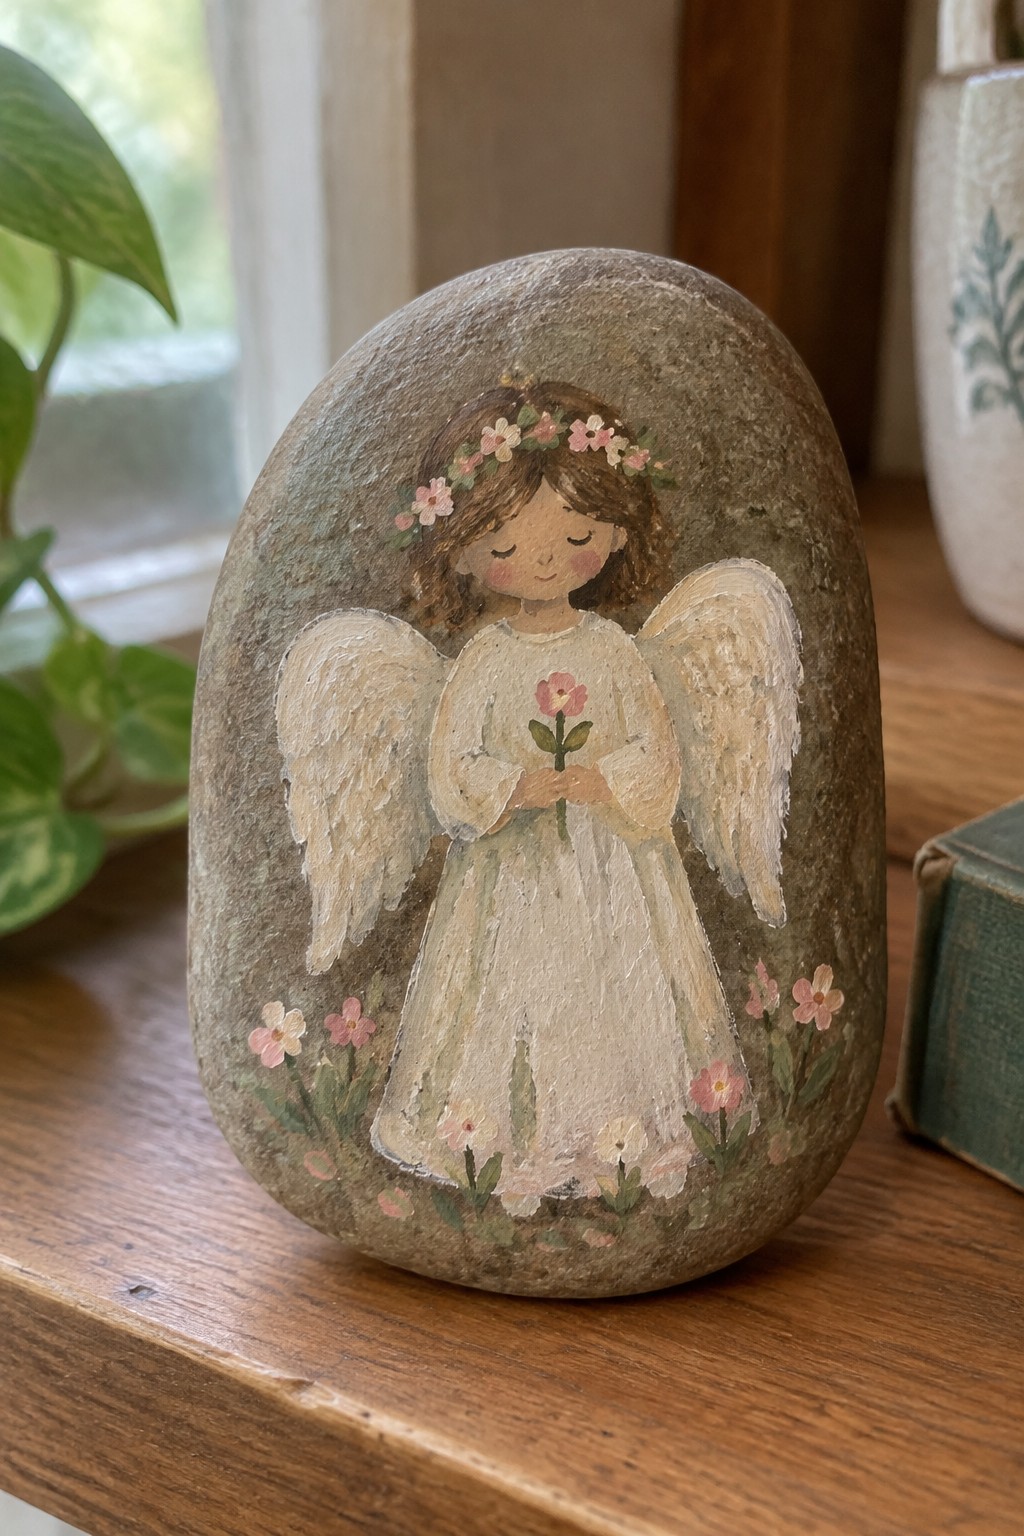
Painting an angel figure that stands upright on the rock works well when you keep the body centered and let the wings extend outward to match the stone’s rounded shape. The flower crown and small blooms along the base create a simple frame that adds color without crowding the main subject. A soft white gown paired with pale wings keeps the overall palette light so the pink flower details stand out.
What makes this idea useful is that the full-body pose stays readable even on medium or large rocks and the floral touches can be swapped for whatever paint colors you already have. You could reduce the wing texture to a few dry-brush strokes or move the base flowers higher if your rock is narrower. This layout works especially well for shelf decor or small gifts because the subject reads clearly from a short distance.
Angel with Crown and Pink Heart
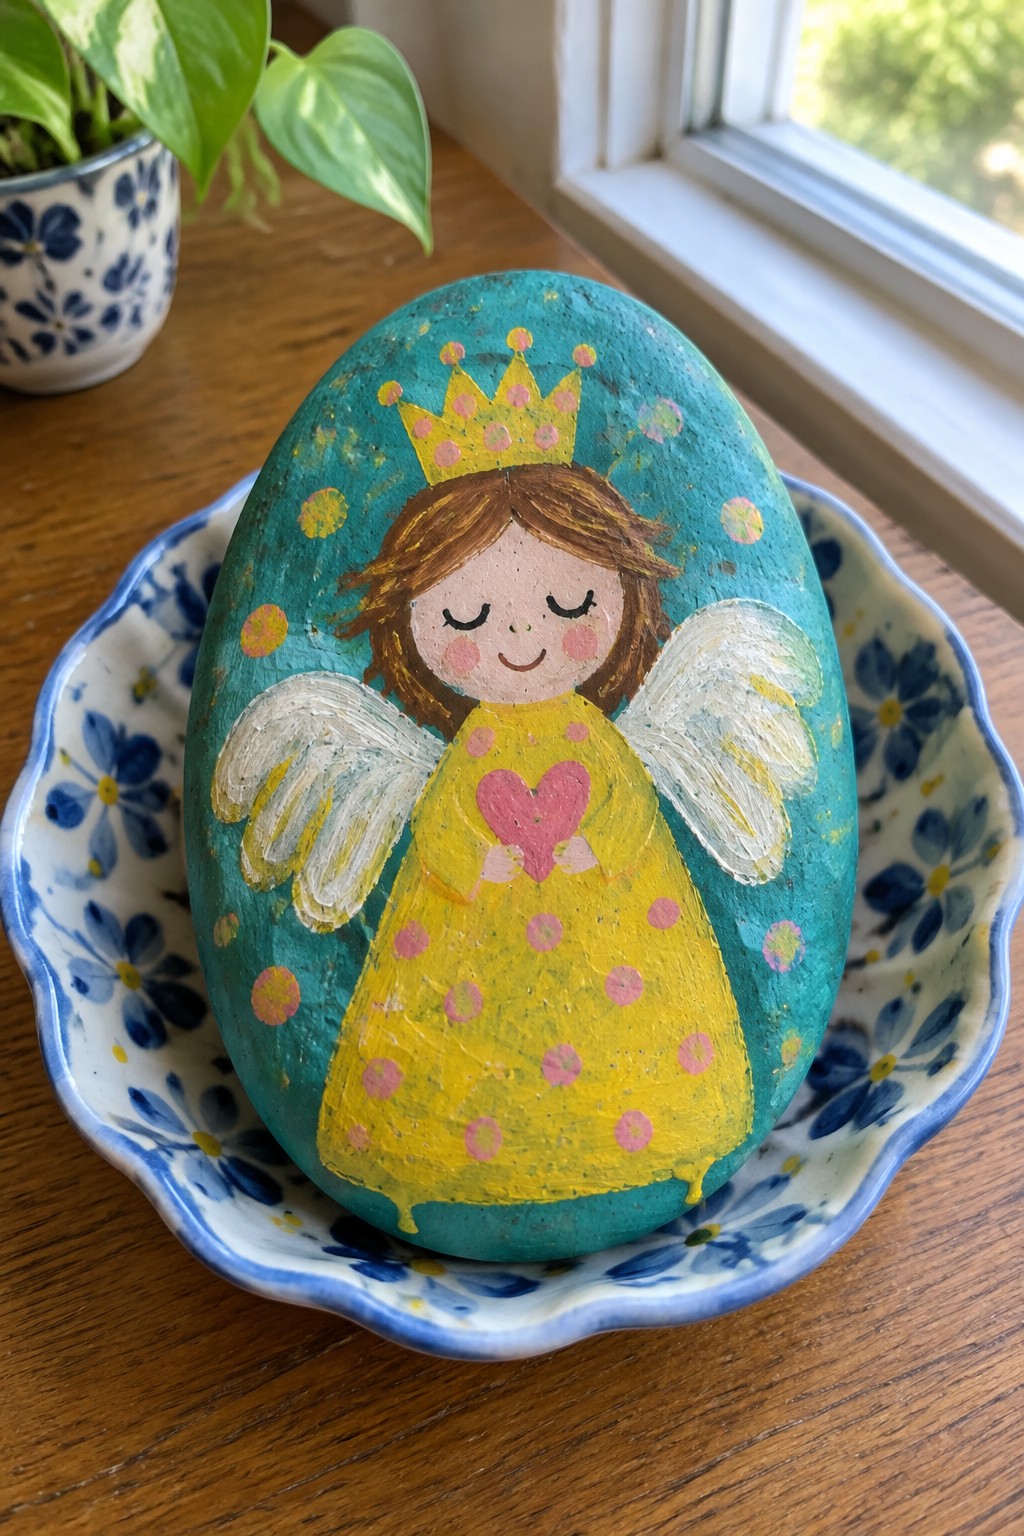
Painting an angel on a rock works by centering a simple figure on an oval shape with a solid teal background. The yellow dress gets its shape from a wide triangle that tapers at the bottom, while pink dots and a small heart provide the main details. White wings on either side and a crown on top finish the look without requiring many layers or tiny brushwork.
What makes this idea useful is how the rock’s natural curve already suggests the angel’s body, so you only need to block in the dress and wings. The teal background keeps the yellow and pink elements from clashing, and you can swap those colors for whatever paints you already have. This kind of figure is easy to scale down on smaller rocks or expand with extra dots if you want more decoration.
Snowy Angel Rock with Red Scarf
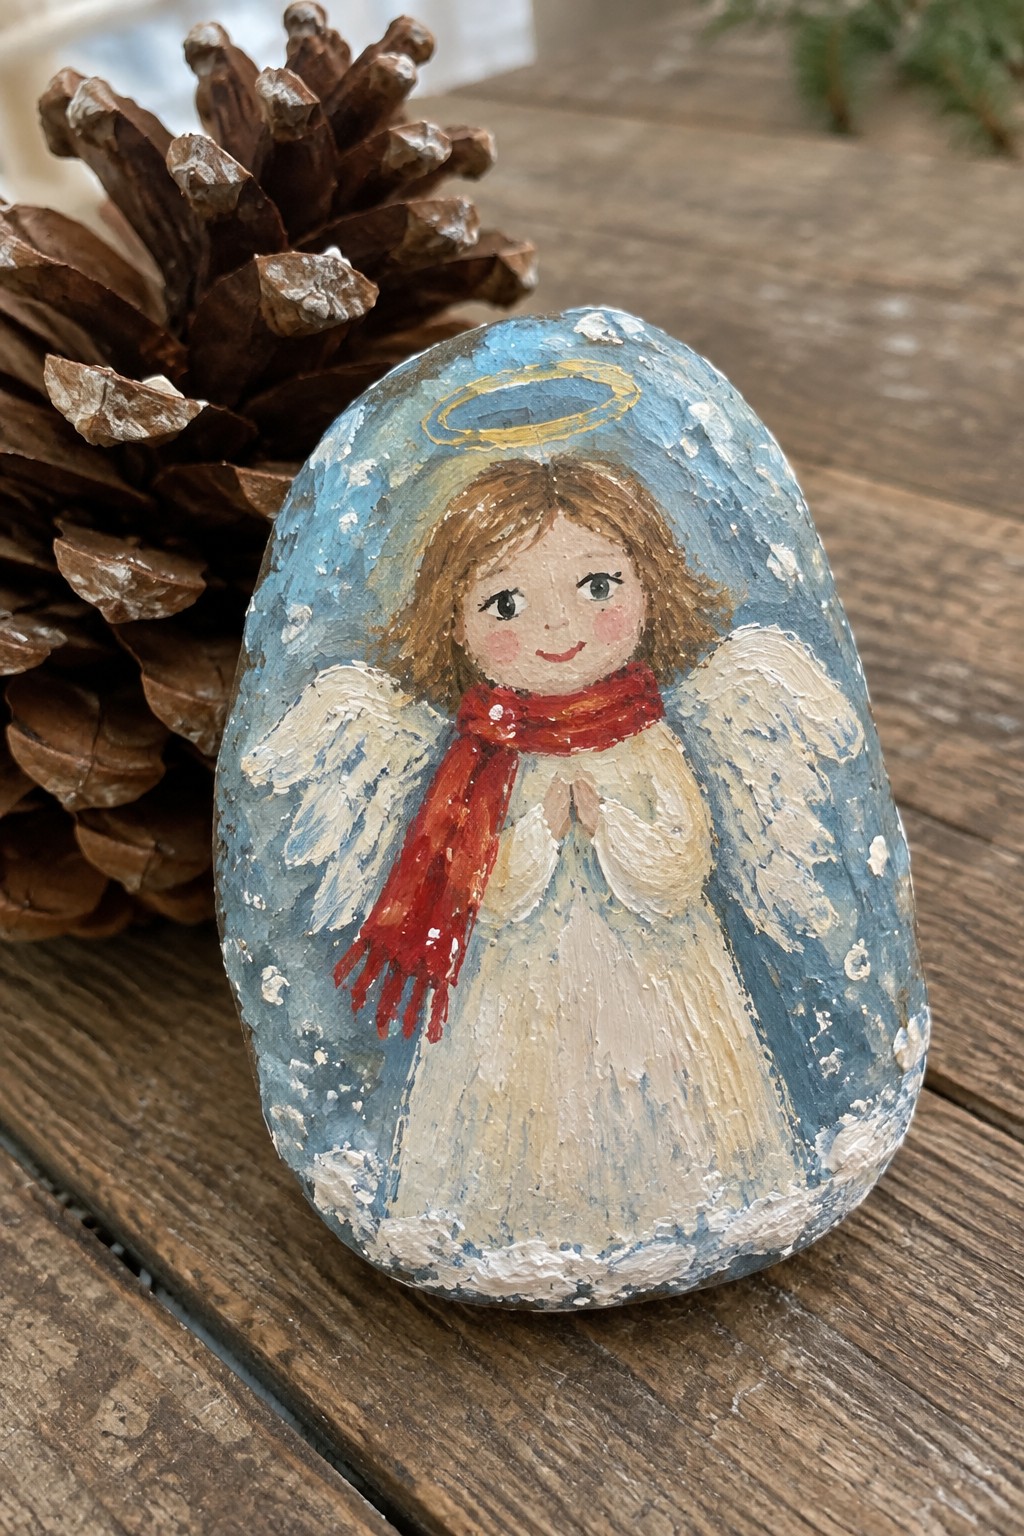
This idea centers on turning a rounded rock into a small angel figure set against a cool blue background scattered with white dots. The angel is built from simple shapes with a white gown, folded wings, and a single red scarf that stands out against the pale tones. The composition works because the rock shape itself guides the body outline while the limited background keeps attention on the figure.
What makes this idea useful is how the red scarf gives an easy focal point without needing extra details. You can swap the scarf color or skip the halo if you want a quicker version. The same layout works on different rock sizes and translates well to winter or holiday displays. For practice this subject helps with basic layering since the gown and wings can be built in stages.
Stacked Angel Trio on an Elongated Rock
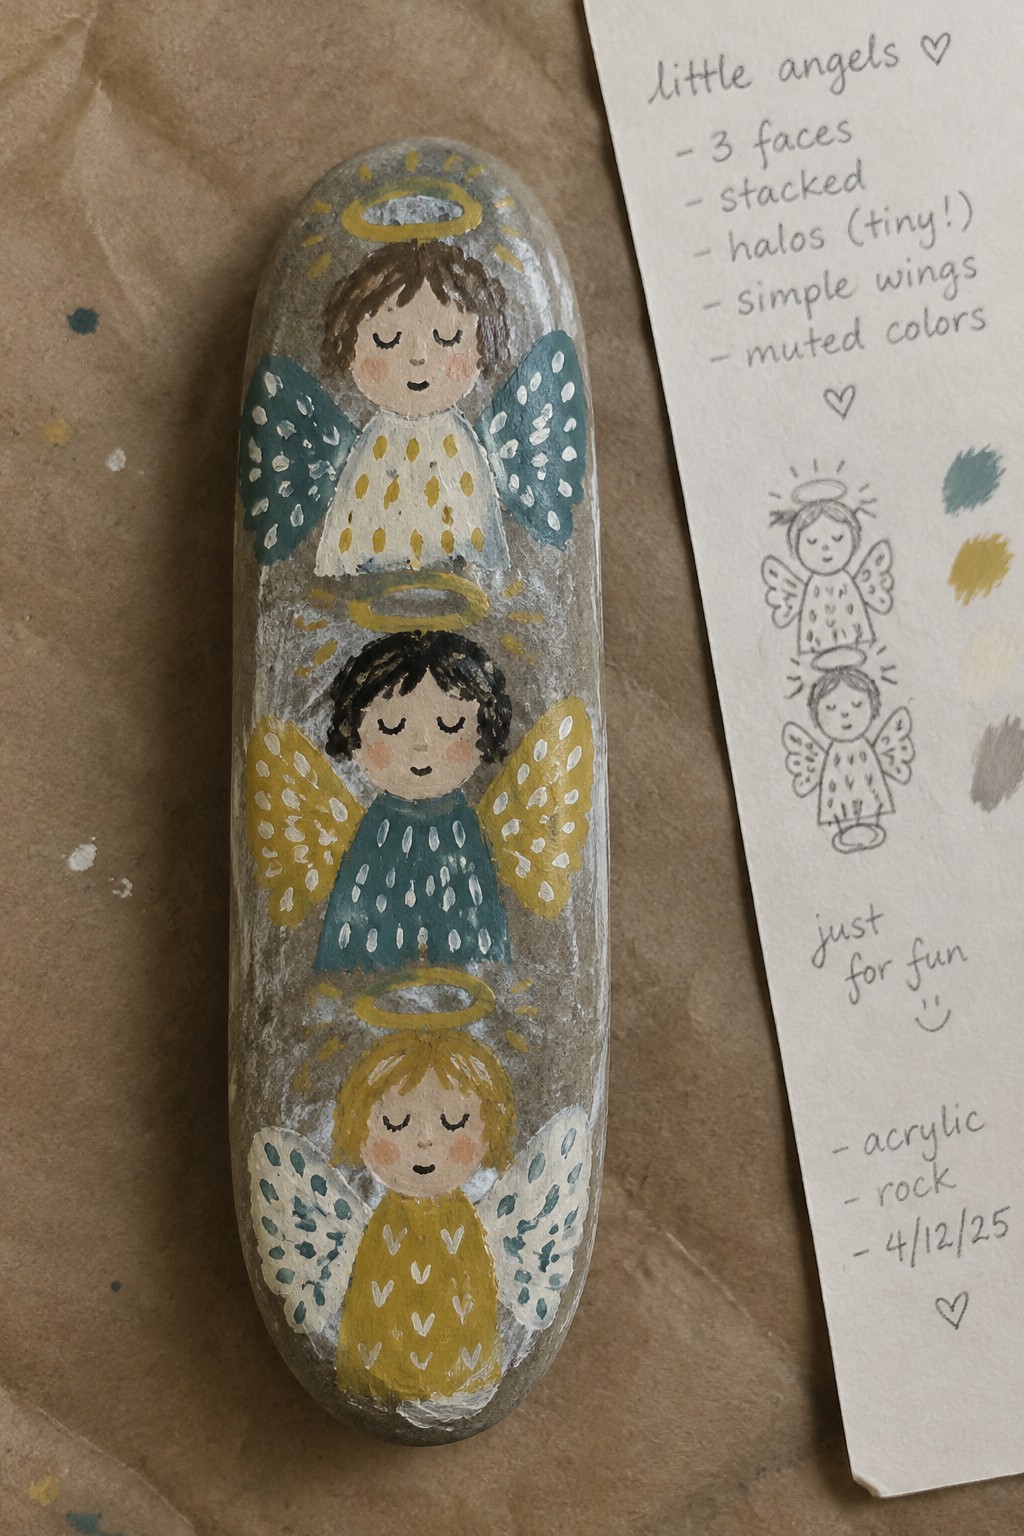
Three angels painted one above the other fit the natural shape of a tall, smooth rock and keep the design compact. Each figure uses the same simple face, halo, and wing layout but switches hair color and wing pattern to create variety while staying consistent. The muted teal, yellow, and cream palette plus small repeating details on the wings prevent the composition from feeling crowded.
The composition does a lot of the work here by using the rock’s length to separate the figures naturally. You can swap the wing patterns or hair colors easily if you want a set for different seasons or to match a gift. This approach works well for practice because the repeated shapes let you focus on clean brushwork and color placement without starting from scratch each time.
Angel and Moon Rock Pair
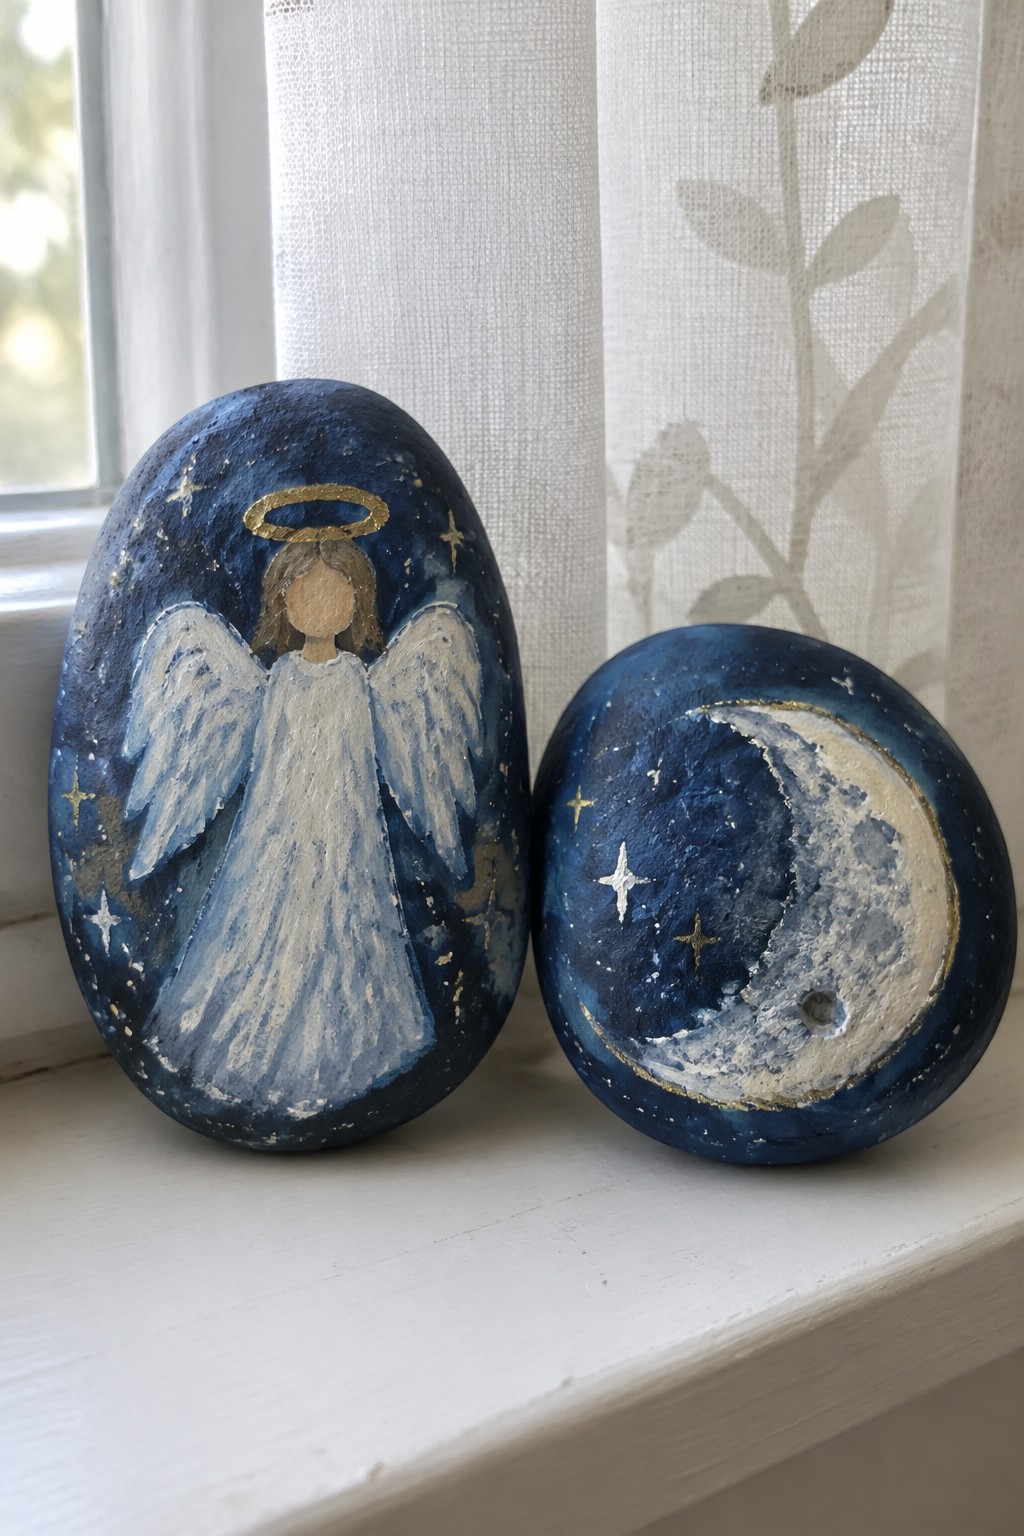
Painting an angel figure on a dark blue rock creates a night sky scene using a simple white gown shape, basic wings, scattered stars, and a thin gold halo. The matching crescent moon rock uses the same blue base with gold edging and white highlights to form a balanced two-piece set. This approach keeps the composition focused by letting the rounded rock shapes guide the placement of the main elements.
The composition does a lot of the work here by turning two ordinary stones into a ready-made display pair. The limited color palette makes this easy to adapt with different metallic shades or by adjusting the wing style for a more minimal look. This would be easy to turn into a small gift set or a seasonal windowsill arrangement. For practice, this kind of subject lets you work on basic figure placement without needing fine details.
Angel Holding a Teacup Painted Rock
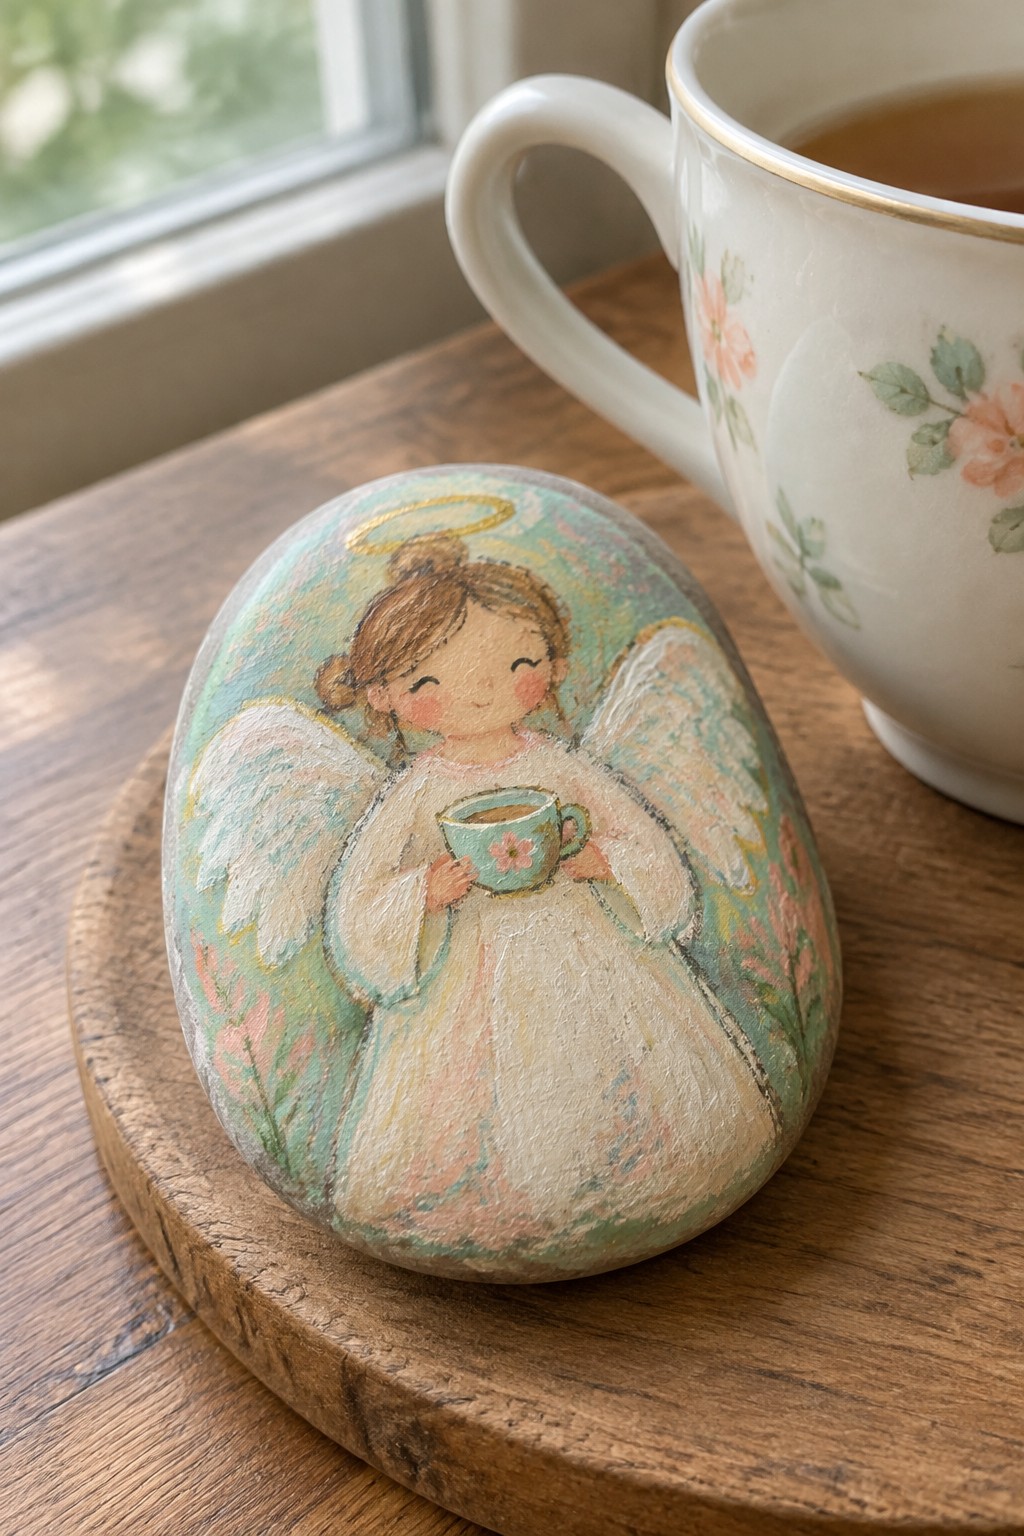
This idea centers on painting a standing angel figure on a smooth oval rock while adding a small teacup in her hands as the main focal point. The composition places the cup at the center of the body so the eye moves naturally from the face down to the hands, and the soft color washes around the wings and dress keep the shape readable even on a curved surface. It falls into the cute decorative category with a light still-life element built into the figure.
What makes this idea useful is the way the teacup gives beginners a simple object to practice inside the larger angel shape without needing extra space on the rock. The rounded form of the stone already suggests the body, so only the arms, wings, and cup need clear outlines. You can swap the cup color or add small flowers to match other rocks in a set, or change the dress tones to fit different seasons. The background stays minimal so the whole design stays quick to finish and easy to repeat.
Layered Scallop Wing in Earth Tones
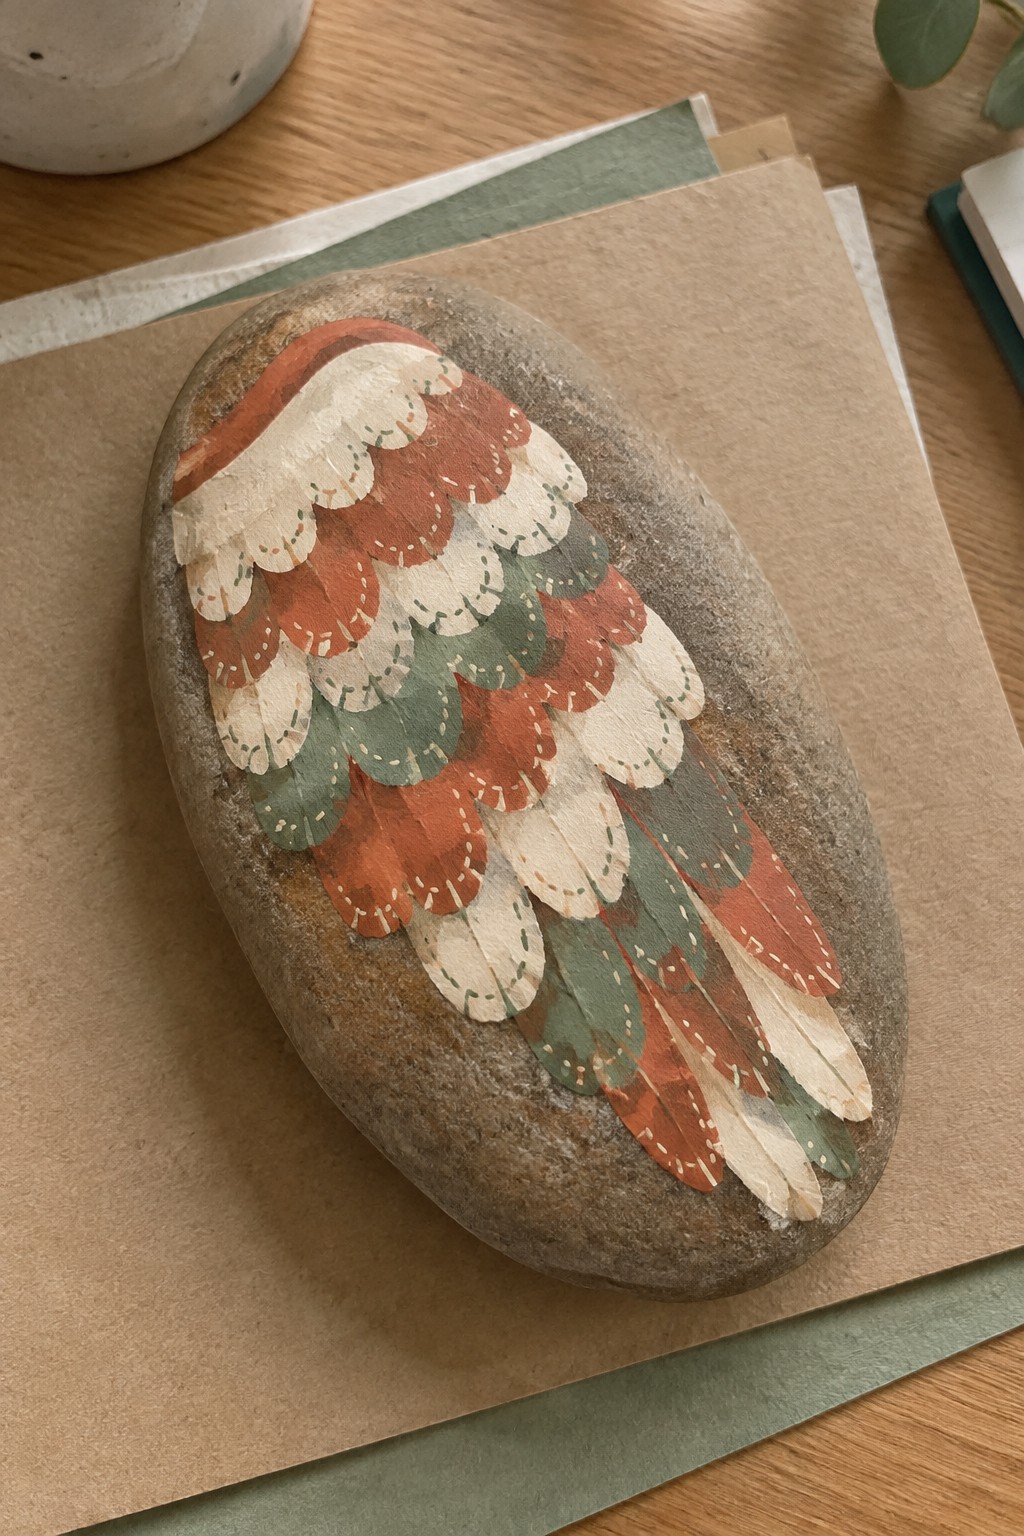
This painting idea uses a series of overlapping scalloped shapes to form an angel wing across an oval rock. The feathers are built in horizontal rows with a warm terracotta, cream, and sage green palette, plus small dotted lines that suggest feather texture. The curved top edge and gradual widening toward the bottom help the design follow the rock’s natural shape without needing precise symmetry.
What makes this idea useful is how the repeated scallop shape can be scaled up or down depending on the rock size. The limited color palette makes it easy to adapt for different seasons or decor styles by swapping in other tones. You could simplify it further by using just two colors or add more rows for a longer wing if your rock allows it. This approach stands out on Pinterest because the pattern reads clearly even in small thumbnail views.
Circle Stacked Angel with Striped Wings
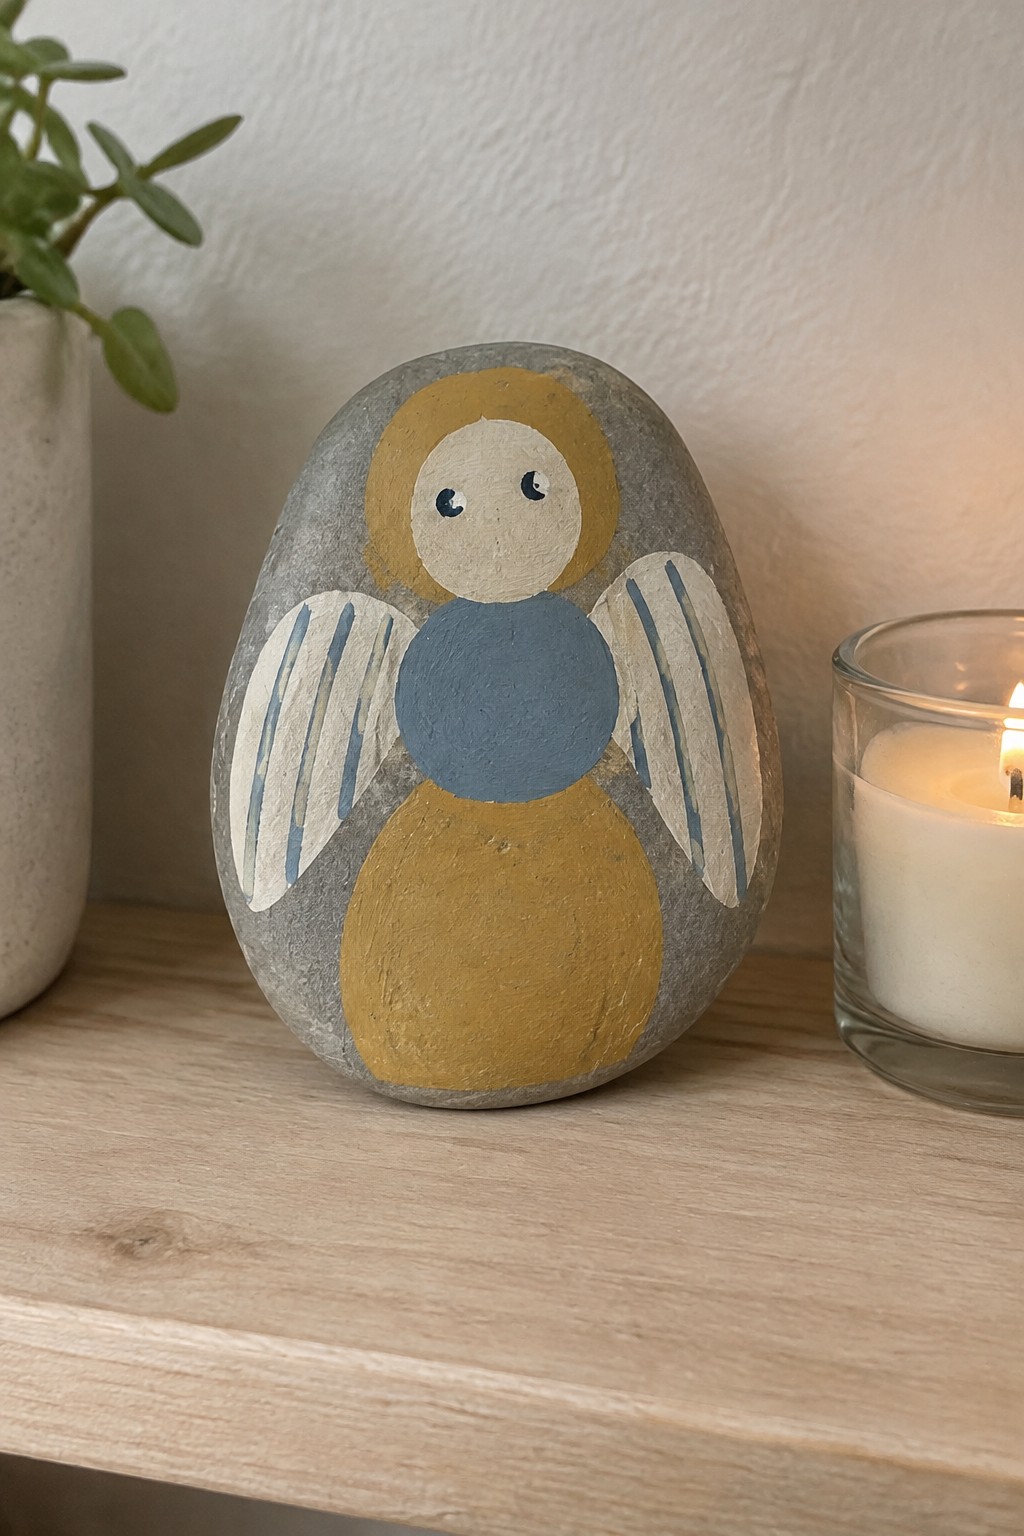
This rock painting uses a simple stack of circles and ovals to create an angel figure that fits the natural shape of the stone. A yellow base oval supports a blue midsection circle, while a smaller white circle forms the head under a golden halo. The wings sit on either side with a few straight blue lines over white to suggest feathers without extra detail.
What makes this idea useful is how the overlapping shapes follow the curve of the rock so the design stays balanced even on uneven surfaces. You can change the blue and yellow to any two colors that match your space or swap the wing lines for dots if you want fewer brushstrokes. The compact layout also works well for painting several versions at once to use as small gifts or shelf accents.
Floral Angel Rock with Headband and Wings

This painting idea uses a rounded rock as the base for a front-facing angel portrait. The design places the face in the center, with brown hair framing the sides, a blue headband across the forehead, and small wings tucked along the lower edges. A narrow band of matching blue and floral trim along the bottom edge helps anchor the composition and keeps the focus on the face.
What makes this idea useful is how the rock’s natural curve already defines the head and shoulder area, so the main work is just placing the features and adding the wings. The color choices stay simple with a few blues, browns, and skin tones, which makes it easy to adapt if you want to change the headband pattern or swap the flowers for dots. You could shrink the wings to fit a smaller stone or extend the floral trim into a full collar if you prefer more detail. This approach stands out on Pinterest because the subject is recognizable at thumbnail size.
Angel Figures Linked into a Rock Garland
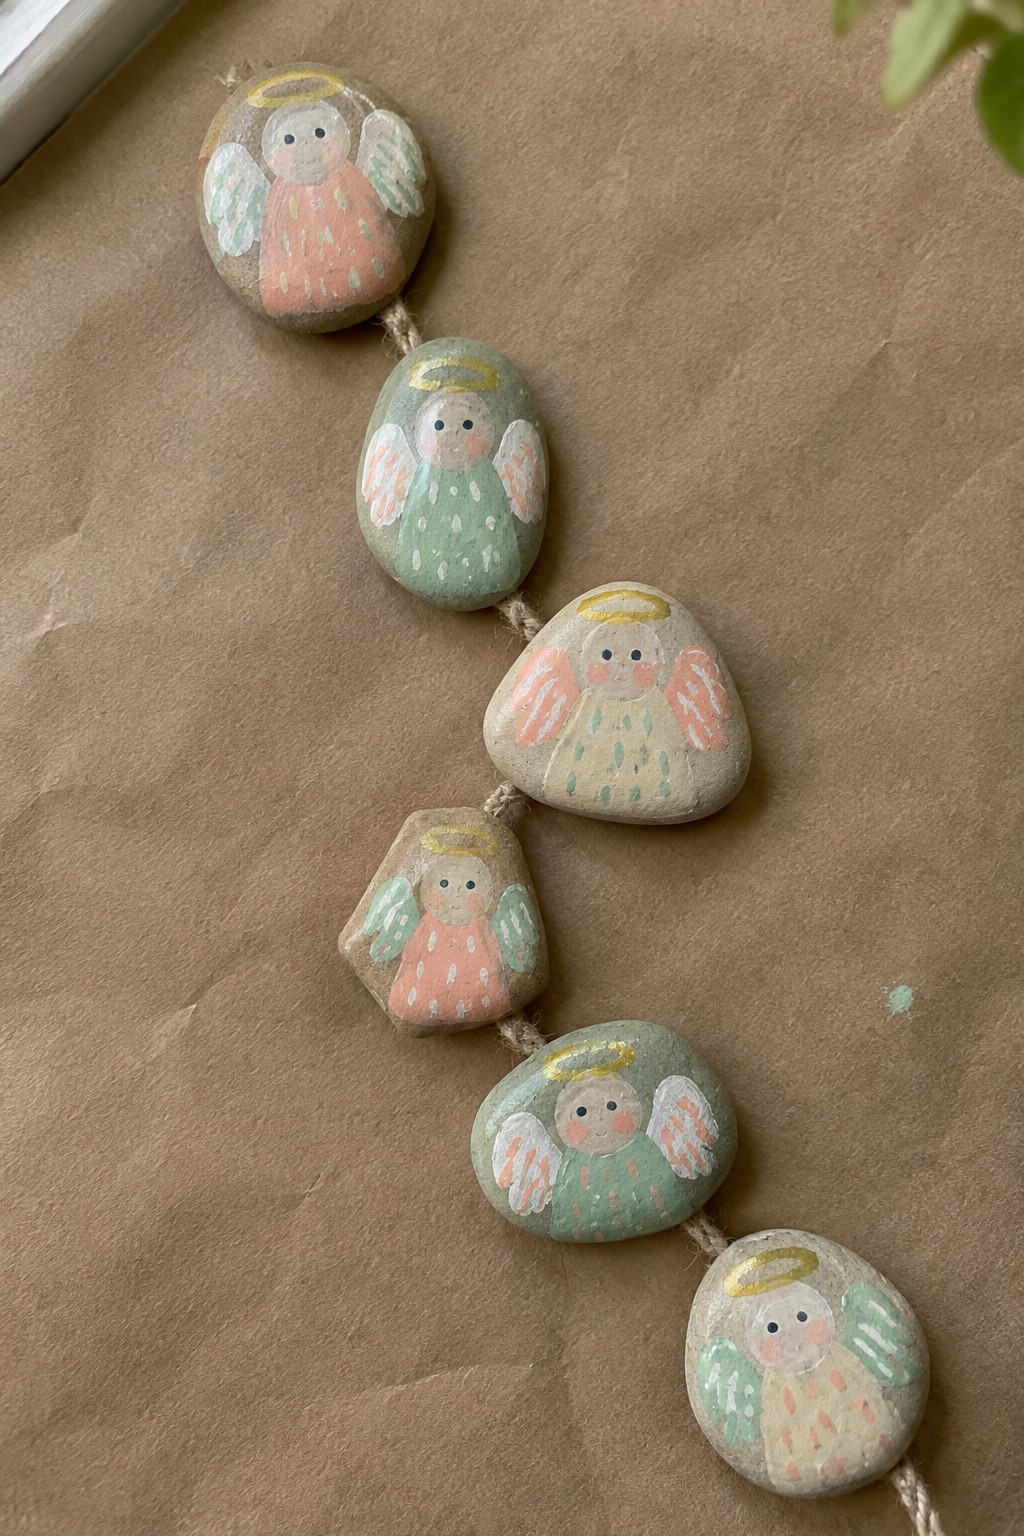
Painting simple angel shapes across several rocks and connecting them with twine creates a hanging strand that can be displayed vertically or draped. Each rock gets a round or oval body, small wings on the sides, a gold halo on top, and a basic dress shape filled with soft color. The repeated motif with slight variations in rock shape and dress color keeps the whole piece consistent without needing complex details.
What makes this idea useful is how the same angel layout can be repeated on rocks of different sizes to form one long strand or broken into smaller groups. The soft peach and mint palette stays easy to match if you want to swap in other pastel shades or add tiny dots for texture. This format works especially well for seasonal hanging decor since the rocks can be stored flat and restrung later with different spacing or extra beads between them.
Frequently Asked Questions
What supplies are recommended for beginners painting whimsical angel rocks? Start with smooth river rocks or flat stones that fit comfortably in your hand. Use acrylic paints in soft pastels and whites for the angel bodies along with fine tipped brushes for wings and halos. Add details like glitter glue or metallic markers for a whimsical touch. Finish with a clear outdoor sealant to protect the designs from weather if you plan to place them outside.
How do I make the angel faces look cute and expressive without advanced drawing skills? Begin by sketching a simple oval for the head and adding two small dots for eyes plus a curved line for a smile using a fine brush. Practice on paper first to get comfortable with proportions. Incorporate fun elements from the ideas such as rosy cheeks with pink paint or tiny star accents around the head to keep the look playful and beginner friendly.
What is the best way to seal painted angel rocks so the colors last? Allow the paint to dry completely for at least 24 hours. Apply two thin coats of a waterproof acrylic sealer with a sponge brush letting each coat dry fully between applications. This step prevents fading and chipping especially if the rocks will be used in gardens or given as gifts.
Can I adapt these angel rock ideas for different seasons or holidays? Yes easily. Swap pastel colors for autumn tones or add tiny pumpkins near the angels for fall themes. For winter use silver and blue paints with snowflake details on the wings. The core whimsical style with flowing robes and soft expressions works well across many occasions so experiment with the 18 base designs.
How long should I expect a single angel rock painting project to take? Most beginners complete one rock in 30 to 60 minutes for the base layers plus another 15 minutes for details. Factor in drying time between coats if you add multiple colors. Set aside a relaxed afternoon to try two or three ideas from the list and enjoy the process without rushing.