As Halloween approaches, my kitchen turns into a cauldron of creativity, bubbling with sweet treats that delight both the eyes and taste buds. I adore crafting ghostly meringue cookies that melt away like whispers. Candy corn fudge adds a cheerful pop of festive color to any table. Each recipe weaves its own spooky tale, sparking your imagination. Are you ready to discover the delicious surprises that await?
Ghostly Meringue Cookies
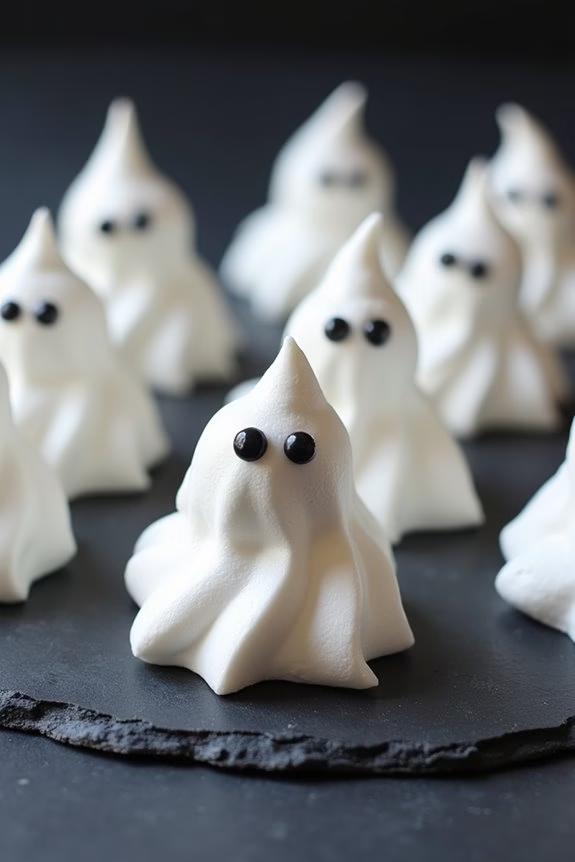
Ghostly Meringue Cookies are a delightful treat perfect for any Halloween gathering. These ethereal cookies, shaped like adorable ghosts, not only look spooky but also melt in your mouth with their light and airy texture. Whipping up a batch of these cookies is a fun activity that can be enjoyed with family and friends, adding a deliciously eerie touch to your festive spread.
These cookies are made of meringue, a simple confection of egg whites and sugar, and they can be piped into ghostly shapes with ease. Despite their delicate appearance, Ghostly Meringue Cookies are surprisingly simple to make, requiring only a few basic ingredients. With just a little bit of patience and a steady hand for piping, you’ll have a hauntingly delicious treat that will impress both kids and adults alike.
Ingredients (Serves 4-6):
- 4 large egg whites
- 1 cup granulated sugar
- 1/4 teaspoon cream of tartar
- 1 teaspoon vanilla extract
- Black gel food coloring (for eyes)
Cooking Instructions:
- Preheat Oven: Begin by preheating your oven to 225°F (110°C). This low temperature guarantees the meringue dries out slowly for a perfectly crisp texture.
- Prepare Baking Sheet: Line a baking sheet with parchment paper. This will prevent the meringue ghosts from sticking and make clean-up easier.
- Beat Egg Whites: In a clean, dry mixing bowl, beat the egg whites on medium speed using an electric mixer until they become frothy.
- Add Cream of Tartar: Add the cream of tartar to the frothy egg whites. This stabilizes the meringue, helping it hold its shape.
- Gradually Add Sugar: Increase the mixer speed to high and gradually add the granulated sugar, one tablespoon at a time. Continue beating until the mixture forms stiff, glossy peaks.
- Add Vanilla Extract: Gently fold in the vanilla extract, being careful not to deflate the meringue.
- Pipe Meringue Ghosts: Transfer the meringue mixture to a piping bag fitted with a round nozzle. Pipe ghost shapes onto the prepared baking sheet, making small blobs for the bodies and pulling up quickly to form the head.
- Add Eyes: Use a toothpick dipped in black gel food coloring to dot eyes onto each ghost.
- Bake: Bake in the preheated oven for 1.5 to 2 hours, or until the meringues are dry to the touch. Turn off the oven and let the cookies cool inside with the door slightly ajar for about an hour.
Extra Tips: Confirm your mixing bowl and beaters are completely grease-free, as any fat can prevent the egg whites from whipping properly.
Also, make sure to add sugar slowly to dissolve thoroughly, which helps achieve that classic stiff and glossy meringue. If possible, avoid making meringue on a humid day, as moisture can prevent the cookies from drying out properly.
Store the cookies in an airtight container to maintain their crispness until serving.
Candy Corn Fudge
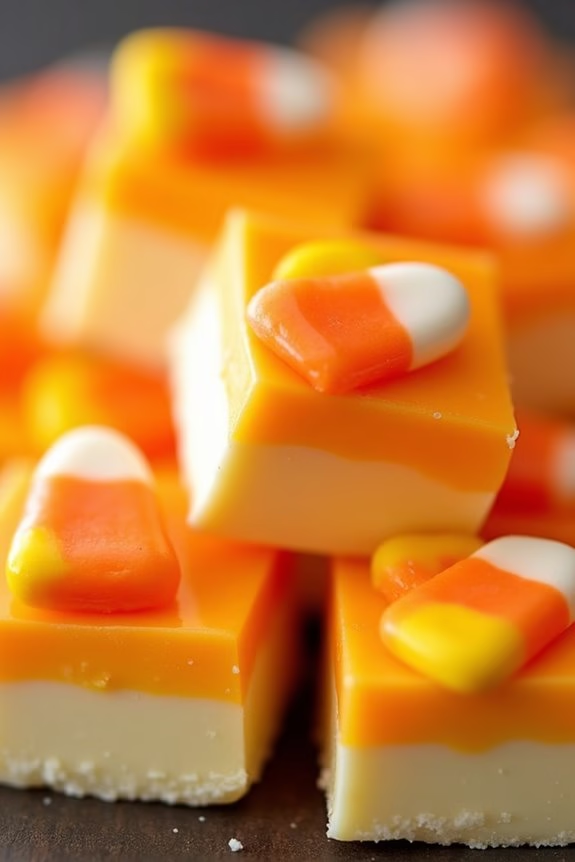
Candy Corn Fudge is a delightful Halloween treat that combines the sweetness of candy corn with the creamy texture of fudge. This festive confection is perfect for parties, trick-or-treating, or simply enjoying at home with family and friends. The vibrant layers of orange, yellow, and white mimic the classic candy corn look, making it a visually appealing addition to your Halloween snacks.
Not only is it easy to make, but it’s also a fun recipe to prepare with kids, as they can help layer the colors and add their own creative flair. This recipe yields a serving size of 4-6 people, making it ideal for small gatherings or to keep as a sweet indulgence throughout the Halloween season.
The combination of white chocolate, sweetened condensed milk, and candy corn creates a rich and decadent treat that’s sure to satisfy any sweet tooth. With just a few ingredients and some simple steps, you can whip up a batch of Candy Corn Fudge that will have everyone asking for seconds.
Ingredients:
- 3 cups white chocolate chips
- 1 can (14 oz) sweetened condensed milk
- 1 teaspoon vanilla extract
- 1 cup candy corn
- Orange food coloring
- Yellow food coloring
- Non-stick cooking spray
Cooking Instructions:
- Prepare the Baking Pan: Line an 8×8-inch baking pan with parchment paper, leaving an overhang on the sides for easy removal. Lightly spray the paper with non-stick cooking spray to guarantee the fudge doesn’t stick.
- Melt the Chocolate: In a medium saucepan, combine the white chocolate chips and sweetened condensed milk. Heat over low-medium heat, stirring constantly until the chocolate is completely melted and the mixture is smooth. Remove from heat and stir in the vanilla extract.
- Divide and Color the Mixture: Divide the melted chocolate mixture into three separate bowls. In the first bowl, add a few drops of orange food coloring and stir until the color is evenly distributed. In the second bowl, add a few drops of yellow food coloring and mix well. Leave the third bowl plain white.
- Create the Layers: Pour the orange-colored mixture into the prepared baking pan and spread it evenly to form the first layer. Gently tap the pan on the counter to remove any air bubbles. Place the pan in the refrigerator for about 15 minutes or until the layer is firm.
- Add the Yellow Layer: Once the orange layer is set, pour the yellow mixture over it, spreading it evenly. Tap the pan again to guarantee a smooth surface, then refrigerate for an additional 15 minutes.
- Finish with the White Layer: Finally, pour the plain white mixture over the yellow layer, smoothing it evenly across the top. Press candy corn pieces into the surface of the white layer, arranging them in rows or a pattern of your choice.
- Chill and Set: Refrigerate the assembled fudge for at least 2 hours or until completely firm and set. Once set, lift the fudge out of the pan using the parchment paper overhang and place it on a cutting board.
- Cut and Serve: Use a sharp knife to cut the fudge into squares or rectangles. Serve immediately or store in an airtight container in the refrigerator until ready to serve.
Extra Tips:
When making Candy Corn Fudge, make sure to stir the chocolate mixture continuously while melting to prevent it from burning. If the mixture becomes too thick while coloring it, a few drops of milk can help achieve the desired consistency.
It’s important to let each layer set properly in the refrigerator before adding the next to guarantee clean, distinct layers. Additionally, if you prefer a softer fudge, you can let it sit at room temperature for a few minutes before serving. Enjoy your festive creation and have a spooktacular Halloween!
Spooky Spider Cupcakes
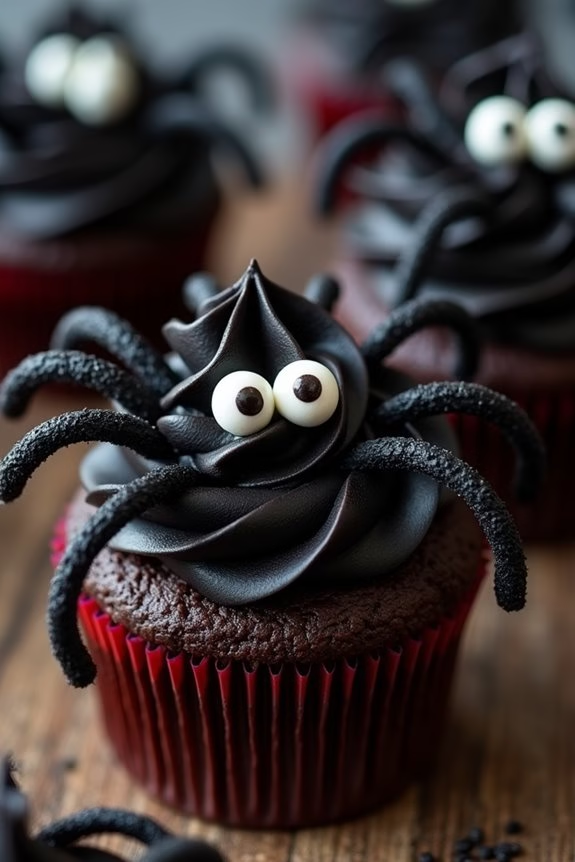
Spooky Spider Cupcakes are a fun and festive treat perfect for Halloween parties or simply to enjoy with family and friends during the spooky season. These delightful cupcakes are designed to look like little spiders, complete with licorice legs and candy eyes, making them both eerie and adorable. Not only do they look impressive, but they also taste delicious with a rich chocolate base and creamy frosting.
Preparing Spooky Spider Cupcakes is a straightforward process that involves baking chocolate cupcakes, topping them with a smooth buttercream frosting, and decorating them to resemble creepy crawly spiders. This Halloween snack is certain to be a hit with both kids and adults, providing a sweet and spooky addition to your celebration. The recipe below serves 4-6 people, making it perfect for a small gathering or for sharing with loved ones.
Ingredients:
- 1 cup all-purpose flour
- 1/2 cup unsweetened cocoa powder
- 1 teaspoon baking soda
- 1/2 teaspoon salt
- 1/2 cup unsalted butter, softened
- 1 cup granulated sugar
- 2 large eggs
- 1 teaspoon vanilla extract
- 3/4 cup buttermilk
- 1 cup buttercream frosting (store-bought or homemade)
- Black food coloring
- 24 pieces of black licorice strings
- 12 candy eyes
Instructions:
- Preheat the Oven: Begin by preheating your oven to 350°F (175°C) and line a 12-cup muffin tin with cupcake liners.
- Prepare the Dry Ingredients: In a medium bowl, sift together the flour, cocoa powder, baking soda, and salt. Set this mixture aside.
- Cream the Butter and Sugar: In a large mixing bowl, use an electric mixer to beat the softened butter and sugar together until light and fluffy, about 3 minutes.
- Add Eggs and Vanilla: Beat in the eggs one at a time, making sure each egg is fully incorporated before adding the next. Mix in the vanilla extract.
- Combine Wet and Dry Ingredients: Gradually add the dry ingredients to the wet mixture, alternating with the buttermilk. Begin and end with the dry ingredients, mixing until just combined.
- Fill the Cupcake Liners: Divide the batter evenly among the cupcake liners, filling each about two-thirds full.
- Bake the Cupcakes: Place the muffin tin in the preheated oven and bake for 18-20 minutes, or until a toothpick inserted into the center of a cupcake comes out clean. Allow the cupcakes to cool completely on a wire rack.
- Prepare the Frosting: While the cupcakes cool, tint the buttercream frosting with black food coloring until the desired shade is achieved.
- Frost the Cupcakes: Once cooled, generously frost each cupcake with the black buttercream.
- Decorate with Licorice and Candy Eyes: Cut the licorice strings into 2-inch pieces and place three pieces on each side of the cupcakes to form spider legs. Place two candy eyes on top of each cupcake for the spider’s eyes.
Extra Tips:
When making Spooky Spider Cupcakes, guarantee that the cupcakes are completely cool before frosting to prevent the buttercream from melting.
If you have difficulty finding black licorice, you can use other edible options like pretzel sticks dipped in black candy melts.
For an added touch of spookiness, consider using different colored candy eyes or adding edible glitter to the frosting.
These cupcakes can be made a day in advance and stored in an airtight container, making them a convenient option for busy hosts.
Monster Eye Pretzel Bites
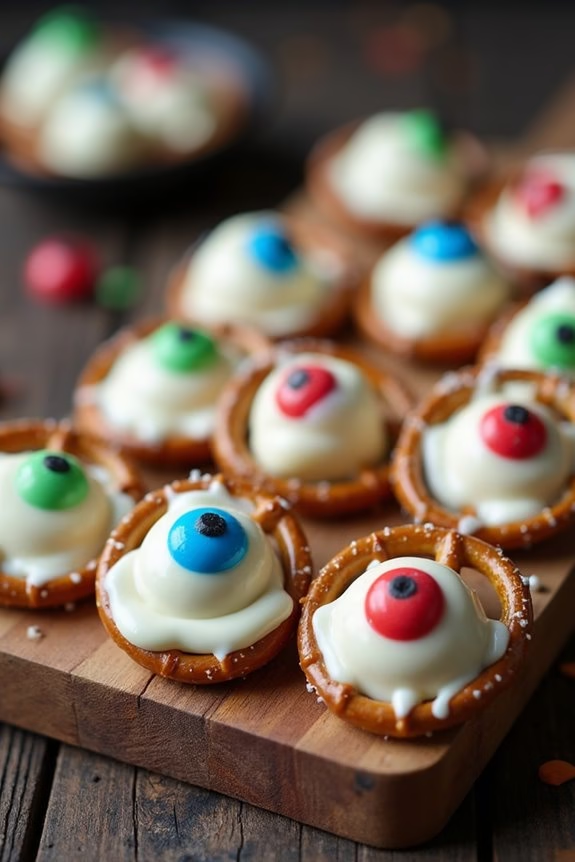
The beauty of this recipe is its simplicity and flexibility. You can customize the colors and candies to match your Halloween theme, making it an interactive and fun activity for the whole family.
Plus, these snacks can be prepared in advance, allowing you to focus on other aspects of your Halloween festivities. With a prep time of only 15 minutes and a short baking time, you’ll have plenty of time to enjoy the spooky season without spending too much time in the kitchen.
Ingredients for 4-6 people:
- 50 mini pretzel twists
- 50 candy-coated chocolates (e.g., M&M’s)
- 50 candy eyeballs
- 1 cup white chocolate melts or chips
- Food coloring (optional, for coloring white chocolate)
Instructions:
- Preheat the Oven: Start by preheating your oven to 200°F (93°C). This low heat setting is perfect for melting the chocolate without burning it.
- Arrange the Pretzels: On a baking sheet lined with parchment paper, arrange the mini pretzel twists in a single layer, ensuring they’re evenly spaced.
- Add Chocolate Melts: Place one white chocolate melt or a few white chocolate chips on top of each pretzel. If you want colored monster eyes, melt your chocolate in separate bowls, add a few drops of food coloring, and stir until evenly combined before placing them on the pretzels.
- Melt the Chocolate: Put the baking sheet in the oven for about 4-5 minutes, or until the chocolate is soft but not completely melted. Keep a close eye on them to prevent over-melting.
- Add Candy Coated Chocolates: Remove the baking sheet from the oven and immediately press a candy-coated chocolate into the center of each melted chocolate disc. This will create the iris of the monster eye.
- Add the Candy Eyes: While the chocolate is still warm, press a candy eyeball onto each candy-coated chocolate. The warmth of the chocolate will hold the candy eye in place as it cools.
- Cool and Set: Allow the Monster Eye Pretzel Bites to cool completely at room temperature or place them in the refrigerator for faster setting.
Extra Tips:
For an extra spooky touch, consider using different colors of candy-coated chocolates to create a variety of monster eyes.
You can also mix dark chocolate melts with white ones for a different flavor profile. If you find the candy eyes aren’t sticking well, slightly remelt the chocolate by placing the pretzels back in the oven for a minute.
Store these pretzel bites in an airtight container at room temperature for up to a week, making them a convenient make-ahead treat for your Halloween festivities.
Witch Hat Cookies
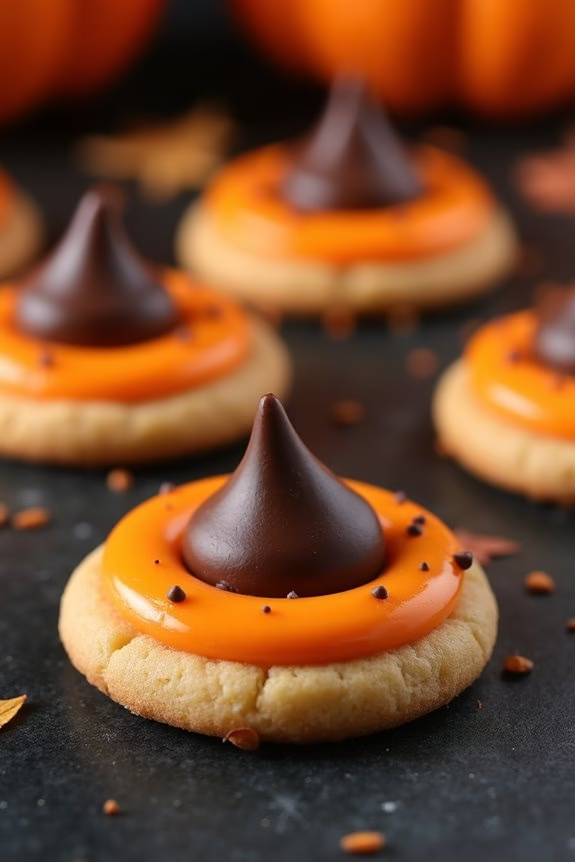
Witch Hat Cookies are a delightful and whimsical treat perfect for Halloween. These cookies not only taste delicious but also serve as a fun and festive decoration for your Halloween party. Shaped like miniature witch hats, these cookies are made using a combination of store-bought ingredients and a touch of creativity. They’re a hit among kids and adults alike, providing a sweet and spooky addition to your holiday snack spread.
The process of making Witch Hat Cookies is incredibly simple and requires minimal baking skills, making it an excellent choice for a quick and easy Halloween snack. The recipe combines chocolate cookies with a luscious dollop of icing, topped with chocolate kisses to create the perfect witch hat silhouette. These cookies can be made in advance and stored, guaranteeing you have ample time to focus on other Halloween preparations. Gather your ingredients, and let’s bring some magic to your kitchen with these charming Witch Hat Cookies.
Ingredients (Serves 4-6):
- 24 chocolate wafer cookies
- 24 chocolate kisses
- 1 cup of orange icing (store-bought or homemade)
- 1/4 cup of mini chocolate chips (optional for decoration)
Cooking Instructions:
- Prepare the Icing: If you’re using homemade icing, prepare it by mixing powdered sugar with a small amount of water or milk and orange food coloring until you reach the desired consistency and color. Store-bought icing can be used directly.
- Set Up the Cookies: Lay out the chocolate wafer cookies on a flat surface or baking tray. Confirm they’re evenly spaced to allow for easy assembly.
- Add the Icing: Using a piping bag or a small spoon, place a small dollop of orange icing in the center of each chocolate wafer cookie. This will act as the adhesive to hold the chocolate kiss in place.
- Attach the Chocolate Kisses: Unwrap the chocolate kisses and gently press one onto the icing of each chocolate wafer cookie. The icing should hold the kiss securely in place. Allow the icing to set slightly before moving on to the next step.
- Decorate (Optional): For an added touch, you can place a few mini chocolate chips around the base of the chocolate kiss or use additional icing to draw designs on the hats.
- Let Them Set: Allow the assembled Witch Hat Cookies to set for about 15-20 minutes at room temperature. This will guarantee the icing hardens enough to keep the components together.
Extra Tips:
For an extra touch of Halloween magic, consider using different colored icings to create a variety of witch hat designs. You can also experiment with different flavors of chocolate kisses, such as dark chocolate or mint, to add a unique twist to your cookies.
If you’re preparing these snacks with children, it can be a fun activity to let them decorate their own witch hats with sprinkles or edible glitter. Remember to store any leftover cookies in an airtight container to maintain freshness, allowing you to enjoy these spooky treats throughout the Halloween season.
Pumpkin Spice Rice Krispie Treats
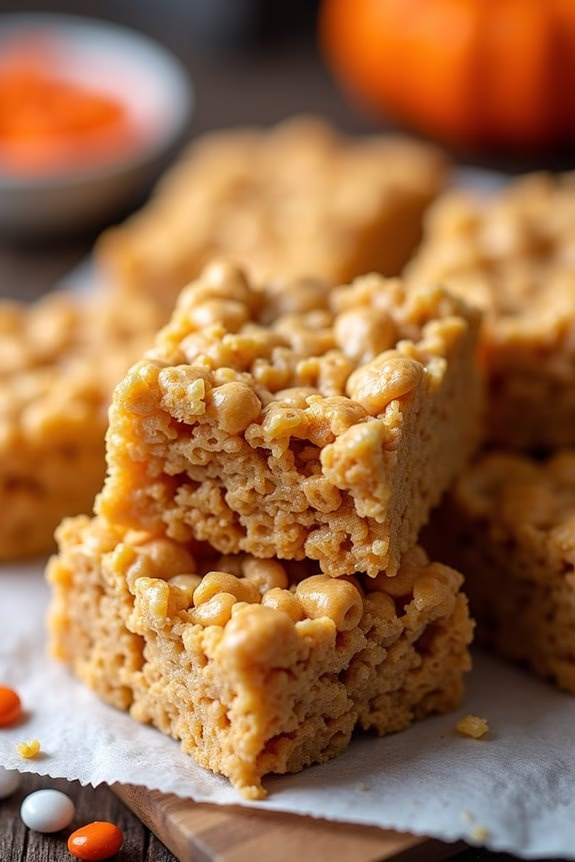
The beauty of Pumpkin Spice Rice Krispie Treats lies in their versatility and ease of preparation. This no-bake recipe saves you time in the kitchen, allowing you to focus on other Halloween festivities.
You can also get creative by using cookie cutters to shape the treats into fun Halloween-themed designs or by adding festive decorations like candy eyes or colored sprinkles. Whether you’re serving them as a standalone treat or as part of a larger Halloween dessert table, these Pumpkin Spice Rice Krispie Treats are sure to be a hit.
Ingredients (Serving size: 4-6 people):
- 6 cups of Rice Krispies cereal
- 1 bag (10 oz) of mini marshmallows
- 1/4 cup of unsalted butter
- 1 teaspoon of pumpkin spice
- 1/2 teaspoon of vanilla extract
- Cooking spray or extra butter for greasing
Cooking Instructions:
- Prepare the Pan: Begin by lightly greasing a 9×13-inch baking dish with cooking spray or butter. Set it aside; this will prevent the Rice Krispie mixture from sticking to the pan.
- Melt the Butter: In a large saucepan, melt the unsalted butter over low heat. Stir continuously to make sure the butter doesn’t burn.
- Add Marshmallows: Once the butter is completely melted, add the mini marshmallows to the saucepan. Stir the mixture constantly until the marshmallows are completely melted and smooth.
- Incorporate Flavors: Stir in the pumpkin spice and vanilla extract into the melted marshmallow mixture. Mix well to make certain the spices are evenly distributed throughout.
- Combine with Cereal: Remove the saucepan from heat. Quickly add the Rice Krispies cereal to the marshmallow mixture. Stir until all the cereal is thoroughly coated with the marshmallow mixture.
- Transfer to the Baking Dish: Pour the cereal mixture into the prepared baking dish. Use a spatula or your hands (lightly greased with butter or cooking spray) to press the mixture evenly into the dish. Be gentle to avoid crushing the cereal.
- Cool and Set: Allow the mixture to cool and set completely at room temperature for at least 30 minutes. This will make it easier to cut into squares or desired shapes.
- Serve: Once set, cut the Pumpkin Spice Rice Krispie Treats into squares or use cookie cutters to create fun shapes. Serve and enjoy!
Extra Tips: For more festive fun, consider adding a few drops of orange food coloring to the marshmallow mixture before adding the cereal, giving your treats a vibrant Halloween hue.
If you prefer a spicier treat, increase the amount of pumpkin spice according to taste. To make cleanup easier, line the baking dish with parchment paper before pressing in the cereal mixture. This way, you can easily lift the entire block of treats out of the dish for cutting.
Finally, store any leftover treats in an airtight container to keep them fresh and chewy for up to a week.
Bat-Shaped Brownies
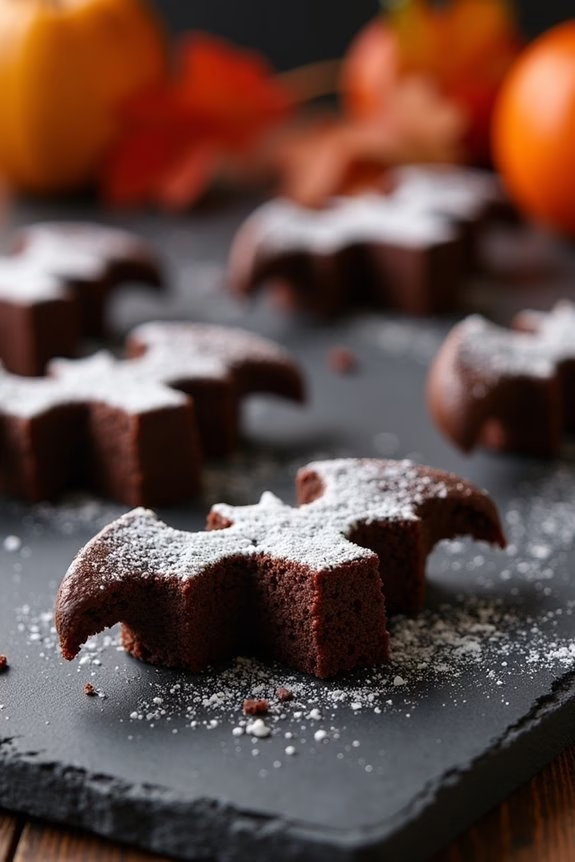
Get ready to delight your guests with these spooktacular Bat-Shaped Brownies, perfect for adding a festive touch to your Halloween snack table.
These rich, chocolatey treats aren’t only delicious but also fun to make! With a simple brownie recipe that’s easy to follow, you can transform ordinary brownies into a Halloween-themed dessert that will charm both kids and adults alike.
Whether you’re hosting a Halloween party, or just looking to add some seasonal flair to your treats, these bat-shaped brownies are bound to be a hit.
To make these bat-shaped brownies, you’ll whip up a classic brownie batter and then use a bat-shaped cookie cutter to achieve the festive appearance.
The brownies can be topped with a variety of decorations such as powdered sugar or chocolate icing to enhance their spooky look.
The combination of rich cocoa flavor and creative presentation makes these brownies an ideal choice for Halloween celebrations.
The recipe below serves 4-6 people, making it perfect for a small gathering or family treat.
Ingredients:
- 1 cup unsalted butter
- 2 cups granulated sugar
- 4 large eggs
- 1 teaspoon vanilla extract
- 1 cup all-purpose flour
- 1/2 cup unsweetened cocoa powder
- 1/2 teaspoon baking powder
- 1/4 teaspoon salt
- Bat-shaped cookie cutter
- Optional: powdered sugar or chocolate icing for decoration
Instructions:
- Preheat the Oven: Start by preheating your oven to 350°F (175°C). This guarantees that your brownies will bake evenly once the batter is ready.
- Prepare the Baking Pan: Grease a 9×13-inch baking pan with butter or non-stick spray. You can also line it with parchment paper for easy removal later.
- Melt the Butter: In a medium saucepan, melt the butter over low heat. Once melted, remove from heat and stir in the sugar until well combined.
- Mix the Wet Ingredients: Add the eggs one at a time into the butter-sugar mixture, beating well after each addition. Stir in the vanilla extract.
- Combine Dry Ingredients: In a separate bowl, sift together the flour, cocoa powder, baking powder, and salt. This helps to guarantee there are no lumps in the batter.
- Create the Batter: Gradually add the dry ingredients to the wet ingredients, mixing until just combined. Avoid overmixing to keep the brownies tender.
- Bake the Brownies: Pour the batter into the prepared baking pan, spreading it evenly. Bake in the preheated oven for 25-30 minutes, or until a toothpick inserted into the center comes out with a few moist crumbs.
- Cool and Cut: Allow the brownies to cool completely in the pan on a wire rack. Once cooled, use the bat-shaped cookie cutter to cut out the brownie bats.
- Decorate: Dust the bat-shaped brownies with powdered sugar or drizzle with chocolate icing for a festive touch.
Extra Tips:
For an extra touch of Halloween fun, consider adding edible googly eyes or other themed decorations to your bat-shaped brownies.
If you’re making these treats with kids, let them get creative with the decorations.
Make sure your cookie cutter is sharp enough to cleanly cut through the brownies, and if the brownies are too thick, you can gently press down to guarantee the shapes come out perfectly.
If you don’t have a bat-shaped cutter, you can print a bat template, place it on the brownies, and carefully cut around it with a knife.
Enjoy your spooky, delicious creations!
Creepy Crawly Gummy Worm Jell-O Cups
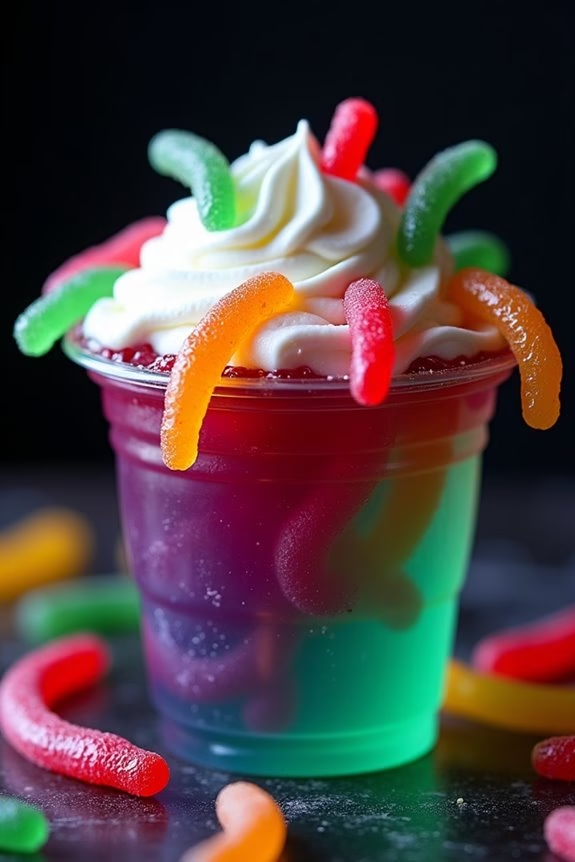
Creepy Crawly Gummy Worm Jell-O Cups are a fun and spooky treat perfect for any Halloween party. These jiggly, colorful desserts bring an element of surprise and fun to your festive spread. The combination of fruity Jell-O and chewy gummy worms is sure to delight both kids and adults alike.
They’re easy to make, visually appealing, and offer just the right amount of “ew” factor to thrill your guests without being too scary. These cups aren’t only delicious but also provide a creative opportunity for presentation. You can serve them in clear cups to display the gummy worms wiggling through the Jell-O, adding to the creepy effect.
This recipe makes enough for 4-6 people, making it an ideal choice for small gatherings or as part of a larger dessert table. With just a few simple ingredients and some chilling time, you can whip up these Halloween treats in no time.
Ingredients for 4-6 servings:
- 2 packs (3 oz each) of flavored Jell-O (any color/flavor)
- 2 cups boiling water
- 2 cups cold water
- 1 pack (7 oz) gummy worms
- Whipped cream (optional for topping)
Cooking Instructions:
- Prepare the Jell-O: Start by boiling 2 cups of water. Once boiling, pour the hot water into a large mixing bowl containing the Jell-O powder. Stir well until the powder is completely dissolved.
- Add Cold Water: After the Jell-O powder is dissolved, add 2 cups of cold water to the mixture. Stir to combine. This helps the Jell-O set properly and cools the mixture down.
- Set the Base Layer: Pour the Jell-O mixture into clear cups, filling each cup about halfway. Place the cups in the refrigerator for about 30-45 minutes, or until the Jell-O is partially set (it should be the consistency of egg whites).
- Add Gummy Worms: After the Jell-O has partially set, remove the cups from the refrigerator. Insert gummy worms into the Jell-O, allowing part of the worm to protrude from the top for a “crawling out” effect. You can add 2-3 worms per cup, depending on your preference.
- Final Layer and Chill: Pour the remaining Jell-O mixture over the gummy worms to fill the cups. Return the cups to the refrigerator and let them chill for at least 2 hours, or until fully set.
- Serve: Once the Jell-O has fully set, you can top each cup with a dollop of whipped cream if desired. Serve chilled and enjoy!
Extra Tips: For an extra spooky effect, use a mix of different colored Jell-O and gummy worms to create a variety of looks. You can also experiment with different flavors to suit your taste.
If you want to add a bit of crunch, consider crushing some chocolate cookies on top to resemble dirt. Make sure to check the setting process; if the Jell-O sets too much before adding the worms, they may not stick in place. Adjust the timing according to your refrigerator’s cooling efficiency.
Bloody Red Velvet Cake Pops
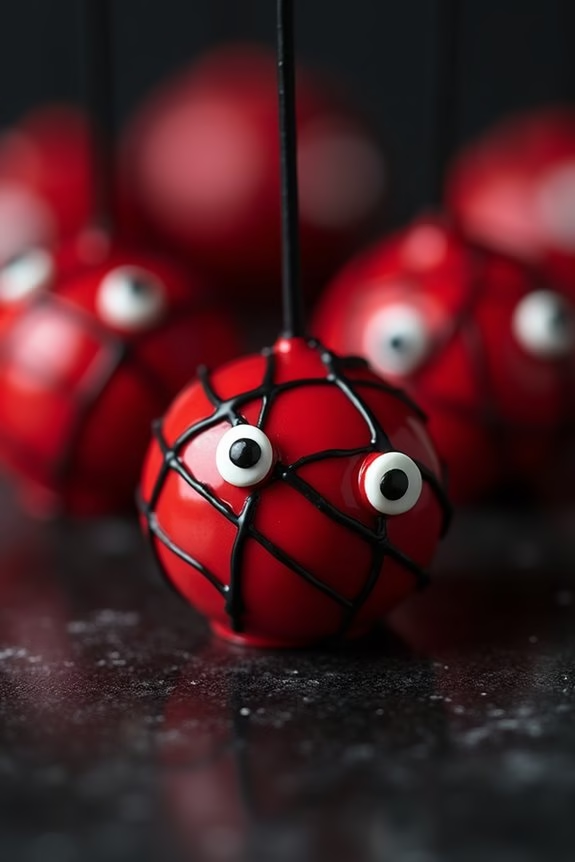
Making Bloody Red Velvet Cake Pops is a fun and engaging activity that can be a great way to involve family or friends in the kitchen. The process involves baking a classic red velvet cake, crumbling it, and mixing it with frosting to create a dough-like consistency. This mixture is then shaped into balls, skewered with sticks, dipped in chocolate, and decorated to resemble bloody eyeballs or other spooky designs.
With a bit of creativity and some simple ingredients, you can transform these cake pops into a frightfully delightful Halloween snack.
Ingredients (for 4-6 people):
- 1 box red velvet cake mix (plus ingredients required for the cake)
- 1 cup cream cheese frosting
- 2 cups white chocolate chips or candy melts
- Red food coloring
- Black food gel or icing
- Cake pop sticks
- Edible candy eyes or decorations of choice
Cooking Instructions:
- Bake the Cake: Prepare the red velvet cake according to the package instructions. Allow the cake to cool completely once baked.
- Crumble the Cake: Once the cake has cooled, crumble it into a large mixing bowl using your hands until it resembles fine crumbs.
- Mix with Frosting: Add the cream cheese frosting to the crumbled cake. Mix until the mixture has a dough-like consistency, guaranteeing that it’s moist enough to hold together when shaped.
- Shape the Cake Pops: Roll the mixture into small balls (about 1-1.5 inches in diameter) and place them on a baking sheet lined with parchment paper. Insert a cake pop stick into each ball.
- Chill the Cake Pops: Place the cake pop tray in the refrigerator for about 1-2 hours, or until they’re firm and hold their shape.
- Prepare the Coating: Melt the white chocolate chips or candy melts in a microwave-safe bowl, heating in 30-second intervals and stirring until smooth. Add a few drops of red food coloring to achieve the desired bloody red color.
- Dip the Cake Pops: Dip each chilled cake pop into the melted chocolate, guaranteeing they’re fully coated. Gently tap off any excess chocolate.
- Decorate: Before the coating sets, add candy eyes or other edible decorations to each cake pop. Use black food gel or icing to create additional spooky designs like veins or cracks.
- Let Them Set: Place the decorated cake pops back on the parchment-lined tray and allow them to set completely at room temperature or in the fridge.
Extra Tips:
For best results, guarantee the cake pops are chilled thoroughly before dipping them in chocolate; this helps them stay intact during the coating process. If the chocolate begins to harden while you’re working, simply reheat it in the microwave in short intervals.
Feel free to experiment with different decorations to make your Bloody Red Velvet Cake Pops uniquely haunting. Adding small edible glitter or sprinkles can add an extra touch of magic to your Halloween treats.
Haunted Graveyard Pudding Cups
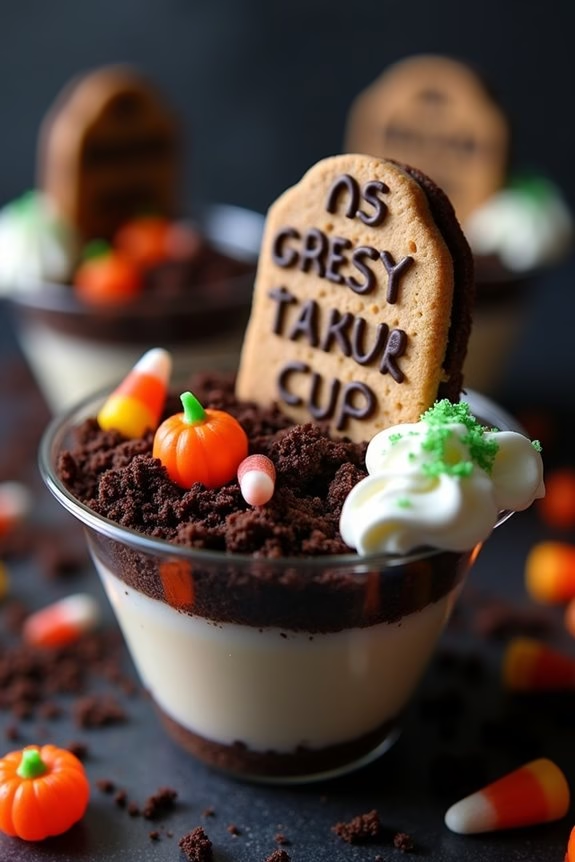
Creating these Haunted Graveyard Pudding Cups requires minimal effort and simple ingredients, making them an ideal last-minute addition to your Halloween menu.
With a serving size of 4-6 people, this recipe allows you to craft a few individual cups, each decorated uniquely for a personalized touch. The best part is, there’s plenty of room for creativity, so feel free to experiment with different decorations and flavors to match your spooky theme.
Ingredients:
- 2 cups of prepared chocolate pudding
- 1 cup of crushed chocolate sandwich cookies
- 6 oval-shaped cookies (e.g., Milano cookies)
- 1/4 cup of candy pumpkins or candy corn
- 1/4 cup of gummy worms
- 1/2 cup of whipped cream
- 2 tbsp of green sprinkles
- Edible black gel icing
Instructions:
- Prepare the Pudding: Begin by preparing 2 cups of chocolate pudding according to package instructions if using instant pudding. Let it chill in the refrigerator until it’s set.
- Crush the Cookies: Place the chocolate sandwich cookies in a ziplock bag and crush them into fine crumbs using a rolling pin or a heavy object. These crumbs will serve as the “dirt” for your graveyard.
- Assemble the Pudding Cups: Divide the chocolate pudding evenly among 4-6 small cups or jars. Fill each cup about halfway with the pudding.
- Layer the Dirt: Sprinkle a generous amount of the crushed cookie crumbs over the pudding in each cup, making sure it resembles a layer of dirt.
- Create Tombstones: Use the edible black gel icing to write spooky messages or names on the oval-shaped cookies to create tombstones. Insert one decorated cookie into each cup, pressing it slightly into the cookie crumb layer.
- Add Decorations: Decorate the cups with candy pumpkins or candy corn and gummy worms to enhance the graveyard theme. Place them strategically around the tombstones.
- Finish with Grass: Add a dollop of whipped cream on the side of each cup to resemble a ghostly cloud, then sprinkle some green sprinkles on top for a grassy effect.
- Serve and Enjoy: Once decorated, serve the Haunted Graveyard Pudding Cups immediately or store them in the refrigerator until you’re ready to serve.
Extra Tips:
When making Haunted Graveyard Pudding Cups, feel free to personalize each cup with different candy decorations to suit your Halloween theme.
For an added touch of realism, consider using a small amount of crushed green cereal instead of green sprinkles for the grass effect. If you prefer a less sweet version, you can use dark chocolate pudding as an alternative.
Remember to let the pudding set well before assembling to guarantee the layers hold their shape. Enjoy experimenting with different variations to create the ultimate spooky dessert!
Vampire Fang Marshmallows
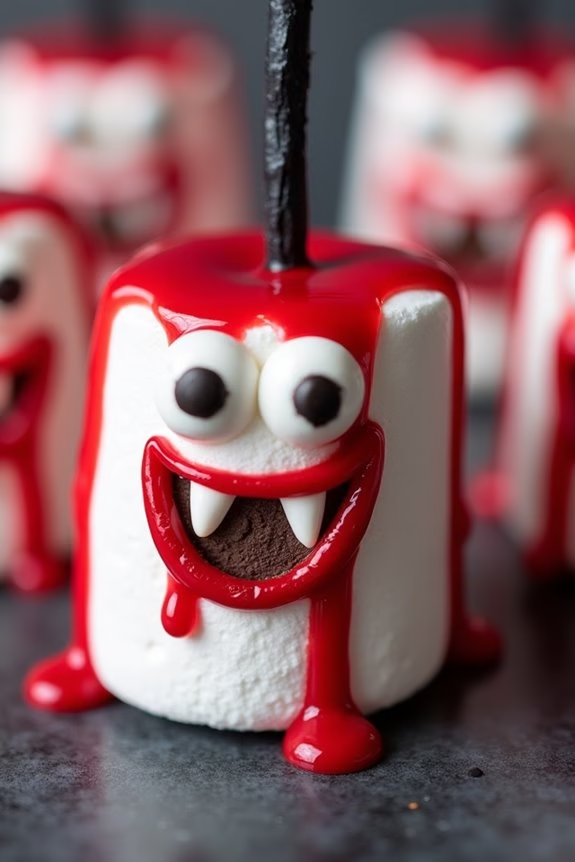
Looking for a spooky yet delicious treat to serve at your Halloween party? Vampire Fang Marshmallows are the perfect festive snack to delight your guests, both young and old. These creative confections aren’t only visually striking with their creepy fang-like appearance but also incredibly easy to prepare and enjoy. With a soft marshmallow base and a perfect blend of sweet and tangy flavors, they’re bound to be a hit at any Halloween gathering.
The beauty of Vampire Fang Marshmallows lies in their simplicity and fun factor. This recipe is ideal for serving 4-6 people, making it a great choice for small get-togethers or as part of a larger spread of Halloween snacks. Whether you’re hosting a party or just looking to make something fun with family and friends, these marshmallow treats are bound to add a touch of eerie elegance to your Halloween festivities.
Ingredients (serving size: 4-6 people):
- 12 large marshmallows
- 1/2 cup red decorating gel
- 1/4 cup mini chocolate chips
- 1/4 cup sliced almonds
- 1/2 cup black licorice laces
Cooking Instructions:
- Prepare the Marshmallows: Begin by laying out the marshmallows on a flat surface, such as a cutting board or baking sheet. Make certain they’re evenly spaced to make assembly easier.
- Apply the Red Gel: Using a tube of red decorating gel, carefully apply a thin line around the middle of each marshmallow to create the look of blood. Allow the gel to drip slightly to enhance the “blood” effect, mimicking freshly bitten fangs.
- Add the Chocolate Chips: Press two mini chocolate chips onto each marshmallow to form the eyes. Position the chips near the top of the marshmallow, leaving enough space for the almond fangs below.
- Insert the Almond Fangs: Gently press two sliced almonds into the marshmallow just below the chocolate chip eyes, angling them slightly to resemble sharp fangs protruding from the marshmallow’s “mouth.”
- Decorate with Licorice Laces: Finally, cut the black licorice laces into small, manageable pieces, and arrange them around the marshmallow to give the appearance of hair or additional decoration. This step is optional but adds a fun and spooky touch.
Extra Tips:
For a more dramatic effect, consider using marshmallow fluff to cover the marshmallows before applying the red gel and other decorations. This will create a stickier surface, making certain the toppings adhere more securely.
If you want to make your Vampire Fang Marshmallows even more interactive, provide guests with small toothpicks or skewers to pick them up, making it easy for them to enjoy without getting sticky fingers. Additionally, have some extra decorating gel on hand in case you want to add more details or adjust the look of your marshmallows as needed.
Eerie Popcorn Mix
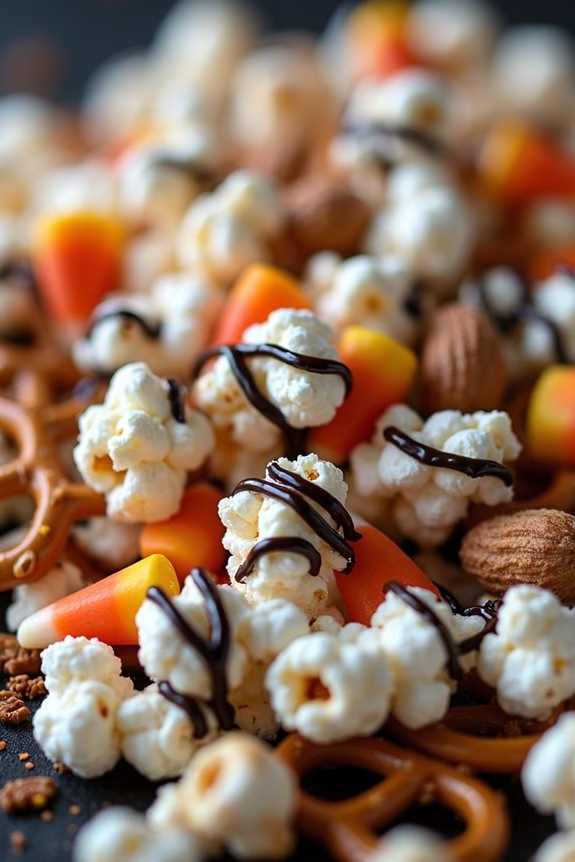
Eerie Popcorn Mix is the perfect spooky snack to delight your guests at any Halloween gathering. This bewitching treat combines a medley of flavors and textures, creating a fun and festive experience for both kids and adults. With colors reminiscent of a haunted house and flavors that dance between sweet and savory, this popcorn mix is bound to become a Halloween favorite.
Imagine a bowl of fluffy popcorn, coated with a light drizzle of chocolate, mingling with a vibrant array of candy, pretzels, and nuts. The combination of sweet and salty components, enhanced by a hint of spice, makes for a snack that’s as satisfying as it’s visually appealing. Serve this Eerie Popcorn Mix at your next Halloween party, and watch it disappear faster than a ghost at dawn!
Ingredients (serving size: 4-6 people):
- 8 cups popped popcorn
- 1 cup mini pretzels
- 1/2 cup candy corn
- 1/2 cup roasted peanuts
- 1/2 cup chocolate chips (dark or milk chocolate)
- 1 teaspoon pumpkin pie spice
- 1/4 cup unsalted butter
- 1/4 cup brown sugar
- 1/2 teaspoon sea salt
- 1/4 cup mini marshmallows (optional)
- Edible glitter or Halloween-themed sprinkles (optional)
Instructions:
- Prepare the Popcorn Base: Start by popping your popcorn if using kernels. You can use an air popper or stovetop method. Once popped, spread the popcorn out on a large baking sheet lined with parchment paper. This will be the base of your Eerie Popcorn Mix.
- Melt the Butter Mixture: In a small saucepan over medium heat, melt the unsalted butter. Add the brown sugar, pumpkin pie spice, and sea salt, stirring continuously until the sugar dissolves completely, creating a smooth caramel-like mixture.
- Coat the Popcorn: Drizzle the butter and sugar mixture evenly over the popcorn. Gently toss the popcorn using a spatula or your hands to guarantee it’s well-coated. Be careful not to crush the popcorn during this process.
- Add the Mix-Ins: Once the popcorn is coated, sprinkle the mini pretzels, candy corn, roasted peanuts, and mini marshmallows (if using) over the popcorn. Gently mix everything together.
- Melt the Chocolate: Place the chocolate chips in a microwave-safe bowl and heat in 30-second increments, stirring in between, until fully melted and smooth.
- Drizzle Chocolate: Using a spoon or a fork, drizzle the melted chocolate over the popcorn mix, creating a spooky web-like effect.
- Add Final Touches: If desired, sprinkle edible glitter or Halloween-themed sprinkles over the mix while the chocolate is still warm to add an extra festive touch.
- Let it Set: Allow the popcorn mix to sit at room temperature until the chocolate hardens. Once set, break the mix into clusters and serve in a large bowl.
Extra Tips:
For an extra crunch, you can toast the nuts before adding them to the popcorn mix. Just spread them on a baking sheet and roast at 350°F (175°C) for about 5 minutes.
If you’re making this snack ahead of time, store it in an airtight container at room temperature for up to two days. This will keep the popcorn fresh and the chocolate from melting.
Adjust the ingredients to accommodate any allergies or dietary preferences, such as using dairy-free chocolate or gluten-free pretzels.

