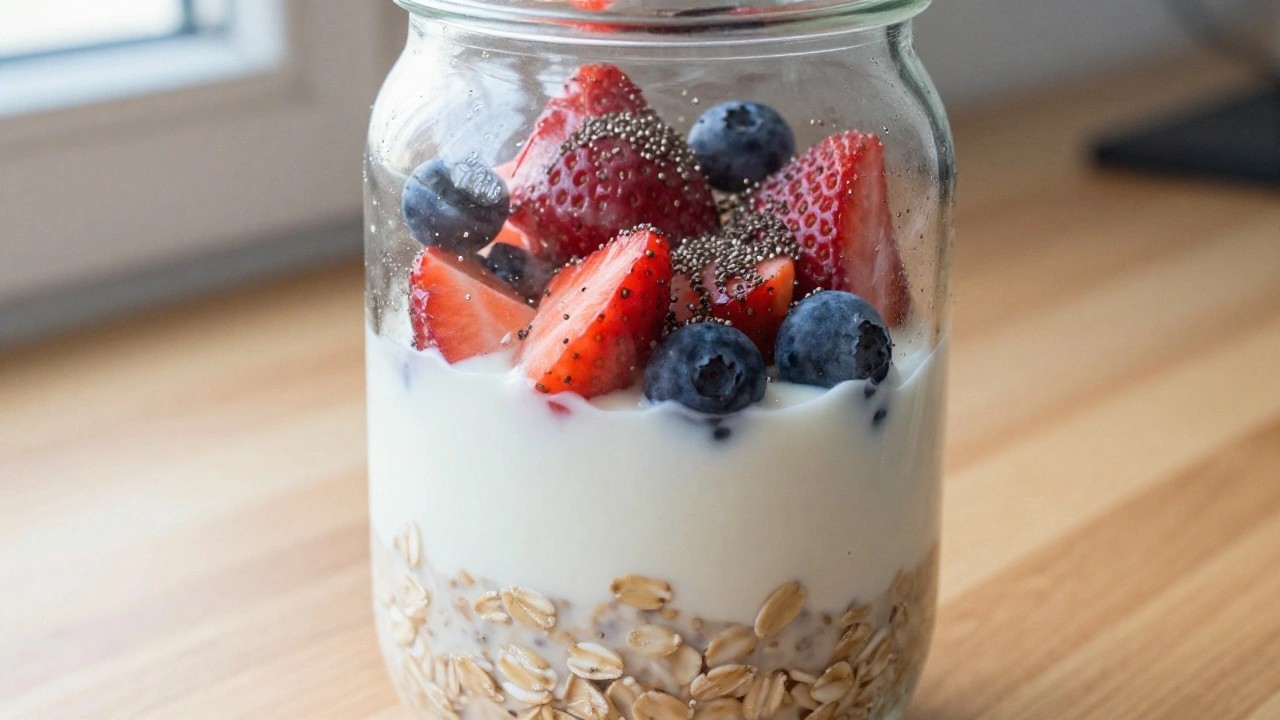
Mornings can get busy when you have work or family to handle right away. Prepping breakfast the night before helps avoid that morning scramble. These recipes focus on simple mixes and layers you can put together in the fridge. They use everyday ingredients and give you several options to match what you like. You can choose the ones that fit your routine and taste preferences.
Helpful Tips Before You Start
These tips will help your overnight breakfasts stay fresh and taste their best.
Use the Right Containers
Mason jars or airtight containers keep portions sealed and prevent spills in the fridge. Glass jars also let you see the layers clearly.
Layer Wet and Dry Ingredients
Put liquids like milk or yogurt at the bottom and dry items like oats or granola on top. This keeps textures from turning soggy by morning.
Hold Back Fresh Toppings
Add berries, nuts, or seeds right before eating. They lose crunch and color if they sit in the fridge all night.
Stir Before Serving
Give overnight oats or chia puddings a quick stir in the morning. This blends any settled liquids and improves the final texture.
Follow Storage Times
Most egg or dairy based preps stay good for three days in the fridge. Label jars with dates so you use them in the right order.
Mixed Berry Chia Pudding Parfaits
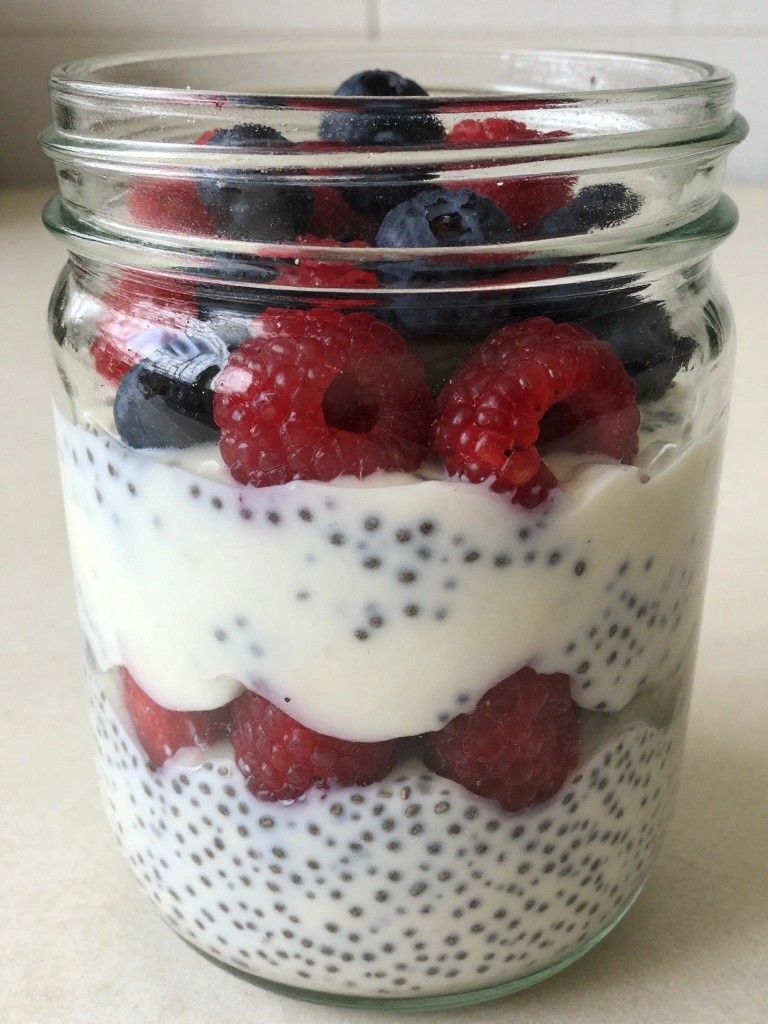
This recipe gives you a creamy breakfast that sets up while you sleep. The chia thickens the milk into a pudding that layers nicely with juicy berries and yogurt. It works well for busy weekdays when you want something ready in the fridge.
The texture stays soft with a slight pop from the chia seeds. Mixed berries add bright flavor without extra sugar. You can grab a jar and go.
Serves 4 people.
Ingredients
- 1/2 cup chia seeds
- 2 cups unsweetened almond milk
- 1 tablespoon honey
- 1 teaspoon vanilla extract
- 2 cups mixed berries, divided
- 1 cup plain Greek yogurt
Instructions
- Combine the chia seeds, almond milk, honey, and vanilla extract in a mixing bowl. Stir well so the chia seeds do not clump.
- Cover the bowl and place it in the refrigerator overnight. The mixture will thicken into a pudding.
- In the morning, stir the chia pudding to check the texture. Add a splash of almond milk if it seems too thick.
- Layer the pudding in four glasses or jars, alternating with half the mixed berries and the Greek yogurt.
- Top each parfait with the remaining berries and serve.
Extra Tips
Use frozen berries when fresh ones are not in season. They release a little juice as they thaw and keep the layers from drying out. Store the assembled parfaits in lidded jars for up to three days. If you prefer a sweeter pudding, stir in an extra teaspoon of honey before the overnight chill. Course: Breakfast Cuisine: American Equipment: Mixing Bowl, Refrigerator, Jars
Apple Cinnamon French Toast Casserole
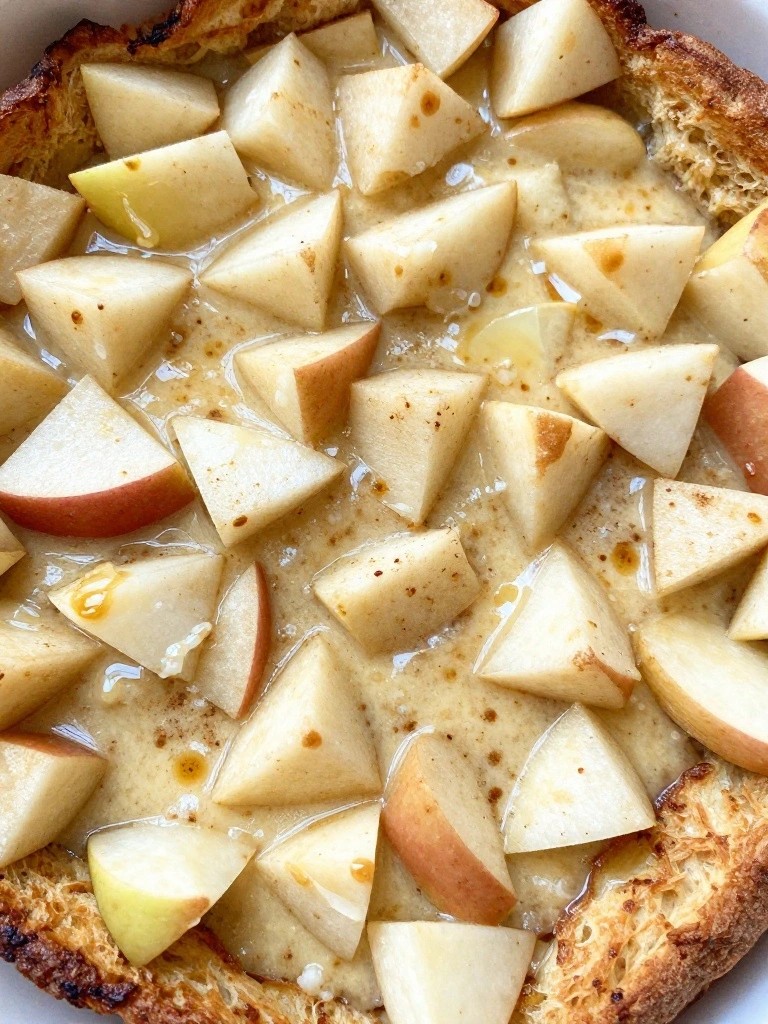
This casserole brings together soft cubes of bread and tender apple pieces in a lightly spiced custard. It is assembled the night before so the flavors meld while it rests in the fridge. The next morning it bakes into a warm, comforting breakfast with minimal effort.
It works well for busy weekdays or relaxed weekend mornings when you want something hearty without standing at the stove. The cinnamon and apple combination gives it a cozy flavor that feels familiar yet special enough for guests.
Serves 4 people.
Ingredients
- 8 slices day-old bread, cut into 1-inch cubes
- 2 medium apples, peeled and diced
- 4 large eggs
- 1 cup milk
- 1/4 cup brown sugar
- 1 teaspoon ground cinnamon
- 1 teaspoon vanilla extract
- 1/4 teaspoon salt
- 2 tablespoons butter, cut into small pieces
Instructions
- In a large mixing bowl, whisk together the eggs, milk, brown sugar, cinnamon, vanilla extract, and salt until smooth.
- Add the bread cubes and diced apples to the bowl. Stir gently until the bread is evenly coated with the custard mixture.
- Transfer the mixture to an 8×8-inch baking dish and spread it into an even layer. Dot the top with the butter pieces.
- Cover the dish tightly with plastic wrap and refrigerate overnight.
- In the morning, remove the dish from the refrigerator and let it sit at room temperature for 15 minutes while the oven preheats to 350 degrees F.
- Bake uncovered for 40 to 45 minutes until the top is golden and the center is set. Let it rest for 5 minutes before serving.
Extra Tips
Use firm apples like Honeycrisp or Granny Smith so they hold their shape after baking. If the top browns too quickly, loosely cover the dish with foil for the last 10 minutes. Leftovers reheat well in a 300-degree oven for 10 minutes, which helps restore a bit of crispness to the top layer. Course: Breakfast Cuisine: American Equipment: Mixing Bowl, 8×8 Baking Dish, Whisk
Savory Spinach Mushroom Egg Strata
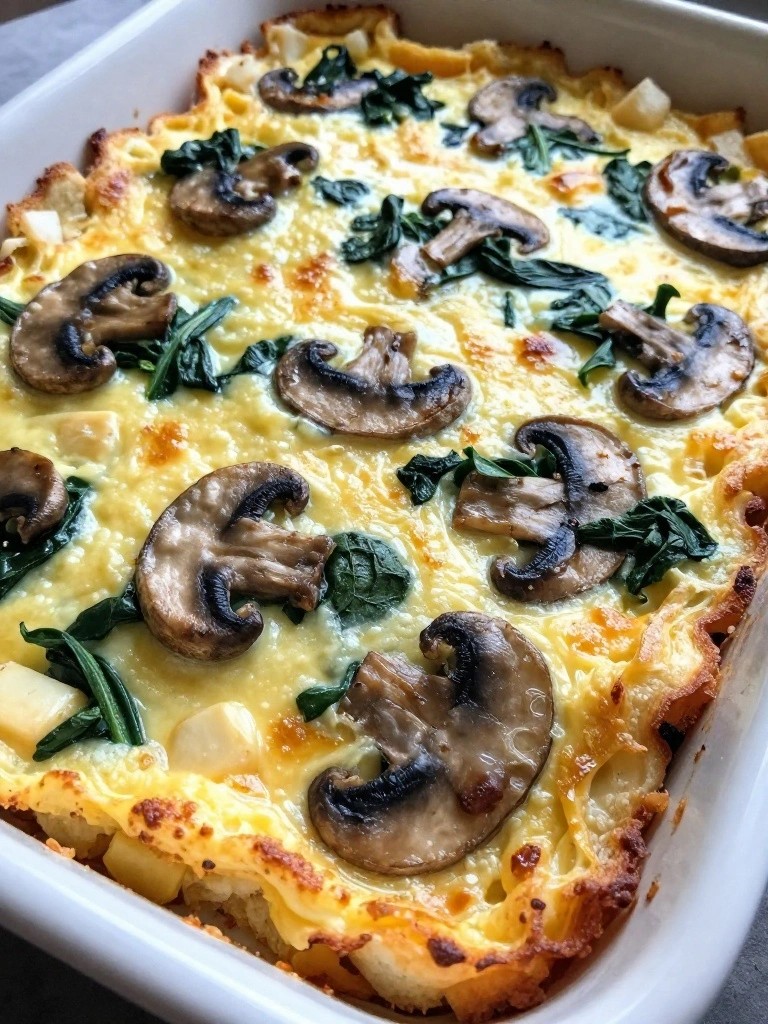
This strata layers cubes of bread with sautéed mushrooms and spinach in a simple egg custard. It sits in the refrigerator overnight so the bread soaks up the flavors, then bakes into a firm, savory breakfast casserole the next morning.
The result is a hearty dish with tender vegetables and a light cheesy top that reheats well for busy weekdays. It works especially well when you need breakfast ready without morning cooking.
Serves 4 people.
Ingredients
- 6 large eggs
- 2 cups milk
- 4 cups cubed day-old bread
- 8 ounces mushrooms, sliced
- 4 cups fresh spinach
- 1 small onion, diced
- 2 cloves garlic, minced
- 1 cup shredded cheddar cheese
- 2 tablespoons butter
- 1 teaspoon salt
- 1/2 teaspoon black pepper
- 1/2 teaspoon dried thyme
Instructions
- Melt the butter in a large skillet over medium heat. Add the diced onion and cook until softened.
- Add the sliced mushrooms and cook until they release their liquid and start to brown.
- Stir in the minced garlic and cook for one minute more.
- Add the fresh spinach and cook until wilted. Remove the skillet from the heat.
- In a mixing bowl, whisk together the eggs, milk, salt, black pepper, and dried thyme.
- Grease an 8×8 baking dish. Spread half the bread cubes in the bottom.
- Top with the mushroom and spinach mixture, then sprinkle with half the shredded cheddar cheese.
- Add the remaining bread cubes and pour the egg mixture evenly over everything. Press down lightly so the bread absorbs the liquid.
- Cover the dish and refrigerate overnight.
- The next morning, remove the cover and bake at 350 degrees Fahrenheit for 45 to 50 minutes until the center is set. Sprinkle the remaining cheese on top during the last 10 minutes of baking.
Extra Tips
Press the bread into the egg mixture before refrigerating so every piece soaks evenly. Leftovers reheat nicely in a 325 degree oven or the microwave. If you want a milder flavor, swap the cheddar for Swiss cheese. Course: Breakfast Cuisine: American Equipment: Large Skillet, 8×8 Baking Dish, Mixing Bowl
Tropical Mango Coconut Quinoa Bowls
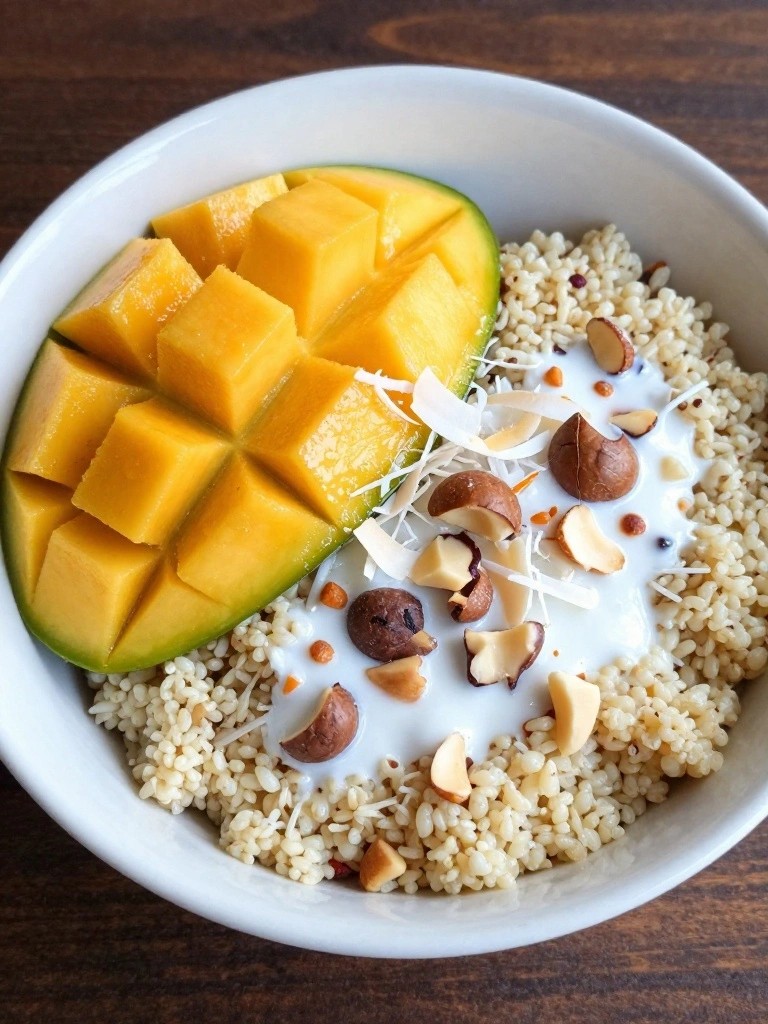
These quinoa bowls bring bright mango and creamy coconut together for a breakfast that feels like a treat but requires almost no morning effort. Cook the quinoa once, mix everything in a bowl, and portion it out for the fridge so you have ready-to-eat meals all week. The texture stays pleasantly chewy while the fruit softens just enough overnight.
This version works especially well when you want something sweet and satisfying that still feels light. The natural sugars from the mango balance the mild nuttiness of the quinoa, and a touch of lime keeps the flavors fresh even after several days in the refrigerator.
Serves 4 people.
Ingredients
- 1 cup uncooked quinoa
- 1 1/2 cups water
- 1/4 teaspoon salt
- 1 cup canned coconut milk
- 2 tablespoons maple syrup
- 2 ripe mangoes, diced
- 1/4 cup unsweetened shredded coconut
- 1 lime, juiced
- 1/4 cup chopped macadamia nuts
Instructions
- Rinse the quinoa under cold water, then combine it with the water and salt in a saucepan. Bring to a boil, reduce heat to low, cover, and simmer for 15 minutes until the water is absorbed.
- Remove the saucepan from heat and let the quinoa sit covered for 5 minutes. Fluff it with a fork, then transfer to a large mixing bowl to cool slightly.
- Stir the coconut milk and maple syrup into the warm quinoa until evenly combined. Add the diced mango, shredded coconut, and lime juice, and mix gently.
- Divide the mixture among four containers or jars. Sprinkle the chopped macadamia nuts on top of each portion.
- Seal the containers and place them in the refrigerator overnight or for at least 4 hours before serving.
Extra Tips
The macadamia nuts stay crunchier if you add them right before eating rather than mixing them in the night before. If the quinoa seems a little thick after chilling, stir in a splash of coconut milk or water to loosen it. Leftovers keep well for four days, so this is an easy option for meal prepping several breakfasts at once. Course: Breakfast Cuisine: American Equipment: Saucepan, Mixing bowl, Measuring cups
Peanut Butter Banana Protein Overnight Oats
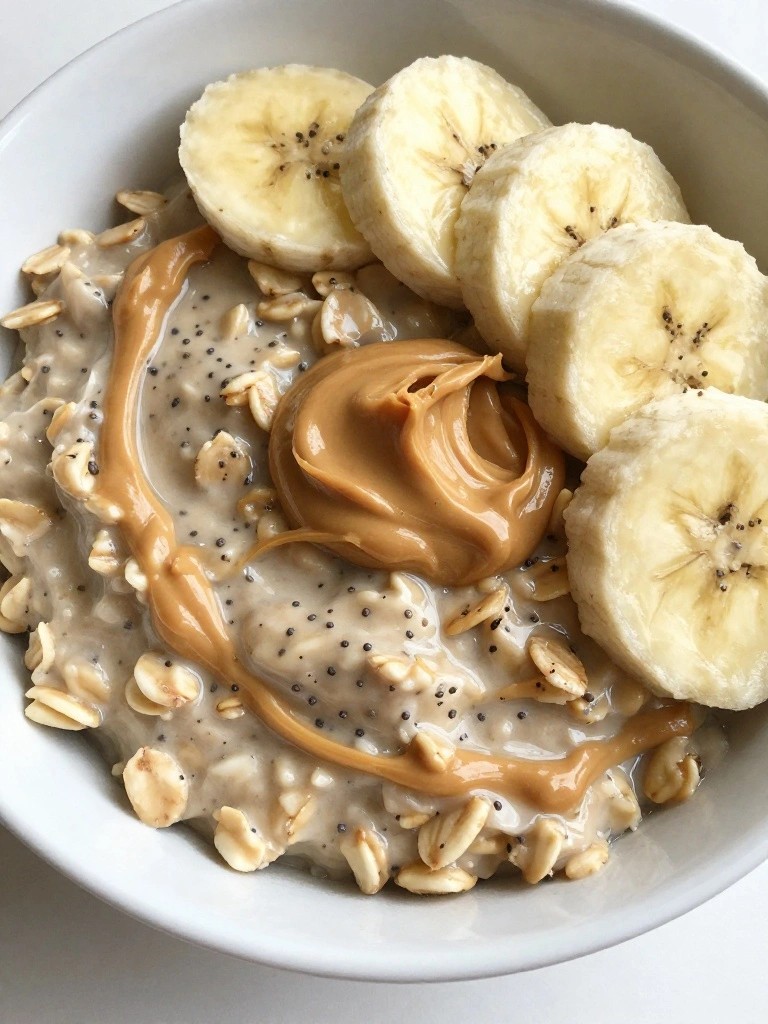
These overnight oats give you a filling breakfast that you can portion out in minutes the night before. The combination of peanut butter and banana creates a naturally sweet flavor with a creamy texture that holds up well after chilling.
They work especially well for busy weekdays when you want something ready to grab from the fridge. The added protein powder helps keep you satisfied longer than plain oats.
Serves 4 people.
Ingredients
- 2 cups rolled oats
- 2 cups milk of choice
- 2 scoops vanilla protein powder
- 4 tablespoons natural peanut butter
- 2 ripe bananas, mashed
- 2 tablespoons chia seeds
- Sliced banana and extra peanut butter for topping
Instructions
- Add the rolled oats, milk, protein powder, peanut butter, mashed bananas, and chia seeds to a large mixing bowl. Stir until the ingredients are evenly combined and no dry pockets of oats or protein powder remain.
- Divide the mixture evenly among four jars or containers. Seal the lids and place them in the refrigerator overnight.
- In the morning, remove one jar per serving. Top with sliced banana and an extra drizzle of peanut butter before eating.
Extra Tips
Mash the bananas well before mixing so they distribute evenly and sweeten the oats without leaving chunks. If the mixture seems too thick after chilling, stir in a splash of milk to loosen it. Store the jars for up to three days in the fridge. Course: Breakfast Cuisine: American Equipment: Mixing Bowl, Jars or Containers, Refrigerator
Lemon Poppy Seed Yogurt Breakfast Jars
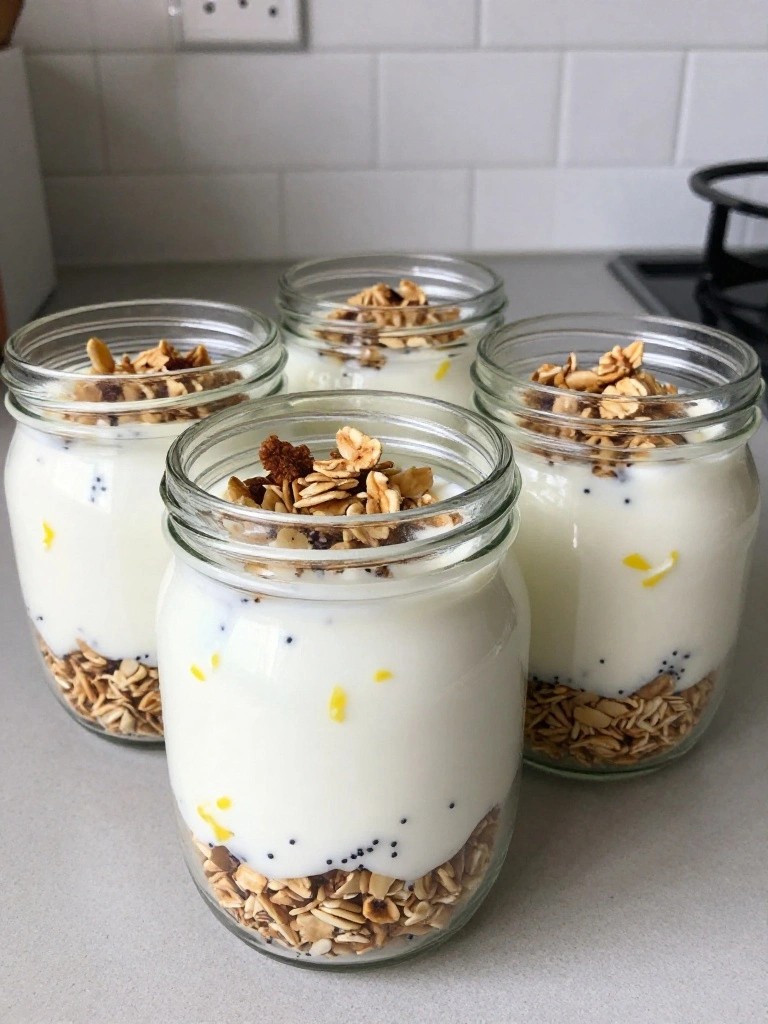
These lemon poppy seed yogurt breakfast jars offer a bright, citrus-forward start to the day with minimal morning effort. The creamy yogurt base soaks up lemon flavor overnight while the poppy seeds add a gentle crunch, making each jar feel like a treat that is still simple and practical.
The recipe works well for weekday mornings or meal prep when you want something ready in the fridge. It delivers a tangy-sweet balance that holds up well after chilling.
Serves 4 people.
Ingredients
- 2 cups plain Greek yogurt
- Zest of 2 lemons
- 3 tablespoons fresh lemon juice
- 2 tablespoons poppy seeds
- 2 tablespoons honey
- 1 cup granola
Instructions
- Add the Greek yogurt, lemon zest, lemon juice, poppy seeds, and honey to a mixing bowl. Stir until the ingredients are evenly combined and the mixture looks smooth.
- Spoon the yogurt mixture into four small glass jars, dividing it evenly so each jar holds about the same amount.
- Top each jar with 1/4 cup of granola, spreading it in an even layer across the surface.
- Seal the jars with lids and place them in the refrigerator to chill overnight before serving.
Extra Tips
Stir the yogurt layer gently before eating if the lemon juice has caused any slight separation. Use a mild honey so the lemon stays the main flavor note. Swap the granola for toasted oats if you prefer a softer texture after overnight chilling. Course: Breakfast Cuisine: American Equipment: Mixing Bowl, 4 Glass Jars
Cheesy Broccoli Ham Breakfast Casserole
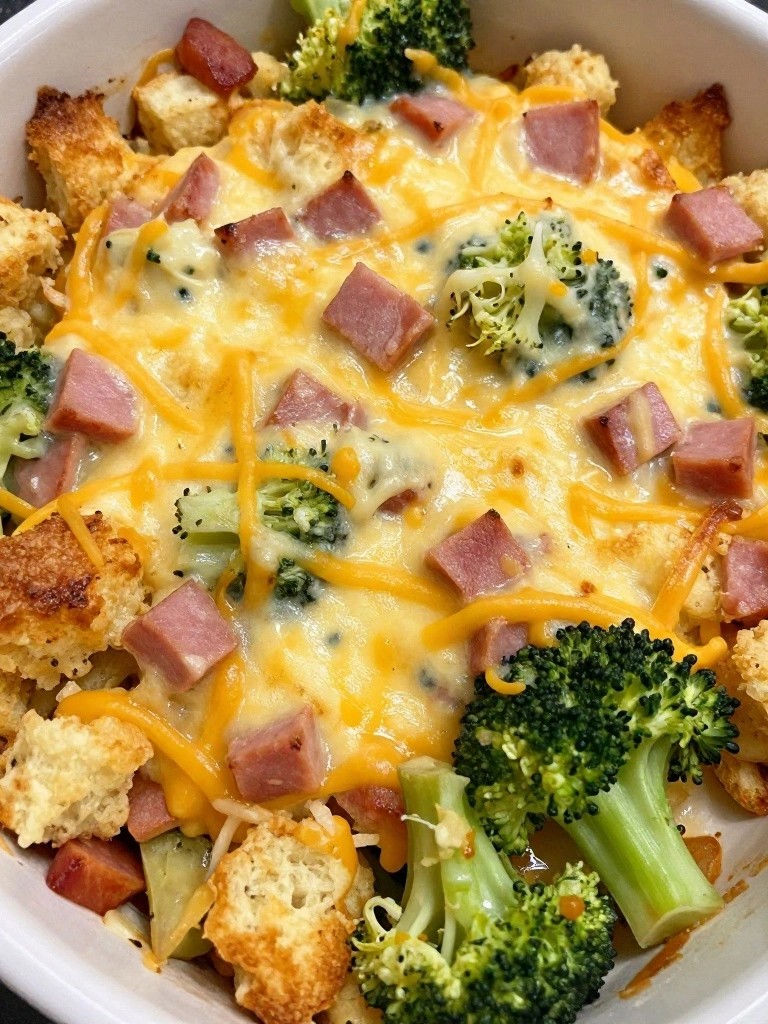
This casserole lets you prep everything the night before so breakfast is ready with almost no morning effort. The combination of eggs, ham, and broccoli baked with plenty of cheese creates a savory, hearty dish that holds up well after chilling.
It works especially well for weekday mornings or when you have overnight guests. The bread soaks up the egg mixture for a soft, custardy texture while the top turns lightly golden.
Serves 4 people.
Ingredients
- 6 large eggs
- 2 cups milk
- 4 cups cubed day-old bread
- 1 1/2 cups diced ham
- 2 cups chopped broccoli florets
- 2 cups shredded cheddar cheese
- 1/2 teaspoon salt
- 1/4 teaspoon black pepper
Instructions
- Whisk the eggs, milk, salt, and pepper in a large bowl until fully combined.
- Add the bread cubes, diced ham, broccoli florets, and 1 1/2 cups of the shredded cheddar to the egg mixture. Stir gently until everything is evenly coated.
- Transfer the mixture to a greased 8×8-inch baking dish and press it down lightly to create an even layer.
- Sprinkle the remaining 1/2 cup of cheddar over the top.
- Cover the dish tightly with plastic wrap and refrigerate overnight.
- In the morning, remove the dish from the refrigerator while the oven preheats to 350 degrees F.
- Bake uncovered for 45 to 50 minutes until the center is set and the top is golden.
Extra Tips
Use fresh or thawed broccoli florets that have been patted dry so the casserole does not turn watery. Leftovers reheat well in the microwave in individual portions. If you want a milder flavor, swap half the cheddar for mozzarella. Course: Breakfast Cuisine: American Equipment: Mixing Bowl, 8×8 Baking Dish, Whisk
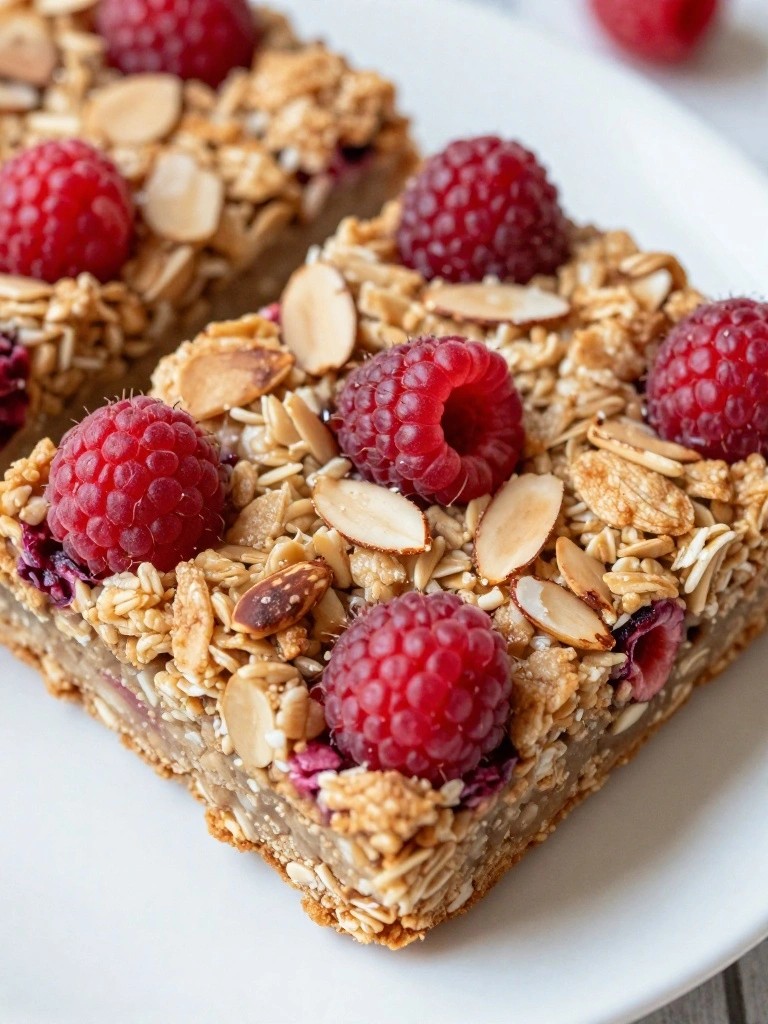
Raspberry Almond Baked Oatmeal Squares
These baked oatmeal squares let you handle all the mixing the night before so you can pull a pan from the fridge and bake fresh squares in the morning. The combination of tart raspberries and toasted almonds gives each bite a nice balance of fruit and crunch against the soft oat base.
This recipe works well for busy weekdays when you want a hearty breakfast without extra morning work. The squares hold their shape once cooled, making them easy to portion and eat on the go or at the table.
Serves 4 people.
Ingredients
- 2 cups rolled oats
- 1/2 cup sliced almonds
- 1 cup fresh raspberries
- 1 1/2 cups almond milk
- 1 large egg
- 1/4 cup maple syrup
- 1 teaspoon baking powder
- 1 teaspoon vanilla extract
- 1/4 teaspoon salt
- 2 tablespoons melted butter
Instructions
- Grease an 8×8 inch baking dish with a small amount of butter. In a large bowl, whisk together the almond milk, egg, maple syrup, vanilla extract, and melted butter until smooth.
- Add the rolled oats, baking powder, and salt to the wet mixture. Stir until the oats are evenly coated.
- Gently fold in three-quarters of the raspberries and half of the sliced almonds. Pour the mixture into the prepared dish and spread it into an even layer.
- Scatter the remaining raspberries and almonds over the top. Cover the dish tightly with plastic wrap and refrigerate overnight.
- The next morning, remove the dish from the fridge while the oven preheats to 350°F. Bake for 30 to 35 minutes until the edges are golden and the center is set. Let the squares cool for 10 minutes before cutting.
Extra Tips
For the best texture, use rolled oats rather than quick oats so the squares stay firm after baking. If you prefer a milder almond flavor, swap the almond milk for regular milk. Leftovers keep well in the fridge for three days and reheat nicely in the microwave for 30 seconds. Course: Breakfast Cuisine: American Equipment: Mixing Bowl, 8×8 Baking Dish, Whisk
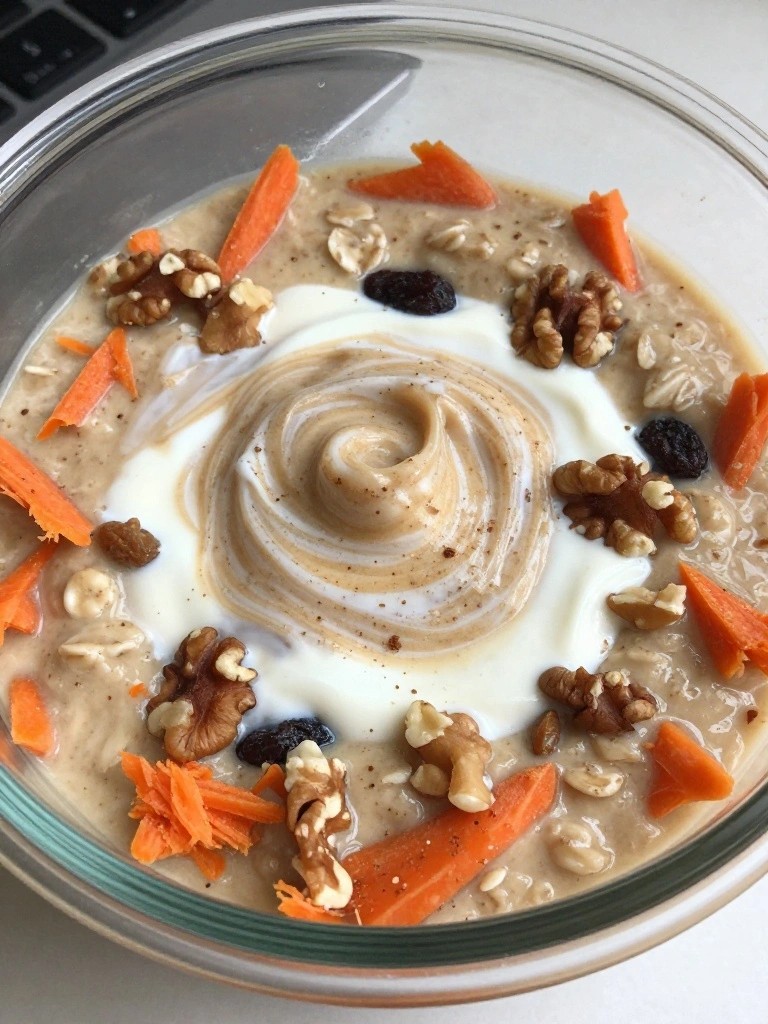
Carrot Cake Overnight Oats with Cream Cheese Swirl
This recipe turns classic carrot cake flavors into an easy breakfast you can prep the night before. The oats soak up milk and spices while the shredded carrots soften, and a simple cream cheese swirl adds a tangy finish that mimics frosting without extra work. It is a good choice for busy weekdays when you want something ready in the fridge.
The texture stays creamy with a bit of chew from the oats and a slight crunch if you add nuts. The warm spices balance the natural sweetness of the carrots, making each serving taste like a treat that still works for a weekday morning.
Serves 4 people.
Ingredients
- 2 cups old-fashioned rolled oats
- 2 1/2 cups milk of choice
- 1 cup finely shredded carrots
- 4 ounces cream cheese, softened
- 3 tablespoons maple syrup, divided
- 1 teaspoon vanilla extract
- 1 teaspoon ground cinnamon
- 1/2 teaspoon ground nutmeg
- 1/4 cup chopped walnuts
- 2 tablespoons raisins
Instructions
- In a large mixing bowl, combine the rolled oats, milk, shredded carrots, vanilla extract, cinnamon, nutmeg, and 2 tablespoons of the maple syrup. Stir until the oats are evenly coated.
- Divide the oat mixture among four jars or containers.
- In a small bowl, mix the softened cream cheese with the remaining 1 tablespoon of maple syrup until smooth. Dollop the mixture over the oats in each jar.
- Use a spoon or knife to gently swirl the cream cheese into the oats, creating a marbled effect. Do not fully mix it in.
- Sprinkle the walnuts and raisins over the top of each jar. Cover and refrigerate overnight before serving.
Extra Tips
If the cream cheese is too firm to swirl easily, let it sit at room temperature for 10 minutes or stir in a teaspoon of milk to loosen it. The oats will thicken more after a full night in the fridge, so add an extra splash of milk in the morning if you prefer a looser texture. Store covered jars for up to four days. Course: Breakfast Cuisine: American Equipment: Mixing Bowl, Jars or Containers, Spoon
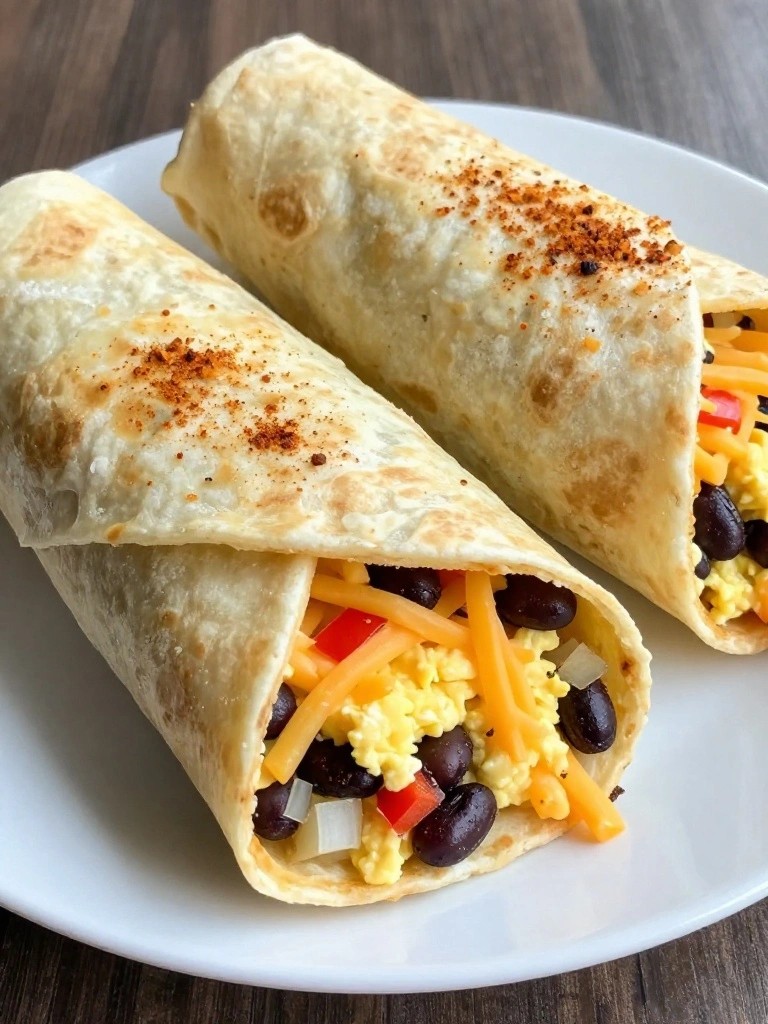
Southwest Black Bean Egg Breakfast Burritos
These burritos combine scrambled eggs with black beans and peppers for a filling breakfast you can assemble the night before. They store well in the fridge and reheat quickly in the morning, making them useful for busy weekdays when you want something hearty without extra effort.
The mix of cumin and chili powder gives the eggs a mild Southwest flavor while the beans add texture and protein. Cheese melts into the filling during reheating, and the tortilla stays soft when wrapped tightly.
Serves 4 people.
Ingredients
- 8 large eggs
- 1 tablespoon olive oil
- 1 small onion, diced
- 1 red bell pepper, diced
- 1 (15-ounce) can black beans, drained and rinsed
- 1 teaspoon ground cumin
- 1 teaspoon chili powder
- 1/2 teaspoon salt
- 1/4 teaspoon black pepper
- 1 cup shredded cheddar cheese
- 4 large flour tortillas
- 1/2 cup salsa, for serving
Instructions
- Heat the olive oil in a large skillet over medium heat. Add the diced onion and red bell pepper and cook for 4 to 5 minutes until the vegetables soften.
- Stir in the black beans, cumin, chili powder, salt, and black pepper. Cook for 2 minutes until the beans are warmed through.
- In a mixing bowl, whisk the eggs. Pour them into the skillet with the bean mixture and scramble gently until the eggs are just set but still moist.
- Remove the skillet from the heat and let the filling cool for 10 minutes. Stir in the shredded cheddar cheese.
- Divide the filling evenly among the four tortillas. Fold the sides in and roll each tortilla tightly into a burrito.
- Wrap each burrito in plastic wrap or foil and place them in the refrigerator overnight.
- The next morning, unwrap the burritos and reheat them in the microwave for 1 to 2 minutes or until hot. Serve with salsa on the side.
Extra Tips
Wrap the burritos snugly so the filling stays moist during overnight storage. If you prefer a crisp exterior, warm the burritos in a skillet for a few minutes after microwaving. Leftovers keep for two days in the fridge and reheat well without becoming soggy when wrapped properly. Course: Breakfast Cuisine: Mexican Equipment: Large Skillet, Mixing Bowl
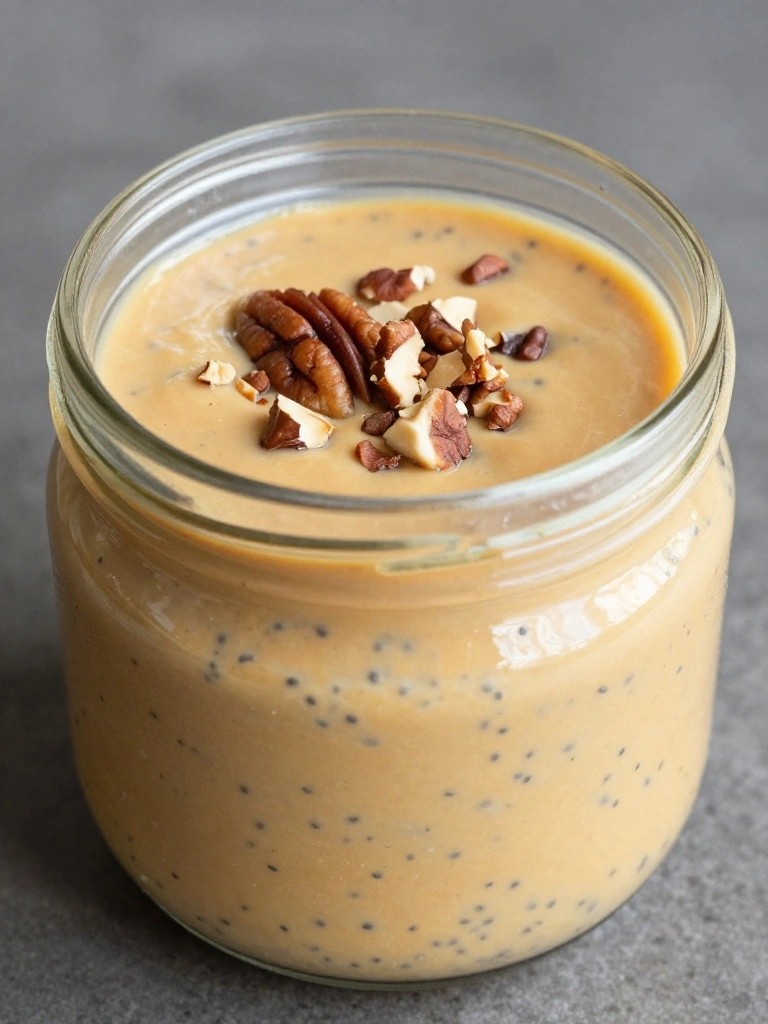
Pumpkin Spice Chia Breakfast Pudding
This make-ahead chia pudding brings together creamy pumpkin and warm spices for a satisfying breakfast that waits in the fridge. It works well on busy mornings when you want something ready to grab without any cooking. The texture turns thick and spoonable after chilling, with a gentle pumpkin flavor balanced by maple sweetness.
It fits the overnight prep theme perfectly since the chia seeds absorb the liquid while you sleep. The result is a cool, spiced pudding that feels like a treat but comes together in minutes the night before.
Serves 4 people.
Ingredients
- 1 1/2 cups milk of choice
- 1 cup pumpkin puree
- 1/2 cup chia seeds
- 3 tablespoons maple syrup
- 2 teaspoons pumpkin pie spice
- 1 teaspoon vanilla extract
- 1/4 teaspoon salt
- 1/4 cup chopped pecans, for serving
Instructions
- In a mixing bowl, whisk together the milk, pumpkin puree, maple syrup, pumpkin pie spice, vanilla extract, and salt until smooth.
- Stir in the chia seeds and mix well to prevent clumping.
- Divide the mixture evenly among four jars or containers.
- Cover and refrigerate overnight so the chia seeds can swell and thicken the pudding.
- In the morning, give each portion a quick stir, then top with chopped pecans before serving.
Extra Tips
Stir the pudding once after two hours of chilling if possible to break up any settled chia seeds. Use full-fat coconut milk for a richer result or thin it slightly with extra milk if the texture feels too thick the next day. Store covered in the refrigerator for up to four days. Course: Breakfast Cuisine: American Equipment: Mixing Bowl, Whisk, 4 Jars
Zucchini Bread Breakfast Muffins
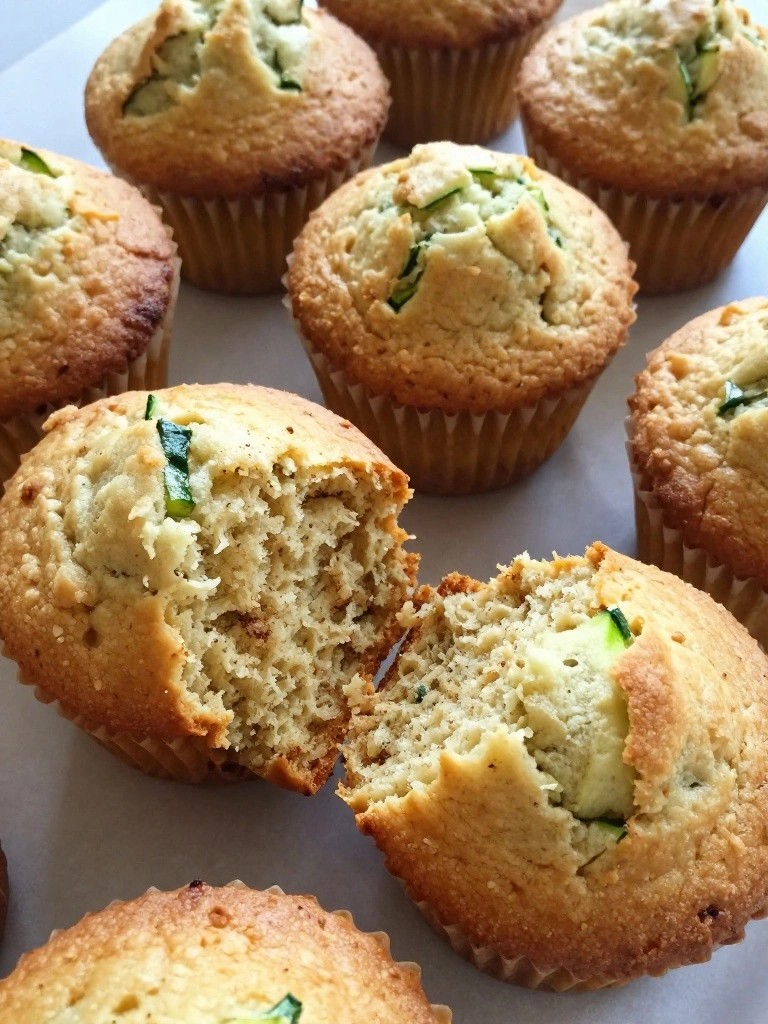
These muffins give you a head start on busy mornings. Mix the batter the night before, cover it, and let it rest in the refrigerator. In the morning the zucchini has softened and the spices have settled, so the muffins bake up moist with a light crumb and gentle cinnamon flavor.
They work well for meal prep because you can bake a batch once and pull them from the fridge each day. The zucchini keeps the texture tender without making the muffins heavy.
Serves 4 people.
Ingredients
- 1 1/2 cups all-purpose flour
- 1 teaspoon baking soda
- 1/2 teaspoon ground cinnamon
- 1/4 teaspoon salt
- 1 cup grated zucchini
- 1/2 cup brown sugar
- 1 large egg
- 1/4 cup vegetable oil
- 1 teaspoon vanilla extract
- 1/2 cup milk
Instructions
- In a large bowl whisk together the flour, baking soda, cinnamon, and salt.
- In a second bowl stir the grated zucchini, brown sugar, egg, oil, vanilla, and milk until smooth.
- Pour the wet mixture into the dry ingredients and fold gently until no streaks of flour remain.
- Cover the bowl and place it in the refrigerator overnight.
- The next morning heat the oven to 350 degrees and line a muffin tin with paper liners.
- Stir the chilled batter once, then divide it evenly among the muffin cups.
- Bake for 18 to 22 minutes until a toothpick inserted in the center comes out clean.
- Cool the muffins in the tin for 5 minutes, then move them to a rack.
Extra Tips
If the batter looks very thick after chilling, stir in one tablespoon of milk before scooping. Store cooled muffins in an airtight container in the refrigerator for up to four days and warm them briefly in the microwave or toaster oven before eating. Course: Breakfast Cuisine: American Equipment: Mixing Bowls, Muffin Tin, Whisk
Maple Pecan Granola Yogurt Parfait Jars
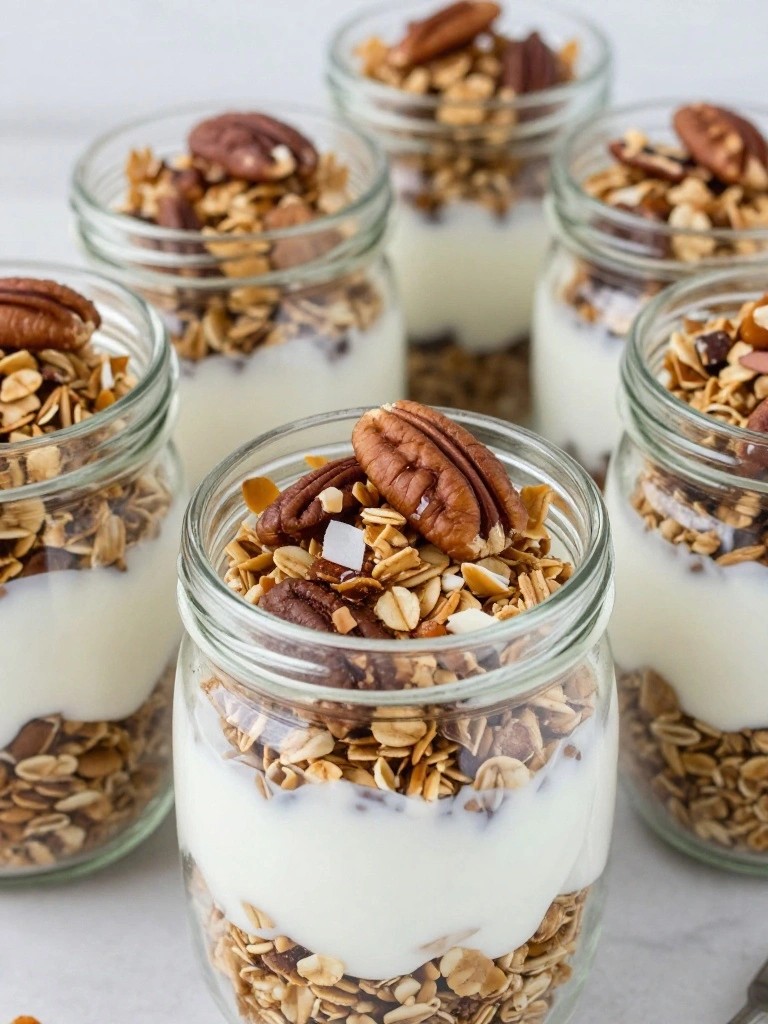
These jars let you wake up to a ready breakfast with layers of creamy yogurt and crunchy maple pecan granola. They work well for busy weekdays when you want something sweet but still filling. The maple brings a gentle sweetness while the pecans add a toasted nutty bite against the cool yogurt.
The recipe keeps everything simple by making a small batch of granola that stores well once cooled. You assemble the jars the night before so the flavors meld in the fridge without the granola turning soggy.
Serves 4 people.
Ingredients
- 1 ½ cups rolled oats
- ¾ cup pecan halves
- ¼ cup maple syrup
- 2 tablespoons coconut oil, melted
- ½ teaspoon ground cinnamon
- ¼ teaspoon salt
- 3 cups vanilla Greek yogurt
Instructions
- Preheat the oven to 325°F and line a baking sheet with parchment paper.
- In a mixing bowl, combine the rolled oats, pecan halves, maple syrup, melted coconut oil, cinnamon, and salt. Stir until the oats and pecans are evenly coated.
- Spread the mixture in a single layer on the prepared baking sheet. Bake for 20 minutes, stirring once halfway through, until the granola is golden.
- Remove the baking sheet from the oven and let the granola cool completely on the sheet.
- Spoon the vanilla Greek yogurt into four mason jars, dividing it evenly. Add a layer of cooled granola to each jar, then repeat with another layer of yogurt and a final layer of granola.
- Seal the jars and place them in the refrigerator overnight.
Extra Tips
Layer the granola between two yogurt sections so it stays crisp until morning. If you prefer a stronger maple flavor, drizzle an extra teaspoon of maple syrup over the yogurt before adding the granola. The jars keep well in the fridge for up to three days. Course: Breakfast Cuisine: American Equipment: Baking sheet, Mixing bowl, Mason jars