
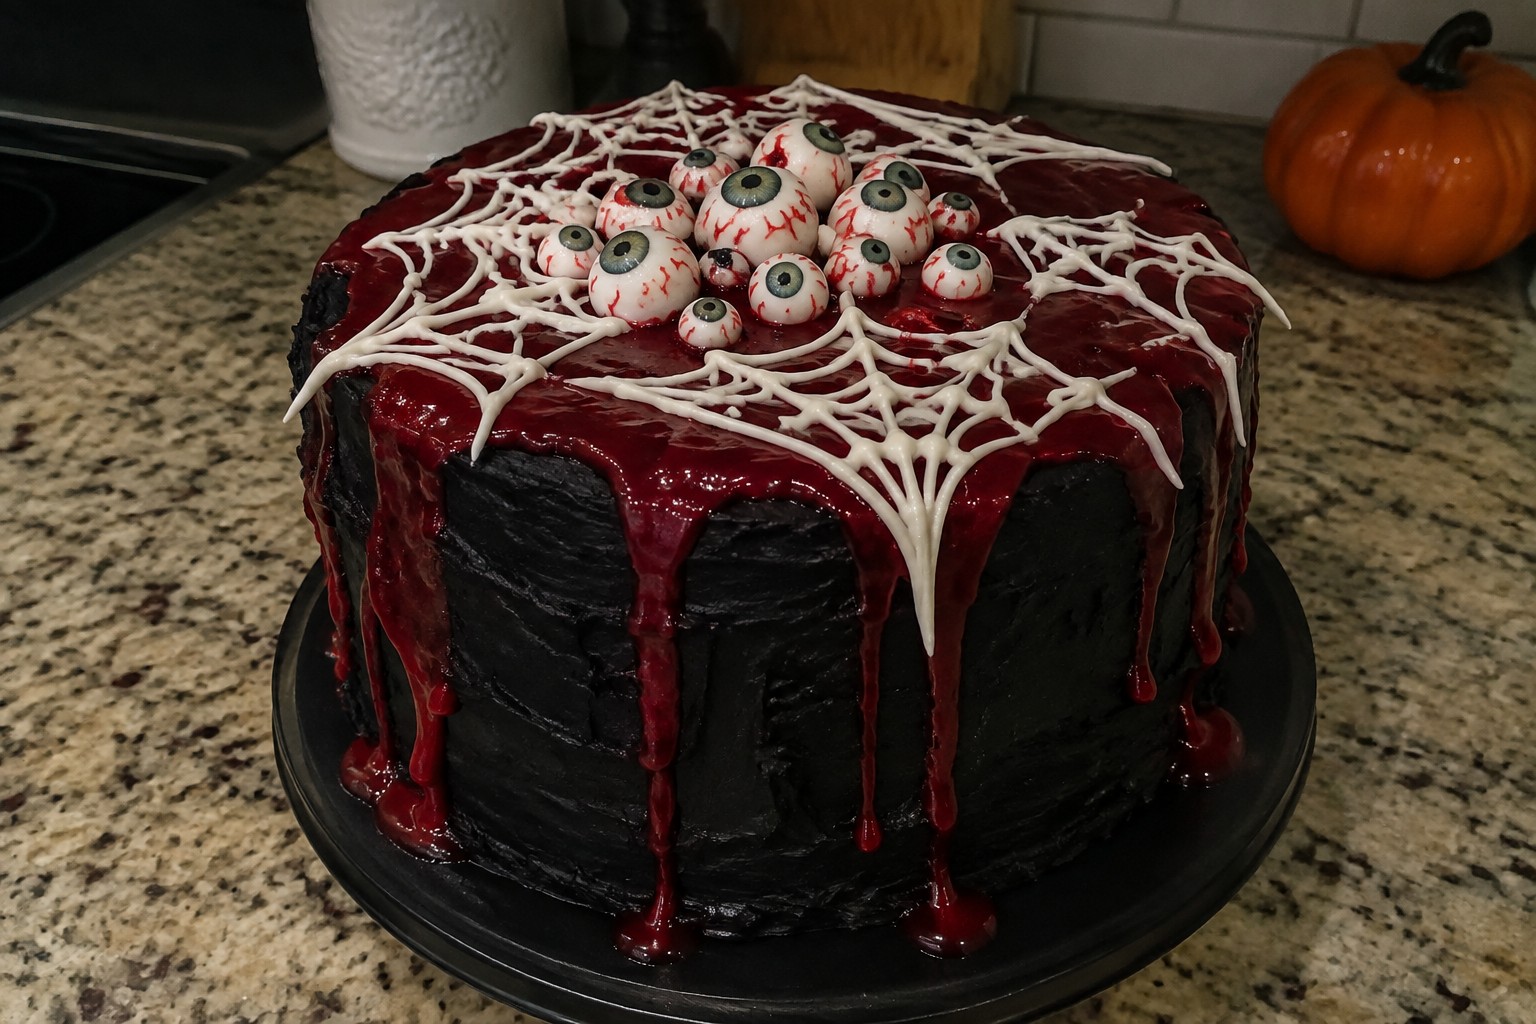
Halloween is coming up and it is a good time to plan a cake for the center of the table.
These ideas focus on scary looks that still work with regular baking supplies.
Each recipe gives you the full steps from start to finish so you can follow along at home.
You will see a range of designs that use common ingredients and basic tools.
Choose the one that matches the time you have and what you already own.
Helpful Tips Before You Start
Keep these points in mind when making cakes that double as table centerpieces.
Recommended Products

Package:It includes 6 zombie figure, 2 skulls, 4 semicircle eyeball decorations, 1 bone, 1 severed finger, 1 ghost claw, 2 simulation trees.Variety, can better show you need a theme cake scene.

Playful Candy Eyes: Add a mischievous touch to your treats with our eyeball mix sprinkles in assorted sizes, resembling quirky eye motifs, perfect for adding a spooky yet fun twist to your Halloween or prank-themed creations
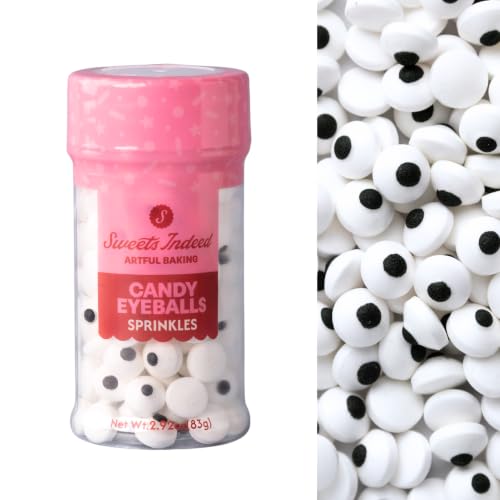
Halloween Candy Eyeballs: Edible eye sprinkles instantly add a spooky finishing touch to Halloween cookies, cupcakes, cakes, brownies, cake pops, and party desserts.
Pick a sturdy base
Use a thick cake board or stand that is wider than the cake itself. This prevents tipping once you add tall decorations.
Make dark colors ahead
Mix black or deep red frosting the day before. Let it sit covered so the shade deepens and you avoid last-minute adjustments.
Plan non-edible accents
Attach plastic spiders or toy bones to toothpicks or skewers. This keeps them separate from the cake so guests can remove them easily.
Build height with support
Insert dowels or straws when stacking layers. A tall centerpiece needs internal structure to stay upright through the party.
Blood-Dripping Red Velvet Skull Cake
This red velvet skull cake brings a bold look to any Halloween table. The moist cocoa-flavored layers hold their shape well in a skull mold, and the bright red color shows through once the cake cools. A simple glaze that runs down the sides adds the dripping effect without extra tools.
It works best as a small centerpiece for four people at an intimate gathering or as part of a larger dessert spread. The flavor stays classic red velvet with a light chocolate note and soft crumb that pairs nicely with the sweet glaze.
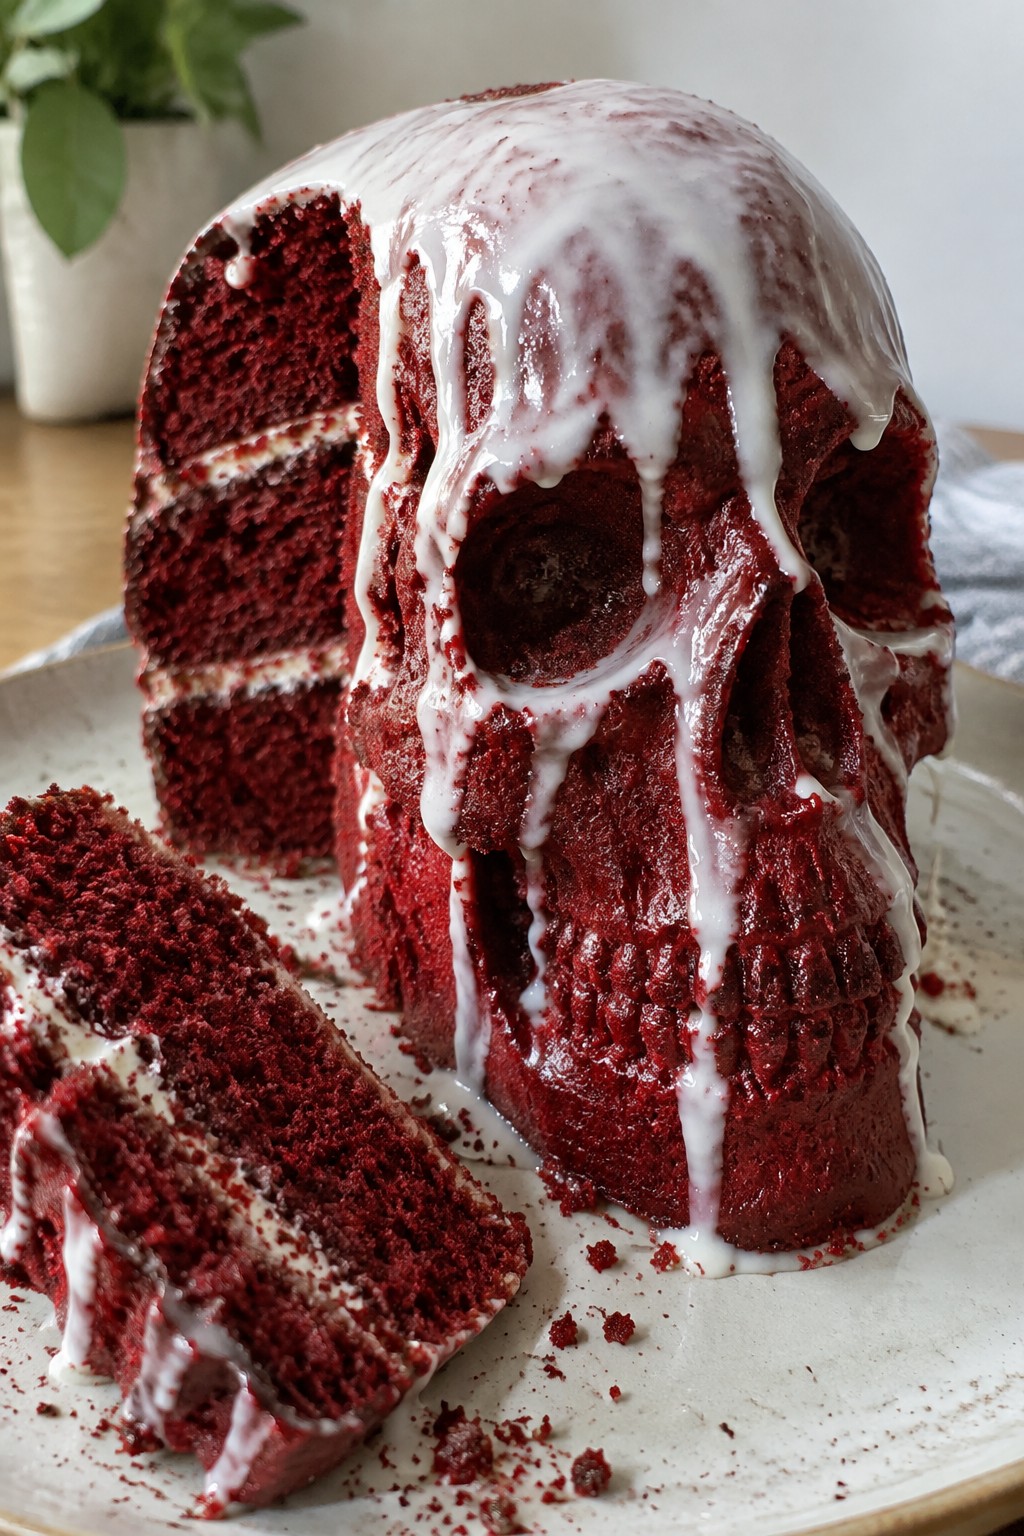
Serves 4 people.
Recommended Products

Perfect Halloween Party Set: Includes 24 tombstone cake decorations and 24 black shovel spoons, Our Halloween cake toppers are not only perfect birthday cupcake decorations, but also wonderful gifts for kids at Halloween themed birthday parties, perfect for creating a spooky graveyard theme for your Halloween birthday party

What You Will Get: you will receive a total of 7 pieces of Halloween spooky kits, including 5 pieces of fake tombstones for graves and 2 pieces of mini fences, the quantity can satisfy your certain decorative needs

SUPER VALUE SET: Includes 6 realistic Halloween tombstone yard signs and 14 stakes for secure display. Each tombstone measures 16.5 × 10.6 inches, making it the perfect size to create a full spooky graveyard scene in your yard or garden.
Ingredients
- 1 1/2 cups all-purpose flour
- 1 cup granulated sugar
- 2 tablespoons unsweetened cocoa powder
- 1 teaspoon baking soda
- 1/2 teaspoon salt
- 1 cup buttermilk
- 1/2 cup vegetable oil
- 2 large eggs
- 2 tablespoons red food coloring
- 1 teaspoon vanilla extract
- 1 teaspoon white vinegar
- 1 cup powdered sugar
- 3 tablespoons milk
Instructions
- Preheat the oven to 350 degrees and grease a skull-shaped cake pan.
- In a large bowl, whisk together the flour, granulated sugar, cocoa powder, baking soda, and salt.
- In a second bowl, mix the buttermilk, vegetable oil, eggs, red food coloring, vanilla extract, and white vinegar until smooth.
- Pour the wet mixture into the dry ingredients and stir just until no streaks remain.
- Spoon the batter into the prepared pan and smooth the top.
- Bake for 30 to 35 minutes, or until a toothpick inserted in the center comes out clean.
- Let the cake cool in the pan for 15 minutes, then turn it out onto a wire rack to cool completely.
- Stir the powdered sugar and milk together in a small bowl until a thick but pourable glaze forms. Add a drop of red food coloring if a deeper red is desired.
- Set the cooled skull cake on a serving plate and slowly pour the glaze over the top so it drips down the sides like blood.
Extra Tips
Use a skull pan with clear details so the shape shows after baking. If the glaze thickens while you work, add a teaspoon of milk at a time to loosen it. The cake stays moist at room temperature for one day or can be wrapped and refrigerated for up to three days. Warm slices slightly before serving if you prefer a softer texture. Course: Dessert Cuisine: American Equipment: Mixing Bowls, Skull Cake Pan, Whisk, Wire Rack
Spiderweb Black Cocoa Layer Cake
This black cocoa cake gives your Halloween table a bold dark look that stands out. The layers bake up moist with a rich chocolate taste that feels fitting for the season.
It works well as a small centerpiece when you want something simple yet themed. The spiderweb detail on top adds a creepy element that guests notice right away.
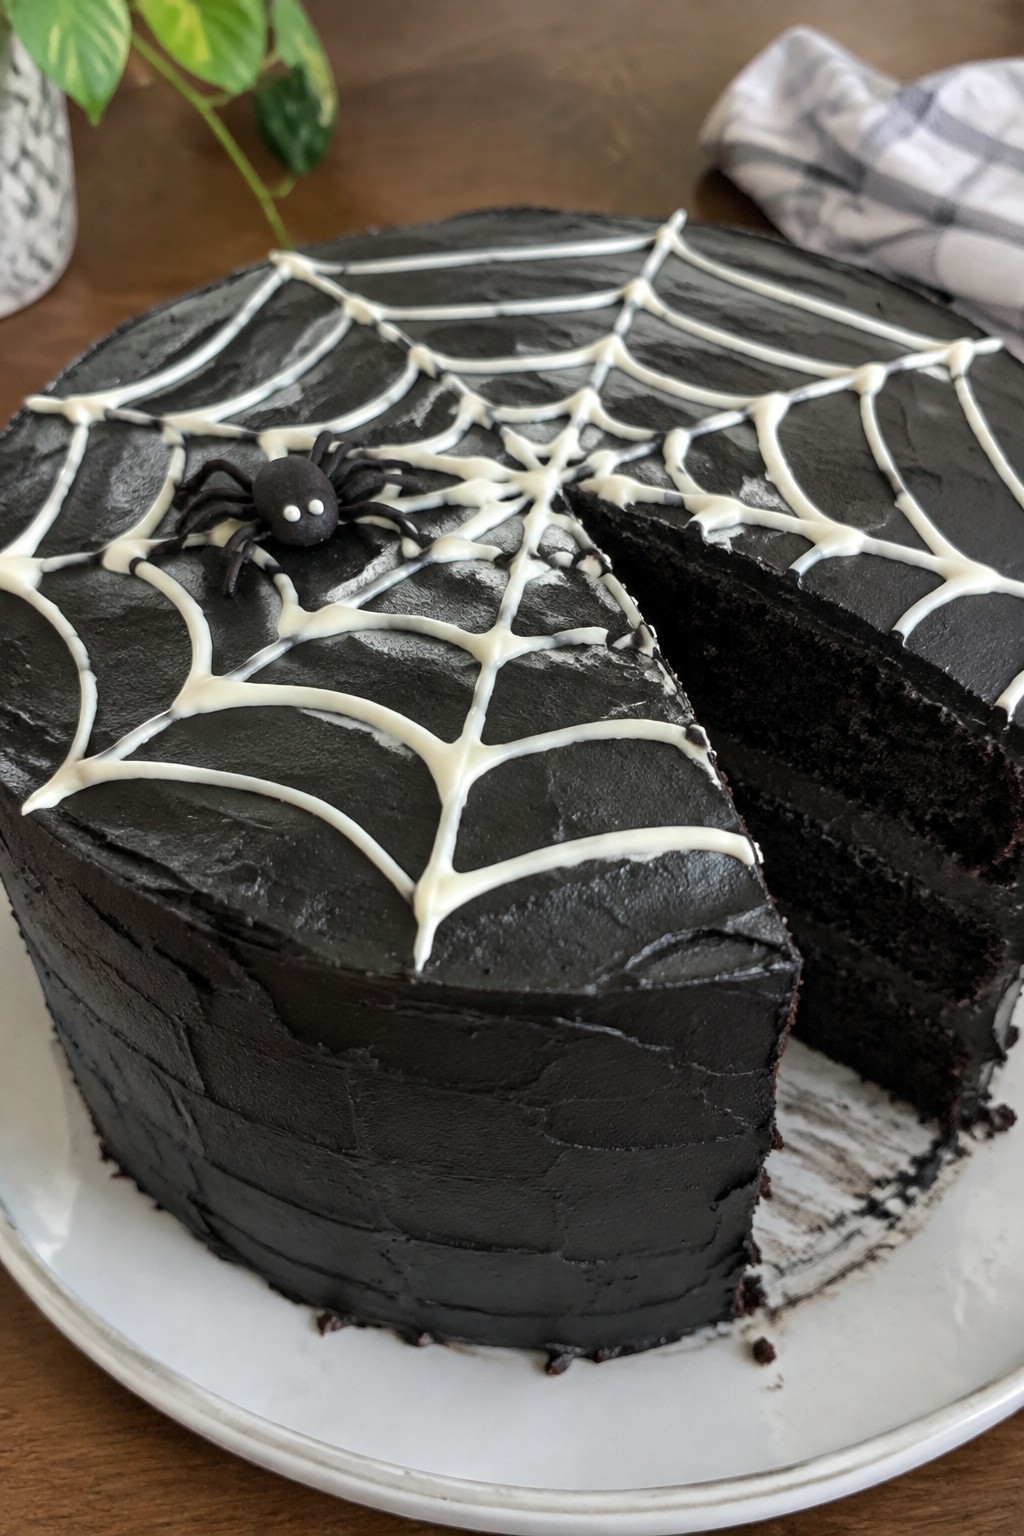
Serves 4 people.
Ingredients
- ¾ cup all-purpose flour
- ¾ cup granulated sugar
- ½ cup black cocoa powder
- 1 teaspoon baking soda
- ½ teaspoon salt
- ½ cup buttermilk
- ¼ cup vegetable oil
- 1 large egg
- 1 teaspoon vanilla extract
- ½ cup hot coffee
- ½ cup unsalted butter, softened
- 2 cups powdered sugar
- 2 tablespoons milk
- Black gel food coloring
- ¼ cup white chocolate, melted
- 1 candy spider
Instructions
- Preheat the oven to 350°F. Grease and line two 6-inch round cake pans.
- In a large bowl, whisk together the flour, granulated sugar, black cocoa powder, baking soda, and salt. Add the buttermilk, vegetable oil, egg, and vanilla extract. Stir until smooth. Pour in the hot coffee and mix until the batter is thin and even.
- Divide the batter between the prepared pans. Bake for 22 to 25 minutes until a toothpick comes out clean. Let the cakes cool in the pans for 10 minutes, then turn them out onto a wire rack to cool completely.
- In a medium bowl, beat the softened butter until creamy. Gradually add the powdered sugar, milk, and vanilla extract. Beat until light and fluffy. Mix in black gel food coloring until the frosting reaches a deep black shade.
- Place one cooled cake layer on a plate. Spread a thin layer of black frosting on top. Add the second layer and frost the top and sides evenly.
- Pipe the melted white chocolate in a spiral on the frosted top. Drag a toothpick from the center outward in lines to form a spiderweb. Place the candy spider on the web.
Extra Tips
Use a small offset spatula to keep the black frosting smooth on the sides so the white web stands out clearly. The cake holds well in the fridge for two days if covered. Let it sit at room temperature for 20 minutes before serving so the frosting softens again. Course: Dessert Cuisine: American Equipment: Mixing bowls, 6-inch cake pans, electric mixer, wire rack, piping bag
Graveyard Brownie Cheesecake
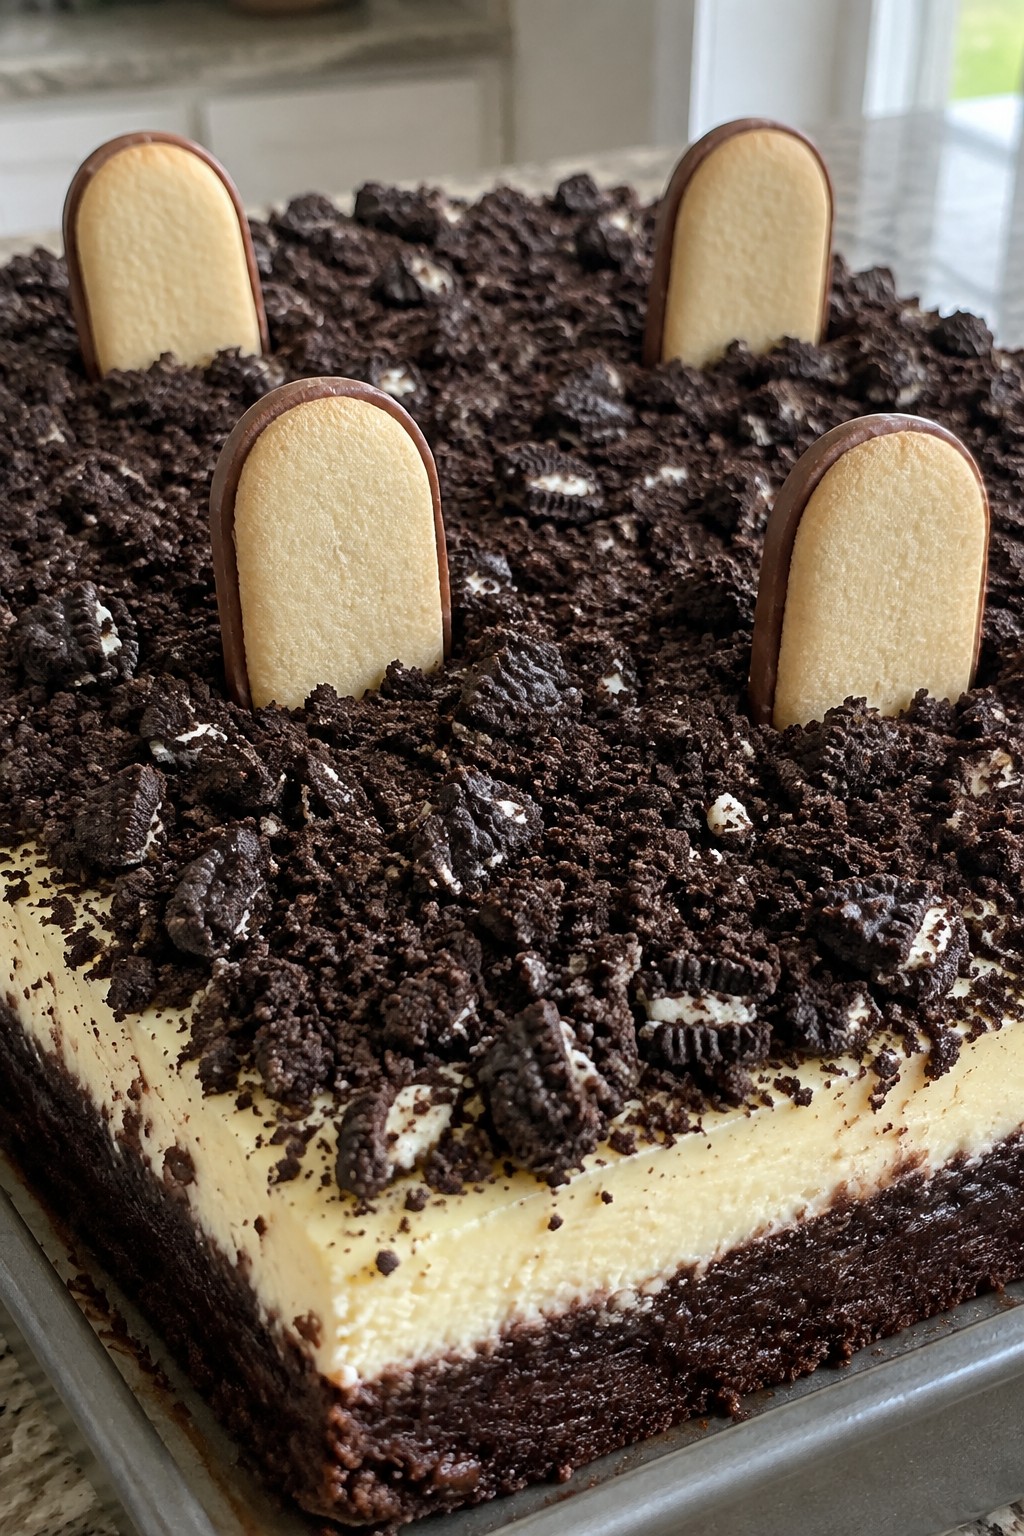
This brownie cheesecake creates a striking Halloween centerpiece with its dark chocolate base and creamy layer. The crushed cookie topping gives it a graveyard look that fits right into a spooky dessert table. It balances rich brownie flavor with smooth cheesecake and a bit of crunch from the cookie soil.
The finished dessert slices cleanly and serves a small group without much fuss. It works well for parties where you want one showstopping cake rather than many small treats.
Serves 4 people.
Recommended Products

Special Design: This cake topper is suitable for Halloween themed birthday parties, creepy horror birthday gatherings, haunted house themed events, Halloween costume parties and other spooky celebration occasions for kids and adults.

Halloween Cupcake Decorations: The set has pumpkin cupcake toppers*4, ghost cake decorations*8, edible knife cake toppers*12, and witch hats cupcake toppers*15. It's perfect for your Halloween party

DecoPac Halloween Cauldron Cupcake Toppers- From bubbling brews to full on potion power this layon is sure to conjure up some Halloween magic. Use half of the cauldron or combine the two halves for a full cauldron. Contains 24 full cauldron decorations or 48 half cauldron's perfect to lay flat on cupcakes.
Ingredients
- 4 tablespoons unsalted butter, melted
- 1/2 cup sugar
- 1 egg
- 1/4 cup cocoa powder
- 1/4 cup all-purpose flour
- 8 oz cream cheese, softened
- 1/4 cup sugar
- 1 egg
- 1 teaspoon vanilla extract
- 6 chocolate sandwich cookies, crushed
- 4 Milano cookies
- 1/4 cup chocolate chips, melted
Instructions
- Preheat the oven to 325°F and line a 6-inch springform pan with parchment paper.
- Stir together the melted butter, 1/2 cup sugar, 1 egg, cocoa powder, and flour until smooth to form the brownie base. Spread the batter evenly in the prepared pan.
- Bake the brownie layer for 15 minutes, then remove the pan from the oven and let it cool slightly.
- In a separate bowl, beat the softened cream cheese with the remaining 1/4 cup sugar, 1 egg, and vanilla extract until creamy and free of lumps.
- Pour the cheesecake mixture over the cooled brownie base and return the pan to the oven. Bake for 25 minutes until the center is just set.
- Cool the cheesecake completely at room temperature, then refrigerate for at least 2 hours.
- Before serving, sprinkle the crushed chocolate sandwich cookies over the top to resemble soil. Press the Milano cookies upright into the topping to stand as gravestones and drizzle the melted chocolate chips over them to create simple lettering.
Extra Tips
Use a small piping bag or zip-top bag with the corner snipped off to write quick RIP messages on the Milano cookies before they go on the cake. If the cheesecake cracks slightly during baking, the cookie topping will cover it completely. Leftovers keep well in the refrigerator for two days when covered tightly with plastic wrap. Course: Dessert Cuisine: American Equipment: Mixing Bowls, 6-inch Springform Pan, Oven, Spatula
Zombie Brain Pistachio Bundt Cake
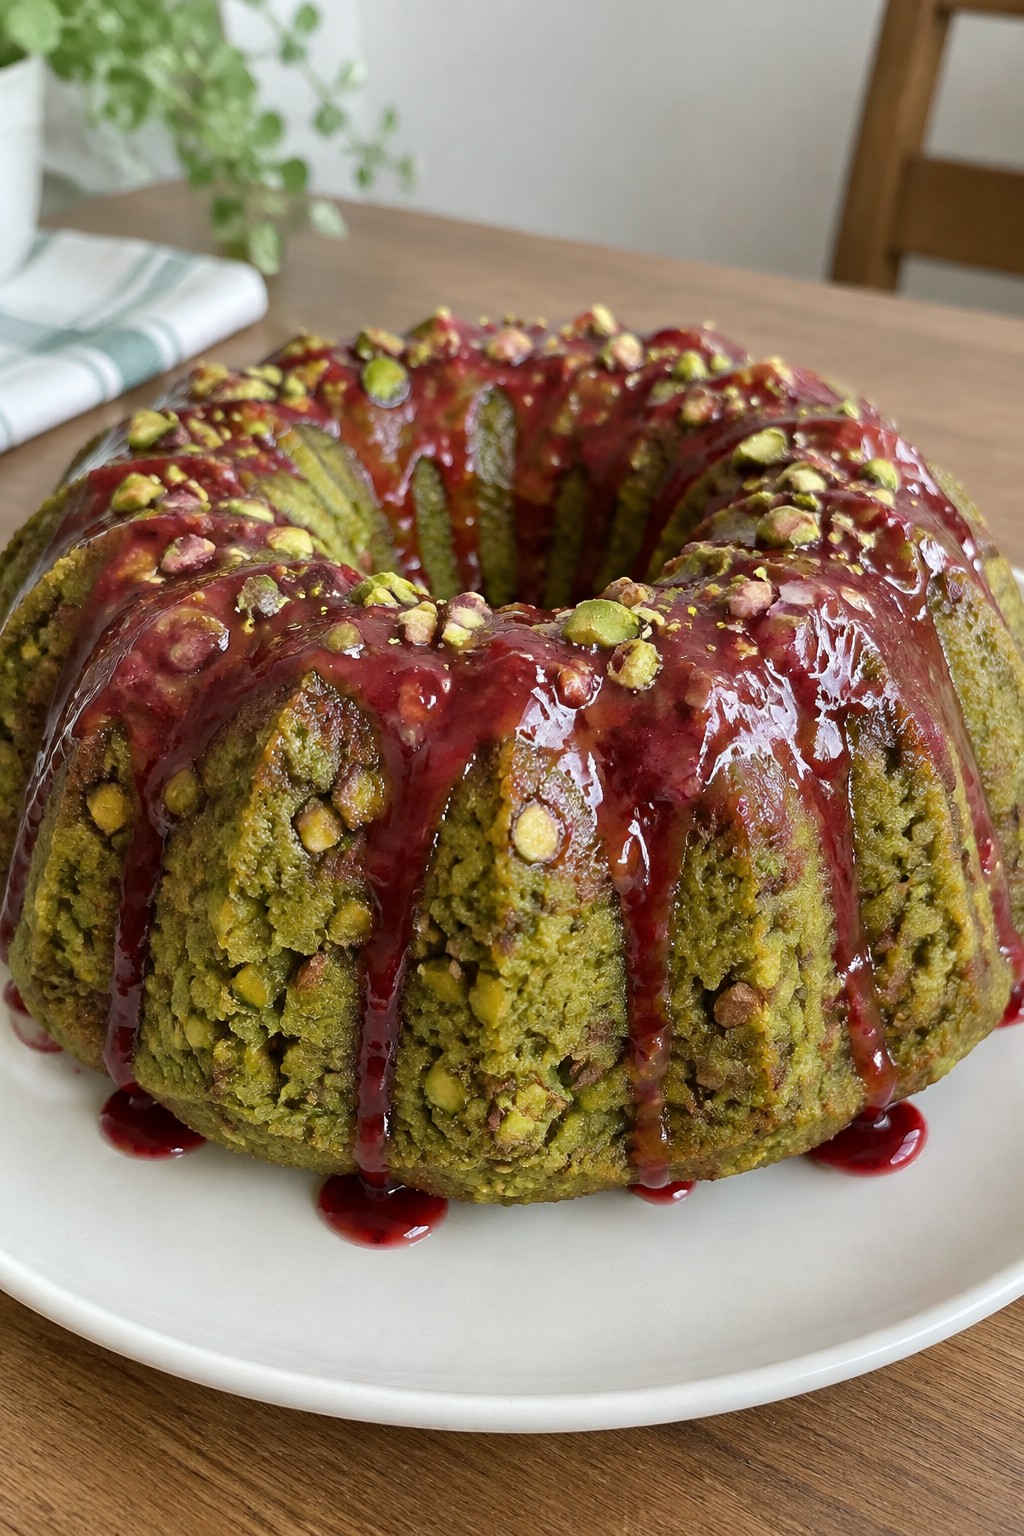
This cake stands out at a Halloween table because the pistachio pudding mix gives it a natural green color that reads as a zombie brain. The bundt shape adds ridges that look textured once glazed, making it a simple but effective centerpiece without extra carving or sculpting.
The flavor is mild and nutty with a moist crumb. A raspberry glaze adds a touch of tartness and a red drip effect that ties into the spooky theme.
Serves 4 people.
Ingredients
- 1 cup all-purpose flour
- ½ cup granulated sugar
- 1 (3.4-ounce) package instant pistachio pudding mix
- 2 large eggs
- ⅓ cup vegetable oil
- ½ cup milk
- ¼ cup chopped pistachios
- ½ cup powdered sugar
- 3 tablespoons raspberry preserves
Instructions
- Heat the oven to 350°F and grease a small bundt pan.
- In a mixing bowl, whisk together the flour, granulated sugar, and pistachio pudding mix until evenly combined.
- Add the eggs, vegetable oil, and milk to the dry ingredients. Stir until the batter is smooth and no dry streaks remain.
- Fold in the chopped pistachios so they are scattered throughout the batter.
- Pour the batter into the prepared bundt pan and smooth the top. Bake for 30 to 35 minutes, or until a toothpick inserted in the center comes out clean.
- Let the cake cool in the pan for 10 minutes, then turn it out onto a wire rack to cool completely.
- Stir the powdered sugar and raspberry preserves together until a thick but pourable glaze forms. Drizzle the glaze over the cooled cake so it runs down the sides like blood.
Extra Tips
Warm the raspberry preserves slightly before mixing the glaze so it drips more easily and creates longer red streaks. If you want a deeper green, add a drop of green food coloring to the batter, though the pudding mix already provides a good shade. Store leftovers covered at room temperature for up to two days. Course: Dessert Cuisine: American Equipment: Bundt pan, Mixing bowls, Whisk, Oven
Haunted Pumpkin Caramel Cauldron Cake
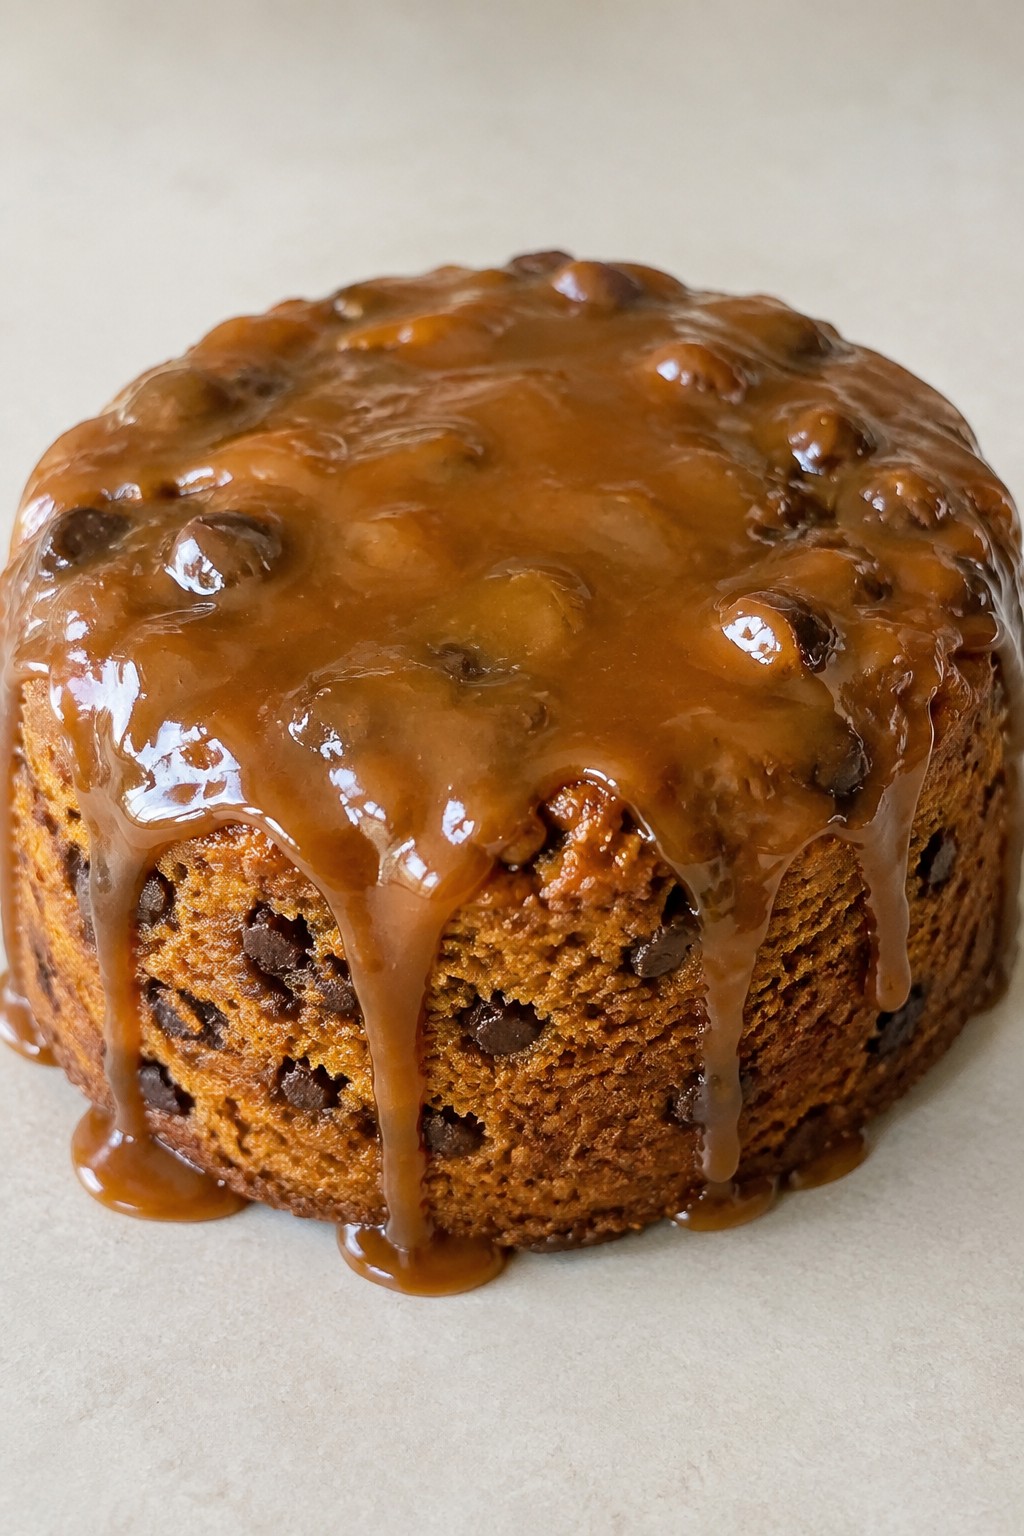
This pumpkin cake brings a moist crumb and warm spice notes together with a thick caramel layer that mimics a bubbling brew. It works well as a small centerpiece for an intimate Halloween gathering and delivers a balance of sweet pumpkin and rich caramel in every bite.
Serves 4 people.
Ingredients
- 1 cup pumpkin puree
- 1 cup all-purpose flour
- ½ cup granulated sugar
- 2 large eggs
- ⅓ cup vegetable oil
- 1 teaspoon baking powder
- 1 teaspoon cinnamon
- ½ cup caramel sauce
- ¼ cup chocolate chips
Instructions
- Preheat the oven to 350°F and lightly grease an 8-inch round cake pan.
- In a mixing bowl, combine the pumpkin puree, granulated sugar, eggs, and vegetable oil until smooth.
- Add the all-purpose flour, baking powder, and cinnamon to the wet mixture and stir until just combined.
- Pour the batter into the prepared pan and bake for 25 to 30 minutes, or until a toothpick inserted in the center comes out clean.
- Let the cake cool in the pan for 10 minutes, then turn it out onto a plate.
- Melt the chocolate chips in a small bowl and drizzle them around the edge of the cake to create a dark rim.
- Pour the caramel sauce into the center of the cake so it pools like a cauldron filling.
Extra Tips
Serve the cake slightly warm so the caramel stays fluid. If you need to make it ahead, bake the cake base the day before and add the melted chocolate and caramel just before serving. Store leftovers covered at room temperature for up to two days. Course: Dessert Cuisine: American Equipment: Mixing Bowls, 8-inch round cake pan, Whisk
Eyeball Marshmallow Ghost White Cake
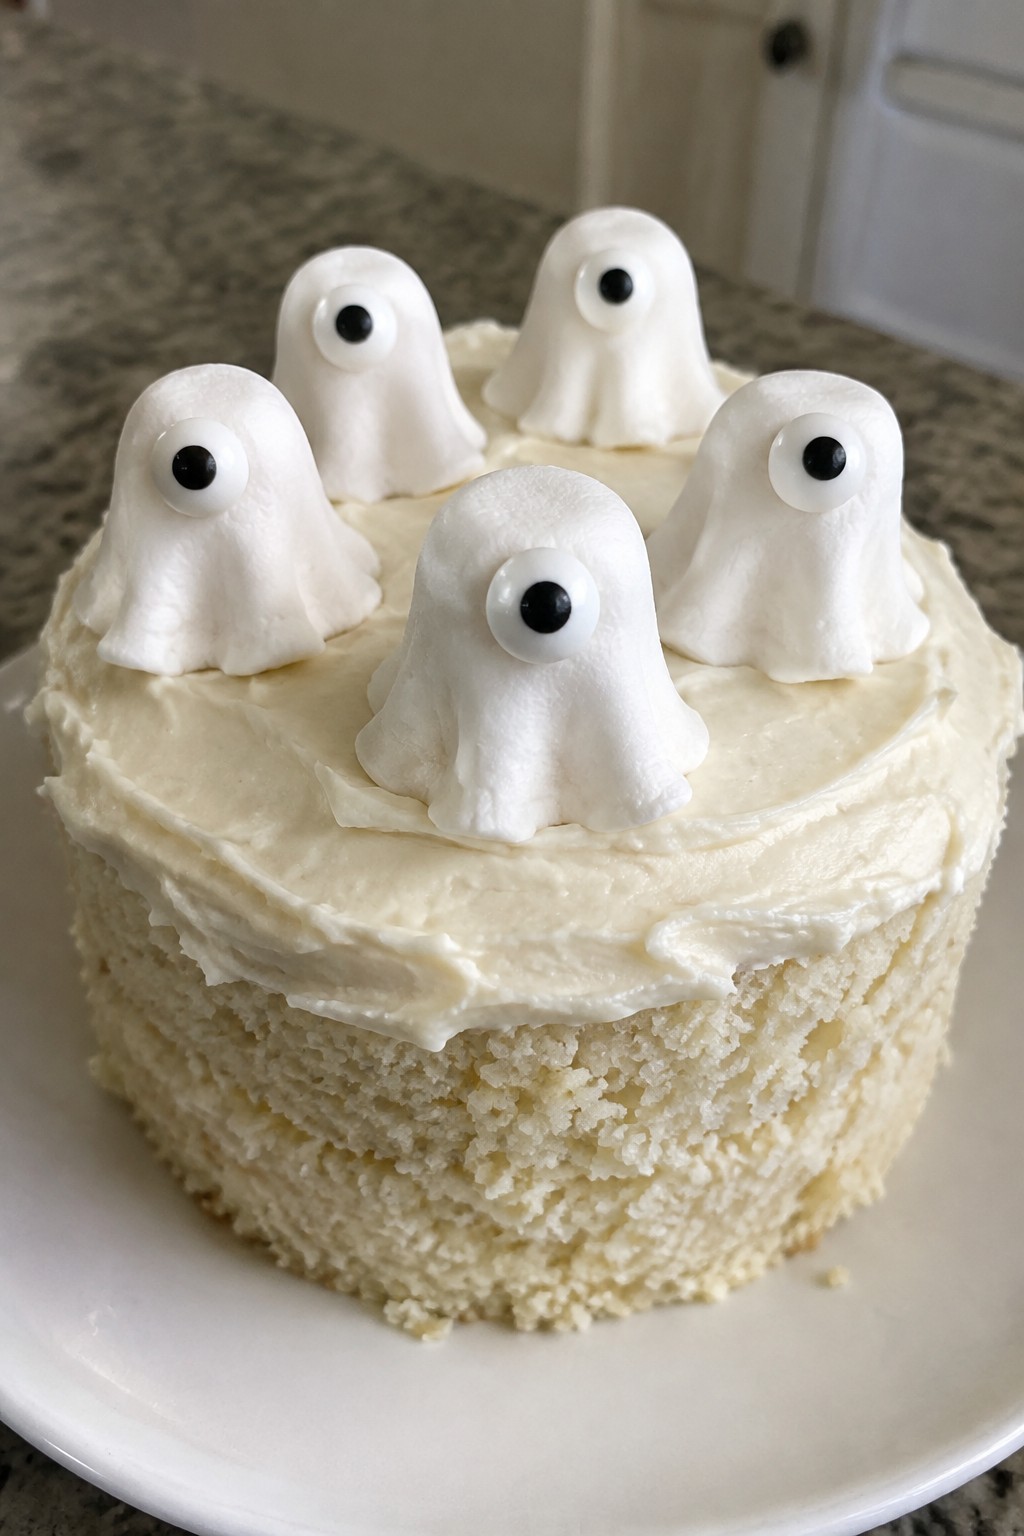
This cake layers a soft white base with marshmallow ghosts that sit on top. Candy eyeballs give each ghost a fixed stare, making it a simple but striking Halloween centerpiece for a small gathering.
The cake stays light with vanilla flavor while the marshmallows add a chewy contrast against the smooth frosting. It works well when you want something festive without complicated decorating skills.
Serves 4 people.
Ingredients
- 1 1/2 cups all-purpose flour
- 3/4 cup granulated sugar
- 1/2 cup unsalted butter, softened
- 2 large egg whites
- 1/2 cup milk
- 1 teaspoon vanilla extract
- 1 teaspoon baking powder
- 1/4 teaspoon salt
- 1 cup mini marshmallows
- 1 cup vanilla frosting
- 12 candy eyeballs
Instructions
- Preheat the oven to 350 degrees F and grease a small 8-inch round cake pan.
- In a mixing bowl, cream the softened butter and sugar until light. Add the egg whites and vanilla extract, then mix until combined.
- In a separate bowl, whisk together the flour, baking powder, and salt. Alternate adding the dry mixture and milk to the wet ingredients, stirring until the batter is smooth.
- Pour the batter into the prepared pan and bake for 25 to 30 minutes until a toothpick comes out clean. Let the cake cool completely in the pan.
- Spread the vanilla frosting evenly over the cooled cake.
- Arrange the mini marshmallows on the frosted surface to form ghost shapes. Press two candy eyeballs onto each marshmallow ghost.
Extra Tips
Press the marshmallows gently into the frosting so they stay in place without sliding. If the frosting feels too thick for spreading, warm it slightly in the microwave for ten seconds. Store leftovers in an airtight container at room temperature for up to two days. Course: Dessert Cuisine: American Equipment: Mixing Bowl, Cake Pan, Electric Mixer
Skeleton Bone Vanilla Almond Cake
This vanilla almond cake brings a subtle nutty flavor and soft crumb that pairs well with the clean taste of vanilla. The recipe works nicely for Halloween gatherings where you want a centerpiece that feels festive without being overly complicated. It bakes up pale and light, making it easy to shape or arrange into bone forms that fit a creepy table display.
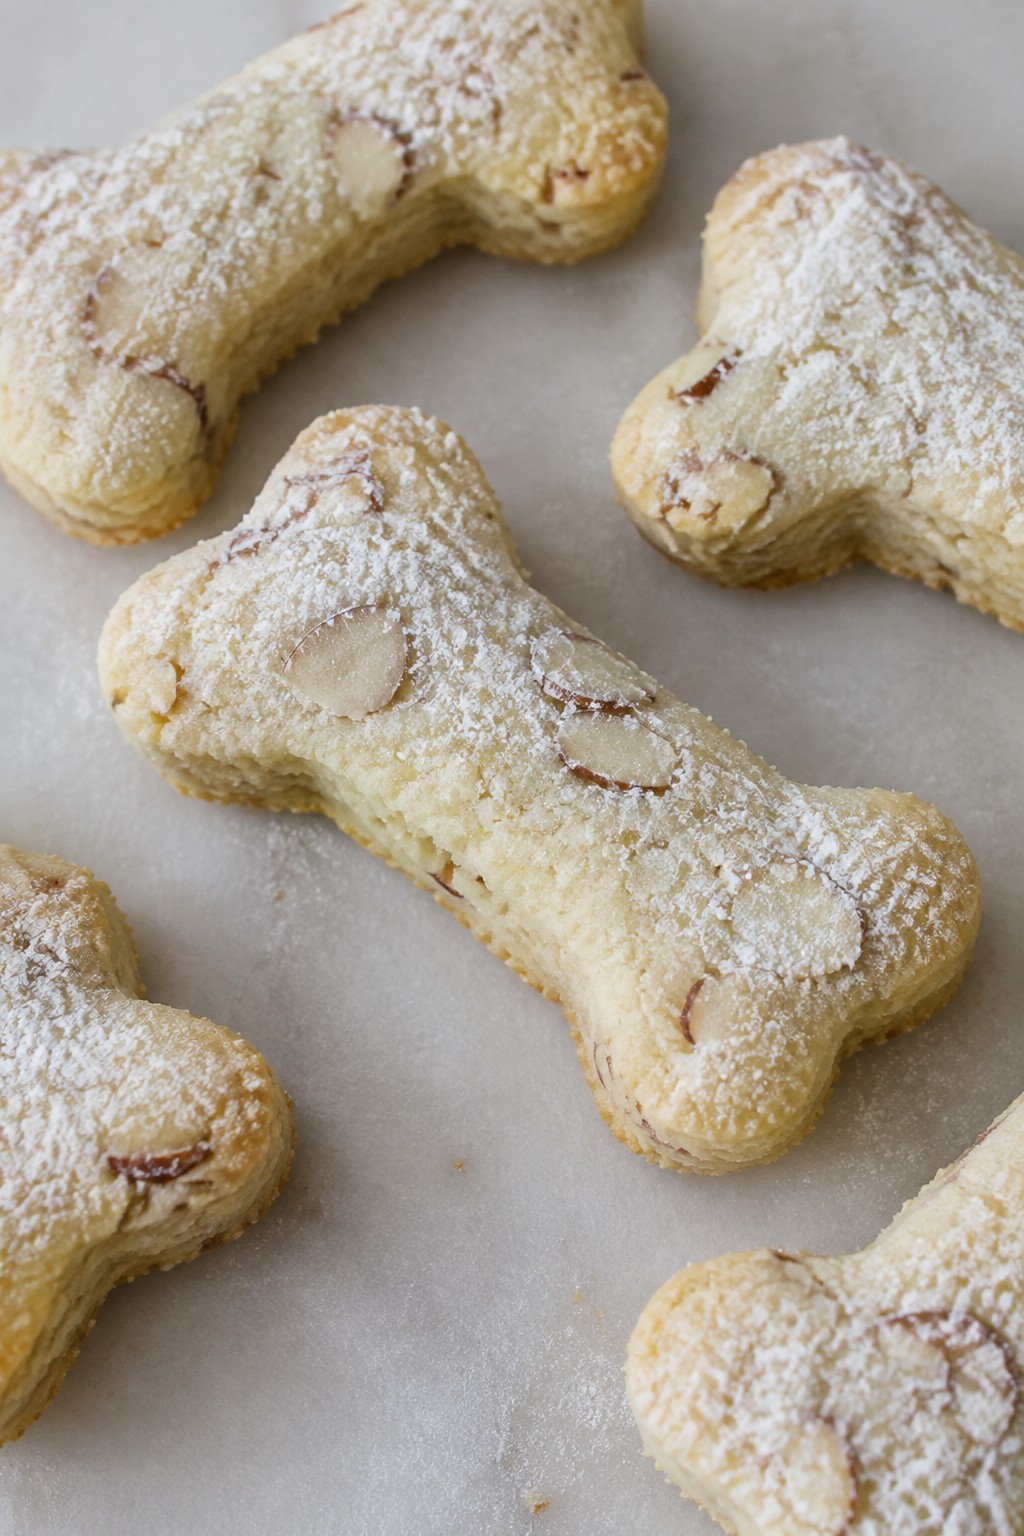
Serves 4 people.
Ingredients
- 1 cup all-purpose flour
- 1/2 cup granulated sugar
- 1/4 cup unsalted butter, softened
- 1 large egg
- 1 teaspoon vanilla extract
- 1/2 teaspoon almond extract
- 1 teaspoon baking powder
- 1/4 cup milk
- 2 tablespoons sliced almonds
- 1/4 cup powdered sugar
Instructions
- Preheat the oven to 350 degrees and grease a small loaf pan or square baking dish.
- In a mixing bowl, whisk together the flour, granulated sugar, and baking powder until evenly combined.
- Add the softened butter, egg, vanilla extract, almond extract, and milk to the dry ingredients. Stir until a smooth batter forms and no dry streaks remain.
- Pour the batter into the prepared pan and scatter the sliced almonds evenly over the top.
- Bake for 25 to 30 minutes, or until a toothpick inserted in the center comes out clean.
- Let the cake cool completely in the pan, then remove it and dust the entire surface with powdered sugar before slicing into bone-shaped pieces.
Extra Tips
Slice the cooled cake into long, narrow strips with rounded ends to emphasize the bone look before dusting with powdered sugar. If you prefer a stronger almond note, you can increase the almond extract by an extra 1/4 teaspoon next time you bake it. Store leftovers in an airtight container at room temperature for up to two days. Course: Dessert Cuisine: American Equipment: Mixing Bowl, Whisk, Loaf Pan
Witch’s Cauldron Purple Ombre Layer Cake
This purple ombre cake creates a striking Halloween centerpiece with layers that shift from deep violet at the bottom to soft lavender at the top. The effect resembles a witch’s potion ready to bubble over, making it a good choice for parties or themed gatherings. The vanilla flavor stays mild and pairs with a simple buttercream that does not overpower the visual.
The texture comes out light and tender with a creamy frosting that seals in moisture. It works best when served fresh so the colors stay vivid against the dark table setting.
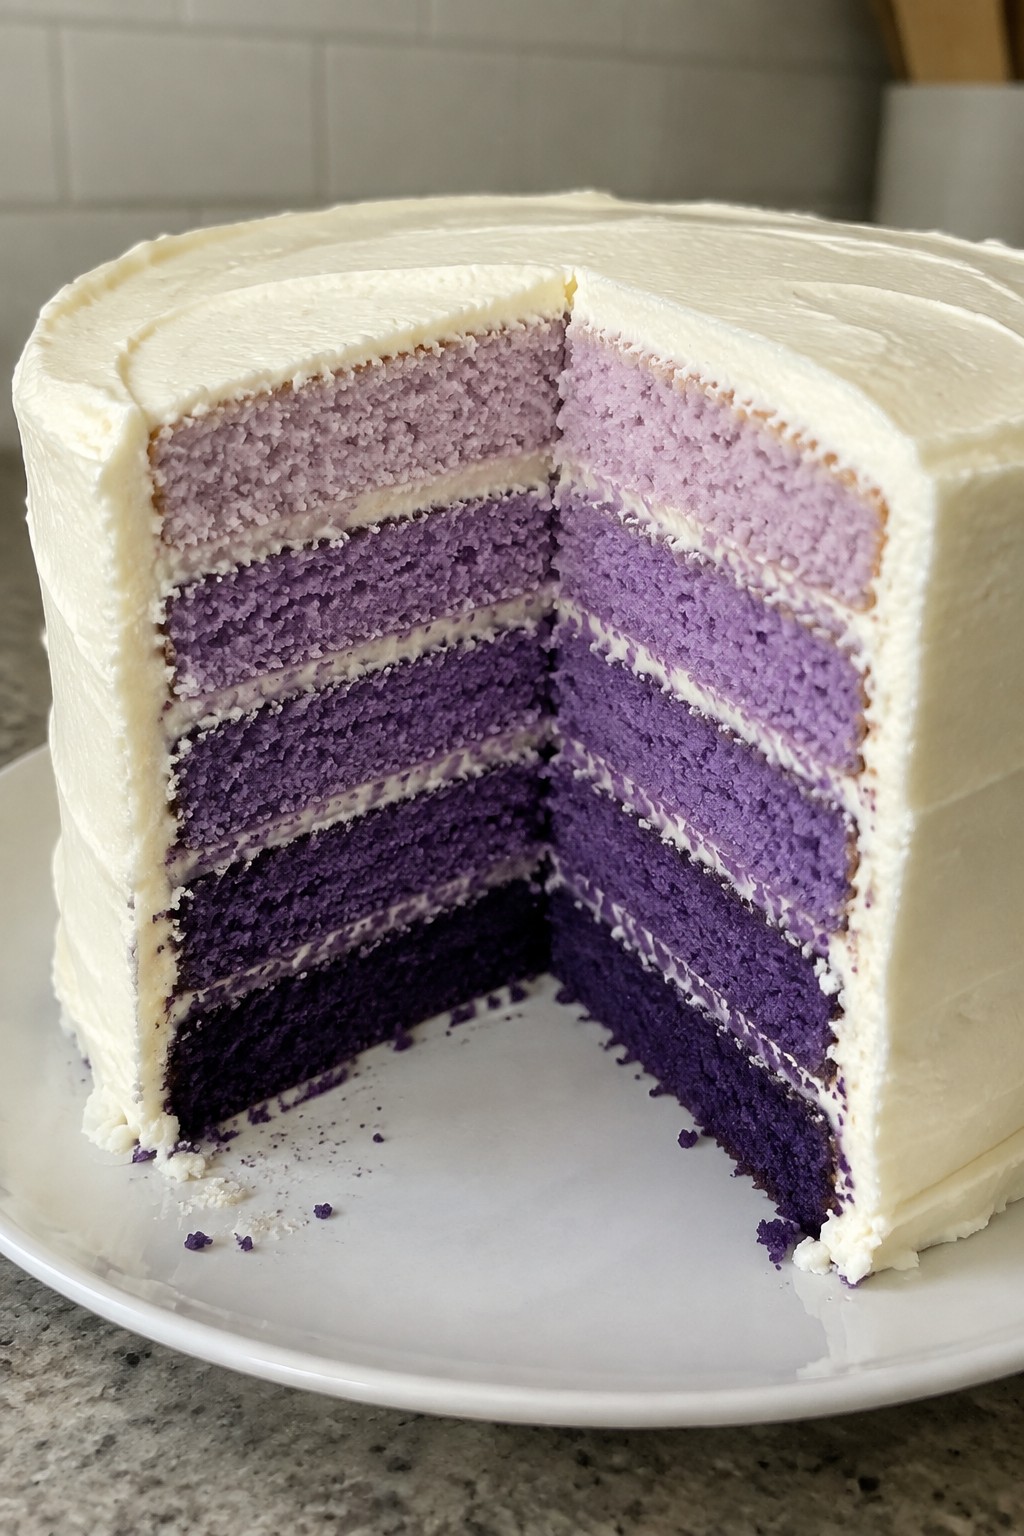
Serves 4 people.
Ingredients
- 1 1/2 cups all-purpose flour
- 3/4 cup granulated sugar
- 1/2 cup unsalted butter, softened
- 2 large eggs
- 1/2 cup milk
- 1 1/2 teaspoons baking powder
- 1 teaspoon vanilla extract
- Purple gel food coloring
- 1/2 cup unsalted butter, softened (for frosting)
- 2 cups powdered sugar
- 2 tablespoons milk (for frosting)
Instructions
- Preheat the oven to 350 degrees and grease two 6-inch round cake pans.
- In a mixing bowl, whisk together the flour and baking powder.
- In a separate bowl, beat the 1/2 cup softened butter with the granulated sugar until light. Add the eggs one at a time, then mix in the vanilla extract.
- Alternate adding the dry mixture and the 1/2 cup milk to the butter mixture, stirring until smooth.
- Divide the batter into three equal portions. Add increasing amounts of purple gel food coloring to each portion to create light, medium, and dark shades.
- Pour the darkest batter into one pan and the medium shade into the second pan. Bake for 22 to 25 minutes until a toothpick comes out clean. Cool the layers completely.
- For the frosting, beat the remaining 1/2 cup butter with the powdered sugar and 2 tablespoons milk until fluffy. Tint half the frosting with a small amount of purple coloring.
- Place the dark layer on a plate and spread with plain frosting. Add the medium layer and repeat. Use the tinted frosting on the top and sides for a subtle ombre finish.
Extra Tips
Color the batter in small increments so the shades stay distinct but still blend when stacked. Chill the cake for 20 minutes after frosting to help the layers set before slicing. Leftovers keep in an airtight container in the fridge for up to two days. Course: Dessert Cuisine: American Equipment: Mixing Bowls, Electric Mixer, Cake Pans, Oven
Creepy Crawler Matcha Green Tea Cake
This matcha green tea cake offers a bright green color that stands out on a Halloween table. The subtle earthy notes from the tea balance the sweetness, giving it a grown-up flavor twist that still appeals to a crowd.
The cake bakes up moist with a tender crumb. Top it with gummy worms arranged to look as if they are crawling across the surface for a simple yet effective creepy effect.
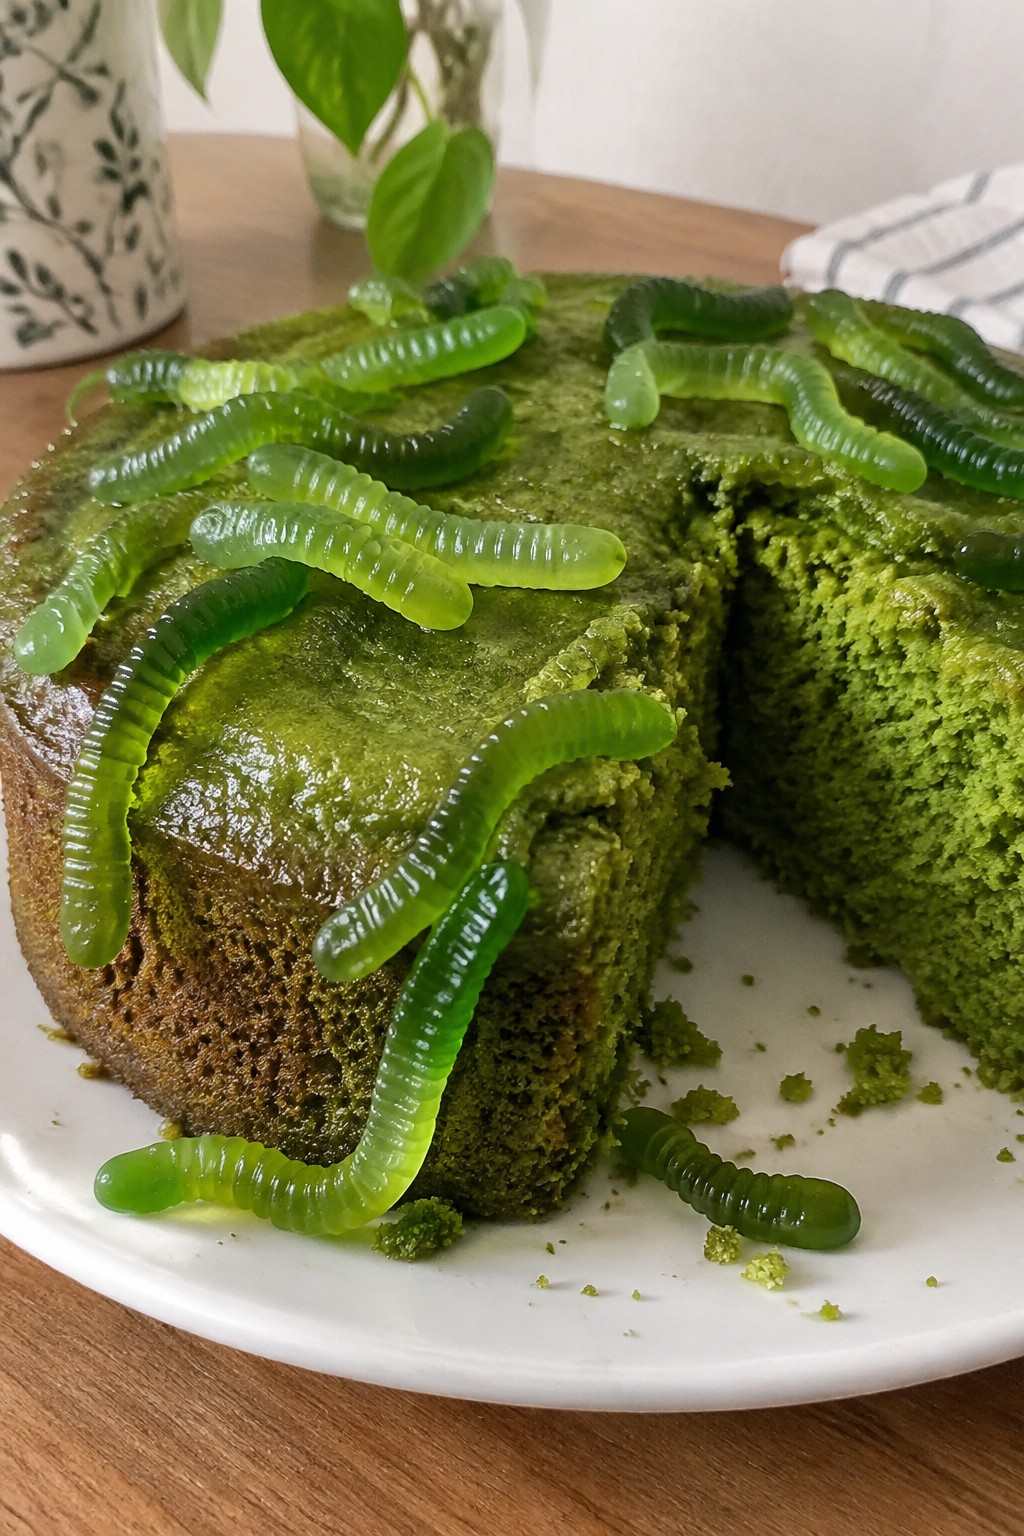
Serves 4 people.
Ingredients
- 1 cup all-purpose flour
- ¾ cup granulated sugar
- 2 tablespoons matcha green tea powder
- 1 teaspoon baking powder
- ½ teaspoon baking soda
- ¼ teaspoon salt
- ½ cup unsalted butter, softened
- 2 large eggs
- ½ cup milk
- 1 teaspoon vanilla extract
- ½ cup green gummy worms
Instructions
- Preheat the oven to 350°F and grease a 6-inch round cake pan.
- In a mixing bowl, whisk together the flour, sugar, matcha powder, baking powder, baking soda, and salt until evenly combined.
- Add the softened butter, eggs, milk, and vanilla extract to the dry ingredients. Beat on medium speed until the batter is smooth and no dry streaks remain.
- Pour the batter into the prepared pan and smooth the top. Bake for 28 to 32 minutes, or until a toothpick inserted in the center comes out clean.
- Cool the cake in the pan for 10 minutes, then turn it out onto a wire rack to cool completely.
- Once cooled, arrange the green gummy worms across the top of the cake so they appear to be crawling over the surface.
Extra Tips
Matcha can taste slightly bitter, so taste the batter before baking and add an extra tablespoon of sugar if you prefer a milder tea flavor. Press the gummy worms gently into the cake while it is still slightly tacky so they stay in place without sliding. Course: Dessert Cuisine: American Equipment: Mixing Bowl, Whisk, 6-inch Cake Pan, Oven, Wire Rack
Mummy-Wrapped Chocolate Peanut Butter Cake
This cake brings together moist chocolate layers and rich peanut butter for a dessert that feels festive without much fuss. It suits a small Halloween party or a weekend bake with kids who want to help with the final wrapping step. The crumb stays tender while the peanut butter adds a nutty note that pairs well with the smooth white frosting bands on top.
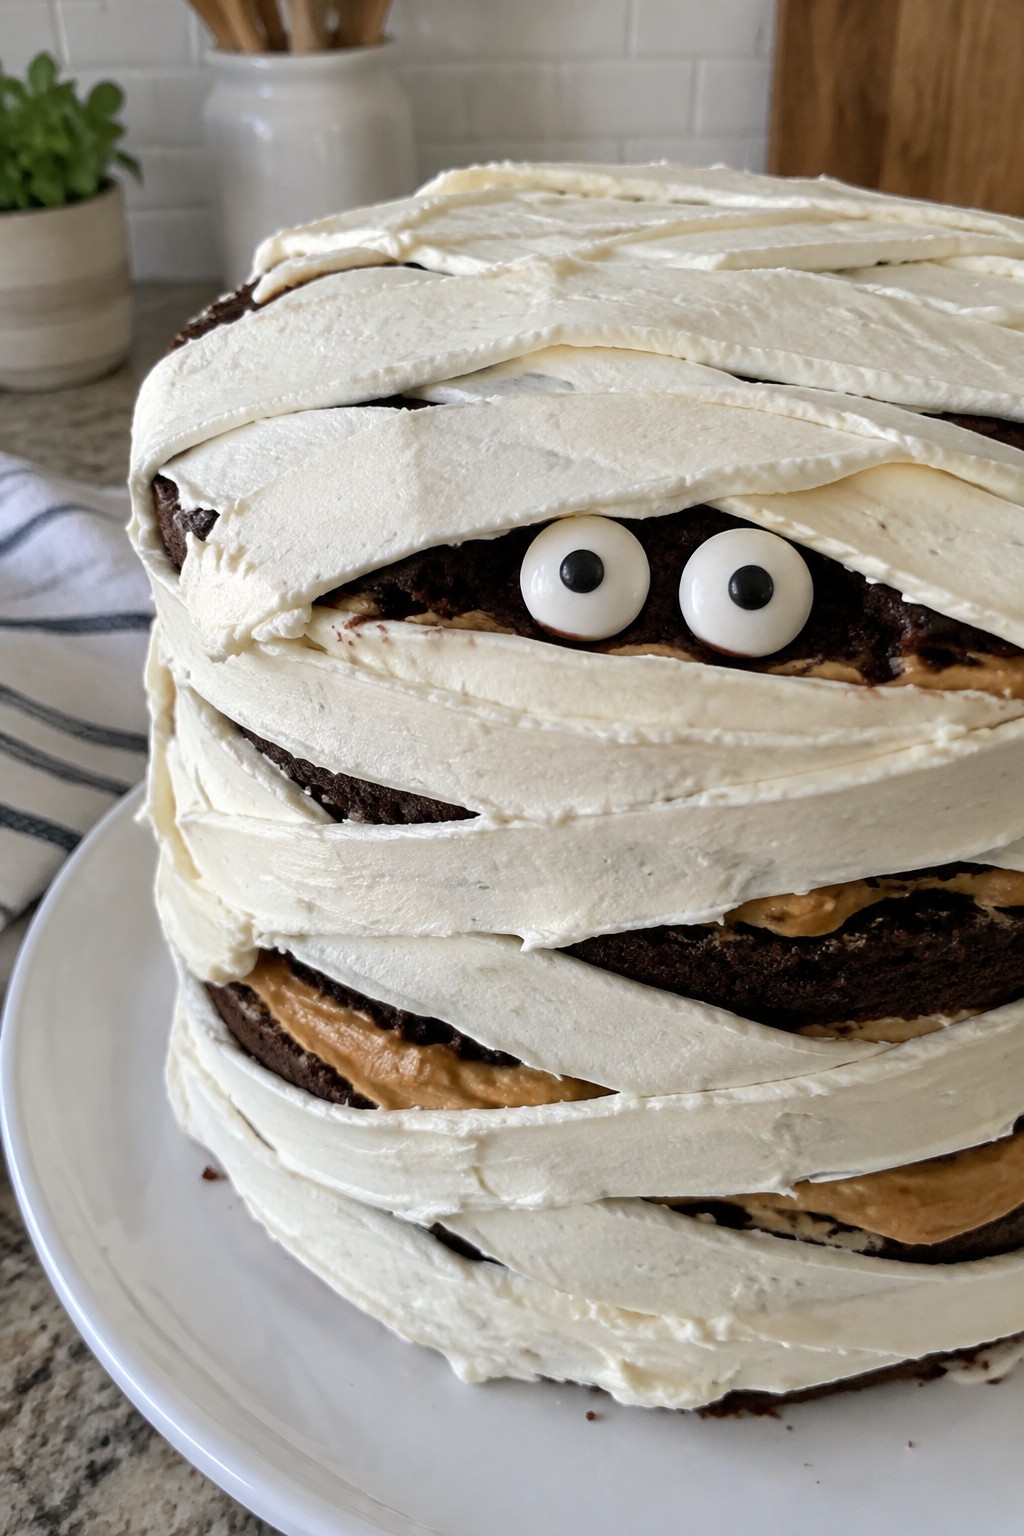
Serves 4 people.
Ingredients
- 1 cup all-purpose flour
- 3/4 cup granulated sugar
- 1/2 cup unsweetened cocoa powder
- 1 teaspoon baking powder
- 1/2 teaspoon salt
- 1/2 cup creamy peanut butter
- 1/3 cup vegetable oil
- 2 large eggs
- 1/2 cup milk
- 1 teaspoon vanilla extract
- 4 tablespoons unsalted butter, softened
- 2 cups powdered sugar
- Candy eyes
Instructions
- Heat the oven to 350 degrees and grease a small 8-inch square pan.
- In a mixing bowl, whisk the flour, sugar, cocoa powder, baking powder, and salt until evenly combined.
- In a second bowl, stir the peanut butter, oil, eggs, milk, and vanilla until smooth.
- Pour the wet mixture into the dry ingredients and stir just until no dry streaks remain. Fold in any chocolate bits if desired, then spread the batter into the prepared pan.
- Bake for 25 to 30 minutes until a toothpick inserted in the center comes out with a few moist crumbs. Cool the cake completely in the pan.
- While the cake cools, beat the softened butter with the powdered sugar and a splash of milk if needed until the frosting reaches a pipeable consistency.
- Transfer the white frosting to a piping bag or zip-top bag with one corner snipped. Pipe overlapping strips across the cooled cake to resemble mummy bandages.
- Press candy eyes onto the frosting near one end of the cake before the frosting sets.
Extra Tips
Pipe the frosting strips while the cake is fully cool so the lines stay sharp and do not melt. If the peanut butter in the batter feels too thick, warm it for ten seconds in the microwave before mixing. Leftovers keep covered in the fridge for two days and taste best at room temperature. Course: Dessert Cuisine: American Equipment: Mixing Bowl, Whisk, 8-inch Cake Pan, Oven, Piping Bag
