
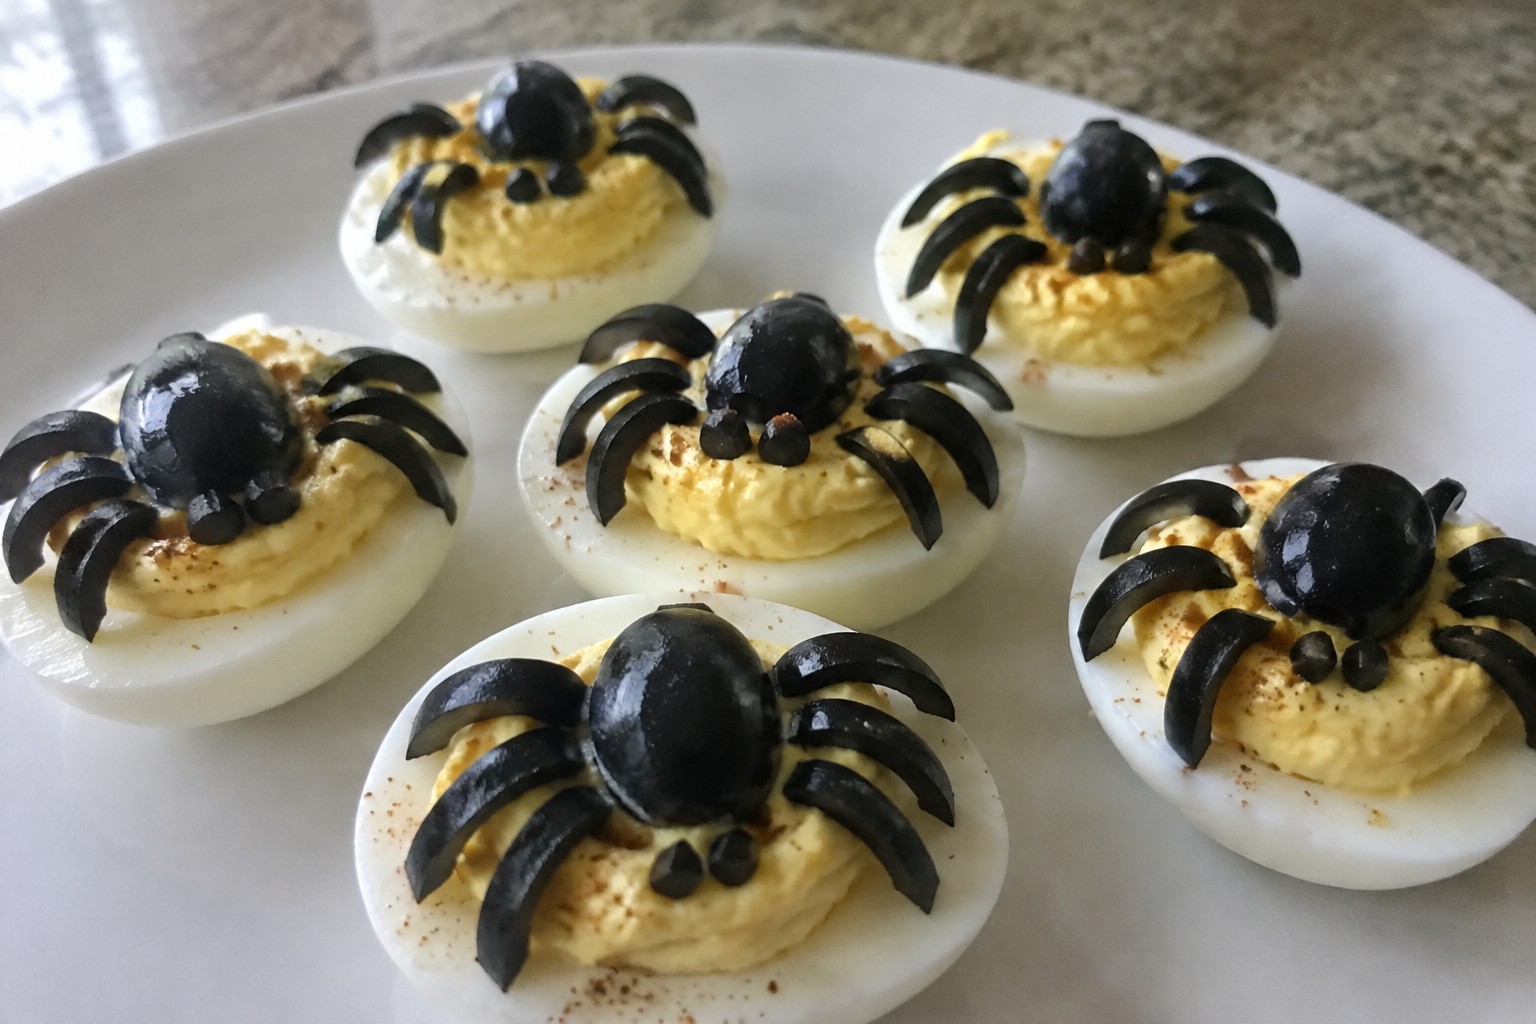
Halloween parties often end up heavy on sweets so it is nice to offer some savory bites too. These appetizers focus on easy steps and common ingredients. They work well for feeding a group without much extra effort. You can choose ones that match what you already have in the kitchen. The ideas aim to keep everyone satisfied until the main meal.
Helpful Tips Before You Start
These tips will help you create savory appetizers that keep guests full and happy during Halloween parties.
Recommended Products

100% Handmade: Each crochet toy is carefully handmade by skilled artisans, using high-quality organic cotton yarn.

Size about 11.5 cm, lifelike surface process.
Choose Hearty Bases
Pick recipes built around proteins like sausage or cheese to offset all the sweets later. This keeps everyone satisfied without reaching for more candy.
Prep Components in Advance
Chop vegetables and mix dips the day before to cut down on last minute work. Many savory bites taste even better after flavors meld overnight.
Use Simple Shapes for Fun
Cut bread or cheese with cookie cutters into bats or pumpkins for quick Halloween appeal. Skip complicated decorations that take too much time.
Balance Hot and Cold Options
Offer a mix so nothing sits out too long or gets cold before serving. This keeps food fresh as guests move around the party.
Mummy-Wrapped Sausage Skewers with Spicy Mustard
These skewers turn simple sausages into a fun Halloween bite. The pastry strips create a mummy effect while the sausages stay juicy inside. They pair well with a bold mustard dip that cuts through the richness.
Serve them at a party spread or as a quick starter before the main meal. The contrast of flaky pastry and savory sausage makes them a hit with both kids and adults.

Serves 4 people.
Ingredients
- 8 small link sausages
- 1 sheet puff pastry, thawed
- 1 large egg
- 1 tablespoon water
- 1/2 cup spicy mustard
Instructions
- Thread two sausages onto each of four skewers, leaving a small gap between them.
- Roll out the puff pastry sheet on a lightly floured surface. Cut it into thin strips about half an inch wide.
- Wrap the pastry strips around each sausage in a crisscross pattern, leaving small gaps so the sausage shows through like mummy bandages.
- Beat the egg with the water to make an egg wash. Brush the wrapped sausages lightly with the wash.
- Place the skewers on a parchment-lined baking sheet. Bake at 400 degrees Fahrenheit for 18 to 20 minutes until the pastry turns golden brown.
- Remove from the oven and let cool for a few minutes. Serve warm with spicy mustard on the side for dipping.
Extra Tips
Use kitchen shears to trim any extra pastry ends so the mummy look stays neat. If the pastry softens while you work, chill the assembled skewers for ten minutes before baking to help the strips hold their shape. Leftovers reheat well in a 350 degree oven for five minutes to restore crispness. Course: Appetizer Cuisine: American Equipment: Baking Sheet, Skewers, Mixing Bowl
Spiderweb Guacamole with Black Sesame Tortilla Chips
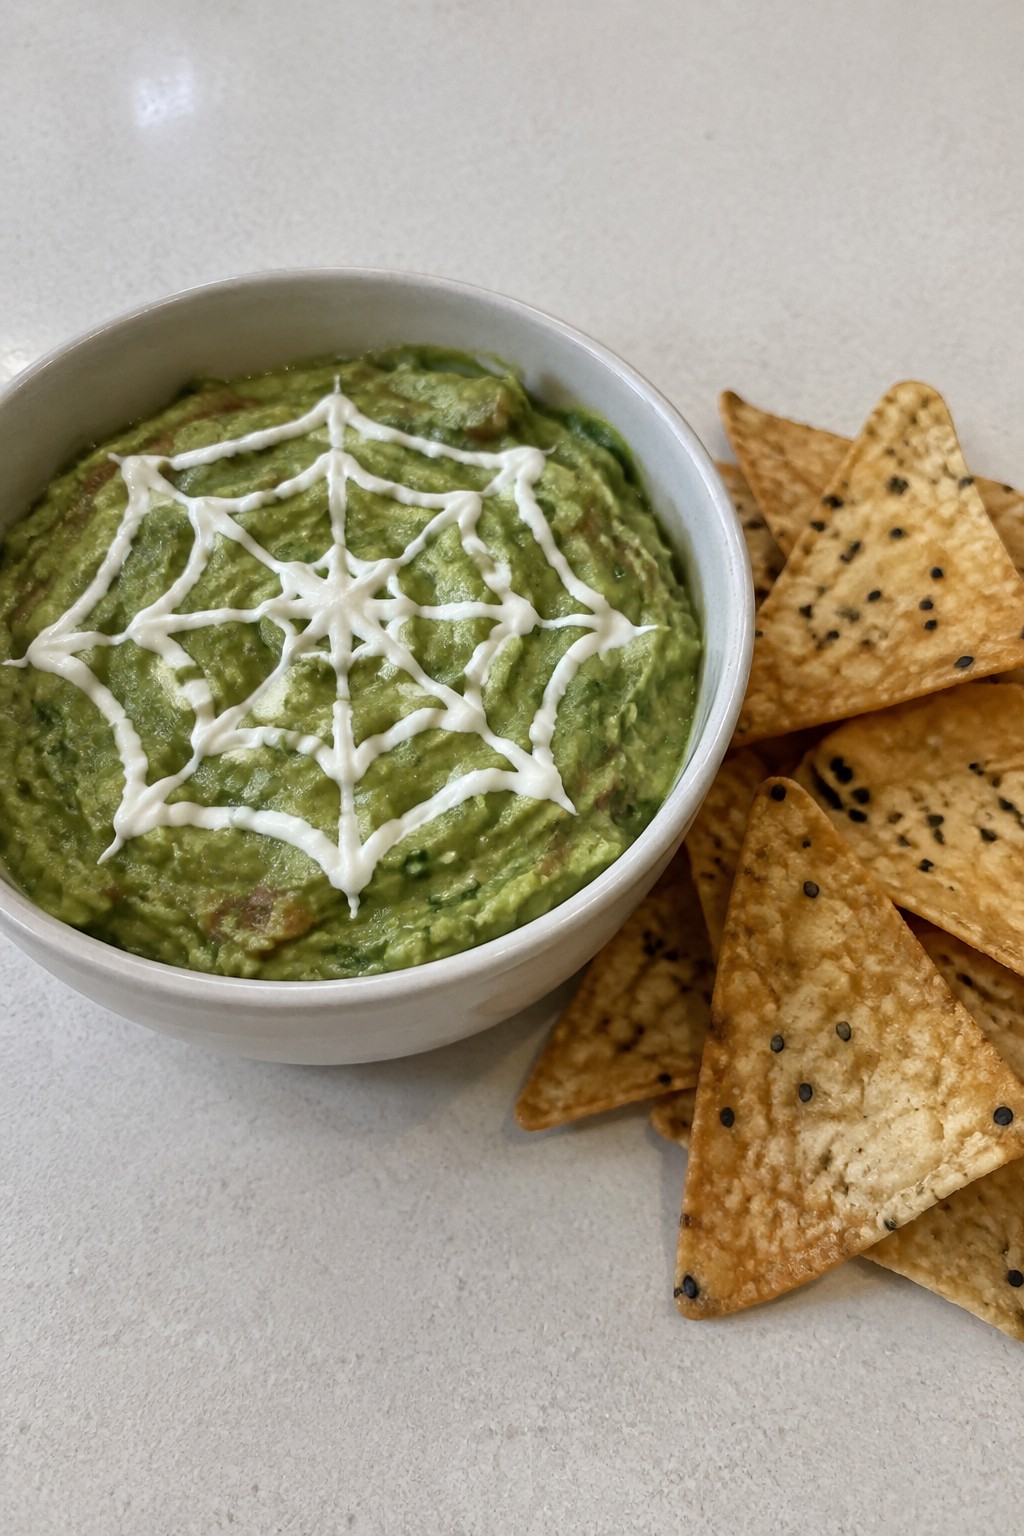
This guacamole gets a simple spiderweb design on top using sour cream. It pairs with tortilla chips that bake up crisp and speckled with black sesame seeds. The result is a savory starter that balances creamy avocado with a bit of crunch and works well for any fall gathering.
The flavor stays bright from lime and fresh vegetables. The chips add a nutty note without overpowering the dip. Serve it as a starter before heavier dishes or as part of a spread of savory bites.
Serves 4 people.
Ingredients
- 3 ripe avocados
- 1 lime, juiced
- 1/2 small red onion, finely diced
- 1 medium tomato, diced
- 2 tablespoons chopped fresh cilantro
- 1/2 teaspoon salt
- 1/4 cup sour cream
- 6 corn tortillas
- 1 tablespoon black sesame seeds
- 2 tablespoons olive oil
- 1/4 teaspoon salt
Instructions
- Preheat the oven to 375 degrees. Cut each corn tortilla into 6 wedges and place them in a large bowl. Drizzle with olive oil, sprinkle with black sesame seeds and 1/4 teaspoon salt, then toss until evenly coated.
- Spread the wedges in a single layer on a baking sheet. Bake for 12 to 15 minutes until the edges turn golden and crisp. Remove and let cool.
- While the chips bake, mash the avocados in a mixing bowl until mostly smooth with a few small chunks remaining. Stir in the lime juice, red onion, tomato, cilantro, and 1/2 teaspoon salt until combined.
- Spoon the guacamole into a shallow serving bowl and smooth the surface. Place the sour cream in a small zip-top bag, snip off one corner, and pipe concentric circles over the guacamole. Drag a toothpick from the center outward in several places to form a web pattern.
- Serve the guacamole with the cooled black sesame tortilla chips.
Extra Tips
Pipe the sour cream web right before serving so the lines stay clean. If you need to make the guacamole ahead, press plastic wrap directly on the surface to keep it from browning. The chips can be baked earlier in the day and stored in an airtight container at room temperature.
Course: Appetizer Cuisine: Mexican Equipment: Mixing Bowl, Baking Sheet, Piping BagOlive-Eyeball Turkey Meatballs in Marinara
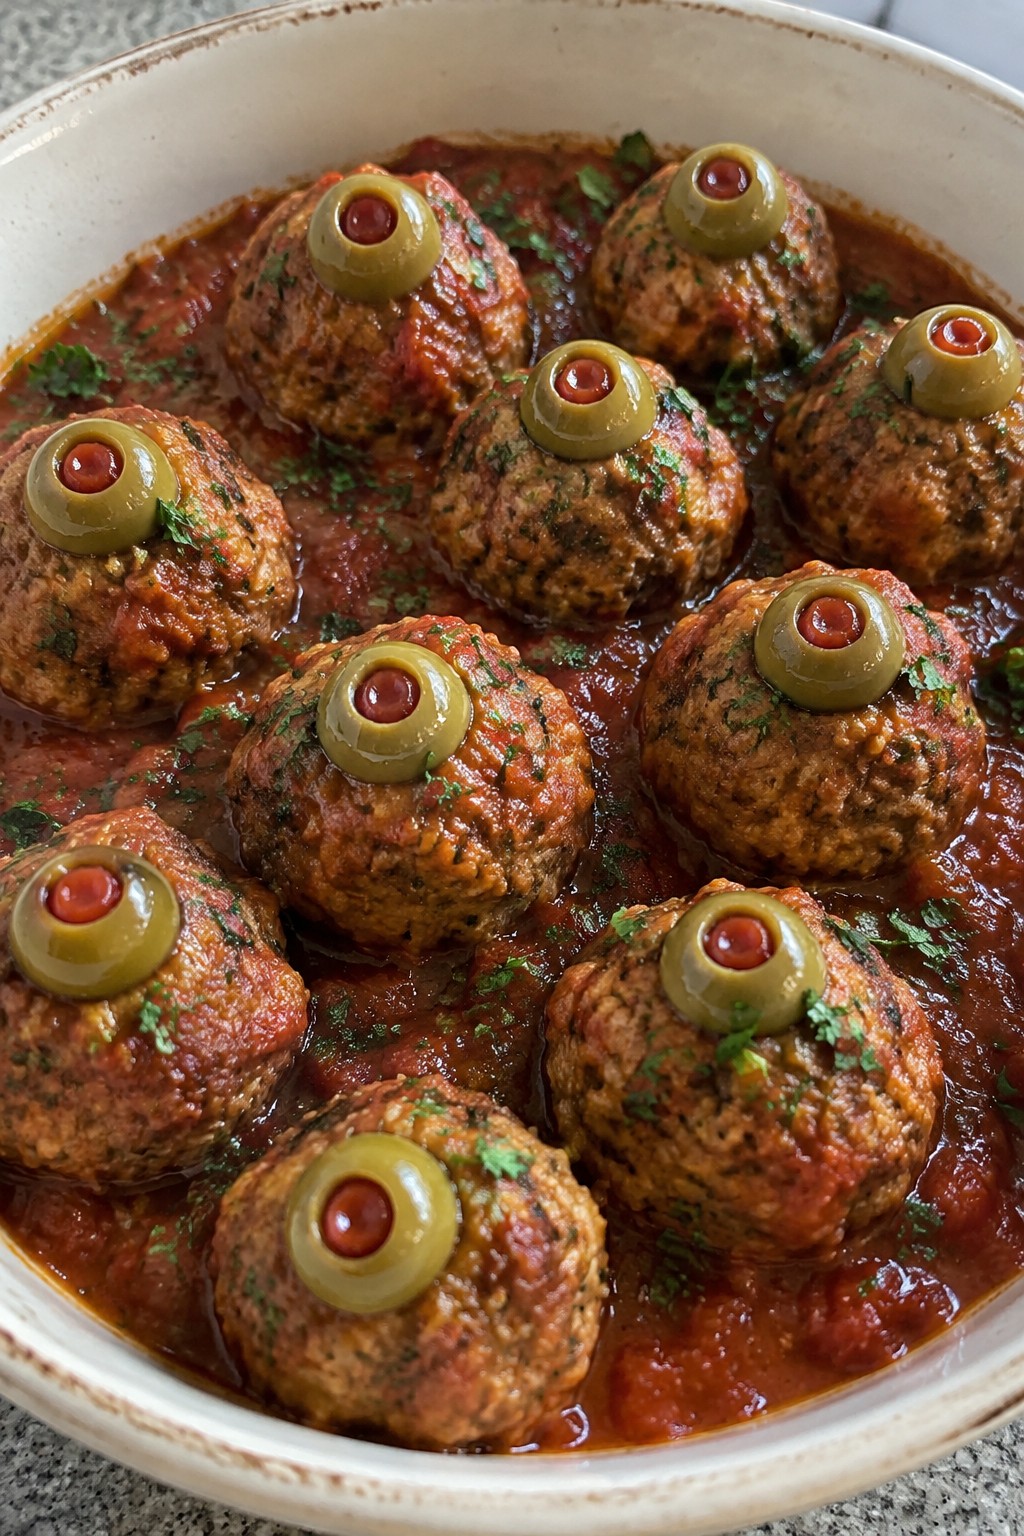
These turkey meatballs get a playful Halloween touch with whole olives pressed into each one to look like eyeballs. The dish stays savory and satisfying, which helps balance out all the sweets that show up at parties. The meatballs stay tender from the egg and breadcrumbs while the marinara brings steady tomato flavor.
Serve them warm in a shallow dish so guests can scoop a few at a time. The olives stay bright on top and give a salty bite against the mild turkey.
Serves 4 people.
Ingredients
- 1 pound ground turkey
- 1/2 cup panko breadcrumbs
- 1 large egg
- 2 cloves garlic, minced
- 1 teaspoon dried oregano
- 1/2 teaspoon salt
- 1/4 teaspoon black pepper
- 2 tablespoons olive oil
- 2 cups marinara sauce
- 12 green olives with pimentos
- 2 tablespoons chopped fresh parsley
Instructions
- Place the ground turkey, panko breadcrumbs, egg, minced garlic, oregano, salt, and black pepper in a mixing bowl. Mix with your hands until the ingredients are evenly combined.
- Scoop the mixture into 12 portions and roll each into a ball. Press one green olive, pimento side up, into the top of each meatball so it stays visible.
- Heat the olive oil in a large skillet over medium heat. Add the meatballs and cook for 8 minutes, turning once, until browned on both sides.
- Pour the marinara sauce into the skillet around the meatballs. Reduce the heat to low, cover, and simmer for 10 minutes until the meatballs are cooked through.
- Sprinkle the chopped parsley over the top before serving.
Extra Tips
Use a spoon to gently press the olives deeper if they shift during cooking. Leftovers reheat well in a covered skillet with a splash of water to loosen the sauce. If you need to make them ahead, form and chill the meatballs up to one day before cooking. Course: Appetizer Cuisine: Italian Equipment: Mixing Bowl, Large Skillet
Jack-O’-Lantern Stuffed Mini Peppers with Sausage and Rice
These stuffed mini peppers bring a savory option to any Halloween spread. The carved faces turn ordinary peppers into festive jack-o’-lanterns while the sausage and rice filling keeps things hearty and satisfying. They work well as a make-ahead party bite that holds up on a buffet table.
The mix of browned sausage, tender rice, and melted cheese gives a balanced, comforting flavor with a slight crunch from the pepper edges. It is a practical choice when you want something warm and filling without adding more sweets to the table.

Serves 4 people.
Ingredients
- 12 mini orange bell peppers
- 1/2 pound Italian sausage, casings removed
- 1 cup cooked white rice
- 1 small onion, finely diced
- 2 garlic cloves, minced
- 1/2 cup shredded cheddar cheese
- 1 tablespoon olive oil
- 1/2 teaspoon salt
- 1/4 teaspoon black pepper
- 2 tablespoons chopped fresh parsley
Instructions
- Preheat the oven to 375 degrees. Line a baking sheet with parchment paper.
- Cut a thin slice from the top of each mini pepper and remove the seeds. Use a small knife to carve simple jack-o’-lantern faces into one side of each pepper.
- Heat the olive oil in a large skillet over medium heat. Add the onion and cook for 3 minutes until softened.
- Add the sausage to the skillet and break it up with a spoon. Cook for 5 minutes until browned.
- Stir in the garlic, salt, and black pepper. Cook for 1 minute more.
- Remove the skillet from heat and mix in the cooked rice until evenly combined.
- Spoon the sausage and rice mixture into each carved pepper, packing it gently.
- Place the stuffed peppers on the baking sheet and sprinkle the cheddar cheese over the tops.
- Bake for 15 minutes until the peppers are tender and the cheese is melted.
- Remove from the oven and sprinkle with chopped parsley before serving.
Extra Tips
Carve the faces after removing the seeds so the peppers stay sturdy while baking. If you want a milder flavor, swap the Italian sausage for ground turkey seasoned with a pinch of fennel seed. Leftovers reheat well in a 350-degree oven for 8 minutes to keep the peppers from getting soggy. Course: Appetizer Cuisine: American Equipment: Baking Sheet, Large Skillet, Sharp Knife
Cauldron of Smoky Bacon and Cheddar Fondue
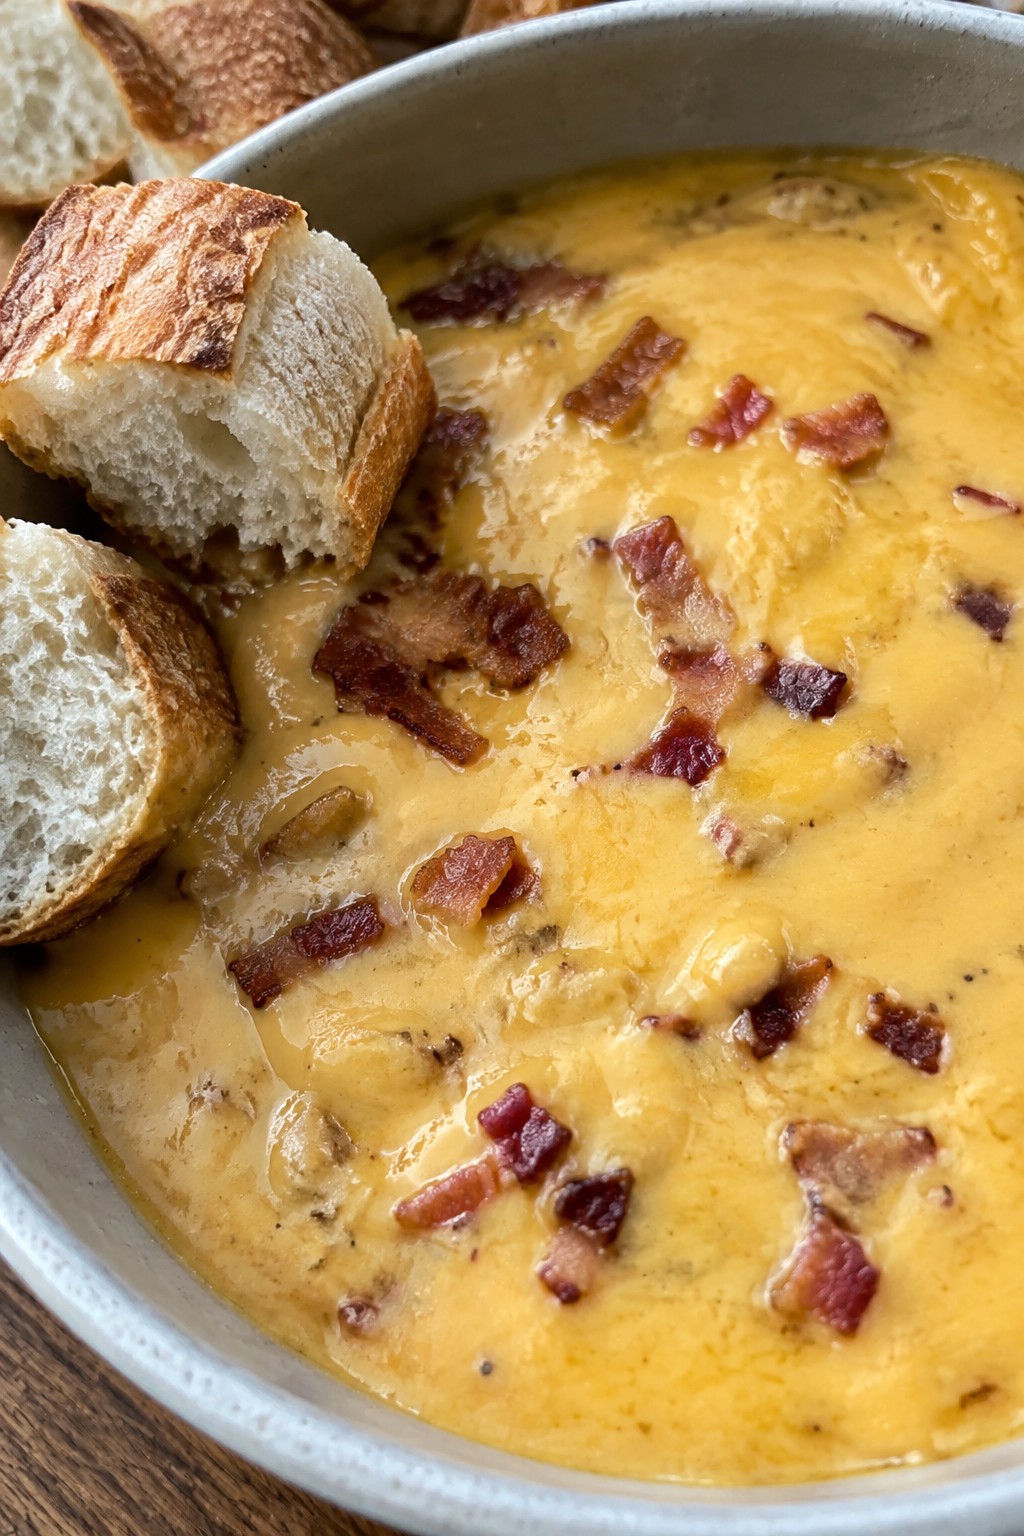
This fondue combines crispy bacon with melted cheddar for a warm, savory dip that fits right into a Halloween party table. It gives guests a hearty option when they want something to balance out all the sweets.
The result is a thick, smoky cheese base with scattered bacon pieces that hold up well on bread or vegetables. It works best served hot so everyone can dip straight from the pot.
Serves 4 people.
Recommended Products

Marinade for chicken and other meats


Ingredients
- 8 ounces bacon, chopped
- 3 cups shredded sharp cheddar cheese
- 1 cup half-and-half
- 1 tablespoon cornstarch
- 2 cloves garlic, minced
- 1 teaspoon smoked paprika
- 1/4 teaspoon salt
- Crusty bread cubes, for serving
Instructions
- Cook the chopped bacon in a skillet over medium heat until crisp. Drain the bacon on paper towels and set aside, leaving 1 tablespoon of the drippings in the skillet.
- Add the minced garlic to the skillet and cook for 30 seconds until fragrant. Stir in the half-and-half and bring it to a gentle simmer.
- Toss the shredded cheddar with the cornstarch and smoked paprika. Add the cheese mixture to the simmering liquid a handful at a time, stirring until fully melted before adding more.
- Stir in the salt and the cooked bacon. Transfer the fondue to a fondue pot or small slow cooker set on low to keep it warm.
- Serve with crusty bread cubes for dipping.
Extra Tips
Stir the fondue often while it sits to prevent a skin from forming on top. If it thickens too much, add a splash of warm half-and-half to loosen it. Use day-old bread for the best texture when dipping. Course: Appetizer Cuisine: American Equipment: Skillet, Saucepan, Fondue pot
Bat-Wing Crispy Chicken Wings with Chili-Lime Glaze
These bat-wing crispy chicken wings give a playful Halloween shape to a classic party snack. The chili-lime glaze delivers a bright, tangy heat that keeps the dish firmly in savory territory.
They suit game nights or pre-trick-or-treat gatherings when you want something substantial that still feels festive. The wings stay crisp under a sticky glaze that clings without making them soggy.

Serves 4 people.
Ingredients
- 2 pounds chicken wings, separated into flats and drumettes
- 1 tablespoon baking powder
- 1 teaspoon salt
- 1/2 teaspoon black pepper
- 2 tablespoons olive oil
- 1/4 cup fresh lime juice
- 2 tablespoons honey
- 1 teaspoon chili powder
- 1 clove garlic, minced
- 2 tablespoons chopped fresh cilantro
- Lime wedges for serving
Instructions
- Preheat the oven to 425°F and line a baking sheet with parchment paper.
- Pat the chicken wings dry, then toss them with baking powder, salt, and black pepper until evenly coated.
- Drizzle the wings with olive oil and spread them in a single layer on the prepared sheet.
- Bake for 40 minutes, flipping halfway through, until the skin is golden and crisp.
- While the wings bake, combine lime juice, honey, chili powder, and minced garlic in a small saucepan. Simmer over medium heat for 3 minutes until slightly thickened.
- Remove the wings from the oven and transfer them to a large bowl. Pour the warm glaze over the wings and toss until fully coated.
- Sprinkle with chopped cilantro and serve with lime wedges on the side.
Extra Tips
For extra-crispy skin, leave the wings uncovered in the refrigerator for a few hours before baking. If the glaze thickens too much while sitting, warm it briefly before tossing. The cilantro adds freshness right before serving, so add it at the last moment. Course: Appetizer Cuisine: American Equipment: Baking sheet, Parchment paper, Small saucepan, Large mixing bowl
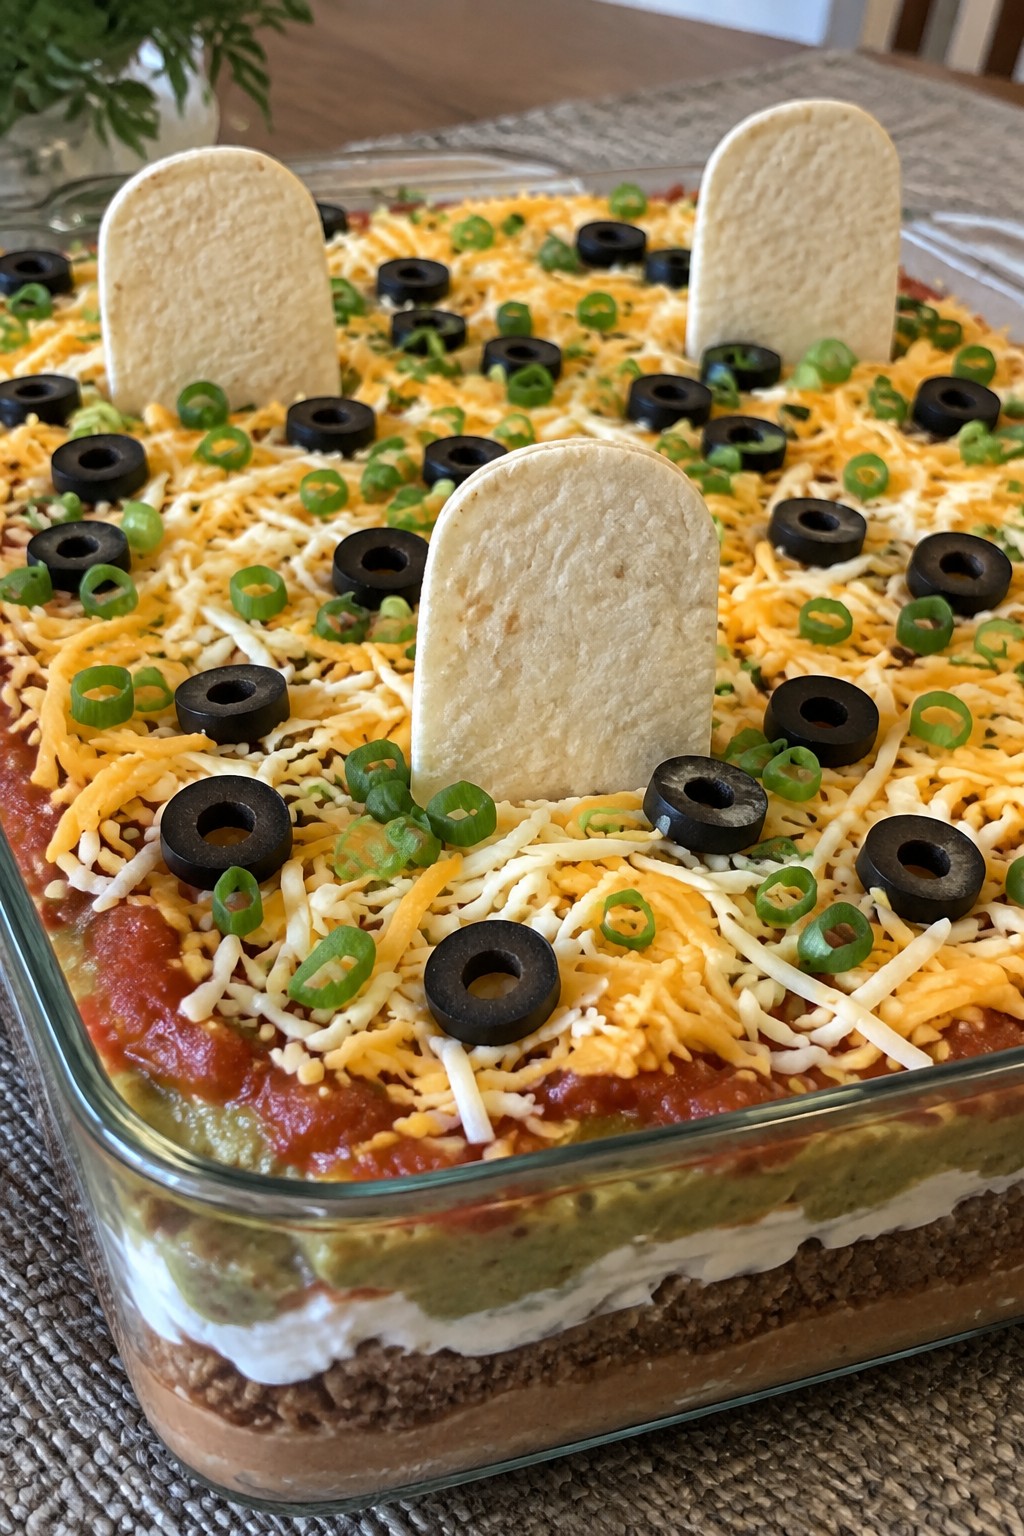
Graveyard Seven-Layer Taco Dip with Tortilla Tombstones
This dip turns a classic layered taco recipe into a Halloween centerpiece. The seven layers stack up into a hearty, scoopable base that holds its own next to sweet treats at any party.
The tortilla tombstones add crunch and a clear graveyard look without extra work. It suits game nights or potlucks where guests want something savory and filling.
Serves 4 people.
Ingredients
- 1 can (15 oz) refried beans
- 8 oz ground beef
- 2 tablespoons taco seasoning
- 1 cup sour cream
- 1 cup prepared guacamole
- 3/4 cup salsa
- 1 1/2 cups shredded Mexican cheese blend
- 1/4 cup sliced black olives
- 2 tablespoons chopped green onions
- 3 small flour tortillas
Instructions
- Cook the ground beef in a skillet over medium heat until browned. Drain any excess fat, then stir in the taco seasoning and 2 tablespoons of water. Simmer for 2 minutes and set aside to cool slightly.
- Spread the refried beans evenly across the bottom of a 8×8 baking dish to form the first layer.
- Spoon the seasoned beef over the beans in an even layer.
- Sprinkle 1 cup of the shredded cheese over the beef.
- Spread the sour cream gently over the cheese layer.
- Add the guacamole as the next layer, smoothing it out with a spatula.
- Pour the salsa over the guacamole and top with the remaining 1/2 cup of cheese.
- Scatter the black olives and green onions across the top.
- Cut each flour tortilla into 3 or 4 tombstone shapes. Place them on a baking sheet and bake at 350°F for 8 minutes until crisp. Insert the cooled tortilla pieces upright into the dip before serving.
Extra Tips
Prepare the layers up to a day ahead and keep the dish covered in the fridge, then add the baked tortilla tombstones right before guests arrive so they stay crisp. If the sour cream layer feels too thick to spread, let it sit at room temperature for 10 minutes first. Swap the ground beef for an extra can of beans if you want a meat-free version. Course: Appetizer Cuisine: Mexican Equipment: Skillet, Baking Dish, Baking Sheet
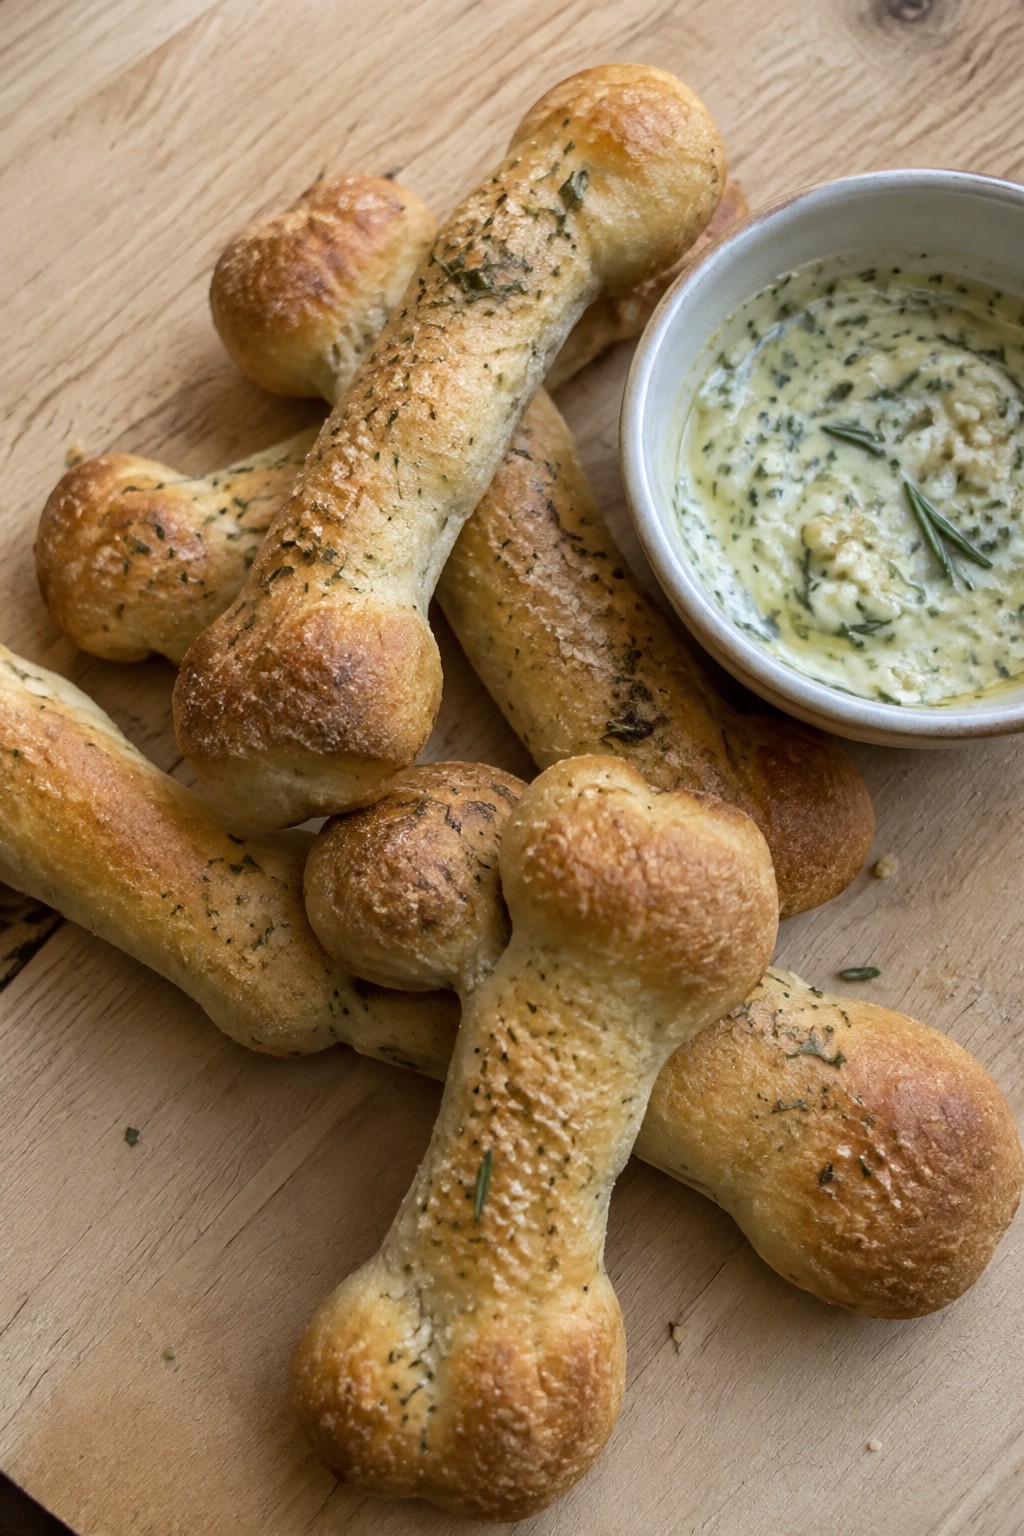
Skeleton Bone Breadsticks with Roasted Garlic Butter
These breadsticks take on the shape of skeleton bones and come with a side of roasted garlic butter for dipping. They fit well at Halloween parties or as a starter before a bigger meal. The dough turns golden and slightly crisp outside while staying soft inside, and the butter adds a mellow garlic flavor that balances the savory profile.
They work as a simple make-ahead option that still feels festive without extra fuss. Shape the dough ahead, then bake and roast the garlic right before serving so everything stays warm.
Serves 4 people.
Ingredients
- 1 pound store-bought pizza dough
- 2 whole heads garlic
- 1/4 cup olive oil
- 4 tablespoons unsalted butter, softened
- 1 teaspoon salt
- 1/2 teaspoon black pepper
- 1 tablespoon fresh rosemary, chopped
Instructions
- Preheat the oven to 400 degrees F. Line a baking sheet with parchment paper.
- Divide the pizza dough into 8 equal pieces. Roll each piece into a long rope about 6 inches in length, then press small knobs at both ends to form a bone shape. Place the shaped pieces on the prepared baking sheet.
- Brush the dough lightly with 2 tablespoons of the olive oil and sprinkle with half the salt. Bake for 15 to 18 minutes until the breadsticks turn golden.
- While the breadsticks bake, slice the tops off the garlic heads to expose the cloves. Set each head on a small piece of foil, drizzle with the remaining olive oil, and wrap tightly. Place the packets on the same baking sheet for the last 12 minutes of baking time.
- Remove everything from the oven. Squeeze the roasted garlic cloves into a small bowl and mash them with the softened butter, remaining salt, black pepper, and rosemary until combined.
Extra Tips
Serve the breadsticks warm with the roasted garlic butter in a small bowl for dipping. If the dough feels too sticky while shaping, dust your hands lightly with flour. Leftovers reheat well in a 350 degree F oven for 5 minutes to restore crisp edges. Course: Appetizer Cuisine: American Equipment: Baking sheet, Oven, Mixing bowl, Knife
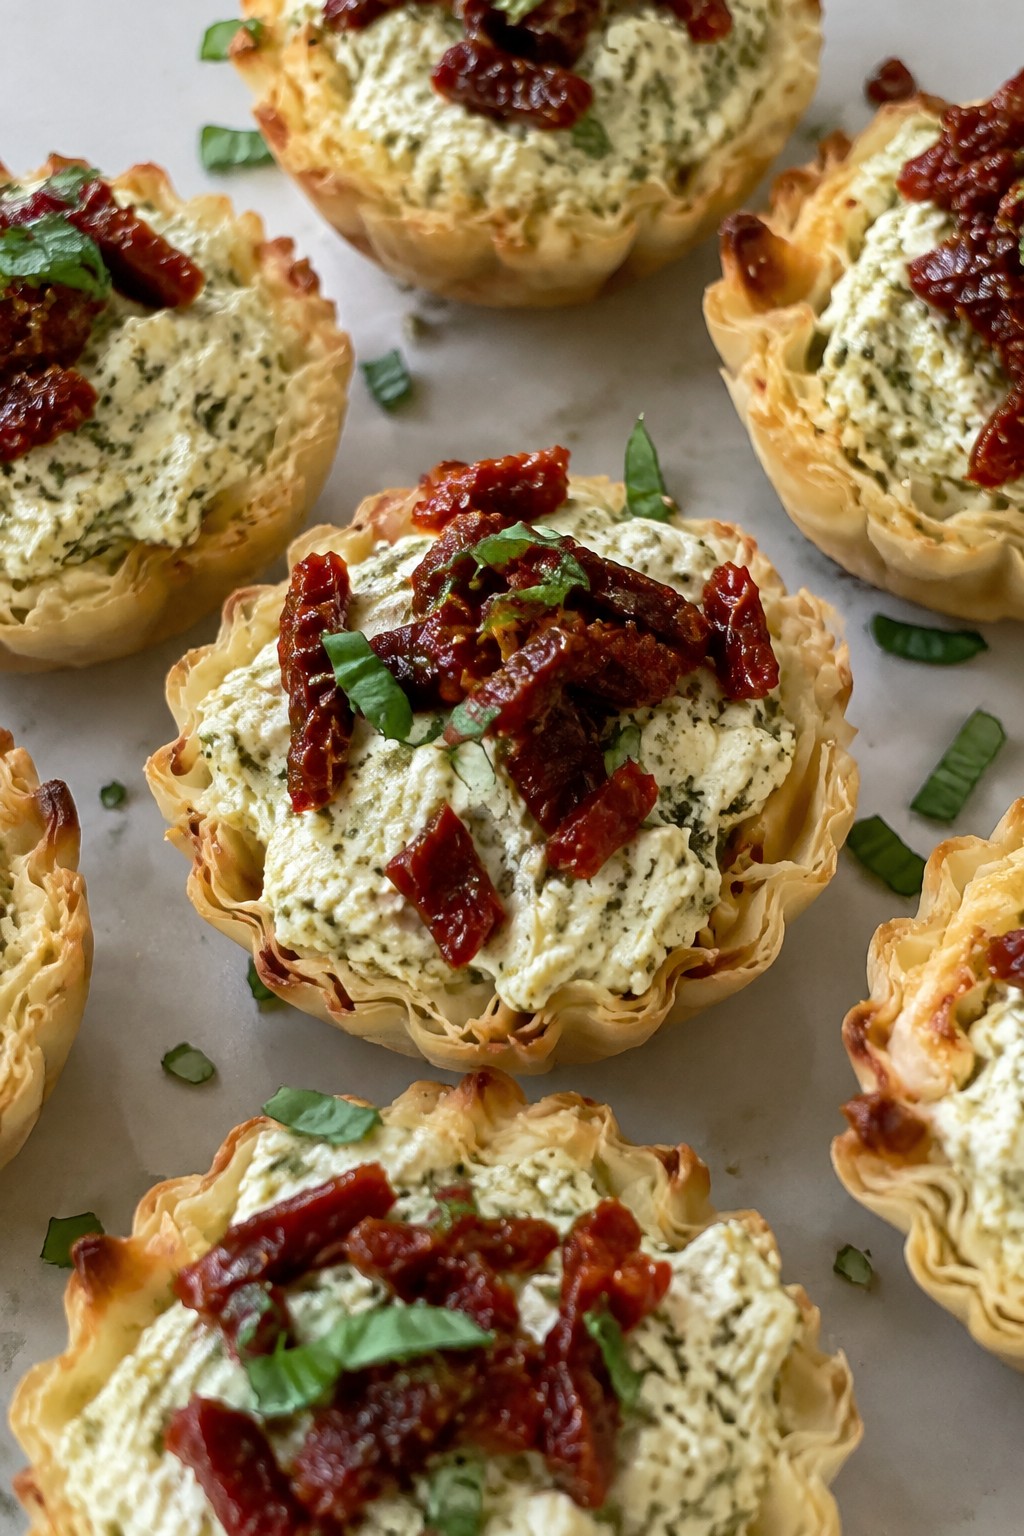
Ghostly Pesto Cheese Tartlets with Sun-Dried Tomatoes
These tartlets bring together flaky pastry shells filled with a creamy pesto cheese blend and finished with tangy sun-dried tomatoes. The pale cheese filling stands out against the deep red tomatoes, giving them a simple ghostly appearance that fits right into a Halloween spread. They work well as a savory option when guests are ready for something other than candy.
The mix of herby pesto and rich cheese offers a balanced bite with a crisp base and soft center. Serve them warm or at room temperature during a party or as a starter before the main meal.
Serves 4 people.
Ingredients
- 12 mini phyllo tart shells
- 8 ounces cream cheese, softened
- 1/4 cup basil pesto
- 1/2 cup grated Parmesan cheese
- 1/3 cup sun-dried tomatoes packed in oil, drained and finely chopped
- 2 tablespoons chopped fresh basil
Instructions
- Preheat the oven to 350 degrees F and line a baking sheet with parchment paper.
- Place the mini phyllo tart shells on the prepared baking sheet.
- In a mixing bowl, combine the softened cream cheese, basil pesto, and grated Parmesan cheese until smooth.
- Spoon or pipe the cheese mixture evenly into each tart shell, filling them to the top without overflowing.
- Scatter the chopped sun-dried tomatoes over the filled tartlets.
- Bake for 10 to 12 minutes until the shells are golden and the filling is warmed through.
- Remove from the oven and sprinkle with the chopped fresh basil before serving.
Extra Tips
Assemble the tartlets up to a few hours ahead and keep them chilled, then bake just before guests arrive to maintain the crisp shells. If the pesto tastes very salty, reduce the Parmesan slightly to balance the flavor. Leftovers can be stored in an airtight container in the fridge for one day and reheated briefly in a low oven. Course: Appetizer Cuisine: Italian Equipment: Baking Sheet, Mixing Bowl
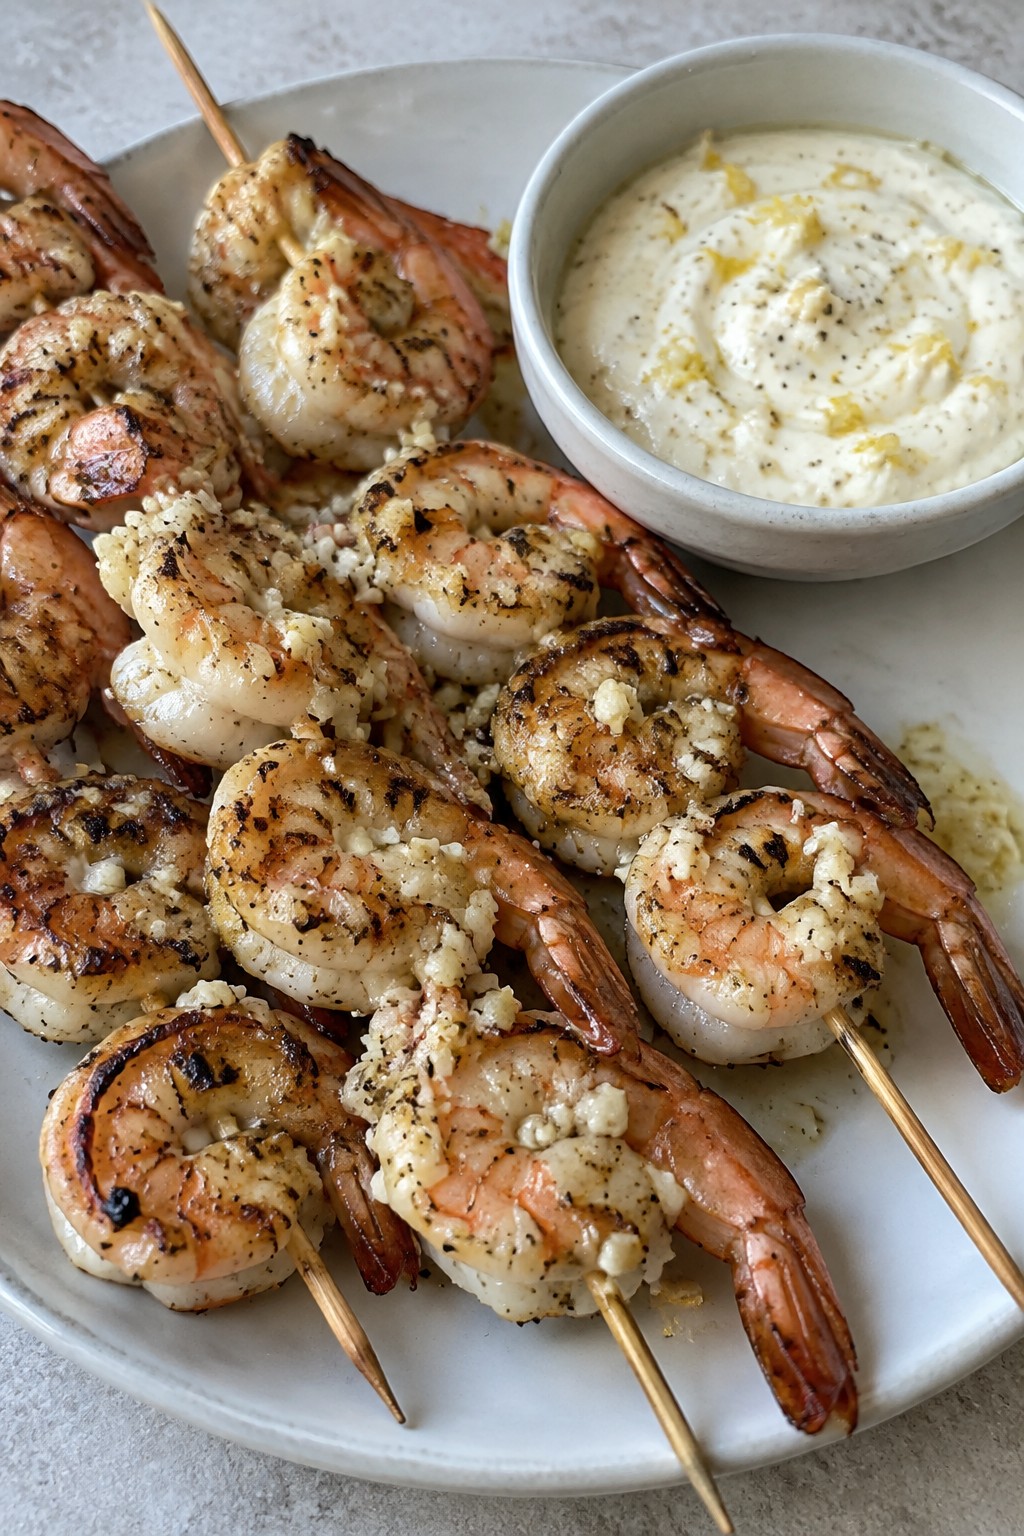
Vampire-Slaying Garlic Shrimp Skewers with Lemon Aioli
These skewers bring a bold garlic punch that stands out against the sweets at any Halloween gathering. They work well as a quick party starter or a light bite before the main meal. The shrimp turn out tender with a light char, while the lemon aioli adds a creamy, bright finish that balances the garlic.
Serves 4 people.
Ingredients
- 1 pound large shrimp, peeled and deveined
- 4 garlic cloves, minced
- 2 tablespoons olive oil
- 1 tablespoon lemon juice
- 1/2 teaspoon salt
- 1/4 teaspoon black pepper
- 8 wooden skewers, soaked in water
- 1/2 cup mayonnaise
- 1 tablespoon lemon zest
- 2 teaspoons lemon juice
- 1 garlic clove, minced
Instructions
- In a bowl, combine the shrimp with the 4 minced garlic cloves, olive oil, 1 tablespoon lemon juice, salt, and black pepper. Toss until the shrimp are evenly coated.
- Thread the shrimp onto the soaked wooden skewers, placing about 4 to 5 shrimp on each skewer.
- Heat a large skillet over medium-high heat. Cook the skewers for 2 to 3 minutes per side until the shrimp turn pink and slightly charred.
- While the shrimp cook, stir together the mayonnaise, lemon zest, 2 teaspoons lemon juice, and the remaining minced garlic clove in a small bowl to make the aioli.
- Remove the skewers from the heat and serve immediately with the lemon aioli on the side for dipping.
Extra Tips
Soak the skewers well ahead of time to keep them from burning in the skillet. If the aioli tastes too rich, add an extra squeeze of lemon juice right before serving. Leftovers keep in the fridge for one day, though the shrimp are best eaten fresh. For milder garlic flavor, use one less clove in the marinade. Course: Appetizer Cuisine: Mediterranean Equipment: Large skillet, Mixing bowls, Wooden skewers
