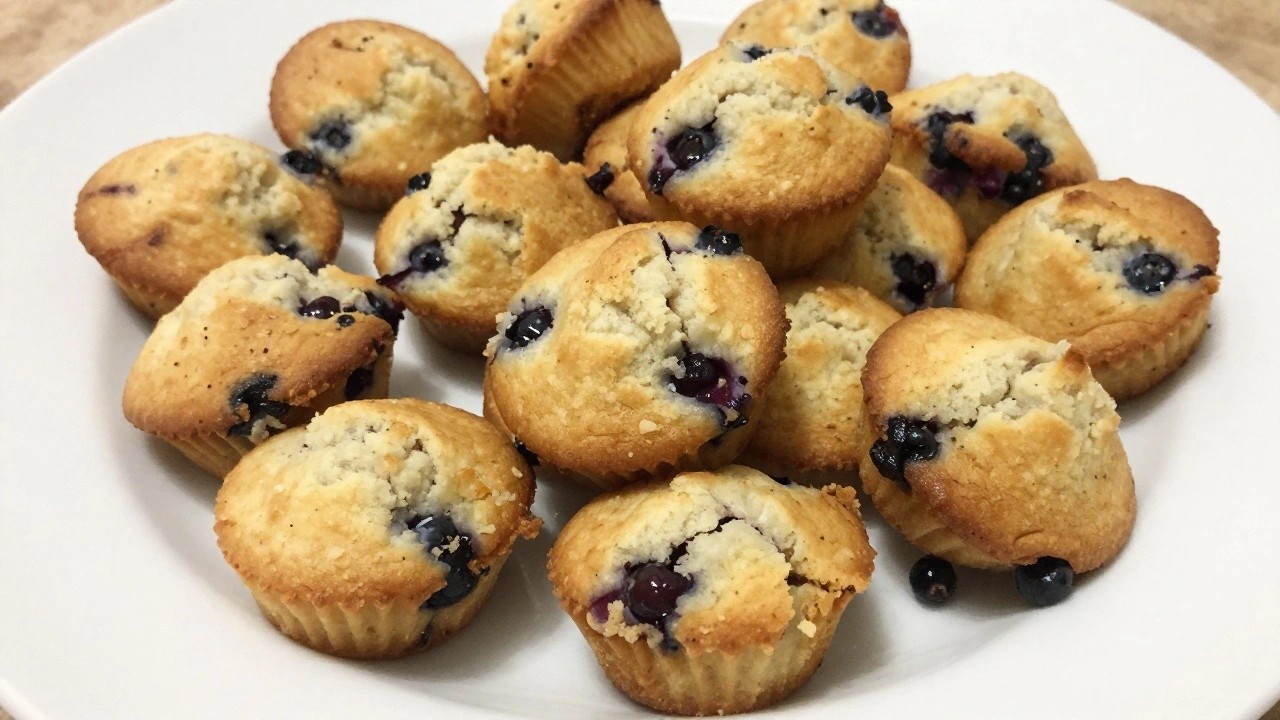
Getting breakfast ready for kids does not have to take a lot of time.
Bite size foods make it simple for them to eat on their own.
This list shares ideas that turn common breakfast items into small pieces they will enjoy.
You can try these recipes with what you already have in the kitchen.
They help turn morning meals into something quick and kid approved.
Helpful Tips Before You Start
These tips will help you turn bite-size foods into breakfasts kids actually want to eat.
Keep Pieces Small and Even
Cut everything into pieces no bigger than a grape. This makes it easy for small hands to grab and reduces mess at the table.
Use Muffin Tins for Portioning
Bake or assemble items in mini muffin tins. The built-in sections keep bites separate and make prep faster for multiple kids.
Prep Components the Night Before
Cook eggs, chop fruit, or bake mini pancakes ahead of time. Store them in the fridge so you can assemble plates in minutes each morning.
Add a Dip on the Side
Serve a small cup of yogurt, nut butter, or applesauce with the bites. Kids often eat more when they can dip each piece themselves.
Let Kids Build Their Own Plate
Set out a few prepped options and let them choose. This simple step increases the chance they will actually eat what you serve.
Mini Veggie Egg Bites with Cheddar
These mini veggie egg bites pack protein and small pieces of vegetables into a cheesy, soft bite. Kids can eat them with their hands, which makes breakfast less messy and more fun.
They work well for school mornings or weekend meals when you want something you can make ahead. The cheddar adds a mild flavor that pairs nicely with the mild vegetables.

Serves 4 people.
Ingredients
- 6 large eggs
- 1/4 cup milk
- 1 cup shredded cheddar cheese
- 1/2 cup finely chopped spinach
- 1/4 cup finely chopped red bell pepper
- 1/2 teaspoon salt
- 1/4 teaspoon black pepper
- Nonstick cooking spray
Instructions
- Preheat the oven to 350°F. Spray a mini muffin tin with nonstick cooking spray.
- In a mixing bowl, whisk the eggs, milk, salt, and black pepper until smooth.
- Stir the spinach, red bell pepper, and 3/4 cup of the cheddar cheese into the egg mixture.
- Spoon the mixture into the prepared mini muffin cups, filling each about three-quarters full.
- Sprinkle the remaining cheddar cheese evenly over the tops.
- Bake for 15 to 18 minutes, until the centers are set and no longer jiggle.
- Remove the tin from the oven and let the bites cool for a few minutes before lifting them out.
Extra Tips
Use a sharp cheddar for stronger flavor if your kids prefer it. These bites reheat well in the microwave for 15 to 20 seconds. Store leftovers in an airtight container in the fridge for up to four days. To keep the texture light, avoid overmixing the eggs once the vegetables are added. Course: Breakfast Cuisine: American Equipment: Mixing Bowl, Mini Muffin Tin, Whisk
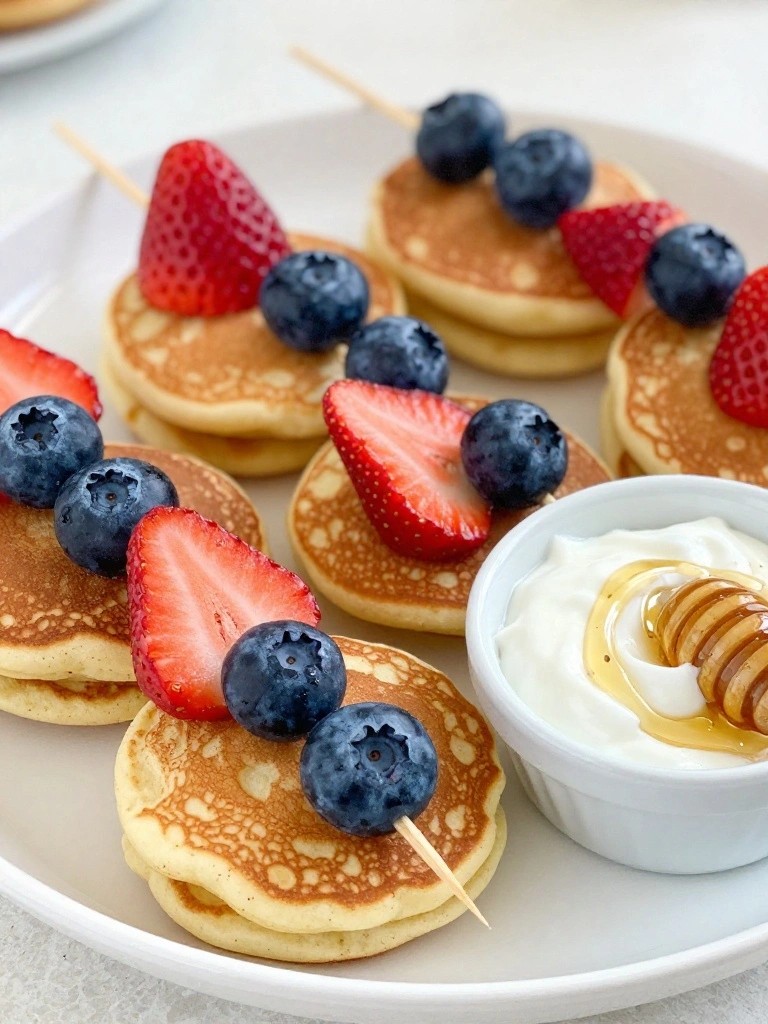
Berry Pancake Skewers with Yogurt Dip
These skewers turn pancakes into finger food that kids can grab and dip. The small size makes them easy to handle at the breakfast table or on busy school mornings. Berries add bright color and natural sweetness while the yogurt dip keeps things creamy and cool.
The pancakes stay soft inside with lightly crisp edges. Threading them with berries creates a balanced bite that feels playful without extra effort.
Serves 4 people.
Ingredients
- 1 cup all-purpose flour
- 2 teaspoons baking powder
- 1 cup milk
- 1 large egg
- 2 tablespoons melted butter
- 1 cup mixed fresh berries (blueberries and halved strawberries)
- 8 wooden skewers
- 1 cup plain Greek yogurt
- 2 tablespoons honey
- 1/2 teaspoon vanilla extract
Instructions
- Mix the flour and baking powder in a bowl. Whisk in the milk, egg, and melted butter until the batter is smooth.
- Heat a skillet over medium heat and lightly grease it. Drop small spoonfuls of batter to form 1-inch pancakes. Cook until bubbles appear, then flip and cook the other side until golden.
- Thread the cooled mini pancakes and berries onto the skewers, alternating pieces for color and variety.
- Stir the Greek yogurt, honey, and vanilla together in a small bowl until blended. Serve the skewers with the yogurt dip on the side.
Extra Tips
Cut strawberries into even halves so they stay secure on the skewers. Prepare the pancakes the night before and store them in an airtight container, then assemble everything fresh in the morning. The dip thickens slightly in the fridge, so give it a quick stir before serving. Course: Breakfast Cuisine: American Equipment: Mixing bowl, Skillet, Wooden skewers
Bite-Size French Toast Sticks with Maple
These bite-size French toast sticks turn a morning favorite into easy finger food that fits right into a busy breakfast routine. Kids can pick them up and dip without any extra utensils, which keeps things simple at the table.
The sticks turn golden and crisp on the outside while staying soft inside. Maple syrup brings a gentle sweetness that pairs well with the cinnamon in the batter.

Serves 4 people.
Ingredients
- 8 slices white bread
- 4 large eggs
- 1/2 cup milk
- 1 teaspoon ground cinnamon
- 1 teaspoon vanilla extract
- 2 tablespoons butter
- 1/2 cup maple syrup
Instructions
- Cut each slice of bread into four even sticks and set them aside.
- Whisk the eggs, milk, cinnamon, and vanilla extract in a shallow bowl until smooth.
- Dip each bread stick into the egg mixture, letting the excess drip off.
- Melt the butter in a large skillet over medium heat.
- Place the dipped sticks in the skillet in a single layer and cook, turning often, until all sides are golden.
- Remove the sticks from the skillet and serve with maple syrup for dipping.
Extra Tips
Use slightly stale bread so the sticks hold their shape during dipping. Cook in batches if needed to avoid crowding the skillet, which helps them crisp evenly. Warm the maple syrup for a few seconds in the microwave before serving so it flows smoothly for little hands. Course: Breakfast Cuisine: American Equipment: Mixing bowl, Large skillet, Knife
Granola-Topped Yogurt Parfait Cups
These cups give kids a fun way to eat breakfast with small, layered portions they can finish without much fuss. They work well for school days or weekend mornings when you need something quick to assemble and easy to serve.
The creamy yogurt base holds up the crunchy granola and soft fruit pieces, creating a simple mix of textures in every spoonful.

Serves 4 people.
Ingredients
- 2 cups vanilla yogurt
- 1 cup granola
- 1 cup diced strawberries
- 1 cup blueberries
- 2 tablespoons honey
Instructions
- Divide the vanilla yogurt evenly among four small cups, using about half a cup per cup.
- Add a layer of diced strawberries and blueberries on top of the yogurt in each cup.
- Drizzle half a tablespoon of honey over the fruit in each cup.
- Sprinkle one quarter cup of granola over the top of each parfait to finish.
Extra Tips
Layer the granola right before serving so it stays crisp instead of softening in the yogurt. Swap in other small fruits like raspberries if strawberries are not available. These cups travel well in a lunchbox if you pack the granola in a separate small bag. Course: Breakfast Cuisine: American Equipment: Small cups, Spoon
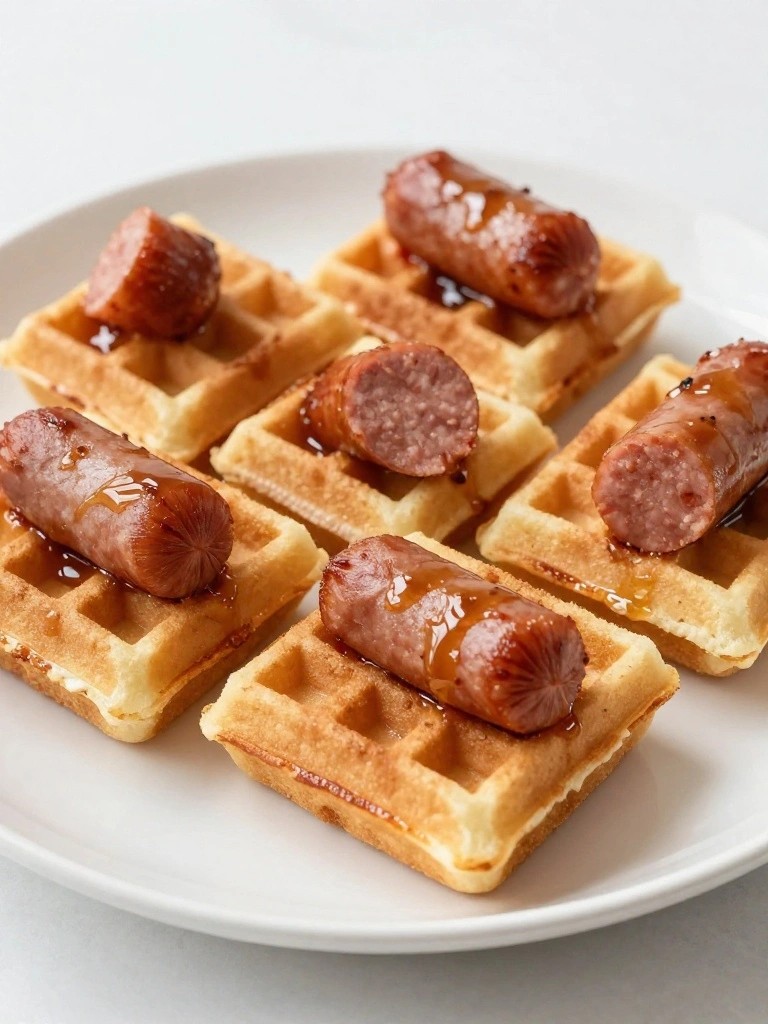
Sausage and Waffle Bite Sandwiches
These sausage and waffle bite sandwiches turn a familiar breakfast into small, easy-to-handle pieces that kids can grab without a fork. They work well on busy school mornings or relaxed weekend tables when you want something a little more fun than plain toast. The waffles come out lightly crisp while the sausage stays juicy, and a touch of maple syrup ties the sweet and savory flavors together.
The sandwiches stay neat in lunchboxes or on plates because everything is cut into bite-size portions before serving. You can prepare the components ahead and assemble them quickly when everyone is ready to eat.
Serves 4 people.
Ingredients
- 12 breakfast sausage links
- 1 1/2 cups all-purpose flour
- 2 tablespoons sugar
- 1 tablespoon baking powder
- 1/2 teaspoon salt
- 1 1/4 cups milk
- 1 large egg
- 1/4 cup vegetable oil
- Maple syrup, for serving
Instructions
- Cook the sausage links in a skillet over medium heat until browned and cooked through, about 8 to 10 minutes. Turn them occasionally so they brown evenly on all sides. Set the cooked links aside on a plate.
- In a large bowl, stir together the flour, sugar, baking powder, and salt until evenly combined.
- In a separate bowl, whisk the milk, egg, and vegetable oil together. Pour the wet mixture into the dry ingredients and stir just until a smooth batter forms.
- Heat a waffle iron and lightly coat it with oil if needed. Pour in enough batter to make one waffle and cook until golden and crisp. Repeat until all the batter is used.
- Cut each cooked waffle into small squares roughly the size of the sausage links. Slice each sausage link in half crosswise.
- Place one sausage half between two waffle squares to form a small sandwich. Repeat with the remaining pieces. Drizzle with maple syrup just before serving.
Extra Tips
Make the waffles and sausages the night before, then store them separately in the refrigerator. Reheat the waffles in a toaster to restore crispness before assembling the sandwiches. If you want a milder flavor, choose mild sausage links instead of spicy ones. These bites travel well in a lunchbox if you pack the syrup in a small container on the side. Course: Breakfast Cuisine: American Equipment: Skillet, Mixing Bowl, Waffle Iron
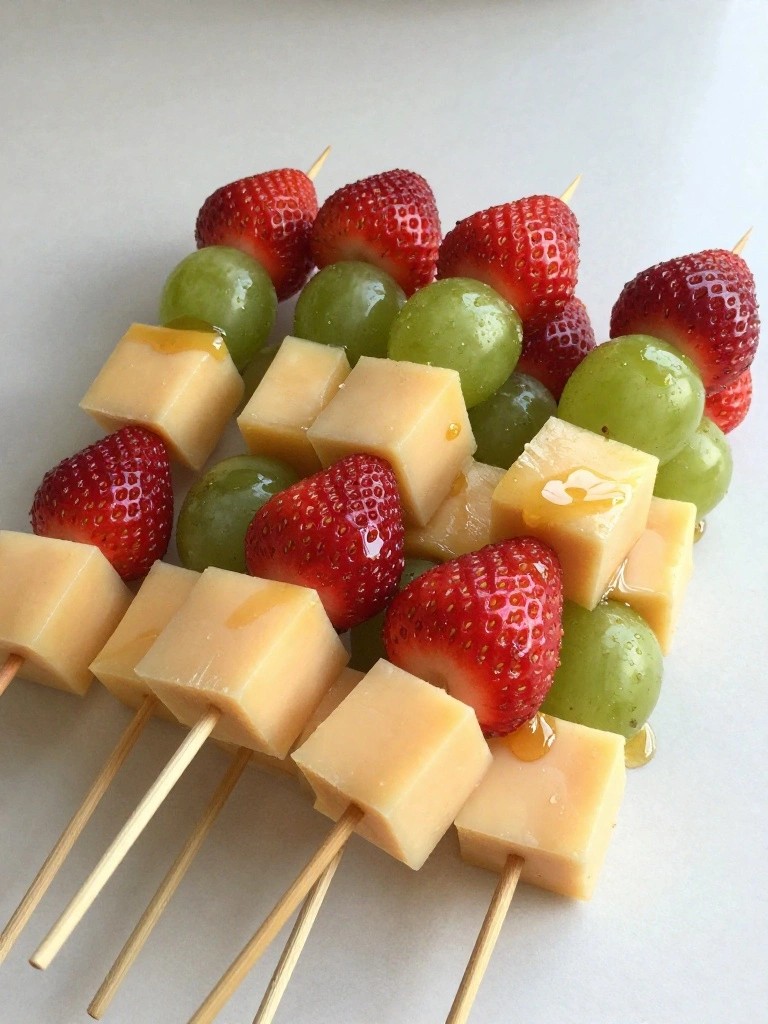
Fruit and Cheese Kabobs with Honey
These kabobs turn simple fruit and cheese into a hands-on breakfast that kids enjoy making and eating. They work well for school mornings or relaxed weekends when you need something quick that still feels special. Each bite mixes juicy fruit with mild cheese and a light honey drizzle for a sweet and savory balance.
Serves 4 people.
Ingredients
- 2 cups strawberries, hulled and halved
- 2 cups green grapes
- 8 ounces cheddar cheese, cut into 1-inch cubes
- 1/4 cup honey
- 8 wooden skewers
Instructions
- Prepare the fruit and cheese by hulling and halving the strawberries and cutting the cheddar into even cubes.
- Thread the strawberries, grapes, and cheese cubes onto the skewers in an alternating pattern until each skewer is filled.
- Arrange the finished kabobs on a serving plate.
- Drizzle the honey evenly over the kabobs just before serving.
Extra Tips
Use a mild cheddar so the flavor stays kid-friendly and does not overpower the fruit. If you make these ahead, store the assembled skewers in an airtight container in the fridge and add the honey right before serving to keep the cheese from getting sticky. Swap in seasonal fruit like blueberries or apple chunks if strawberries are not available. Course: Breakfast Cuisine: American Equipment: Cutting board, knife, skewers
Mini Bagel Pizza Breakfast Rounds
Mini bagel pizza rounds turn a classic kid favorite into a quick breakfast that travels well in lunchboxes or on busy school mornings. Each small round delivers a crisp bagel base, tangy sauce, and melty cheese with bits of bacon and fluffy egg tucked on top. The result is a savory, handheld bite that feels like pizza but fits a morning routine.

Serves 4 people.
Ingredients
- 4 mini bagels, split in half
- 1/2 cup pizza sauce
- 1 cup shredded mozzarella cheese
- 1/2 cup cooked bacon bits
- 4 large eggs
- 2 tablespoons milk
- 1 tablespoon butter
- 1/4 teaspoon salt
- 1/8 teaspoon black pepper
Instructions
- Preheat the oven to 375°F and line a baking sheet with parchment paper.
- Place the split mini bagels cut side up on the baking sheet.
- In a bowl, whisk the eggs with the milk, salt, and black pepper.
- Melt the butter in a skillet over medium heat, then pour in the egg mixture and scramble until just set.
- Spread a thin layer of pizza sauce on each bagel half.
- Top the sauce with a spoonful of scrambled eggs, a sprinkle of bacon bits, and a generous pinch of mozzarella cheese.
- Bake for 8 to 10 minutes until the cheese is melted and the edges of the bagels are lightly golden.
Extra Tips
Scramble the eggs just until they are still soft so they stay moist after baking. If you want to make these ahead, assemble the bagels without the eggs, freeze them, then add fresh scrambled eggs before the final bake. Use everything bagels for extra flavor without adding more ingredients. Course: Breakfast Cuisine: American Equipment: Baking Sheet, Skillet, Mixing Bowl
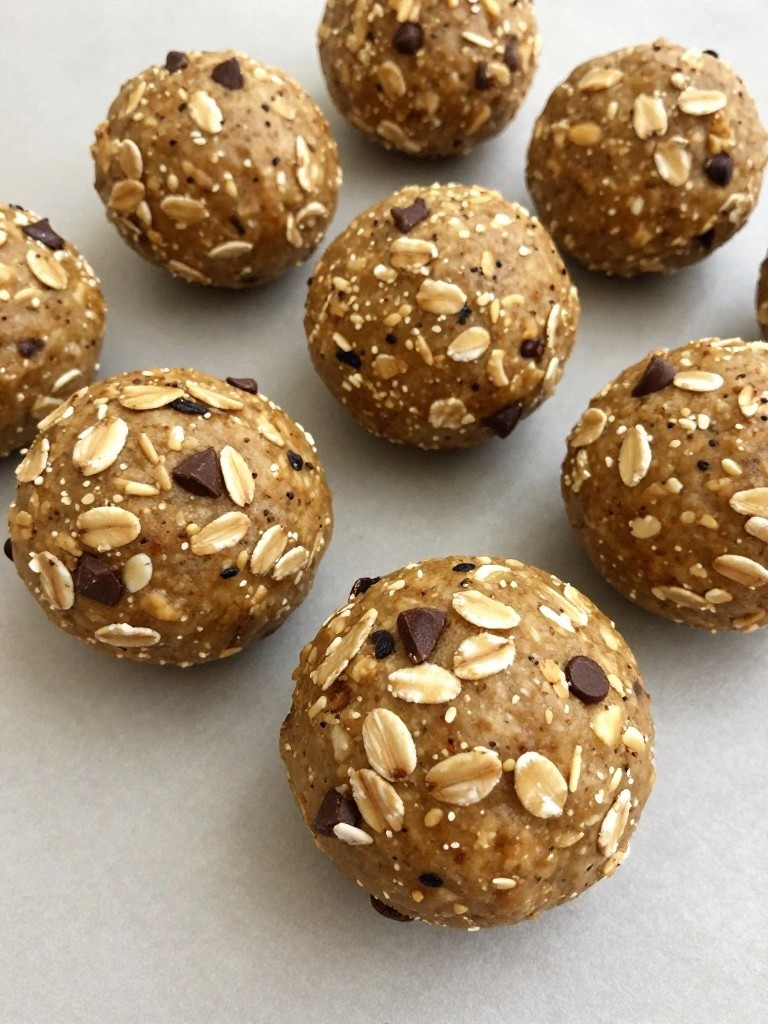
Oatmeal Cookie Dough Energy Balls
These oatmeal cookie dough energy balls give kids a breakfast they can eat with their hands. The no-bake bites taste like raw cookie dough but use simple pantry staples to keep them wholesome enough for the morning. They work well on rushed school days when everyone needs something quick and filling.
They come together fast and store easily, so you can make a batch ahead and pull them out as needed. The texture stays chewy with little bursts of chocolate, while the oats and nut butter keep kids satisfied until lunch.
Serves 4 people.
Ingredients
- 1 cup rolled oats
- 1/2 cup creamy peanut butter
- 1/4 cup honey
- 1 teaspoon vanilla extract
- 1/4 teaspoon ground cinnamon
- Pinch of salt
- 1/3 cup mini chocolate chips
Instructions
- Add the rolled oats, peanut butter, honey, vanilla extract, cinnamon, and salt to a mixing bowl.
- Stir the mixture until the ingredients are evenly combined and the oats are fully coated.
- Fold in the mini chocolate chips until they are scattered throughout the dough.
- Scoop out tablespoon-sized portions and roll them between your palms into balls.
- Place the finished balls on a plate or tray and refrigerate them for 15 minutes to firm up before serving.
Extra Tips
Chill the balls a little longer if your kitchen is warm, as the peanut butter can soften. For a different flavor, swap the peanut butter for almond butter, but keep the honey and chocolate chips the same to maintain the cookie dough taste. Store leftovers in an airtight container in the fridge for up to five days. Course: Breakfast Cuisine: American Equipment: Mixing Bowl, Measuring Cups, Measuring Spoons
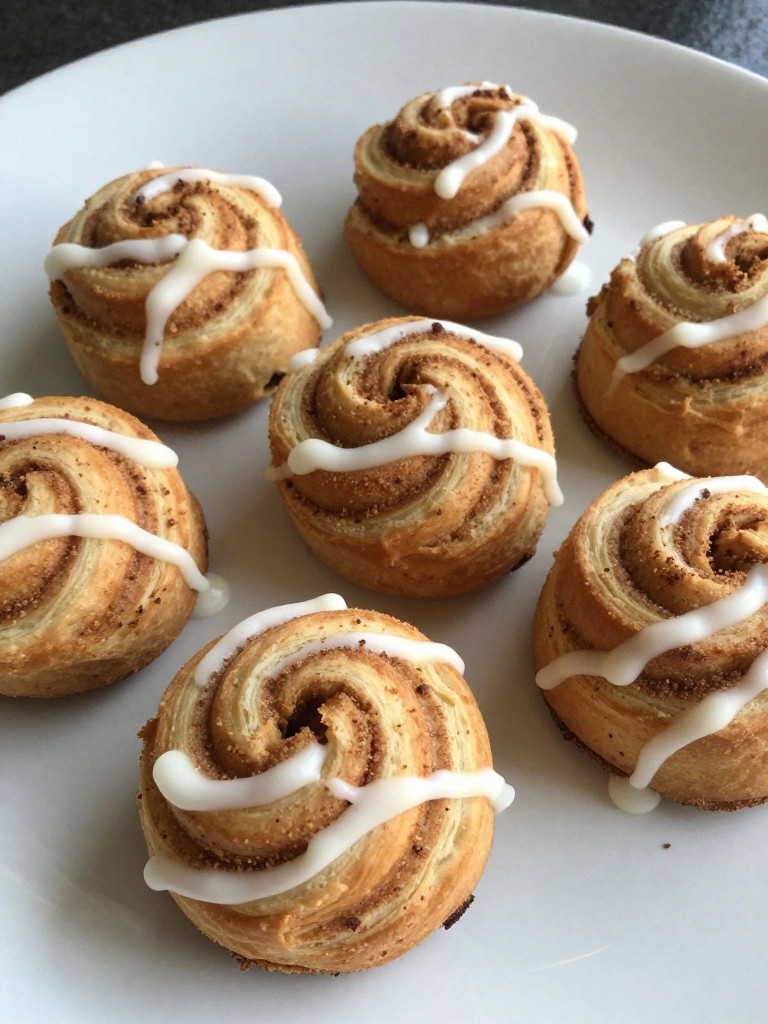
Cinnamon Roll Pinwheel Bites
These small pinwheels give kids a fun way to enjoy cinnamon roll flavor in easy, one-bite portions. They fit well on busy weekday mornings or relaxed weekend breakfasts when you want something sweet that travels from plate to hand without extra utensils.
The dough bakes into soft, flaky layers with a light cinnamon-sugar swirl inside. A simple icing drizzle on top keeps the sweetness balanced while the small size makes them easy for little hands to manage.
Serves 4 people.
Ingredients
- 1 can (12.4 oz) refrigerated cinnamon rolls with icing
- 2 tablespoons unsalted butter, softened
- 2 tablespoons brown sugar
- 1 teaspoon ground cinnamon
Instructions
- Heat the oven to 375°F and line a baking sheet with parchment paper.
- Open the can and separate the dough into the individual rolls. Unroll each one into a flat strip on a clean surface.
- Spread the softened butter evenly across each strip of dough.
- Stir the brown sugar and cinnamon together in a small bowl, then sprinkle the mixture over the buttered dough.
- Roll each strip back up from one end. Slice each rolled strip into three or four bite-size pieces and set them cut-side up on the baking sheet.
- Bake for 10 to 12 minutes until the edges turn golden. Remove from the oven and let the bites cool for a few minutes.
- Drizzle the icing from the can over the warm bites before serving.
Extra Tips
If the icing feels too thick to drizzle, warm it in the microwave for five seconds first. Leftovers stay soft when stored in an airtight container at room temperature and reheat well with a quick 10-second zap in the microwave. For a milder flavor, cut the cinnamon amount in half on the first try. Course: Breakfast Cuisine: American Equipment: Baking sheet, Mixing bowl, Knife
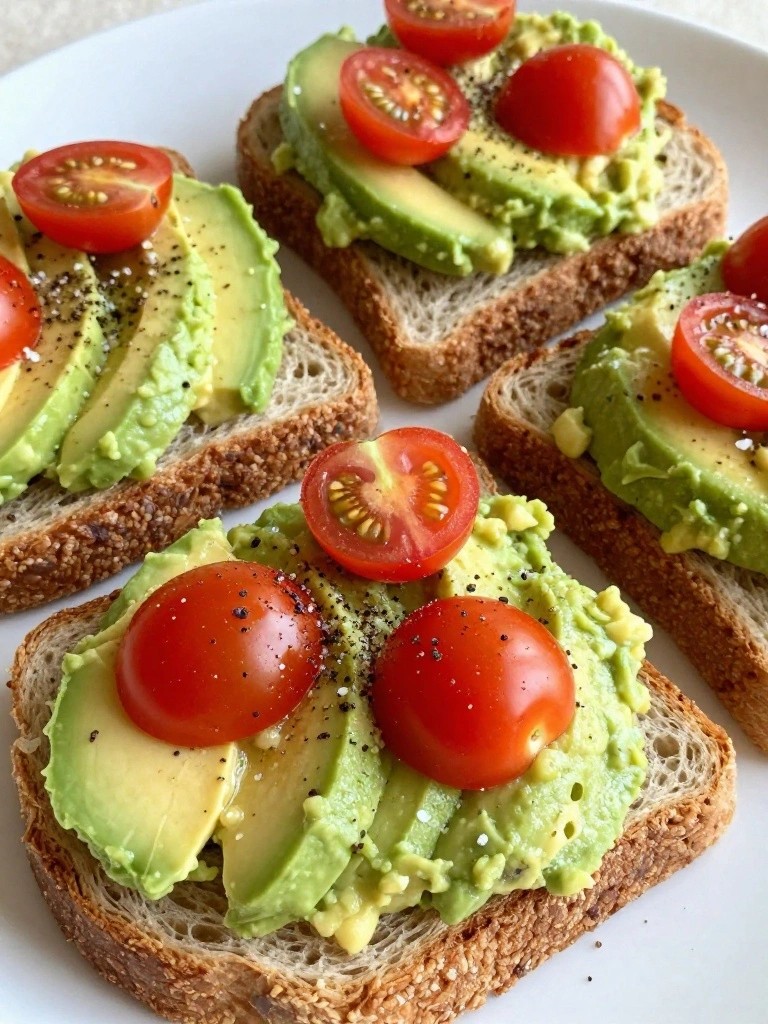
Avocado Toast Triangles with Cherry Tomatoes
This recipe turns everyday avocado toast into small triangles that little hands can grab without fuss. The soft bread base holds a creamy spread while juicy tomato halves add a bright pop on top. It works well for weekday mornings when you need something quick that still feels fresh.
The mild flavors and simple textures appeal to kids who might shy away from bigger or messier breakfasts. Each piece stays neat enough to eat on the go or at the table.
Serves 4 people.
Ingredients
- 4 slices whole wheat bread
- 2 ripe avocados
- 1 tablespoon lemon juice
- 1/4 teaspoon salt
- 1 cup cherry tomatoes, halved
- 1/4 teaspoon black pepper
Instructions
- Place the bread slices in a toaster and toast until golden and crisp.
- Cut the avocados in half, remove the pits, and scoop the flesh into a mixing bowl.
- Add the lemon juice and salt to the avocados, then mash with a fork until mostly smooth with a few small chunks remaining.
- Spread the mashed avocado evenly over each slice of toasted bread.
- Arrange the halved cherry tomatoes on top of the avocado layer, cut side up.
- Sprinkle the black pepper over the tomatoes.
- Cut each slice into four triangles using a sharp knife.
Extra Tips
Cut the triangles right before serving so the edges stay crisp. Ripe avocados mash more smoothly and help the spread stay in place on the toast. If you need to prep ahead, mash the avocado mixture and store it with plastic wrap pressed directly on the surface to slow browning, then assemble the triangles at the last minute. Course: Breakfast Cuisine: American Equipment: Toaster, Mixing bowl, Knife, Cutting board, Fork
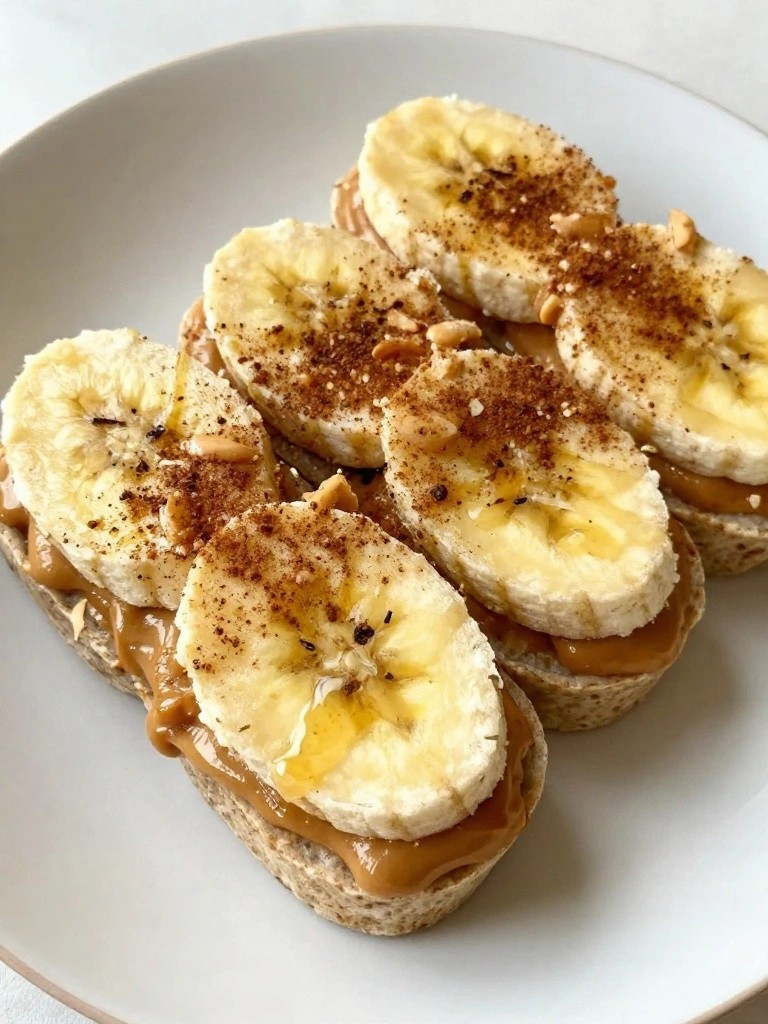
Peanut Butter Banana Sushi Rolls
These rolls give kids a playful breakfast they can eat with their hands. They work well on school mornings when you need something quick to prepare and easy to portion into small bites. The soft tortilla holds everything together without making a mess.
The flavor is creamy and lightly sweet from the peanut butter and banana, with a hint of cinnamon for warmth. Slicing the rolls into rounds creates that sushi shape while keeping portions kid-sized.
Serves 4 people.
Ingredients
- 4 large whole wheat tortillas
- ½ cup creamy peanut butter
- 2 bananas, peeled
- 1 tablespoon honey
- ½ teaspoon ground cinnamon
Instructions
- Lay one tortilla flat on a clean surface. Spread 2 tablespoons of peanut butter evenly across the tortilla, leaving a small border around the edges.
- Drizzle about ¾ teaspoon of honey over the peanut butter and sprinkle with a pinch of cinnamon.
- Place half a banana along one edge of the tortilla. Roll the tortilla tightly around the banana to form a log.
- Repeat steps 1 through 3 with the remaining tortillas, peanut butter, honey, cinnamon, and bananas.
- Use a sharp knife to slice each rolled tortilla into 1-inch rounds. Arrange the rounds on a plate for serving.
Extra Tips
Slice the rolls right before serving so the banana stays fresh and the tortilla does not dry out. If you want a bit more texture, use crunchy peanut butter instead of creamy. These rolls travel well in a lunchbox if packed in a single layer. Course: Breakfast Cuisine: American Equipment: Knife, Cutting board, Spoon
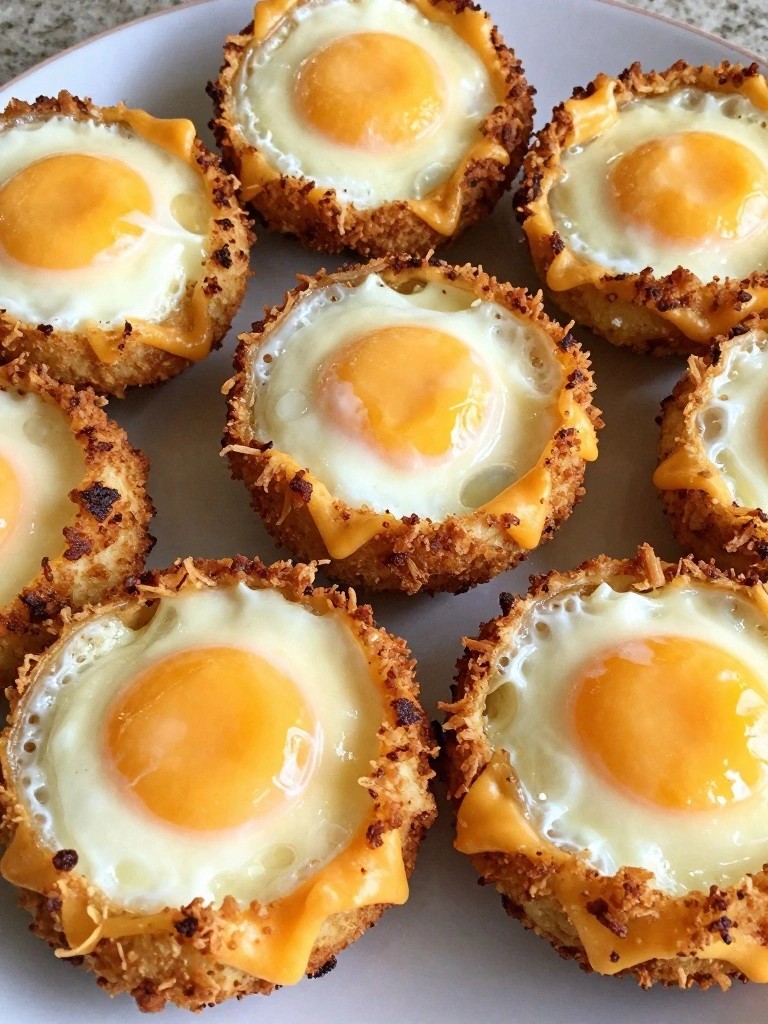
Cheesy Hash Brown Breakfast Cups
These cheesy hash brown breakfast cups pack crispy potato edges and melted cheese into small, easy-to-hold portions. They suit busy school mornings or relaxed family weekends when kids want something familiar but fun to eat.
The cups combine a crunchy hash brown shell with a soft, cheesy egg center that appeals to young eaters without being messy.
Serves 4 people.
Ingredients
- Nonstick cooking spray
- 4 cups frozen shredded hash browns, thawed
- 1 1/2 cups shredded cheddar cheese, divided
- 4 large eggs
- 1/4 cup milk
- 1/2 teaspoon salt
- 1/4 teaspoon black pepper
Instructions
- Heat the oven to 375 degrees and lightly coat 8 cups of a muffin tin with nonstick cooking spray.
- Place the thawed hash browns and 1 cup of the cheddar cheese in a mixing bowl and stir until evenly combined.
- Divide the hash brown mixture among the prepared muffin cups and press it firmly into the bottom and up the sides to form a crust.
- Whisk the eggs, milk, salt, and black pepper in a separate bowl until smooth.
- Pour the egg mixture evenly into each hash brown cup, filling them about three-quarters full.
- Sprinkle the remaining 1/2 cup of cheddar cheese over the tops of the cups.
- Bake until the egg is set and the cheese on top is melted and lightly golden.
Extra Tips
Press the hash browns firmly when shaping the cups so they hold together after baking. If the centers seem too soft, return the tin to the oven for a few extra minutes. These cups reheat well in a toaster oven to restore crisp edges, and leftovers store in the refrigerator for up to two days. Course: Breakfast Cuisine: American Equipment: Muffin Tin, Mixing Bowls, Whisk
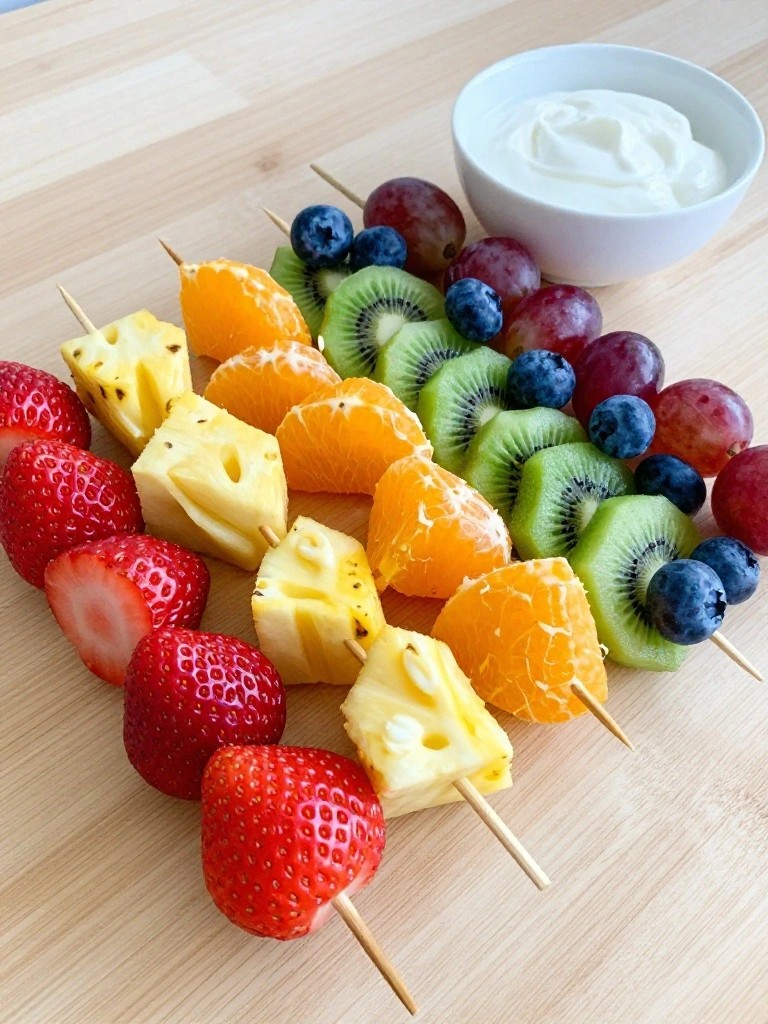
Rainbow Fruit Skewers with Vanilla Yogurt
These skewers turn simple fruit into a colorful breakfast that kids can pick up and eat without a fuss. The bite-size pieces on sticks make them easy to serve at the table or pack for school mornings. Fresh fruit gives a juicy texture while the vanilla yogurt adds a smooth, mild dip that balances the sweetness.
This recipe works well when you need something quick that still feels special. Kids enjoy the rainbow pattern, and parents like that it requires no cooking. The combination stays light and refreshing without being too sweet.
Serves 4 people.
Ingredients
- 8 wooden skewers
- 1 cup strawberries, hulled and halved
- 1 cup mandarin orange segments
- 1 cup pineapple chunks
- 1 cup kiwi slices
- 1 cup blueberries
- 1 cup red grapes
- 2 cups vanilla yogurt
Instructions
- Wash all the fruit and prepare it according to the ingredient list by hulling the strawberries and cutting the larger pieces into bite-size chunks.
- Lay out the prepared fruit in rainbow order: strawberries, orange segments, pineapple, kiwi, blueberries, and grapes.
- Thread one piece of each fruit onto a skewer, repeating the rainbow sequence until the skewer is full but still easy to hold.
- Repeat the threading process with the remaining skewers and fruit until all eight are complete.
- Divide the vanilla yogurt into four small bowls and serve alongside the finished skewers for dipping.
Extra Tips
Make the skewers the night before and store them covered in the refrigerator so the fruit stays fresh. If the pineapple or kiwi pieces feel too large for little hands, cut them smaller before threading. Swap in any single fruit color only if you keep the same total amount to maintain the rainbow look. Course: Breakfast Cuisine: American Equipment: Wooden skewers, Cutting board, Knife, Small bowls
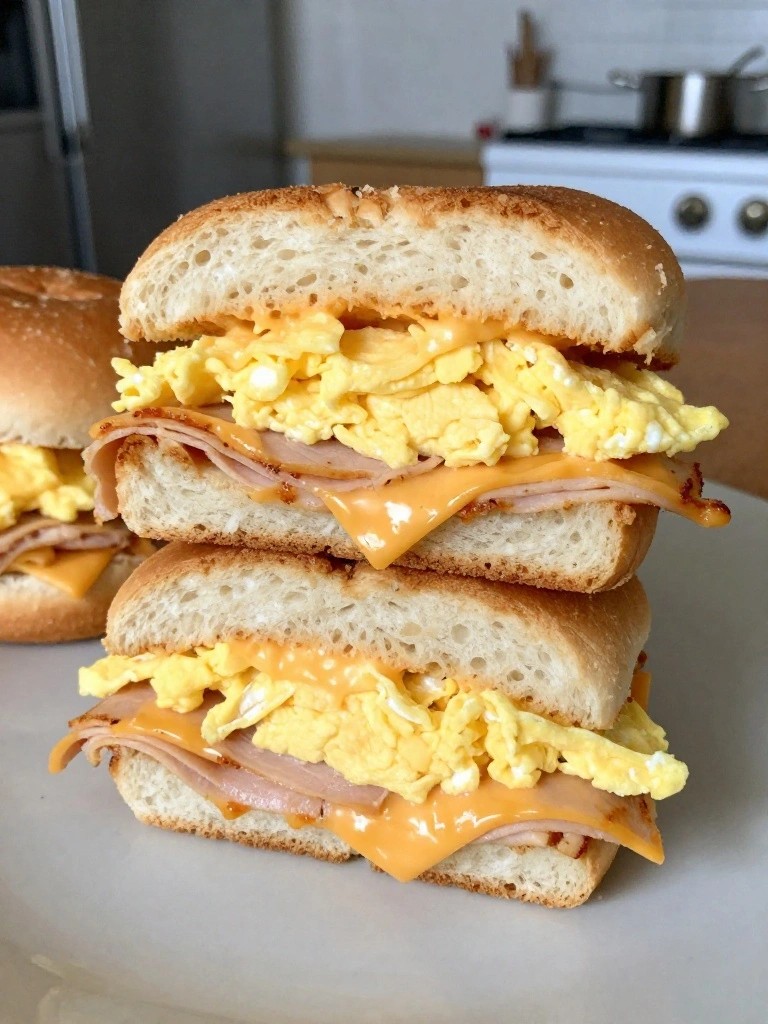
Turkey and Cheese Breakfast Slider Bites
These turkey and cheese breakfast slider bites turn simple ingredients into small, easy-to-hold sandwiches that appeal to kids. They work well for rushed weekday mornings or relaxed weekend meals when you want something warm and filling without much fuss.
The soft buns hold layers of savory turkey, melted cheese, and fluffy scrambled eggs. Each bite stays balanced and mild in flavor while offering a mix of textures from the tender bread and creamy eggs.
Serves 4 people.
Ingredients
- 8 slider buns
- 8 slices deli turkey
- 8 slices cheddar cheese
- 4 large eggs
- 2 tablespoons butter
- 1/4 teaspoon salt
Instructions
- Crack the eggs into a bowl, add the salt, and whisk until combined.
- Heat 1 tablespoon of butter in a skillet over medium heat, pour in the eggs, and cook while stirring until they form soft curds. Remove from heat.
- Slice the slider buns in half if they are not pre-sliced. Place the bottoms on a baking sheet.
- Layer one slice of turkey and one slice of cheddar cheese on each bottom bun.
- Spoon the scrambled eggs evenly over the cheese on all eight sliders.
- Add the top buns and brush the remaining tablespoon of melted butter over the tops.
- Bake at 350°F for 8 to 10 minutes until the cheese melts and the buns turn lightly golden.
Extra Tips
Split the sliders in half again after baking if you want even smaller pieces for very young kids. You can scramble the eggs the night before and store them in the fridge so assembly takes just a few minutes in the morning. Skip extra seasonings on the eggs if your children prefer plain flavors. Course: Breakfast Cuisine: American Equipment: Skillet, Baking sheet, Whisk