
Halloween at the office is such a fun time to surprise your coworkers with some delightfully spooky treats. Last year, I whipped up a batch of spider cupcakes, and they were gobbled up in no time. There’s something truly magical about sharing festive goodies that bring out everyone’s inner child. From mummy hot dogs to witch hat cookies, the possibilities are endless. Are you curious about what other treats could make your Halloween office party a hit? Let’s explore some delicious ideas together!
Spooky Spider Cupcakes
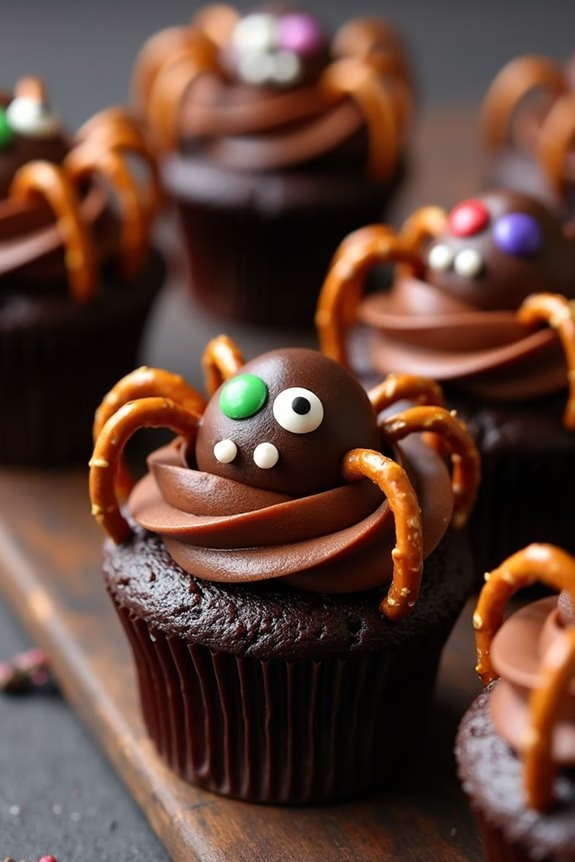
Spooky Spider Cupcakes are a delightful and eerie treat that’s perfect for sharing with coworkers during the Halloween season. These cupcakes aren’t only delicious but also creatively decorated to resemble spooky spiders, making them an ideal addition to any Halloween-themed office party.
With rich chocolate cupcakes as the base and a playful decoration on top, these treats are sure to impress and bring a touch of Halloween spirit to your workplace. The base of these cupcakes is a moist and decadent chocolate cake, topped with a smooth, velvety chocolate frosting.
The spider decoration is made using a combination of chocolate-covered pretzels and candy, creating an eye-catching and fun dessert. Whether you’re a baking novice or a seasoned pro, these Spooky Spider Cupcakes are easy to make and require only a bit of creativity and patience.
Plus, they make for a festive and memorable treat that your coworkers will certainly enjoy.
Ingredients (Serves 4-6 people):
- 1 cup all-purpose flour
- 1/2 cup unsweetened cocoa powder
- 1 teaspoon baking powder
- 1/2 teaspoon baking soda
- 1/4 teaspoon salt
- 1/2 cup unsalted butter, softened
- 1 cup granulated sugar
- 2 large eggs
- 1 teaspoon vanilla extract
- 1/2 cup buttermilk
- 1 cup chocolate frosting
- 24 chocolate-covered pretzel sticks
- 12 chocolate candies (such as M&M’s or chocolate buttons)
- Small tube of white icing or gel for decorating
Cooking Instructions:
- Preheat the Oven: Preheat your oven to 350°F (175°C) and line a 12-cup muffin tin with cupcake liners.
- Mix Dry Ingredients: In a medium bowl, whisk together the flour, cocoa powder, baking powder, baking soda, and salt. Set aside.
- Cream Butter and Sugar: In a large bowl, beat the butter and sugar together using an electric mixer at medium speed until light and fluffy. This should take about 3 minutes.
- Add Eggs and Vanilla: Add the eggs one at a time, beating well after each addition. Stir in the vanilla extract.
- Combine Wet and Dry Ingredients: Gradually add the dry mixture to the wet mixture, alternating with the buttermilk, starting and ending with the dry ingredients. Mix until just combined.
- Fill Cupcake Liners: Divide the batter evenly among the cupcake liners, filling each about two-thirds full.
- Bake: Bake in the preheated oven for 18-20 minutes, or until a toothpick inserted into the center of a cupcake comes out clean. Let them cool in the pan for 5 minutes, then transfer to a wire rack to cool completely.
- Frost the Cupcakes: Once the cupcakes are cool, spread a generous amount of chocolate frosting on top of each cupcake.
- Decorate: To create the spider legs, insert four chocolate-covered pretzel sticks on each side of the cupcakes. Use two chocolate candies as the eyes and add pupils with a small amount of white icing or gel.
- Finishing Touches: Let the decorated cupcakes sit for a few minutes to allow the frosting to set before serving.
Extra Tips:
When making Spooky Spider Cupcakes, feel free to get creative with the decorations. You can use different types of candy for the eyes or add edible glitter for an extra spooky effect.
If you prefer, you can also use pre-made chocolate cupcakes to save time. Additionally, make sure the cupcakes are completely cool before frosting to prevent the frosting from melting.
Enjoy these delightful treats and watch them disappear quickly at your Halloween office party!
Mummy Hot Dogs

Mummy Hot Dogs are a delightful and spooky treat perfect for a Halloween celebration with your coworkers. Not only are they fun to make, but they also add a whimsical touch to any festive gathering. These adorable mummies, wrapped in crescent roll bandages, are sure to be a hit with adults and kids alike, offering a savory surprise in every bite.
Serve them up as a playful appetizer or main dish at your Halloween office party for a guaranteed conversation starter.
The best part about Mummy Hot Dogs is that they require minimal ingredients and are quick to prepare, making them an ideal choice for busy individuals looking to whip up something special without spending hours in the kitchen. You can easily adjust the recipe to suit your preferences, whether you want to make them with classic beef hot dogs, turkey dogs, or even vegetarian options.
The combination of flaky pastry and juicy hot dog creates an irresistible texture that’s sure to please everyone’s palate.
Ingredients (for a serving size of 4-6 people):
- 1 package of 8 hot dogs (beef, turkey, or vegetarian)
- 1 can of refrigerated crescent roll dough
- 1 egg, beaten
- Mustard or ketchup (for decoration)
Cooking Instructions:
- Preheat the Oven: Start by preheating your oven to 375°F (190°C). This guarantees that your mummies will bake evenly and achieve a golden, flaky crust.
- Prepare the Dough: Unroll the crescent roll dough on a clean surface. Separate it into individual triangles, then slice each triangle into thin strips, approximately 1/4 inch wide. These strips will serve as the mummy’s bandages.
- Wrap the Hot Dogs: Take one hot dog at a time and begin wrapping it with the dough strips. Leave a small gap at the top for the mummy’s face. Overlap the strips randomly to create the appearance of bandages. Repeat this process for all the hot dogs.
- Brush with Egg Wash: Place the wrapped hot dogs on a baking sheet lined with parchment paper. Use a pastry brush to lightly coat each mummy with the beaten egg. This will give them a nice sheen once baked.
- Bake the Mummies: Put the baking sheet in the preheated oven and bake for 12-15 minutes, or until the dough is golden brown.
- Add the Eyes: Once the mummies are out of the oven and slightly cooled, use a small amount of mustard or ketchup to dot on eyes in the exposed gap you left for the face.
- Serve: Arrange your Mummy Hot Dogs on a platter and serve them warm. They pair well with a variety of dipping sauces on the side.
Extra Tips:
When making Mummy Hot Dogs, you can get creative with the dough wrapping to give each one its unique look. If you’re looking for a healthier option, consider using whole wheat crescent rolls or substituting the hot dogs with chicken sausages.
For added flavor, you can sprinkle a little garlic powder or sesame seeds on the dough before baking. These little touches can elevate your Mummy Hot Dogs and make them even more enjoyable for your coworkers.
Witch Hat Cookies

Witch Hat Cookies are a delightful treat perfect for sharing with coworkers during the Halloween season. These whimsical cookies aren’t only visually appealing with their classic witch hat shape, but they also offer a delicious combination of chocolate and vanilla flavors. Made with simple ingredients, they’re easy to prepare and are sure to impress anyone who tries them.
Whether you’re hosting a Halloween party at the office or just want to bring a festive snack to share, these cookies are a fantastic choice. The base of the Witch Hat Cookies is a simple sugar cookie, topped with a chocolate kiss to create the pointed hat shape. The cookies are then decorated with a band of colored frosting and a small candy to mimic a buckle, adding a fun and festive touch.
This recipe yields 24 cookies, making it ideal for serving a group of 4-6 people. Let’s plunge into how you can create these spooky treats that are as much fun to make as they’re to eat!
Ingredients for 4-6 People (24 Cookies):
- 1 cup unsalted butter, softened
- 1 cup granulated sugar
- 1 large egg
- 1 teaspoon vanilla extract
- 2 1/2 cups all-purpose flour
- 1/2 teaspoon baking powder
- 1/4 teaspoon salt
- 24 chocolate kisses (e.g., Hershey’s Kisses)
- 1 cup chocolate chips, melted
- 1/2 cup colored frosting (orange or purple work well)
- 24 small round candies (e.g., M&M’s or candy pearls)
Cooking Instructions:
- Prepare the Dough: In a large bowl, cream together the softened butter and granulated sugar until light and fluffy. Add the egg and vanilla extract, beating until well combined.
- Mix the Dry Ingredients: In a separate bowl, whisk together the all-purpose flour, baking powder, and salt. Gradually add the dry ingredients to the butter mixture, mixing until a dough forms.
- Shape the Cookies: Preheat your oven to 350°F (175°C). Roll the dough into 1-inch balls and place them on a baking sheet lined with parchment paper. Press each ball down slightly with your palm to flatten.
- Bake the Cookies: Bake in the preheated oven for 10-12 minutes, or until the edges are lightly golden. Remove from the oven and let the cookies cool on the baking sheet for 5 minutes before transferring them to a wire rack to cool completely.
- Attach the Chocolate Kisses: Once the cookies have cooled, add a small dollop of melted chocolate chips on the center of each cookie using a spoon or piping bag. Immediately press a chocolate kiss onto the melted chocolate, making sure it sticks.
- Decorate the Hats: Using a piping bag or a small zip-top bag with the corner snipped off, pipe a band of colored frosting around the base of each chocolate kiss. Press a small round candy onto the frosting band to resemble a buckle.
Extra Tips:
For best results, verify that your butter is at room temperature before starting the dough. This helps achieve a smooth and creamy texture. If you don’t have a piping bag, a small zip-top bag with a corner cut off can be used for applying the frosting.
Additionally, you can experiment with different colors of frosting and candies to match your Halloween theme. These cookies can be stored in an airtight container at room temperature for up to a week, making them a convenient make-ahead treat for your Halloween celebration.
Ghostly Popcorn Balls

Ghostly Popcorn Balls are a fun and festive treat perfect for bringing a little Halloween spirit to the office. These spooky snacks aren’t only a hit among coworkers due to their delightful appearance, but they also offer a tasty mix of sweet and salty flavors. With a little creativity, you can transform ordinary popcorn balls into ghostly figures that are sure to provoke smiles and maybe even a playful scare or two.
This recipe is designed to make 12-15 popcorn balls, suitable for serving 4-6 people. The chewy marshmallow coating holds everything together and allows for easy shaping, while the popcorn provides a satisfying crunch. By adding a few simple decorations, like candy eyes or drizzles of chocolate, you can personalize each ghostly figure, making them both a treat for the palate and the eyes.
Ingredients:
- 12 cups popped popcorn
- 1/2 cup unsalted butter
- 1 package (10 ounces) mini marshmallows
- 1 teaspoon vanilla extract
- 1/2 teaspoon salt
- Candy eyes or chocolate chips for decoration
Cooking Instructions:
- Prepare the Popcorn: Begin by popping 12 cups of popcorn using your preferred method, whether it’s stovetop, microwave, or air-popped. Once popped, transfer the popcorn to a large bowl, making sure to remove any unpopped kernels.
- Melt the Butter and Marshmallows: In a large saucepan over medium heat, melt 1/2 cup of unsalted butter. Once melted, add the entire package of mini marshmallows and stir continuously until the marshmallows are completely melted and combined with the butter to form a smooth mixture.
- Add Flavoring: Remove the saucepan from the heat and stir in 1 teaspoon of vanilla extract and 1/2 teaspoon of salt. Mix well to guarantee the flavors are evenly distributed throughout the marshmallow mixture.
- Combine Popcorn and Marshmallow Mixture: Pour the marshmallow mixture over the prepared popcorn in the large bowl. Using a spatula or your hands (greased to prevent sticking), gently fold the popcorn and marshmallow mixture together until all the popcorn is evenly coated.
- Shape the Popcorn Balls: Grease your hands with a little butter or cooking spray, then take a handful of the popcorn mixture and press it together to form a ball. Continue shaping until you have 12-15 popcorn balls. Place each ball on a sheet of wax paper or a greased baking sheet.
- Decorate Your Ghosts: Once the popcorn balls have cooled and set slightly, press candy eyes or chocolate chips into each ball to create ghostly faces. Get creative with the expressions for a fun and playful touch.
Extra Tips:
When making Ghostly Popcorn Balls, make certain that you work quickly when combining the popcorn with the marshmallow mixture, as it can begin to set and become more difficult to shape.
If you’re having trouble with the mixture sticking to your hands, keep a small bowl of water or extra butter nearby to re-grease your hands as needed.
For added flavor, you can mix in a handful of chocolate chips or candy corn into the popcorn before shaping the balls.
Finally, store the completed popcorn balls in an airtight container to maintain their freshness and crunchiness until you’re ready to share them with your coworkers.
Pumpkin Cheese Balls
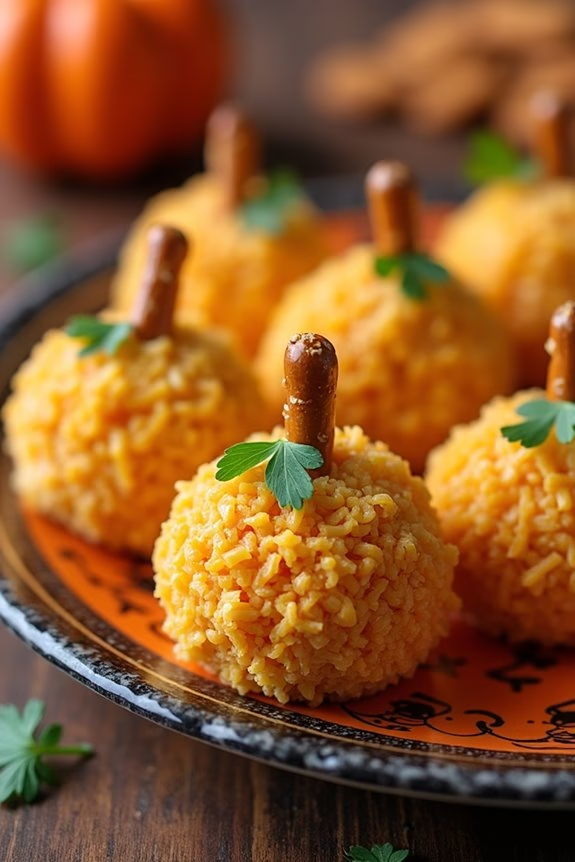
Pumpkin Cheese Balls are a delightful and festive treat, perfect for sharing with coworkers during Halloween. These savory snacks not only look the part with their cute pumpkin-like appearance, but they also bring a burst of flavor that combines tangy cheese with a hint of spice.
They’re easy to prepare, make for a great conversation starter, and are sure to be a hit at any office Halloween gathering. Whether you’re hosting a potluck or simply want to surprise your colleagues with a seasonal snack, these cheese balls are a delicious and memorable choice.
The combination of cream cheese, cheddar, and a blend of spices creates a rich and creamy texture that’s perfectly balanced by the crunch of the outer coating. Shaping them into small, pumpkin-like balls not only adds to their visual appeal but also makes them convenient to eat as bite-sized snacks.
Topped with pretzel sticks to mimic the pumpkin stem, these cheese balls are as fun to make as they’re to eat. Below is a simple recipe to prepare Pumpkin Cheese Balls for a serving size of 4-6 people.
Ingredients:
- 8 oz cream cheese, softened
- 1 1/2 cups shredded sharp cheddar cheese
- 1/4 cup finely chopped green onions
- 1/4 cup finely chopped bell pepper (orange or red)
- 1 tsp garlic powder
- 1 tsp smoked paprika
- Salt and pepper to taste
- 1 cup crushed pretzels
- Pretzel sticks (for stems)
- Fresh parsley leaves (for garnish)
Cooking Instructions:
- Prepare the Cheese Mixture: Begin by placing the softened cream cheese and shredded cheddar cheese in a large mixing bowl. Use a hand mixer or a spoon to blend them together until smooth and well combined.
- Add Flavorings: Stir in the chopped green onions, bell pepper, garlic powder, smoked paprika, salt, and pepper. Mix until all ingredients are evenly distributed throughout the cheese mixture.
- Shape the Cheese Balls: Using your hands, scoop out about 2 tablespoons of the cheese mixture and roll it into a ball. Repeat this process until all of the cheese mixture is used up, forming approximately 8-10 balls.
- Coat the Cheese Balls: Pour the crushed pretzels onto a shallow plate. Roll each cheese ball in the pretzels until fully coated, ensuring an even layer covers the entire surface.
- Add the Finishing Touches: Insert a pretzel stick into the top of each cheese ball to resemble a pumpkin stem. Add a small parsley leaf beside the pretzel stick for a touch of green, enhancing the pumpkin look.
- Chill Before Serving: Place the cheese balls on a tray and cover them with plastic wrap. Refrigerate for at least 1 hour before serving to allow them to firm up and the flavors to meld together.
Extra Tips:
For the best presentation, serve the Pumpkin Cheese Balls on a platter lined with fresh autumn leaves or a festive Halloween-themed plate. If you prefer a spicier kick, consider adding a dash of cayenne pepper to the cheese mixture.
These cheese balls can be made a day in advance and stored in the refrigerator, making them an ideal make-ahead option for busy workdays. Additionally, if you have coworkers with dietary restrictions, you can easily substitute gluten-free pretzels to accommodate their needs.
Enjoy this creative twist on a classic cheese ball recipe, and have a spooktacular Halloween!
Monster Eyeball Truffles
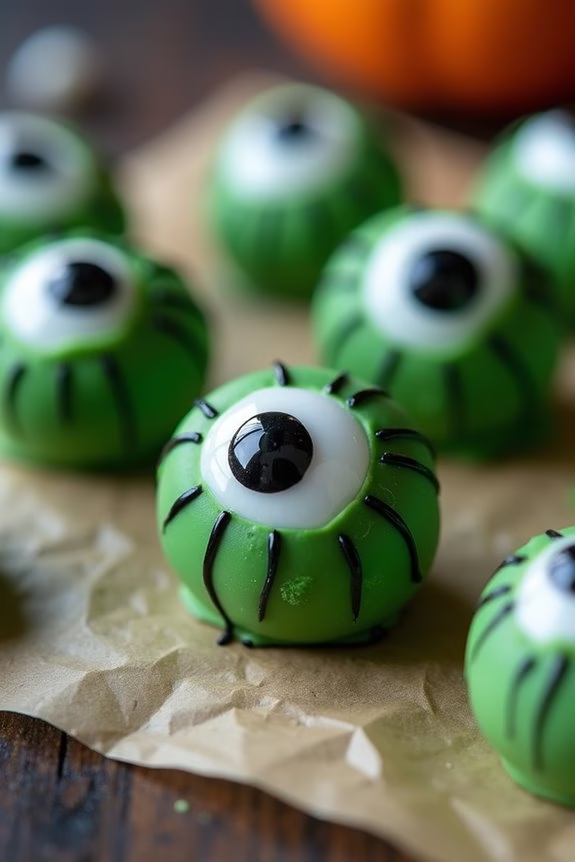
Monster Eyeball Truffles are the perfect Halloween treat to surprise and delight your coworkers. These spooky yet delicious confections are sure to be a hit at your office party. With their eerie appearance and rich, chocolatey taste, Monster Eyeball Truffles are as fun to make as they’re to eat.
Whether you’re a seasoned chef or a kitchen novice, this recipe is simple enough for anyone to master. Just a few ingredients and a little creativity will transform ordinary truffles into a hauntingly delightful treat.
The key to these Monster Eyeball Truffles is to use quality chocolate and vibrant decorations to create an eye-catching effect. You’ll start by making a smooth chocolate ganache that will serve as the base for your truffles. Once the ganache is chilled and rolled into balls, you’ll cover them with a white chocolate coating and add some eerie details to make them look like monster eyeballs.
This recipe serves 4-6 people, making it ideal for small gatherings or office parties.
Ingredients (serves 4-6):
- 8 oz semi-sweet chocolate, chopped
- 1/2 cup heavy cream
- 1/2 tsp vanilla extract
- 8 oz white chocolate, chopped
- Green and red food coloring
- Candy eyeballs or edible eyeball decorations
- 1 tbsp coconut oil
- Black decorating gel or icing
Instructions:
- Prepare the Ganache: In a heatproof bowl, combine the semi-sweet chocolate and heavy cream. Place the bowl over a pot of simmering water, ensuring the bottom of the bowl doesn’t touch the water. Stir until the chocolate is fully melted and the mixture is smooth. Remove from heat and stir in the vanilla extract.
- Chill the Ganache: Cover the bowl with plastic wrap and refrigerate for about 2 hours or until the ganache is firm enough to handle.
- Form the Truffle Balls: Once the ganache is set, use a small scoop or spoon to portion out the ganache and roll it into small balls. Place the truffle balls on a baking sheet lined with parchment paper and return them to the refrigerator to firm up for about 30 minutes.
- Melt the White Chocolate: In a clean, dry bowl, combine the white chocolate and coconut oil. Melt the mixture over a simmering pot of water, stirring occasionally until smooth. Divide the melted white chocolate into two bowls, adding a few drops of green food coloring to one and mixing until fully colored.
- Coat the Truffles: Remove the truffle balls from the refrigerator. Dip each ball into the green-tinted white chocolate, ensuring they’re fully coated. Place them back on the parchment-lined baking sheet.
- Decorate: While the chocolate coating is still wet, press a candy eyeball or edible eyeball decoration into the center of each truffle. Use the black decorating gel to draw veins around the eyeball for a spooky effect. Allow the truffles to set at room temperature until the chocolate coating is firm.
- Store and Serve: Once set, store the Monster Eyeball Truffles in an airtight container in the refrigerator until ready to serve.
Extra Tips:
When making the ganache, be sure to stir continuously to prevent the chocolate from burning or seizing. If the ganache becomes too firm to scoop and roll, let it sit at room temperature for a few minutes to soften slightly.
For a more vibrant appearance, don’t be afraid to adjust the amount of food coloring until you achieve your desired hue. If you can’t find candy eyeballs, you can use small chocolate chips or round candies as a substitute.
Finally, get creative with your decorations! Adding different colors or patterns can give your Monster Eyeball Truffles a unique and personal touch.
Candy Corn Pretzel Bites
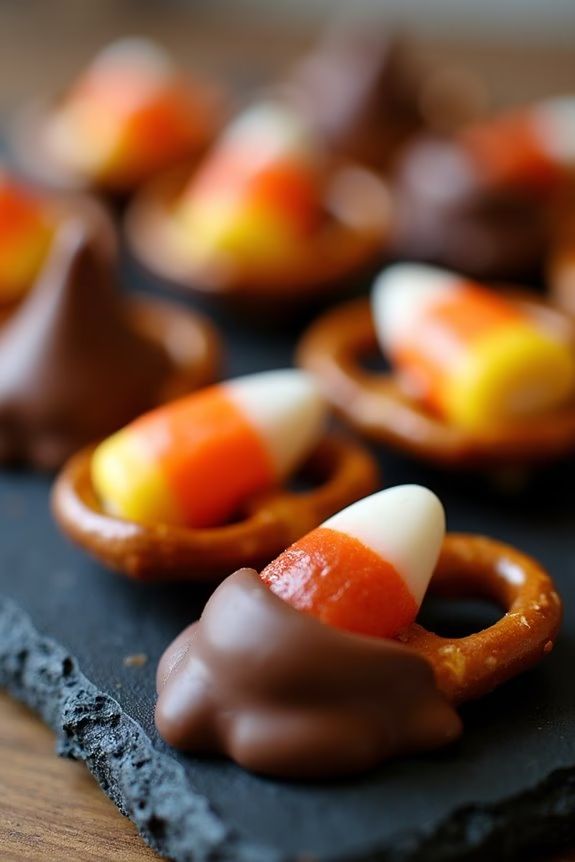
Candy Corn Pretzel Bites are a delightful and festive treat that’s perfect for sharing with coworkers during Halloween. These sweet and salty bites combine the classic Halloween candy, candy corn, with the satisfying crunch of pretzels, creating a snack that’s both visually appealing and incredibly delicious.
Not only are they simple to make, but they also add a touch of seasonal cheer to any office gathering or Halloween party. This recipe is designed to serve 4-6 people, making it an ideal choice for small group celebrations. The preparation is quick and requires minimal ingredients, making it a stress-free option for busy individuals.
Plus, the combination of flavors and textures is sure to impress your coworkers and leave them reaching for more, making it a Halloween treat they’ll talk about long after the holiday is over.
Ingredients:
- 48 mini pretzels
- 48 candy corn pieces
- 48 Hershey’s Kisses or Rolos
- Parchment paper
Cooking Instructions:
- Preheat the Oven: Start by preheating your oven to 200°F (93°C). This low temperature will allow the chocolate to melt gently without burning.
- Prepare the Baking Sheet: Line a baking sheet with parchment paper to prevent the pretzels from sticking and to make cleanup easier.
- Assemble the Pretzel Bites: Place the mini pretzels in a single layer on the prepared baking sheet. On top of each pretzel, place one unwrapped Hershey’s Kiss or Rolo candy.
- Melt the Chocolate: Put the baking sheet in the preheated oven for about 4-5 minutes. Watch closely—you’re looking for the chocolate to become glossy and soft, not completely melted.
- Add the Candy Corn: Remove the baking sheet from the oven. Immediately press one candy corn gently into the center of each softened chocolate candy. The chocolate should be soft enough to hold the candy corn in place.
- Cool the Pretzel Bites: Allow the pretzel bites to cool completely. You can speed up the process by placing them in the refrigerator for about 15-20 minutes, or until the chocolate sets.
- Serve and Enjoy: Once the chocolate has hardened, your Candy Corn Pretzel Bites are ready to serve. Transfer them to a festive platter and watch them disappear!
Extra Tips:
When making Candy Corn Pretzel Bites, be sure to use fresh candy corn for the best texture and flavor. If you prefer a nuttier taste, opt for Rolos instead of Hershey’s Kisses, as they add a caramel twist to the treats.
Additionally, if you’re planning to transport these to your workplace, consider using a container with a lid to prevent them from shifting and to maintain their shape. Finally, these bites can be made a day in advance and stored in an airtight container, making them a convenient option for planning ahead.
Bat-Shaped Brownies
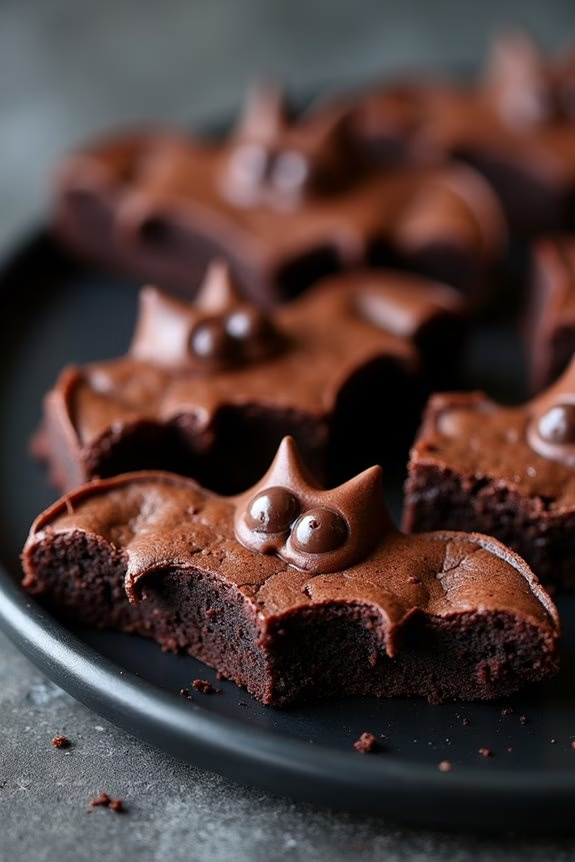
Are you looking to add a dash of spooky fun to your workplace this Halloween? Bat-Shaped Brownies are the perfect treat to surprise and delight your coworkers.
These rich, chocolatey brownies aren’t only delicious but also visually appealing with their festive bat shapes. Perfect for a Halloween party or just to share a little seasonal cheer, these brownies are bound to be a hit.
The recipe is simple enough to whip up the night before or even the morning of your office celebration. All you need is a few basic baking ingredients and a bat-shaped cookie cutter to create these delightful treats. The following recipe serves 4-6 people, making it ideal for a small office gathering or to bring as a contribution to a larger Halloween potluck.
Ingredients (Serves 4-6 people):
- 1/2 cup (1 stick) unsalted butter
- 1 cup granulated sugar
- 2 large eggs
- 1 teaspoon vanilla extract
- 1/3 cup unsweetened cocoa powder
- 1/2 cup all-purpose flour
- 1/4 teaspoon salt
- 1/4 teaspoon baking powder
- 1/2 cup mini chocolate chips (optional)
- Bat-shaped cookie cutter
Instructions:
- Preheat and Prepare the Pan: Preheat your oven to 350°F (175°C). Line an 8×8 inch baking pan with parchment paper, leaving some overhang for easy removal of the brownies later.
- Melt the Butter: In a medium saucepan, melt the butter over low heat. Once melted, remove from heat and stir in the sugar, eggs, and vanilla extract until well combined.
- Mix Dry Ingredients: In a separate bowl, whisk together the cocoa powder, flour, salt, and baking powder. Slowly add the dry ingredients to the wet ingredients, stirring until just combined. Be careful not to overmix.
- Add Chocolate Chips (Optional): If you’re using them, fold in the mini chocolate chips to add an extra burst of chocolate in every bite.
- Bake: Pour the brownie batter into the prepared baking pan and spread it evenly. Bake in the preheated oven for 20-25 minutes, or until a toothpick inserted into the center comes out with a few moist crumbs.
- Cool and Cut: Allow the brownies to cool completely in the pan on a wire rack. Once cool, use the parchment paper edges to lift the brownies out of the pan. Use your bat-shaped cookie cutter to cut out bat shapes from the brownies.
- Serve: Arrange the bat-shaped brownies on a serving platter and watch your coworkers’ eyes light up with delight.
Extra Tips: For an added touch, you can dust the bat-shaped brownies with powdered sugar or drizzle with melted white chocolate to give them a spooky look.
If you don’t have a bat-shaped cookie cutter, you can use a sharp knife to carefully cut out the bat shapes. Make sure to let the brownies cool completely before cutting to guarantee clean edges.
If you’re short on time, you can prepare the brownie batter the night before and bake them in the morning. Enjoy sharing these fun and festive treats with your coworkers!
Vampire Blood Punch
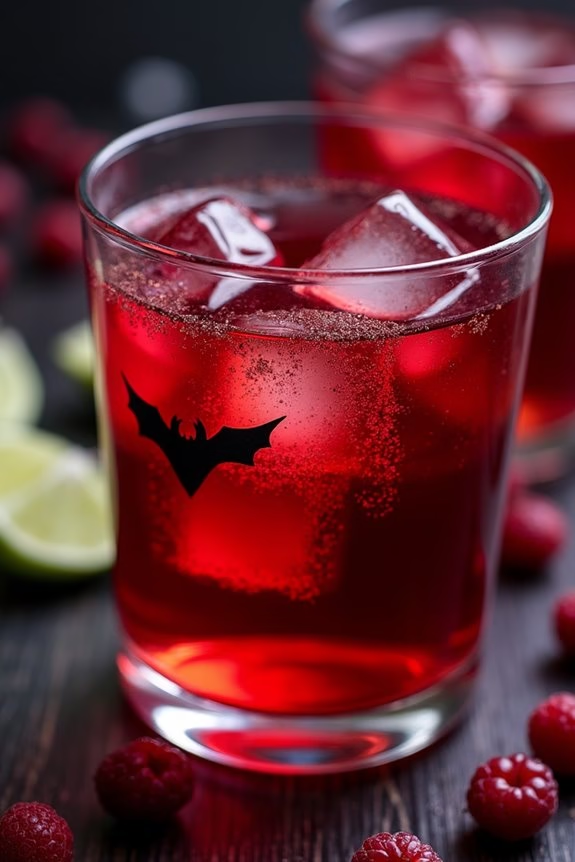
Vampire Blood Punch is the perfect Halloween treat to surprise and delight your coworkers with its spooky yet delicious flair. This vibrant, blood-red concoction isn’t only visually engaging but also invigoratingly tasty. Combining the zing of citrus with the sweetness of berries and a hint of fizz, this punch will become a staple for any Halloween gathering. Best of all, it’s an easy-to-make beverage that requires minimal effort and delivers maximum impact.
Whether you’re hosting a Halloween office party or simply want to bring a little festive fun to the workplace, Vampire Blood Punch is sure to be a hit. It’s non-alcoholic, making it suitable for everyone, but feel free to add a splash of your favorite spirit for an adult twist. With just a few simple ingredients and steps, you’ll have a crowd-pleaser that keeps everyone coming back for more.
Ingredients (Serving Size: 4-6 people)
- 4 cups cranberry juice
- 2 cups ginger ale
- 1 cup orange juice
- 1 cup mixed berry juice
- 1/2 cup fresh lime juice
- 1/4 cup grenadine
- Ice cubes
- Optional: Edible glitter for a sparkling effect
Cooking Instructions
- Mix the Juices: In a large punch bowl, combine the cranberry juice, orange juice, mixed berry juice, and fresh lime juice. Stir well to confirm all the juices are thoroughly mixed.
- Add the Fizz: Pour in the ginger ale slowly to maintain the carbonation. Stir gently to mix the ginger ale with the juices without losing too much of the fizz.
- Sweeten the Punch: Add the grenadine to the punch mixture. Stir gently, allowing the grenadine to sink and create a rich, deep red color that resembles blood.
- Chill the Punch: Add a generous amount of ice cubes to the punch to keep it chilled. Alternatively, refrigerate the punch for at least an hour before serving to enhance the flavors and serve it cold.
- Garnish and Serve: For an extra spooky touch, sprinkle a little edible glitter on top of the punch before serving. This will create a sparkling effect that catches the light. Serve the punch in clear glasses or cups to showcase its vibrant color.
Extra Tips
To intensify the Halloween vibe, consider adding Halloween-themed ice cubes made with silicone molds of bats, skulls, or pumpkins.
For a more adult version, you can spike the punch with vodka or rum, about 1 cup, adjusting to taste. If you want to tone down the sweetness, swap the ginger ale with club soda.
For an added visual effect, garnish each glass with a slice of lime or a few fresh berries. This punch can be prepared a few hours in advance and kept refrigerated until party time, allowing the flavors to meld perfectly.
Caramel Apple Slices
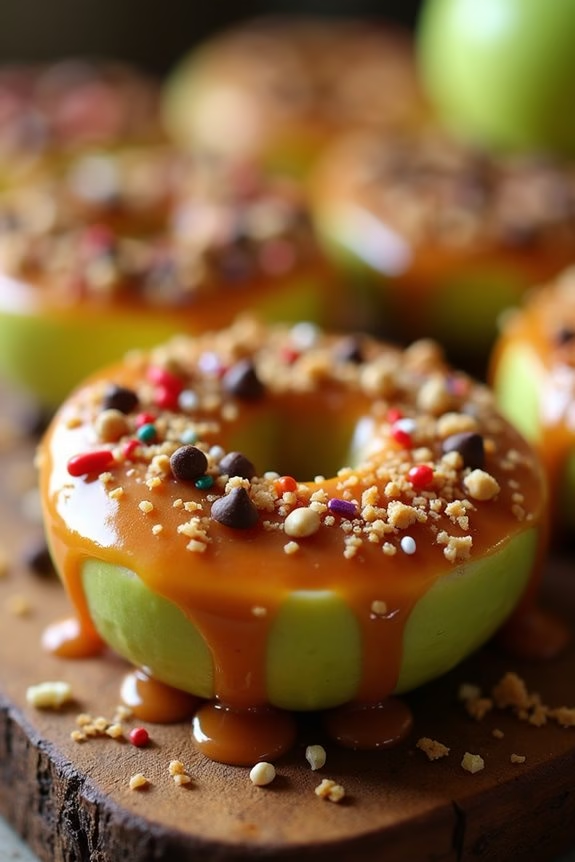
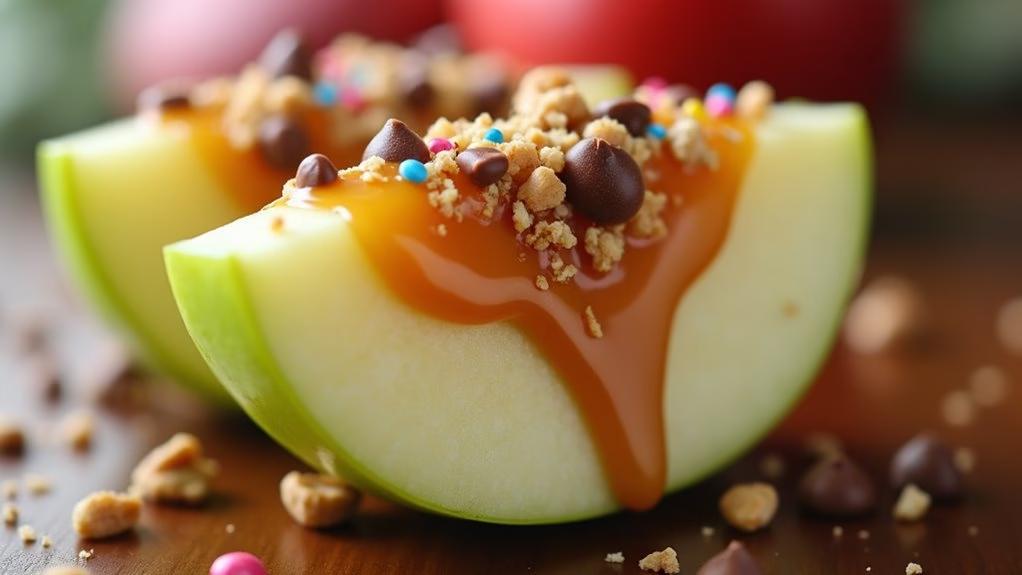
Caramel Apple Slices are a delightful twist on a classic fall treat, perfect for sharing with coworkers during Halloween. Instead of the whole apple-on-a-stick format, these slices make it easier for everyone to enjoy without committing to an entire apple. This not only makes them easier to eat but also more convenient for serving at work, where people might prefer a smaller, bite-sized treat.
The combination of crisp apple slices dipped in gooey caramel and sprinkled with a variety of toppings creates a festive and irresistible snack that captures the essence of autumn. This recipe allows for customization, letting you choose your favorite toppings to sprinkle on the caramel-coated apple slices.
Whether you prefer crushed nuts, mini chocolate chips, or festive sprinkles, each slice can be personalized to suit different tastes. This flexibility makes Caramel Apple Slices an excellent option for a Halloween office party, where diverse preferences are sure to be present. With this recipe, you can prepare a batch that will cater to different palates, guaranteeing everyone can find a slice they love.
Ingredients (serves 4-6 people):
- 4 large apples (Granny Smith or Honeycrisp work well)
- 1 package (14 oz) of caramel candies
- 2 tablespoons of heavy cream
- 1 cup of assorted toppings (such as crushed nuts, mini chocolate chips, and sprinkles)
- 1 tablespoon of lemon juice
- 8-12 wooden skewers or lollipop sticks
Instructions:
- Prepare the Apples: Wash the apples thoroughly and pat them dry with a paper towel. Use an apple slicer or a sharp knife to cut each apple into 6-8 even slices. Discard the core and seeds.
- Prevent Browning: In a small bowl, mix the lemon juice with a bit of water. Lightly brush the apple slices with this mixture to prevent browning. This step helps maintain the fresh appearance of the apple slices.
- Insert Sticks: Insert a wooden skewer or lollipop stick into each apple slice. Make sure the stick is secure but be gentle to avoid splitting the apple.
- Melt the Caramel: In a medium saucepan over low heat, combine the caramel candies and heavy cream. Stir constantly until the caramel is fully melted and smooth. This should take about 5-7 minutes.
- Coat the Slices: Dip each apple slice halfway into the melted caramel, allowing any excess to drip off before placing it on a parchment-lined baking sheet.
- Add Toppings: While the caramel is still warm and sticky, quickly sprinkle your choice of toppings over the caramel-coated side of each apple slice.
- Set the Caramel: Allow the caramel to set by letting the slices rest at room temperature for about 15-20 minutes. For faster setting, you can place them in the refrigerator for 10 minutes.
Extra Tips:
When preparing Caramel Apple Slices, make sure your apples are completely dry after washing, as any moisture can prevent the caramel from sticking properly. If you want to add a touch of saltiness, consider lightly sprinkling sea salt over the caramel before adding other toppings.
Additionally, to make cleanup easier, use parchment paper or a silicone baking mat on your baking sheet. This will prevent the caramel from sticking to the surface and make it easier to remove the slices once they’re set. Finally, if your caramel seems too thick, you can add an additional tablespoon of heavy cream to achieve a smoother consistency.