Halloween is creeping up, and it’s the perfect time to add a little spooky flair to your dinner table. Picture this: mummified meatloaf or a bubbling witch’s brew soup to kick off your haunted feast. Each dish carries its own eerie charm, enchanting guests of all ages. With these ghoulishly delightful ideas, your table will surely be the talk of the town. Ready to conjure up some culinary magic?
Mummified Meatloaf
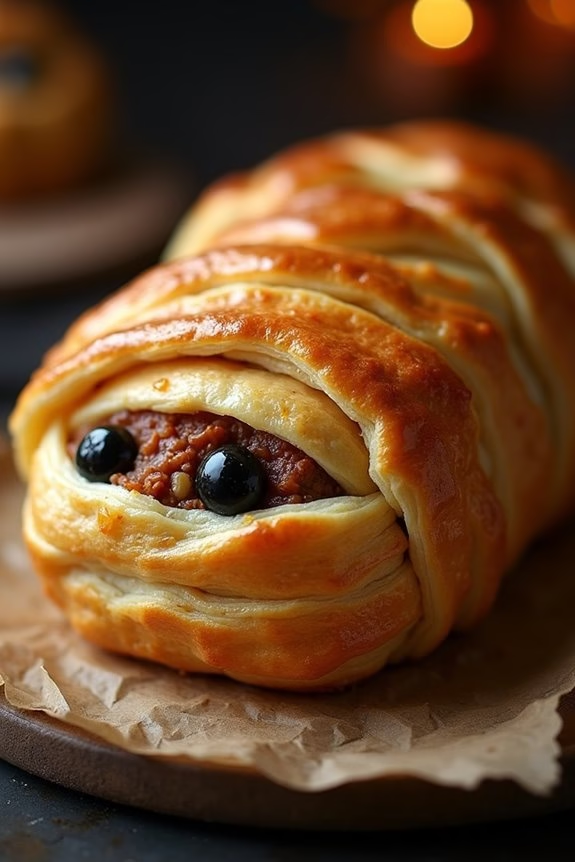
Mummified Meatloaf is a fun and spooky twist on the classic comfort dish, perfect for Halloween gatherings. This dish transforms ordinary meatloaf into a ghoulish delight by wrapping it in a flaky, golden pastry to resemble a mummy. The meatloaf itself is seasoned to perfection, providing a hearty and flavorful base, while the pastry adds a delightful crunch. It’s a visually impressive dish that’s sure to be the star of your Halloween spread, delighting both kids and adults alike.
To create this eerie entrée, a blend of ground beef, pork, and flavorful seasonings are used to form the meatloaf. The loaf is then wrapped in strips of puff pastry, which crisps up in the oven, creating the appearance of a mummy’s bandages. With just a handful of ingredients and a bit of creativity, you can craft this tantalizing and festive dish for your Halloween festivities, serving 4-6 people.
Ingredients:
- 1 pound ground beef
- 1/2 pound ground pork
- 1 cup breadcrumbs
- 2 eggs
- 1/2 cup milk
- 1 small onion, finely chopped
- 2 cloves garlic, minced
- 1/4 cup ketchup
- 1 tablespoon Worcestershire sauce
- 1 teaspoon salt
- 1/2 teaspoon black pepper
- 1 teaspoon Italian seasoning
- 1 package puff pastry (2 sheets)
- 1 egg, beaten (for egg wash)
- 4-6 black olives (for eyes)
Cooking Instructions:
- Preheat the Oven: Start by preheating your oven to 350°F (175°C). This will guarantee that it’s at the right temperature by the time you’re ready to bake your meatloaf.
- Prepare the Meatloaf Mixture: In a large mixing bowl, combine the ground beef, ground pork, breadcrumbs, eggs, milk, chopped onion, minced garlic, ketchup, Worcestershire sauce, salt, pepper, and Italian seasoning. Mix until all ingredients are thoroughly combined, but be careful not to overwork the meat.
- Shape the Meatloaf: Transfer the meat mixture to a baking sheet lined with parchment paper. Shape it into a loaf about 10 inches long and 4 inches wide. Make sure the loaf is compact and smooth.
- Wrap the Mummy: Roll out the puff pastry sheets on a lightly floured surface. Cut the pastry into long strips about 1 inch wide. Carefully wrap the strips around the meatloaf diagonally, leaving small gaps to mimic mummy bandages. Leave a small space unwrapped for the eyes.
- Apply the Egg Wash: Brush the wrapped meatloaf with the beaten egg. This will give the pastry a beautiful golden color as it bakes.
- Bake the Meatloaf: Place the wrapped meatloaf in the preheated oven and bake for 40-45 minutes, or until the internal temperature of the meatloaf reaches 160°F (70°C) and the pastry is golden brown.
- Add the Eyes: Once cooked, remove the meatloaf from the oven and let it rest for a few minutes. Use sliced black olives to create eyes within the space you left unwrapped.
- Serve: Slice the meatloaf and serve warm, showcasing the mummified effect to your guests.
Extra Tips:
When crafting your Mummified Meatloaf, make certain that the puff pastry is kept cold until you’re ready to use it, as warm pastry can become difficult to manage and less flaky when baked.
If you’re short on time, you can prepare the meatloaf mixture ahead and refrigerate it until you’re ready to wrap and bake.
Additionally, feel free to experiment with different seasonings or add-ins like chopped bell peppers or mushrooms to customize the flavor to your liking. Enjoy this deliciously frightful dish as a centerpiece for your Halloween celebration!
Witch’s Brew Soup

Get ready to cast a spell on your taste buds with this enchanting Witch’s Brew Soup, a perfect Halloween treat for the whole family. This tantalizing concoction is a blend of earthy flavors and vibrant colors that mimic the bubbling cauldron of a witch’s brew. With a base of hearty vegetables and aromatic herbs, this soup is both comforting and visually striking, making it an ideal centerpiece for your Halloween feast.
It’s easy to prepare and can be customized to suit various taste preferences, making it a versatile addition to your spooky celebration. This Witch’s Brew Soup serves 4-6 people and is perfect for warming up chilly autumn nights. The rich, green hue of the soup comes from spinach and kale, while potatoes and carrots provide substance and a hint of sweetness.
The addition of spices and herbs will fill your kitchen with a tantalizing aroma, inviting everyone to gather around and enjoy a bowl of this magical elixir. Whether you’re hosting a Halloween party or simply enjoying a festive family dinner, this soup is sure to leave everyone spellbound.
Ingredients:
- 2 tablespoons olive oil
- 1 large onion, chopped
- 3 cloves garlic, minced
- 2 medium potatoes, peeled and diced
- 2 large carrots, sliced
- 4 cups vegetable broth
- 2 cups baby spinach
- 2 cups kale, chopped
- 1 teaspoon dried thyme
- 1 teaspoon dried oregano
- 1/2 teaspoon smoked paprika
- Salt and pepper to taste
- 1/4 cup heavy cream (optional for creamy texture)
- Fresh parsley for garnish
Cooking Instructions:
- Prepare the Base: In a large pot, heat the olive oil over medium heat. Add the chopped onion and garlic, sautéing until the onion becomes translucent and the garlic is fragrant, about 5 minutes.
- Add Vegetables: Stir in the diced potatoes and sliced carrots, coating them in the onion and garlic mixture. Cook for another 5 minutes until the vegetables start to soften.
- Simmer the Soup: Pour in the vegetable broth and bring the mixture to a boil. Reduce the heat to low, cover the pot, and let it simmer for 15-20 minutes, or until the potatoes and carrots are tender.
- Blend the Greens: Add the spinach, kale, thyme, oregano, and smoked paprika to the pot. Stir well and continue to cook for another 5 minutes until the greens are wilted.
- Puree the Mixture: Carefully transfer the soup to a blender or use an immersion blender to puree the soup until smooth and creamy. If you prefer a chunkier texture, blend just half of the soup.
- Final Touches: Return the soup to the pot. Stir in the heavy cream if using, and season with salt and pepper to taste. Heat gently until the soup is warm but not boiling.
- Serve: Ladle the Witch’s Brew Soup into bowls, garnish with fresh parsley, and serve hot.
Extra Tips:
For an added touch of Halloween magic, consider serving this soup in hollowed-out mini pumpkins or cauldrons for a festive presentation. You can also adjust the consistency by adding more broth or cream, depending on your preference.
If you want to add some protein, consider incorporating cooked chicken or chickpeas before blending. Remember to taste and adjust the seasoning as needed, and feel free to experiment with additional herbs and spices to make the soup your own special brew. Happy Halloween!
Spider Web Pizza
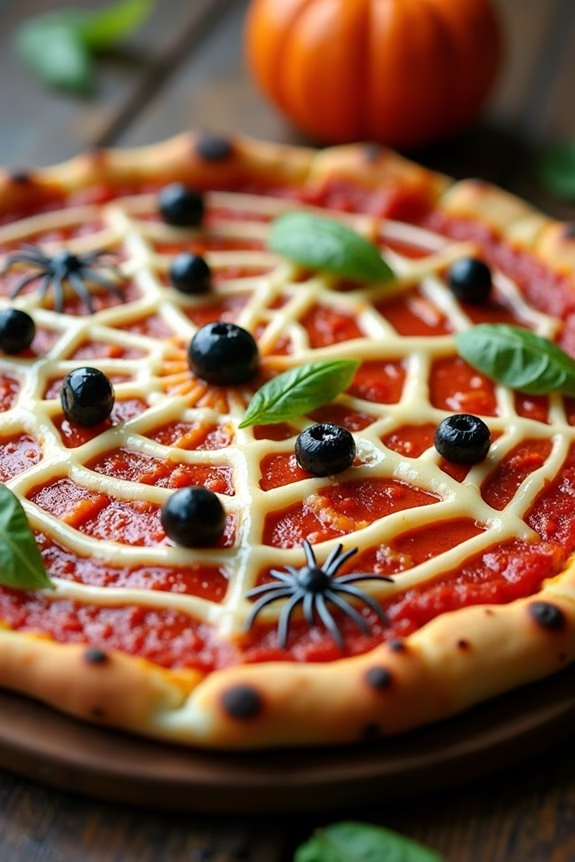
Spider Web Pizza is a fun and spooky treat perfect for Halloween festivities. This creative twist on classic pizza is sure to be a hit with both kids and adults. The visually appealing design of a spider web made from mozzarella cheese adds an eerie touch to your table, while the delicious flavors of pizza remain intact.
Whether you’re hosting a party or want to surprise your family with a themed dinner, Spider Web Pizza is an excellent choice that combines taste and creativity.
To create this Halloween-inspired dish, you’ll need to start with a basic pizza base. You can use store-bought pizza dough or make your own from scratch, depending on your preference and time constraints. The toppings can be customized to suit your taste, but the key ingredient is the mozzarella cheese, which will be used to form the spider web. With just a few ingredients and some creativity, you’ll have a ghoulishly good meal ready to enjoy.
Ingredients (serving size: 4-6 people):
- 1 pizza dough (store-bought or homemade)
- 1 cup tomato pizza sauce
- 2 cups shredded mozzarella cheese
- 1/2 cup sliced black olives
- 1/2 cup sliced bell peppers (optional)
- 1/4 cup grated Parmesan cheese
- Olive oil (for brushing)
- Fresh basil leaves (for garnish, optional)
Cooking Instructions:
- Preheat the Oven: Start by preheating your oven to 450°F (230°C). This guarantees that the pizza will cook evenly and the crust will be nice and crispy.
- Prepare the Dough: Roll out the pizza dough on a floured surface to your desired thickness. Transfer it to a baking sheet or pizza stone, and brush the edges with a little olive oil to help them crisp up in the oven.
- Add the Sauce: Spread the tomato pizza sauce evenly over the dough, leaving a small border around the edges for the crust.
- Create the Spider Web: Sprinkle the shredded mozzarella cheese over the sauce. Use strips of mozzarella or pipe melted mozzarella in concentric circles to form a web pattern. You can use a piping bag or a plastic bag with the corner snipped off to help with precision.
- Add Toppings: Distribute the sliced black olives and bell peppers evenly over the cheese. The olives can represent spiders, while the bell peppers add color and flavor.
- Bake the Pizza: Place the prepared pizza in the preheated oven and bake for 12-15 minutes or until the cheese is melted and bubbly, and the crust is golden brown.
- Finish and Serve: Remove the pizza from the oven and sprinkle with grated Parmesan cheese. Let it cool slightly before slicing. Garnish with fresh basil leaves if desired, and serve hot.
Extra Tips:
For an even more realistic spider effect, consider using whole black olives to make spider bodies and sliced olives for legs. If you want to add some spookiness, you can dye the mozzarella cheese with a few drops of black food coloring to make the web stand out even more.
Additionally, if you prefer a softer crust, reduce the baking time slightly and use a lower oven temperature. Remember to have fun with the design and let your creativity run wild to make your Spider Web Pizza the highlight of your Halloween celebration!
Ghostly Shepherd’s Pie
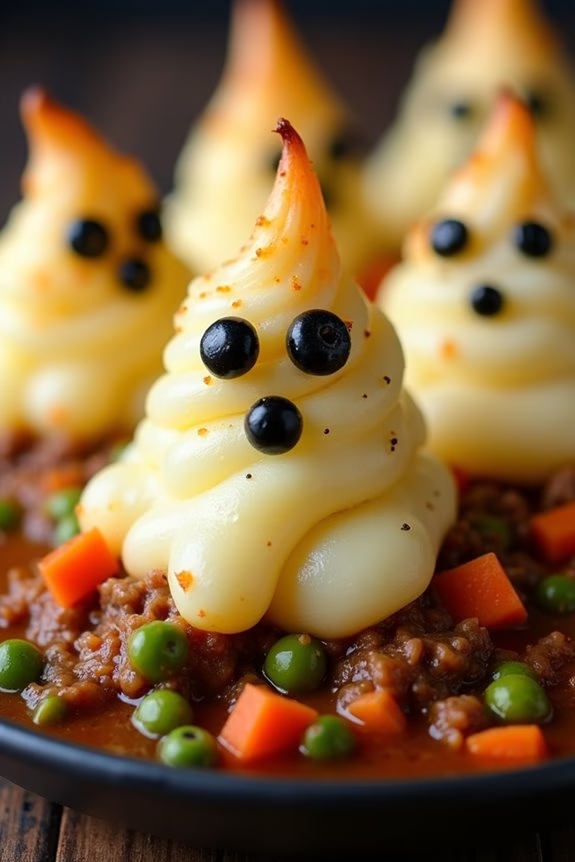
Ghostly Shepherd’s Pie is a fun and spooky twist on the classic comfort food, perfect for celebrating Halloween. This dish combines the hearty flavors of traditional shepherd’s pie with a ghostly presentation that will delight both kids and adults alike. The creamy mashed potato ‘ghosts’ topping the savory meat and vegetable filling make for an impressive and tasty centerpiece on your Halloween dining table.
To create this eerie yet delicious dish, you’ll start by preparing a rich, flavorful base of ground meat and vegetables, seasoned to perfection. The topping, made from smooth and creamy mashed potatoes, is skillfully piped to resemble ghostly figures, complete with eyes made from black olives or peppercorns. This Ghostly Shepherd’s Pie serves 4-6 people, making it an ideal choice for a small Halloween gathering or family dinner.
Ingredients:
- 1 ½ pounds ground beef or lamb
- 1 large onion, chopped
- 2 cloves garlic, minced
- 2 carrots, diced
- 1 cup peas
- 2 tablespoons tomato paste
- 1 tablespoon Worcestershire sauce
- 1 cup beef or vegetable broth
- 2 tablespoons flour
- Salt and pepper to taste
- 2 pounds potatoes, peeled and cubed
- 4 tablespoons butter
- ½ cup milk
- ¼ cup sour cream
- Black olives or peppercorns for eyes
Cooking Instructions:
- Prepare the Potatoes: Start by boiling the peeled and cubed potatoes in a large pot of salted water. Cook for about 15-20 minutes or until they’re tender and easily pierced with a fork. Drain and set aside.
- Cook the Meat Filling: In a large skillet over medium heat, add the ground meat, breaking it up with a spatula as it cooks. Once the meat is browned, add the chopped onion, minced garlic, and diced carrots. Cook for another 5 minutes, or until the vegetables begin to soften.
- Season the Filling: Stir in the tomato paste, Worcestershire sauce, and flour, ensuring everything is well combined. Gradually add the broth, stirring constantly to create a thick sauce. Add the peas and season with salt and pepper to taste. Allow the mixture to simmer for about 10 minutes, or until the sauce has thickened.
- Make the Mashed Potatoes: Return to your boiled potatoes. Add butter, milk, and sour cream, mashing them until smooth and creamy. Season with salt and pepper to taste.
- Assemble the Pie: Preheat your oven to 400°F (200°C). Transfer the meat mixture to a deep baking dish, spreading it evenly. Spoon or pipe the mashed potatoes over the top, creating ghost shapes with peaks.
- Add the Eyes: Place black olive slices or peppercorns on the mashed potato ghosts to create eyes.
- Bake: Place the assembled dish in the preheated oven and bake for 25-30 minutes, or until the potato peaks are golden brown.
- Serve: Let the Ghostly Shepherd’s Pie cool slightly before serving to allow the filling to set.
Extra Tips:
To create the best ghost shapes, use a piping bag with a large round tip to pipe the mashed potatoes onto the meat mixture. If you don’t have a piping bag, a resealable plastic bag with the corner snipped off can work as a substitute.
Make sure the mashed potatoes are smooth to achieve the best ghostly appearance. If you want to add more flavor, consider incorporating herbs like thyme or rosemary into the meat mixture.
And remember, this dish can be prepared ahead of time and baked just before serving, making it a convenient option for a busy Halloween day.
Creepy-Crawly Tacos
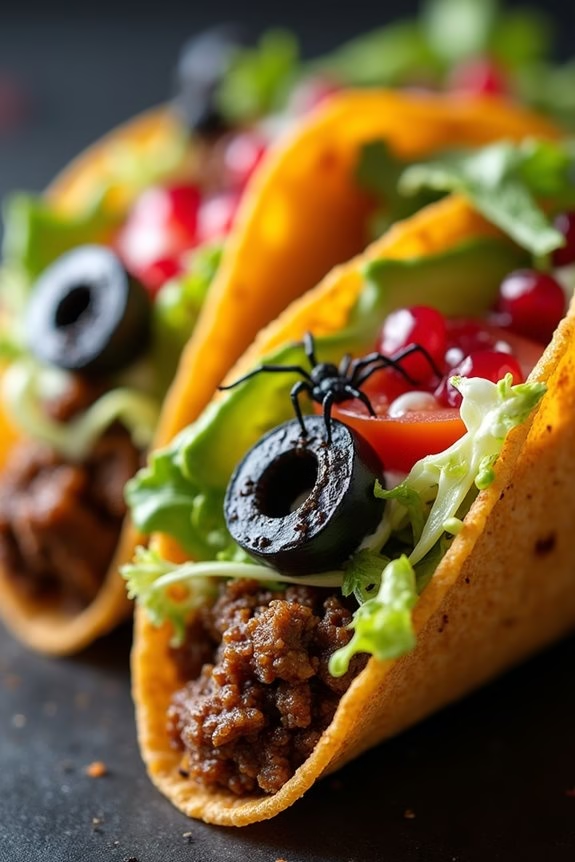
Halloween is the perfect time to let your spooky culinary imagination run wild, and Creepy-Crawly Tacos are a fun and delicious way to celebrate the season’s eerie atmosphere.
These tacos aren’t just a treat for the taste buds but also a visual delight, designed to look like they’ve creepy crawlers peeking out. With a combination of seasoned beef, vibrant veggies, and strategically placed black olives or pomegranate seeds for “spiders,” these tacos will be the talk of your Halloween gathering.
They’re easy to make, allowing you to spend less time in the kitchen and more time enjoying the festivities.
In addition to being a visual masterpiece, Creepy-Crawly Tacos are packed with flavors that everyone will love. The seasoned beef provides a savory base, while the fresh toppings add a burst of color and texture.
The “creepy” elements are cleverly crafted using ingredients that add to the overall flavor profile rather than taking away from it. Get ready to scare up some fun with this easy-to-follow recipe for a serving size of 4-6 people.
Ingredients:
- 1 lb ground beef
- 1 packet taco seasoning mix
- 12 taco shells (hard or soft)
- 1 cup shredded lettuce
- 1 cup cherry tomatoes, halved
- 1 cup shredded cheddar cheese
- 1/2 cup black olives, sliced
- 1/4 cup pomegranate seeds (optional for extra “crawlers”)
- 1/2 cup sour cream
- 1 avocado, sliced
- Hot sauce (optional)
Cooking Instructions:
- Prepare the Beef: In a large skillet over medium heat, add the ground beef. Cook until browned, breaking it into crumbles with a spatula. Drain excess fat.
- Season the Beef: Return the beef to the skillet and add the taco seasoning mix along with 2/3 cup of water. Stir to combine and let it simmer for about 5 minutes, or until the sauce thickens.
- Prepare the Toppings: While the beef is simmering, wash and dry the lettuce, then shred it finely. Halve the cherry tomatoes and slice the avocado.
- Warm the Taco Shells: Preheat your oven to 350°F (175°C). Place the taco shells on a baking sheet and heat them in the oven for about 5 minutes until warm and crispy.
- Assemble the Tacos: Fill each taco shell with a spoonful of the seasoned beef. Top with shredded lettuce, cherry tomatoes, shredded cheddar cheese, and avocado slices.
- Add the Creepy Elements: Carefully place sliced black olives or pomegranate seeds on top of each taco to resemble “spiders” or “bugs.” You can use a dab of sour cream to help them stick if needed.
- Serve: Drizzle with sour cream and hot sauce if desired, and serve immediately while the shells are crispy.
Extra Tips:
To make your Creepy-Crawly Tacos even spookier, consider using different colored taco shells available in stores, such as blue corn or spinach-flavored ones.
If you’re serving a younger crowd, you might want to control the spice level by offering mild taco seasoning and providing hot sauce on the side for those who like more heat.
For a vegetarian version, substitute the ground beef with cooked lentils or black beans, seasoned in the same way.
Keep the atmosphere fun and festive by serving these tacos with Halloween-themed napkins and plates!
Vampire Bat Wings
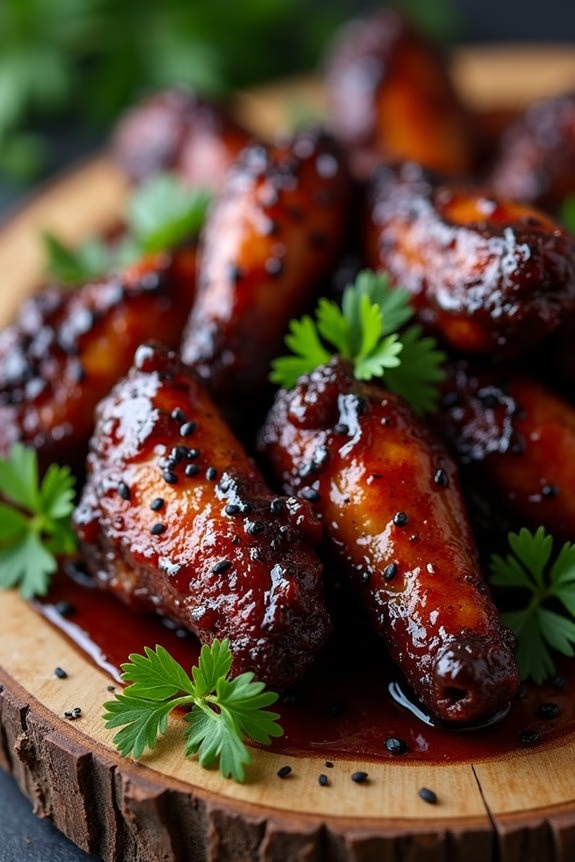
Embrace the spooky spirit of Halloween with a dish that’s as eerie as it’s delicious — Vampire Bat Wings! These sinister-looking chicken wings are perfect for a Halloween party or themed dinner. The secret to their dark, alluring appearance is a blend of flavorful ingredients that not only make the wings look frightfully fun but also taste irresistibly good.
The wings are marinated in a rich, tangy sauce that gives them a mouthwatering flavor profile, featuring hints of soy sauce, balsamic vinegar, and a touch of heat from cayenne pepper.
When serving Vampire Bat Wings, you can create a sinister atmosphere by lighting some candles and decorating the table with fake cobwebs and plastic spiders. This simple yet creative dish promises to be a hit with both kids and adults, offering the perfect balance of spice and sweetness.
Whether you’re hosting a Halloween bash or simply want to enjoy a themed meal with your family, these wings will surely become a go-to recipe for the spooky season.
Ingredients (Serves 4-6):
- 2 pounds of chicken wings
- 1/4 cup soy sauce
- 1/4 cup balsamic vinegar
- 2 tablespoons honey
- 2 tablespoons olive oil
- 1 tablespoon Worcestershire sauce
- 1 teaspoon garlic powder
- 1/2 teaspoon onion powder
- 1/2 teaspoon cayenne pepper
- 1/2 teaspoon black pepper
- 1/2 teaspoon salt
- Red food coloring (optional for extra effect)
- Black sesame seeds for garnish
- Fresh parsley for garnish
Cooking Instructions:
- Prepare the Marinade: In a large bowl, combine the soy sauce, balsamic vinegar, honey, olive oil, Worcestershire sauce, garlic powder, onion powder, cayenne pepper, black pepper, and salt. Mix thoroughly to create a well-blended marinade.
- Marinate the Wings: Place the chicken wings into the marinade, ensuring each wing is fully coated. Cover the bowl with plastic wrap and refrigerate for at least 2 hours, or preferably overnight, to allow the flavors to fully penetrate the meat.
- Preheat the Oven: About 30 minutes before you’re ready to cook, preheat your oven to 400°F (200°C). Line a baking sheet with aluminum foil and lightly grease it with cooking spray or a bit of oil.
- Bake the Wings: Arrange the marinated wings on the prepared baking sheet in a single layer. If desired, add a few drops of red food coloring to the wings to enhance their spooky appearance. Bake in the preheated oven for 35-40 minutes, or until the wings are crispy and cooked through, turning them halfway through the cooking time for even browning.
- Garnish and Serve: Remove the wings from the oven and transfer them to a serving platter. Sprinkle black sesame seeds over the top for a bat-like effect and garnish with fresh parsley for an added pop of color. Serve immediately while hot.
Extra Tips:
For an even more intense flavor, consider grilling the wings instead of baking them. This will add a smoky aroma and a slightly charred taste that pairs beautifully with the marinade.
If you want to make the wings extra spicy, you can increase the amount of cayenne pepper or add a dash of hot sauce to the marinade. Additionally, using fresh garlic instead of garlic powder can enhance the flavor profile even more.
Remember to keep an eye on the wings as they bake to avoid overcooking them, ensuring they remain juicy on the inside and crispy on the outside.
Stuffed Jack-O’-Lantern Peppers
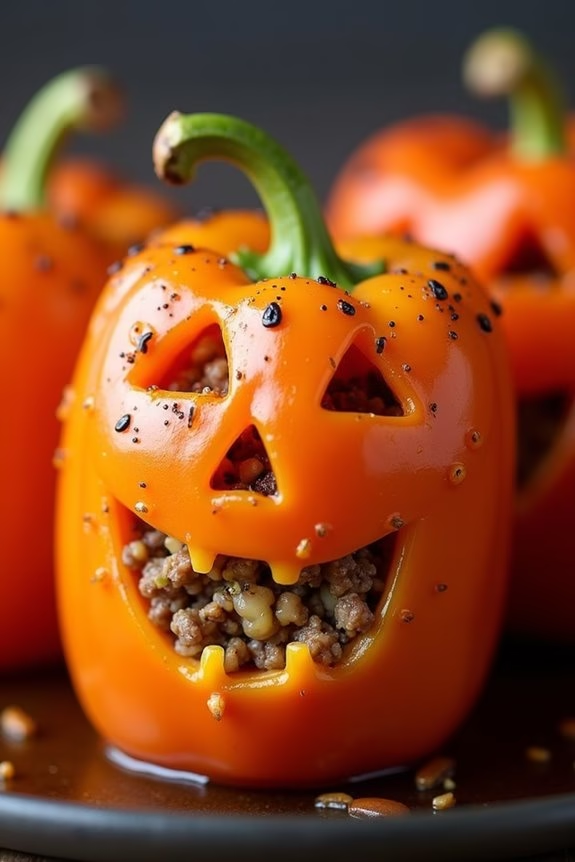
Halloween is a time for creativity and fun, and what better way to celebrate than with a dish that combines both? Stuffed Jack-O’-Lantern Peppers are a festive and delicious way to get into the spooky spirit. These adorable peppers are carved to resemble mini jack-o’-lanterns and are filled with a savory mixture of ground meat, vegetables, and spices. They make a perfect addition to any Halloween gathering, not only as a tasty treat but also as a delightful decoration for your table.
This recipe serves 4-6 people and is a great option for a Halloween dinner or party. The peppers are simple to prepare and can be customized with your favorite fillings. Whether you’re hosting a party or just looking to bring some Halloween cheer to your dinner table, these Stuffed Jack-O’-Lantern Peppers are sure to be a hit. Enjoy the combination of flavors and the festive presentation as you dig into these delightful and spooky treats.
Ingredients:
- 6 large orange bell peppers
- 1 pound ground beef or turkey
- 1 cup cooked rice
- 1 small onion, chopped
- 2 cloves garlic, minced
- 1 can (14.5 oz) diced tomatoes, drained
- 1 cup shredded cheddar cheese
- 1 teaspoon Italian seasoning
- Salt and pepper to taste
- Olive oil for drizzling
- Optional: Black olives for decoration
Cooking Instructions:
- Preheat the Oven: Preheat your oven to 375°F (190°C) to prepare it for baking the stuffed peppers.
- Prepare the Peppers: Cut the tops off the bell peppers and remove the seeds and membranes. Use a small knife to carefully carve jack-o’-lantern faces into one side of each pepper. Set the carved peppers aside.
- Cook the Filling: In a large skillet over medium heat, cook the ground beef or turkey until browned. Add the chopped onion and minced garlic, and cook until the onion is translucent. Stir in the drained diced tomatoes, cooked rice, Italian seasoning, salt, and pepper. Cook for another 5 minutes, allowing the flavors to meld together.
- Stuff the Peppers: Spoon the meat and rice mixture into each carved pepper, pressing down gently to guarantee they’re filled completely. Sprinkle shredded cheddar cheese on top of each filled pepper.
- Bake the Peppers: Place the stuffed peppers in a baking dish. Drizzle a little olive oil over the top of each pepper. Cover the dish with aluminum foil and bake in the preheated oven for 30 minutes. Remove the foil and bake for an additional 10-15 minutes, or until the peppers are tender and the cheese is melted and bubbly.
- Decorate and Serve: Optionally, use small pieces of black olives to give the jack-o’-lantern faces eyes or other features. Serve the peppers warm, and enjoy!
Extra Tips:
When carving the faces into the peppers, use a small, sharp knife for precision and to avoid tearing the pepper skin. Feel free to customize the filling by adding other vegetables like corn or black beans, or even using quinoa instead of rice for a different texture.
If you prefer more spice, add some chili powder or red pepper flakes to the filling. These stuffed peppers can also be prepared a day in advance and baked just before serving, making them a convenient option for busy Halloween festivities.
Bloody Finger Hot Dogs

Bloody Finger Hot Dogs are a delightfully creepy treat perfect for your Halloween festivities. These deliciously spooky snacks aren’t only fun to look at but also tantalizingly tasty.
Whether you’re hosting a Halloween party or simply want to surprise your family with a unique meal, Bloody Finger Hot Dogs will surely be a hit. Their convincing appearance, complete with “bloody” ketchup and realistic finger-like ridges, makes them a standout dish that adds a touch of eerie excitement to any Halloween spread.
The secret to making these hot dogs appear like bloody fingers lies in the detailed presentation. By carefully crafting the hot dogs to resemble fingers, complete with a “fingernail” and “knuckle” details, you can transform a simple meal into a show-stopping centerpiece.
Pair them with some ketchup for the bloody effect, and you’ve got yourself a Halloween dish that’s both appetizing and spine-chillingly fun. Below is a recipe designed to serve 4-6 people, ensuring that everyone gets a chance to enjoy these ghoulish delights.
Ingredients (Serves 4-6):
- 8-12 hot dogs
- 8-12 hot dog buns
- Ketchup
- Mustard (optional)
- 1 small onion (optional, for added flavor)
Cooking Instructions:
- Prepare the Hot Dogs: Start by boiling a pot of water and cook the hot dogs for about 4-5 minutes until they’re fully heated through. While the hot dogs are cooking, prepare the other ingredients.
- Craft the Fingers: Once the hot dogs are cooked, let them cool slightly. Use a paring knife to cut off a small section at one end of each hot dog to create the appearance of a fingernail. Then, make shallow cuts below the “fingernail” and in the middle of the hot dog to mimic the knuckle creases.
- Prepare the Buns: Warm the hot dog buns by either steaming them for a few minutes or toasting them lightly in an oven at 350°F (175°C) until soft and warm.
- Assemble the Bloody Fingers: Place each hot dog into a bun. Add ketchup around the base of the hot dog to give the appearance of blood oozing from a severed finger. If desired, you can also add a thin slice of onion underneath the hot dog for extra flavor and texture.
- Serve and Enjoy: Arrange the completed Bloody Finger Hot Dogs on a serving platter and present them to your guests. Serve with extra ketchup on the side for dipping.
Extra Tips:
To make the Bloody Finger Hot Dogs even more realistic, consider using a mix of regular and jumbo-sized hot dogs to create a variety of “finger” sizes.
You can also experiment with different types of sausages for added flavor. If you want to add more gore, try mixing a bit of food coloring into the ketchup for a deeper red hue.
Remember to supervise children when they’re helping with the preparation, especially when using knives to create the finger details. Enjoy your spooky culinary creation!
Monster Mac and Cheese
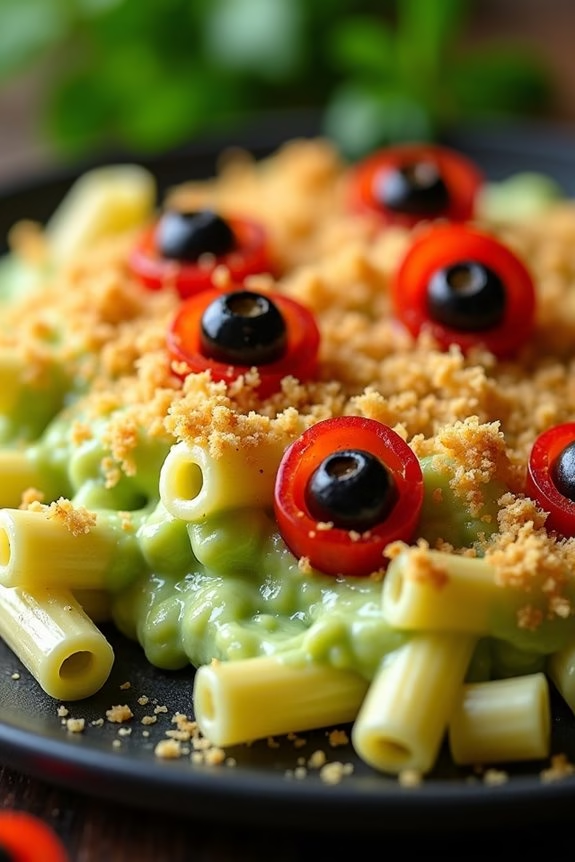
For a spooky twist on a classic favorite, try making Monster Mac and Cheese for your Halloween festivities. This dish combines creamy macaroni and cheese with a fun and ghoulish presentation that’s sure to delight both kids and adults.
Whether you’re hosting a Halloween party or just enjoying a themed dinner with your family, Monster Mac and Cheese is a perfect addition to your menu. The vibrant colors and creative garnishes will bring a dash of whimsy to your table, making it a memorable part of your celebration.
Monster Mac and Cheese not only looks the part but also delivers on flavor. The rich, cheesy sauce envelops each piece of pasta, while the crunchy toppings add texture and a delightful contrast.
By using natural food coloring and decorative edible elements, you can create a dish that’s both eye-catching and delicious. With this recipe, you’ll be able to whip up a batch that serves 4-6 people, making it ideal for small gatherings or family dinners. Immerse yourself in the recipe below to bring this monstrous delight to life.
Ingredients
- 16 oz elbow macaroni
- 4 cups shredded cheddar cheese
- 2 cups milk
- 1/4 cup unsalted butter
- 1/4 cup all-purpose flour
- 1/2 tsp garlic powder
- 1/2 tsp onion powder
- Salt and pepper to taste
- Green food coloring
- 1/2 cup bread crumbs
- Black olives (for eyes)
- Cherry tomatoes (for eyes)
- Fresh parsley (for garnish)
Cooking Instructions
- Cook the macaroni: Bring a large pot of salted water to a boil. Add the macaroni and cook until al dente, according to package instructions. Drain and set aside.
- Prepare the cheese sauce: In a large saucepan, melt the butter over medium heat. Add the flour and whisk continuously for about 1 minute until the mixture bubbles and turns a pale golden color.
- Add milk and thicken: Gradually whisk in the milk, ensuring there are no lumps. Continue to cook the mixture, stirring constantly, until it thickens and coats the back of a spoon.
- Incorporate cheese and spices: Reduce the heat to low and stir in the shredded cheddar cheese, one cup at a time, until the cheese has melted and the sauce is smooth. Add the garlic powder, onion powder, and season with salt and pepper.
- Color the sauce: Add a few drops of green food coloring to the cheese sauce, stirring until you reach your desired shade of green.
- Combine macaroni and sauce: Add the cooked macaroni to the cheese sauce, stirring gently to coat all the pasta evenly.
- Prepare the topping: In a small bowl, mix the bread crumbs with a tablespoon of melted butter. Sprinkle this mixture over the mac and cheese.
- Decorate with monster eyes: Slice the black olives and cherry tomatoes to create eyes. Arrange them on top of the mac and cheese to resemble monster eyes.
- Bake the dish: Preheat your oven to 350°F (175°C). Transfer the mac and cheese into a baking dish and bake for about 15-20 minutes, or until the top is golden and bubbling.
- Garnish and serve: Remove from the oven and let it cool slightly. Garnish with fresh parsley before serving.
Extra Tips
For an extra spooky touch, you can use different colored food dyes to create a variety of monster-themed mac and cheese bowls.
If you want to sneak in some vegetables, consider adding spinach or broccoli to the cheese sauce before blending, which will enhance the green color naturally.
Be mindful of the food coloring; start with a small amount and gradually add more to avoid an overly intense hue. Finally, be creative with the garnishes, using different shapes and sizes to give each bowl its own unique monster face.
Skeleton Ribs
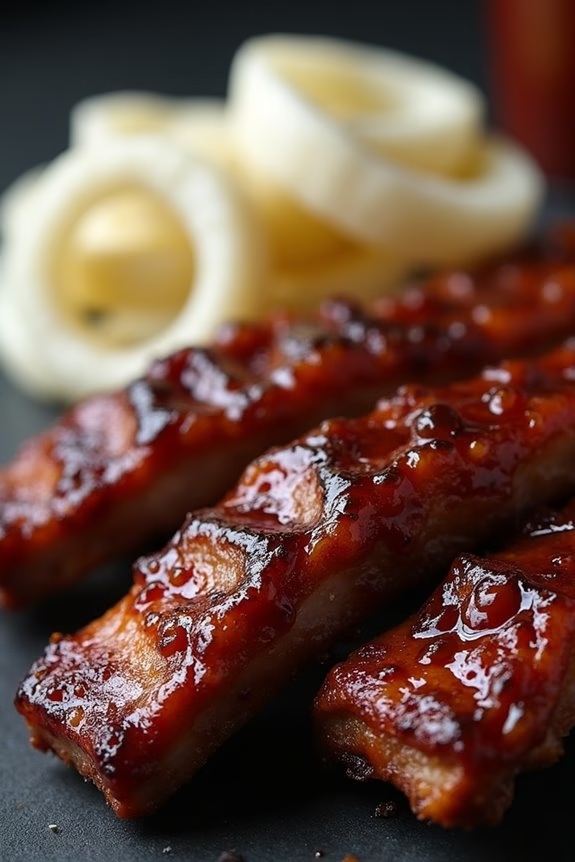
Transform your Halloween party into a bone-chilling feast with our Skeleton Ribs. This spooky dish doesn’t just look ghoulishly good, it’s also finger-licking delicious. The tender, smoky ribs are arranged to resemble a skeleton, making it the perfect centerpiece for your Halloween spread. Your guests will be thrilled to dig into this eerie yet scrumptious meal, which combines the flavors of a classic BBQ with a haunting presentation.
Perfect for serving 4-6 people, Skeleton Ribs are both fun and easy to prepare. The key to this dish is making sure the ribs are cooked to perfection—soft and juicy on the inside, with a slightly crispy exterior. The ribs are seasoned with a blend of spices that complement the smoky BBQ sauce, resulting in a mouth-watering flavor that’s sure to be a hit at your Halloween gathering. Read on for the full list of ingredients and step-by-step instructions to create this spooky delight.
Ingredients:
- 2 racks of baby back ribs
- 1 tablespoon olive oil
- 2 tablespoons brown sugar
- 1 tablespoon smoked paprika
- 1 teaspoon garlic powder
- 1 teaspoon onion powder
- 1 teaspoon ground cumin
- 1/2 teaspoon cayenne pepper
- Salt and pepper to taste
- 1 cup barbecue sauce
- 1 white onion (for decoration)
Cooking Instructions:
- Preheat the Oven: Begin by preheating your oven to 275°F (135°C). This low temperature will make certain the ribs cook slowly and become tender.
- Prepare the Ribs: Remove the membrane from the back of the ribs for better flavor penetration. Pat the ribs dry with paper towels and rub them with olive oil.
- Season the Ribs: In a small bowl, mix together the brown sugar, smoked paprika, garlic powder, onion powder, ground cumin, cayenne pepper, salt, and pepper. Generously coat both sides of the ribs with this spice rub, pressing it into the meat.
- Wrap and Bake: Wrap the seasoned ribs tightly in aluminum foil and place them on a baking sheet. Bake in the preheated oven for about 2.5 to 3 hours, or until the ribs are tender and pull apart easily.
- Glaze the Ribs: Remove the ribs from the oven and carefully unwrap them. Baste both sides with the barbecue sauce. Increase the oven temperature to 400°F (200°C).
- Finish Cooking: Place the ribs back in the oven, uncovered, and bake for an additional 20-30 minutes, or until the sauce is sticky and caramelized.
- Assemble the Skeleton: Slice the white onion into rings and use them to create a skull and ribcage design on a large platter. Arrange the ribs around the onion ‘skull’ to resemble a skeleton.
Extra Tips:
For added flavor, consider marinating the ribs overnight with the spice rub in the refrigerator. This allows the flavors to fully infuse into the meat.
If you prefer a smokier taste, you can finish the ribs on a grill instead of the oven for the final glaze step. Just be sure to watch them closely to prevent the sauce from burning.
Finally, let the ribs rest for about 10 minutes before serving to make certain the juices redistribute, resulting in more succulent ribs. Enjoy your spooky Skeleton Ribs!
Cauldron Chili
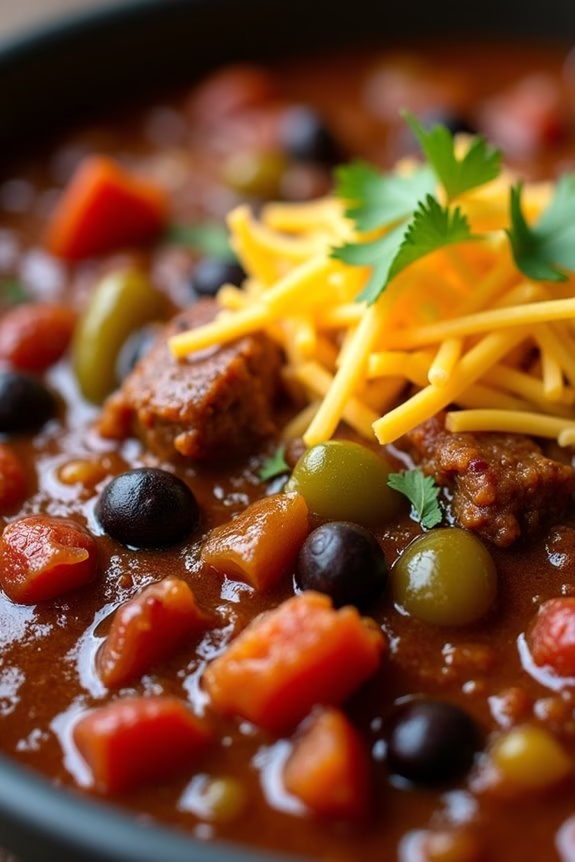
Halloween is the perfect time to get creative in the kitchen, and what better way to do that than with a spooky and delicious Cauldron Chili? This hearty dish is perfect for warming you up during those chilly October evenings, and its rich flavors will be a hit at any Halloween gathering.
Served in a cauldron-inspired pot or a regular dish, this chili is brimming with tender beef, beans, and a tantalizing blend of spices that will have everyone coming back for seconds.
Cauldron Chili isn’t only tasty but also easy to make. It’s a one-pot wonder that requires minimal cleanup, so you can spend more time enjoying the festivities. Whether you’re hosting a party or just want a comforting meal, this recipe will surely satisfy.
The following ingredients and steps will guide you to create a delicious Cauldron Chili that serves 4-6 people.
Ingredients:
- 2 tablespoons olive oil
- 1 large onion, diced
- 3 cloves garlic, minced
- 1 pound ground beef
- 1 red bell pepper, diced
- 1 green bell pepper, diced
- 1 (15-ounce) can kidney beans, drained and rinsed
- 1 (15-ounce) can black beans, drained and rinsed
- 1 (28-ounce) can diced tomatoes
- 3 tablespoons chili powder
- 1 teaspoon cumin
- 1 teaspoon paprika
- 1/2 teaspoon cayenne pepper (optional, for heat)
- Salt and black pepper, to taste
- 2 cups beef broth
- 2 tablespoons tomato paste
- 1 tablespoon Worcestershire sauce
- 1 teaspoon sugar
- Optional toppings: shredded cheese, sour cream, chopped cilantro, sliced jalapeños
Cooking Instructions:
- Prepare the Ingredients: Begin by dicing the onions and bell peppers and mincing the garlic. This will guarantee everything is ready to go once you start cooking.
- Cook the Beef: In a large pot or Dutch oven, heat the olive oil over medium heat. Add the diced onion and cook until it’s soft and translucent, about 5 minutes. Stir in the minced garlic and cook for another minute until fragrant.
- Brown the Meat: Add the ground beef to the pot, breaking it apart with a spoon. Cook until the beef is browned and no longer pink, about 6-8 minutes. Drain any excess fat if necessary.
- Add Vegetables: Stir in the diced red and green bell peppers and cook for another 3-4 minutes until they begin to soften.
- Combine Ingredients: Add the drained kidney beans, black beans, and diced tomatoes to the pot. Stir to combine all ingredients.
- Spice It Up: Sprinkle the chili powder, cumin, paprika, cayenne pepper, salt, and black pepper into the pot. Stir thoroughly to guarantee the spices are evenly distributed.
- Simmer: Pour in the beef broth, add the tomato paste, Worcestershire sauce, and sugar. Stir well, then bring the mixture to a simmer. Reduce the heat to low and let it simmer, uncovered, for 30-40 minutes, stirring occasionally.
- Adjust Seasoning: Taste the chili and adjust the seasoning as needed, adding more salt, pepper, or spices according to your preference.
- Serve: Ladle the Cauldron Chili into bowls and top with your choice of shredded cheese, sour cream, chopped cilantro, or sliced jalapeños.
Extra Tips:
For an even richer flavor, consider preparing the chili a day in advance. Allowing it to sit overnight in the refrigerator helps the flavors to meld together beautifully.
If you prefer a spicier chili, feel free to increase the amount of cayenne pepper or add some diced jalapeños directly into the pot. You can also substitute ground turkey or chicken for a leaner option.
Finally, if you have a slow cooker, you can transfer the mixture after step 6 and cook on low for 6-8 hours or on high for 3-4 hours for a hands-off approach. Happy Halloween cooking!
Eyeball Spaghetti
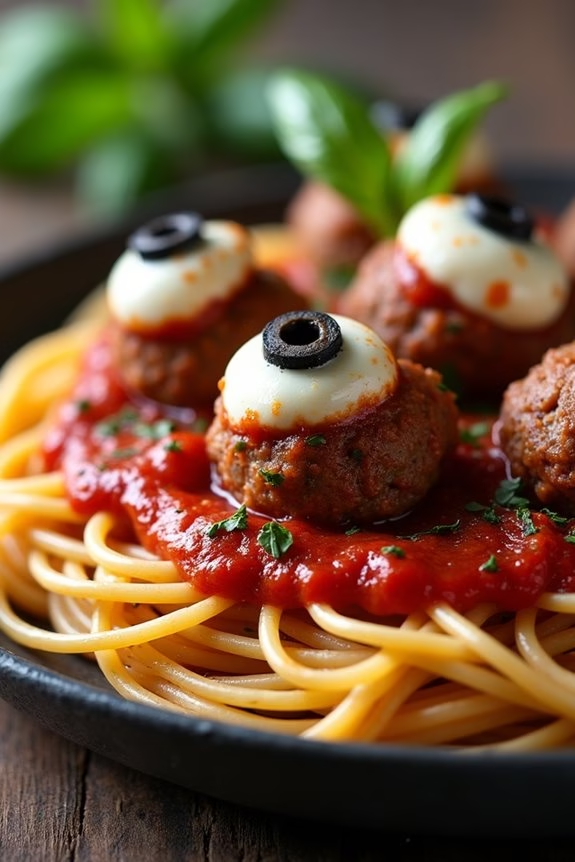
Halloween is the perfect time to get creative with your meals, and Eyeball Spaghetti is a spooky dish that’s both fun to make and delicious to eat. This dish combines classic spaghetti with a creepy twist—meatballs that look like eyeballs! The meatballs are adorned with mozzarella and olives to create the eerie eyeball effect. Not only is this dish visually exciting, but it’s also packed with flavor, thanks to a rich tomato sauce and perfectly seasoned meatballs.
Serving Eyeball Spaghetti at your Halloween gathering will surely be a hit with both kids and adults alike. It’s a great opportunity to engage your guests with a playful, thematic meal that doesn’t compromise on taste. Plus, it’s a simple way to add a festive vibe to your dinner table. Let’s plunge into how you can bring this spooky dish to life.
Ingredients for 4-6 servings:
- 1 pound spaghetti
- 1 pound ground beef or turkey
- 1/2 cup breadcrumbs
- 1/4 cup grated Parmesan cheese
- 1 large egg
- 2 cloves garlic, minced
- Salt and pepper to taste
- 24 small mozzarella balls (bocconcini)
- 24 black olives, sliced
- 1 jar (24 oz) marinara sauce
- 2 tablespoons olive oil
- Fresh basil leaves for garnish (optional)
Cooking Instructions:
- Prepare the Meatballs:
- In a large bowl, combine the ground beef, breadcrumbs, Parmesan cheese, egg, minced garlic, salt, and pepper. Mix the ingredients thoroughly until well combined.
- Shape the mixture into 24 small meatballs, roughly the size of a golf ball.
- Cook the Meatballs:
- Heat the olive oil in a large skillet over medium heat. Add the meatballs and cook them until browned on all sides, approximately 6-8 minutes. Confirm they’re cooked through by cutting one open to check that no pink remains.
- Add the Mozzarella and Olives:
- Once the meatballs are cooked, remove them from the skillet and set them on a plate. Allow them to cool slightly.
- Press a mozzarella ball into the top of each meatball, then place an olive slice over the mozzarella to create an eyeball appearance.
- Prepare the Spaghetti and Sauce:
- In a large pot of boiling salted water, cook the spaghetti according to package instructions until al dente. Drain the pasta and set it aside.
- In the same skillet used for the meatballs, pour in the marinara sauce and bring it to a gentle simmer. Add the cooked meatballs back into the sauce and allow them to heat through, about 5 minutes.
- Assemble the Dish:
- Serve the spaghetti on a large platter or individual plates. Spoon the meatballs and sauce over the spaghetti. If desired, garnish with fresh basil leaves for added color and aroma.
Extra Tips:
When making Eyeball Spaghetti, try using fresh ingredients for the best flavor. If you prefer a spicier dish, add red pepper flakes to the marinara sauce.
You can also prepare the meatballs a day in advance and refrigerate them, which will help the flavors meld together even more. For a vegetarian version, substitute the meatballs with plant-based options available in stores.
Enjoy your spooky creation and have a happy Halloween!
Ghastly Garlic Bread

Ghastly Garlic Bread is the perfect spooky addition to your Halloween dinner table. This flavorful, aromatic bread is a treat for garlic lovers, and its eerie presentation is sure to delight guests of all ages. The secret to this dish lies in the rich blend of garlic butter and herbs, which infuse each slice with a hauntingly delicious taste that will leave everyone craving more.
An ideal side dish for any Halloween gathering, Ghastly Garlic Bread pairs wonderfully with soups, pasta, or grilled meats. With its crispy crust and soft, buttery center, this bread isn’t only easy to make but also a crowd-pleaser. Follow the recipe below to create this festive dish for 4-6 people, and get ready to thrill your guests with its ghostly allure.
Ingredients:
- 1 large French baguette
- 1 cup unsalted butter, softened
- 6 cloves garlic, minced
- 1 tablespoon fresh parsley, chopped
- 1 tablespoon fresh oregano, chopped
- 1/2 teaspoon salt
- 1/4 teaspoon black pepper
- 1/2 cup grated Parmesan cheese
- Optional: red food coloring for a spooky effect
Cooking Instructions:
- Preheat the Oven: Start by preheating your oven to 375°F (190°C). This will guarantee that the garlic bread bakes evenly and achieves a perfect golden-brown crust.
- Prepare the Garlic Butter: In a medium-sized bowl, combine the softened butter, minced garlic, chopped parsley, chopped oregano, salt, and black pepper. Mix until all ingredients are well incorporated. If desired, add a few drops of red food coloring to give the butter a spooky tint, and mix thoroughly.
- Slice the Baguette: Carefully slice the baguette into 1-inch thick slices, making sure not to cut all the way through. This allows the loaf to stay intact while filling it with the garlic butter mixture.
- Spread the Garlic Butter: Using a butter knife, generously spread the prepared garlic butter mixture between each slice of the baguette. Be sure to coat each side of the slices for maximum flavor.
- Add the Parmesan Cheese: Sprinkle the grated Parmesan cheese over the top of the baguette, allowing it to fall between the slices as well. This will add a delicious cheesy crust to the bread.
- Wrap and Bake: Wrap the prepared baguette in aluminum foil and place it on a baking sheet. Bake in the preheated oven for 15-20 minutes, or until the butter is melted and the bread is heated through.
- Broil for a Crispy Finish: Unwrap the foil and set the oven to broil. Place the bread back in the oven for an additional 2-3 minutes, or until the top is golden and crispy. Keep a close watch to prevent burning.
- Serve: Remove the bread from the oven, let it cool slightly, and then serve warm. Enjoy the Ghastly Garlic Bread with your favorite Halloween dishes.
Extra Tips:
For an even spookier presentation, consider placing the garlic bread on a large platter surrounded by decorative Halloween props like plastic spiders or faux cobwebs.
To enhance the flavor, you can experiment by adding different herbs or spices to the garlic butter. If you’re looking to save time, you can prepare the garlic butter mixture a day ahead and refrigerate it until you’re ready to use it. Just be sure to let it soften before spreading it onto the bread.
Zombie Stuffed Mushrooms

Halloween is the perfect time to get creative in the kitchen, and Zombie Stuffed Mushrooms are a fun and delicious option for your spooky festivities. These creepy but tasty treats are bound to be a hit at your Halloween party, providing a ghoulishly good appetizer that’s both easy to make and full of flavor.
With a savory filling and a touch of eerie presentation, your guests will be both delighted and slightly spooked by these haunting hors d’oeuvres. Zombie Stuffed Mushrooms aren’t only visually appealing but also packed with flavor. The earthy taste of mushrooms combines beautifully with a savory filling of cream cheese, herbs, and spices, creating a delightful bite-sized snack.
The dish is also versatile, allowing you to customize the filling with your favorite ingredients. The presentation of these mushrooms can be made to look sinister with a few simple tweaks – perfect for adding a little scare to your spread.
Ingredients (Serves 4-6 people):
- 20 large button or cremini mushrooms
- 8 oz cream cheese, softened
- 1/2 cup grated Parmesan cheese
- 1/4 cup breadcrumbs
- 2 cloves garlic, minced
- 2 tablespoons fresh parsley, chopped
- 1 tablespoon olive oil
- 1 teaspoon dried oregano
- 1/2 teaspoon salt
- 1/4 teaspoon black pepper
- Red bell pepper (for decoration)
- Black olives (for decoration)
Cooking Instructions:
- Preheat the Oven: Start by preheating your oven to 375°F (190°C) to make sure it’s ready for baking the stuffed mushrooms.
- Prepare the Mushrooms: Carefully clean the mushrooms with a damp cloth and remove the stems. Set the caps aside for stuffing.
- Make the Filling: In a mixing bowl, combine the softened cream cheese, Parmesan cheese, breadcrumbs, minced garlic, chopped parsley, olive oil, dried oregano, salt, and black pepper. Mix until well combined and smooth.
- Stuff the Mushrooms: Spoon the cream cheese mixture into each mushroom cap, pressing gently to make certain the filling is secure and slightly mounded.
- Decorate with ‘Zombie Eyes’: Slice small rounds from the red bell pepper and black olives. Place a red pepper slice on top of each stuffed mushroom, then add a slice of black olive in the center to create a spooky ‘eye’ effect.
- Bake the Mushrooms: Arrange the stuffed mushrooms on a baking sheet lined with parchment paper. Bake in the preheated oven for 20-25 minutes, or until the mushrooms are tender and the filling is golden on top.
- Serve and Enjoy: Allow the mushrooms to cool slightly before serving. Arrange them on a platter for a creepy, yet delicious, Halloween appetizer.
Extra Tips:
For an extra touch of Halloween flair, consider adding a few drops of green food coloring to the cream cheese filling for a more ghastly appearance.
You can also experiment with different cheese varieties, such as goat cheese or blue cheese, to vary the flavor profile. If you want to prepare these in advance, you can stuff the mushrooms and store them in the refrigerator for a few hours before baking.
This will save you time on the day of your party, making it possible to focus on other ghoulish treats.
Haunted Graveyard Chicken Pot Pie
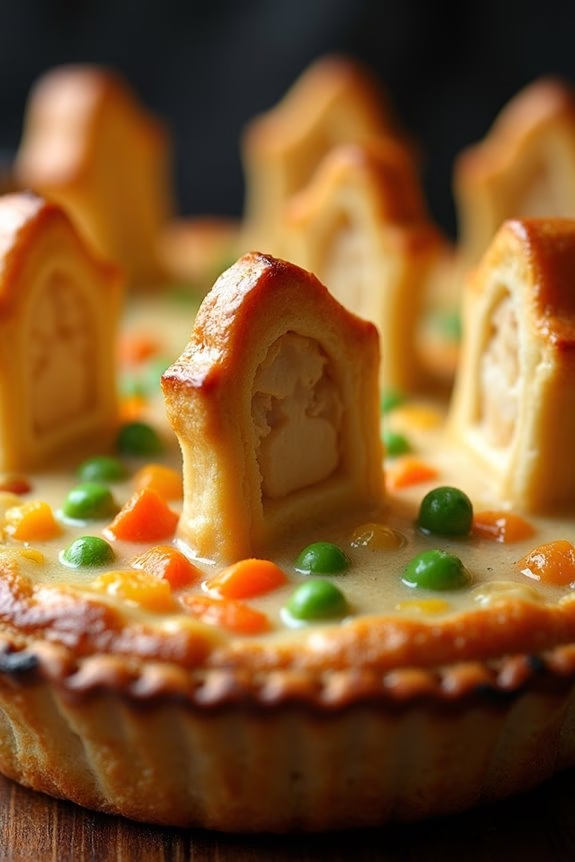
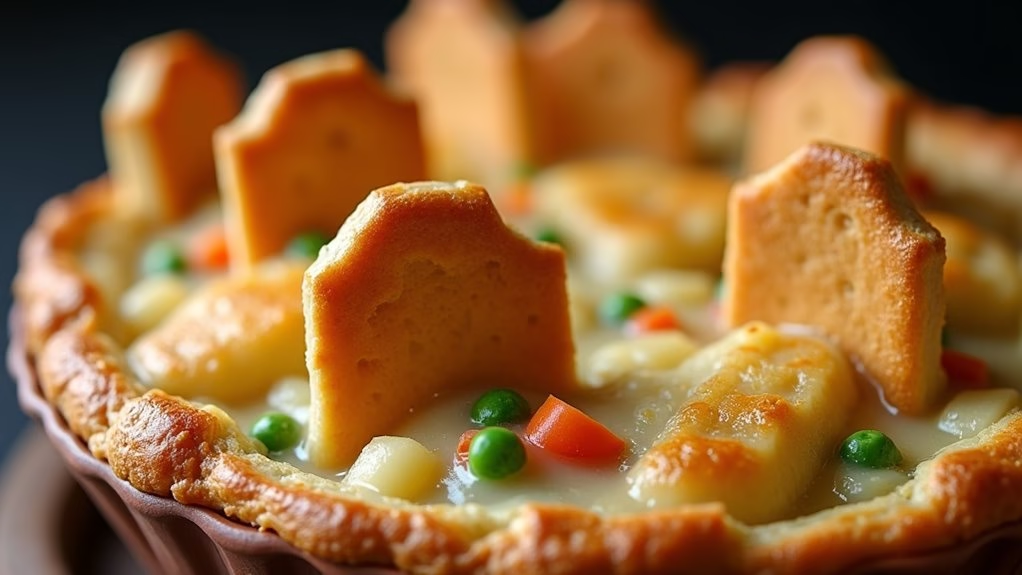
The Haunted Graveyard Chicken Pot Pie is a spooky twist on a classic comfort dish, perfect for adding a bit of fright to your Halloween festivities. This eerie pie combines tender chicken, savory vegetables, and creamy sauce encased in a flaky crust, all decorated to resemble a haunted graveyard. The tombstone pastry cutouts and hauntingly delicious flavors will delight both kids and adults, making it a centerpiece for any Halloween table.
This dish not only offers a visual treat but also a hearty meal that can be enjoyed by a group of 4-6 people. The haunted graveyard theme is easy to achieve with a few creative touches, allowing you to bring some Halloween spirit to your dinner table. Follow this recipe to create a delicious and suitably spooky dish that’s sure to impress your guests.
Ingredients:
- 2 cups cooked chicken, shredded
- 1 cup frozen peas
- 1 cup diced carrots
- 1 cup diced potatoes
- 1 cup diced onions
- 3 cups chicken broth
- 1/2 cup heavy cream
- 1/4 cup all-purpose flour
- 2 tablespoons butter
- 1 teaspoon salt
- 1/2 teaspoon black pepper
- 1 teaspoon dried thyme
- 2 sheets of puff pastry
- 1 egg (for egg wash)
Cooking Instructions:
- Prepare the Filling: In a large saucepan, melt the butter over medium heat. Add the onions and cook until they’re translucent. Stir in the flour to create a roux, cooking for another minute or two until it turns a light golden color.
- Make the Sauce: Gradually whisk in the chicken broth, ensuring there are no lumps. Bring the mixture to a simmer and cook until it thickens slightly. Add the heavy cream, thyme, salt, and black pepper, stirring well to combine.
- Combine Ingredients: Add the shredded chicken, peas, carrots, and potatoes to the saucepan. Stir everything together and let it simmer for about 10 minutes, allowing the flavors to meld and the vegetables to become tender.
- Preheat Oven: While the filling is cooking, preheat your oven to 400°F (200°C).
- Prepare the Pastry: Roll out the puff pastry sheets on a floured surface. Cut one sheet into tombstone shapes using a knife or cookie cutter, and set aside. Place the second sheet into a greased pie dish, trimming the edges as needed.
- Assemble the Pie: Pour the chicken mixture into the pastry-lined pie dish. Lay the tombstone-shaped pastry pieces on top, overlapping slightly to create a graveyard effect. Brush the pastry with a beaten egg to create a golden finish.
- Bake the Pie: Place the pie in the preheated oven and bake for about 25-30 minutes, or until the pastry is golden brown and crispy.
- Serve: Remove from the oven and let it cool slightly before serving. Enjoy the Haunted Graveyard Chicken Pot Pie with your guests.
Extra Tips:
For an added spooky effect, use food-safe markers or edible ink pens to write names or spooky messages on the tombstone cutouts before baking.
If you prefer a more dramatic presentation, consider adding a few drops of green or black food coloring to the dough for a ghoulish appearance.
Adjust the seasoning to your taste, and feel free to add other vegetables such as corn or mushrooms for extra flavor and texture.

