
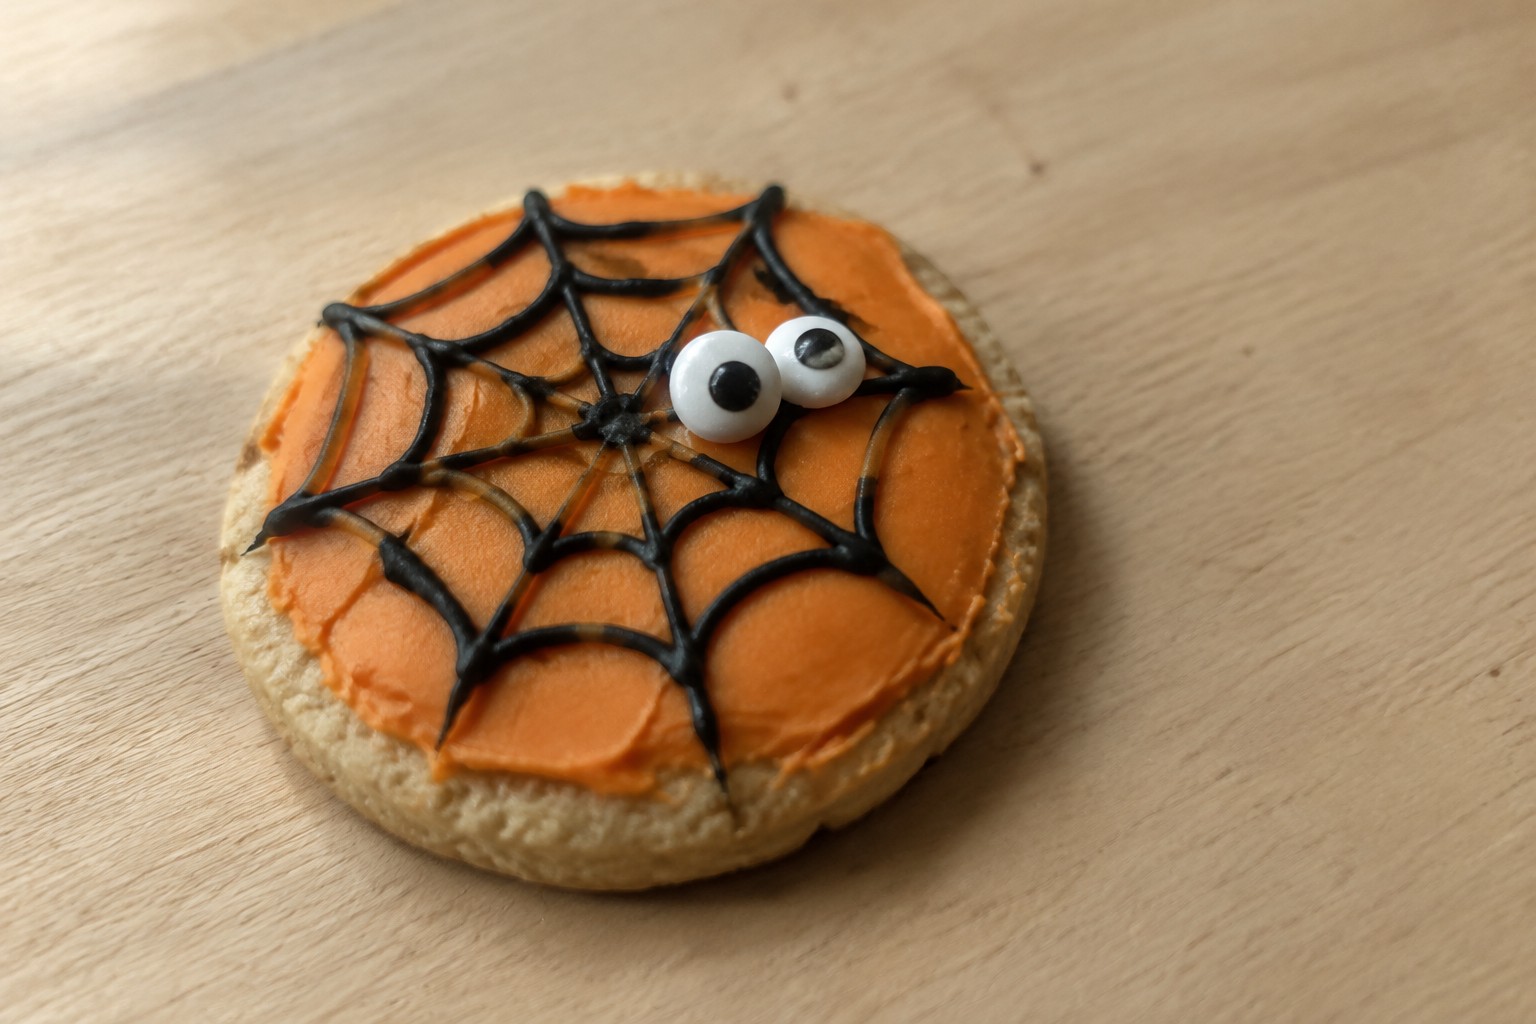
Halloween cookies are a simple way to add something festive to your baking plans. These ideas focus on adding eyes for a quick fun detail without extra steps. You will find 15 recipes that use common ingredients and basic tools. Most take under an hour to put together once the dough is ready. They work well for school events or small gatherings at home.
Helpful Tips Before You Start
These tips will help the eyes on your Halloween cookies stay in place and look neat.
Use a dab of icing for candy eyes
Press candy eyes onto cookies with a small amount of royal icing or melted chocolate. This keeps them from sliding off once the cookies are moved or stored.
Let cookies cool fully first
Warm cookies can cause candy eyes or icing to melt and lose shape. Wait until they reach room temperature before adding any eyes.
Pipe simple eyes with icing
For a homemade look, pipe two small white circles and add a black dot in the center while the white is still wet. Work quickly so the layers bond.
Match eye size to cookie shape
Small eyes work best on bite size cookies while larger ones suit bigger rounds or shapes. Test a few on one cookie before finishing the whole batch.
Fudgy Brownie Monster Eye Cookies
These fudgy brownie monster eye cookies deliver a rich chocolate taste with a chewy center that stays moist after baking. They suit Halloween gatherings or quick after-school treats when you want something simple yet themed.
The cookies bake up thick like brownies but hold their shape for easy decorating. Candy eyes add the fun monster detail without extra steps.

Serves 4 people.
Ingredients
- 4 tablespoons unsalted butter, melted
- 1/2 cup granulated sugar
- 1 large egg
- 1/3 cup unsweetened cocoa powder
- 1/2 cup all-purpose flour
- 1/4 teaspoon salt
- 1/2 cup semisweet chocolate chips
- 8 candy eyes
Instructions
- Preheat the oven to 350 degrees and line a baking sheet with parchment paper.
- Stir the melted butter and sugar together in a bowl until smooth.
- Mix in the egg until fully combined.
- Add the cocoa powder, flour, and salt. Stir until a thick batter forms.
- Fold in the chocolate chips.
- Scoop the batter into four mounds on the baking sheet and flatten each slightly.
- Bake for 10 to 12 minutes until the edges look set.
- Remove from the oven and immediately press two candy eyes onto each warm cookie.
Extra Tips
Press the candy eyes down gently right after baking so they stick without frosting. Store cooled cookies in an airtight container at room temperature to keep the centers fudgy for up to three days. If the batter feels too thick to scoop, let it rest for five minutes before portioning. Course: Dessert Cuisine: American Equipment: Mixing Bowl, Baking Sheet, Oven
Spiced Pumpkin Ghost Eye Cookies
These spiced pumpkin ghost eye cookies bring a cozy fall flavor to Halloween treats. The soft, cake-like texture comes from real pumpkin and warm spices, while the ghost shapes with simple eyes make them fun for parties or after-school snacks.
They work well for October baking when you want something seasonal but easy to shape. Kids can help press on the eyes once the cookies cool.

Serves 4 people.
Ingredients
- ½ cup canned pumpkin puree
- 1 ¼ cups all-purpose flour
- ½ cup granulated sugar
- ¼ cup unsalted butter, softened
- 1 large egg
- 1 teaspoon ground cinnamon
- ½ teaspoon ground ginger
- ¼ teaspoon ground nutmeg
- ½ teaspoon baking soda
- ¼ teaspoon salt
- 24 candy eyes
Instructions
- Heat the oven to 350°F and line a baking sheet with parchment paper.
- In a mixing bowl, beat the softened butter and sugar until light and fluffy.
- Add the pumpkin puree and egg, then mix until smooth.
- Stir in the cinnamon, ginger, nutmeg, baking soda, and salt.
- Gradually add the flour and mix until a soft dough forms.
- Roll the dough out on a lightly floured surface to about ¼-inch thickness.
- Cut out ghost shapes with a cookie cutter and place them on the prepared baking sheet.
- Bake for 10 to 12 minutes until the edges are lightly golden.
- Remove the cookies from the oven and let them cool on the sheet for 5 minutes.
- Press two candy eyes onto each ghost while the cookies are still warm.
Extra Tips
Let the cookies cool completely before stacking so the candy eyes stay in place. If the dough feels too sticky, chill it for 15 minutes before rolling. These cookies keep in an airtight container for up to three days at room temperature. Course: Dessert Cuisine: American Equipment: Mixing bowl, baking sheet, cookie cutter, parchment paper
Chewy Gingerbread Bat Eye Cookies
These cookies bring a fun Halloween twist with their bat shapes and candy eyes. The chewy centers and spiced gingerbread flavor make them a hit at fall gatherings or as a simple treat for kids. They hold up well for decorating and taste best when served the same day.
They work nicely for parties because the bold spices pair with the sweet candy accents. The texture stays soft inside with crisp edges after baking.

Serves 4 people.
Ingredients
- 1 1/2 cups all-purpose flour
- 1/2 teaspoon baking soda
- 2 teaspoons ground ginger
- 1/2 teaspoon ground cinnamon
- 1/4 teaspoon ground cloves
- 1/4 cup unsalted butter, softened
- 1/4 cup brown sugar
- 1/4 cup molasses
- 1 large egg yolk
- 1/2 teaspoon vanilla extract
- 24 candy eyes
Instructions
- Preheat the oven to 350 degrees and line a baking sheet with parchment paper.
- Whisk the flour, baking soda, ginger, cinnamon, and cloves in a mixing bowl until evenly combined.
- In a second bowl, beat the butter and brown sugar until smooth, then mix in the molasses, egg yolk, and vanilla extract.
- Stir the dry mixture into the wet mixture until a dough forms.
- Roll the dough to 1/4 inch thick on a lightly floured surface and cut out bat shapes with a cookie cutter.
- Place the shapes on the baking sheet and bake for 8 to 10 minutes until the edges firm up.
- Press two candy eyes onto each warm cookie right after baking so they stick as the cookies cool.
Extra Tips
Chill the dough for 15 minutes if it feels too soft to cut cleanly. Store leftovers in an airtight container at room temperature for up to two days to keep the chew. Use a smaller bat cutter if you want more cookies from the same batch. Course: Dessert Cuisine: American Equipment: Mixing Bowl, Baking Sheet, Cookie Cutter
Vanilla Bean Skeleton Eye Cookies
These cookies stand out on a Halloween dessert table with their simple vanilla flavor and eye decorations that give off a skeleton vibe. The vanilla bean gives a clean, aromatic taste that pairs well with the sweet icing details. They suit after-school treats or a small gathering where you want something fun but not overly complicated.
The finished cookies have a soft center and lightly crisp edges. The white icing eyes with black accents create the skeleton look without needing fancy tools.

Serves 4 people.
Ingredients
- 1 1/2 cups all-purpose flour
- 1/2 cup unsalted butter, softened
- 1/2 cup granulated sugar
- Seeds from 1 vanilla bean
- 1 large egg
- 1 teaspoon baking powder
- 1/4 teaspoon salt
- 1 cup powdered sugar
- 2 tablespoons milk
- Black gel food coloring
Instructions
- Preheat the oven to 350 degrees and line a baking sheet with parchment paper.
- In a mixing bowl, beat the softened butter and granulated sugar until light.
- Add the egg and vanilla bean seeds, then mix until combined.
- In a separate bowl, whisk together the flour, baking powder, and salt.
- Gradually add the dry ingredients to the wet mixture and stir until a dough forms.
- Roll the dough into small balls, place them on the baking sheet, and flatten slightly.
- Bake for 10 to 12 minutes until the edges turn lightly golden.
- Let the cookies cool completely on a wire rack.
- In a small bowl, stir the powdered sugar and milk until smooth to make the icing.
- Spread a small amount of white icing on each cookie to form an eye shape.
- Add a drop of black gel food coloring to the remaining icing and pipe pupils and thin lines around the eyes to create the skeleton effect.
Extra Tips
Pipe the black icing lines while the white base is still slightly tacky so they stick without bleeding. Store cooled cookies in an airtight container at room temperature for up to three days to keep the icing firm. Course: Dessert Cuisine: American Equipment: Mixing Bowl, Baking Sheet, Wire Rack
Molasses Mummy Eye Cookies
These cookies combine the rich taste of molasses with warm spices for a chewy bite that suits cooler weather. The simple icing wraps give them a mummy look that fits right into Halloween spreads or fall bake sales.
They come together with basic pantry items and add a light touch of fun to any cookie tray. Kids and adults both enjoy spotting the candy eyes peeking through the icing strips.

Serves 4 people.
Ingredients
- 1 1/2 cups all-purpose flour
- 1/4 cup unsalted butter, softened
- 1/4 cup brown sugar
- 1/4 cup molasses
- 1 large egg
- 1 teaspoon baking soda
- 1 teaspoon ground cinnamon
- 1/2 teaspoon ground ginger
- 1/4 teaspoon salt
- 1 cup powdered sugar
- 2 tablespoons milk
- 8 candy eyes
Instructions
- Heat the oven to 350 degrees and line a baking sheet with parchment paper.
- Stir together the flour, baking soda, cinnamon, ginger, and salt in a medium bowl.
- In a separate bowl, beat the butter and brown sugar until smooth, then mix in the molasses and egg.
- Add the dry ingredients to the wet mixture and stir until a dough forms.
- Scoop the dough into eight equal portions and shape each into an oval on the baking sheet.
- Bake for 10 to 12 minutes until the edges are set, then let the cookies cool completely on a wire rack.
- Whisk the powdered sugar and milk in a small bowl until the icing reaches a pipeable consistency.
- Transfer the icing to a zip-top bag, snip a small corner, and pipe thin lines across each cookie to resemble bandages.
- Press two candy eyes onto each cookie while the icing is still soft.
Extra Tips
Pipe the icing lines in uneven layers so the mummy wrap looks more natural. Store cooled cookies in an airtight container at room temperature for up to three days to keep the texture chewy. If the icing thickens while you work, add a drop of milk to loosen it. Course: Dessert Cuisine: American Equipment: Mixing bowls, baking sheet, wire rack, zip-top bag
Dark Chocolate Vampire Eye Cookies
These dark chocolate cookies bring a spooky yet simple touch to any Halloween spread. The rich cocoa base pairs with chewy centers and a slight crunch from the edges, while the eye decorations make them stand out on a dessert table. They work well for parties or as a quick bake when you want something themed without much fuss.
The flavor stays balanced with deep chocolate notes and a hint of sweetness from the finishing touches. Kids and adults both enjoy assembling the eyes, turning the process into a fun activity.

Serves 4 people.
Ingredients
- 1 cup all-purpose flour
- ½ cup unsweetened cocoa powder
- ½ teaspoon baking soda
- ¼ teaspoon salt
- ½ cup unsalted butter, softened
- ¾ cup granulated sugar
- 1 large egg
- 1 teaspoon vanilla extract
- ½ cup dark chocolate chips
- 16 candy eyeballs
- 2 tablespoons red icing
Instructions
- Preheat the oven to 350°F and line a baking sheet with parchment paper.
- Whisk together the flour, cocoa powder, baking soda, and salt in a medium bowl.
- In a separate bowl, beat the softened butter and sugar until light and fluffy.
- Add the egg and vanilla extract to the butter mixture and mix until combined.
- Gradually stir the dry ingredients into the wet ingredients until a dough forms.
- Fold in the dark chocolate chips.
- Scoop rounded tablespoons of dough onto the prepared baking sheet, spacing them a couple inches apart.
- Bake for 10 to 12 minutes until the edges are set.
- Remove the cookies from the oven and immediately press two candy eyeballs into the center of each cookie.
- Let the cookies cool on the sheet for 5 minutes, then drizzle or pipe small amounts of red icing around the eyes to create a vampire effect.
Extra Tips
Press the candy eyeballs in while the cookies are still warm so they stick without extra icing. If the red icing feels too thick, warm it slightly in the microwave for a few seconds to make piping easier. Store cooled cookies in an airtight container at room temperature for up to three days. Course: Dessert Cuisine: American Equipment: Mixing Bowl, Baking Sheet, Oven
Lemon Poppy Seed Owl Eye Cookies
These lemon poppy seed cookies bring a bright citrus note and gentle crunch to any Halloween spread. The owl eye design uses simple chocolate chips to create a fun face that fits right into a themed cookie tray. They work well for an afternoon baking project with kids or as a light dessert after a fall meal.
The dough bakes into tender rounds with visible poppy seeds and a fresh lemon scent. Two chocolate chips pressed into each cookie form the eyes, giving the finished treats their owl look without extra decorating steps.

Serves 4 people.
Ingredients
- 1 1/4 cups all-purpose flour
- 2 tablespoons poppy seeds
- 1/2 cup unsalted butter, softened
- 1/2 cup granulated sugar
- Zest and juice of 1 lemon
- 1 large egg yolk
- 1/2 teaspoon baking powder
- 1/4 teaspoon salt
- 8 chocolate chips
Instructions
- Heat the oven to 350 degrees and line a baking sheet with parchment paper.
- Stir the flour, poppy seeds, baking powder, and salt together in a bowl.
- In a separate bowl, beat the butter and sugar until light. Add the lemon zest, lemon juice, and egg yolk and mix until smooth.
- Combine the wet and dry mixtures until a soft dough forms.
- Scoop the dough into eight portions and roll each into a ball. Place the balls on the baking sheet and flatten slightly.
- Press two chocolate chips into the top of each cookie to form the eyes.
- Bake for 10 to 12 minutes until the edges turn light golden. Cool on the sheet for a few minutes before moving to a rack.
Extra Tips
Press the chocolate chips in right after shaping so they stick during baking. If the dough feels sticky, chill it for 15 minutes before forming the cookies. Store cooled cookies in an airtight container at room temperature for up to three days. Course: Dessert Cuisine: American Equipment: Mixing bowl, baking sheet, electric mixer
Apple Cinnamon Witch Eye Cookies
These apple cinnamon cookies bring a cozy fall flavor to your Halloween spread. The soft, chewy texture comes from fresh apple pieces mixed into a spiced dough, while candy eyes add the spooky touch that fits the theme.
They work well for a small gathering or as a simple treat to share with kids. The cinnamon warms the apple taste without overpowering it, and the eyes stay visible after baking for an easy visual effect.

Serves 4 people.
Ingredients
- 1 cup all-purpose flour
- 1 teaspoon ground cinnamon
- 1/2 teaspoon baking powder
- 1/4 teaspoon salt
- 1/4 cup unsalted butter, softened
- 1/4 cup granulated sugar
- 1 egg
- 1/2 cup grated apple
- 8 candy eyes
Instructions
- Preheat the oven to 350 degrees and line a baking sheet with parchment paper.
- Stir together the flour, cinnamon, baking powder, and salt in a bowl.
- In a separate bowl, cream the butter and sugar until light. Add the egg and mix well.
- Combine the dry ingredients with the wet mixture, then fold in the grated apple until evenly distributed.
- Scoop the dough into 8 small rounds on the baking sheet and flatten each slightly.
- Bake for 12 to 14 minutes until the edges turn golden.
- Remove from the oven and gently press two candy eyes onto each warm cookie so they stick as the cookies cool.
Extra Tips
Grate the apple finely so it blends into the dough without making the cookies too wet. If the candy eyes do not adhere well after cooling, warm the cookies for 30 seconds and try again. These keep in an airtight container for three days at room temperature. Course: Dessert Cuisine: American Equipment: Mixing Bowl, Baking Sheet, Oven
Coconut Lime Spider Eye Cookies
These cookies add a bright, tropical note to a Halloween spread. The chewy coconut and sharp lime make them stand out from heavier chocolate treats, and they come together quickly for an afternoon bake with kids or a last-minute party tray.
They work best served the same day at room temperature so the coconut stays crisp and the lime flavor stays fresh.

Serves 4 people.
Ingredients
- 1 1/4 cups all-purpose flour
- 3/4 cup unsweetened shredded coconut
- 1/2 cup granulated sugar
- 1/2 cup unsalted butter, softened
- 1 large egg
- Zest and juice of 2 limes
- 1/2 teaspoon baking powder
- 1/4 teaspoon salt
- 16 candy eyes
Instructions
- Heat the oven to 350°F and line a baking sheet with parchment paper.
- In a mixing bowl, beat the softened butter and sugar until smooth and creamy.
- Add the egg, lime zest, and lime juice, then mix until fully combined.
- Stir in the flour, shredded coconut, baking powder, and salt until a soft dough forms.
- Scoop tablespoon-sized balls of dough onto the prepared sheet, spacing them a few inches apart.
- Bake for 12 to 14 minutes until the edges turn lightly golden.
- Remove the cookies from the oven and immediately press two candy eyes into the center of each cookie while they are still warm.
- Let the cookies cool on the sheet for 5 minutes, then move them to a wire rack to finish cooling.
Extra Tips
Press the candy eyes in right after baking so they stick without icing. If you want a stronger lime taste, add an extra teaspoon of zest to the dough before baking. Store leftovers in an airtight container at room temperature for up to two days; the coconut keeps its chew but the eyes may soften slightly. Course: Dessert Cuisine: American Equipment: Mixing Bowl, Baking Sheet, Oven
Almond Butter Black Cat Eye Cookies
These almond butter black cat eye cookies add a simple spooky detail to any Halloween table. The almond butter gives the dough a rich, nutty base that stays soft after baking while the dark chocolate eyes stand out against the light cookie.
They suit an afternoon baking session with kids or a last-minute treat for a fall gathering. The finished cookies have a chewy center and crisp edges that hold the chocolate pieces in place.

Serves 4 people.
Ingredients
- 1/2 cup almond butter
- 1/4 cup brown sugar
- 1 large egg
- 1/2 teaspoon vanilla extract
- 3/4 cup all-purpose flour
- 1/2 teaspoon baking soda
- 1/4 teaspoon salt
- 1/4 cup dark chocolate chips
Instructions
- Preheat the oven to 350 degrees and line a baking sheet with parchment paper.
- In a mixing bowl, stir together the almond butter, brown sugar, egg, and vanilla extract until smooth.
- Add the flour, baking soda, and salt to the bowl and mix until a soft dough forms.
- Scoop the dough into eight equal portions and roll each into a ball, then place them on the prepared baking sheet and flatten slightly.
- Press two dark chocolate chips into the top of each cookie to create the cat eyes, spacing them evenly.
- Bake for 10 to 12 minutes until the edges turn light golden.
- Cool the cookies on the baking sheet for 5 minutes before moving them to a rack.
Extra Tips
Space the chocolate chips a little wider than usual so the eyes look more like a cat’s rather than close-set buttons. If the dough feels too sticky to handle, chill it for 10 minutes before shaping. Store cooled cookies in an airtight container at room temperature for up to three days. Course: Dessert Cuisine: American Equipment: Mixing Bowl, Baking Sheet, Parchment Paper
Matcha White Chocolate Zombie Eye Cookies
These cookies stand out with their bright green matcha color and pockets of melted white chocolate. They work well for Halloween parties or as a simple project to make with family before trick-or-treating.
The matcha adds an earthy note that balances the sweetness of the white chocolate. The cookies bake up soft in the center with lightly crisp edges.

Serves 4 people.
Ingredients
- 1 cup all-purpose flour
- 2 teaspoons matcha powder
- 1/2 teaspoon baking soda
- 1/4 teaspoon salt
- 1/2 cup unsalted butter, softened
- 1/2 cup granulated sugar
- 1 large egg
- 1 teaspoon vanilla extract
- 3/4 cup white chocolate chips
- 12 candy eyeballs
Instructions
- Preheat the oven to 350 degrees F and line a baking sheet with parchment paper.
- Whisk together the flour, matcha powder, baking soda, and salt in a medium bowl.
- In a large bowl, beat the softened butter and sugar until light and fluffy.
- Add the egg and vanilla extract to the butter mixture and mix until combined.
- Gradually stir the dry ingredients into the wet ingredients until a dough forms.
- Fold the white chocolate chips into the dough.
- Scoop rounded tablespoons of dough onto the prepared baking sheet, spacing them a few inches apart.
- Bake for 10 to 12 minutes until the edges are set but the centers still look soft.
- Remove the cookies from the oven and immediately press two candy eyeballs into each cookie while they are still warm.
- Let the cookies cool on the baking sheet for 5 minutes before moving them to a wire rack.
Extra Tips
Press the candy eyeballs in right after baking so they stick without extra icing. If you want a stronger matcha taste, add an extra half teaspoon to the dry mix on the next batch. Store cooled cookies in an airtight container at room temperature for up to three days. Course: Dessert Cuisine: American Equipment: Mixing Bowl, Baking Sheet, Whisk, Oven
Caramel Pecan Jack-O’-Lantern Eye Cookies
These cookies bring together a simple buttery base with rich caramel and toasted pecans. The jack-o-lantern design uses candy eyes as the focal point, which makes them easy to spot on a Halloween dessert table.
The flavor stays balanced between sweet caramel and nutty crunch against a crisp cookie. They work well for afternoon baking sessions or as a quick addition to a party spread.

Serves 4 people.
Ingredients
- 1 cup all-purpose flour
- 1/2 cup unsalted butter, softened
- 1/4 cup granulated sugar
- 1/2 cup caramel sauce
- 1/2 cup pecan halves
- 8 candy eyes
Instructions
- Preheat the oven to 350°F. In a mixing bowl, combine the flour, softened butter, and sugar until a soft dough forms.
- Roll the dough to about 1/4-inch thickness on a lightly floured surface. Cut out eight round shapes and place them on a baking sheet.
- Bake the cookies for 10 to 12 minutes until the edges turn lightly golden. Remove them from the oven and let them cool completely on the sheet.
- Drizzle a thin layer of caramel sauce over each cooled cookie. Press pecan halves into the caramel to outline a simple jack-o-lantern mouth and stem.
- Place two candy eyes on each cookie, pressing them gently into the caramel so they stay in place.
Extra Tips
Press the candy eyes onto the caramel while it is still slightly warm for the best hold. If the caramel thickens, warm it briefly in the microwave before drizzling. Store finished cookies in a single layer in an airtight container at room temperature to keep the pecans crisp. Course: Dessert Cuisine: American Equipment: Mixing Bowl, Baking Sheet, Oven
Raspberry Jam Skull Eye Cookies
These skull-shaped cookies feature raspberry jam pressed into the eye sockets for a bold, spooky detail. They work well for Halloween gatherings or as a simple treat to make with kids.
The dough bakes into a crisp, buttery cookie that contrasts with the soft, tart jam centers. Candy eyes add an extra layer of fun without extra work.

Serves 4 people.
Ingredients
- 1 1/2 cups all-purpose flour
- 1/2 teaspoon baking powder
- 1/4 teaspoon salt
- 1/2 cup unsalted butter, softened
- 1/2 cup granulated sugar
- 1 large egg
- 1 teaspoon vanilla extract
- 1/4 cup raspberry jam
- 8 candy eyeballs
Instructions
- Heat the oven to 350 degrees and line a baking sheet with parchment paper.
- Whisk the flour, baking powder, and salt in a medium bowl.
- In a separate bowl, beat the butter and sugar until light and fluffy.
- Mix in the egg and vanilla extract until combined.
- Stir the dry ingredients into the wet mixture to form a dough.
- Roll the dough to 1/4-inch thickness on a lightly floured surface.
- Cut out skull shapes with a cookie cutter and place them on the baking sheet.
- Use a small spoon or your finger to press two shallow indentations for eyes in each skull.
- Fill each eye indentation with about 1/2 teaspoon raspberry jam.
- Bake for 10 to 12 minutes until the edges turn lightly golden.
- Remove from the oven and press one candy eyeball into each jam center while the cookies are still warm.
- Cool the cookies on the sheet for 5 minutes, then move them to a wire rack.
Extra Tips
Press the jam gently into the dough so it stays in place during baking. If the dough feels too soft to cut, chill it for 15 minutes first. Store cooled cookies in an airtight container at room temperature for up to three days. Course: Dessert Cuisine: American Equipment: Mixing Bowl, Baking Sheet, Cookie Cutter
Espresso Shortbread Werewolf Eye Cookies
These espresso shortbread cookies bring a bold coffee taste to a simple buttery base. The crumbly texture pairs well with the slight bitterness of espresso, making them a nice change from sweeter Halloween treats. They work well for a party platter or as an afternoon snack when you want something with a grown-up edge.
The werewolf eye detail comes from placing two candy eyes on each cooled cookie. This keeps the focus on the shortbread while adding a quick visual touch that fits the season.

Serves 4 people.
Ingredients
- 1 cup all-purpose flour
- ½ cup unsalted butter, softened
- ¼ cup granulated sugar
- 2 tablespoons instant espresso powder
- ½ teaspoon vanilla extract
- ¼ teaspoon salt
- 16 edible candy eyes
Instructions
- Heat the oven to 325°F and line a baking sheet with parchment paper.
- In a mixing bowl, cream the softened butter and sugar together until light and smooth.
- Stir in the vanilla extract, espresso powder, and salt until evenly combined.
- Add the flour and mix until a soft dough forms. Do not overmix.
- Divide the dough into 8 equal pieces and roll each into a ball. Place the balls on the baking sheet and flatten slightly into rounds.
- Bake for 12 to 15 minutes until the edges are lightly golden. Let the cookies cool on the sheet for 5 minutes, then move them to a wire rack to cool completely.
- Once cool, press two candy eyes onto the top of each cookie.
Extra Tips
Use a fine espresso powder so it blends evenly into the dough without grittiness. The cookies stay crisp if stored in an airtight container at room temperature for up to three days. If you want a stronger coffee note, add an extra half tablespoon of espresso powder to the dough. Course: Dessert Cuisine: American Equipment: Mixing Bowl, Baking Sheet, Wire Rack
Orange Zest Frankenstein Eye Cookies
These cookies bring a bright citrus note to Halloween treats. The orange zest adds fresh flavor to a simple sugar cookie base, while green coloring gives them a playful Frankenstein look. They work well for school parties or family gatherings when you want something quick to make and easy to decorate.
The finished cookies have a tender texture with a light orange scent. Candy eyes pressed on top complete the fun theme without extra steps.

Serves 4 people.
Ingredients
- 1 1/4 cups all-purpose flour
- 1/2 cup unsalted butter, softened
- 1/3 cup granulated sugar
- 1 egg yolk
- 1 tablespoon orange zest
- 1/2 teaspoon vanilla extract
- 1/4 teaspoon baking powder
- 1/4 teaspoon salt
- Green gel food coloring
- 12 candy eyes
Instructions
- Preheat the oven to 350 degrees and line a baking sheet with parchment paper.
- In a mixing bowl, cream the softened butter and sugar until light and smooth.
- Add the egg yolk, orange zest, and vanilla extract, then stir until combined.
- In a separate bowl, whisk the flour, baking powder, and salt.
- Gradually mix the dry ingredients into the wet mixture until a dough forms.
- Add a few drops of green gel food coloring and knead until the color is even.
- Scoop tablespoon-sized portions of dough, roll into balls, and place on the baking sheet. Flatten each slightly.
- Bake for 10 to 12 minutes until the edges are set.
- Remove from the oven and immediately press two candy eyes onto each cookie while still warm. Let cool on the sheet.
Extra Tips
Use a microplane for the orange zest to avoid bitter white pith. Press the candy eyes in right after baking so they stick without icing. Store cooled cookies in an airtight container at room temperature for up to three days. For a stronger citrus taste, add an extra half teaspoon of zest to the dough. Course: Dessert Cuisine: American Equipment: Mixing Bowl, Baking Sheet, Parchment Paper, Oven
