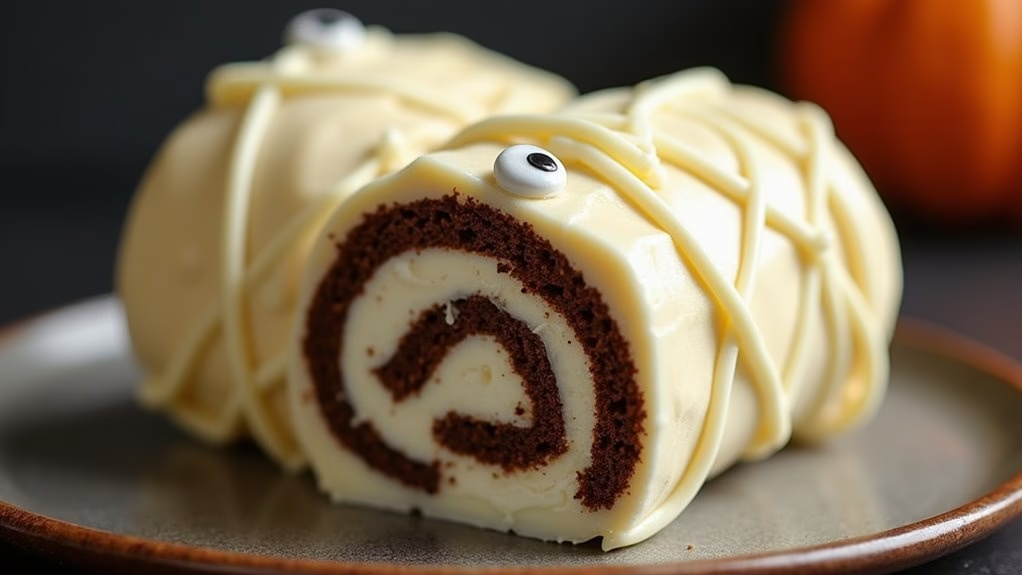
When Halloween comes knocking, it’s the perfect time to sprinkle some spooky magic into the kitchen with enchanting cake ideas. Think gooey monster cupcakes with marshmallow fillings or a spider web cake that’s just the right amount of eerie. These sweet treats are more than just delicious—they are a visual delight too. I’ve gathered some charming tricks to make your little ones squeal with delight. Are you intrigued yet?
Gooey Monster Cupcakes
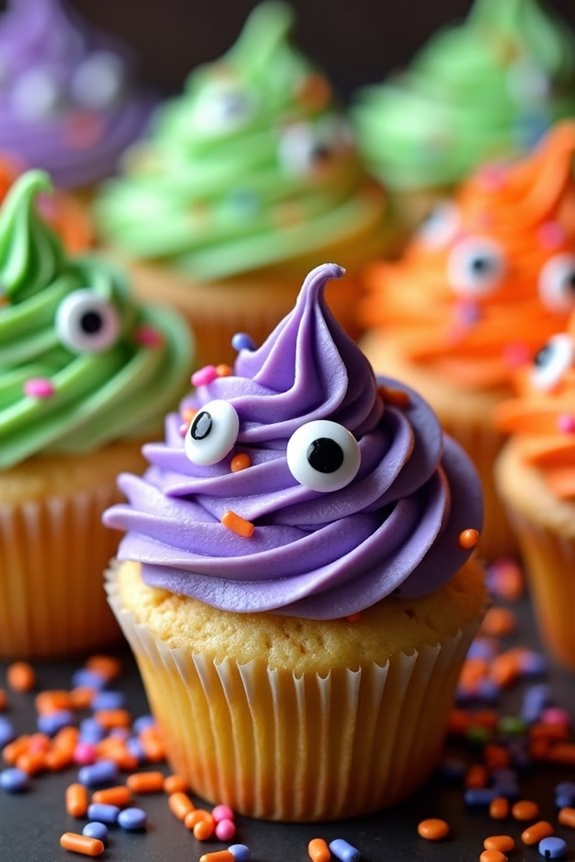
Halloween is the perfect time to get creative in the kitchen, and nothing screams festive fun like Gooey Monster Cupcakes. These adorable treats aren’t only delicious but also incredibly fun to make, especially for kids who love to get involved in the baking process. With vibrant colors, playful decorations, and a touch of gooey filling, these cupcakes are sure to be a hit at any Halloween gathering.
Whether you’re hosting a spooky party or just want to surprise your family with a themed dessert, these cupcakes will bring a smile to everyone’s face.
The base of these cupcakes is a moist and fluffy vanilla cake, dyed in a variety of monster colors to create a colorful surprise when bitten into. The gooey center, made from a simple marshmallow and butter mixture, adds an unexpected twist that will delight both kids and adults alike. Topped with a swirl of buttercream frosting and decorated with candy eyes and sprinkles, these cupcakes come to life as cute little monsters. This recipe yields enough for 4-6 people, making it perfect for a cozy family celebration or a small party.
Ingredients (Serves 4-6):
- 1 ½ cups all-purpose flour
- 1 cup granulated sugar
- ½ cup unsalted butter, softened
- 2 large eggs
- 1 teaspoon vanilla extract
- ½ cup milk
- 1 teaspoon baking powder
- ½ teaspoon salt
- Food coloring (green, purple, and orange)
- 1 cup mini marshmallows
- 2 tablespoons butter
- 1 cup unsalted butter, softened (for frosting)
- 3 cups powdered sugar (for frosting)
- 2-3 tablespoons milk (for frosting)
- Candy eyes
- Assorted sprinkles
Cooking Instructions:
- Preheat the Oven: Preheat your oven to 350°F (175°C) and line a muffin tin with cupcake liners.
- Prepare the Cupcake Batter: In a large bowl, cream together the softened butter and granulated sugar until light and fluffy. Add the eggs one at a time, beating well after each addition. Mix in the vanilla extract.
- Combine Dry Ingredients: In a separate bowl, whisk together the flour, baking powder, and salt. Gradually add the dry ingredients to the wet ingredients, alternating with the milk. Mix until just combined.
- Color the Batter: Divide the batter evenly into three bowls. Add a few drops of food coloring to each bowl to create monster colors (green, purple, and orange). Stir until the color is evenly distributed.
- Fill the Cupcake Liners: Spoon the colored batters into the cupcake liners, filling each liner about 2/3 full. You can layer the colors or swirl them together for a fun effect.
- Bake the Cupcakes: Bake in the preheated oven for 18-20 minutes or until a toothpick inserted into the center comes out clean. Allow the cupcakes to cool completely.
- Prepare the Gooey Filling: In a small saucepan over low heat, melt the marshmallows and 2 tablespoons of butter together, stirring constantly until smooth. Allow the mixture to cool slightly.
- Core the Cupcakes: Once the cupcakes are cool, use a small knife or cupcake corer to remove a small section from the center of each cupcake.
- Fill the Cupcakes: Spoon the gooey marshmallow filling into the hollowed-out center of each cupcake.
- Make the Frosting: In a large bowl, beat the softened butter until creamy. Gradually add the powdered sugar, and then add the milk one tablespoon at a time, beating until smooth and fluffy.
- Decorate the Cupcakes: Pipe or spread the frosting onto the cooled cupcakes. Decorate each cupcake with candy eyes and sprinkles to create monster faces.
Extra Tips: When adding food coloring to the cupcake batter, start with a small amount and gradually add more until you achieve the desired shade. Be careful not to overmix the batter after adding the color, as this can affect the texture of the cupcakes.
For a more dramatic effect, use gel food coloring, which tends to be more vibrant. If you don’t have a cupcake corer, the handle of a spoon works well for creating a cavity for the gooey filling. To make the decorating process easier for kids, set up a decorating station with a variety of candy eyes and sprinkles so they can create their own unique monster designs.
Spooky Spider Web Cake
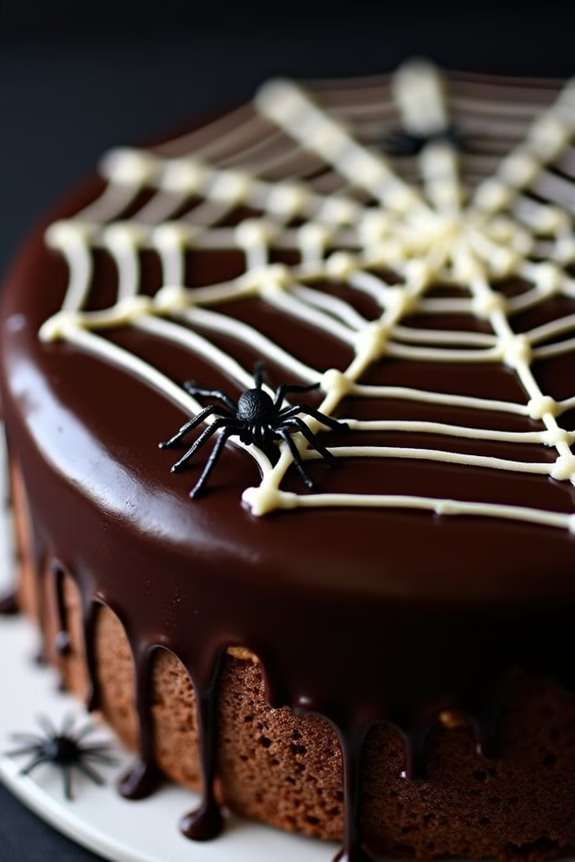
Halloween is the perfect time to get creative in the kitchen, and a Spooky Spider Web Cake is sure to be a hit with kids and adults alike. This dessert combines the classic flavors of chocolate cake with a spooky twist, making it a delightful centerpiece for any Halloween celebration. The spider web design on top adds an eerie touch that will captivate the imaginations of young trick-or-treaters, while the moist, rich chocolate cake satisfies their sweet tooth.
Creating a Spooky Spider Web Cake is easier than you might think, and it’s a fun project to involve the kids in. With a few simple ingredients and some clever decorating techniques, you can transform a basic cake into a Halloween masterpiece. Whether you’re hosting a Halloween party or simply want to make a festive treat for your family, this cake won’t disappoint. Follow the recipe below to serve 4-6 people with this deliciously spooky dessert.
Ingredients:
- 1 ¾ cups all-purpose flour
- 1 ½ cups granulated sugar
- ¾ cup unsweetened cocoa powder
- 1 ½ teaspoons baking powder
- 1 ½ teaspoons baking soda
- 1 teaspoon salt
- 2 large eggs
- 1 cup whole milk
- ½ cup vegetable oil
- 2 teaspoons vanilla extract
- 1 cup boiling water
- 1 cup heavy cream
- 2 cups dark chocolate chips
- ½ cup white chocolate chips for decorating
- Black food coloring (optional)
- Plastic spider decorations (optional)
Instructions:
- Prepare the Cake Batter: Preheat your oven to 350°F (175°C). Grease and flour two 9-inch round cake pans. In a large bowl, combine the flour, sugar, cocoa powder, baking powder, baking soda, and salt. Add the eggs, milk, oil, and vanilla extract to the dry ingredients. Mix until well combined. Gradually stir in the boiling water until the batter is smooth and thin.
- Bake the Cake: Divide the batter evenly between the prepared cake pans. Bake for 30-35 minutes or until a toothpick inserted into the center comes out clean. Let the cakes cool in the pans for 10 minutes, then remove them from the pans and transfer to a wire rack to cool completely.
- Make the Chocolate Ganache: In a small saucepan, bring the heavy cream to a gentle simmer over medium heat. Remove from heat and add the dark chocolate chips, stirring until smooth and glossy. Allow the ganache to cool slightly before using.
- Assemble the Cake: Place one cooled cake layer on a serving plate. Spread a thin layer of chocolate ganache over the top. Place the second cake layer on top and pour the remaining ganache over the entire cake, allowing it to drip down the sides.
- Decorate with Spider Web: Melt the white chocolate chips in a microwave-safe bowl in 30-second intervals, stirring until smooth. Add a few drops of black food coloring for a spooky effect, if desired. Transfer the melted white chocolate to a piping bag or a zip-lock bag with a small corner snipped off. Starting from the center of the cake, pipe a spiral outwards. Use a toothpick to drag lines from the center to the edges, creating a spider web effect.
- Add Final Touches: If using, place plastic spider decorations on the cake for an added spooky touch.
Extra Tips:
For the best results, verify all ingredients are at room temperature before mixing. This helps the batter to combine more smoothly.
If you want to make the cake even more festive, consider adding a few drops of orange food coloring to the ganache for a contrasting color. You can also use store-bought chocolate cake mix and ganache to save on prep time.
When melting chocolate, keep a close eye to prevent burning, and stir frequently. Finally, get creative with your spider web design and have fun involving your kids in the decorating process!
Witch Hat Cake Pops
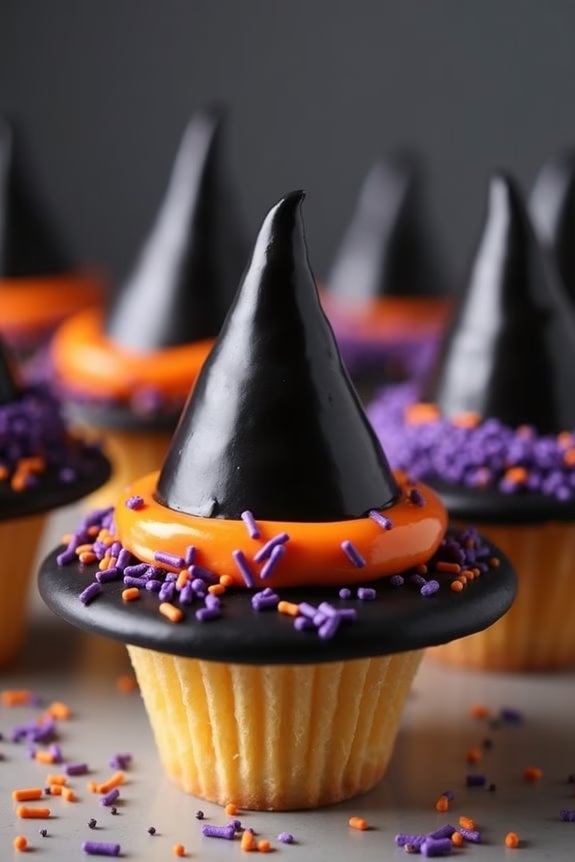
Witch Hat Cake Pops are a delightful and spooky treat that kids will absolutely adore during Halloween. These adorable cake pops not only look festive but are also deliciously fun to eat. Imagine bite-sized cakes coated in a rich candy shell and adorned with an edible witch hat – they’re perfect for parties or as a special treat for your little ones. Kids won’t only enjoy eating them but also have a blast helping you decorate these whimsical desserts.
Making Witch Hat Cake Pops involves a few steps, but the end result is worth the effort. The process starts with baking a simple cake, crumbling it, and mixing it with frosting to create a dough-like consistency. This mixture is then rolled into balls and skewered on lollipop sticks. Once coated in melted candy and topped with a chocolate cone for the witch’s hat, these cake pops come to life as a Halloween favorite. This recipe serves 4-6 people, making it ideal for a small gathering or family celebration.
Ingredients for Witch Hat Cake Pops (Serving Size: 4-6)
- 1 box of cake mix (any flavor)
- Ingredients required for cake mix (usually eggs, oil, and water)
- 1 cup of frosting (store-bought or homemade)
- 24 lollipop sticks
- 2 cups of black candy melts
- 12 sugar cones (mini size)
- Orange and purple icing
- Assorted sprinkles
- 1 cup of chocolate chips
- Green food coloring (optional)
Instructions
- Bake the Cake: Prepare the cake mix according to the package instructions. Once baked, allow the cake to cool completely.
- Form the Cake Pops: Crumble the cooled cake into a large bowl. Add the frosting and mix until it’s a dough-like consistency. Roll the mixture into small balls about 1 inch in diameter and place them on a baking sheet lined with parchment paper.
- Insert the Sticks: Melt a small amount of candy melts. Dip one end of each lollipop stick into the melted candy and insert it halfway into the cake balls. This helps the stick adhere to the cake pop. Place them in the fridge to set for about 30 minutes.
- Prepare the Witch Hats: While the cake pops are chilling, melt the chocolate chips in a microwave-safe bowl. Dip the open end of the mini sugar cones into the melted chocolate and allow the excess to drip off. Set them aside on a parchment-lined sheet to harden.
- Coat the Cake Pops: Melt the black candy melts in a microwave or double boiler, stirring until smooth. Dip each cake pop into the melted candy, gently tapping off any excess. Insert the cake pops into a styrofoam block to dry completely.
- Decorate: Once the cake pops are dry, attach the chocolate-dipped sugar cones on top using a dab of melted candy melts. Use the orange and purple icing to draw a band around the base of each cone. Add sprinkles for extra decoration if desired.
- Serve: Allow the decorated cake pops to set completely before serving them to your enthusiastic trick-or-treaters.
Extra Tips
When making Witch Hat Cake Pops, keeping the cake balls firm is essential for easy handling. If you find them too soft to shape or dip, refrigerate them longer before coating.
Additionally, consider using a cup of melted white candy melts mixed with green food coloring for an exciting twist on the traditional witch theme. Use a piping bag for more precise icing work, and don’t hesitate to get creative with different colors and patterns for the witch hats!
Creepy Crawly Bug Cake
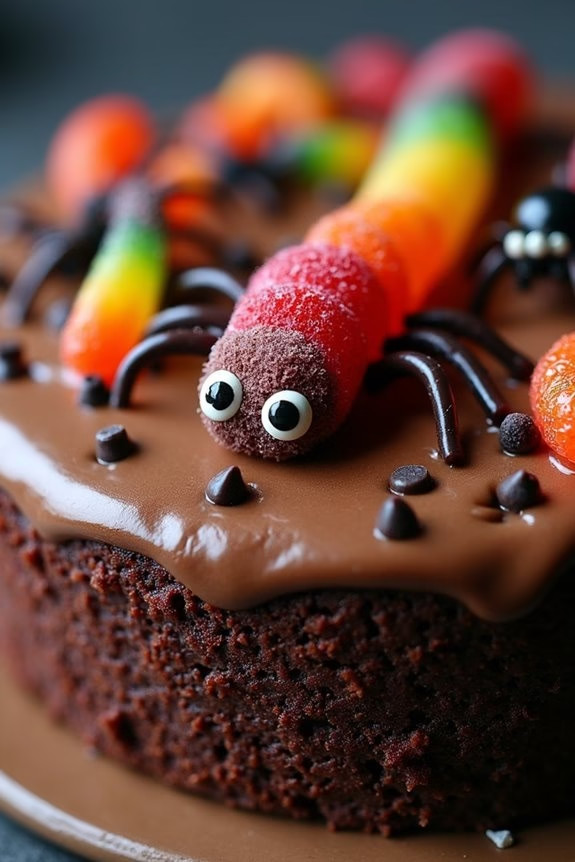
Halloween is the perfect time to get creative in the kitchen, especially when it comes to baking spooky treats for kids. The Creepy Crawly Bug Cake is an ideal dessert for Halloween parties or a fun family baking day. This cake isn’t only delicious but also doubles as a fun, interactive activity that lets kids get involved in decorating their own edible bug-infested masterpiece.
With gummy worms, chocolate spiders, and a rich, fudgy cake base, this creepy crawly creation is sure to be a hit with kids and adults alike. The Creepy Crawly Bug Cake is designed to delight the senses with its combination of gooey textures and rich flavors.
This cake features a moist chocolate base, which is topped with a decadent layer of chocolate frosting. The real fun starts when you decorate the cake with a variety of edible critters, such as gummy worms, candy spiders, and chocolate chips to mimic ants. This recipe serves 4-6 people, making it perfect for a small Halloween gathering or as a special treat for your family.
Ingredients (serves 4-6 people):
- 1 cup all-purpose flour
- 1 cup granulated sugar
- 1/3 cup unsweetened cocoa powder
- 1/2 teaspoon baking soda
- 1/4 teaspoon baking powder
- 1/4 teaspoon salt
- 1/3 cup vegetable oil
- 1 teaspoon vanilla extract
- 1/2 cup buttermilk
- 1 large egg
- 1/2 cup boiling water
- 1 cup chocolate frosting (store-bought or homemade)
- Gummy worms
- Chocolate chips
- Candy spiders
Instructions:
- Preheat and Prepare: Preheat your oven to 350°F (175°C). Grease and flour an 8-inch cake pan, making sure all sides and bottom are well-coated to prevent sticking.
- Mix Dry Ingredients: In a medium mixing bowl, combine the flour, sugar, cocoa powder, baking soda, baking powder, and salt. Whisk together until well-combined.
- Combine Wet Ingredients: In a separate bowl, mix the vegetable oil, vanilla extract, buttermilk, and egg until smooth. Gradually add the wet ingredients to the dry ingredients, stirring until the batter is well-blended.
- Incorporate Boiling Water: Carefully stir in the boiling water. The batter will be thin, but this is normal and will result in a moist cake.
- Bake: Pour the batter into the prepared cake pan. Bake for 30-35 minutes, or until a toothpick inserted in the center comes out clean. Allow the cake to cool in the pan for about 10 minutes, then transfer to a wire rack to cool completely.
- Frost the Cake: Once the cake has cooled, spread an even layer of chocolate frosting on top. Confirm the frosting is smooth and covers the entire surface.
- Decorate with Bugs: Let the fun begin by adding gummy worms, chocolate chips, and candy spiders on top of the cake. Be creative with your placement to give the cake a creepy crawly appearance.
Extra Tips:
For an even more realistic effect, try creating a dirt look on the cake by crushing chocolate cookies and sprinkling them over the frosting before adding your edible bugs.
You can also use icing pens to draw web patterns or add more detail to your candy spiders. If you don’t have buttermilk on hand, you can make a substitute by mixing 1/2 cup of milk with 1/2 tablespoon of lemon juice or vinegar and letting it sit for a few minutes.
This cake is best served fresh, but it can be stored in an airtight container for up to two days at room temperature.
Ghostly Meringue Cake
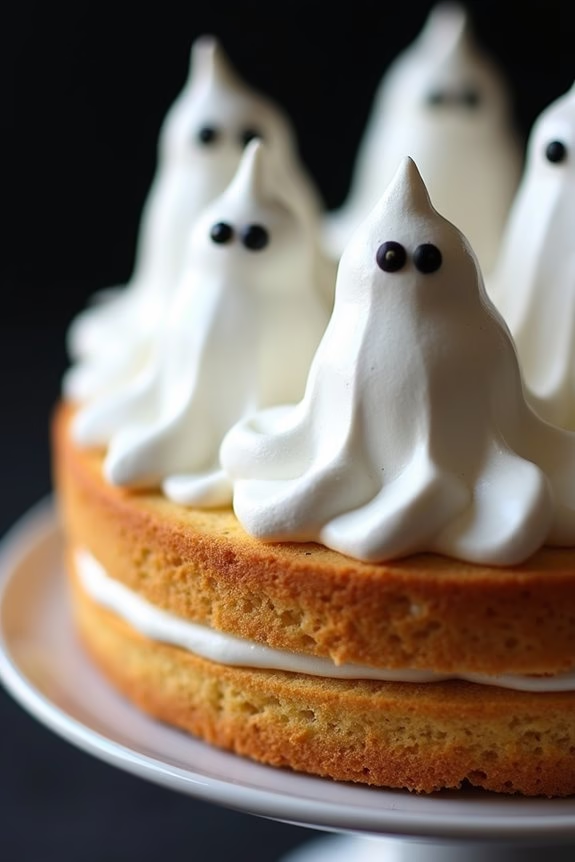
Transform your Halloween celebration into a spooky delight with this Ghostly Meringue Cake that kids will absolutely love. This cake combines the light, airy texture of meringue with the rich flavors of a classic cake, all topped with adorable ghostly meringue figures. It’s a perfect treat not only for its taste but also for its delightful appearance, making it a fantastic centerpiece for your Halloween party.
The process involves crafting a simple cake base, preparing the meringue ghosts, and then assembling them together for a fantastically eerie dessert. The Ghostly Meringue Cake is designed to serve 4-6 people, making it an ideal choice for a small family gathering or a kids’ Halloween party. The contrast between the soft cake and the crisp meringue is sure to be a hit.
Not only is it delicious, but this recipe is also a great opportunity to involve kids in the cooking process, from whipping the meringue to decorating the cake with ghostly figures. Grab your ingredients and let’s plunge into this spooky culinary adventure!
Ingredients (Serves 4-6):
- 1 ½ cups all-purpose flour
- 1 teaspoon baking powder
- ½ teaspoon baking soda
- ¼ teaspoon salt
- ½ cup unsalted butter, softened
- 1 cup granulated sugar
- 2 large eggs
- 1 teaspoon vanilla extract
- ½ cup milk
- 4 large egg whites
- 1 cup superfine sugar
- Pinch of cream of tartar
- Black food coloring gel
Cooking Instructions:
1. Preheat and Prepare Cake Base:
Preheat your oven to 350°F (175°C). Grease and flour a 9-inch round cake pan. In a bowl, sift together the flour, baking powder, baking soda, and salt.
2. Make the Cake Batter:
In a large mixing bowl, cream the butter and granulated sugar until light and fluffy. Beat in the eggs one at a time, then stir in the vanilla. Gradually add in the flour mixture alternately with the milk, beginning and ending with the flour mixture, until just combined.
3. Bake the Cake:
Pour the batter into the prepared cake pan and smooth the top with a spatula. Bake in the preheated oven for 25-30 minutes or until a toothpick inserted into the center comes out clean. Allow the cake to cool completely on a wire rack.
4. Prepare the Meringue Ghosts:
Preheat your oven to 225°F (110°C). In a clean, dry mixing bowl, beat the egg whites with a pinch of cream of tartar until soft peaks form. Gradually add the superfine sugar, a tablespoon at a time, continuing to beat until stiff peaks form and the meringue is glossy.
5. Shape and Bake Meringue Ghosts:
Line a baking sheet with parchment paper. Transfer the meringue to a piping bag fitted with a round nozzle. Pipe ghost shapes onto the parchment paper. Bake for 1 hour or until the meringues are crisp and easily lift off the parchment paper. Allow them to cool.
6. Decorate Ghosts:
Using a toothpick, apply tiny dots of black food coloring gel as eyes and mouths on the meringue ghosts.
7. Assemble the Cake:
Once the cake is cooled, place it on a serving platter. Arrange the meringue ghosts on top of the cake, pressing lightly to verify they stick.
Extra Tips:
For best results, confirm that your egg whites are at room temperature before you start making the meringues as this helps them whip up to their fullest volume.
Additionally, make sure that all your mixing equipment is completely clean and dry to avoid any oil or moisture, which can prevent the meringue from forming properly. If you don’t have superfine sugar on hand, you can pulse regular granulated sugar in a food processor for a few seconds to achieve a finer consistency.
Enjoy your ghostly creation and have a spooktacular Halloween!
Frankenstein’s Monster Cake
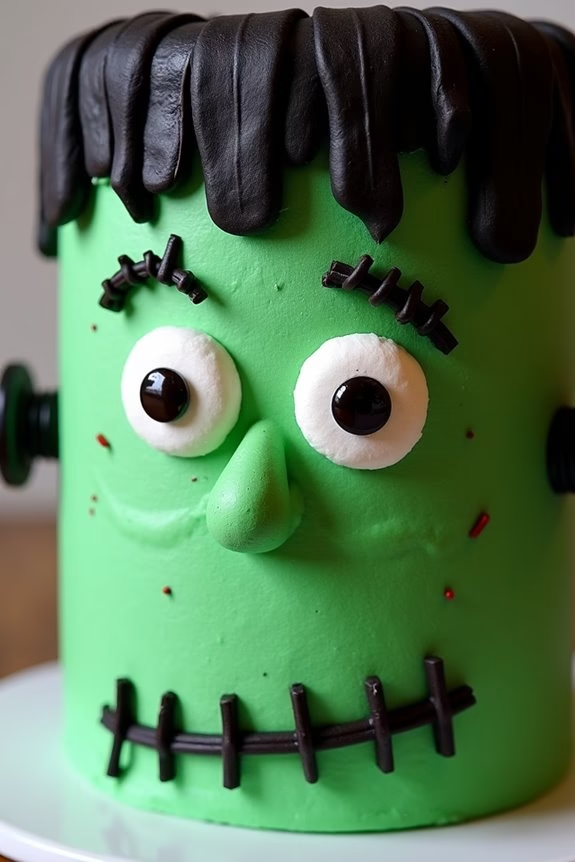
This recipe provides a serving size for 4-6 people, making it ideal for a small Halloween gathering. Since the cake is designed to resemble Frankenstein’s monster, you’ll be using food coloring and various candies to create its unique look.
Whether you’re a novice baker or a seasoned pro, this recipe is designed to be fun and accessible, guaranteeing that you end up with a delicious cake that looks fantastically frightful. Read on for the ingredients and step-by-step instructions to craft your very own Frankenstein’s Monster Cake.
Ingredients
- 2 cups all-purpose flour
- 1 ½ cups granulated sugar
- 2 teaspoons baking powder
- ½ teaspoon baking soda
- ½ teaspoon salt
- 1 cup unsalted butter, softened
- 4 large eggs
- 1 cup buttermilk
- 2 teaspoons vanilla extract
- Green food coloring
- 2 cups buttercream frosting
- Black licorice or chocolate sticks for hair
- Candy eyes
- Marshmallows for neck bolts
- Black gel icing for stitches
Cooking Instructions
- Preheat and Prepare Pans: Preheat your oven to 350°F (175°C). Grease and flour two 8-inch round cake pans to guarantee the cake doesn’t stick.
- Mix Dry Ingredients: In a large bowl, sift together the flour, sugar, baking powder, baking soda, and salt. This guarantees that the dry ingredients are well combined.
- Cream Butter and Sugar: In another bowl, cream the softened butter and granulated sugar until light and fluffy. This should take about 3-5 minutes with an electric mixer set to medium speed.
- Add Eggs: Beat in the eggs, one at a time, mixing well after each addition to fully incorporate them into the butter and sugar mixture.
- Combine Wet and Dry Mixtures: Gradually add the dry ingredients to the creamed mixture, alternating with the buttermilk, starting and ending with the dry ingredients. Mix on low speed until just combined.
- Add Vanilla and Color: Stir in the vanilla extract. Add green food coloring a few drops at a time until you achieve the desired shade of “Frankenstein green.”
- Bake the Cake: Divide the batter evenly between the prepared cake pans. Bake for 25-30 minutes, or until a toothpick inserted into the center comes out clean. Allow the cakes to cool in the pans for 10 minutes, then remove from pans and cool completely on wire racks.
- Prepare the Frosting: While the cakes are cooling, tint the buttercream frosting with green food coloring to match the cake.
- Assemble and Decorate: Once the cakes are completely cool, place one layer on a serving platter. Spread a layer of green frosting on top, then place the second layer on top. Frost the entire cake with the green buttercream.
- Add Features: Use black licorice or chocolate sticks to create hair, attach candy eyes, and use marshmallows for neck bolts. Use black gel icing to draw stitches and a mouth on the cake.
Extra Tips
When adding food coloring to your cake batter and frosting, start with just a few drops and gradually add more to reach your desired shade. This will help you avoid over-coloring.
Additionally, guarantee the cakes are completely cool before frosting to prevent the buttercream from melting. If you’re feeling adventurous, try using other candies or edible decorations to customize your Frankenstein’s Monster for added flair.
Most importantly, have fun with the process and let your creativity run wild!
Pumpkin Patch Cupcakes
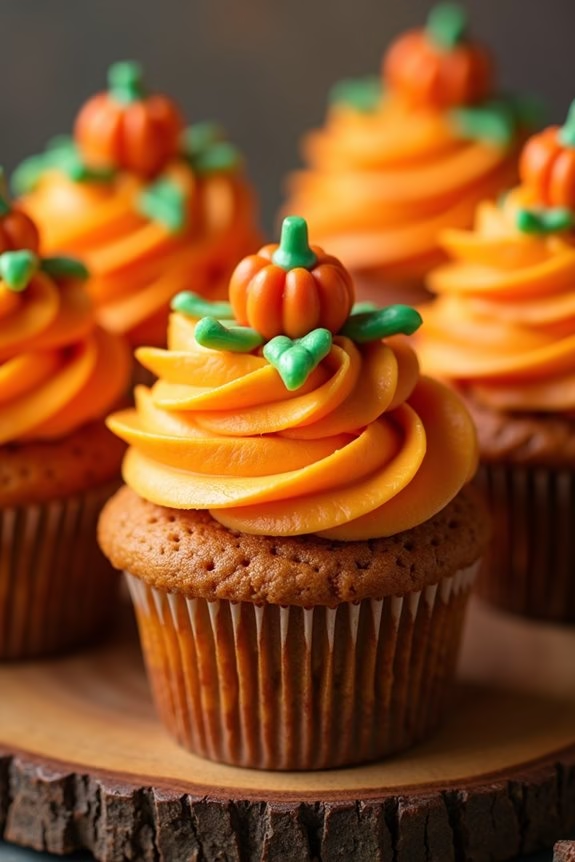
Pumpkin Patch Cupcakes are the perfect festive treat for a Halloween celebration, especially when catering to kids. These adorable cupcakes not only look like a miniature pumpkin patch, but they’re also deliciously moist with a hint of pumpkin spice flavor. With their vibrant orange frosting and charming candy pumpkins, they bring a pop of color and fun to any Halloween party spread.
Whether you’re a seasoned baker or a beginner, these cupcakes are easy to make and guaranteed to impress.
The key to these delightful cupcakes is in the detail. The cupcakes themselves are flavored with pumpkin puree and a mix of spices like cinnamon and nutmeg, giving them a warm, comforting taste. The frosting is a simple yet tasty vanilla buttercream tinted orange to resemble pumpkins. Topped with green-colored frosting piped as vines and candy pumpkins, these cupcakes are as pleasing to the eye as they’re to the palate.
This recipe serves 4-6 people, making it ideal for a small gathering or a family treat.
Ingredients:
- 1 cup all-purpose flour
- 1 teaspoon baking powder
- 1/2 teaspoon baking soda
- 1/2 teaspoon cinnamon
- 1/4 teaspoon nutmeg
- 1/4 teaspoon salt
- 1/2 cup unsalted butter, softened
- 1/2 cup granulated sugar
- 1/4 cup brown sugar
- 1 large egg
- 1 teaspoon vanilla extract
- 1/2 cup pumpkin puree
- 1/4 cup buttermilk
For the Frosting:
- 1/2 cup unsalted butter, softened
- 2 cups powdered sugar
- 1 teaspoon vanilla extract
- 2 tablespoons milk
- Orange food coloring
- Green food coloring
- Candy pumpkins (e.g., candy corn pumpkins)
Instructions:
- Prepare the Oven and Muffin Tin: Preheat your oven to 350°F (175°C). Line a muffin tin with cupcake liners to prepare for baking.
- Mix Dry Ingredients: In a bowl, whisk together the flour, baking powder, baking soda, cinnamon, nutmeg, and salt. Set aside.
- Cream Butter and Sugars: In a separate large bowl, beat the softened butter, granulated sugar, and brown sugar together until light and fluffy, about 3 minutes.
- Add Wet Ingredients: Beat in the egg and vanilla extract until well combined. Then, mix in the pumpkin puree.
- Combine Ingredients: Gradually add the dry ingredients to the wet ingredients, alternating with the buttermilk, beginning and ending with the dry ingredients. Mix until just combined.
- Fill Cupcake Liners: Divide the batter evenly among the prepared cupcake liners, filling each about two-thirds full.
- Bake: Bake in the preheated oven for 18-20 minutes, or until a toothpick inserted into the center comes out clean. Allow the cupcakes to cool completely on a wire rack before frosting.
- Prepare the Frosting: In a large bowl, beat the butter until creamy. Gradually add the powdered sugar, beating until combined. Mix in the vanilla extract and milk, adjusting the consistency as needed.
- Color the Frosting: Divide the frosting into two bowls. Tint the majority of the frosting with orange food coloring and a smaller portion with green food coloring for the vines.
- Decorate the Cupcakes: Spread or pipe the orange frosting onto each cooled cupcake. Use a piping bag fitted with a small round tip to pipe green vines on top of the cupcakes. Finish by placing a candy pumpkin on each cupcake to complete the pumpkin patch look.
Extra Tips:
When making these Pumpkin Patch Cupcakes, make sure your ingredients are at room temperature for the best texture and consistency. If you’re short on time, you can use pre-made frosting and simply tint it with food coloring.
For a more authentic pumpkin color, try mixing red and yellow food coloring to achieve the perfect shade of orange. Finally, involve your kids in the decorating process; they’ll love creating their own miniature pumpkin patches!
Haunted Graveyard Cake

Creating a Haunted Graveyard Cake is a fun and spooky activity that children will love participating in during Halloween. This cake is a delightful masterpiece that combines the eerie elements of a graveyard scene with delicious flavors that everyone can enjoy. Bringing this cake to life involves a mixture of baking skills and creative flair, making it an ideal project for the whole family.
Whether you’re hosting a Halloween party or simply want to surprise your kids with a spooky treat, this Haunted Graveyard Cake will surely be the highlight of the evening.
The Haunted Graveyard Cake is layered with moist chocolate cake and topped with a rich chocolate frosting. The decorations, which include cookie tombstones, candy pumpkins, and green-colored coconut for grass, create a hauntingly realistic graveyard scene. The cake serves 4-6 people, making it perfect for a small gathering or family treat. By using some everyday baking ingredients and a few special Halloween-themed decorations, you can craft a cake that looks as spectacular as it tastes.
Ingredients (Serves 4-6):
- 2 cups all-purpose flour
- 2 cups granulated sugar
- ¾ cup unsweetened cocoa powder
- 1½ teaspoons baking powder
- 1½ teaspoons baking soda
- 1 teaspoon salt
- 2 large eggs
- 1 cup whole milk
- ½ cup vegetable oil
- 2 teaspoons vanilla extract
- 1 cup boiling water
- 1 cup unsalted butter (for frosting)
- 3½ cups powdered sugar (for frosting)
- ½ cup unsweetened cocoa powder (for frosting)
- ¼ cup milk (for frosting)
- 1 teaspoon vanilla extract (for frosting)
- Chocolate sandwich cookies (for tombstones)
- Green food coloring
- Shredded coconut
- Candy pumpkins
Instructions:
- Prepare the Cake Batter: Preheat your oven to 350°F (175°C). In a large bowl, combine the flour, sugar, cocoa powder, baking powder, baking soda, and salt. Add the eggs, milk, oil, and vanilla extract. Mix until well blended. Gradually stir in the boiling water until the batter is smooth and consistent.
- Bake the Cake: Pour the batter into two greased and floured 9-inch round cake pans. Bake in the preheated oven for 30-35 minutes, or until a toothpick inserted into the center comes out clean. Allow the cakes to cool in the pans for about 10 minutes, then remove them from the pans and transfer to a wire rack to cool completely.
- Make the Frosting: In a medium bowl, beat the butter until creamy. Gradually add the powdered sugar and cocoa powder, alternating with the milk, and beat until smooth. Stir in the vanilla extract. If the frosting is too thick, add a little more milk until the desired consistency is reached.
- Assemble the Cake: Place one cake layer on a serving plate and spread a layer of frosting on top. Place the second cake layer on top and frost the top and sides of the cake completely.
- Decorate the Cake: Crush some chocolate sandwich cookies to create “dirt” and sprinkle them on top of the cake. Use whole cookies to make tombstones by sticking them upright into the cake. To create grass, mix shredded coconut with a few drops of green food coloring until evenly coated, then sprinkle around the base of the tombstones. Add candy pumpkins for a festive touch.
Extra Tips:
For an even spookier effect, consider using a small amount of dry ice around the base of the cake to create a misty graveyard atmosphere—just make sure it’s handled safely and kept away from the actual cake.
If you want to make the tombstones more personalized, use an icing pen to write spooky names or dates on them. To save time, you can bake the cake layers a day ahead and assemble it on the day of your event. The Haunted Graveyard Cake should be stored in a cool place to keep the decorations intact until ready to serve.
Eyeball Cake Pops
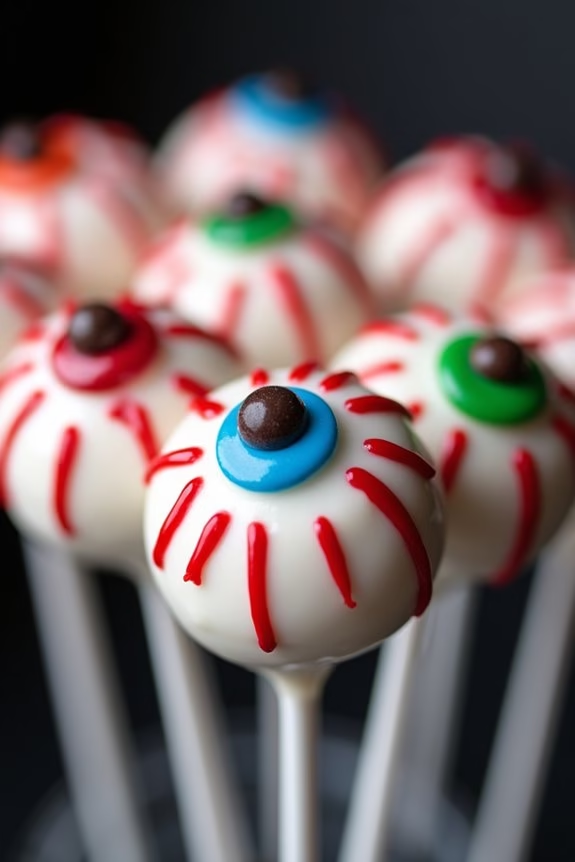
Halloween is the perfect time for spooktacular treats, and Eyeball Cake Pops are a fun and creepy addition to any festive gathering. These delicious little bites are made from moist cake and creamy frosting, then decorated to resemble eerie eyeballs. Kids will love the combination of sweetness and spookiness, and they’re sure to be a hit at any Halloween party.
Not only are they delicious, but they’re also easy to make, allowing even novice bakers to create a show-stopping treat.
The process of making Eyeball Cake Pops involves baking a simple cake, crumbling it, and mixing it with frosting to form a dough-like consistency. After shaping the mixture into balls and chilling them, you’ll dip them in white candy coating and decorate them with colorful candy and edible markers to create a realistic eyeball effect.
This recipe serves 4-6 people, guaranteeing there’s enough to go around for all the little monsters at your Halloween celebration.
Ingredients:
- 1 box of vanilla cake mix
- Ingredients required for cake mix (usually eggs, oil, and water)
- 1 cup vanilla frosting
- 12 ounces white candy melts
- Red, blue, or green candy melts (optional for iris)
- Red edible marker or gel icing
- Lollipop sticks
- Candy eyeballs or chocolate chips for pupils
Instructions:
- Bake the Cake: Prepare the vanilla cake mix according to the package instructions. Once baked, allow the cake to cool completely.
- Crumble the Cake: Once cooled, crumble the cake into a large mixing bowl until it resembles fine crumbs.
- Mix with Frosting: Add vanilla frosting to the crumbled cake, a little at a time, mixing until the mixture holds together like cookie dough.
- Shape the Cake Pops: Roll the mixture into small balls, about 1 inch in diameter, and place them on a baking sheet lined with parchment paper.
- Chill the Cake Balls: Place the baking sheet in the refrigerator for at least 1 hour, or in the freezer for about 20 minutes, to allow the cake balls to firm up.
- Prepare the Candy Melts: Melt the white candy melts according to the package instructions. Optionally, melt red, blue, or green candy melts for the iris.
- Insert Lollipop Sticks: Dip the end of each lollipop stick into the melted candy and insert it into a cake ball. This helps secure the stick to the cake pop.
- Coat the Cake Pops: Dip each cake pop into the melted white candy, covering completely and allowing excess to drip off. Stand them upright in a foam block to dry.
- Decorate the Eyeballs: Once the coating has set, use the red edible marker or gel icing to draw bloodshot lines on the white surface. Attach candy eyeballs or chocolate chips to create pupils, and if desired, use colored candy melts to add an iris around the pupil.
Extra Tips:
When working with candy melts, make sure they’re smooth and lump-free for easy coating. If the candy melts are too thick, you can add a small amount of vegetable shortening to thin them out.
Confirm the cake balls are well chilled before dipping; this helps prevent them from falling apart. If you’re planning to make these in advance, store the decorated cake pops in an airtight container in the refrigerator to keep them fresh.
Vampire Bat Cake
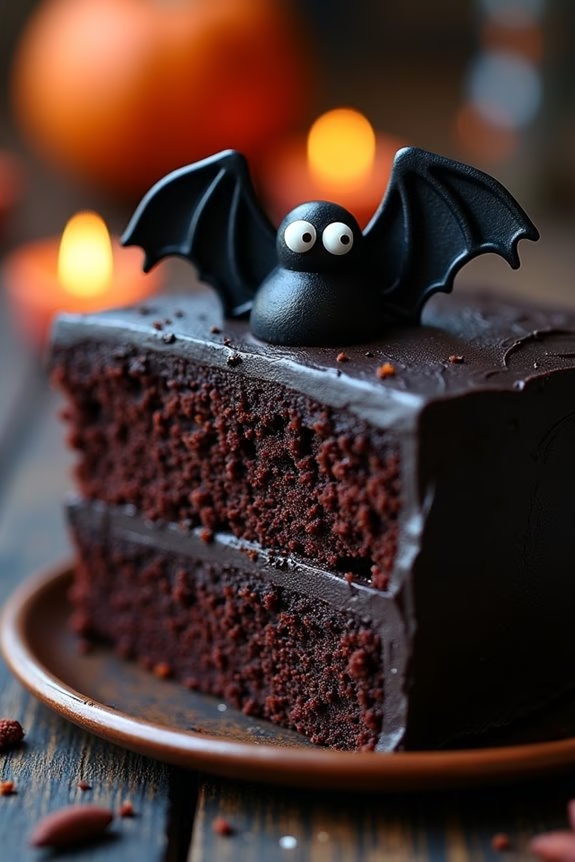
Vampire Bat Cake is a spooktacular Halloween treat that’s certain to delight kids and adults alike! This cake isn’t just about the delicious taste but also the creative presentation that captures the eerie essence of Halloween. Perfect for a themed party or a fun family baking project, this Vampire Bat Cake will add an impressive touch to your Halloween dessert table.
The cake is moist and rich, complemented by a smooth frosting, and topped with bat-shaped decorations that will have everyone in awe. Creating this cake involves a bit of artistry, but it’s a fantastic opportunity to get kids involved in the kitchen. The recipe uses basic cake ingredients, and the decorations can be customized to suit your preference. You can make the bats as spooky or as cute as you want them to be.
This cake serves 4–6 people, making it ideal for a small gathering or as part of a dessert buffet. Gather your ingredients and get ready to conjure up a Halloween masterpiece!
Ingredients
- 1 ½ cups all-purpose flour
- 1 cup granulated sugar
- ½ cup unsweetened cocoa powder
- 1 ½ teaspoons baking powder
- ½ teaspoon baking soda
- ½ teaspoon salt
- 2 large eggs
- 1 cup whole milk
- ½ cup vegetable oil
- 2 teaspoons vanilla extract
- ¾ cup boiling water
- 1 cup unsalted butter, softened
- 3 ½ cups powdered sugar
- ¼ cup heavy cream
- Black food coloring
- Edible candy eyes
- Black fondant or licorice for bat wings
Cooking Instructions
- Preheat and Prepare: Preheat your oven to 350°F (175°C). Grease and flour two 8-inch round cake pans and set them aside.
- Mix Dry Ingredients: In a large mixing bowl, whisk together the flour, sugar, cocoa powder, baking powder, baking soda, and salt until well combined.
- Combine Wet Ingredients: In another bowl, beat the eggs, milk, vegetable oil, and vanilla extract until smooth. Gradually add the dry ingredients to the wet ingredients, mixing until just combined.
- Add Boiling Water: Carefully stir in the boiling water to the batter. The batter will be thin, but this is normal and will result in a moist cake.
- Bake the Cake: Divide the batter evenly between the prepared cake pans. Bake for 30-35 minutes or until a toothpick inserted into the center comes out clean. Let the cakes cool in the pans for 10 minutes, then turn them out onto wire racks to cool completely.
- Prepare the Frosting: Beat the softened butter in a large bowl until creamy. Gradually add the powdered sugar, mixing well after each addition. Add the heavy cream and continue beating until smooth and fluffy. Mix in the black food coloring until the desired shade is achieved.
- Assemble the Cake: Once the cakes are completely cooled, place one layer on a serving plate. Spread a layer of frosting on top, then place the second cake layer on top. Frost the top and sides of the cake with the remaining black frosting.
- Decorate: Roll out the black fondant and cut out bat wing shapes, or use strips of licorice. Place the bat wings on the cake and add edible candy eyes to complete the bats.
Extra Tips
When coloring the frosting black, start with a small amount of food coloring and gradually add more to reach the desired shade. It’s easier to adjust the color as needed than to fix overly dark frosting.
To guarantee a smooth frosting application, make sure the cake layers are completely cooled before decorating. If you want to get creative, you can use additional decorations like edible glitter or colored sprinkles to add some festive flair.
Candy Corn Layer Cake
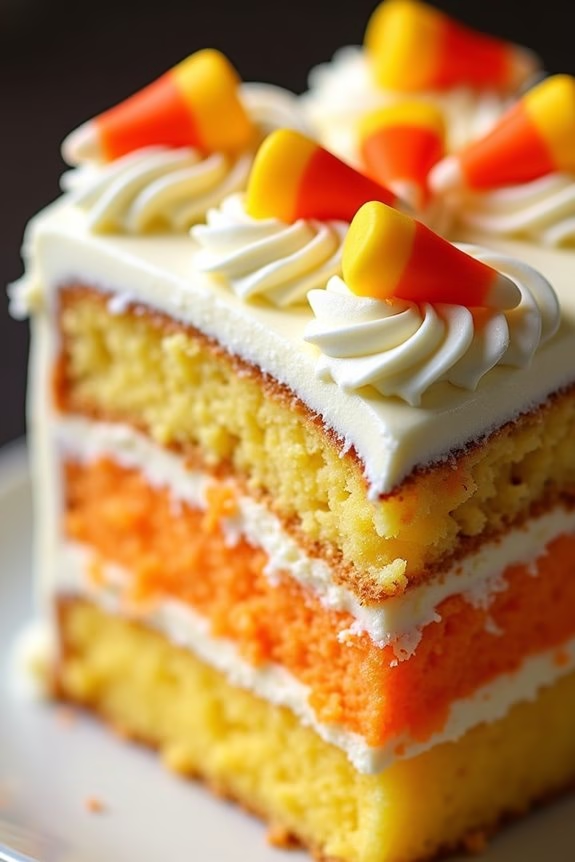
Celebrate Halloween with a delightful Candy Corn Layer Cake that’s sure to be a hit with kids and adults alike. This vibrant cake mimics the colors of the classic candy corn, making it not only a treat for the taste buds but also a feast for the eyes. Each layer features a different color – yellow, orange, and white – to replicate the iconic candy, and the entire cake is frosted with a creamy, sweet buttercream icing. This cake is a fun and festive way to bring the Halloween spirit to your table!
Perfect for a Halloween party or a family gathering, this cake serves 4-6 people and can be a great way to get the kids involved in baking. The layers are made from a simple vanilla cake batter that’s divided and dyed to match the candy corn theme. The smooth buttercream frosting ties all the layers together, creating a delicious dessert that captures the essence of Halloween in every bite.
Ingredients (serves 4-6 people):
- 2 1/2 cups all-purpose flour
- 1 tablespoon baking powder
- 1/2 teaspoon salt
- 1 cup unsalted butter, softened
- 2 cups granulated sugar
- 4 large eggs
- 1 tablespoon vanilla extract
- 1 cup whole milk
- Yellow and orange food coloring
- 3 cups powdered sugar
- 1/4 cup heavy cream
- Candy corn pieces for decoration
Instructions:
- Preheat and Prep: Preheat your oven to 350°F (175°C). Grease and flour three 8-inch round cake pans. This prevents the cake from sticking to the pans and guarantees even baking.
- Mix Dry Ingredients: In a medium bowl, whisk together the flour, baking powder, and salt. This step guarantees that the leavening agent is evenly distributed throughout the flour, which helps the cake to rise properly.
- Cream Butter and Sugar: In a large mixing bowl, beat the softened butter and granulated sugar together until light and fluffy. This should take about 3-4 minutes. Properly creamed butter and sugar create a cake with a tender crumb.
- Add Eggs and Vanilla: Add the eggs, one at a time, beating well after each addition. Stir in the vanilla extract. This method helps to incorporate air into the batter and prevents the mixture from curdling.
- Combine Wet and Dry Ingredients: Gradually add the dry ingredients to the creamed mixture, alternating with the milk. Begin and end with the dry ingredients, mixing just until combined. Avoid overmixing to keep the cake light.
- Divide and Color the Batter: Divide the batter evenly into three bowls. Tint one portion with yellow food coloring and another with orange food coloring, leaving the third one plain. Mix each until the color is evenly distributed.
- Bake the Layers: Pour each colored batter into the prepared cake pans. Bake for 20-25 minutes, or until a toothpick inserted into the center comes out clean. Allow the cakes to cool in the pans for 10 minutes before transferring to wire racks to cool completely.
- Prepare the Frosting: In a large bowl, beat the remaining butter until smooth. Gradually add the powdered sugar, alternating with the heavy cream, beating until the frosting is light and fluffy.
- Assemble the Cake: Place the yellow layer on a serving plate. Spread a layer of frosting over the top, then place the orange layer on top. Repeat with more frosting, followed by the white layer. Frost the top and sides of the cake with the remaining buttercream.
- Decorate: Garnish the top of the cake with candy corn pieces, arranging them in a circle or any pattern you like.
Extra Tips: For best results, confirm all ingredients are at room temperature before you start baking. This helps the batter mix more easily and results in a smoother texture. If you find the frosting too thick, add a little more heavy cream to reach your desired consistency. For a more striking color contrast, you can increase the amount of food coloring used in each layer. Finally, always use gel food coloring for more vibrant hues without altering the cake’s texture.
Mummy Roll Cake
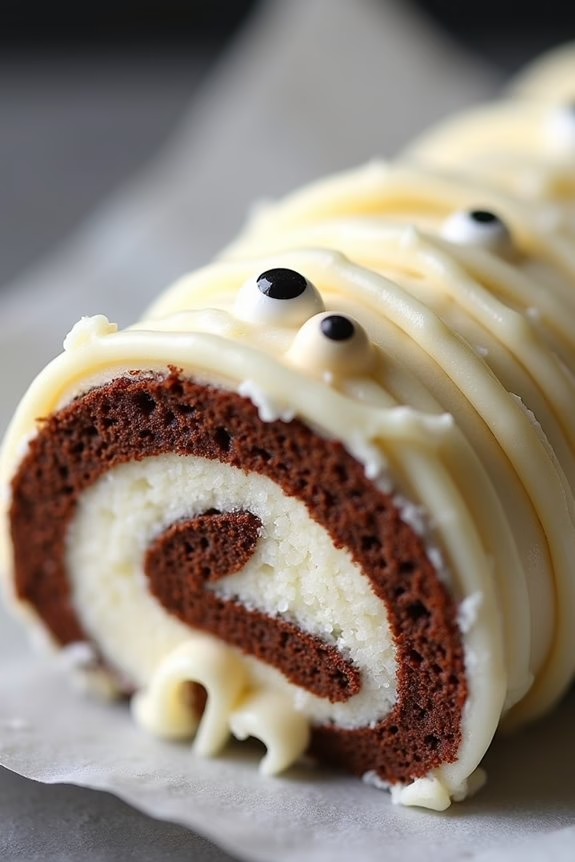
Looking to add a spooky yet delightful touch to your Halloween treats? The Mummy Roll Cake isn’t just a sweet indulgence for kids but also a fun baking project that will elevate the Halloween spirit in your home. This cake combines the classic Swiss roll with a Halloween twist, featuring a soft, fluffy sponge cake wrapped in layers of creamy frosting and decorated to resemble a mummy. With its eye-catching presentation and irresistible taste, this cake will be a hit at any Halloween party or gathering.
The Mummy Roll Cake is as fun to make as it’s to eat. You can get creative with the decorations by using candy eyes, colored frosting, and even marshmallows to mimic the mummy’s bandages. Not only is the cake delicious, but it also offers a fantastic opportunity to involve the kids in the kitchen, letting them help with the rolling and decorating. This cake serves 4-6 people, making it perfect for a small Halloween party or family gathering.
Ingredients for Mummy Roll Cake (Serves 4-6):
- 4 large eggs
- 100g granulated sugar
- 1 teaspoon vanilla extract
- 100g all-purpose flour
- 1/4 teaspoon baking powder
- 1/4 teaspoon salt
- 2 tablespoons cocoa powder
- 1 cup heavy cream
- 2 tablespoons powdered sugar
- 1/2 teaspoon vanilla extract (for cream)
- 1/2 cup white chocolate chips
- Candy eyes
- Black food coloring gel or black edible marker
Cooking Instructions:
- Preheat and Prepare: Start by preheating your oven to 350°F (175°C). Prepare a 10×15-inch jelly roll pan by lining it with parchment paper.
- Make the Sponge: In a mixing bowl, beat the eggs, sugar, and vanilla extract with an electric mixer at high speed until the mixture is thick and pale, about 5-7 minutes.
- Mix Dry Ingredients: In another bowl, sift together the flour, baking powder, salt, and cocoa powder. Gently fold the dry ingredients into the egg mixture using a spatula until well combined.
- Bake the Cake: Pour the batter into the prepared jelly roll pan, spreading it evenly. Bake for 10-12 minutes until the cake springs back when touched lightly.
- Roll the Cake: Once baked, immediately turn the cake onto a clean kitchen towel dusted with powdered sugar. Peel off the parchment paper and roll the cake tightly with the towel from the short end. Let it cool completely.
- Prepare the Filling: Whip the heavy cream, powdered sugar, and vanilla extract until stiff peaks form. Unroll the cooled cake and spread the whipped cream evenly over the surface.
- Reroll and Chill: Gently reroll the cake without the towel and place it seam side down on a serving platter. Refrigerate for at least 30 minutes to set.
- Decorate the Mummy: Melt the white chocolate chips and spread or pipe them over the cake to create the mummy’s bandages. Place candy eyes on the roll and use black food coloring gel or an edible marker to add details.
Extra Tips:
When making the Mummy Roll Cake, verify the sponge cake is rolled while it’s still warm to prevent cracking. If you don’t have a jelly roll pan, you can use a similar-sized pan, but keep an eye on the baking time.
For a more pronounced mummy effect, create bandage layers using a piping bag and different nozzles. If your kitchen is warm, place the whipped cream in the refrigerator for a few minutes before spreading it on the cake to maintain its firmness.
Enjoy the process and don’t worry about perfection; the spooky charm of this cake lies in its whimsical imperfection!

