
As the air turns crisp and leaves crunch underfoot, there’s something irresistibly magical about crafting a Halloween feast that thrills the senses and sends a shiver down your spine. Picture sipping a Bloody Mary from a syringe or biting into a hot dog that looks just like severed fingers. These scary yet tantalizing treats promise to delight your inner ghoul. Ready to explore the deliciously eerie side of Halloween? Let’s conjure up these spine-tingling recipes together.
Bloody Mary Syringes
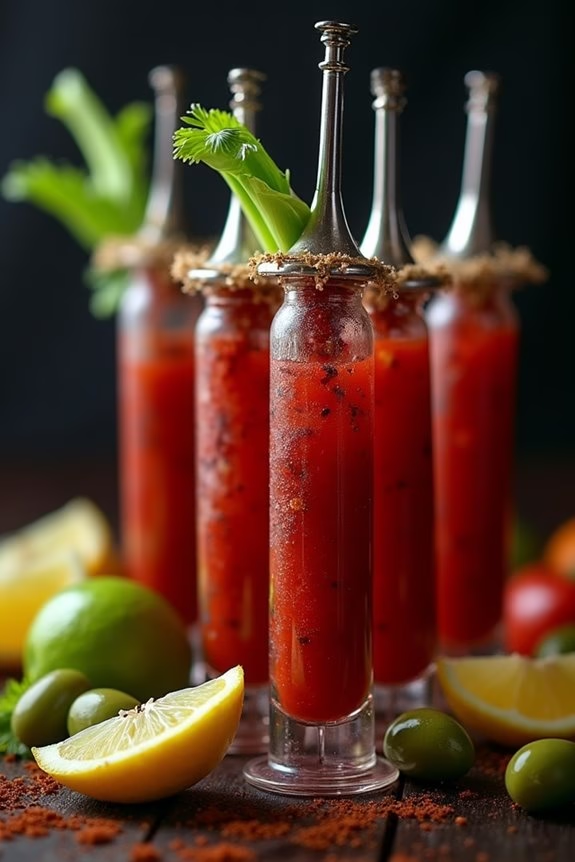
The Bloody Mary Syringe is an excellent choice for those who appreciate a good cocktail and want to add a playful twist to their Halloween festivities. The recipe involves creating a flavorful Bloody Mary mix, which is then injected into large, food-safe plastic syringes. These syringes allow guests to inject the cocktail directly into their mouths, adding an element of surprise and delight. The recipe can be customized according to your spice preference, making it versatile enough to please all your party-goers.
Here’s how you can whip up a batch of Bloody Mary Syringes for 4-6 people:
Ingredients:
- 1 liter tomato juice
- 1/2 cup vodka
- 2 tablespoons Worcestershire sauce
- 2 tablespoons freshly squeezed lemon juice
- 1 tablespoon hot sauce (adjust to taste)
- 1 teaspoon celery salt
- 1 teaspoon ground black pepper
- 1 teaspoon smoked paprika
- 1 tablespoon horseradish (optional, for extra spice)
- Celery sticks, olives, and lemon wedges for garnish
- 4-6 large food-safe plastic syringes (2 oz each)
Instructions:
- Prepare the Bloody Mary Mix: In a large pitcher, combine the tomato juice, vodka, Worcestershire sauce, lemon juice, hot sauce, celery salt, black pepper, smoked paprika, and horseradish if using. Stir thoroughly until all the ingredients are well mixed.
- Taste and Adjust: Taste the mixture and adjust the seasoning according to your preference. You may add more hot sauce for heat, more Worcestershire for depth, or more lemon juice for tanginess.
- Fill the Syringes: Carefully fill each syringe with the Bloody Mary mix. To do this, submerge the open end of the syringe into the pitcher and slowly pull the plunger to draw the liquid into the syringe. Verify each syringe is filled to capacity.
- Chill the Syringes: Once filled, place the syringes in the refrigerator for at least 30 minutes to chill. This step is essential for serving the cocktail cold and enhancing the flavors.
- Serve with Garnishes: Arrange the syringes on a tray and serve with garnishes on the side, such as celery sticks, olives, and lemon wedges. Encourage guests to enjoy the cocktail by pressing the syringe directly into their mouths for a fun and interactive experience.
Extra Tips: For a more intense flavor, prepare the Bloody Mary mix a day in advance and let it sit in the refrigerator overnight. This allows the flavors to meld together beautifully.
If you want to make a non-alcoholic version, simply omit the vodka and consider adding a splash of pickle juice for an extra zing. Finally, verify the syringes are food-safe and clean before use to prevent any contamination.
Severed Finger Hot Dogs
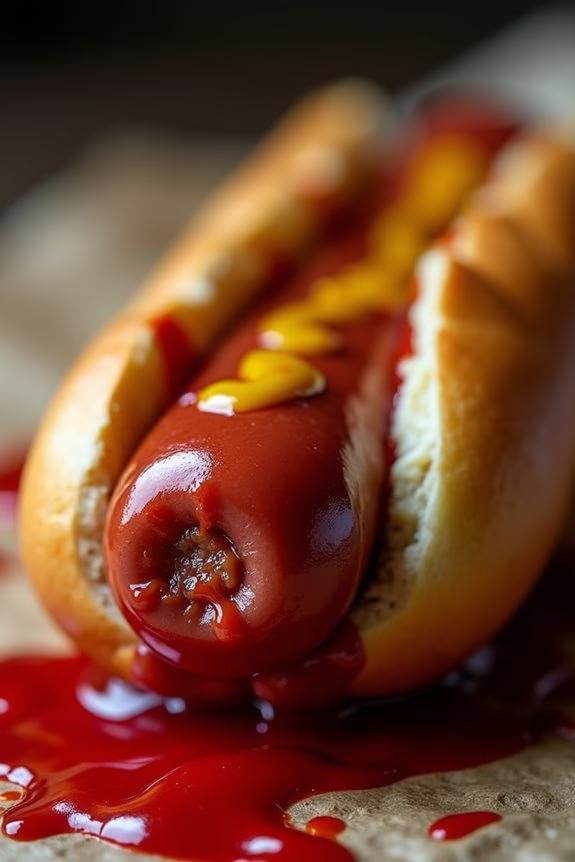
Severed Finger Hot Dogs are a delightfully gruesome dish perfect for adding a spooky touch to your Halloween party spread. This eerie appetizer takes the classic hot dog and transforms it into something worthy of a horror movie set. The visual effect is both creepy and fun, making it a hit among adults who appreciate a good Halloween theme.
The best part is that Severed Finger Hot Dogs are easy to prepare and can be made in advance, allowing you to spend more time enjoying the festivities.
These hot dogs are cleverly crafted to resemble severed fingers, complete with knuckle lines and fingernails made from edible ingredients. They’re served on a bed of ketchup or mustard, simulating blood or pus for an extra frightful effect. Whether you serve them as finger food or part of a larger buffet, they’re sure to draw some gasps and giggles from your guests.
Let’s get started on creating this spine-chilling dish for 4-6 people.
Ingredients:
- 8 hot dogs
- 8 hot dog buns
- Ketchup or mustard
- 1 small onion (optional, for extra detail)
- Sliced almonds or small pieces of bell pepper (for fingernails)
Cooking Instructions:
- Prepare the Hot Dogs: Begin by boiling the hot dogs in water according to the package instructions, usually for about 5-7 minutes until fully heated through. Alternatively, you can grill them for a bit of charred flavor.
- Create the Finger Effect: Once cooked, remove the hot dogs from the water or grill. Using a small, sharp knife, cut shallow slits in the hot dogs to resemble knuckle lines. Make three slits about 1/4 inch apart near the middle and another three slits about 1/4 inch from one end.
- Add the Fingernails: At the opposite end of the knuckle slits, slice off a small section of the hot dog to create a flat surface. Place a small piece of sliced almond or bell pepper on the flat end to mimic a fingernail. If using almonds, you may want to lightly press them into the hot dog to secure them.
- Assemble the Severed Fingers: If desired, slice small pieces of onion to add as extra details on the knuckle lines. Place the hot dogs into the buns, positioning them so the “fingernail” end is slightly out of the bun.
- Add the Gory Details: Generously drizzle ketchup or mustard at the base of the hot dogs to create a gory, bloody effect. Allow some to drip down the sides for added spookiness.
Extra Tips:
For an even more realistic effect, try charring the hot dogs slightly on the grill to give them a more rugged, finger-like appearance.
You can also experiment with different “fingernail” options, such as using thinly sliced olives or even small pieces of cheese. If you’re preparing these in advance, assemble the hot dogs and buns but wait to add the ketchup or mustard until just before serving to prevent the buns from becoming soggy.
Enjoy your creepy culinary creation and the spine-tingling reactions it inspires!
Vampire Bat Wings
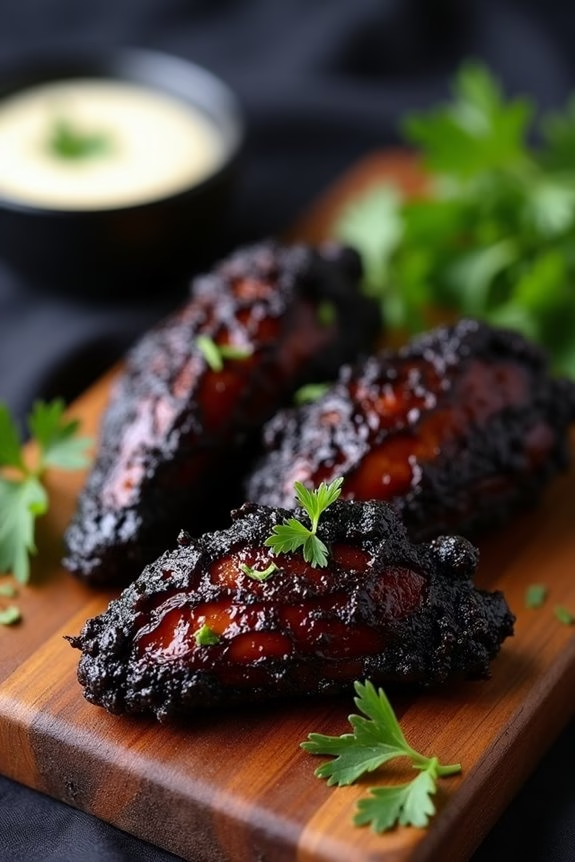
Halloween is the perfect time to release your culinary creativity and serve up some spooky treats for adults who enjoy a good scare on their plates. One standout dish that perfectly captures the eerie essence of the season is Vampire Bat Wings. These tantalizingly dark and flavorful chicken wings are an enticing blend of savory and spicy, offering a gothic twist on a classic favorite.
Perfect for a Halloween gathering, these wings are sure to be a hit with your guests, providing not only a visual treat but also a delicious burst of flavor.
What makes Vampire Bat Wings so special is their deep, dark appearance, achieved through a unique marinade that incorporates soy sauce, balsamic vinegar, and black food coloring. The marinade infuses the wings with a rich umami flavor, while a hint of cayenne pepper adds a touch of heat that’s sure to warm up any cool October evening.
These wings are best served with a creamy garlic dip, which not only complements the wings but also pays homage to the legendary garlic-repelling lore of vampires. Whether you’re hosting a sophisticated Halloween soiree or a casual get-together, Vampire Bat Wings will add a memorable and deliciously frightful flair to your menu.
Ingredients (Serves 4-6):
- 2 lbs chicken wings, split at the joint, tips removed
- 1/2 cup soy sauce
- 1/4 cup balsamic vinegar
- 2 tablespoons olive oil
- 1 tablespoon honey
- 2 teaspoons garlic powder
- 1 teaspoon onion powder
- 1 teaspoon smoked paprika
- 1/2 teaspoon cayenne pepper
- Black food coloring (optional, for a darker effect)
- Salt and pepper to taste
- Fresh parsley, chopped for garnish (optional)
Cooking Instructions:
- Prepare the Marinade: In a large mixing bowl, combine the soy sauce, balsamic vinegar, olive oil, honey, garlic powder, onion powder, smoked paprika, cayenne pepper, and a few drops of black food coloring. Stir the mixture thoroughly until all ingredients are well incorporated.
- Marinate the Wings: Place the chicken wings in a resealable plastic bag or a shallow dish. Pour the marinade over the wings, making sure they’re fully coated. Seal the bag or cover the dish, and allow the wings to marinate in the refrigerator for at least 2 hours, or overnight for best results.
- Preheat the Oven: Preheat your oven to 400°F (200°C). Line a baking sheet with aluminum foil or parchment paper for easy cleanup and place a wire rack on top.
- Arrange the Wings: Remove the wings from the marinade, letting excess marinade drip off. Arrange the wings in a single layer on the prepared wire rack. Make sure to leave some space between each wing for even cooking.
- Bake the Wings: Place the baking sheet in the preheated oven and bake the wings for 35-40 minutes, or until they’re cooked through and the skin is crispy. Turn the wings halfway through cooking to guarantee even browning.
- Garnish and Serve: Once baked, remove the wings from the oven and allow them to cool for a few minutes. Transfer the wings to a serving platter and garnish with fresh parsley if desired. Serve with a side of creamy garlic dip for a complete vampire-themed treat.
Extra Tips:
For an even spookier presentation, consider using a mix of both black and red food coloring to create a blood-red hue on some of the wings. If you prefer a less intense heat level, reduce the amount of cayenne pepper or omit it altogether.
Additionally, if you don’t have a wire rack, you can place the wings directly on the lined baking sheet, but be sure to flip them more frequently to guarantee they crisp up nicely. To make the wings extra crispy, consider broiling them for an additional 3-5 minutes at the end of the baking time, keeping a close eye to avoid burning.
Creepy Crawly Deviled Eggs

Creepy Crawly Deviled Eggs are a perfect Halloween treat for adults, combining a classic appetizer with a spooky twist. These eggs aren’t only delicious but also delightfully eerie, making them an excellent conversation starter for any Halloween gathering. The devilish appearance is achieved by creatively using black olives to mimic spiders crawling across the egg surface, giving your party spread a fun and festive feel.
With the right balance of flavors and a touch of imagination, these deviled eggs will be the highlight of your Halloween table. Despite their sinister appearance, Creepy Crawly Deviled Eggs are surprisingly easy to make and require minimal ingredients. The creamy yolk mixture is enhanced with tangy mustard and a hint of paprika, providing a flavorful backdrop for the olive “spiders.”
This recipe serves 4-6 people and can be easily doubled for larger gatherings. By following the simple steps below, you’ll be able to create a spooky snack that’s sure to impress your guests.
Ingredients (for 4-6 servings):
- 6 large eggs
- 3 tablespoons mayonnaise
- 1 teaspoon Dijon mustard
- 1/2 teaspoon white vinegar
- Salt and pepper, to taste
- Paprika, for garnish
- 12-18 pitted black olives
Instructions:
- Boil the Eggs: Place the eggs in a saucepan and cover them with cold water. Bring the water to a boil over medium-high heat. Once boiling, remove the saucepan from the heat, cover it, and let it sit for 10 minutes.
- Cool and Peel: After 10 minutes, transfer the eggs to a bowl of ice water to cool for about 5 minutes. Once cooled, gently peel the eggs under running water to remove the shells.
- Cut and Scoop: Slice each egg in half lengthwise. Carefully remove the yolks and place them in a small mixing bowl. Arrange the egg whites on a serving platter.
- Prepare the Filling: Mash the yolks with a fork until they’re crumbly. Add mayonnaise, Dijon mustard, vinegar, salt, and pepper. Mix until smooth and creamy.
- Fill the Egg Whites: Spoon or pipe the yolk mixture back into the egg white halves, mounding slightly.
- Create the Spiders: For each egg half, use one olive to create a spider. Slice the olive in half; use one half for the body. Slice the remaining half into thin strips to form the legs. Arrange the olive body and legs on top of the yolk mixture.
- Garnish and Serve: Lightly sprinkle the deviled eggs with paprika for extra flavor and color. Refrigerate until ready to serve.
Extra Tips:
For best results, use fresh eggs for boiling as they’re easier to peel. If you want to make the yolk mixture even creamier, add a little more mayonnaise until you reach the desired consistency.
If you’re making these in advance, prepare the eggs and filling separately, and assemble them shortly before serving to guarantee the olives stay fresh and the eggs maintain their appearance. Additionally, experimenting with different spices or adding a splash of hot sauce can give your deviled eggs a unique twist, perfect for delighting adventurous taste buds.
Frankenstein Guacamole
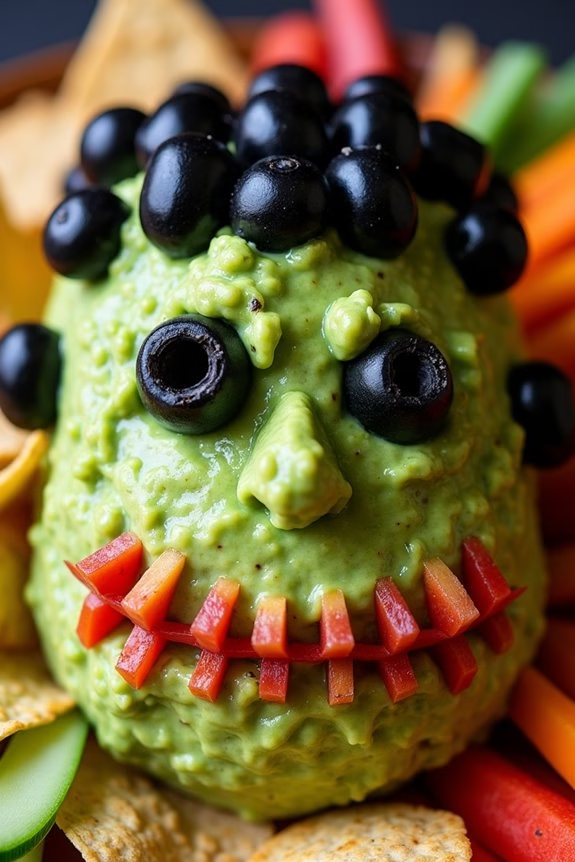
Frankenstein Guacamole is a playful and delicious twist on the classic guacamole, designed to bring a touch of spooky fun to your Halloween gathering. This recipe transforms the traditional avocado dip into a ghoulishly green creation that resembles the iconic monster, making it a perfect centerpiece for a Halloween party spread. Not only is it visually entertaining, but it also maintains the rich, creamy texture and fresh flavors that make guacamole a crowd favorite.
The key to this dish lies in the presentation. By using a few simple ingredients, you can craft a guacamole that not only tastes amazing but also looks like Frankenstein’s face. Serve it with your choice of tortilla chips or vegetable sticks, and watch as your guests marvel at your creativity and enjoy this delicious dip. Here’s how you can make Frankenstein Guacamole for 4-6 people:
Ingredients:
- 4 ripe avocados
- 1 medium lime, juiced
- 2 Roma tomatoes, diced
- 1 small red onion, finely chopped
- 1 jalapeño, seeded and minced
- 2 tablespoons fresh cilantro, chopped
- Salt and pepper to taste
- Black olives (for decoration)
- 1 small cucumber (for decoration)
- 1 red bell pepper (for decoration)
Instructions:
- Prepare the Avocados: Slice the avocados in half, remove the pits, and scoop the flesh into a large mixing bowl. Use a fork or potato masher to mash the avocado until you reach your desired consistency.
- Add Fresh Ingredients: To the mashed avocados, add the lime juice, diced tomatoes, chopped red onion, minced jalapeño, and chopped cilantro. Stir the mixture well until all ingredients are thoroughly combined.
- Season: Add salt and pepper to taste, and mix well. Taste the guacamole and adjust seasoning if necessary.
- Create Frankenstein’s Face: Transfer the guacamole onto a serving platter and spread it out evenly to form a large, oval shape, representing Frankenstein’s face.
- Decorate: Use black olives to create Frankenstein’s hair and eyes. Slice the cucumber to create a mouth and use thin strips of red bell pepper to craft a scar or stitches across the face.
- Serve: Present your Frankenstein Guacamole with tortilla chips or vegetable sticks around the platter and enjoy the compliments on your creative and delicious dip!
Extra Tips: To prevent the guacamole from browning, you can press a sheet of plastic wrap directly onto the surface of the dip before serving. This helps to minimize air exposure. Additionally, make sure that your avocados are perfectly ripe for the best texture and flavor. If you prefer a spicier dip, you can leave some seeds in the jalapeño or add an extra one.
Feel free to get creative with the decorations, using other vegetables or edible items to add your personal touch to Frankenstein’s face.
Mummified Sausage Rolls
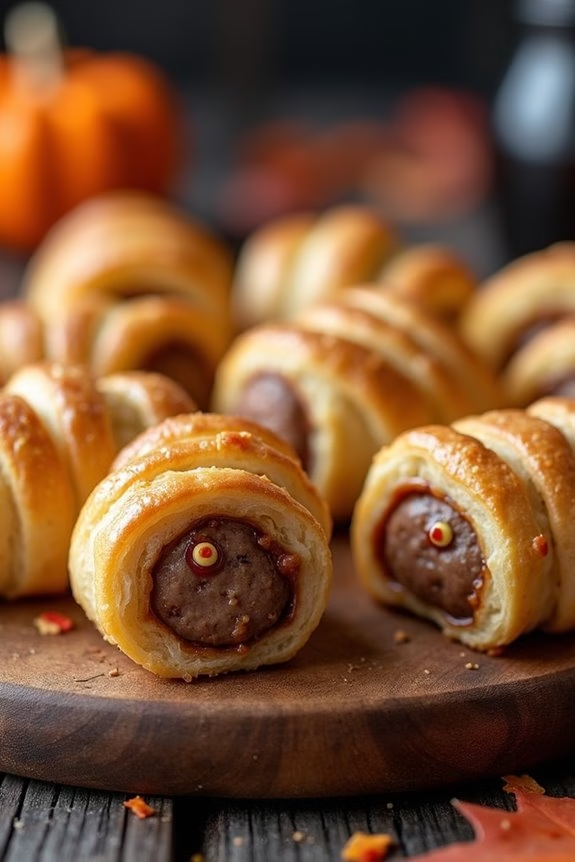
Halloween isn’t just for kids, and neither is the spooky food that comes with it. Mummified Sausage Rolls are the perfect Halloween food idea for adults looking to add a bit of festive fun to their party spread. These delightful appetizers are a playful twist on the classic sausage roll, featuring sausages wrapped in strips of flaky puff pastry to resemble little mummies. Not only are they visually appealing, but they also deliver a delicious and savory flavor that will be a hit among guests.
The key to making Mummified Sausage Rolls lies in the puff pastry, which forms the mummy’s bandages, and the mini sausages, which serve as the bulk of the mummy. The preparation is simple yet fun, allowing you to get creative with your rolling and wrapping techniques. Whether you’re hosting a Halloween party or just want to enjoy some frightful finger food, these Mummified Sausage Rolls are bound to delight and entertain.
Ingredients for a serving size of 4-6 people:
- 12 mini sausages
- 1 sheet of puff pastry
- 1 egg, beaten
- Mustard or ketchup for “eyes”
Cooking Instructions:
- Preheat the Oven: Begin by preheating your oven to 400°F (200°C). This guarantees that it’s ready for baking once your sausage rolls are prepared.
- Prepare the Puff Pastry: Roll out the puff pastry sheet on a lightly floured surface to prevent sticking. Use a sharp knife or pizza cutter to slice the pastry into thin strips, approximately 1/4 inch wide. These strips will serve as the mummy’s bandages.
- Wrap the Sausages: Take one mini sausage at a time and wrap it with the puff pastry strips. Start at one end of the sausage and spiral the strip around, leaving a small gap near the top to form a face. Continue wrapping until the sausage is fully covered, making sure the ends of the pastry strips are tucked or pressed into the dough to secure them.
- Brush with Egg Wash: Place the wrapped sausages onto a baking sheet lined with parchment paper. Using a pastry brush, gently coat each sausage roll with the beaten egg. This will give them a golden, shiny finish once baked.
- Bake the Sausage Rolls: Place the baking sheet in the preheated oven and bake for 15-20 minutes, or until the pastry is puffed and golden brown.
- Add the Eyes: Once baked, remove the sausage rolls from the oven and let them cool slightly. Use a small amount of mustard or ketchup to create tiny eyes on the exposed part of the sausage, bringing your mummies to life.
Extra Tips:
When working with puff pastry, it’s best to keep it chilled until you’re ready to use it, as it becomes difficult to handle if it gets too warm. If the pastry becomes too soft while wrapping the sausages, simply place it back in the refrigerator for a few minutes to firm up.
Additionally, feel free to experiment with different types of sausages or even add a slice of cheese under the pastry for a more indulgent treat. These Mummified Sausage Rolls can also be prepared ahead of time and stored in the refrigerator until you’re ready to bake them, making them a convenient choice for party planning.
Ghostly Cheese Balls
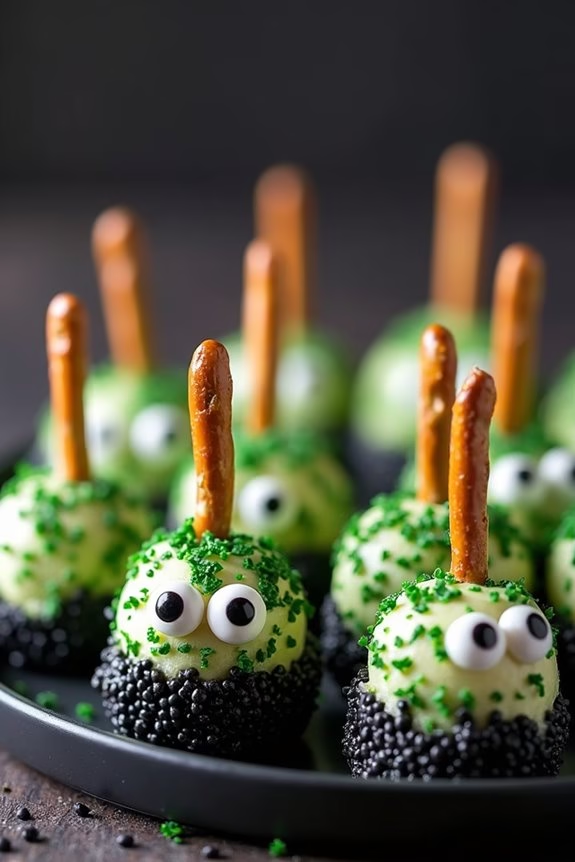
Get ready to add a spooky twist to your Halloween party with these delightful Ghostly Cheese Balls. This dish is a perfect blend of creamy and tangy flavors, sure to impress your guests with both its taste and fun ghostly appearance.
The ghostly cheese balls are made using a combination of cream cheese and cheddar cheese, which is then shaped into small balls and decorated to resemble cute, little ghosts. They serve as an excellent appetizer or snack and are a definite crowd-pleaser for adults who enjoy a playful yet sophisticated treat.
These Ghostly Cheese Balls aren’t only delicious but also relatively easy to prepare, making them a great choice for your Halloween festivities. With just a few ingredients and simple steps, you can create this fun dish that will surely be the talk of the party.
Serve them with crackers, breadsticks, or fresh vegetables for a complete and satisfying snack that will keep your guests coming back for more. This recipe serves 4-6 people, making it an ideal choice for a small gathering or as part of a larger spread of Halloween-themed foods.
Ingredients:
- 8 oz cream cheese, softened
- 1 cup shredded sharp cheddar cheese
- 1/4 cup grated Parmesan cheese
- 1/4 teaspoon garlic powder
- 1/4 teaspoon onion powder
- Salt and pepper, to taste
- 1/2 cup finely chopped fresh parsley
- 1/4 cup black sesame seeds
- 12-18 mini pretzel sticks
- 12-18 edible candy eyes
Cooking Instructions:
- Prepare the Cheese Mixture: In a large mixing bowl, combine the softened cream cheese, shredded cheddar cheese, grated Parmesan cheese, garlic powder, onion powder, salt, and pepper. Mix well until all the ingredients are evenly incorporated and the mixture is smooth and creamy.
- Shape the Balls: Using your hands, take small portions of the cheese mixture and roll them into balls approximately 1 inch in diameter. You should be able to make 12-18 cheese balls depending on the size.
- Decorate the Cheese Balls: Roll each cheese ball in the finely chopped parsley until it’s completely coated, giving them a fresh green appearance. Then, dip the bottom of each ball lightly in the black sesame seeds to create a base, simulating the appearance of a ghost floating.
- Add the Details: Insert a mini pretzel stick into the top of each cheese ball to serve as a holder and attach two edible candy eyes to each cheese ball to give them a ghostly face.
- Chill Before Serving: Place the ghostly cheese balls on a tray and refrigerate for at least 30 minutes to allow them to firm up before serving. This will help maintain their shape and make them easier to handle.
Extra Tips:
To make sure the cheese balls hold their shape and stay firm, it’s important to chill the mixture thoroughly before rolling it into balls. If you’re preparing these in advance, keep them covered in the refrigerator until you’re ready to serve.
Feel free to get creative with the decorations, such as using different herbs or seeds for coating. For a more festive touch, you can also use colored edible eyes or experiment with different shapes to fit your Halloween theme.
Witch’s Brew Punch

Witch’s Brew Punch is the perfect concoction for adding a spooky touch to your Halloween festivities. This eerie, vibrant green punch isn’t just visually enchanting but also invigoratingly delicious, making it an ideal choice for adult gatherings. The combination of fruit juices and a hint of fizz provides a delightful balance of flavors, while the optional addition of alcohol adds an extra kick for those looking to spice up the celebration.
Serve this chilling beverage in a cauldron with dry ice for an added theatrical effect that will leave your guests enchanted.
Creating Witch’s Brew Punch is as much about presentation as it’s about taste. The punch is designed to evoke the mysterious and magical aura of a witch’s potion, complete with swirling mists and bubbling froth. Whether you’re hosting a costume party or a more intimate get-together, this punch is sure to be a hit.
With just a few ingredients and minimal preparation, you can easily whip up a batch that will serve 4-6 people, making sure everyone gets to enjoy a glass of this bewitching beverage.
Ingredients for 4-6 servings:
- 4 cups of pineapple juice
- 2 cups of limeade
- 1 liter of lemon-lime soda
- 1 cup of vodka (optional)
- 1/2 cup of blue curaçao
- Lime slices for garnish
- Green food coloring (optional)
- Dry ice (optional, for decoration)
Cooking Instructions:
- Combine Juices: In a large punch bowl, combine the pineapple juice and limeade. Stir the mixture until well blended. This forms the base of your punch, providing the sweet and tangy flavors that are both invigorating and delicious.
- Add Fizz: Slowly pour in the lemon-lime soda to add a bubbly, effervescent quality to your punch. Stir gently to maintain the carbonation, which will help create the frothy, witchy appearance.
- Incorporate Alcohol: If you choose to make an alcoholic version, add the vodka and blue curaçao to the punch. Stir well to blend the alcohol evenly throughout the mixture. The blue curaçao will also enhance the green color, giving the punch its signature witchy hue.
- Adjust the Color: If you desire a more vibrant green, add a few drops of green food coloring. Stir until you achieve the desired color. This step is optional but can make the punch look more magical.
- Garnish and Serve: Slice limes and add them to the punch for a decorative and flavorful garnish. For an extra spooky effect, place a small piece of dry ice in the punch bowl just before serving. This will create a bubbling, misty effect that will wow your guests.
Extra Tips:
When using dry ice, handle it with care and use gloves or tongs, as it can cause burns if touched directly. Make sure that the dry ice is used only for decorative purposes and not ingested.
To maintain the punch’s fizz, add the soda just before serving, and consider keeping extra soda on hand to top up if necessary. Additionally, if you prefer a non-alcoholic version, simply omit the vodka and blue curaçao, and increase the limeade for added flavor.
Enjoy the mystical experience of serving Witch’s Brew Punch at your Halloween gathering!
Zombie Brain Pâté

Looking to add a touch of eerie elegance to your Halloween gathering? Consider crafting a dish that’s both sophisticated and spine-chilling: Zombie Brain Pâté. This culinary creation is perfect for an adult Halloween party, offering a deliciously creepy centerpiece that’s sure to impress your guests.
With a rich blend of flavors and a presentation that’s straight out of a horror movie, Zombie Brain Pâté combines the refinement of classic pâté with the macabre allure of Halloween.
Zombie Brain Pâté is made with chicken liver, creating a smooth and creamy texture that’s enhanced by aromatic herbs and flavorful seasonings. The pâté is shaped and garnished to resemble a brain, adding to the ghoulish theme. Served with crusty bread or crackers, this dish is an excellent choice for those who appreciate the artistry of food presentation as much as its taste.
Below, you’ll find the recipe to make enough for 4-6 people, guaranteeing everyone can savor this spooky delight.
Ingredients for 4-6 people:
- 1 pound chicken livers, cleaned
- 1 medium onion, finely chopped
- 3 garlic cloves, minced
- 1/2 cup unsalted butter, divided
- 1/4 cup heavy cream
- 1/4 cup brandy or cognac
- 2 teaspoons fresh thyme leaves
- Salt and black pepper, to taste
- Red food coloring
- White food coloring
- Crackers or sliced baguette, for serving
Cooking Instructions:
- Prepare the Chicken Livers: Begin by thoroughly cleaning the chicken livers, removing any fat and connective tissue. Pat them dry with paper towels to remove excess moisture.
- Sauté the Aromatics: In a large skillet, melt half of the butter over medium heat. Add the chopped onion and minced garlic, sautéing until the onion becomes translucent and fragrant.
- Cook the Livers: Add the cleaned chicken livers to the skillet. Cook them for about 5-7 minutes, until they’re browned on the outside but still slightly pink on the inside. This will guarantee they remain tender.
- Flambé with Brandy: Carefully pour the brandy or cognac into the skillet. Use a long lighter to ignite the alcohol, allowing the flames to cook off. This step adds depth of flavor to the pâté.
- Blend the Mixture: Transfer the contents of the skillet to a food processor. Add the remaining butter, heavy cream, and thyme leaves. Blend until smooth, then season with salt and pepper to taste.
- Shape the Pâté: Spoon the pâté onto a serving dish, shaping it into a brain-like form. Use a knife or spatula to create grooves and folds to mimic the appearance of a brain.
- Add Color: Mix a few drops of red and white food coloring to achieve a pale, brain-like hue. Carefully brush this coloring onto the surface of the pâté for a realistic effect.
- Chill and Serve: Refrigerate the shaped pâté for at least 2 hours, allowing it to firm up. Serve with crackers or sliced baguette, accompanied by a decorative knife for guests to serve themselves.
Extra Tips:
For a smoother pâté, you can pass the mixture through a fine-mesh sieve after blending. This step creates a silky texture, ideal for spreading.
When flambéing, be sure to stand back and use caution, as the flames can be quite high. If you’re unable to use alcohol, substitute with a splash of apple cider vinegar for acidity.
Finally, for an extra touch of realism, add a few veins using a thin line of blue food coloring applied with a toothpick. Enjoy the eerie elegance of your Zombie Brain Pâté!
Eerie Eyeball Martini
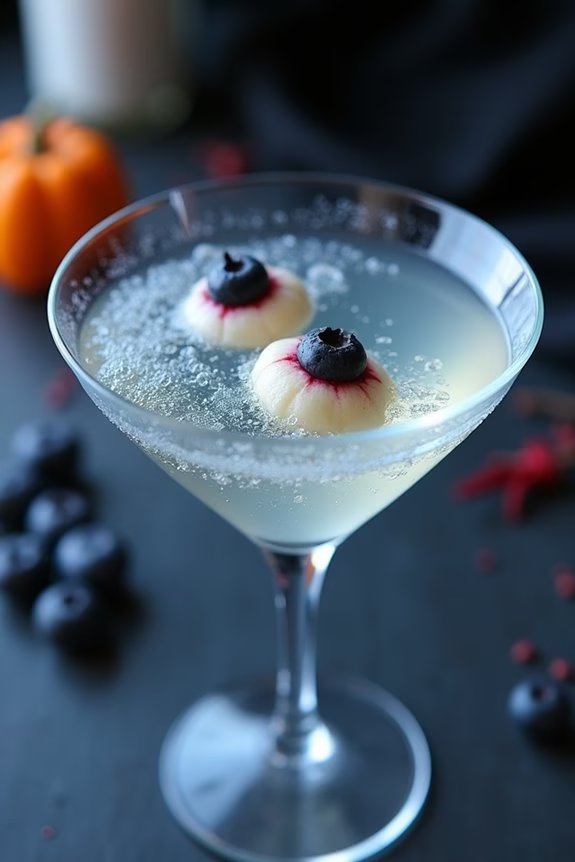
If you’re looking to add a spooky touch to your Halloween party for adults, the Eerie Eyeball Martini is a must-try! This cocktail isn’t only delicious but also visually striking, creating a perfect blend of sophistication and spine-chilling fun. The Eerie Eyeball Martini combines the smooth flavors of vodka with a hint of lychee, complemented by a “creepy” garnish that resembles an eyeball, making it a perfect centerpiece for your Halloween festivities.
This cocktail is a great conversation starter and is sure to impress your guests with its creative presentation. The eyeball garnish is the true star of the Eerie Eyeball Martini. Using lychee fruit and blueberries, you can create a realistic and edible “eyeball” that floats enticingly in your martini glass.
The lychee’s delicate sweetness pairs wonderfully with the vodka, while the blueberry adds a pop of color, enhancing the overall eerie effect. This cocktail isn’t only a visual treat but also a delectable delight, offering a tantalizing balance of flavors. Whether you’re hosting a Halloween party or simply want to enjoy a themed drink, the Eerie Eyeball Martini is a perfect choice.
Ingredients for 4-6 servings:
- 1 cup vodka
- 1/2 cup lychee liqueur
- 1/2 cup white cranberry juice
- 12 canned lychee fruits
- 12 fresh blueberries
- Ice cubes
- Red food coloring (optional)
- Cocktail picks
Cooking Instructions:
- Prepare the Eyeballs: Drain the canned lychee fruits and gently pat them dry with a paper towel. Insert a fresh blueberry into the hollow center of each lychee fruit to create an “eyeball.” If desired, use a toothpick dipped in red food coloring to add “veins” to the lychee for a more realistic effect. Set aside these eyeball garnishes.
- Mix the Martini: In a cocktail shaker, combine the vodka, lychee liqueur, and white cranberry juice. Add a generous amount of ice cubes to the shaker. Secure the lid and shake vigorously for about 20-30 seconds until the mixture is well-chilled.
- Strain and Serve: Strain the mixture into chilled martini glasses, filling each glass about three-quarters full. Gently place two or three of the prepared lychee “eyeballs” into each glass, allowing them to float.
- Garnish and Present: For an extra spooky touch, use cocktail picks to skewer an additional lychee eyeball and rest it on the rim of each glass. Serve immediately to guarantee the best presentation and flavor.
Extra Tips:
For an even more chilling experience, consider chilling the lychee eyeballs in the freezer for a few minutes before adding them to the drinks. This will help them keep their shape longer and maintain the eerie appearance in the glass.
Additionally, if you’re looking to enhance the color of your martini, you can add a drop or two of red food coloring to the mixture to create a blood-like hue. Remember, the key to the perfect Eerie Eyeball Martini is balancing the flavors, so don’t hesitate to adjust the proportions of the ingredients to suit your taste. Enjoy your spooky, sophisticated cocktail!
Sinister Skeleton Cake

Transform your Halloween gathering into a ghoulishly delightful affair with a Sinister Skeleton Cake that’s as eerie as it’s delicious. This dessert captures the spooky essence of Halloween with a chocolatey base shaped into a spine-chilling skeleton. The cake’s rich, moist texture combined with a creamy frosting makes it a perfect treat for adults looking to indulge in the Halloween spirit.
Decorate with white fondant to create realistic bones, and you’ll have a centerpiece that will both shock and delight your guests. This cake is designed to serve 4-6 people, making it ideal for an intimate Halloween get-together. The Sinister Skeleton Cake is a fun and creative way to showcase your baking skills while embracing the holiday’s playful side.
It may look complex, but with a little patience and attention to detail, you can create a professional-looking piece of edible art that will have your guests reaching for their cameras before their forks.
Ingredients:
- 1 ¾ cups all-purpose flour
- ¾ cup unsweetened cocoa powder
- 1 ½ teaspoons baking powder
- 1 ½ teaspoons baking soda
- 1 teaspoon salt
- 2 cups granulated sugar
- 2 large eggs
- 1 cup whole milk
- ½ cup vegetable oil
- 2 teaspoons vanilla extract
- 1 cup boiling water
- 2 cups heavy cream
- 1 cup confectioners’ sugar
- 8 oz cream cheese, softened
- 1 teaspoon vanilla extract (for frosting)
- White fondant (for skeleton decoration)
Instructions:
- Preheat and Prepare: Preheat your oven to 350°F (175°C). Grease and lightly flour two 9-inch round cake pans. This will guarantee the cakes don’t stick to the pans and are easy to remove once baked.
- Mix Dry Ingredients: In a large bowl, whisk together the flour, cocoa powder, baking powder, baking soda, and salt. This helps to evenly distribute the leavening agents and cocoa throughout the flour.
- Combine Wet Ingredients: In another bowl, beat together the sugar, eggs, milk, vegetable oil, and vanilla extract until well combined. The sugar should be fully dissolved in the wet mixture.
- Blend Batter: Gradually add the dry ingredients to the wet mixture, stirring until just combined. Be careful not to overmix. Finally, stir in the boiling water until the batter is smooth. Expect the batter to be thin.
- Bake the Cakes: Divide the batter evenly between the prepared cake pans. Bake for 30-35 minutes or until a toothpick inserted into the center comes out clean. Allow the cakes to cool in the pans for 10 minutes before transferring them to a wire rack to cool completely.
- Prepare the Frosting: In a large bowl, beat the heavy cream until soft peaks form. In another bowl, beat the confectioners’ sugar, cream cheese, and vanilla extract until smooth. Gently fold the whipped cream into the cream cheese mixture until fully integrated.
- Assemble the Cake: Place one cake layer on a serving plate and spread a generous layer of frosting on top. Place the second layer on top and cover the entire cake with the remaining frosting.
- Decorate: Roll out the white fondant and cut out shapes to resemble a skeleton’s bones. Carefully place the fondant pieces on top of the cake to form a skeleton.
Extra Tips:
When decorating your Sinister Skeleton Cake, use a small, sharp knife or fondant tools to shape the bones accurately. If the fondant is too sticky, dust your hands and tools with a bit of confectioners’ sugar to prevent sticking.
To make the cake even more festive, consider using edible glitter or black food coloring to create shadows and enhance the spooky effect. Finally, remember to store the cake in a cool place until serving to guarantee the fondant and frosting maintain their structure.
Poison Apple Tartlets
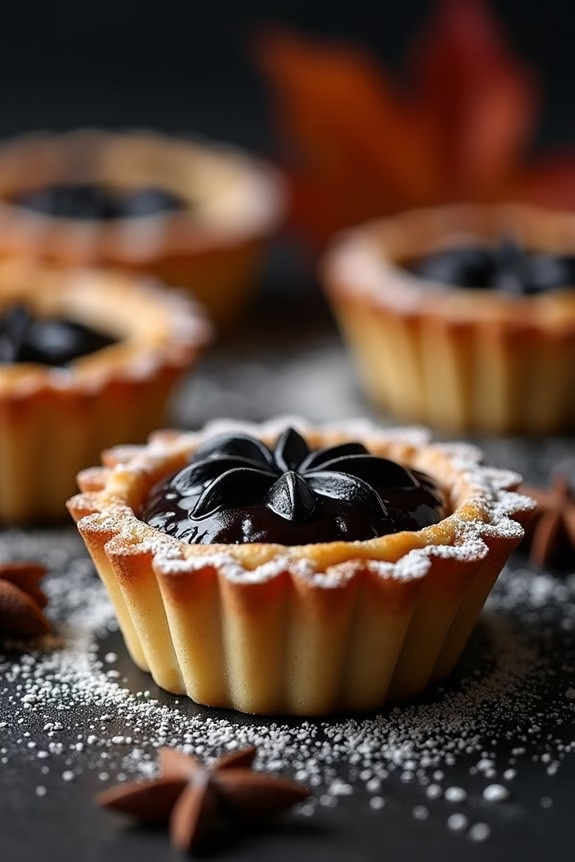
Elevate your Halloween gathering with these tantalizing Poison Apple Tartlets. This eerie dessert combines the sweet and sour flavors of apples with a spooky twist that will delight your adult guests. The tartlets feature a buttery, flaky pastry shell filled with a rich, spiced apple filling that has been tinted with a sinister hint of black food coloring for an extra Halloween flair.
These tartlets aren’t only delicious but also visually striking, making them the perfect addition to your Halloween menu. The Poison Apple Tartlets are surprisingly easy to prepare, requiring only a few basic ingredients that come together to create a bewitching treat. The dish is designed to serve 4-6 people, making it ideal for a small gathering.
Whether you’re hosting a Halloween party or simply want to surprise your friends with a spooky dessert, these tartlets are sure to impress. Follow this recipe to bring a touch of the macabre to your celebration.
Ingredients (serving size: 4-6 people):
- 1 package of puff pastry sheets (2 sheets)
- 4 medium-sized apples (preferably Granny Smith or Honeycrisp)
- 1/2 cup granulated sugar
- 1/4 cup brown sugar
- 1 tablespoon lemon juice
- 1 teaspoon ground cinnamon
- 1/4 teaspoon ground nutmeg
- 1/4 teaspoon ground cloves
- 1 tablespoon cornstarch
- 1 tablespoon butter
- Black gel food coloring
- 1 egg (for egg wash)
- Powdered sugar (for dusting, optional)
Cooking Instructions:
- Prepare the Apples: Peel, core, and thinly slice the apples. Place them in a large bowl and toss with lemon juice to prevent browning.
- Make the Filling: In a saucepan over medium heat, combine the apples, granulated sugar, brown sugar, cinnamon, nutmeg, cloves, and butter. Cook until the apples are soft, about 10 minutes. Stir in the cornstarch and cook for an additional 2 minutes until the mixture thickens. Remove from heat and let it cool slightly.
- Add Color: Once the apple mixture has cooled, add a few drops of black gel food coloring and stir until you achieve a deep, dark hue. Adjust the coloring as needed to reach the desired shade.
- Prepare the Pastry: Preheat your oven to 375°F (190°C). Roll out the puff pastry sheets on a lightly floured surface and cut into 4-6 equal squares, depending on the size of your tartlet pans.
- Assemble the Tartlets: Lightly grease your tartlet pans and line each with a square of puff pastry, pressing gently into the corners. Trim any excess pastry from the edges.
- Fill the Tartlets: Spoon the cooled apple mixture into each pastry shell, filling them generously.
- Egg Wash and Bake: Beat the egg and brush it over the edges of the pastry. This will give the tartlets a golden finish. Bake in the preheated oven for 20-25 minutes, or until the pastry is golden brown and crisp.
- Cool and Serve: Allow the tartlets to cool slightly before removing them from the pans. Dust with powdered sugar before serving, if desired.
Extra Tips:
To guarantee your Poison Apple Tartlets have the perfect texture, make sure the apple filling isn’t too watery before placing it into the pastry shells. You can adjust the thickness by adding a little more cornstarch if necessary.
For an added touch of Halloween drama, consider garnishing the tartlets with edible glitter or a sprinkle of cinnamon before serving. Also, remember that the puff pastry should remain cold until it goes into the oven to achieve the best flakiness. Enjoy your spooky creation!
Spooky Black Pasta
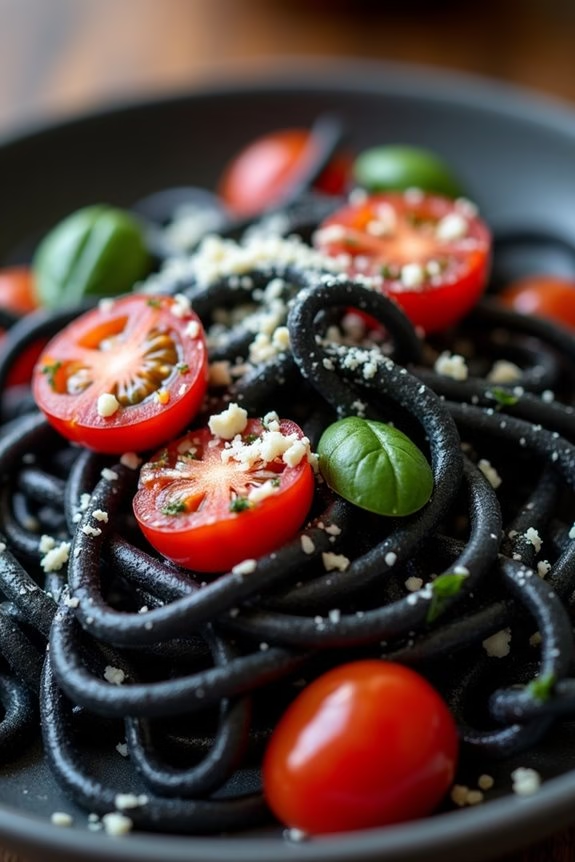
Spooky Black Pasta is a perfect dish for adult Halloween gatherings, offering a striking visual appeal and deliciously rich flavors. This eerie dish uses squid ink pasta to create a deep black hue, which provides the perfect canvas for contrasting ingredients like bright red cherry tomatoes and vibrant green herbs.
The result is a sophisticated yet playful dish that’s bound to impress guests with both its appearance and taste. The pasta is paired with a creamy garlic sauce, enhanced with a touch of white wine and finished with a sprinkle of Parmesan cheese. The sauce clings to the pasta, guaranteeing each bite is packed with flavor.
It’s a delightful culinary experience that balances the umami flavor of the squid ink with the creaminess of the sauce and the freshness of the herbs. Whether hosting a Halloween dinner party or simply looking for a unique dish to enjoy, this Spooky Black Pasta makes for an unforgettable meal.
Ingredients (Serves 4-6):
- 1 pound squid ink pasta
- 2 tablespoons olive oil
- 4 cloves garlic, minced
- 1 cup cherry tomatoes, halved
- 1/2 cup white wine
- 1 cup heavy cream
- Salt and black pepper to taste
- 1/2 cup grated Parmesan cheese
- Fresh parsley or basil, chopped, for garnish
Cooking Instructions:
- Cook the Pasta:
- Bring a large pot of salted water to a boil. Add the squid ink pasta and cook according to the package instructions until al dente. Reserve 1/2 cup of the pasta water, then drain the rest and set the pasta aside.
- Prepare the Sauce:
- In a large skillet, heat the olive oil over medium heat. Add the minced garlic and sauté for about 1 minute, or until fragrant. Be careful not to burn the garlic.
- Add the Tomatoes:
- Add the cherry tomatoes to the skillet with the garlic. Cook for about 3-4 minutes, stirring occasionally, until the tomatoes begin to soften.
- Deglaze with Wine:
- Pour in the white wine and stir, scraping any bits from the bottom of the skillet. Allow the wine to reduce by half, about 2-3 minutes.
- Finish the Sauce:
- Reduce the heat to low and stir in the heavy cream. Let the sauce simmer for about 5 minutes, until it slightly thickens. Season with salt and black pepper to taste.
- Combine Pasta and Sauce:
- Add the cooked pasta to the skillet with the sauce. Toss to coat the pasta, adding reserved pasta water a little at a time until the sauce reaches the desired consistency.
- Serve:
- Transfer the pasta to serving plates and sprinkle with grated Parmesan cheese. Garnish with fresh parsley or basil for a pop of color.
Extra Tips:
To enhance the dish further, consider adding a pinch of red pepper flakes for a hint of heat or a squeeze of lemon juice for a touch of acidity that complements the creaminess of the sauce.
If you can’t find squid ink pasta, you can make your own by kneading squid ink into regular pasta dough, though it may take a bit more time. Finally, remember to taste and adjust the seasoning before serving to confirm your Spooky Black Pasta is perfectly balanced in flavor.
Cobweb Cupcakes

Cobweb Cupcakes are the perfect spooky treat for any Halloween gathering, offering a delightful blend of sweet flavors with a touch of eerie elegance. These cupcakes are a fun way to add a festive flair to your Halloween party, whether you’re hosting adults or looking for a sophisticated dessert to accompany a themed dinner.
With a fluffy chocolate base and a creamy, web-like frosting, these cupcakes are bound to impress both in taste and presentation. Not only do Cobweb Cupcakes look fantastic, but they’re also surprisingly simple to make. The key to achieving the cobweb effect lies in the frosting technique, which creates intricate, delicate patterns that mimic the look of a spider’s web.
By using a basic chocolate cupcake recipe as the foundation, you can then focus on perfecting the cobweb frosting. This recipe serves 4-6 people and is ideal for anyone looking to add a touch of creativity and charm to their Halloween festivities.
Ingredients (Serves 4-6)
For the Chocolate Cupcakes:
- 1 cup all-purpose flour
- 1/3 cup unsweetened cocoa powder
- 3/4 teaspoon baking powder
- 1/2 teaspoon baking soda
- 1/4 teaspoon salt
- 1/2 cup granulated sugar
- 1/2 cup brown sugar
- 1/2 cup unsalted butter, softened
- 2 large eggs
- 1 teaspoon vanilla extract
- 1/2 cup buttermilk
For the Cobweb Frosting:
- 1 cup heavy cream
- 1/4 cup powdered sugar
- 1 teaspoon vanilla extract
- 1/4 cup dark chocolate chips, melted
- 1 tablespoon corn syrup
Cooking Instructions
1. Prepare the Cupcake Batter:
Preheat your oven to 350°F (175°C) and line a muffin tin with cupcake liners. In a medium bowl, whisk together the flour, cocoa powder, baking powder, baking soda, and salt. In a separate large bowl, beat together the granulated sugar, brown sugar, and butter until light and fluffy.
Add the eggs one at a time, beating well after each addition. Stir in the vanilla extract.
2. Combine Ingredients:
Gradually add the dry ingredients to the butter mixture, alternating with the buttermilk, beginning and ending with the dry ingredients. Mix until just combined. Be careful not to overmix, as this can result in dense cupcakes.
3. Bake the Cupcakes:
Divide the batter evenly among the prepared cupcake liners, filling each about two-thirds full. Bake in the preheated oven for 18-20 minutes or until a toothpick inserted into the center of a cupcake comes out clean.
Allow the cupcakes to cool in the tin for 5 minutes before transferring them to a wire rack to cool completely.
4. Make the Cobweb Frosting:
In a medium bowl, beat the heavy cream, powdered sugar, and vanilla extract until soft peaks form. In a separate small bowl, mix the melted chocolate and corn syrup until smooth.
5. Decorate the Cupcakes:
Spread a layer of the whipped cream frosting over each cooled cupcake. Using a small piping bag or a plastic bag with the tip cut off, drizzle thin lines of the chocolate mixture over the frosting to create a cobweb pattern.
Use a toothpick to drag the chocolate lines outwards from the center to enhance the web effect.
Extra Tips
To achieve the best cobweb pattern, make certain the chocolate isn’t too hot when applying it over the whipped cream frosting, as this could cause the frosting to melt.
Practice your drizzling technique on a piece of parchment paper before applying it to the cupcakes to get a feel for the consistency and flow. If the chocolate mixture becomes too thick to drizzle, gently warm it in short intervals in the microwave.
Store any leftover cupcakes in an airtight container in the refrigerator to keep them fresh.
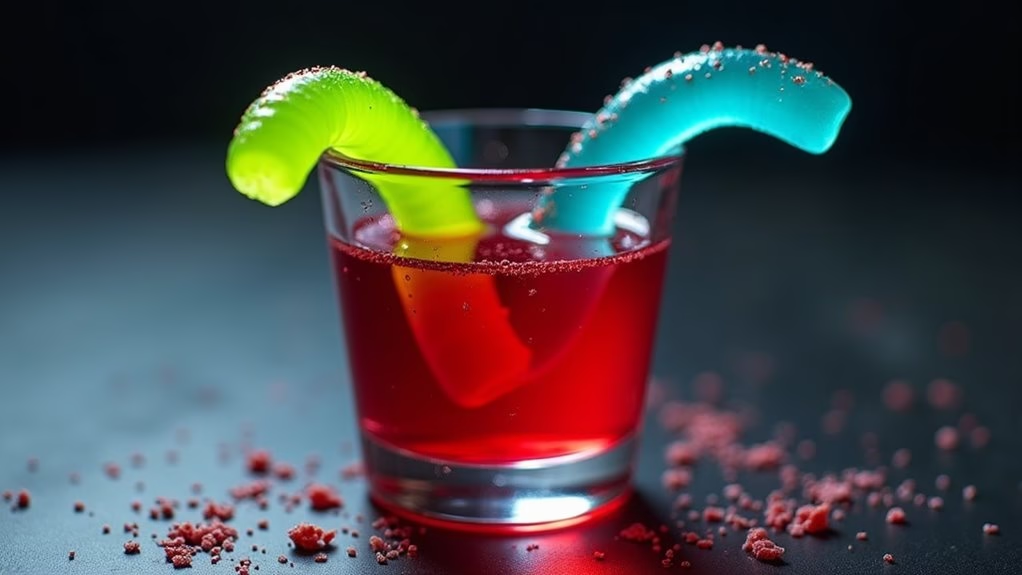
Gory Gummy Worm Shots
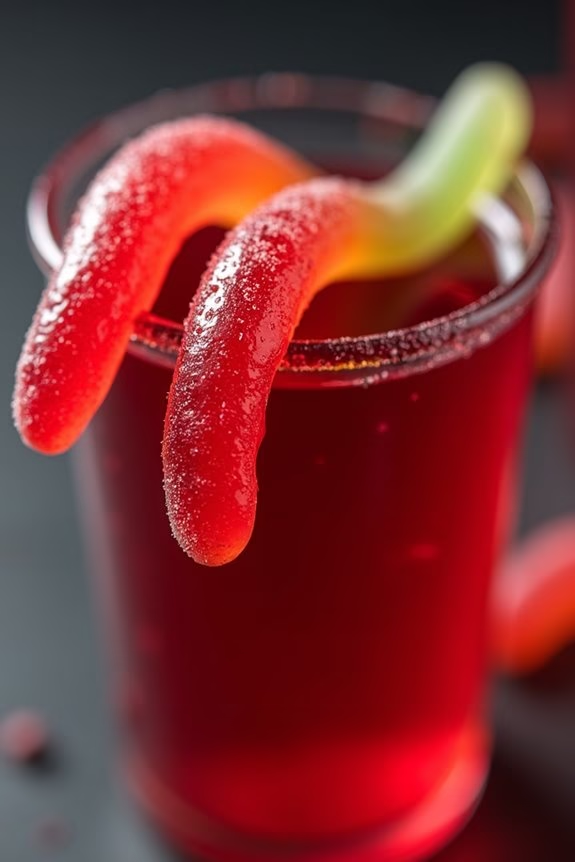
Halloween is the perfect time to get creative with your party treats, and Gory Gummy Worm Shots are a spooky addition that will delight your guests. These shots are a fun, adult twist on the childhood favorite gummy worms, providing a deliciously creepy appearance and a burst of flavor. With a combination of gelatin and vodka, these shots are both visually striking and delicious, making them a hit at any Halloween gathering.
The great thing about Gory Gummy Worm Shots is that they’re easy to prepare and can be made in advance, freeing you up to enjoy your party. The dish’s main ingredient, gummy worms, is a classic Halloween candy, and when paired with a bright red gelatin, they create a blood-like appearance that’s sure to get your guests talking. This recipe serves 4-6 people, making it ideal for small gatherings or as part of a larger selection of Halloween treats.
Ingredients (Serves 4-6):
- 1 package (3 oz) of raspberry or cherry flavored gelatin
- 1 cup boiling water
- 1/2 cup cold water
- 1/2 cup vodka
- 24 gummy worms
- Edible glitter or red sugar for garnish (optional)
Cooking Instructions:
- Prepare the Gelatin Base: Start by emptying the gelatin package into a medium-sized mixing bowl. Pour in the boiling water and stir until the gelatin powder is completely dissolved. This should take about 2 minutes.
- Mix in the Liquids: Once the gelatin is dissolved, add the cold water and vodka to the mixture. Stir well to make certain all ingredients are fully combined. This will be the liquid base for your shots.
- Prepare the Molds: Line up shot glasses or silicone molds on a tray. If using silicone molds, lightly spray them with cooking spray to make removing the shots easier.
- Add the Gummy Worms: Place two gummy worms into each shot glass or mold. You can let them hang over the edge for a more dramatic effect or submerge them completely for a hidden surprise.
- Pour the Gelatin Mixture: Carefully pour the gelatin mixture into each mold or glass until the gummy worms are just covered. Leave a small gap at the top of each glass to make handling easier.
- Chill the Shots: Transfer the tray to the refrigerator and let the shots chill for at least 2-4 hours, or until they’re firm. This chilling time allows the gelatin to set completely.
- Garnish and Serve: Once set, you can optionally sprinkle edible glitter or red sugar on top of each shot for an extra spooky touch. Serve cold and enjoy responsibly!
Extra Tips:
For an extra eerie presentation, use a mix of gummy worms in different colors to make each shot unique. You can also experiment with different gelatin flavors to suit your taste or match your party’s theme.
If you prefer a non-alcoholic version, simply replace the vodka with an equivalent amount of cold water. Make sure to chill your shots well in advance of your party, as they require time to set properly.
Finally, confirm the gummy worms are fresh and pliable; stale candy can become hard and less appealing when chilled.