
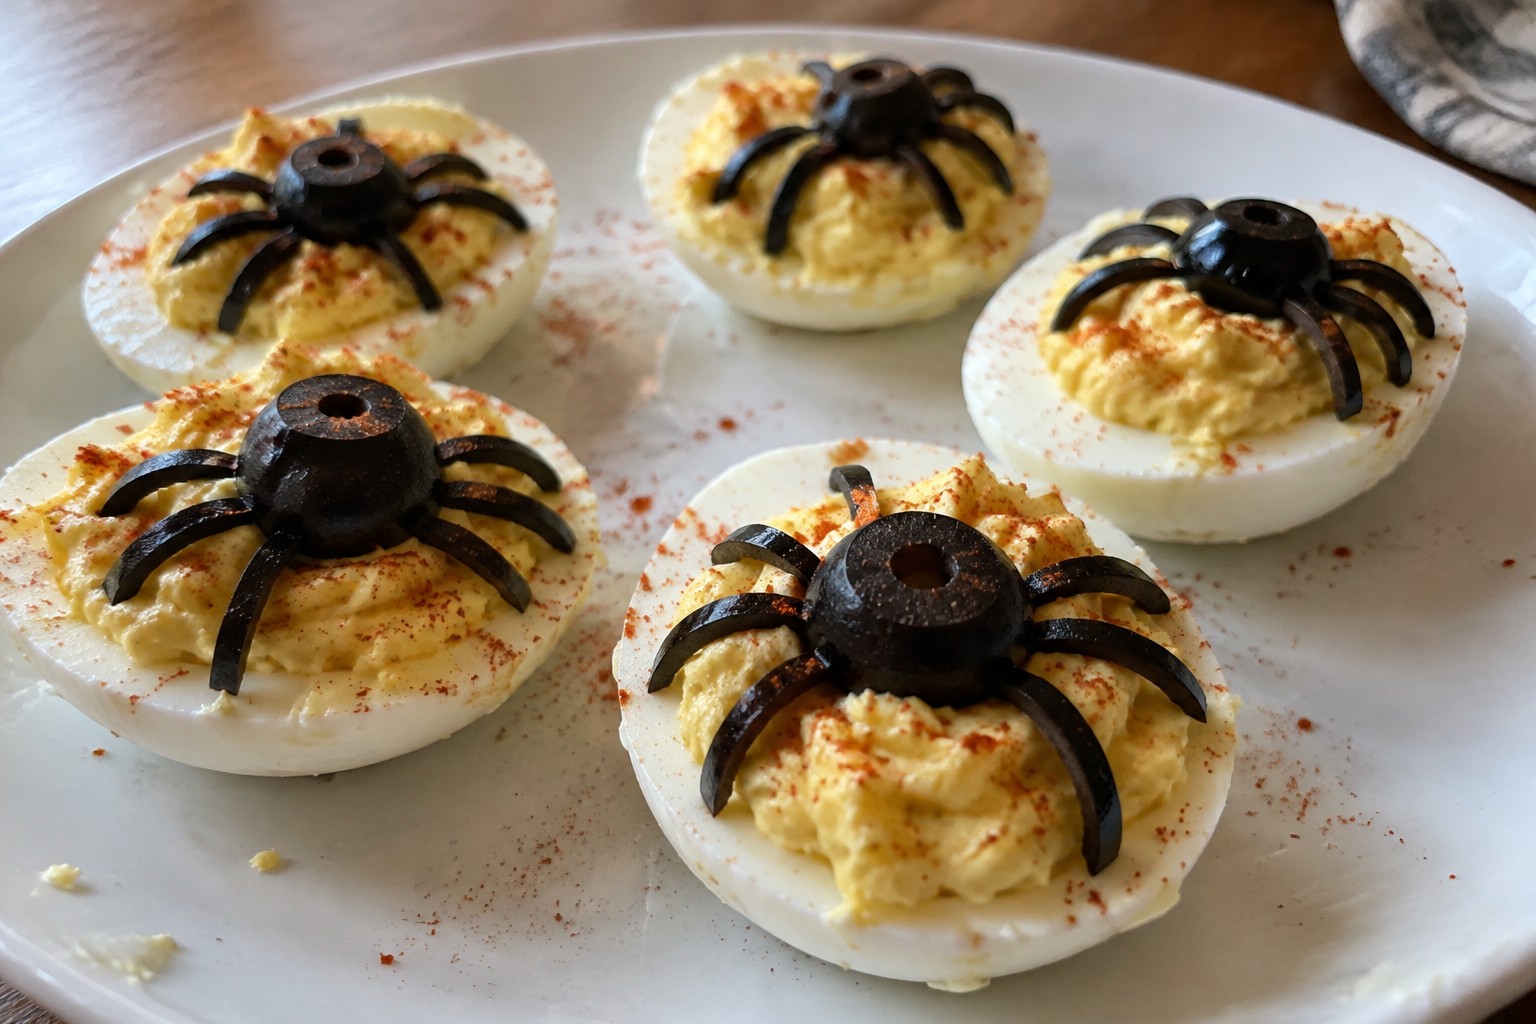
Halloween is a good time to make some food for get togethers with friends. These ideas focus on simple recipes that adults tend to like. They use everyday ingredients and do not take long to put together. You can find options that fit different tastes and time limits.
Helpful Tips Before You Start
These steps keep your Halloween snacks quick and stress free for adult guests.
Recommended Products

【Easter Deviled Egg Platter】Upon purchasing this product, you will receive two wooden deviled egg plates, each measuring approximately 13.8 x 13.8 inches (35 x 35 cm). Each tray features 22 recesses adorned with whimsical facial expressions. This distinctive design adds a unique decorative touch to your dining table, suitable for everyday meals or Easter gatherings
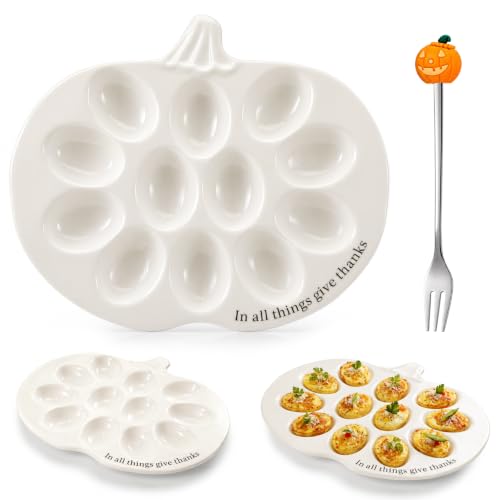
Deviled Egg Platter Tray: you will receive an 11" X 8.75" egg plate and a pumpkin shaped fork

The deviled egg platter holds eggs still to easily pipe in fillings. This decorative deviled egg platter makes a fantastic centerpiece for your table. This hard boiled egg serving dish is made of durable, reusable quality plastic.
Pick Store Bought Bases
Use pre made pizza dough, crackers, or frozen pastry to skip long prep steps and focus on flavors.
Add Adult Twists Early
Mix in spices, cheese, or a splash of liquor while assembling so the final result tastes more grown up without extra work.
Prep Components Ahead
Chop fillings or mix dips the day before and store them in the fridge so you only assemble and heat on party day.
Use Fast Garnishes
Add simple details like sliced olives or herb sprigs right before serving instead of complex designs that take time.
Group Similar Items
Choose recipes that share ingredients like cream cheese or peppers to cut down on shopping and waste.
Spooky Black Olive and Feta Crostini
This crostini brings together salty feta and briny black olives on crisp toasted bread. The dark olives give it a bold look that fits a Halloween spread without extra effort. It works well as a quick appetizer when guests arrive and you need something ready fast.
The texture stays light with a crunchy base and creamy topping. Flavors lean savory and tangy with a touch of herb. Adults tend to reach for seconds because it feels more grown up than typical party snacks.

Serves 4 people.
Ingredients
- 1 baguette, cut into 12 slices
- 3 tablespoons olive oil, divided
- 1 garlic clove, halved
- 1 cup pitted black olives, sliced
- 4 ounces feta cheese, crumbled
- 1 teaspoon dried oregano
- 2 tablespoons chopped fresh parsley
Instructions
- Preheat the oven to 400 degrees F. Place the baguette slices on a baking sheet and brush them with 2 tablespoons of olive oil. Rub the cut side of the garlic clove over each slice.
- Toast the bread in the oven for 6 to 8 minutes until the edges turn golden and crisp.
- In a small bowl, mix the sliced black olives with the remaining tablespoon of olive oil and the dried oregano.
- Remove the toasted bread from the oven. Spoon the olive mixture evenly over each slice.
- Sprinkle the crumbled feta cheese on top of the olives. Return the baking sheet to the oven for 2 minutes just to warm the feta slightly.
- Remove from the oven and scatter the chopped parsley over the crostini before serving.
Extra Tips
Use a firm baguette so the slices hold up under the toppings. If you prep the olive mixture ahead, keep it in the fridge and assemble right before toasting to maintain the crunch. A light sprinkle of black pepper can sharpen the flavors if you like a little extra bite. Course: Appetizer Cuisine: Mediterranean Equipment: Baking sheet, Mixing bowl, Knife
Vampire Balsamic Strawberry Bruschetta
This Vampire Balsamic Strawberry Bruschetta gives a simple appetizer a Halloween edge. The strawberries take on a deep red color from the balsamic, which makes the topping look striking against the toasted bread. It comes together fast and offers a mix of juicy fruit, creamy cheese, and crisp bread that adults tend to like at parties.
The flavor stays balanced with sweet and tangy notes from the fruit and vinegar, plus a touch of garlic and fresh basil. It works well as a starter for a small gathering or a quick bite before a night out.

Serves 4 people.
Ingredients
- 1 baguette, sliced into 12 pieces
- 2 cups strawberries, diced
- 1/4 cup balsamic vinegar
- 2 tablespoons olive oil, divided
- 1 garlic clove, minced
- 4 ounces goat cheese, softened
- 1/4 cup fresh basil, thinly sliced
- Salt and black pepper to taste
Instructions
- Preheat the oven to 400 degrees F. Place the baguette slices on a baking sheet and brush them with 1 tablespoon of olive oil. Toast for 5 to 7 minutes until the edges turn golden.
- In a mixing bowl, stir together the diced strawberries, balsamic vinegar, minced garlic, remaining tablespoon of olive oil, salt, and black pepper. Let the mixture sit for a few minutes so the flavors combine.
- Spread a thin layer of goat cheese on each toasted bread slice.
- Spoon the strawberry mixture evenly over the goat cheese and finish with the sliced basil.
Extra Tips
Let the strawberry mixture rest a little longer if you want a stronger balsamic taste. Day-old bread holds up better under the topping without getting soggy. Skip the basil if you need to make it ahead and add it right before serving instead. Course: Appetizer Cuisine: Italian Equipment: Baking sheet, Mixing bowl, Oven
Prosciutto-Wrapped Goat Cheese Dates
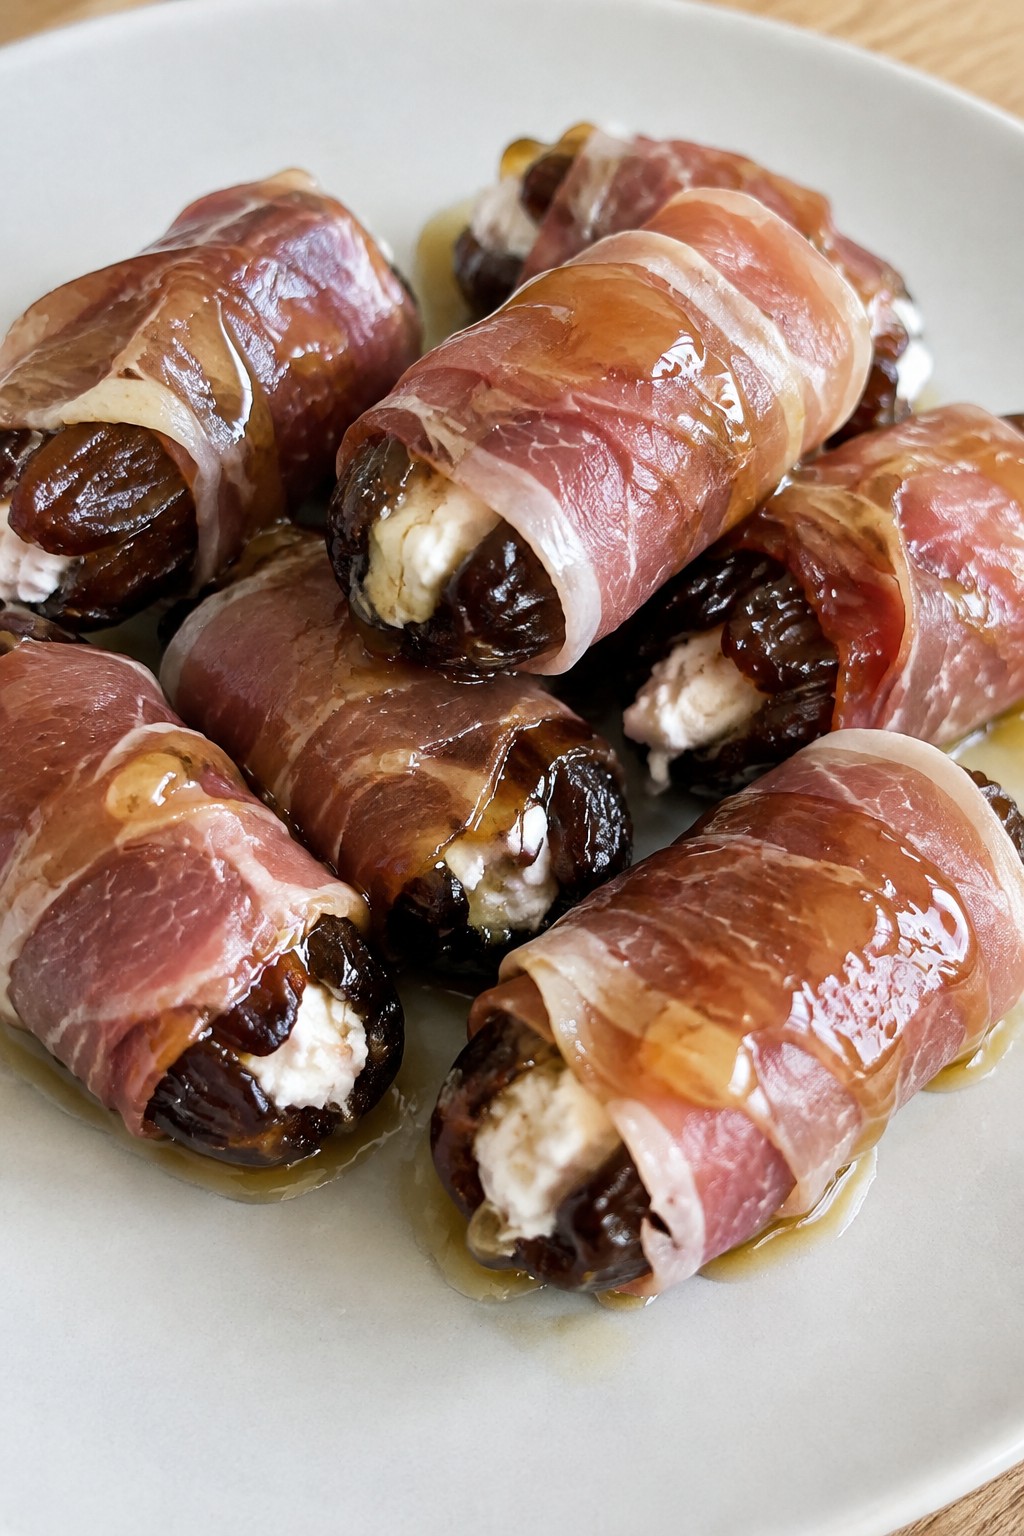
These Prosciutto-Wrapped Goat Cheese Dates come together quickly with minimal ingredients and no cooking required. They make an easy choice for adult Halloween gatherings when you want something savory and slightly sweet that feels a bit more elevated than typical party snacks.
The soft dates hold a creamy filling of goat cheese while the prosciutto adds a salty, thin wrap around each one. A light honey drizzle at the end ties the flavors together for a balanced bite.
Serves 4 people.
Recommended Products

Ingredients: Pasteurized Cultured Cow’s Milk and Cream, Salt, Cheese Cultures, Enzymes, Calcium Chloride, Penicillium Candidum (Harmless White Mold), Microbial Rennet...
Ingredients
- 12 Medjool dates, pitted
- 4 ounces goat cheese
- 6 slices prosciutto, halved crosswise
- 1 tablespoon honey
Instructions
- Open each pitted date along the natural seam and fill the center with roughly one teaspoon of goat cheese. Press gently to close the date around the filling.
- Take one half slice of prosciutto and wrap it around each stuffed date, securing the ends underneath.
- Arrange the wrapped dates on a serving plate and drizzle the honey evenly over the top just before serving.
Extra Tips
Assemble the dates up to a few hours ahead and keep them covered in the refrigerator, then add the honey right before guests arrive. Thinly sliced prosciutto works best here since thicker slices can overpower the soft date and cheese. If the goat cheese feels too firm, let it sit at room temperature for ten minutes to make stuffing easier. Course: Appetizer Cuisine: Mediterranean Equipment: Knife, Cutting Board, Serving Plate
Mini Pumpkin and Sage Arancini
These mini arancini turn leftover rice into a savory bite with pumpkin and sage. They work well as a quick appetizer for adult Halloween gatherings when you want something warm and handheld.
The outside turns crisp while the inside stays creamy with earthy notes from the sage. This version keeps the process simple by starting with cooked rice instead of making risotto from scratch.

Serves 4 people.
Ingredients
- 2 cups cooked arborio rice
- ¾ cup pumpkin puree
- ¼ cup grated Parmesan cheese
- 2 tablespoons fresh sage, chopped
- 1 large egg
- 1 cup panko breadcrumbs
- ½ teaspoon salt
- ¼ teaspoon black pepper
- Vegetable oil for frying
Instructions
- Place the cooked arborio rice in a large bowl. Add the pumpkin puree, Parmesan cheese, chopped sage, egg, salt, and black pepper. Mix until the ingredients are evenly combined.
- Scoop out about 1 tablespoon of the mixture and roll it into a small ball. Repeat with the remaining mixture to form all the arancini.
- Pour the panko breadcrumbs into a shallow dish. Roll each rice ball in the breadcrumbs until fully coated on all sides.
- Heat about 2 inches of vegetable oil in a deep skillet over medium heat. Once the oil is hot, add the arancini in small batches and fry for 2 to 3 minutes per side until golden brown.
- Remove the arancini with a slotted spoon and drain on a paper towel-lined plate. Serve warm.
Extra Tips
Form the balls firmly so they hold together during frying. If the mixture feels too wet, add a spoonful of extra breadcrumbs before shaping. Leftovers reheat well in a 350°F oven for 8 minutes to restore crispness without added oil. Course: Appetizer Cuisine: Italian Equipment: Large bowl, Deep skillet, Slotted spoon
Ghostly Caprese Salad Skewers
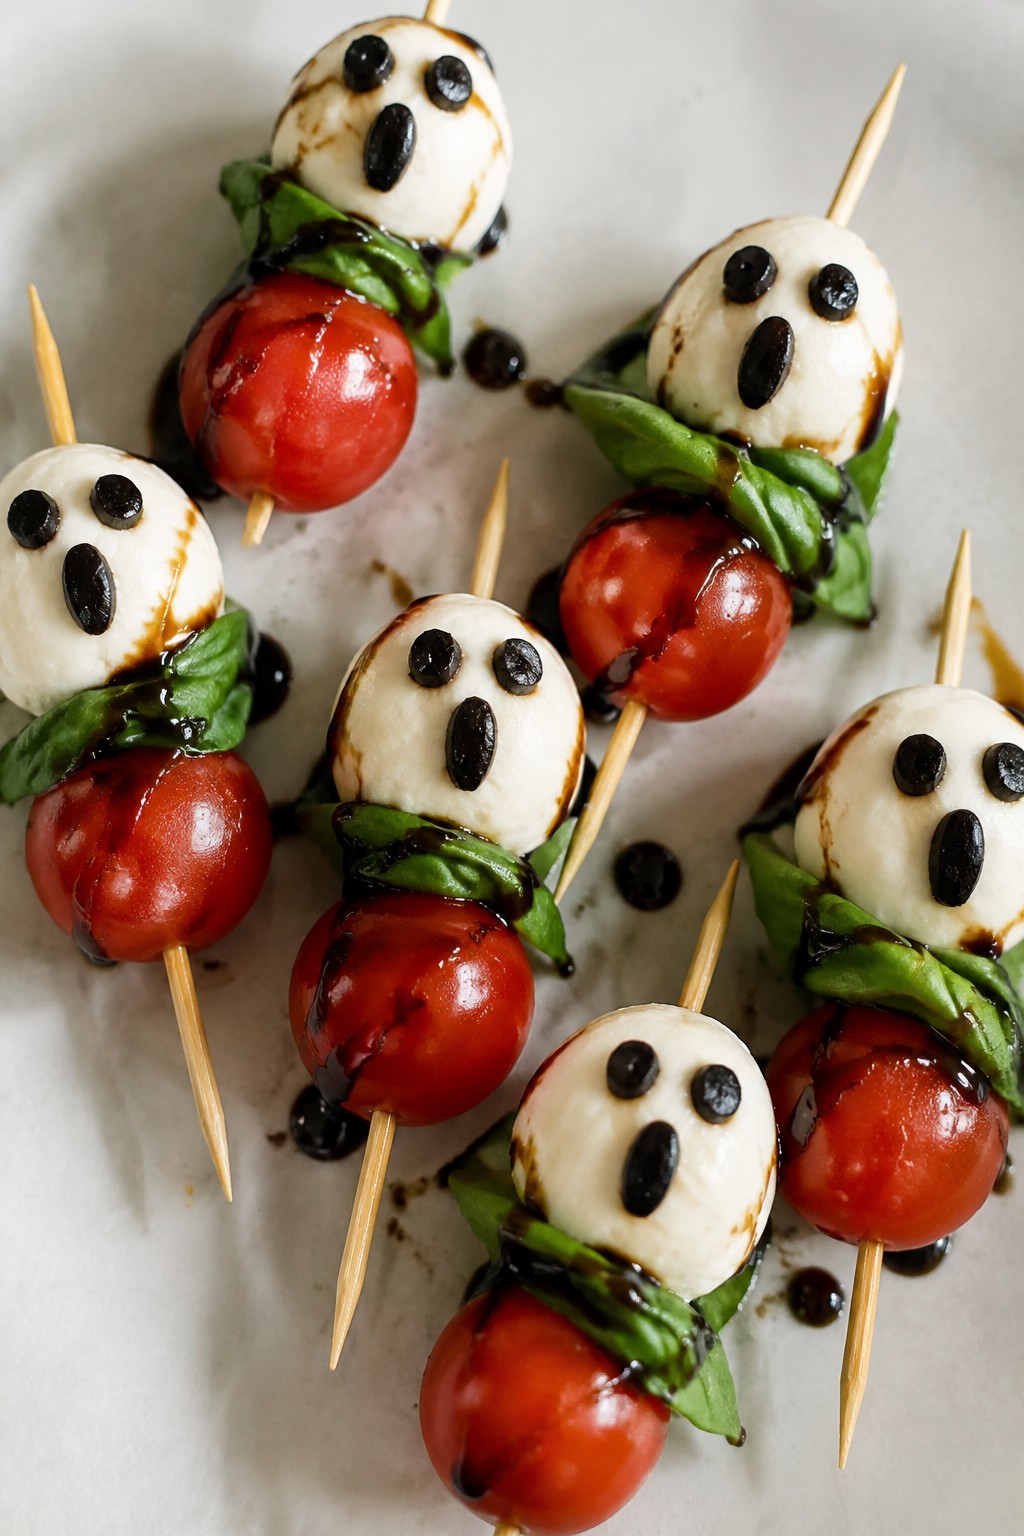
These Ghostly Caprese Salad Skewers turn a classic Italian starter into a quick Halloween bite. The white mozzarella balls stand out against red tomatoes and green basil, making them easy to spot on a party table. They come together fast with no cooking and keep things light for adult guests who want something fresh.
The flavor stays bright and simple. Juicy tomatoes pair with creamy mozzarella and herbal basil, finished with a touch of balsamic. They work well as a starter before heavier dishes or as a snack during a casual get-together.
Serves 4 people.
Ingredients
- 12 cherry tomatoes
- 12 bocconcini mozzarella balls
- 12 fresh basil leaves
- 12 wooden skewers
- 3 pitted black olives, cut into small pieces
- 2 tablespoons balsamic glaze
Instructions
- Thread one cherry tomato onto each skewer.
- Add one basil leaf next.
- Push one bocconcini mozzarella ball onto the skewer after the basil.
- Place two small pieces of black olive on the front of each mozzarella ball to form eyes.
- Arrange the finished skewers on a platter.
- Drizzle the balsamic glaze over the skewers just before serving.
Extra Tips
Make the skewers a few hours ahead and keep them covered in the fridge. Add the olive eyes and balsamic glaze right before guests arrive so the mozzarella stays white and the basil looks fresh. If you run out of olives, a small drop of balsamic glaze works for eyes instead. Course: Appetizer Cuisine: Italian Equipment: Wooden skewers, Cutting board, Knife
Spicy Sausage and Kale Stuffed Mushrooms
These stuffed mushrooms deliver a hearty bite with bold sausage flavor and a touch of heat. They make a smart choice for adult Halloween parties since they come together quickly and hold up well on a buffet table.
The filling combines spicy sausage with wilted kale for a savory mix that contrasts nicely with the tender mushroom caps. A light breadcrumb topping adds just enough crunch to keep each bite interesting.

Serves 4 people.
Ingredients
- 16 large white mushrooms
- 8 oz spicy Italian sausage, casings removed
- 2 cups chopped kale leaves
- 1/2 cup diced onion
- 2 garlic cloves, minced
- 1/3 cup breadcrumbs
- 1/4 cup grated Parmesan cheese
- 2 tablespoons olive oil
- 1/4 teaspoon red pepper flakes
- Salt and black pepper
Instructions
- Preheat the oven to 375°F and line a baking sheet with parchment paper. Clean the mushrooms with a damp cloth and remove the stems to create space for filling.
- Heat 1 tablespoon olive oil in a large skillet over medium heat. Add the sausage and cook, breaking it up with a spoon, until browned.
- Add the onion, garlic, and red pepper flakes to the skillet. Cook for 2 minutes until the onion softens.
- Stir in the kale and cook until it wilts, about 3 minutes. Season with salt and black pepper.
- Remove the skillet from heat and mix in the breadcrumbs and Parmesan cheese until evenly combined.
- Spoon the filling into each mushroom cap and place them on the baking sheet. Drizzle the remaining tablespoon of olive oil over the tops.
- Bake for 18 to 20 minutes until the mushrooms are tender and the tops turn golden.
Extra Tips
These mushrooms taste best served right after baking while the tops stay crisp. You can prepare the filling up to a day ahead and store it in the fridge, then stuff and bake the mushrooms just before guests arrive. If the sausage is very spicy, cut the red pepper flakes in half. Course: Appetizer Cuisine: American Equipment: Large skillet, Baking sheet, Mixing bowl
Blood Orange Ricotta Flatbreads
These flatbreads bring a bright, tangy note to any spread with creamy ricotta and juicy blood orange slices. They come together quickly for adult Halloween parties or casual get-togethers when you need something that looks put together without much effort. The mix of sweet citrus, mild cheese, and a touch of honey gives a balanced flavor with a soft and crisp texture.
The red-orange segments add a seasonal pop that fits the holiday without extra decoration. Serve them warm as a light bite alongside drinks.

Serves 4 people.
Ingredients
- 4 store-bought flatbreads
- 1 1/2 cups ricotta cheese
- 3 blood oranges, peeled and sliced into rounds
- 2 tablespoons honey
- 1 tablespoon olive oil
- 1 teaspoon fresh thyme leaves
- Salt and black pepper to taste
Instructions
- Preheat the oven to 400 degrees F and line a baking sheet with parchment paper.
- Place the flatbreads on the baking sheet. Spread an even layer of ricotta cheese over each one.
- Drizzle the olive oil over the ricotta and season lightly with salt and black pepper.
- Bake for 8 to 10 minutes until the edges turn golden and the ricotta warms through.
- Remove from the oven. Arrange the blood orange slices on top of each flatbread.
- Drizzle with honey and scatter the fresh thyme leaves over everything before serving.
Extra Tips
Warm the flatbreads just until the ricotta softens so the base stays crisp under the juicy oranges. If blood oranges are out of season, regular oranges work but lose the deep color. Leftovers reheat best in a toaster oven for a few minutes to restore texture. Course: Appetizer Cuisine: Mediterranean Equipment: Baking sheet, Oven, Knife
Witch’s Cauldron Spinach Artichoke Dip
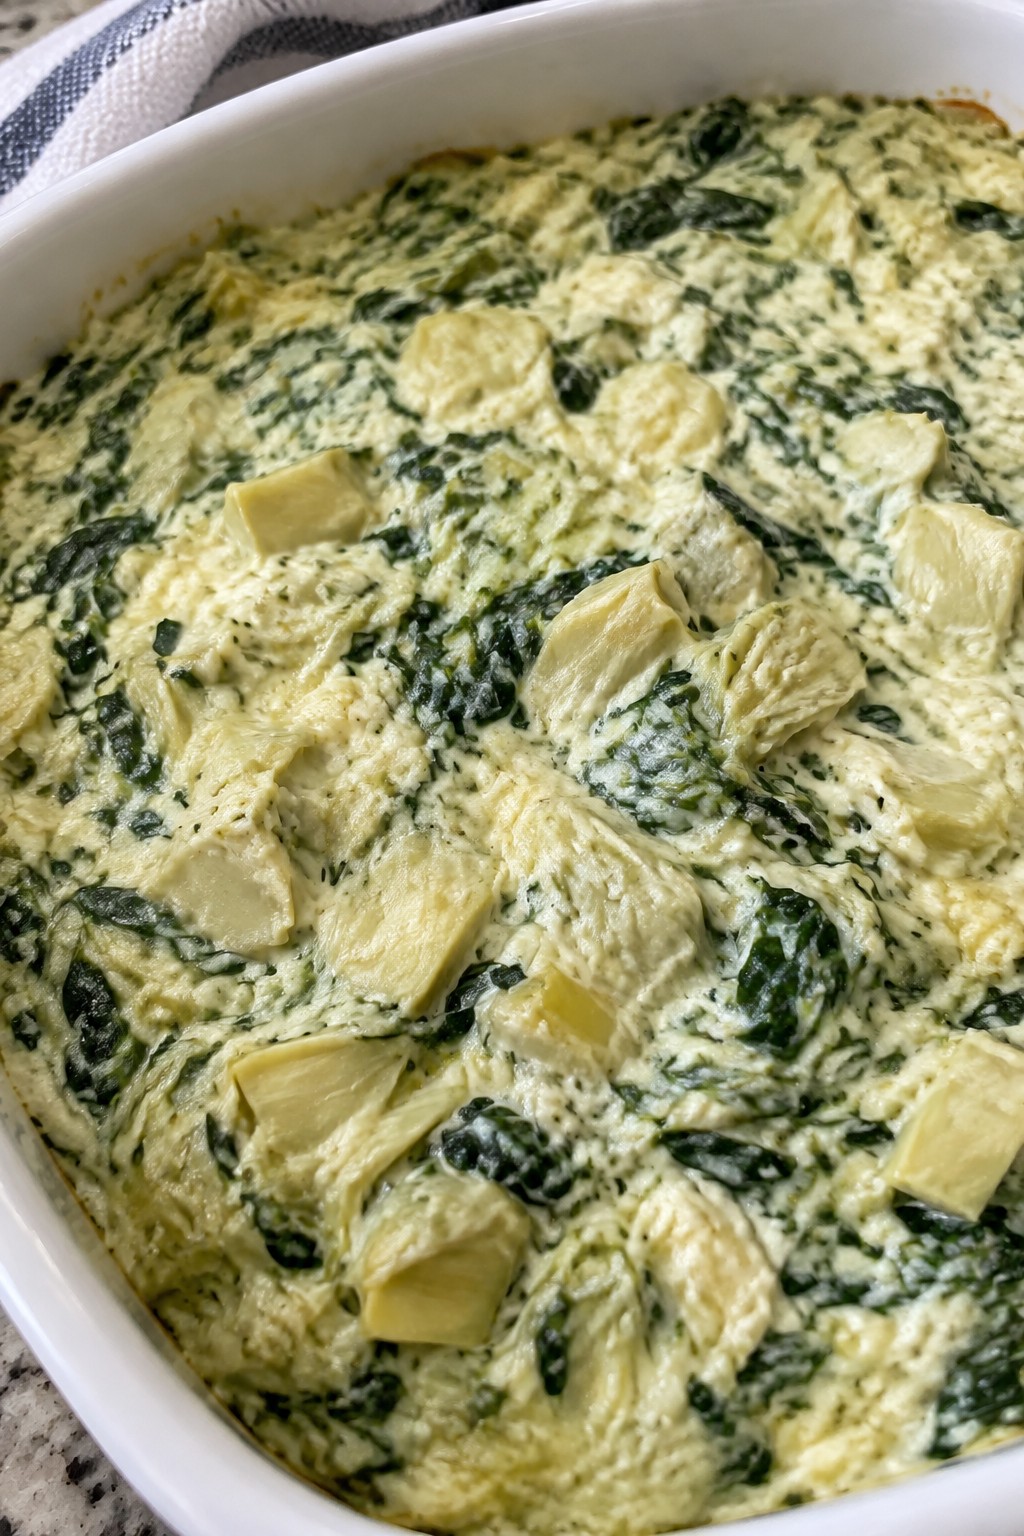
This warm dip comes together quickly for last-minute Halloween gatherings. Adults enjoy the creamy texture and savory flavors while it fits easily into a party spread. It works well as a shared starter that feels festive without extra effort.
The finished dip has a thick, cheesy consistency with bits of spinach and artichoke throughout. It pairs nicely with sturdy dippers for scooping.
Serves 4 people.
Recommended Products

[2 Packs]Halloween Creepy Cloth, DealKits Spooky Giant (48 x 240 in.) Cheese Cloth Tapestry for Party Supplies Decorations Outdoor Yard Home Wall Decor, Black

Four Halloween Handle Designs: The set includes four cheese spreaders, each with a unique hand-painted resin handle design. These designs capture the essence of Halloween, featuring a black cat, a pumpkin lantern, a ghost, and a skull, adding a spooky and festive touch to your Halloween table.

Ingredients
- 10 oz frozen spinach, thawed and drained
- 14 oz can artichoke hearts, drained and chopped
- 8 oz cream cheese, softened
- 1/2 cup mayonnaise
- 1/2 cup sour cream
- 1 cup shredded mozzarella cheese
- 1/2 cup grated Parmesan cheese
- 2 garlic cloves, minced
- Salt and pepper to taste
Instructions
- Preheat the oven to 375 degrees F.
- In a mixing bowl, combine the cream cheese, mayonnaise, and sour cream until smooth.
- Stir in the minced garlic, spinach, and chopped artichoke hearts.
- Add the mozzarella cheese and Parmesan cheese, then season with salt and pepper.
- Transfer the mixture to a baking dish and spread it evenly.
- Bake for 20 minutes until the top turns lightly golden and the dip is hot throughout.
Extra Tips
For a smoother texture, drain the spinach well before mixing. If the dip thickens after cooling, stir in a spoonful of sour cream when reheating. Serve it straight from the baking dish with sturdy crackers or sliced baguette. Course: Appetizer Cuisine: American Equipment: Mixing Bowl, Baking Dish, Oven
Caramel Apple and Brie Phyllo Cups
These Caramel Apple and Brie Phyllo Cups offer a quick way to add something a little different to a Halloween party spread. They combine store-bought shells with simple fillings, so they fit easily into a busy evening when you need a few adult-friendly bites ready fast.
The result is a warm, crisp shell filled with creamy brie that softens around tart apples and sweet caramel. The mix of textures and flavors feels balanced without much effort.

Serves 4 people.
Ingredients
- 12 mini phyllo pastry cups
- 4 ounces brie cheese, cut into small cubes
- 2 small Granny Smith apples, cored and diced
- 1/4 cup prepared caramel sauce
- 1/2 teaspoon ground cinnamon
- 2 tablespoons chopped walnuts
Instructions
- Preheat the oven to 350 degrees F and line a baking sheet with parchment paper.
- Place the phyllo cups on the prepared baking sheet in a single layer.
- Add two or three brie cubes to the bottom of each cup.
- Spoon the diced apples evenly over the brie and sprinkle with cinnamon.
- Drizzle about 1 teaspoon of caramel sauce into each cup and top with a few pieces of chopped walnuts.
- Bake for 5 to 7 minutes, or until the brie has softened and begun to melt.
- Remove from the oven and let the cups cool for 1 minute before serving.
Extra Tips
Fill the cups right before baking so the phyllo stays crisp. A tart apple variety keeps the sweetness from the caramel in check. If you prepare the components ahead, store the filled unbaked cups in the fridge and add the final bake just before guests arrive. Course: Appetizer Cuisine: American Equipment: Baking Sheet, Oven, Knife
Roasted Beet and Whipped Feta Tartlets
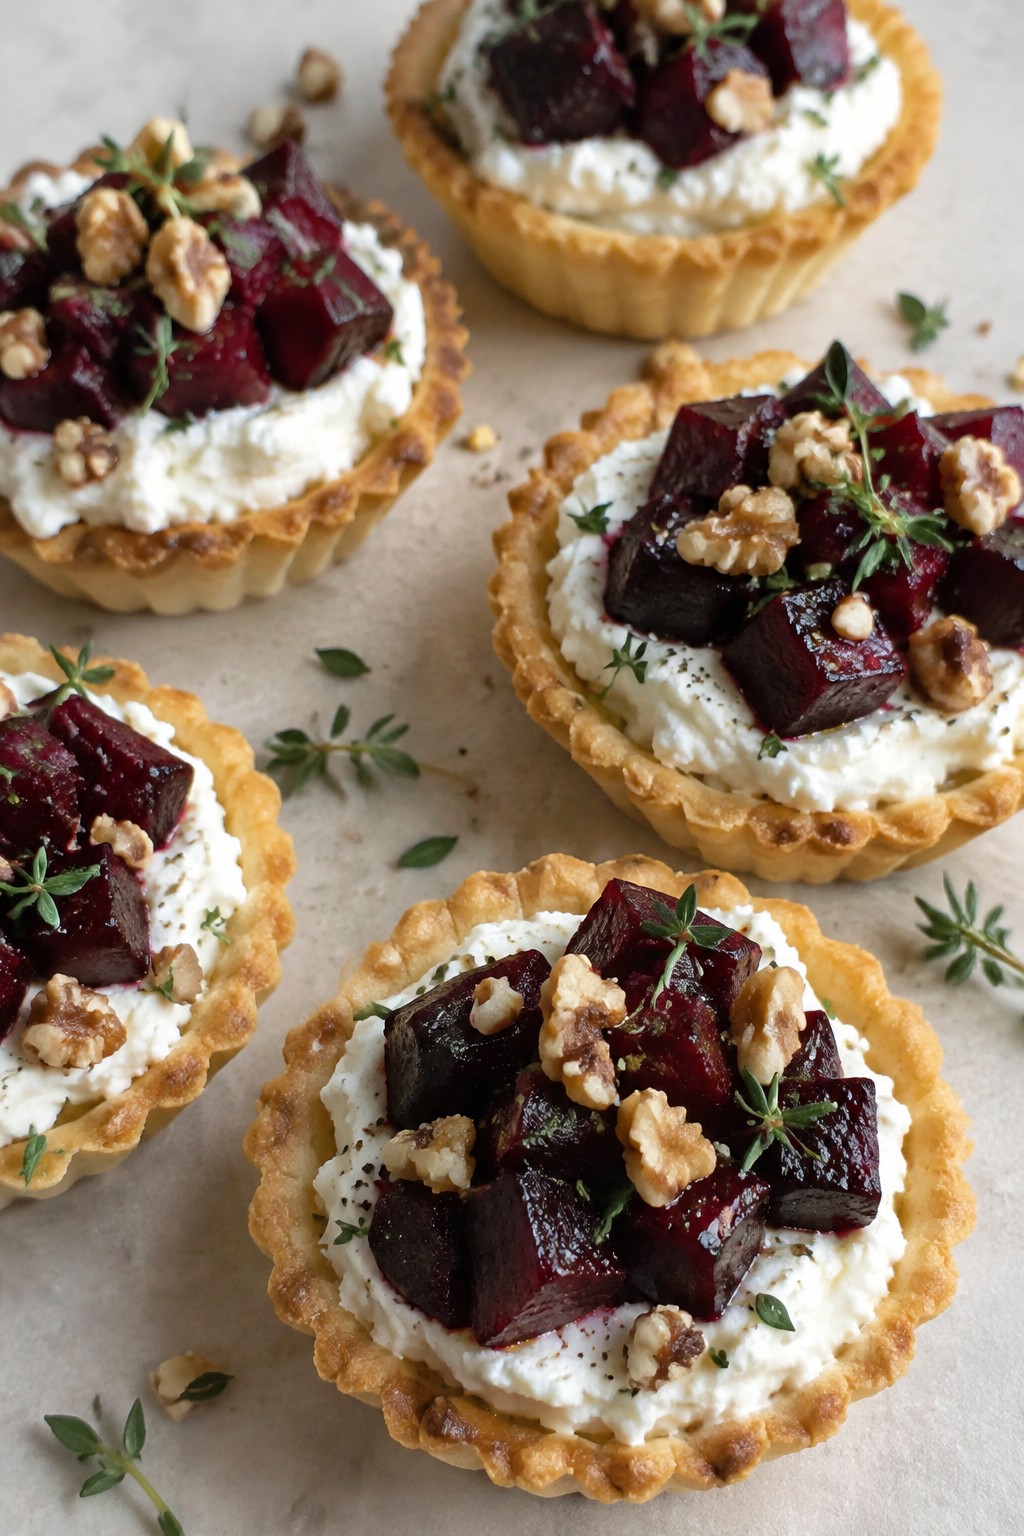
These tartlets bring together sweet roasted beets and creamy whipped feta in small, crisp shells. They work well as an appetizer at adult Halloween gatherings where you want something a little different from the usual snacks. The combination gives a nice balance of earthy sweetness, tangy creaminess, and a bit of crunch from the nuts.
Serves 4 people.
Ingredients
- 12 store-bought mini tartlet shells
- 3 medium beets, peeled and cut into small cubes
- 8 ounces feta cheese
- 4 ounces cream cheese, softened
- 2 tablespoons olive oil
- 1 tablespoon honey
- 1/4 cup walnuts, chopped
- 1 teaspoon fresh thyme leaves
- Salt and black pepper
Instructions
- Preheat the oven to 400 degrees. Toss the beet cubes with 1 tablespoon olive oil, salt, and pepper on a baking sheet. Roast for 25 minutes until the beets are tender.
- While the beets roast, place the feta cheese, cream cheese, remaining tablespoon of olive oil, and honey in a food processor. Blend until smooth and creamy.
- Warm the tartlet shells in the oven for the last 5 minutes of beet roasting time if they are not already crisp.
- Spoon the whipped feta mixture into each tartlet shell. Top with the roasted beet cubes.
- Sprinkle the chopped walnuts and thyme leaves over the tops. Add a light grind of black pepper before serving.
Extra Tips
Roast the beets a day ahead and store them in the fridge to cut down on day-of work. If the whipped feta seems too thick after blending, add a teaspoon of water to loosen it. These taste best served at room temperature so the filling stays creamy. Course: Appetizer Cuisine: Mediterranean Equipment: Baking sheet, Food processor, Oven
Mummy-Wrapped Brie with Fig Jam
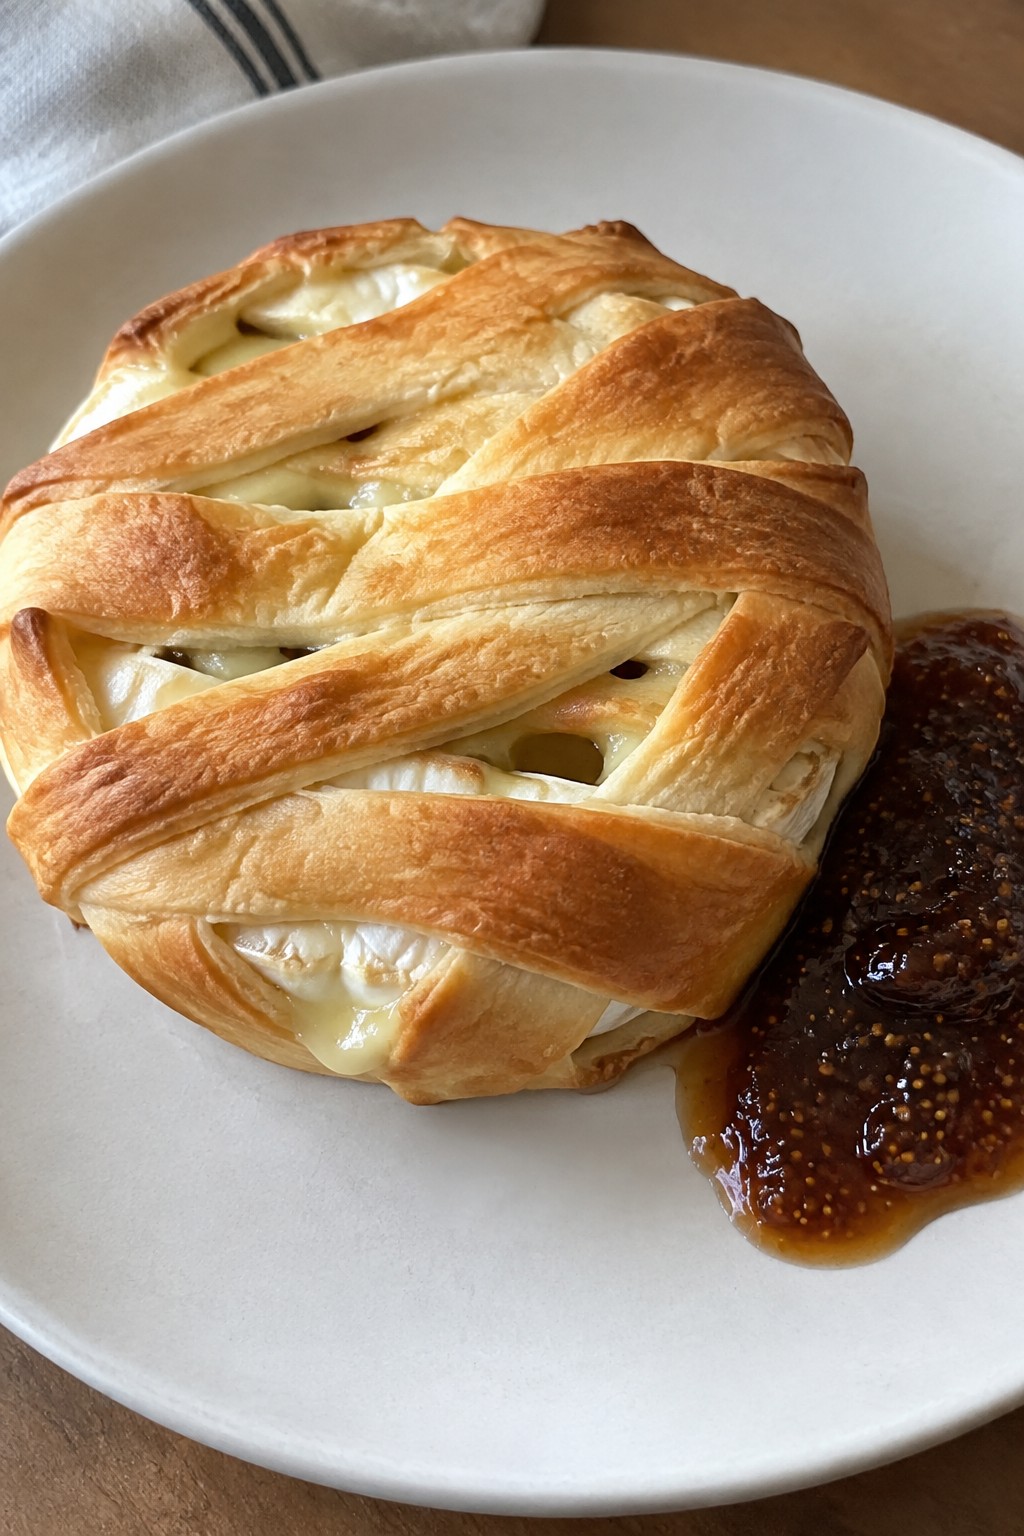
This recipe turns a wheel of brie into a quick Halloween appetizer that looks like a wrapped mummy but tastes creamy and rich. It works well for adult parties where you need something ready in under 30 minutes with minimal fuss. The flaky pastry gives a crisp bite against the soft cheese, while the fig jam adds a sweet contrast that balances the richness.
The dish feels festive without being childish, so it fits right into a grown-up spread alongside drinks or other finger foods.
Serves 4 people.
Ingredients
- 1 (8-ounce) wheel of brie cheese
- 1 (8-ounce) package crescent roll dough
- ¼ cup fig jam
Instructions
- Preheat the oven to 375°F and line a baking sheet with parchment paper.
- Unroll the crescent roll dough on a lightly floured surface and cut it into thin strips about ½ inch wide.
- Place the brie wheel in the center of the baking sheet. Wrap the dough strips around the cheese in overlapping layers, leaving a small uncovered area near the top to resemble a mummy face.
- Bake for 15 to 18 minutes until the pastry turns golden brown and the cheese begins to soften.
- Remove from the oven and let it rest for 2 minutes. Spoon or serve the fig jam on the side or lightly drizzle some over the top before slicing.
Extra Tips
Use room-temperature brie so it softens quickly once baked. If the dough strips break while wrapping, just press the ends together. Leftovers can be covered and reheated in a 350°F oven for a few minutes to restore crispness, though the jam is best added fresh. Course: Appetizer Cuisine: American Equipment: Baking sheet, Oven, Knife
Dark Chocolate-Dipped Pretzel Rods with Sea Salt
These dark chocolate-dipped pretzel rods offer a quick sweet and salty bite that feels a little more grown up than typical Halloween treats. The crunchy pretzel base pairs with a thin layer of rich chocolate and a touch of sea salt for balance. They come together fast and work well for last-minute parties or movie nights at home.
The finished rods stay crisp with a smooth chocolate coating that sets without much effort. They make a nice addition to a snack spread when you want something simple but still festive.

Serves 4 people.
Ingredients
- 12 pretzel rods
- 8 ounces dark chocolate chips
- 1 teaspoon flaky sea salt
Instructions
- Line a baking sheet with parchment paper and set it aside.
- Place the dark chocolate chips in a microwave-safe bowl. Heat in 30-second bursts, stirring after each one, until the chocolate is fully melted and smooth.
- Hold each pretzel rod by one end and dip the other half into the melted chocolate. Let excess chocolate drip back into the bowl.
- Lay the dipped pretzel rod on the prepared baking sheet. Repeat with the remaining rods.
- While the chocolate is still wet, sprinkle each rod lightly with flaky sea salt.
- Let the rods sit at room temperature until the chocolate sets, or place the sheet in the refrigerator for faster results.
Extra Tips
Use a tall, narrow bowl for melting the chocolate so the rods can be dipped deeper without wasting chocolate. If the coating feels too thick after the first dip, let it sit for a minute before sprinkling the salt. Store any leftovers in an airtight container at room temperature for up to two days to keep the pretzels crisp. Course: Snack Cuisine: American Equipment: Microwave-safe bowl, Baking sheet, Parchment paper
