
The irresistible charm of a perfectly baked red velvet cake is something we all adore.
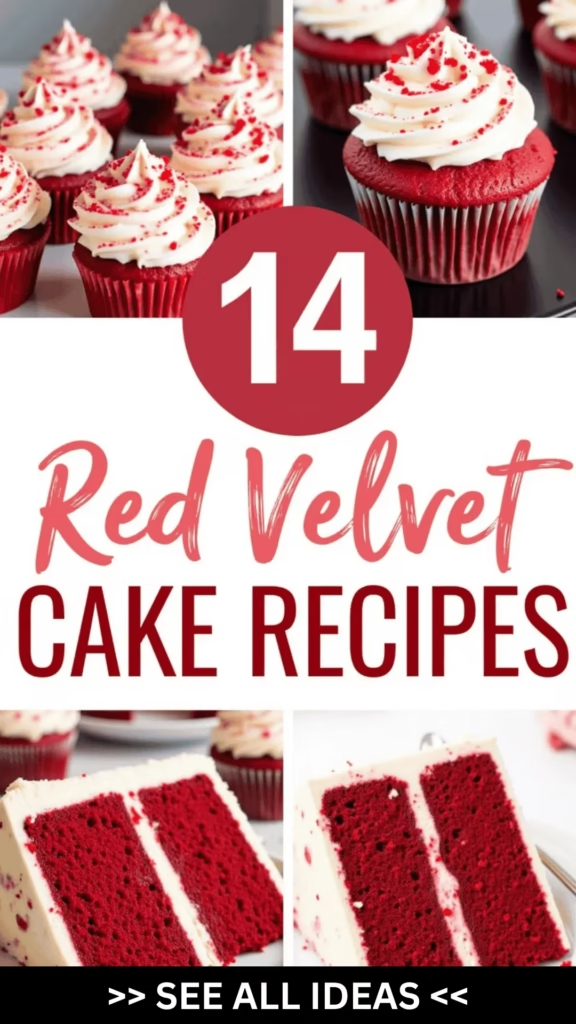
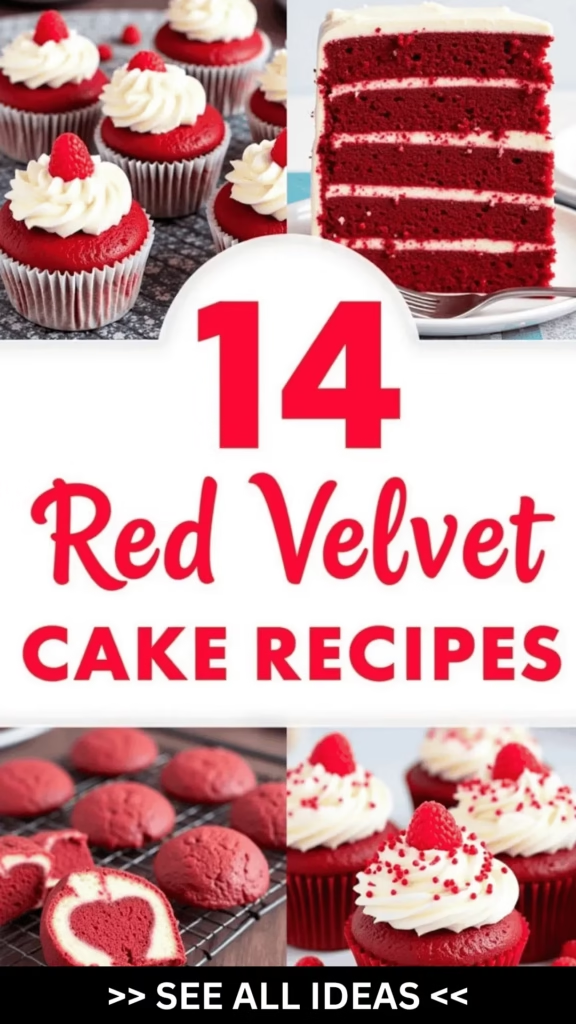
I’m so excited to share 14 velvety recipes that capture that iconic texture we love.
From the classic favorite to one-bowl wonders and even vegan delights, there’s something for everyone.
Each cake is a vibrant masterpiece, rich in cocoa and boasting a stunning red hue.
And in one special recipe, there’s a secret ingredient that takes the flavor to extraordinary heights. Curious?
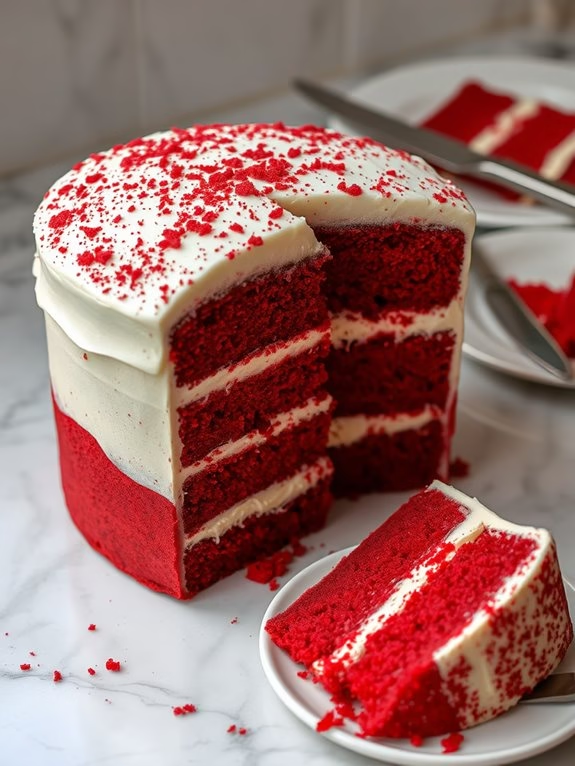
Classic Red Velvet Cake
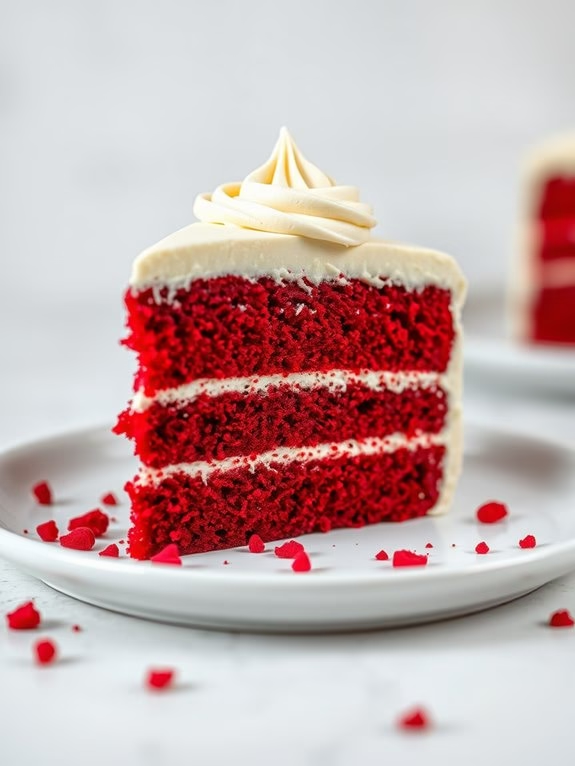
Classic Red Velvet Cake Recipe
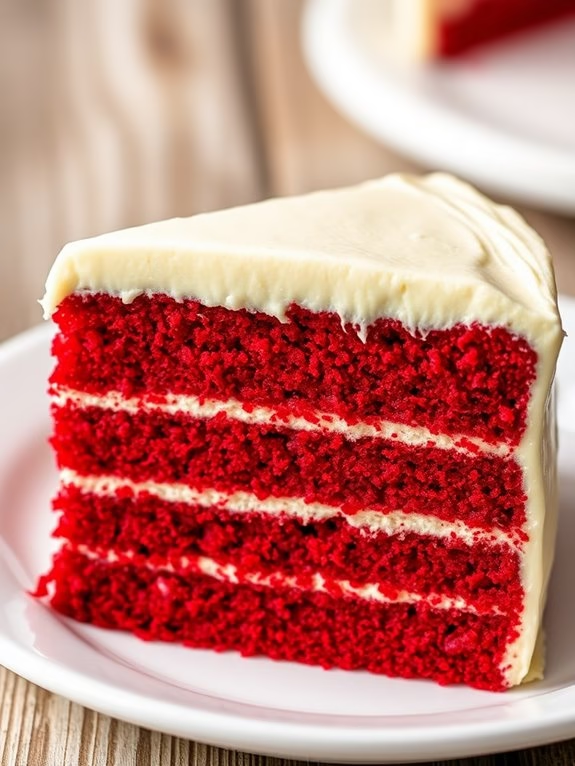
Red Velvet Cake is a classic dessert that combines a soft, velvety texture with a rich cocoa flavor, all wrapped in a stunning red hue. Traditionally topped with a cream cheese frosting, this cake is perfect for any special occasion or as a delightful treat at home. The combination of buttermilk, vinegar, and cocoa powder creates a unique flavor profile that’s both tangy and sweet, making it a favorite among cake enthusiasts.
To achieve the quintessential red velvet color, a small amount of food coloring is added, enhancing the cake’s visual appeal without overpowering its delicate chocolate taste. This recipe is designed to serve 4-6 people, guaranteeing everyone gets a generous slice of this luscious cake. With clear instructions and a few essential tips, you’ll be able to bake a red velvet cake that looks as good as it tastes.
Ingredients (Serves 4-6)
- 2 1/2 cups all-purpose flour
- 1 1/2 cups granulated sugar
- 1 teaspoon baking soda
- 1 teaspoon salt
- 1 teaspoon cocoa powder
- 1 1/2 cups vegetable oil
- 1 cup buttermilk, at room temperature
- 2 large eggs
- 2 tablespoons red food coloring
- 1 teaspoon vanilla extract
- 1 teaspoon white vinegar
- 1/2 cup unsalted butter, softened
- 8 oz cream cheese, softened
- 4 cups powdered sugar
- 1 teaspoon vanilla extract (for frosting)
Cooking Instructions
- Preheat and Prepare Pans: Preheat your oven to 350°F (175°C). Grease and flour two 9-inch round cake pans. Set them aside while you prepare the batter.
- Mix Dry Ingredients: In a medium bowl, whisk together the flour, sugar, baking soda, salt, and cocoa powder until well combined.
- Combine Wet Ingredients: In a large mixing bowl, beat together the vegetable oil, buttermilk, eggs, food coloring, vanilla extract, and vinegar. Mix until the ingredients are fully incorporated.
- Incorporate Dry and Wet Mixtures: Gradually add the dry ingredients to the wet mixture, mixing on low speed until just combined. Be careful not to over-mix to maintain the cake’s tender texture.
- Bake the Cakes: Divide the batter evenly between the prepared cake pans. Smooth the tops with a spatula. Bake in the preheated oven for 25-30 minutes or until a toothpick inserted into the center comes out clean.
- Cool the Cakes: Allow the cakes to cool in the pans for about 10 minutes. Then, turn them out onto a wire rack to cool completely before frosting.
- Prepare the Frosting: In a large bowl, beat together the softened butter and cream cheese until smooth. Gradually add the powdered sugar and vanilla extract, beating until the frosting is light and fluffy.
- Assemble the Cake: Place one cake layer on a serving platter. Spread a generous layer of cream cheese frosting over the top. Add the second cake layer and frost the top and sides of the cake evenly.
Extra Tips
For the best results, make certain that all your ingredients are at room temperature before you start baking. This helps them to mix together more easily and evenly.
When adding the food coloring, you can adjust the amount slightly to achieve your desired shade of red. If you prefer a more natural color, consider using beet juice as a natural food coloring alternative.
Remember to sift the powdered sugar before making the frosting to avoid lumps and achieve a smooth, creamy consistency.
Enjoy your homemade classic red velvet cake with a cup of coffee or a glass of milk for the ultimate indulgence!
One-Bowl Red Velvet
One-Bowl Red Velvet Cake
Red velvet cake is a classic dessert with its rich, velvety texture and signature red hue. This one-bowl version simplifies the baking process, making it perfect for bakers of all skill levels. By combining all the ingredients in a single bowl, you reduce the cleanup time while still accomplishing a moist and delicious cake. This recipe is designed for a serving size of 4-6 people, making it ideal for intimate gatherings or family desserts.
The unique flavor of red velvet cake comes from the blend of cocoa powder and buttermilk, which creates a subtle chocolate taste with a tangy edge. The vibrant red color is traditionally achieved with red food coloring, but you can also use beet juice for a natural alternative. This one-bowl red velvet cake is topped with a classic cream cheese frosting, adding a creamy and slightly tangy finish that complements the cake perfectly.
Ingredients:
- 1 1/4 cups all-purpose flour
- 1 cup granulated sugar
- 1 tablespoon unsweetened cocoa powder
- 1/2 teaspoon baking soda
- 1/2 teaspoon salt
- 1 large egg
- 3/4 cup buttermilk
- 1/4 cup vegetable oil
- 1 tablespoon red food coloring
- 1 teaspoon vanilla extract
- 1 teaspoon white vinegar
- 1/2 cup unsalted butter (softened)
- 8 ounces cream cheese (softened)
- 2 cups powdered sugar
- 1 teaspoon vanilla extract (for frosting)
Instructions:
- Preheat the Oven: Begin by preheating your oven to 350°F (175°C). Grease and flour a 9-inch round cake pan or line it with parchment paper for easy removal.
- Mix Dry Ingredients: In a large mixing bowl, whisk together the all-purpose flour, granulated sugar, cocoa powder, baking soda, and salt until well combined.
- Combine Wet Ingredients: Add the egg, buttermilk, vegetable oil, red food coloring, vanilla extract, and white vinegar to the dry ingredients. Mix everything together using a hand mixer or a whisk until the batter is smooth and uniform. Be careful not to overmix.
- Pour and Bake: Pour the batter into the prepared cake pan and smooth the top with a spatula. Bake in the preheated oven for 25-30 minutes, or until a toothpick inserted into the center of the cake comes out clean.
- Cool the Cake: Once baked, remove the cake from the oven and let it cool in the pan for about 10 minutes. Then, transfer it to a wire rack to cool completely before frosting.
- Prepare the Frosting: In a medium bowl, beat the softened butter and cream cheese together until creamy and smooth. Gradually add the powdered sugar and vanilla extract, beating until the frosting is light and fluffy.
- Frost the Cake: Once the cake is completely cooled, spread the cream cheese frosting evenly over the top. You can also slice the cake horizontally to add a layer of frosting in between for a layered effect.
Extra Tips:
For a natural red hue, consider using beet juice instead of red food coloring, though the color will be less vibrant. To enhance the chocolate flavor, you can increase the cocoa powder to 2 tablespoons, but remember this will affect the cake’s classic red appearance.
When making the frosting, confirm both the butter and cream cheese are at room temperature to prevent lumps. If you’re short on time, the cake can be made a day in advance and stored in the refrigerator, covered, until ready to serve.
Vegan Red Velvet Cake

Vegan Red Velvet Cake
Red velvet cake is a classic dessert known for its moist texture, vibrant red color, and subtle cocoa flavor. This vegan version of the cake maintains all the delightful characteristics of the traditional recipe but without any animal products. Perfect for anyone with dietary restrictions or those who are looking to try something new, this vegan red velvet cake is both delicious and easy to make.
With its rich flavor and beautiful presentation, it’s sure to impress at any gathering or celebration. This recipe yields a cake that serves 4-6 people, making it ideal for small parties or family get-togethers. The cake is made using simple, plant-based ingredients that are both accessible and affordable.
Whether you’re a seasoned baker or a novice in the kitchen, this recipe provides clear instructions to guarantee your cake turns out perfectly every time. So, gather your ingredients and get ready to bake a cake that’s sure to satisfy your sweet tooth and wow your guests.
Ingredients:
- 1 1/2 cups all-purpose flour
- 1 cup granulated sugar
- 2 tablespoons unsweetened cocoa powder
- 1 teaspoon baking soda
- 1/2 teaspoon salt
- 1 cup almond milk
- 1 teaspoon apple cider vinegar
- 1/3 cup vegetable oil
- 1 tablespoon vanilla extract
- 1 tablespoon red food coloring
- 1 teaspoon white vinegar
- 1/2 cup vegan cream cheese
- 1/4 cup vegan butter
- 2 cups powdered sugar
- 1 teaspoon vanilla extract
Cooking Instructions:
- Preheat the Oven: Start by preheating your oven to 350°F (175°C). Grease two 8-inch round cake pans with a little vegetable oil or line them with parchment paper to prevent sticking.
- Mix Dry Ingredients: In a large mixing bowl, sift together the all-purpose flour, granulated sugar, unsweetened cocoa powder, baking soda, and salt. Mix well to combine all dry ingredients evenly.
- Prepare Wet Ingredients: In a separate bowl, combine the almond milk and apple cider vinegar. Let this mixture sit for about 5 minutes to curdle, creating a vegan buttermilk. Then, add in the vegetable oil, vanilla extract, red food coloring, and white vinegar. Stir until well combined.
- Combine Ingredients: Gradually incorporate the wet ingredients into the dry ingredients, mixing gently until just combined. Be careful not to overmix, as this can make the cake dense.
- Bake the Cake: Divide the batter evenly between the two prepared cake pans. Place the pans in the oven and bake for 25-30 minutes, or until a toothpick inserted into the center of the cakes comes out clean.
- Cool and Frost: Allow the cakes to cool in the pans for about 10 minutes before transferring them to a wire rack to cool completely. Meanwhile, prepare the frosting by beating together the vegan cream cheese, vegan butter, powdered sugar, and vanilla extract until smooth and creamy.
Once the cakes are completely cool, spread the frosting between the layers and on top of the cake.
Extra Tips:
When making a vegan red velvet cake, it’s important to use high-quality cocoa powder to enhance the cake’s flavor. Additionally, verify the almond milk is fresh and not flavored or sweetened to maintain the desired taste balance.
If you’re using liquid food coloring, you might need to adjust the quantity for the desired redness. For best results, let the frosted cake sit in the refrigerator for about an hour before serving to let the flavors meld together. This will also help the frosting set, making it easier to slice and serve.
Gluten-Free Red Velvet
Gluten-Free Red Velvet Cake
Red velvet cake is a classic dessert, known for its rich flavor and striking red hue. However, for those with gluten sensitivities, indulging in this treat can be a challenge. This gluten-free red velvet cake recipe allows everyone to enjoy a slice without compromising on taste or texture. Made with a blend of gluten-free flours, this cake is just as moist and tender as the original.
The cream cheese frosting adds a perfect tangy balance to the cake’s sweet, cocoa-infused layers. This recipe is designed to serve 4-6 people, making it ideal for small gatherings or family dinners. Using readily available gluten-free ingredients, you can whip up this delicious cake with ease.
The vibrant red color is achieved with natural food coloring, guaranteeing that the cake is as wholesome as it’s beautiful. Whether you’re celebrating a special occasion or simply treating yourself, this gluten-free red velvet cake is sure to delight.
Ingredients:
- 1 ½ cups gluten-free all-purpose flour
- 1 cup granulated sugar
- 1 tablespoon unsweetened cocoa powder
- ½ teaspoon baking soda
- ½ teaspoon salt
- 1 cup buttermilk
- ½ cup vegetable oil
- 2 large eggs
- 1 teaspoon vanilla extract
- 1 teaspoon white vinegar
- 1 ounce red food coloring (natural preferred)
- 8 ounces cream cheese, softened
- ½ cup unsalted butter, softened
- 4 cups powdered sugar
- 1 teaspoon vanilla extract
Cooking Instructions:
- Preheat and Prep: Preheat your oven to 350°F (175°C). Grease and flour two 8-inch round cake pans with a gluten-free flour blend to guarantee easy removal.
- Mix Dry Ingredients: In a large mixing bowl, whisk together the gluten-free all-purpose flour, granulated sugar, cocoa powder, baking soda, and salt until well combined.
- Combine Wet Ingredients: In a separate bowl, mix the buttermilk, vegetable oil, eggs, vanilla extract, vinegar, and red food coloring. Whisk until everything is thoroughly blended.
- Blend Wet and Dry: Gradually add the wet ingredients to the dry ingredients, stirring gently until the batter is smooth and free of lumps.
- Bake the Cake: Divide the batter evenly between the prepared cake pans. Bake in the preheated oven for 25-30 minutes, or until a toothpick inserted into the center of the cakes comes out clean.
- Cool the Cakes: Allow the cakes to cool in the pans for about 10 minutes, then turn them out onto a wire rack to cool completely.
- Make the Frosting: In a medium bowl, beat the softened cream cheese and butter together until creamy. Gradually add in the powdered sugar and vanilla extract, beating until smooth and fluffy.
- Assemble the Cake: Once the cakes are completely cool, spread a layer of cream cheese frosting on top of one cake layer. Place the second cake layer on top and frost the top and sides of the entire cake with the remaining frosting.
- Serve and Enjoy: Slice and serve the cake to your guests. Enjoy the delicious combination of flavors and textures.
Extra Tips:
When making gluten-free baked goods, it’s vital to verify all your ingredients, especially the all-purpose flour blend, are certified gluten-free.
Additionally, if you’re using a different gluten-free flour blend, the texture might vary slightly, so you may need to adjust the liquid ingredients accordingly. For a deeper red color, you can add extra food coloring as needed.
Remember to let the cake cool completely before frosting to avoid the frosting melting. Enjoy your delicious gluten-free red velvet cake!
Red Velvet Cupcakes

Red Velvet Cupcakes are a delightful treat that combines the rich flavors of cocoa and vanilla with a hint of tanginess, all enveloped in a vibrant red hue. These cupcakes are a classic dessert option that never goes out of style and are perfect for any occasion, from birthday parties to casual gatherings.
Their moist and fluffy texture, topped with a creamy and slightly tangy cream cheese frosting, makes them irresistible to both kids and adults alike.
To achieve the perfect balance of flavors and texture, it’s vital to follow the recipe carefully and pay attention to each ingredient’s role. The buttermilk and vinegar are important in reacting with the baking soda to give the cupcakes their characteristic rise and tender crumb. Meanwhile, the red food coloring gives them their signature look, making them visually appealing.
Whether you’re a novice baker or a seasoned pro, these Red Velvet Cupcakes are sure to impress.
Ingredients (Serves 4-6)
- 1 1/4 cups all-purpose flour
- 1 cup granulated sugar
- 1/2 teaspoon baking soda
- 1/2 teaspoon salt
- 1 tablespoon cocoa powder
- 3/4 cup vegetable oil
- 1 large egg
- 1/2 cup buttermilk
- 1 tablespoon red food coloring
- 1/2 teaspoon vanilla extract
- 1/2 teaspoon white vinegar
For the Cream Cheese Frosting:
- 8 oz cream cheese, softened
- 1/4 cup unsalted butter, softened
- 2 cups powdered sugar
- 1 teaspoon vanilla extract
Cooking Instructions
- Preheat and Prepare: Preheat your oven to 350°F (175°C). Line a 12-cup muffin tin with cupcake liners.
- Mix Dry Ingredients: In a large bowl, whisk together the all-purpose flour, granulated sugar, baking soda, salt, and cocoa powder until well combined.
- Combine Wet Ingredients: In a separate bowl, mix the vegetable oil, egg, buttermilk, red food coloring, vanilla extract, and white vinegar until smooth.
- Combine Mixtures: Gradually add the wet ingredients to the dry ingredients, stirring gently until the batter is smooth and evenly mixed.
- Fill the Cupcake Liners: Divide the batter evenly among the prepared cupcake liners, filling each about two-thirds full.
- Bake: Place the muffin tin in the preheated oven and bake for 18-20 minutes, or until a toothpick inserted into the center of a cupcake comes out clean.
- Cool Completely: Remove the cupcakes from the oven and allow them to cool in the tin for 5 minutes before transferring them to a wire rack to cool completely.
- Prepare the Frosting: While the cupcakes are cooling, prepare the cream cheese frosting by beating the softened cream cheese and butter together in a medium bowl until creamy. Gradually add the powdered sugar and vanilla extract, continuing to beat until the frosting is smooth and fluffy.
- Frost the Cupcakes: Once the cupcakes are completely cool, use a piping bag or a spatula to frost each cupcake generously with the cream cheese frosting.
Extra Tips
When making Red Velvet Cupcakes, it’s important to not overmix the batter, as this can lead to dense cupcakes rather than light and fluffy ones.
Additionally, make sure all your ingredients are at room temperature before you begin, as this helps everything incorporate more smoothly.
If you don’t have buttermilk on hand, you can make a substitute by combining 1/2 cup of milk with 1/2 tablespoon of white vinegar or lemon juice and letting it sit for 5 minutes. This will help guarantee your cupcakes have the right tang and texture.
Finally, for a more decorative touch, consider sprinkling some red velvet cake crumbs or chocolate shavings on top of the frosted cupcakes.
Red Velvet Sheet Cake

Red Velvet Sheet Cake is a classic dessert that combines the subtle flavors of cocoa with the rich, tangy taste of cream cheese frosting, all in the convenience of a sheet cake form. This cake is perfect for gatherings, as it offers generous servings with its soft, moist texture and eye-catching red color, making it a crowd-pleaser for any occasion.
The luxurious cream cheese frosting adds a deliciously creamy layer that complements the cake’s unique flavor profile, creating a dessert that’s both beautiful and scrumptious.
Preparing a Red Velvet Sheet Cake for 4-6 people is both straightforward and rewarding. With a few basic ingredients and some simple steps, you can create a cake that’s not only delicious but also visually stunning.
Whether you’re a seasoned baker or a beginner in the world of cake-making, this recipe guides you through each step to guarantee your cake turns out perfectly every time.
Ingredients:
- 1 1/4 cups all-purpose flour
- 1 cup granulated sugar
- 1/4 cup unsweetened cocoa powder
- 1/2 teaspoon baking soda
- 1/2 teaspoon salt
- 1/2 cup unsalted butter, softened
- 1 large egg
- 1 teaspoon vanilla extract
- 1/2 cup buttermilk
- 1 tablespoon red food coloring
- 1 teaspoon white vinegar
Cream Cheese Frosting:
- 8 oz cream cheese, softened
- 1/4 cup unsalted butter, softened
- 2 cups powdered sugar
- 1 teaspoon vanilla extract
Instructions:
- Preheat the Oven: Start by preheating your oven to 350°F (175°C). Grease a 9×13 inch baking pan and set it aside.
- Mix Dry Ingredients: In a large bowl, whisk together the flour, sugar, cocoa powder, baking soda, and salt until well combined.
- Cream Butter and Sugar: In another bowl, beat together the softened butter and sugar using an electric mixer until light and fluffy. This should take about 2-3 minutes.
- Add Egg and Flavorings: Add the egg and vanilla extract to the butter mixture. Mix until well integrated.
- Combine with Dry Ingredients: Gradually add the dry ingredients to the wet mixture, alternating with the buttermilk. Begin and end with the flour mixture, mixing well after each addition.
- Add Color and Vinegar: Stir in the red food coloring and vinegar until the batter is uniformly colored.
- Bake the Cake: Pour the batter into the prepared baking pan and spread it evenly. Bake for 25-30 minutes, or until a toothpick inserted into the center of the cake comes out clean.
- Cool the Cake: Once baked, remove the cake from the oven and let it cool in the pan on a wire rack.
- Prepare Frosting: While the cake cools, make the cream cheese frosting. Beat together the softened cream cheese and butter until smooth. Gradually add the powdered sugar and vanilla extract, beating until the frosting is creamy and spreadable.
- Frost the Cake: Once the cake has completely cooled, spread the cream cheese frosting evenly over the top of the cake using a spatula.
Extra Tips:
To guarantee your Red Velvet Sheet Cake has the perfect consistency, be careful not to overmix the batter, as this can lead to a denser cake.
Make sure the cake is fully cooled before applying the frosting, as any residual heat can cause the frosting to melt and slide off.
If you prefer a more intense red color, you can adjust the amount of food coloring to your liking.
Finally, for a decorative touch, consider adding a sprinkle of cocoa powder or red velvet crumbs on top of the frosting.
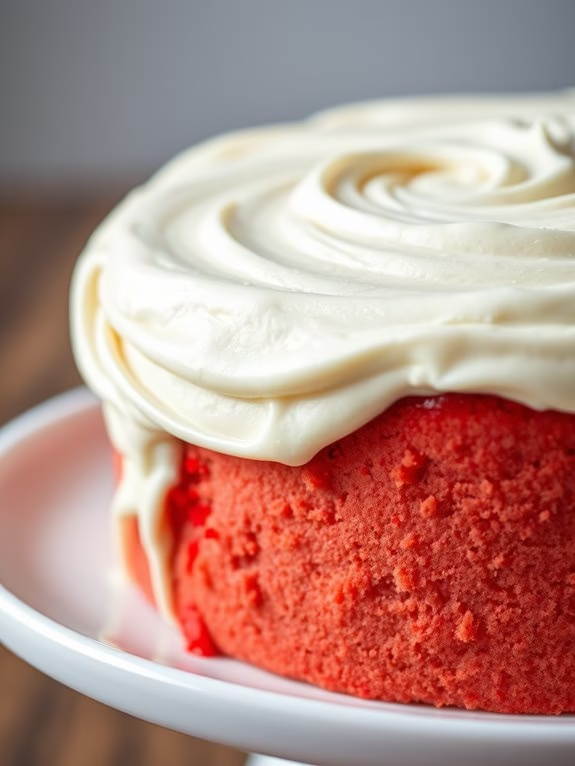
Red Velvet Bundt Cake
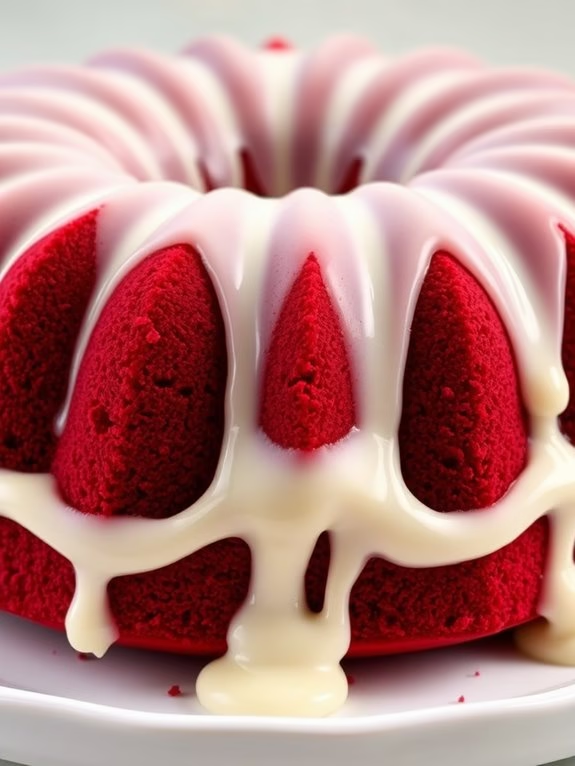
Red Velvet Bundt Cake Recipe
There’s something irresistibly charming about a Red Velvet Bundt Cake. Its rich, velvety texture and striking red color make it a showstopper at any gathering. The bundt shape adds an elegant touch, while the cream cheese glaze drizzled on top brings a delightful balance of tanginess and sweetness. This cake is perfect for special occasions or as a decadent treat for your loved ones.
This recipe caters to a serving size of 4-6 people, making it ideal for a small party or family gathering. The cake is moist and fluffy, with a hint of cocoa flavor that complements the rich cream cheese glaze. With a few simple steps, you’ll have a beautiful and delicious Red Velvet Bundt Cake that will impress your guests and satisfy your sweet tooth.
Ingredients:
- 2 ½ cups all-purpose flour
- 1 ½ cups granulated sugar
- 1 teaspoon baking soda
- 1 teaspoon salt
- 1 teaspoon cocoa powder
- 1 ½ cups vegetable oil
- 1 cup buttermilk, room temperature
- 2 large eggs, room temperature
- 2 tablespoons red food coloring
- 1 teaspoon vanilla extract
- 1 teaspoon white vinegar
For the Cream Cheese Glaze:
- 4 ounces cream cheese, softened
- 2 cups powdered sugar
- 1 teaspoon vanilla extract
- 2-3 tablespoons milk
Cooking Instructions:
- Preheat the Oven: Begin by preheating your oven to 350°F (175°C). Grease a bundt pan generously with butter or non-stick spray to guarantee easy removal of the cake after baking.
- Mix Dry Ingredients: In a medium-sized bowl, whisk together the flour, sugar, baking soda, salt, and cocoa powder. Confirm they’re well combined and set aside.
- Combine Wet Ingredients: In a large mixing bowl, beat together the vegetable oil, buttermilk, eggs, red food coloring, vanilla extract, and vinegar until smooth. The mixture should be well-blended, with an even red color.
- Create Batter: Gradually add the dry ingredients to the wet mixture, stirring until just combined. Be careful not to overmix, as this can result in a dense cake.
- Bake the Cake: Pour the batter into the prepared bundt pan, smoothing the top with a spatula. Bake in the preheated oven for 45-50 minutes, or until a toothpick inserted into the center comes out clean.
- Cool the Cake: Allow the cake to cool in the pan for about 10 minutes, then carefully invert it onto a wire rack to cool completely.
- Prepare the Cream Cheese Glaze: In a medium bowl, beat the softened cream cheese until smooth. Gradually add the powdered sugar, vanilla extract, and enough milk to reach your desired glaze consistency. It should be thick yet pourable.
- Glaze the Cake: Once the cake is completely cooled, drizzle the cream cheese glaze evenly over the top, allowing it to cascade down the sides of the bundt cake.
Extra Tips:
When making a Red Velvet Bundt Cake, it’s essential to use room temperature ingredients, as they blend more easily and create a smoother batter.
If you don’t have buttermilk on hand, you can make a substitute by adding a tablespoon of white vinegar to a cup of milk and letting it sit for 5 minutes.
Additionally, confirm your bundt pan is well-greased to prevent sticking, and don’t rush the cooling process—cooling the cake in the pan for a bit before transferring it to a rack helps maintain its shape.
Finally, feel free to adjust the amount of food coloring to achieve your desired shade of red.
No-Bake Red Velvet

No-Bake Red Velvet Cake
Indulge in the classic flavors of red velvet cake without the need for an oven with this delightful No-Bake Red Velvet Cake. Perfect for warm days or when you’re simply in the mood for a delicious dessert that doesn’t require baking, this cake combines the rich flavors of cocoa and cream cheese with the vibrant red hue that makes red velvet so iconic.
This easy-to-make dessert is sure to impress your family and friends at any gathering or special occasion. This version of red velvet cake is delightfully creamy, featuring a velvety smooth texture that melts in your mouth. The combination of a crunchy base with a creamy red velvet filling, topped off with a luscious cream cheese layer, makes every bite an explosion of flavors and textures.
Whether you’re a seasoned baker or a beginner, this no-bake recipe is simple to follow and guarantees a stunning result that looks as good as it tastes.
Ingredients for 4-6 servings:
- 1 1/2 cups crushed chocolate graham crackers
- 1/2 cup unsalted butter, melted
- 2 cups heavy whipping cream
- 8 oz cream cheese, softened
- 1 cup powdered sugar
- 1/4 cup cocoa powder
- 1 teaspoon vanilla extract
- 1 tablespoon red food coloring
- 1 tablespoon gelatin
- 1/4 cup water
- 1/2 cup white chocolate chips
- Red velvet sprinkles (optional)
Instructions:
- Prepare the Base: In a medium bowl, combine crushed chocolate graham crackers with the melted butter. Mix well until the crumbs are fully coated with butter. Press the mixture firmly into the bottom of a springform pan to form an even base. Refrigerate for 30 minutes to set.
- Dissolve Gelatin: In a small bowl, sprinkle gelatin over water and let it sit for about 5 minutes to bloom. Once bloomed, microwave the gelatin mixture for about 15 seconds or until dissolved. Set aside to cool slightly.
- Make the Filling: In a large mixing bowl, beat the cream cheese with powdered sugar until smooth and creamy. Add cocoa powder, vanilla extract, and red food coloring, mixing on low speed until fully incorporated. Gradually add the dissolved gelatin into the cream cheese mixture, stirring constantly.
- Whip the Cream: In a separate bowl, whip the heavy whipping cream until stiff peaks form. Gently fold the whipped cream into the cream cheese mixture until well combined and smooth.
- Assemble the Cake: Pour the red velvet filling over the chilled crust in the springform pan, spreading it evenly. Cover the pan with plastic wrap and refrigerate for at least 4 hours or until set.
- Prepare the Topping: Melt the white chocolate chips in a microwave-safe bowl, heating in 20-second intervals and stirring until smooth. Allow to cool slightly.
- Add the Topping: Spread the melted white chocolate over the set red velvet filling. Optionally, sprinkle with red velvet sprinkles for decoration. Return the cake to the refrigerator for another 30 minutes to allow the topping to set.
- Serve: Once set, carefully remove the cake from the springform pan. Slice and serve chilled.
Extra Tips:
For the best results, make sure that the cream cheese is softened to room temperature before mixing, as this will help achieve a smooth filling without lumps.
When whipping the cream, watch closely to avoid over-whipping, which can lead to a grainy texture. If you don’t have chocolate graham crackers, you can substitute with regular graham crackers and add a tablespoon of cocoa powder to the mix.
Finally, feel free to adjust the amount of red food coloring to achieve your desired shade of red.
Red Velvet Cheesecake
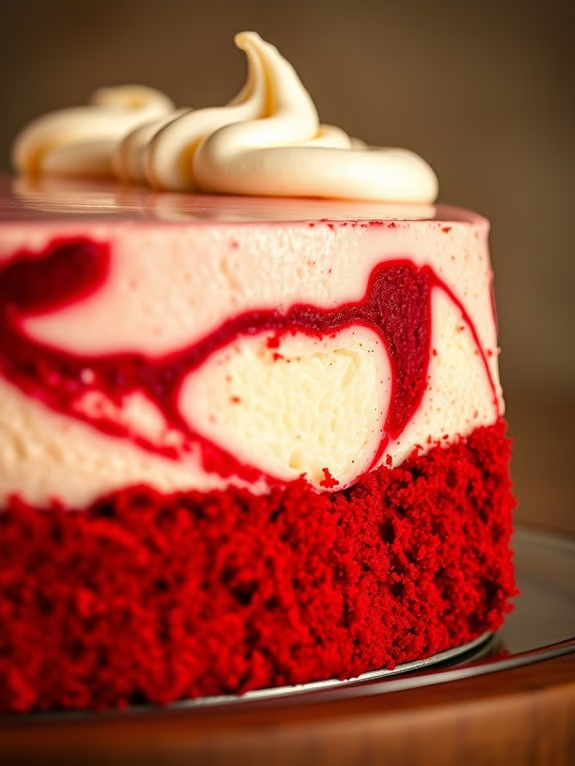
Red Velvet Cheesecake Recipe
Red velvet cheesecake is a delightful twist on the classic red velvet cake, combining the rich flavors of red velvet with the creamy, tangy notes of cheesecake. This dessert is perfect for special occasions or as a luxurious treat for any day. The striking red hue paired with the smooth, velvety texture makes this cheesecake a showstopper at any gathering.
With a combination of a crunchy crust, luscious red velvet layers, and a creamy cheesecake center, this dish is both visually appealing and incredibly delicious. This recipe is designed to serve 4-6 people, making it ideal for small gatherings or family occasions. The process involves creating a rich red velvet cake layer, a smooth cheesecake filling, and a decadent cream cheese frosting. Each component complements the other, resulting in a dessert that’s both satisfying and indulgent.
Follow the steps below to create an unforgettable red velvet cheesecake that will leave a lasting impression on your taste buds.
Ingredients:
- 1 cup all-purpose flour
- 1/4 cup unsweetened cocoa powder
- 1/2 teaspoon baking soda
- 1/2 teaspoon salt
- 1/2 cup unsalted butter, softened
- 1 cup granulated sugar
- 1 large egg
- 1 teaspoon vanilla extract
- 1/2 cup buttermilk
- 1 tablespoon red food coloring
- 1 teaspoon white vinegar
- 16 ounces cream cheese, softened
- 1/2 cup sour cream
- 1/2 cup granulated sugar
- 2 large eggs
- 1 teaspoon vanilla extract
- 1 1/2 cups graham cracker crumbs
- 1/4 cup unsalted butter, melted
- 8 ounces cream cheese, softened (for frosting)
- 1/4 cup unsalted butter, softened (for frosting)
- 2 cups powdered sugar
- 1 teaspoon vanilla extract (for frosting)
Instructions:
- Prepare the Crust: Preheat your oven to 325°F (163°C). In a medium bowl, combine graham cracker crumbs and melted butter until well mixed. Press the mixture firmly into the bottom of a 9-inch springform pan. Bake for 10 minutes, then set aside to cool.
- Make the Red Velvet Layer: In a medium bowl, sift together flour, cocoa powder, baking soda, and salt. In a large bowl, beat softened butter and granulated sugar until light and fluffy. Add the egg and vanilla extract, mixing well. Incorporate the buttermilk, red food coloring, and vinegar, mixing until combined. Gradually add the dry ingredients to the wet, mixing until just combined.
- Prepare the Cheesecake Layer: In a large bowl, beat the cream cheese until smooth. Add sour cream and granulated sugar, mixing until well combined. Add the eggs one at a time, beating after each addition, then mix in the vanilla extract.
- Assemble the Cheesecake: Pour half of the red velvet cake batter over the prepared crust, spreading evenly. Gently spoon the cheesecake mixture over the red velvet layer, then top with the remaining red velvet batter. Use a knife to swirl the layers slightly for a marbled effect.
- Bake the Cheesecake: Place the springform pan in the oven and bake for 55-60 minutes, or until the cheesecake is set but slightly jiggly in the center. Remove from the oven and let cool to room temperature. Refrigerate for at least 4 hours or overnight.
- Prepare the Frosting: In a medium bowl, beat softened cream cheese and butter together until smooth and creamy. Gradually add powdered sugar, mixing until the frosting is light and fluffy. Stir in vanilla extract.
- Frost and Serve: Carefully remove the cheesecake from the springform pan and place it on a serving dish. Spread the cream cheese frosting evenly over the top of the cheesecake. For an extra touch, you can pipe decorative patterns or add red velvet crumbs as a garnish.
Extra Tips:
When making this red velvet cheesecake, verify that all ingredients, especially the cream cheese, are at room temperature before beginning. This will help achieve a smooth and creamy texture in the cheesecake layer.
If you prefer a denser cheesecake, consider baking it in a water bath to prevent cracking. To achieve a vibrant red color, use gel food coloring instead of liquid, as it provides a more concentrated hue. Finally, always chill the cheesecake sufficiently before serving to verify it sets properly and firms up nicely.
Red Velvet Cake Pops

Red Velvet Cake Pops
Red velvet cake pops are a delightful and fun twist on the classic red velvet cake, perfect for parties or as an elegant treat. These bite-sized confections combine the rich, moist texture of red velvet cake with a smooth, creamy frosting, all encased in a crisp chocolate shell. With their vibrant color and decadent taste, red velvet cake pops are bound to be a hit with both kids and adults alike.
Making red velvet cake pops can be a fun and rewarding kitchen project. First, you’ll bake a traditional red velvet cake and then crumble it into fine crumbs. These crumbs are then mixed with cream cheese frosting to form a dough-like consistency. The mixture is rolled into balls, set on sticks, and coated with a luscious chocolate shell. The result is an eye-catching and delicious treat that’s as enjoyable to make as it’s to eat.
Ingredients (Serves 4-6):
- 1 box red velvet cake mix (plus ingredients listed on the box)
- 1 cup cream cheese frosting (store-bought or homemade)
- 2 cups semi-sweet chocolate chips or candy melts
- 2 tablespoons vegetable oil
- Lollipop sticks
- Sprinkles or other decorations (optional)
Cooking Instructions:
- Prepare the Cake: Preheat your oven to 350°F (175°C) and bake the red velvet cake according to the package instructions. Once baked, let the cake cool completely on a wire rack.
- Crumble the Cake: Once the cake has cooled, crumble it into a large mixing bowl using your hands or a fork until you have fine crumbs with no large pieces remaining.
- Mix with Frosting: Add the cream cheese frosting to the cake crumbs. Use your hands or a spoon to thoroughly combine the mixture until it reaches a dough-like consistency.
- Shape the Pops: Roll the mixture into 1-inch balls using your hands. Place the balls on a baking sheet lined with parchment paper. Insert a lollipop stick into each ball, making sure it’s securely placed in the center.
- Chill the Pops: Place the cake pops in the refrigerator for about 30 minutes, or until they’re firm enough to handle without falling apart.
- Melt the Chocolate: In a microwave-safe bowl, combine the chocolate chips or candy melts with the vegetable oil. Microwave in 30-second intervals, stirring in between, until the chocolate is completely melted and smooth.
- Coat the Pops: Dip each cake pop into the melted chocolate, making sure it’s fully covered. Gently tap off any excess chocolate and place the cake pop back onto the parchment paper. If desired, sprinkle decorations over the pops while the chocolate is still wet.
- Set the Coating: Allow the chocolate coating to set completely. You can place the cake pops in the refrigerator to speed up this process.
Extra Tips:
For best results, verify the cake pops are chilled before coating them in chocolate; this will help the chocolate to adhere better and set more quickly.
If you find the pops falling off the sticks, try dipping the tip of each stick into melted chocolate before inserting it into the cake ball for added stability.
Additionally, to avoid cracking in the chocolate shell, make sure the chocolate is at room temperature before dipping, and avoid refrigerating the cake pops directly after dipping.
Experiment with different decorations and flavors of candy melts to create a variety of fun and unique cake pops.
Red Velvet Mug Cake

Red Velvet Mug Cake is a delightful twist on the classic red velvet cake, perfect for those moments when you crave a quick and easy dessert. This single-serving cake is made in a microwave, cutting down on both cooking and cleanup time. It’s ideal for those late-night cravings or when you need a quick dessert fix for a small gathering.
With its vibrant red color and irresistible cream cheese frosting, this mug cake is sure to satisfy your sweet tooth. This recipe is designed to serve 4-6 people, allowing you to share the delight with friends or family. The cake is moist, fluffy, and has the characteristic cocoa flavor that red velvet is known for. The addition of buttermilk and vinegar helps to create a tender crumb and enhance the cake’s unique flavor. Topped with a luscious cream cheese frosting, this dessert is both visually stunning and delicious.
Ingredients for 4-6 servings:
- 1 cup all-purpose flour
- 1/2 cup granulated sugar
- 2 tablespoons cocoa powder
- 1 teaspoon baking powder
- 1/2 teaspoon baking soda
- 1/4 teaspoon salt
- 1/2 cup buttermilk
- 1/4 cup vegetable oil
- 1 large egg
- 1 teaspoon vanilla extract
- 1 teaspoon white vinegar
- 1 tablespoon red food coloring
- 1/2 cup cream cheese, softened
- 1/4 cup unsalted butter, softened
- 1 cup powdered sugar
- 1 teaspoon vanilla extract
Cooking Instructions:
- Prepare Dry Ingredients: In a large mixing bowl, combine the flour, sugar, cocoa powder, baking powder, baking soda, and salt. Whisk together until well blended, making sure there are no lumps.
- Mix Wet Ingredients: In another bowl, whisk together the buttermilk, vegetable oil, egg, and vanilla extract. Add the white vinegar and red food coloring, stirring until the mixture is uniformly red.
- Combine Mixtures: Gradually add the wet ingredients to the dry ingredients, stirring gently until just combined. Be careful not to overmix the batter as this can result in a dense cake.
- Divide Batter: Evenly distribute the batter into 4-6 microwave-safe mugs, filling each only halfway to allow room for rising.
- Microwave: Place one mug in the microwave and cook on high for 1 to 1.5 minutes, checking after 1 minute to prevent overcooking. The cake should rise and be firm to the touch. Repeat with the remaining mugs.
- Make Frosting: While the cakes are cooling, beat the softened cream cheese and butter together until smooth. Gradually add the powdered sugar and vanilla extract, continuing to beat until light and fluffy.
- Frost and Serve: Once the mug cakes have cooled slightly, top each with a generous dollop of cream cheese frosting. Serve immediately for the best experience.
Extra Tips:
When preparing the Red Velvet Mug Cake, verify your microwave is set to the correct power level; a high setting is often best, but microwaves can vary.
If you find the cake is coming out dry, try reducing the cooking time slightly. For an added touch, sprinkle some chocolate chips or nuts on top of the batter before microwaving for extra flavor and texture.
Finally, if you prefer a less sweet frosting, adjust the powdered sugar to taste. Enjoy your quick and delicious homemade dessert!
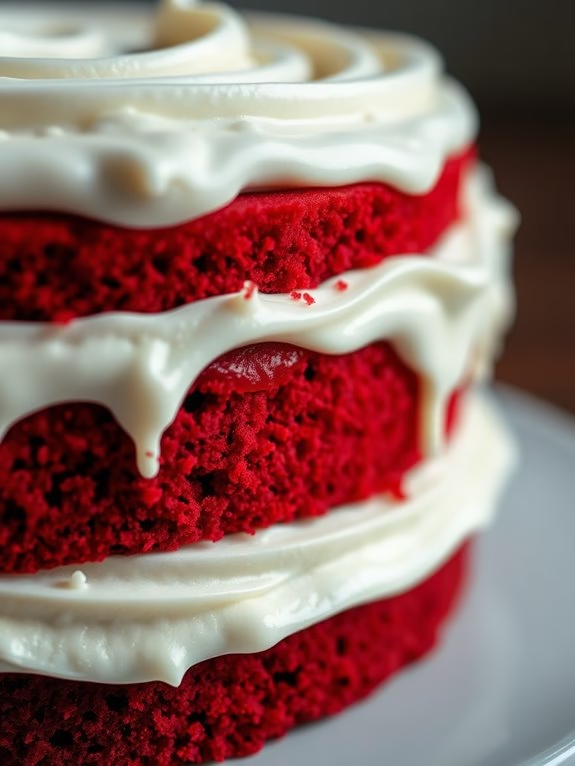
Red Velvet Layer Cake
Red Velvet Layer Cake
Red Velvet Layer Cake is a classic dessert that brings a touch of elegance and richness to any occasion. Known for its striking red hue and velvety texture, this cake is a perfect balance of cocoa and vanilla flavors. The cake layers are soft and moist, and when paired with a luscious cream cheese frosting, they create a delightful treat that’s hard to resist.
Whether you’re celebrating a birthday, an anniversary, or just indulging in a sweet craving, this Red Velvet Layer Cake is bound to impress both in taste and appearance.
The origin of the Red Velvet Cake is often attributed to the Victorian era, where its vibrant color was seen as a symbol of luxury and sophistication. Over time, it has become a beloved staple in American baking, particularly in the Southern United States. The secret to its unique texture lies in the use of buttermilk and vinegar, which react with the baking soda to create a light and fluffy crumb.
This recipe will guide you through making a stunning Red Velvet Layer Cake that serves 4-6 people, guaranteeing that each slice is as beautiful as it’s delicious.
Ingredients:
- 1 1/4 cups all-purpose flour
- 1 cup granulated sugar
- 1 tablespoon cocoa powder
- 1/2 teaspoon baking soda
- 1/2 teaspoon salt
- 1/2 cup unsalted butter, softened
- 1 large egg
- 1/2 cup buttermilk
- 1 tablespoon red food coloring
- 1 teaspoon vanilla extract
- 1/2 teaspoon white vinegar
- 8 ounces cream cheese, softened
- 1/2 cup unsalted butter, softened (for frosting)
- 2 cups powdered sugar
- 1 teaspoon vanilla extract (for frosting)
Cooking Instructions:
- Preheat and Prepare: Preheat your oven to 350°F (175°C). Grease and flour two 8-inch round cake pans to prevent sticking.
- Mix the Dry Ingredients: In a medium bowl, sift together the flour, cocoa powder, baking soda, and salt. Set aside.
- Cream Butter and Sugar: In a large mixing bowl, beat 1/2 cup of softened unsalted butter and granulated sugar until light and fluffy, about 2-3 minutes.
- Add Egg: Add the egg to the butter-sugar mixture and beat until well combined.
- Incorporate Wet Ingredients: In a small bowl, mix the buttermilk, red food coloring, vinegar, and 1 teaspoon vanilla extract.
- Combine Wet and Dry Ingredients: Gradually add the dry ingredients to the creamed mixture, alternating with the buttermilk mixture. Begin and end with the dry ingredients, mixing just until combined after each addition.
- Pour and Bake: Divide the batter evenly between the prepared cake pans. Smooth the tops with a spatula, and bake in the preheated oven for 25-30 minutes, or until a toothpick inserted into the center comes out clean.
- Cool the Cakes: Remove the cakes from the oven and let them cool in the pans for about 10 minutes. Turn them out onto a wire rack to cool completely.
- Prepare the Frosting: In a medium bowl, beat the cream cheese and 1/2 cup of softened butter together until smooth. Gradually add powdered sugar and 1 teaspoon vanilla extract, beating until the frosting is creamy and spreadable.
- Assemble the Cake: Place one cake layer on a serving plate. Spread a generous amount of frosting over the top. Place the second layer on top, and frost the top and sides of the cake evenly.
Extra Tips:
For the best results, verify your ingredients are at room temperature before starting the recipe. This helps achieve a smoother batter and a more consistent frosting texture.
When adding the food coloring, start with less and adjust to your preferred shade of red. If you prefer a darker red, add a little more food coloring, but be cautious as too much can affect the taste.
For a more sophisticated presentation, consider garnishing the cake with white chocolate shavings or fresh berries. Enjoy your Red Velvet Layer Cake with a cup of coffee or tea for the perfect dessert pairing.
Red Velvet Pancakes
Red Velvet Pancakes Recipe
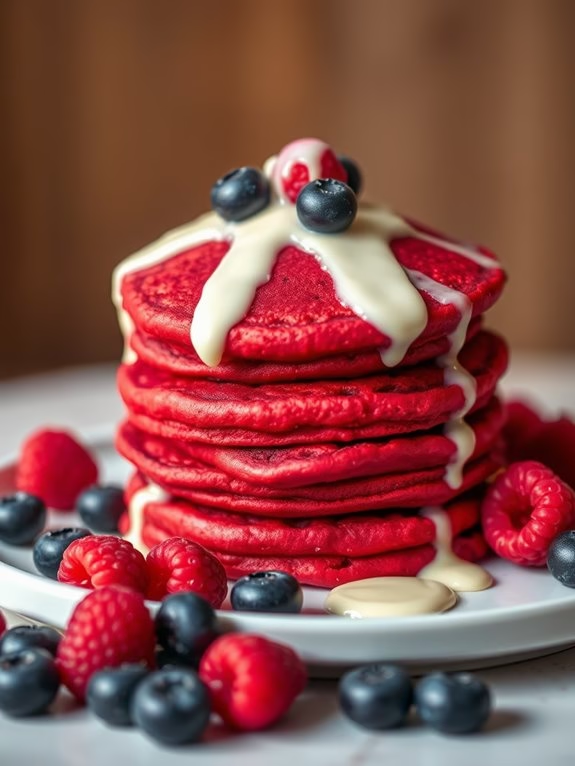
Red velvet pancakes are a delightful twist on the classic red velvet cake, offering a perfect treat for breakfast or brunch. These pancakes are fluffy, colorful, and have a subtle hint of cocoa that pairs beautifully with the tangy cream cheese glaze often associated with red velvet flavors.
Whether you’re serving them for a special occasion or just want to add a splash of color to your morning routine, red velvet pancakes bring a festive feel to any table.
The key to achieving the vibrant red color in these pancakes lies in the careful balance of ingredients, which include a touch of cocoa powder and a dash of red food coloring. The pancakes aren’t overly sweet, making them an excellent canvas for toppings like whipped cream, fresh berries, or the classic cream cheese frosting.
With this recipe, you can create a batch of fluffy, flavorful pancakes that will surely impress your family and friends.
Ingredients for 4-6 Servings:
- 1 1/2 cups all-purpose flour
- 2 tablespoons granulated sugar
- 2 tablespoons unsweetened cocoa powder
- 1 teaspoon baking powder
- 1/2 teaspoon baking soda
- 1/2 teaspoon salt
- 1 1/4 cups buttermilk
- 2 large eggs
- 2 tablespoons unsalted butter, melted
- 1 teaspoon vanilla extract
- 1 tablespoon red food coloring
- 1 teaspoon white vinegar
- Butter or oil for cooking
Cooking Instructions:
- Mix Dry Ingredients: In a large mixing bowl, whisk together the flour, sugar, cocoa powder, baking powder, baking soda, and salt until well combined.
- Prepare Wet Ingredients: In a separate bowl, beat the eggs and then add in the buttermilk, melted butter, vanilla extract, red food coloring, and white vinegar. Mix until all the wet ingredients are fully incorporated.
- Combine Mixtures: Gradually pour the wet ingredients into the dry ingredients, stirring gently until just combined. Be careful not to overmix; a few lumps are okay.
- Heat the Pan: Place a non-stick skillet or griddle over medium heat and lightly grease it with butter or oil. Make sure the surface is evenly coated.
- Cook Pancakes: Pour about 1/4 cup of the batter onto the heated skillet for each pancake. Cook until bubbles form on the surface, about 2-3 minutes, then flip and cook for an additional 1-2 minutes or until the other side is golden brown.
- Serve: Stack the pancakes on a plate and serve warm with your choice of toppings such as cream cheese frosting, whipped cream, or fresh berries.
Extra Tips:
To guarantee your pancakes are perfectly fluffy, make sure not to overmix the batter. Overmixing can result in dense pancakes.
Also, keep your skillet at a consistent medium heat to cook the pancakes evenly without burning them. If you find the batter too thick, add a tablespoon of buttermilk at a time until you reach your desired consistency.
For an extra touch, consider adding a pinch of cinnamon to the batter for a warm, spicy note.
Red Velvet Trifle
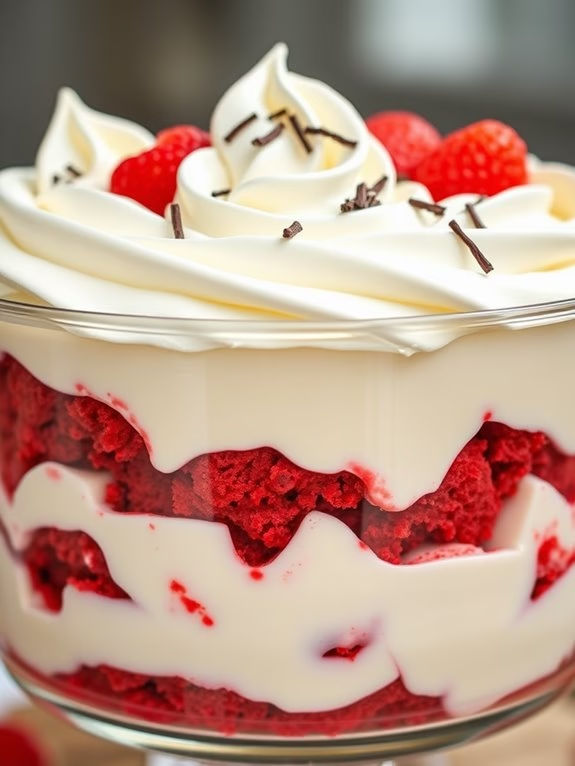
Red Velvet Trifle is a delightful dessert that combines the rich flavors of red velvet cake with the creamy texture of whipped cream and pudding. This layered dessert isn’t only visually appealing with its striking red and white contrast but also incredibly delicious, making it a perfect treat for gatherings or special occasions.
The trifle is served in a large glass bowl or individual serving glasses to showcase its beautiful layers, guaranteeing that each spoonful offers a perfect balance of cake, cream, and pudding.
Creating a Red Velvet Trifle is a fun and rewarding process that allows you to express your creativity. The recipe is versatile and can be easily adapted to suit your taste preferences. Whether you prepare everything from scratch or use store-bought components, the result is sure to impress your friends and family.
This recipe serves 4-6 people, making it ideal for a small party or family dinner.
Ingredients:
- 1 box of red velvet cake mix
- 3 large eggs
- 1 cup water
- 1/3 cup vegetable oil
- 2 cups heavy whipping cream
- 1/4 cup powdered sugar
- 1 teaspoon vanilla extract
- 1 package (3.4 oz) instant vanilla pudding mix
- 2 cups cold milk
- 1 cup cream cheese, softened
- 1/4 cup granulated sugar
- 1 teaspoon vanilla extract
- Fresh berries or chocolate shavings for garnish (optional)
Instructions:
1. Prepare the Red Velvet Cake: Preheat your oven to 350°F (175°C). In a large mixing bowl, combine the red velvet cake mix, eggs, water, and vegetable oil. Beat the mixture with an electric mixer on medium speed for about 2 minutes until smooth.
Pour the batter into a greased and floured 9×13 inch baking pan. Bake for 25-30 minutes or until a toothpick inserted into the center comes out clean. Let the cake cool completely on a wire rack.
2. Make the Whipped Cream: In a chilled mixing bowl, combine the heavy whipping cream, powdered sugar, and vanilla extract. Beat with an electric mixer on high speed until stiff peaks form. Set aside in the refrigerator.
3. Prepare the Pudding Layer: In a medium bowl, whisk together the instant vanilla pudding mix and cold milk until thickened, about 2 minutes. Set aside.
4. Prepare the Cream Cheese Layer: In another mixing bowl, beat the softened cream cheese, granulated sugar, and vanilla extract until smooth and creamy. Gently fold in half of the prepared whipped cream until well combined.
5. Assemble the Trifle: Cut the cooled red velvet cake into small cubes. In a large glass trifle bowl or individual serving glasses, start with a layer of red velvet cake cubes.
Follow with a layer of the cream cheese mixture, then a layer of vanilla pudding. Repeat the layers, ending with a layer of whipped cream on top.
6. Garnish and Serve: Decorate the top with fresh berries or chocolate shavings, if desired. Chill the trifle in the refrigerator for at least 2 hours before serving to allow the flavors to meld together.
Extra Tips:
When preparing the Red Velvet Trifle, confirm that the cake is completely cooled before cutting it into cubes to prevent it from crumbling.
For a more intense flavor, consider adding a splash of liqueur, such as Grand Marnier or Irish cream, to the cake cubes before layering. This dessert can be made a day in advance, which will enhance the flavor and make it more convenient for entertaining.
If you’re short on time, store-bought red velvet cake or cake mix can be used as a quick alternative.