
As the holiday season approaches, I’ve put together a delightful list of 12 vegetarian Christmas dinner recipes just for you. From the elegant Balsamic Roasted Vegetable Wellington to the creamy indulgence of Wild Mushroom Risotto, there’s something to charm every palate. Picture the comforting flavors of Spinach and Ricotta Stuffed Shells alongside the festive touch of Stuffed Acorn Squash. These recipes promise to bring joy and warmth to your holiday table. Ready to explore these delicious ideas?
Balsamic Roasted Vegetable Wellington
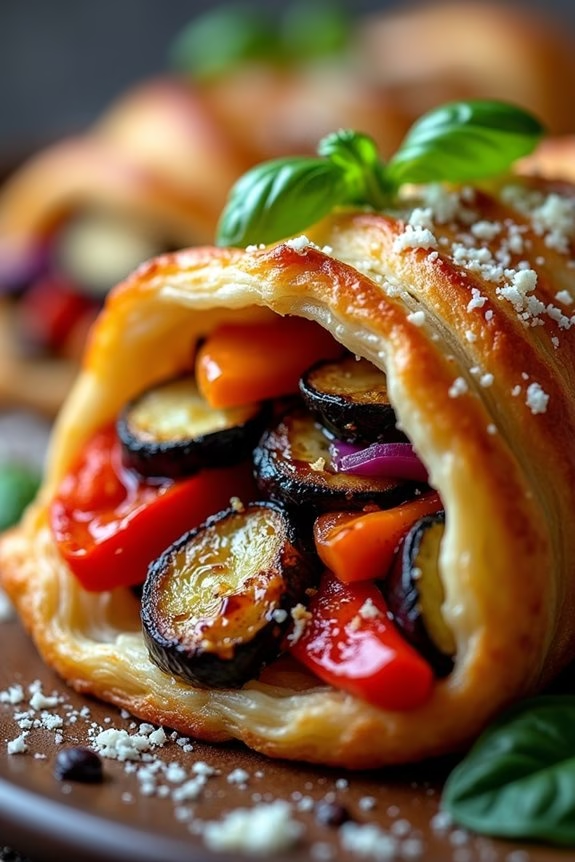
Balsamic Roasted Vegetable Wellington is a delightful and impressive centerpiece for any vegetarian Christmas dinner. This dish combines a medley of seasonal vegetables, roasted to perfection with a sweet and tangy balsamic glaze, all wrapped in a golden, flaky puff pastry. Not only is it visually stunning, but it also offers a rich depth of flavors that even the most devout meat-lovers will appreciate.
The balance of savory roasted vegetables and the buttery pastry makes this Wellington a satisfying and memorable addition to your holiday table. This recipe serves 4-6 people and is perfect for a festive gathering. The preparation involves roasting a selection of your favorite vegetables, which can be customized to your liking, and then assembling them inside a puff pastry sheet.
The balsamic glaze enhances the natural sweetness of the vegetables, making each bite irresistibly delicious. With a little patience and attention to detail, you can create a show-stopping dish that will impress your family and friends.
Ingredients:
- 1 large eggplant, diced
- 2 red bell peppers, diced
- 2 zucchinis, diced
- 1 large red onion, diced
- 3 cloves garlic, minced
- 2 tablespoons olive oil
- 3 tablespoons balsamic vinegar
- Salt and pepper to taste
- 1 teaspoon dried thyme
- 1 teaspoon dried rosemary
- 1 sheet of puff pastry (store-bought or homemade)
- 1 egg, beaten (for egg wash)
- 2 tablespoons grated Parmesan cheese (optional)
- Fresh basil leaves for garnish (optional)
Cooking Instructions:
- Preheat the Oven: Begin by preheating your oven to 400°F (200°C). This guarantees that the vegetables will roast evenly and the pastry will bake to a perfect golden brown.
- Prepare the Vegetables: In a large mixing bowl, combine the diced eggplant, red bell peppers, zucchinis, and red onion. Add the minced garlic, olive oil, balsamic vinegar, salt, pepper, thyme, and rosemary. Toss everything together until the vegetables are well coated with the oil and seasonings.
- Roast the Vegetables: Spread the vegetable mixture in a single layer on a baking sheet lined with parchment paper. Roast in the preheated oven for about 25-30 minutes, or until the vegetables are tender and slightly caramelized. Stir halfway through to guarantee even cooking.
- Prepare the Puff Pastry: While the vegetables are roasting, roll out the puff pastry sheet on a lightly floured surface to smooth out any creases. Verify that the pastry is large enough to fold over the vegetable filling completely.
- Assemble the Wellington: Once the vegetables are done, remove them from the oven and let them cool slightly. Place the roasted vegetable mixture in the center of the puff pastry sheet, leaving enough space around the edges to fold over. Sprinkle with grated Parmesan cheese if desired.
- Seal and Shape: Fold the edges of the pastry over the vegetables, sealing them together by pressing gently. Use a fork to crimp the edges for a decorative finish. Brush the entire surface of the pastry with beaten egg to give it a glossy finish when baked.
- Bake the Wellington: Transfer the assembled Wellington to a baking sheet lined with parchment paper. Bake in the oven for 25-30 minutes, or until the pastry is golden brown and puffed up.
- Serve: Allow the Wellington to cool for a few minutes before slicing. Garnish with fresh basil leaves before serving for an added touch of color and flavor.
Extra Tips:
For the best results, confirm the roasted vegetables aren’t too moist before placing them in the pastry. Excess moisture can make the pastry soggy. You can prepare the roasted vegetables a day in advance to save time on the day of serving.
Feel free to experiment with different vegetables or add a layer of spinach or mushrooms for extra flavor. If you don’t have puff pastry, a shortcrust pastry can also be used as an alternative.
Creamy Wild Mushroom Risotto
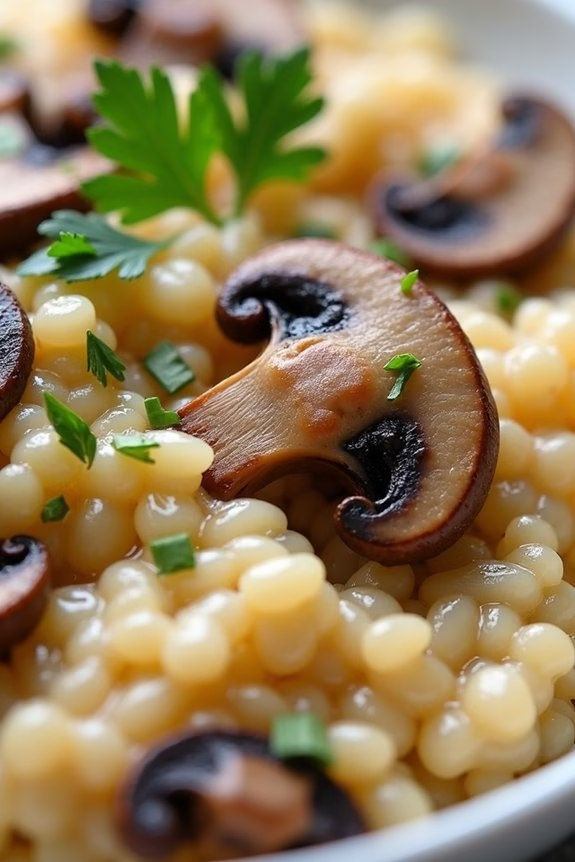
The Creamy Wild Mushroom Risotto is a luxurious and satisfying dish that’s perfect for a vegetarian Christmas dinner. This risotto is bursting with rich, earthy flavors from a variety of wild mushrooms and is made irresistibly creamy with the addition of Parmesan cheese. It’s an elegant dish that will impress your guests and provide a comforting warmth to your festive feast.
Whether you’re serving it as a main course or a decadent side, this risotto is sure to be a highlight of your holiday meal.
The preparation of this risotto involves slowly cooking Arborio rice while gradually adding vegetable stock, allowing the rice to absorb the rich mushroom flavors. The wild mushrooms are sautéed until golden brown, enhancing their natural umami taste. Finished with a touch of cream and a generous helping of Parmesan cheese, this dish offers a rich and velvety texture.
Follow the instructions below to create this delightful Creamy Wild Mushroom Risotto for a serving size of 4-6 people.
Ingredients:
- 1 cup Arborio rice
- 1 lb mixed wild mushrooms (such as shiitake, cremini, and oyster)
- 1 small onion, finely chopped
- 2 cloves garlic, minced
- 4 cups vegetable stock
- 1/2 cup dry white wine
- 1/2 cup grated Parmesan cheese
- 1/4 cup heavy cream
- 2 tablespoons olive oil
- 2 tablespoons unsalted butter
- Salt and freshly ground black pepper to taste
- Fresh parsley, chopped, for garnish
Cooking Instructions:
- Prepare the Mushrooms: Clean the wild mushrooms by wiping them with a damp cloth. Trim the stems and slice them into uniform pieces to guarantee even cooking.
- Sauté the Mushrooms: In a large skillet, heat the olive oil over medium-high heat. Add the sliced mushrooms and sauté them for about 5-7 minutes until they’re golden brown and have released their moisture. Season with a pinch of salt and pepper. Remove the mushrooms from the skillet and set them aside.
- Cook the Aromatics: In the same skillet, add the butter. Once it has melted, add the chopped onion and cook for 3-4 minutes until the onion is translucent. Add the minced garlic and sauté for another minute, being careful not to let it burn.
- Toast the Rice: Add the Arborio rice to the skillet with the onion and garlic. Stir the rice continuously for 2-3 minutes until the grains become slightly translucent around the edges.
- Deglaze with Wine: Pour in the dry white wine and stir until it’s mostly absorbed by the rice, about 1-2 minutes.
- Add Stock Gradually: Begin adding the vegetable stock, one ladleful at a time, stirring frequently. Allow the rice to absorb most of the liquid before adding more. Continue this process for about 18-20 minutes or until the rice is creamy and al dente.
- Incorporate Mushrooms and Cream: Once the rice is cooked, stir the sautéed mushrooms back into the skillet along with the heavy cream. Mix well to combine.
- Finish with Cheese: Remove the skillet from heat and stir in the grated Parmesan cheese. Season with additional salt and pepper to taste.
- Serve Garnished: Serve the risotto hot, garnished with fresh parsley.
Extra Tips:
For the best results, use high-quality vegetable stock as it profoundly affects the dish’s flavor. It’s essential to stir the risotto frequently to release the starches from the rice, which contributes to the creamy texture.
If you prefer a non-alcoholic version, you can substitute the white wine with an equal amount of additional vegetable stock. Finally, keep an eye on the risotto as it cooks—this dish requires attention to develop its characteristic creaminess and guarantee the rice is perfectly cooked.
Stuffed Acorn Squash With Cranberries and Pecans
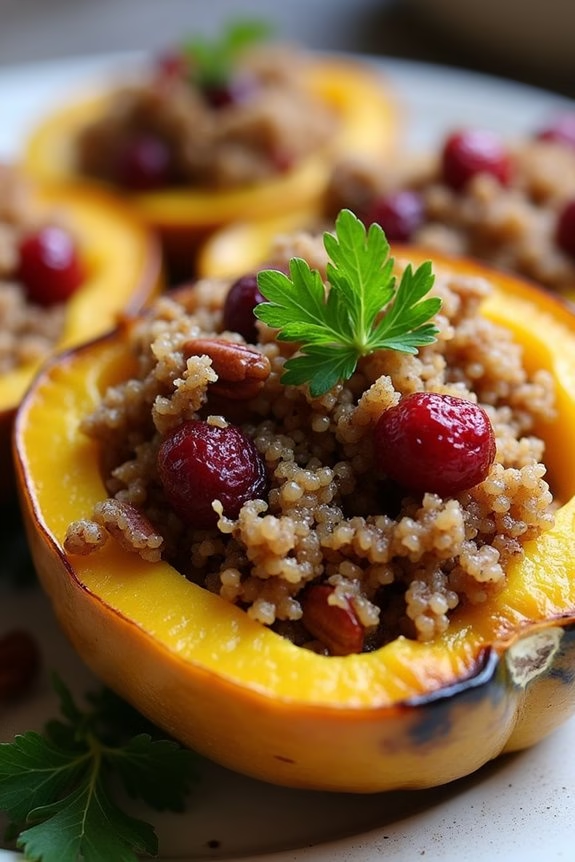
Elevate your vegetarian Christmas dinner with this festive and flavorful Stuffed Acorn Squash with Cranberries and Pecans. This dish combines the natural sweetness of acorn squash with the tartness of cranberries and the nutty crunch of pecans, creating a perfect harmony of flavors.
The stuffing is a delightful mixture of quinoa, fresh herbs, and spices, providing a nutritious and satisfying centerpiece for your holiday table. It’s not only a feast for the taste buds but also a visually stunning dish that will impress your guests.
Acorn squash, with its unique shape and vibrant color, serves as an edible bowl for the delightful stuffing. When roasted, the squash becomes tender and sweet, perfectly complementing the savory and slightly tangy stuffing. This recipe is ideal for serving 4-6 people, making it a great option for an intimate holiday gathering.
Whether you’re catering to vegetarians or simply looking for a delicious side dish, this Stuffed Acorn Squash is sure to be a hit.
Ingredients (serving size: 4-6 people):
- 3 medium acorn squash
- 1 cup quinoa
- 2 cups vegetable broth
- 1 cup fresh cranberries
- 1/2 cup pecans, roughly chopped
- 1 small onion, diced
- 2 cloves garlic, minced
- 1 tablespoon olive oil
- 1 teaspoon ground cinnamon
- 1/2 teaspoon ground nutmeg
- 1 tablespoon maple syrup
- Salt and pepper to taste
- Fresh parsley for garnish
Cooking Instructions:
- Preheat the Oven: Preheat your oven to 400°F (200°C). This will guarantee the squash roasts evenly and becomes tender.
- Prepare the Squash: Cut each acorn squash in half and scoop out the seeds. Drizzle the cut sides with olive oil, and sprinkle with salt and pepper. Place them cut-side down on a baking sheet lined with parchment paper.
- Roast the Squash: Roast the squash in the preheated oven for about 30-35 minutes or until they’re tender when pierced with a fork.
- Cook the Quinoa: While the squash is roasting, rinse the quinoa under cold water. In a medium saucepan, combine the quinoa and vegetable broth. Bring to a boil, then reduce heat to low, cover, and simmer for about 15 minutes or until the quinoa is cooked and the liquid is absorbed.
- Prepare the Stuffing: In a large skillet, heat olive oil over medium heat. Sauté the diced onion and minced garlic until the onion is translucent. Add the cranberries, pecans, cinnamon, nutmeg, and cooked quinoa. Stir well to combine. Drizzle with maple syrup, and season with salt and pepper.
- Stuff the Squash: Once the squash is roasted, remove them from the oven and turn them cut-side up. Spoon the quinoa mixture into each squash half, packing it lightly.
- Bake Again: Return the stuffed squash to the oven and bake for an additional 10-15 minutes, allowing the flavors to meld and the tops to become slightly crispy.
- Garnish and Serve: Remove from the oven and let them cool slightly before garnishing with fresh parsley. Serve warm.
Extra Tips:
When selecting acorn squash, look for ones that are firm and free of blemishes, with a deep green color and a smooth, hard rind. The size of the squash can vary, so adjust the quantity based on their size to guarantee they can comfortably hold the stuffing.
For added flavor, consider incorporating dried herbs such as thyme or rosemary into the stuffing. If fresh cranberries aren’t available, dried cranberries can be used as a substitute; just reduce the amount slightly to maintain balance in sweetness.
Spinach and Ricotta Stuffed Shells
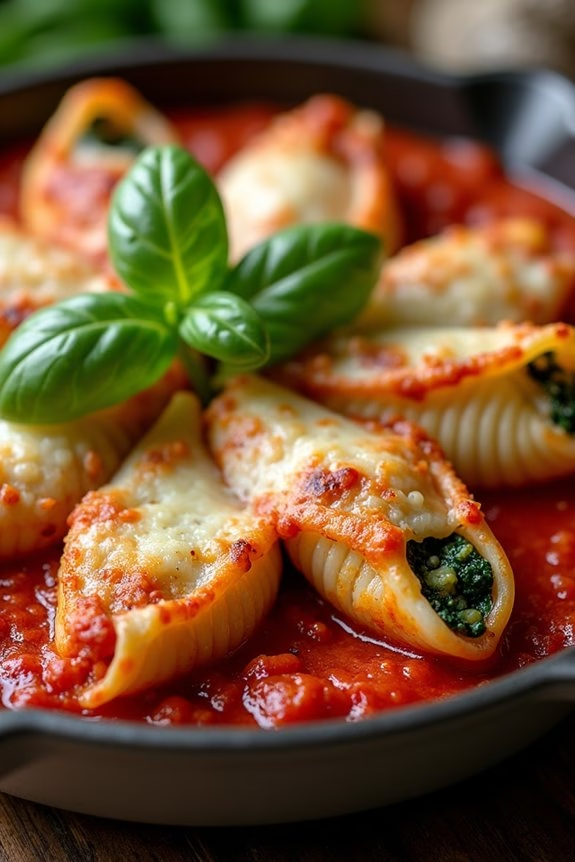
Spinach and Ricotta Stuffed Shells are a delightful and hearty option for a vegetarian Christmas dinner. This dish combines the creamy texture of ricotta cheese with the vibrant flavors of fresh spinach, all encased within tender pasta shells. The addition of a rich tomato sauce and a sprinkle of cheese on top makes it a comforting and satisfying meal, perfect for the holiday season.
The beauty of this dish lies in its simplicity and the way it brings together classic Italian flavors in a way that feels both festive and nourishing.
Preparing Spinach and Ricotta Stuffed Shells is an excellent way to impress your guests while keeping the holiday meal vegetarian-friendly. This dish isn’t only delicious but also visually appealing, with its bright green filling contrasting beautifully against the red tomato sauce.
It’s a perfect main course that can be made ahead of time, allowing you to enjoy more time with family and friends during the festivities. With just a few easy steps, you can create a memorable and tasty centerpiece for your Christmas dinner table.
Ingredients (serves 4-6 people):
- 20-24 large pasta shells
- 2 cups ricotta cheese
- 1 cup grated Parmesan cheese
- 2 cups mozzarella cheese, shredded
- 2 cups fresh spinach, chopped
- 1 egg
- 2 cloves garlic, minced
- 1 teaspoon dried oregano
- 1/2 teaspoon salt
- 1/4 teaspoon black pepper
- 3 cups marinara sauce (store-bought or homemade)
- Fresh basil leaves (optional, for garnish)
Cooking Instructions:
1. Prepare the Pasta Shells:
Bring a large pot of salted water to a boil. Add the pasta shells and cook them until they’re just al dente, according to the package instructions. Drain the shells and set them aside to cool.
2. Make the Filling:
In a large mixing bowl, combine the ricotta cheese, 1/2 cup of the Parmesan cheese, 1 cup of the mozzarella cheese, chopped spinach, egg, minced garlic, dried oregano, salt, and black pepper. Mix well until all the ingredients are evenly combined.
3. Stuff the Shells:
Preheat your oven to 375°F (190°C). Take each cooled shell and gently stuff it with a generous spoonful of the spinach and ricotta mixture. Be careful not to overfill the shells.
4. Assemble the Dish:
Spread 1 cup of the marinara sauce evenly over the bottom of a large baking dish. Arrange the stuffed shells in a single layer over the sauce. Pour the remaining marinara sauce over the top of the shells, ensuring they’re well covered.
5. Add Cheese and Bake:
Sprinkle the remaining 1/2 cup of Parmesan cheese and 1 cup of mozzarella cheese over the marinara sauce-covered shells. Cover the baking dish with aluminum foil and bake in the preheated oven for 25 minutes. Remove the foil and bake for an additional 10-15 minutes, or until the cheese is bubbly and golden brown.
6. Serve:
Remove the dish from the oven and let it cool for a few minutes before serving. Garnish with fresh basil leaves if desired.
Extra Tips:
When cooking the pasta shells, make sure not to overcook them, as they’ll continue to cook in the oven and you want them to retain their shape.
If you’re making this dish ahead of time, you can assemble it up to the baking step and refrigerate it for a day. Just add a few extra minutes to the baking time if baking straight from the refrigerator.
To add more flavor, consider mixing in some nutmeg or lemon zest into the filling. Enjoy your festive meal!
Festive Lentil and Nut Roast
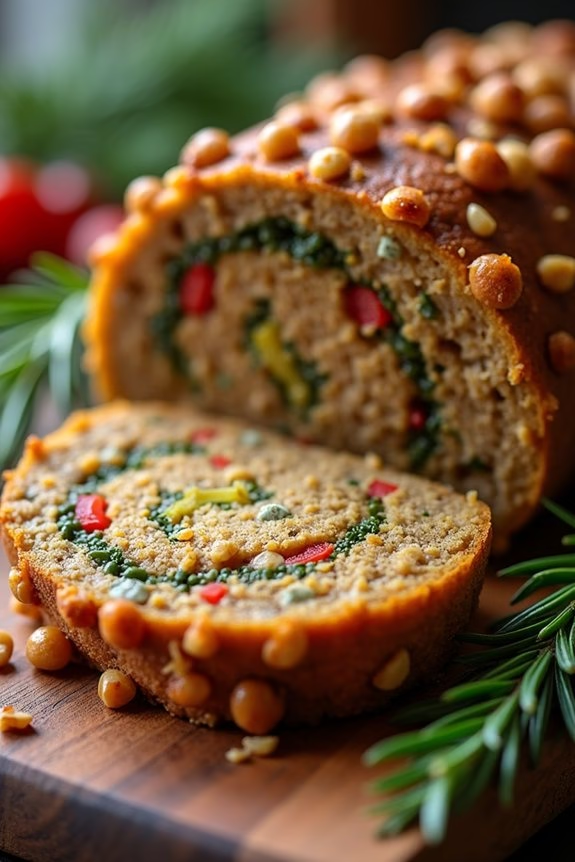
Festive Lentil and Nut Roast is a delightful vegetarian centerpiece perfect for a Christmas dinner. This hearty dish is packed full of flavor, combining the earthiness of lentils with the richness of nuts, herbs, and vegetables. It’s a perfect alternative to a traditional meat roast, offering a satisfying texture and taste that even meat-eaters will enjoy.
The combination of ingredients not only delivers a festive aroma but also guarantees a nutritious meal packed with protein, fiber, and essential vitamins.
The preparation of this dish involves creating a flavorful mixture of cooked lentils and finely chopped nuts, enhanced with a blend of savory herbs and spices. The mixture is then baked to perfection, resulting in a golden-brown crust and a moist, tender interior.
Whether served with a rich gravy or alongside roasted vegetables, this Festive Lentil and Nut Roast is sure to be a showstopper at your Christmas table. Here’s how you can make it for 4-6 people:
Ingredients:
- 1 cup green or brown lentils
- 2 cups vegetable broth
- 1 tablespoon olive oil
- 1 onion, finely chopped
- 2 cloves garlic, minced
- 1 carrot, grated
- 1 celery stalk, finely chopped
- 1 cup mixed nuts (walnuts, almonds, cashews), finely chopped
- 1 cup breadcrumbs
- 2 tablespoons soy sauce
- 2 tablespoons tomato paste
- 1 tablespoon fresh thyme, chopped
- 1 tablespoon fresh rosemary, chopped
- Salt and pepper to taste
Instructions:
- Prepare the Lentils: Rinse the lentils under cold water. In a saucepan, combine the lentils with vegetable broth and bring to a boil. Reduce the heat to a simmer, cover, and cook for about 20-25 minutes until the lentils are tender and the liquid is absorbed. Set aside to cool.
- Sauté Vegetables: In a large skillet, heat the olive oil over medium heat. Add the onion and garlic, and sauté until the onion is translucent. Stir in the grated carrot and chopped celery, cooking for an additional 5 minutes until the vegetables are softened.
- Combine Ingredients: In a large mixing bowl, combine the cooked lentils with the sautéed vegetables. Add the chopped nuts, breadcrumbs, soy sauce, tomato paste, thyme, rosemary, salt, and pepper. Mix thoroughly until all ingredients are well combined.
- Shape the Roast: Preheat your oven to 375°F (190°C). Line a loaf pan with parchment paper. Transfer the lentil mixture into the prepared loaf pan, pressing it down firmly to ascertain it’s well packed.
- Bake: Place the loaf pan in the preheated oven and bake for about 45-50 minutes, or until the top is golden brown and firm to the touch. Allow the roast to cool in the pan for 10 minutes before transferring it to a serving platter.
- Serve: Slice the lentil and nut roast and serve it warm, accompanied by your choice of gravy or roasted vegetables.
Extra Tips:
If you prefer a slightly different flavor, feel free to experiment with the herbs and spices. Adding a pinch of smoked paprika or a dash of balsamic vinegar can provide a unique twist.
Make sure to chop the nuts finely to guarantee they blend well with the lentils, creating a cohesive texture. If the mixture seems too dry before baking, you can add a splash of vegetable broth to help bind it.
Finally, this roast can be made a day in advance and reheated, making it a convenient option for a busy holiday schedule.
Chestnut and Sage Stuffed Mushrooms
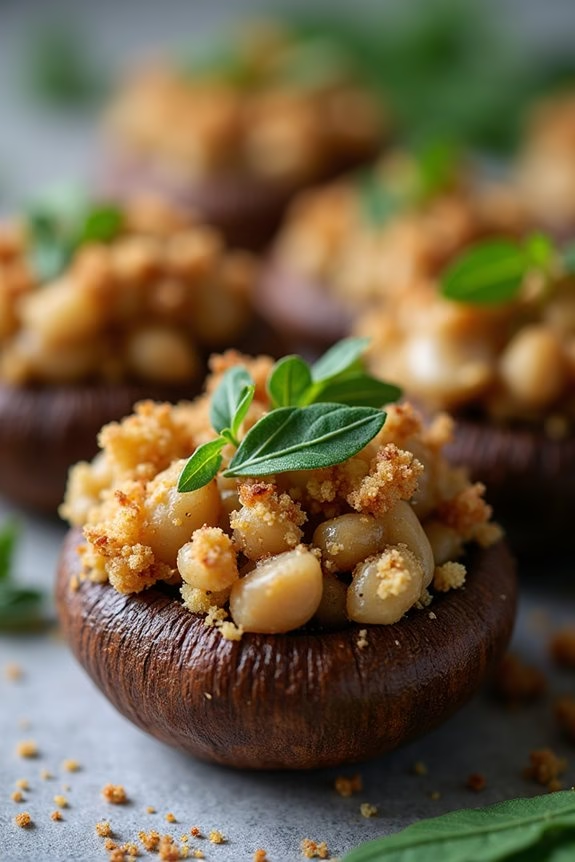
Chestnut and Sage Stuffed Mushrooms are a delightful vegetarian option for your Christmas dinner. These savory morsels combine the earthy flavors of chestnuts and mushrooms with the aromatic touch of sage, creating a dish that’s both comforting and festive. Perfect as an appetizer or a side dish, they’re bound to impress both vegetarians and meat-eaters alike.
The stuffing inside the mushroom caps offers a rich and satisfying bite that pairs well with the other flavors on your holiday table. This dish shines not only in flavor but also in presentation, with the mushrooms serving as natural, edible bowls that are as visually appealing as they’re delicious.
Preparing these stuffed mushrooms is surprisingly straightforward, making them an excellent choice for those looking to add a gourmet touch to their Christmas menu without too much fuss. With just a few fresh ingredients and a little bit of time, you can create a dish that’s both elegant and wholesome.
Ingredients (Serves 4-6):
- 18-24 large cremini or button mushrooms
- 2 tablespoons olive oil
- 1 small onion, finely chopped
- 2 cloves garlic, minced
- 1 cup cooked and peeled chestnuts, roughly chopped
- 1 tablespoon fresh sage, finely chopped
- 1/4 cup breadcrumbs
- 1/4 cup grated Parmesan cheese (optional)
- Salt and pepper to taste
- Fresh parsley, chopped, for garnish
Cooking Instructions:
1. Prepare the Mushrooms: Preheat your oven to 375°F (190°C). Begin by cleaning the mushrooms with a damp paper towel to remove any dirt. Carefully remove the stems and set them aside, as they’ll be used in the stuffing.
2. Sauté the Aromatics: In a skillet, heat the olive oil over medium heat. Add the chopped onion and sauté for about 3 minutes until they become translucent. Add the minced garlic and cook for an additional minute, stirring frequently.
3. Make the Stuffing: Chop the mushroom stems finely and add them to the skillet, cooking for another 2 minutes. Stir in the chopped chestnuts and sage, continuing to cook for 3-4 minutes until everything is well combined and fragrant.
Remove from heat and mix in the breadcrumbs and Parmesan cheese (if using). Season the mixture with salt and pepper to taste.
4. Stuff the Mushrooms: Place the mushroom caps on a baking sheet, cavity side up. Using a spoon, generously fill each cap with the stuffing mixture, pressing it down gently to guarantee it stays in place.
5. Bake the Mushrooms: Transfer the baking sheet to the preheated oven and bake for 20-25 minutes, or until the mushrooms are tender and the tops are golden brown.
6. Garnish and Serve: Once baked, remove the mushrooms from the oven and let them cool slightly. Before serving, sprinkle them with freshly chopped parsley for a burst of color and flavor.
Extra Tips:
For added richness, consider drizzling a little melted butter over the mushrooms before baking. If you prefer a vegan option, simply omit the Parmesan cheese or substitute it with a vegan cheese alternative.
These stuffed mushrooms can also be prepared a day in advance and stored in the refrigerator; just bake them right before serving to ascertain they’re fresh and warm. To guarantee even cooking, try to select mushrooms that are uniform in size.
Enjoy these Chestnut and Sage Stuffed Mushrooms as a delicious and elegant addition to your Christmas dinner spread.
Maple Glazed Carrots With Thyme
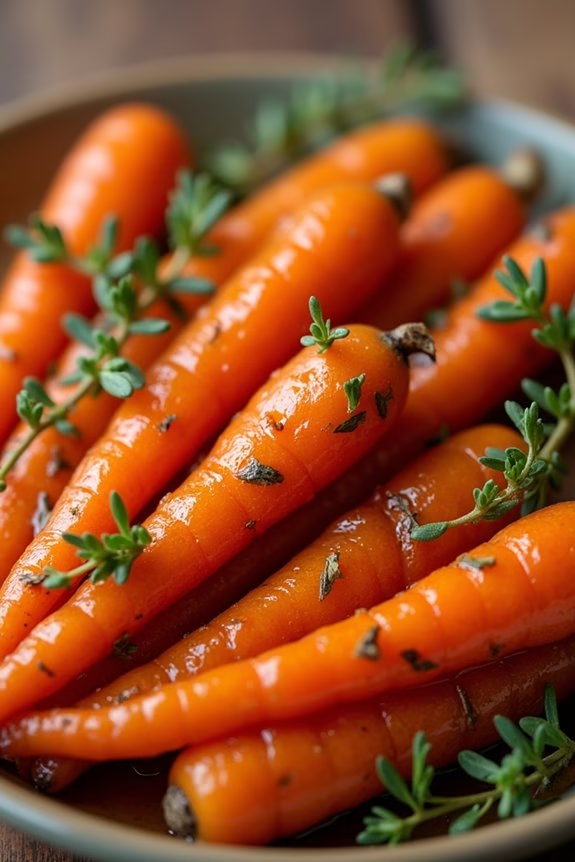
Maple Glazed Carrots With Thyme make for a delightful addition to any festive vegetarian Christmas dinner. Their vibrant color and sweet, aromatic glaze provide a beautiful contrast to traditional holiday fare. This dish combines the natural sweetness of carrots with the warm, earthy flavors of maple syrup and fresh thyme, creating a side dish that’s both simple to prepare and impressively delicious.
Perfect for serving alongside roasted vegetables, mashed potatoes, or a hearty vegetarian main, these carrots offer a sophisticated touch to your holiday table.
The process of making Maple Glazed Carrots With Thyme is both straightforward and rewarding. The key to this dish is to guarantee that the carrots are cooked to just the right level of tenderness, allowing them to absorb the rich flavors of the glaze without losing their structure.
By gently simmering the carrots in a combination of maple syrup, butter, and thyme, you create a glossy, flavorful coating that enhances their natural sweetness and delivers a mouthwatering burst of flavor with every bite.
Ingredients for 4-6 servings:
- 2 pounds of carrots, peeled and cut into 2-inch pieces
- 3 tablespoons unsalted butter
- 1/4 cup pure maple syrup
- 1 teaspoon salt
- 1/2 teaspoon freshly ground black pepper
- 1 tablespoon fresh thyme leaves
- 1 cup water
Cooking Instructions:
- Prepare the Carrots: Begin by peeling the carrots and slicing them into uniform 2-inch pieces. This guarantees even cooking, allowing the glaze to coat each piece thoroughly.
- Melt the Butter: In a large skillet or sauté pan, melt the butter over medium heat. Once melted, add the maple syrup and stir until the mixture is well combined.
- Cook the Carrots: Add the prepared carrots to the pan, ensuring they’re evenly spread out. Pour in the water, and sprinkle the salt and pepper over the top. Stir to combine.
- Simmer and Reduce: Bring the mixture to a gentle simmer. Cover the pan with a lid and let the carrots cook for about 15-20 minutes, or until they’re fork-tender. Stir occasionally to prevent sticking and guarantee even cooking.
- Add Thyme and Glaze: Remove the lid and increase the heat to medium-high. Add the fresh thyme leaves and continue to cook the carrots, stirring frequently, until the liquid reduces to a thick, glossy glaze coating the carrots, about 5-7 minutes.
- Serve: Once the carrots are nicely glazed and the thyme is evenly distributed, transfer them to a serving dish. Serve warm as a delightful side to your holiday meal.
Extra Tips: When preparing Maple Glazed Carrots With Thyme, consider using a mix of carrot varieties, such as rainbow carrots, for a more colorful presentation.
If you prefer a deeper caramelization, allow the carrots to sit undisturbed for a minute or two during the final glazing stage. This can enhance the flavor profile with a subtle hint of caramel.
Additionally, be sure to taste the glaze before serving, adjusting the seasoning if necessary to achieve the perfect balance of sweet and savory.
Herb-Crusted Cauliflower Steaks
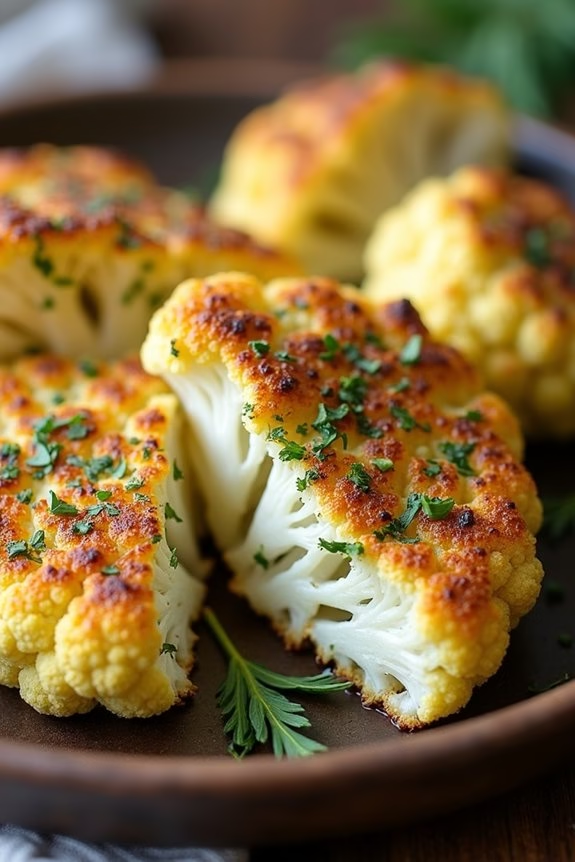
Herb-Crusted Cauliflower Steaks are an elegant and savory addition to any vegetarian Christmas dinner. This dish transforms the humble cauliflower into a centerpiece worthy of the holiday table. The cauliflower steaks are sliced thick and coated with a flavorful herb crust that crisps up beautifully in the oven, creating a delightful contrast between the tender interior and the crunchy exterior.
This recipe not only looks impressive but also offers a burst of flavor that’s certain to satisfy both vegetarians and meat-eaters alike. These cauliflower steaks are versatile and can be paired with a variety of side dishes, making them a perfect choice for Christmas dinner.
The herbs and spices infuse the cauliflower with a festive aroma, while the golden crust adds a touch of elegance to the presentation. Whether you’re serving them as a main course or as part of a larger spread, these Herb-Crusted Cauliflower Steaks are certain to be a hit at your holiday gathering.
Ingredients for 4-6 people:
- 2 large heads of cauliflower
- 1 cup of panko breadcrumbs
- 1/2 cup of grated Parmesan cheese
- 1/4 cup of chopped fresh parsley
- 2 tablespoons of chopped fresh thyme
- 2 tablespoons of chopped fresh rosemary
- 4 tablespoons of olive oil
- 1 teaspoon of garlic powder
- 1 teaspoon of onion powder
- Salt and pepper to taste
Cooking Instructions:
- Preheat the Oven: Start by preheating your oven to 400°F (200°C). This guarantees that the cauliflower steaks will cook evenly and develop a nice, crispy crust.
- Prepare the Cauliflower: Remove the outer leaves and trim the stem of the cauliflower heads. Slice each cauliflower head into thick steaks, approximately 1-inch thick. You should get about 2-3 steaks from each head, depending on its size.
- Mix the Herb Crust: In a large bowl, combine the panko breadcrumbs, grated Parmesan cheese, chopped parsley, thyme, rosemary, garlic powder, onion powder, salt, and pepper. Stir the mixture until well combined.
- Coat the Cauliflower Steaks: Brush each cauliflower steak generously with olive oil on both sides. Then press the steaks into the herb crust mixture, ensuring that both sides are well-coated with the breadcrumb mix.
- Bake the Steaks: Arrange the coated cauliflower steaks on a baking sheet lined with parchment paper. Bake in the preheated oven for 25-30 minutes, flipping halfway through, until the crust is golden brown and the cauliflower is tender.
- Serve: Remove the steaks from the oven and let them cool slightly before serving. Garnish with additional fresh herbs if desired, and enjoy!
Extra Tips:
For the best results, make sure the cauliflower steaks are cut evenly to guarantee they cook at the same rate. If the cauliflower breaks apart while slicing, don’t worry — you can piece it together on the baking sheet, and the crust will help hold it together.
Feel free to customize the herb crust with your favorite herbs and spices to suit your taste. Additionally, serving these steaks with a drizzle of balsamic reduction or a sprinkle of lemon zest can add an extra layer of flavor and brightness to the dish.
Butternut Squash and Sage Tart

Celebrate the festive season with a delightful Butternut Squash and Sage Tart, a perfect vegetarian centerpiece for your Christmas dinner. This tart combines the sweet, nutty flavor of roasted butternut squash with the aromatic earthiness of fresh sage, all nestled in a flaky, buttery pastry crust. It’s a comforting dish that not only looks stunning on the table but also delivers a delicious blend of flavors and textures.
Whether you’re hosting a vegetarian feast or looking to add a meat-free option to your holiday menu, this tart is sure to impress your guests. Ideal for a serving size of 4-6 people, it can be paired with a fresh salad or roasted vegetables to create a balanced and satisfying meal. The tart is versatile enough to be served warm or at room temperature, making it convenient for busy holiday gatherings.
Ingredients (serves 4-6):
- 1 medium butternut squash (about 2 pounds), peeled, seeded, and cut into 1/2-inch cubes
- 2 tablespoons olive oil
- Salt and pepper to taste
- 1 pre-made pie crust or homemade pastry for a 9-inch tart
- 1 tablespoon unsalted butter
- 1 small onion, finely chopped
- 2 cloves garlic, minced
- 1/4 cup fresh sage leaves, chopped
- 3/4 cup ricotta cheese
- 1/2 cup grated Parmesan cheese
- 2 large eggs
- 1/2 cup heavy cream
- 1/4 teaspoon nutmeg
Instructions:
- Preheat the Oven: Preheat your oven to 400°F (200°C). Line a baking sheet with parchment paper.
- Roast the Butternut Squash: Toss the butternut squash cubes with olive oil, salt, and pepper on the prepared baking sheet. Spread them out in a single layer and roast for 25-30 minutes or until tender and lightly browned. Remove from the oven and let cool.
- Prepare the Pastry: Roll out the pie crust and fit it into a 9-inch tart pan with a removable bottom. Trim any excess dough. Prick the bottom of the crust with a fork and refrigerate for 15 minutes to prevent shrinkage.
- Blind Bake the Crust: Line the crust with parchment paper and fill with pie weights or dried beans. Bake in the preheated oven for 10 minutes. Remove the weights and parchment paper, and bake for an additional 5 minutes until lightly golden. Set aside to cool slightly.
- Cook the Onion and Garlic: In a skillet, melt the butter over medium heat. Add the onion and sauté until translucent, about 5 minutes. Add the garlic and chopped sage, cooking for another minute until fragrant. Remove from heat and let cool.
- Make the Filling: In a large bowl, combine the ricotta, Parmesan, eggs, heavy cream, and nutmeg. Stir in the sautéed onion mixture and roasted butternut squash. Season with salt and pepper to taste.
- Assemble the Tart: Pour the filling into the prepared tart crust, spreading it evenly with a spatula.
- Bake the Tart: Reduce the oven temperature to 375°F (190°C). Bake the tart for 30-35 minutes, or until the filling is set and the top is golden brown. Let it cool for at least 10 minutes before slicing.
Extra Tips:
For a crispier crust, consider brushing the inside of the tart shell with an egg wash (a beaten egg mixed with a little water) before blind baking. This creates a barrier that helps to prevent the crust from becoming soggy.
If fresh sage isn’t available, dried sage can be used, but reduce the quantity to avoid overpowering the flavors. This tart can be made a day in advance and reheated just before serving, making it an excellent option for a stress-free holiday meal.
Parmesan and Garlic Mashed Potatoes
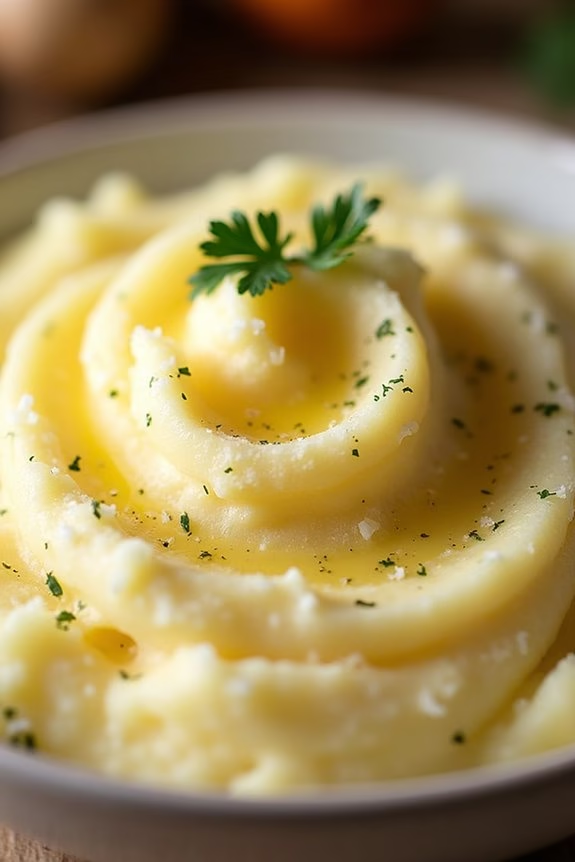
Parmesan and Garlic Mashed Potatoes are a delicious and flavorful twist on the classic mashed potato dish, making them a perfect addition to your vegetarian Christmas dinner. The creamy texture of the potatoes is enhanced by the rich, nutty flavor of Parmesan cheese, while roasted garlic adds a subtle depth of flavor that complements the dish beautifully.
These mashed potatoes aren’t only comforting but also elegant enough to serve as a standout side dish during your holiday feast. This recipe is designed to serve 4-6 people, offering a generous portion that pairs well with other festive dishes. The combination of creamy potatoes, savory garlic, and sharp Parmesan creates a harmonious blend that will delight your taste buds and impress your guests.
Whether you’re hosting a large gathering or enjoying a more intimate meal, these Parmesan and Garlic Mashed Potatoes are sure to be a hit at your Christmas table.
Ingredients:
- 3 pounds Yukon Gold potatoes
- 1 tablespoon salt (for boiling water)
- 1/2 cup unsalted butter
- 1 cup heavy cream
- 1 head of garlic
- 1 cup grated Parmesan cheese
- Salt and pepper to taste
- Fresh parsley, chopped (optional, for garnish)
Instructions:
- Prepare the Garlic: Preheat your oven to 400°F (200°C). Slice the top off the head of garlic to expose the cloves, drizzle with a little olive oil, wrap in aluminum foil, and roast for about 30-35 minutes until soft. Once cooled, squeeze the roasted garlic cloves out of their skins and mash them into a paste.
- Boil the Potatoes: Peel and quarter the potatoes. Place them in a large pot and cover with cold water. Add 1 tablespoon of salt to the water. Bring to a boil over medium-high heat and cook until the potatoes are tender, about 15-20 minutes. Drain well.
- Mash the Potatoes: Return the drained potatoes to the pot. Add the butter, heavy cream, and mashed roasted garlic. Use a potato masher or electric mixer to mash until smooth and creamy.
- Add Parmesan: Stir in the grated Parmesan cheese until fully incorporated. Season with salt and pepper to taste. If the mixture is too thick, add a little more cream to reach your desired consistency.
- Serve: Transfer the mashed potatoes to a serving dish. Garnish with chopped fresh parsley if desired, and serve hot.
Extra Tips:
For the best texture, avoid over-mixing the potatoes, as this can make them gluey. Yukon Gold potatoes are recommended for their buttery flavor and smooth texture, but you can substitute with Russet potatoes if preferred.
To save time, the garlic can be roasted a day in advance and stored in the refrigerator until needed. Adjust the amount of garlic and Parmesan based on your taste preferences, and consider adding a touch of truffle oil for an extra luxurious flair.
Cranberry and Brie Puff Pastry Bites

Cranberry and Brie Puff Pastry Bites are a delightful appetizer perfect for adding a touch of elegance to your vegetarian Christmas dinner.
These bite-sized treats combine the creamy richness of Brie cheese with the tangy sweetness of cranberry sauce, all encased in a flaky puff pastry shell. They aren’t only delicious but also incredibly easy to prepare, making them an ideal choice for both experienced cooks and kitchen novices alike.
The combination of flavors and textures in this recipe is sure to impress your guests, making it a standout dish at any festive gathering. The warm, gooey Brie melts beautifully inside the golden pastry, while the cranberry sauce adds a burst of vibrant color and a hint of tartness that complements the cheese perfectly.
Serve these bites as an elegant starter or a light snack during your holiday celebrations.
Ingredients (serves 4-6):
- 1 sheet of puff pastry, thawed
- 8 oz Brie cheese, cut into small cubes
- 1/2 cup cranberry sauce
- 1 egg, beaten (for egg wash)
- Fresh rosemary sprigs (optional, for garnish)
Instructions:
- Preheat the Oven: Start by preheating your oven to 375°F (190°C) to guarantee it reaches the right temperature for baking your puff pastry bites.
- Prepare the Puff Pastry: Roll out the thawed puff pastry sheet on a lightly floured surface. Using a sharp knife or a pizza cutter, cut the sheet into approximately 2-inch squares. You should be able to get about 24 squares from one sheet.
- Assemble the Bites: Place a small cube of Brie cheese in the center of each pastry square. Add about a teaspoon of cranberry sauce on top of the Brie. Be careful not to overfill, as the filling may spill out during baking.
- Seal the Pastry: Gently bring the corners of each pastry square together over the filling and pinch them to seal. You can also twist the corners slightly to create a more decorative look.
- Apply Egg Wash: Arrange the assembled bites on a baking sheet lined with parchment paper. Brush the tops with beaten egg to encourage a golden, glossy finish on the pastry.
- Bake the Bites: Place the baking sheet in the preheated oven and bake for 15-20 minutes, or until the pastry is puffed and golden brown.
- Garnish and Serve: Remove from the oven and let cool slightly before serving. Garnish with fresh rosemary sprigs for a festive touch, if desired.
Extra Tips:
For the best results, make sure your puff pastry remains cold while working with it, as this helps achieve a flakier texture. If you find the pastry becoming too warm, pop it back in the fridge for a few minutes before continuing.
Additionally, using a good quality Brie and homemade cranberry sauce can elevate the flavor of these bites. If you prefer a sweeter profile, try using a cranberry sauce with added orange zest or a hint of cinnamon.
These bites are best served warm, so consider baking them just before your guests arrive for maximum enjoyment.
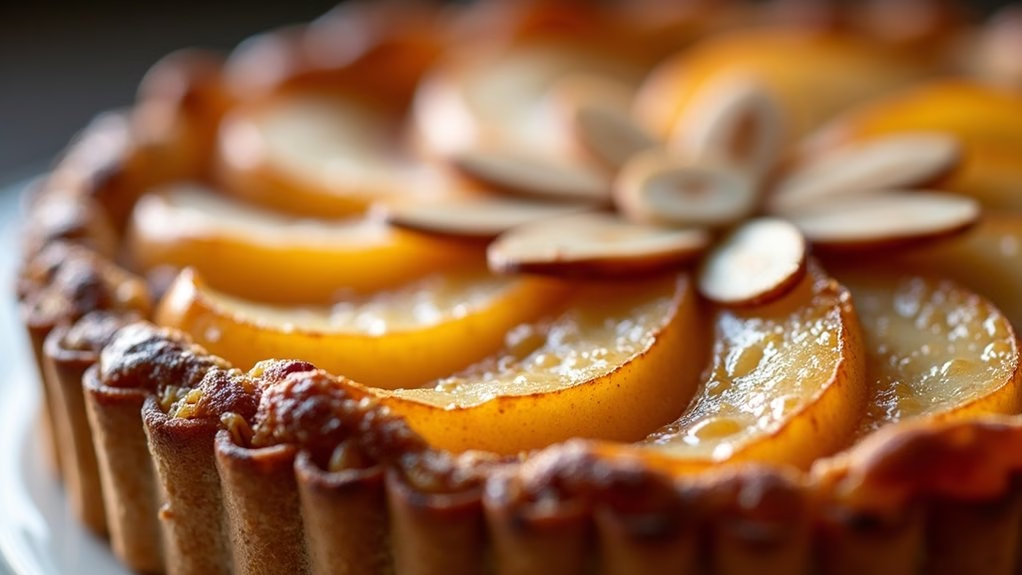
Spiced Pear and Almond Tart
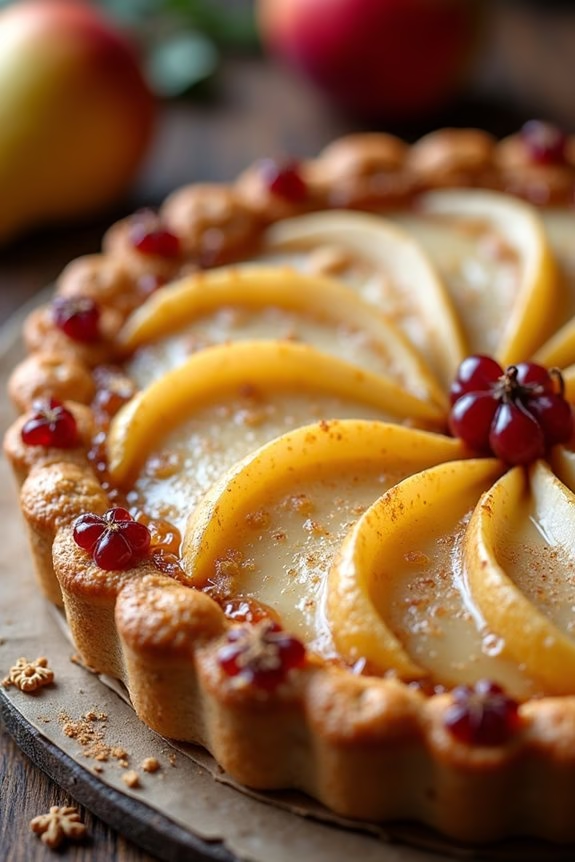
Celebrate the festive season with a delightful Spiced Pear and Almond Tart that’s certain to impress your guests. This elegant dessert combines the subtle sweetness of ripe pears with the warm, aromatic spices of cinnamon and nutmeg, all enveloped in a delicate almond frangipane filling.
The tart is nestled in a crisp, buttery pastry crust that provides the perfect contrast to the soft, juicy pears. Perfect for a vegetarian Christmas dinner, this tart isn’t only visually stunning but also a treat for the taste buds.
The combination of flavors in this tart is both sophisticated and comforting, making it an ideal end to a holiday meal. The pears are poached with spices to infuse them with flavor, while the almond frangipane adds a rich, nutty dimension. This recipe serves 4-6 people, making it a great choice for an intimate gathering.
Whether you’re serving it with a dollop of whipped cream or a scoop of vanilla ice cream, this Spiced Pear and Almond Tart is certain to become a festive favorite.
Ingredients:
- 1 sheet of ready-made puff pastry
- 3 ripe pears, peeled, halved, and cored
- 1/2 cup granulated sugar
- 1 cup water
- 1 cinnamon stick
- 1/2 teaspoon ground nutmeg
- 1 cup almond meal
- 1/4 cup unsalted butter, softened
- 1/4 cup powdered sugar
- 1 large egg
- 1 teaspoon vanilla extract
- 1 tablespoon all-purpose flour
- 1/4 cup sliced almonds
- Optional: whipped cream or vanilla ice cream for serving
Instructions:
- Preheat the oven to 375°F (190°C). Roll out the puff pastry on a lightly floured surface to fit a 9-inch tart pan. Press the pastry into the pan, trimming any excess. Prick the base with a fork and chill in the refrigerator for 15 minutes.
- Poach the pears: In a medium saucepan, combine water, granulated sugar, cinnamon stick, and nutmeg. Bring to a simmer over medium heat. Add the pear halves and poach for about 15 minutes or until just tender. Remove from heat and let cool in the syrup.
- Make the almond frangipane: In a mixing bowl, cream together the soft butter and powdered sugar until light and fluffy. Beat in the egg and vanilla extract until well combined. Stir in the almond meal and flour until you have a smooth paste.
- Assemble the tart: Spread the almond frangipane evenly over the chilled pastry crust. Drain the poached pears and arrange them on top of the frangipane, cut side down. Sprinkle the sliced almonds over the tart.
- Bake the tart: Place the tart in the preheated oven and bake for 30-35 minutes, or until the pastry is golden brown and the filling is set. Remove from the oven and let cool slightly before serving.
- Serve: Slice the tart and serve warm or at room temperature. Accompany with a dollop of whipped cream or a scoop of vanilla ice cream if desired.
Extra Tips:
When choosing pears for this recipe, opt for ripe but firm ones to make sure they hold their shape during poaching and baking.
If you prefer a deeper spice flavor, consider adding a few cloves or a small piece of star anise to the poaching liquid. For added texture, you can lightly toast the sliced almonds before sprinkling them over the tart.
To make the tart ahead of time, you can poach the pears and prepare the almond frangipane a day in advance, then assemble and bake just before serving.