

Isn’t there just something heartwarming about traditional Christmas potluck recipes?
As I plan my next festive gathering, I can already sense the aroma of Classic Roast Turkey with Herb Stuffing filling the room.
And let’s not forget the sweet allure of Honey-Glazed Ham.
These cherished dishes bring both comfort and nostalgia to our tables.
Curious to see which other holiday classics make this list? Let’s explore the flavors that never fade.
Classic Roast Turkey With Herb Stuffing
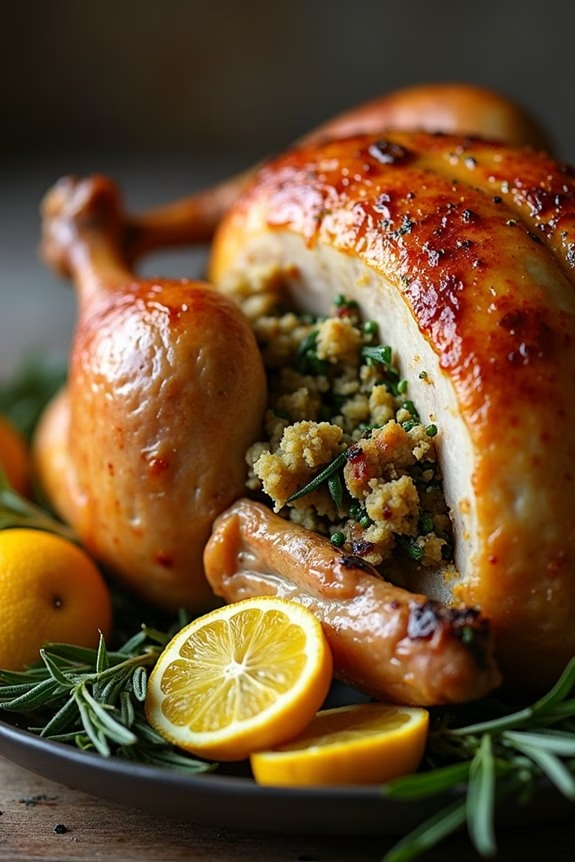
Roasting a turkey is a time-honored tradition for many families during the Christmas season. This Classic Roast Turkey with Herb Stuffing is a delightful centerpiece for any holiday potluck, combining the rich flavors of savory herbs with tender, juicy turkey meat. The stuffing, cooked inside the bird, absorbs the turkey’s natural juices, making it a flavorful side that complements the main dish perfectly.
Whether you’re a seasoned cook or a beginner, this recipe is designed to help you impress your guests with a perfectly roasted turkey and delicious herb stuffing. This recipe serves 4-6 people, making it ideal for a small family gathering or a festive potluck. The key to a successful roast turkey is guaranteeing it stays moist and flavorful throughout the cooking process. By following the steps and tips below, you’ll create a holiday masterpiece that will be remembered and enjoyed by all.
Ingredients:
- 1 turkey, approximately 8-10 pounds
- 1 cup unsalted butter, softened
- 2 tablespoons olive oil
- 1 tablespoon salt
- 1 teaspoon black pepper
- 1 tablespoon garlic powder
- 1 tablespoon onion powder
- 2 tablespoons fresh thyme, chopped
- 2 tablespoons fresh rosemary, chopped
- 2 tablespoons fresh sage, chopped
- 1 lemon, cut into wedges
- 1 onion, chopped
- 4 cups cubed bread (day-old bread works best)
- 1 cup chicken broth
- 2 stalks celery, chopped
- 1 egg, beaten
Instructions:
- Preheat the Oven: Preheat your oven to 325°F (165°C). This temperature allows the turkey to cook evenly without drying out.
- Prepare the Turkey: Rinse the turkey inside and out with cold water, then pat dry with paper towels. Place it in a large roasting pan.
- Season the Turkey: In a small bowl, mix the softened butter with olive oil, salt, pepper, garlic powder, onion powder, and half of the chopped herbs. Rub this mixture all over the turkey, making sure to get under the skin for maximum flavor.
- Stuff the Turkey: In a large bowl, combine the cubed bread, remaining herbs, chopped onion, celery, chicken broth, and beaten egg. Mix until the bread is moist. Stuff the mixture into the turkey cavity but don’t overfill, as the stuffing will expand during cooking.
- Prepare for Roasting: Place the lemon wedges inside the turkey cavity with the stuffing. Tuck the wing tips under the body and tie the legs together with kitchen twine.
- Roast the Turkey: Place the turkey in the preheated oven. Roast for about 3 to 3.5 hours, or until the internal temperature reaches 165°F (75°C) in the thickest part of the thigh and the stuffing. Baste the turkey every 30 minutes with the pan juices to keep it moist.
- Rest Before Carving: Once done, remove the turkey from the oven and let it rest for at least 20 minutes before carving. This allows the juices to redistribute throughout the meat.
Extra Tips:
For a crispy skin, consider blasting the turkey at a higher temperature (around 425°F/220°C) for the last 30 minutes of cooking. To prevent the stuffing from being too soggy, use bread that’s slightly stale.
If your stuffing seems dry, add a bit more chicken broth until you reach the desired consistency. Remember, the key to a successful turkey is frequent basting and not overcooking. If you’re unsure about the cooking time, use a meat thermometer to guarantee accuracy.
Honey-Glazed Ham
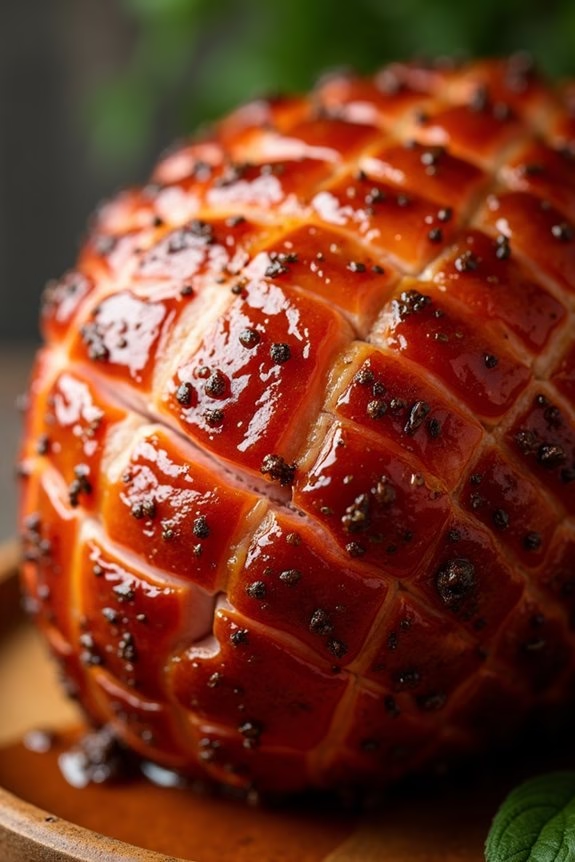
The Honey-Glazed Ham is a quintessential centerpiece for any traditional Christmas potluck. With its sweet and savory glaze, this dish not only looks impressive but also offers a delightful taste that’s certain to please a crowd. The combination of honey, brown sugar, and spices creates a rich, caramelized crust that perfectly complements the tender and juicy ham. This recipe is designed to feed a small gathering of 4-6 people, making it ideal for intimate holiday celebrations.
Preparing a Honey-Glazed Ham is a straightforward process that requires minimal ingredients but delivers maximum flavor. The key is to use a high-quality, fully cooked ham and to generously apply the glaze during the baking process. The result is a beautifully golden, aromatic dish that will have guests coming back for seconds.
Whether you’re a seasoned cook or a novice in the kitchen, this recipe is both manageable and rewarding.
Ingredients (Serving Size: 4-6 people):
- 1 (3-4 pound) bone-in, fully cooked ham
- 1/2 cup honey
- 1/4 cup brown sugar
- 2 tablespoons Dijon mustard
- 1 tablespoon apple cider vinegar
- 1/2 teaspoon ground cinnamon
- 1/4 teaspoon ground cloves
- 1/4 teaspoon ground nutmeg
Cooking Instructions:
- Preheat the Oven: Set your oven to 325°F (165°C) to guarantee even cooking of the ham.
- Prepare the Ham: Place the ham on a roasting rack in a large roasting pan. Use a sharp knife to score the surface of the ham in a crisscross pattern, being careful not to cut too deeply into the meat.
- Make the Glaze: In a medium saucepan, combine the honey, brown sugar, Dijon mustard, apple cider vinegar, cinnamon, cloves, and nutmeg. Heat over medium heat, stirring frequently, until the sugar is dissolved and the glaze is smooth.
- Apply the Glaze: Brush half of the glaze over the ham, ensuring it’s completely covered. Reserve the remaining glaze for later use.
- Bake the Ham: Cover the ham loosely with aluminum foil to prevent over-browning. Place it in the preheated oven and bake for about 1 hour and 30 minutes, or until the internal temperature reaches 140°F (60°C).
- Glaze Again: About 15 minutes before the ham is done, remove the foil and brush the remaining glaze over the ham. Return the ham to the oven, uncovered, to allow the glaze to caramelize.
- Rest and Serve: Remove the ham from the oven and let it rest for about 10 minutes before slicing. This allows the juices to redistribute, guaranteeing each slice is moist and flavorful.
Extra Tips:
For the best flavor, try to apply the glaze multiple times during the baking process. This will create a thicker, more flavorful crust.
If you prefer a smokier taste, consider using a smoked ham. Additionally, the leftover ham can be used in sandwiches, soups, or even breakfast dishes, making this a versatile recipe that extends beyond the holiday meal.
Always remember to let the ham rest before slicing to maintain its juiciness and tenderness.
Creamy Mashed Potatoes
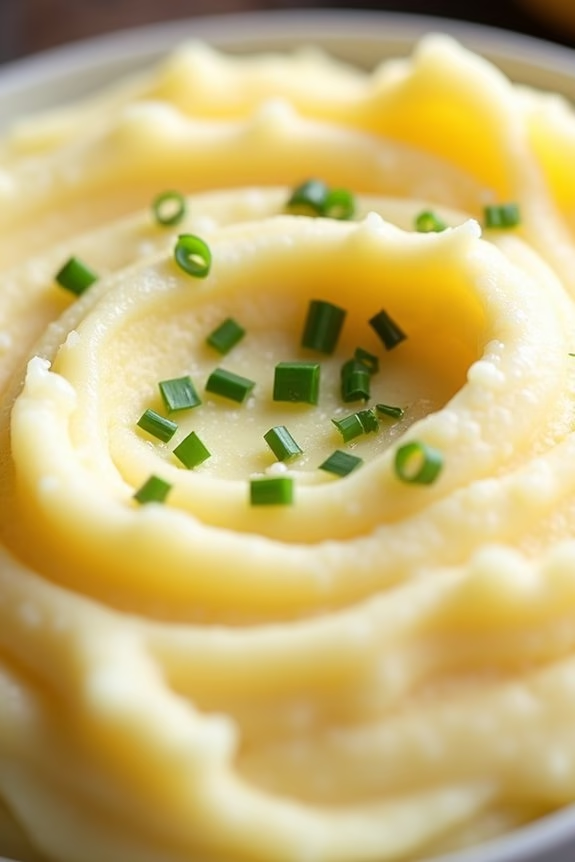
Creamy Mashed Potatoes are a quintessential side dish during holiday gatherings, and they make a perfect addition to any Christmas potluck. This dish is known for its smooth, velvety texture and rich flavor, which make it a comforting accompaniment to any main course. By using a combination of butter, cream, and perfectly cooked potatoes, you can create a luxurious dish that will have everyone reaching for seconds.
The key to attaining the ideal creamy mashed potatoes lies in the selection of the right potatoes and mastering the perfect mashing technique. Yukon Gold potatoes are an excellent choice due to their naturally buttery flavor and creamy texture. Additionally, guaranteeing that the potatoes are evenly cooked and using warm dairy products will result in a more cohesive, luscious mash.
Follow this recipe to serve a delightful dish that will complement your festive menu, serving 4-6 people.
Ingredients:
- 3 pounds Yukon Gold potatoes
- 1 cup heavy cream
- 1/2 cup unsalted butter
- 1/2 cup whole milk
- Salt, to taste
- Freshly ground black pepper, to taste
- Optional: Chopped fresh chives or parsley for garnish
Cooking Instructions:
- Prepare the Potatoes: Start by peeling the potatoes and cutting them into evenly-sized chunks. This guarantees they cook uniformly. Rinse the potatoes under cold water to remove excess starch.
- Cook the Potatoes: Place the potato chunks in a large pot and cover them with cold water. Add a generous pinch of salt. Bring the water to a boil over medium-high heat, then reduce to a simmer. Cook for about 15-20 minutes, or until the potatoes are fork-tender.
- Heat the Dairy: While the potatoes are cooking, combine the heavy cream, butter, and milk in a small saucepan. Gently heat over low heat until the butter is melted and the mixture is warm. Don’t let it boil.
- Mash the Potatoes: Once the potatoes are cooked, drain them thoroughly and return them to the pot. Begin mashing the potatoes using a potato masher or a ricer for a smoother texture.
- Incorporate the Dairy: Gradually add the warm cream mixture to the mashed potatoes, stirring continuously until fully incorporated. Season with salt and freshly ground black pepper to taste.
- Final Touches: Transfer the creamy mashed potatoes to a serving dish. If desired, sprinkle with chopped fresh chives or parsley for a pop of color and added flavor.
Extra Tips:
For the best results, always make certain that your dairy products are warm before mixing them into the potatoes, as this prevents the butter from seizing and results in a smoother texture.
If you prefer a richer flavor, consider substituting half of the milk with additional cream. Additionally, avoid over-mixing the potatoes to prevent them from becoming gluey.
If you have leftovers, they can be stored in the refrigerator and reheated gently with a splash of cream or milk to restore their creamy consistency.
Sweet Potato Casserole
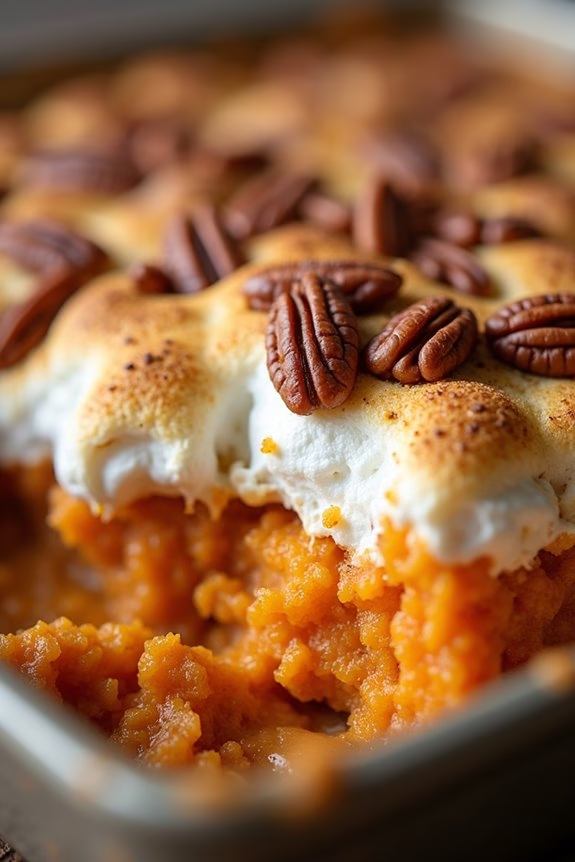
Sweet Potato Casserole is a heartwarming and delicious dish that’s perfect for any traditional Christmas potluck. This dish combines the natural sweetness of sweet potatoes with a crunchy pecan and marshmallow topping for a delightful contrast in textures. It’s a favorite among many and a staple on holiday tables due to its vibrant flavors and comforting warmth.
This particular recipe serves 4-6 people, making it ideal for sharing with family and friends. The sweet potatoes are mashed to creamy perfection and mixed with brown sugar and spices, creating a rich base that pairs beautifully with the crisp topping. Whether it’s served as a side dish or a dessert, this Sweet Potato Casserole is bound to be a hit at any festive gathering.
Ingredients:
- 4 large sweet potatoes, peeled and cubed
- 1/2 cup brown sugar
- 1/4 cup melted butter
- 1/2 teaspoon vanilla extract
- 1/2 teaspoon ground cinnamon
- 1/4 teaspoon ground nutmeg
- 1/4 teaspoon salt
- 1/2 cup chopped pecans
- 1 cup mini marshmallows
Cooking Instructions:
- Boil the Sweet Potatoes: Start by placing the peeled and cubed sweet potatoes in a large pot. Cover them with water and bring to a boil over medium-high heat. Cook for about 15-20 minutes or until the sweet potatoes are tender and easily pierced with a fork.
- Mash the Potatoes: Drain the sweet potatoes and return them to the pot. Use a potato masher or fork to mash them until smooth. Stir in the brown sugar, melted butter, vanilla extract, ground cinnamon, nutmeg, and salt until well combined.
- Prepare the Casserole Dish: Preheat your oven to 350°F (175°C). Grease a 9×13 inch baking dish with butter or cooking spray. Spread the sweet potato mixture evenly into the prepared dish.
- Add the Toppings: Sprinkle the chopped pecans evenly over the top of the mashed sweet potatoes. Next, evenly distribute the mini marshmallows on top of the pecans.
- Bake the Casserole: Place the casserole dish in the preheated oven and bake for 25-30 minutes. The casserole is done when the marshmallows are golden brown and the edges are bubbling.
- Serve: Allow the casserole to cool slightly before serving. This dish can be served warm or at room temperature.
Extra Tips:
For an even richer flavor, try adding a touch of maple syrup to the sweet potato mixture, or use candied pecans for an extra-sweet topping.
If you’d like a more textured top layer, consider mixing the pecans with a tablespoon of flour and a tablespoon of brown sugar before sprinkling them over the sweet potatoes. Ascertain the marshmallows are evenly spread to get a consistent golden brown finish across the top.
If you prefer a less sweet version, reduce the amount of marshmallows or omit them altogether, opting for just the pecan topping.
Green Bean Almondine
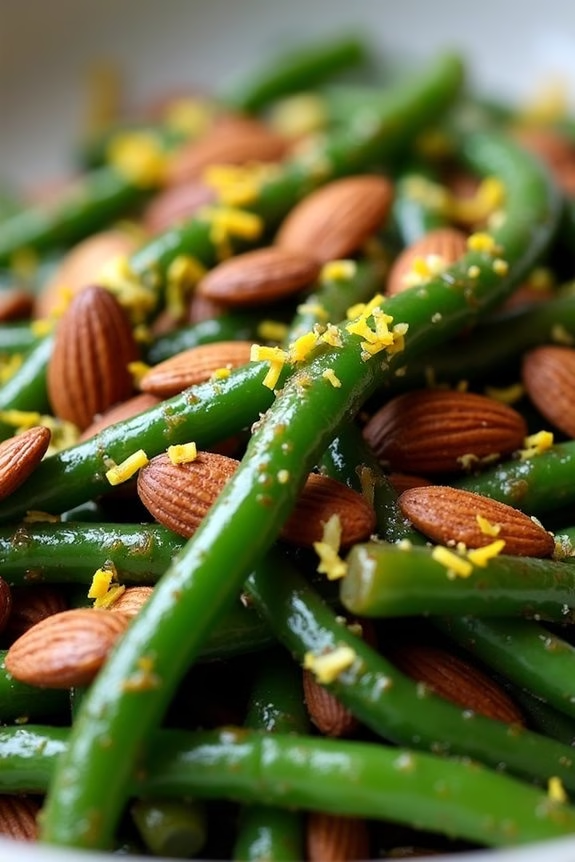
Green Bean Almondine is a classic and elegant side dish that’s perfect for any holiday potluck, including Christmas gatherings. The dish combines the crisp freshness of green beans with the nutty flavor of toasted almonds, all enhanced by the rich aroma of browned butter and a hint of lemon. This recipe isn’t only delicious but also easy to prepare, making it an excellent choice for both experienced cooks and beginners alike. The vibrant green of the beans and the golden almonds add a festive touch to your holiday table.
The dish is rooted in French cuisine and is traditionally made with haricots verts, which are slender green beans. However, regular green beans work just as well and are more readily available. The key to a successful Green Bean Almondine is to blanch the beans first, guaranteeing they retain their bright color and tender-crisp texture. Toasting the almonds elevates their flavor, and a squeeze of fresh lemon juice brings a revitalizing zest that balances the richness of the butter.
Ingredients for 4-6 servings:
- 1 pound fresh green beans, trimmed
- 1/3 cup sliced almonds
- 3 tablespoons unsalted butter
- 2 cloves garlic, minced
- 1 tablespoon fresh lemon juice
- Salt and freshly ground black pepper to taste
- Lemon zest (optional, for garnish)
Cooking Instructions:
- Blanch the Green Beans: Begin by bringing a large pot of salted water to a boil. Add the green beans and cook for about 3-4 minutes until they’re bright green and just tender. Immediately transfer the beans to a bowl of ice water to halt the cooking process. Drain and set aside.
- Toast the Almonds: In a large skillet over medium heat, add the sliced almonds. Stir frequently for about 3-5 minutes until the almonds are golden brown and fragrant. Remove from the skillet and set aside.
- Prepare the Butter Sauce: In the same skillet, melt the butter over medium heat. Add the minced garlic and cook until the butter starts to brown lightly and the garlic is fragrant, about 1-2 minutes.
- Combine Ingredients: Add the drained green beans to the skillet with the browned butter and garlic. Toss to coat the beans evenly. Add the toasted almonds, lemon juice, salt, and pepper. Stir until everything is well combined and heated through, about 2-3 minutes.
- Serve: Transfer the Green Bean Almondine to a serving platter. If desired, garnish with a bit of lemon zest for an extra burst of flavor. Serve warm.
Extra Tips:
To achieve the best flavor, use fresh green beans rather than canned or frozen, as they offer a superior texture and taste. If possible, toast the almonds just before assembling the dish to maintain their crunchiness.
Be careful not to burn the butter; it should be a light golden brown to add a nutty depth without bitterness. Adjust the lemon juice according to your taste preference, as some may prefer a more pronounced citrus note.
Finally, consider preparing this dish last minute to guarantee the beans remain crisp and the almonds stay crunchy, providing a delightful contrast in textures.
Cranberry Sauce With Orange Zest
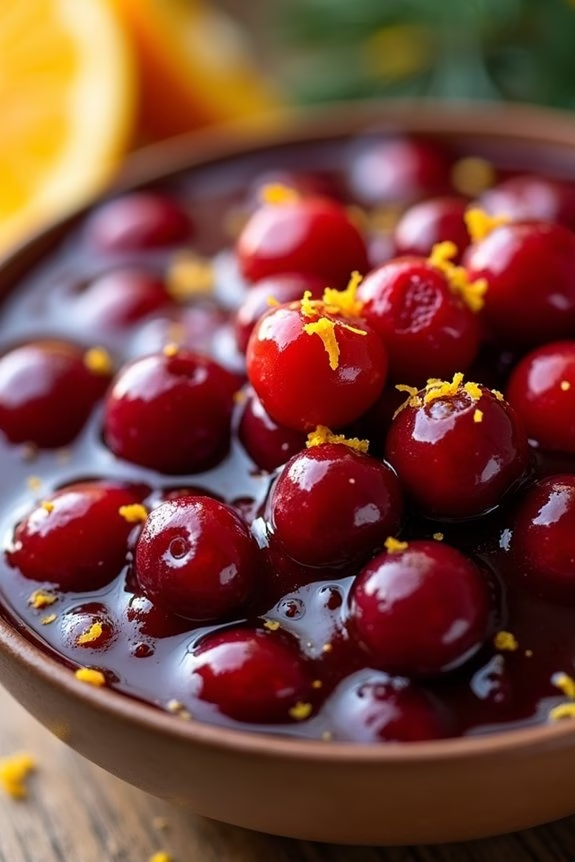
Cranberry Sauce With Orange Zest is a classic and delightful addition to any holiday potluck. This dish combines the tartness of cranberries with the sweet, citrusy flavor of orange zest, creating a perfect balance that complements roasted meats and other holiday staples. The vibrant red color of the cranberry sauce also adds a festive touch to your table setting.
Making homemade cranberry sauce is surprisingly simple and allows you to control the sweetness and texture of the dish. By using fresh cranberries and a touch of orange zest, you can create a sauce that’s both invigorating and flavorful. The aromatic scent of orange zest mingling with the cranberries as they cook is sure to fill your kitchen with the scent of the holidays.
Ingredients (serves 4-6):
- 12 ounces fresh cranberries
- 1 cup granulated sugar
- 1 cup water
- Zest of 1 orange
- 1/4 cup freshly squeezed orange juice
- 1/2 teaspoon vanilla extract (optional)
- Pinch of salt
Cooking Instructions:
- Prepare the Ingredients: Rinse the cranberries under cold water and discard any that are soft or damaged. Zest the orange and then juice it to obtain the required amount.
- Combine Ingredients: In a medium saucepan, combine the sugar and water. Stir over medium heat until the sugar has completely dissolved, creating a simple syrup.
- Add Cranberries: Once the sugar is dissolved, add the cranberries to the saucepan. Bring the mixture to a boil.
- Cook the Sauce: After the mixture reaches a boil, reduce the heat to medium-low and let it simmer. Stir occasionally, cooking for about 10 minutes or until the cranberries begin to pop.
- Incorporate Orange Flavors: Stir in the orange zest, orange juice, and a pinch of salt. If using, add the vanilla extract at this stage. Continue to simmer for another 5 minutes, allowing the flavors to meld together.
- Cool and Thicken: Remove the saucepan from the heat and let the cranberry sauce cool. As it cools, it will thicken to a spreadable consistency.
- Serve and Store: Transfer the cranberry sauce to a serving dish and refrigerate until ready to serve. It can be made a day or two in advance, as the flavors only improve over time.
Extra Tips: For a twist on this traditional recipe, you can add a splash of brandy or port wine for extra depth of flavor. If you prefer a smoother sauce, you can mash the cranberries with a fork or blend them slightly with an immersion blender.
Also, consider adding a cinnamon stick while cooking for an additional layer of spice. Remember, the sauce will continue to thicken as it cools, so don’t worry if it seems a little thin right off the stove.
Traditional Yorkshire Pudding

Yorkshire Pudding is a classic British dish often served as part of a traditional roast dinner, especially during festive occasions like Christmas. This savory pudding isn’t a dessert, but rather a perfect accompaniment to roasted meats, particularly beef, and is beloved for its light and airy texture.
Its origins date back to the 18th century in England, where it was initially served as a first course to fill diners before the more expensive meat course. Today, it’s a staple at many holiday tables, cherished for its simplicity and comforting flavor.
The key to making perfect Yorkshire Pudding lies in achieving a batter that puffs up in the oven, creating a crispy outside and a soft, tender inside. The batter is similar to a pancake mix, made from eggs, flour, and milk. It’s traditionally baked in a preheated pan with hot drippings from the roast, which helps it rise dramatically and attain its characteristic puffiness.
Whether you’re a seasoned cook or a beginner, mastering Yorkshire Pudding is a surefire way to impress your guests at your next Christmas potluck.
Ingredients for 4-6 servings:
- 1 cup all-purpose flour
- 1 cup whole milk
- 3 large eggs
- 1/2 teaspoon salt
- 1/4 cup beef drippings or vegetable oil
Cooking Instructions:
- Prepare the Batter: In a medium mixing bowl, whisk together the all-purpose flour and salt. In a separate bowl, beat the eggs and milk until well combined. Gradually add the wet ingredients to the dry ingredients, whisking continuously to form a smooth batter. Let the batter rest for at least 30 minutes at room temperature. This allows the flour to fully absorb the liquid, guaranteeing a smooth and airy pudding.
- Preheat the Oven: Preheat your oven to 425°F (220°C). Place a 12-cup muffin tin or a similar baking dish in the oven to heat up. This step is essential as a hot tin helps the batter rise quickly once it hits the oven.
- Add Drippings to the Tin: Once the oven and tin are hot, carefully remove the tin and add about 1 teaspoon of beef drippings or vegetable oil into each section. Return the tin to the oven and heat the drippings until they’re sizzling hot, about 5 minutes.
- Pour in the Batter: Quickly but carefully remove the hot tin from the oven. Pour the rested batter evenly into each section of the tin, filling each about halfway. The sizzling drippings will help the batter rise and create a crispy crust.
- Bake the Puddings: Return the tin to the oven and bake for 20-25 minutes or until the puddings are puffed up and golden brown. Avoid opening the oven door during baking, as this can cause the puddings to deflate.
- Serve Immediately: Once done, remove the puddings from the oven and serve immediately as they’re best enjoyed fresh and hot.
Extra Tips:
For the best results, make sure that your ingredients are at room temperature before mixing the batter. This helps the batter to rise more evenly.
If you don’t have beef drippings, vegetable oil is an excellent substitute. However, using drippings from your roast can add extra flavor to your puddings.
Sausage and Chestnut Stuffing
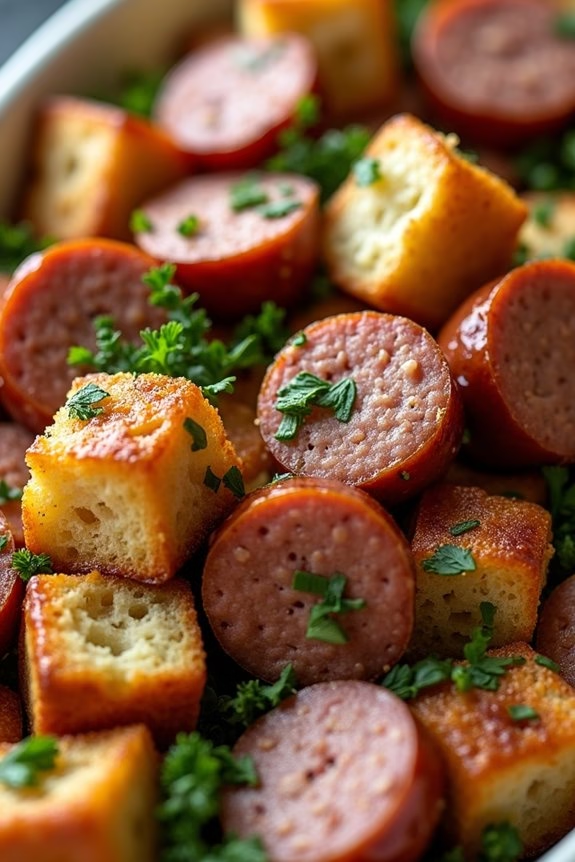
Sausage and Chestnut Stuffing is a beloved classic at many Christmas potlucks, offering a savory, nutty, and slightly sweet accompaniment to the main holiday spread. This dish combines the rich flavors of sausage and chestnuts with aromatic herbs to create a stuffing that’s both comforting and indulgent.
The combination of textures from the crunchy nuts and tender sausage makes this stuffing a delightful addition to any Christmas table, certain to be enjoyed by all guests. Ideal for serving 4-6 people, this recipe brings together a medley of traditional ingredients, guaranteeing that each bite is packed with flavor.
The key to a great stuffing is balancing the moistness without making it soggy, allowing the bread cubes to soak up all the delicious flavors from the broth and sausage drippings. With this recipe, you’ll create a dish that not only complements your holiday meal but might just become a new family favorite.
Ingredients:
- 1 pound Italian sausage, casings removed
- 2 cups cooked and peeled chestnuts, roughly chopped
- 1 loaf of rustic bread, cubed (about 10 cups)
- 1 large onion, finely chopped
- 2 celery stalks, diced
- 2 cloves garlic, minced
- 1/4 cup fresh parsley, chopped
- 1 tablespoon fresh sage, chopped
- 1 tablespoon fresh thyme leaves
- 1/2 teaspoon salt
- 1/4 teaspoon black pepper
- 2 cups chicken or vegetable broth
- 1/4 cup unsalted butter, melted
- Olive oil for cooking
Cooking Instructions:
- Prepare the Bread Cubes: Preheat your oven to 350°F (175°C). Spread the cubed bread on a baking sheet and toast in the oven for about 10 minutes, or until they’re slightly crispy and golden. Remove from oven and set aside to cool.
- Cook the Sausage: In a large skillet, heat a drizzle of olive oil over medium heat. Add the sausage and cook until browned, breaking it up into smaller pieces with a spatula. Once cooked, remove the sausage from the skillet and set aside, leaving the drippings.
- Sauté the Vegetables: In the same skillet, add the onion, celery, and garlic to the sausage drippings. Sauté until the vegetables are soft and translucent, about 5-7 minutes.
- Combine Ingredients: In a large mixing bowl, combine the toasted bread cubes, cooked sausage, sautéed vegetables, chopped chestnuts, parsley, sage, thyme, salt, and pepper.
- Add Liquid: Pour the chicken or vegetable broth and melted butter over the mixture. Toss everything gently until the bread cubes are evenly moistened but not soggy.
- Bake the Stuffing: Transfer the stuffing mixture into a greased baking dish. Cover with foil and bake in the preheated oven for 25 minutes. Remove the foil and continue to bake for another 15 minutes, or until the top is golden and crispy.
Extra Tips:
For an extra depth of flavor, you can use a combination of different bread types, like sourdough or whole grain, to add complexity to the stuffing.
If you prefer a vegetarian version, simply omit the sausage and use vegetable broth. Additionally, the stuffing can be made a day ahead and stored in the refrigerator; just reheat it in the oven before serving to save time on the day of your gathering.
Remember to taste the stuffing before baking to confirm the seasoning is to your liking, as different sausages can vary in saltiness.
Baked Brie With Cranberry and Pecans
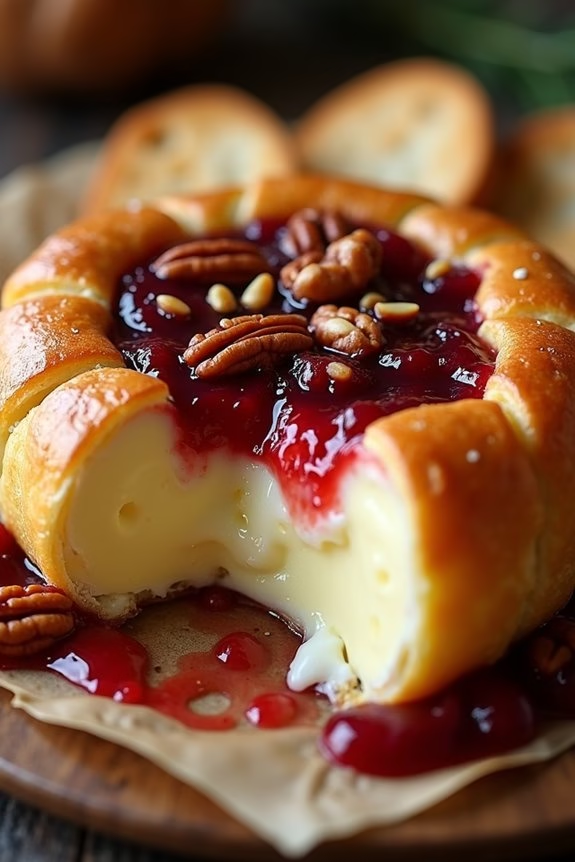
Baked Brie with Cranberry and Pecans is a delectable dish that combines the creamy richness of Brie cheese with the tart sweetness of cranberries and the nutty crunch of pecans. This dish is perfect for a festive Christmas potluck, offering a beautiful balance of flavors and textures that make it a crowd-pleaser.
Whether served as an appetizer or as part of a larger spread, this baked brie is certain to be a memorable highlight of your holiday meal. The dish is simple to prepare yet elegant in presentation, making it an ideal choice for both novice and experienced cooks.
The Brie is wrapped in a flaky pastry, which turns golden and crisp in the oven, while the cranberry sauce and pecans provide a lovely contrast to the soft, melted cheese. This recipe serves 4-6 people, making it suitable for small gatherings or as a part of a larger meal.
Ingredients:
- 1 wheel of Brie cheese (about 8-12 oz)
- 1 sheet of puff pastry, thawed
- 1/2 cup whole berry cranberry sauce
- 1/4 cup chopped pecans
- 1 egg, beaten
- Crackers or sliced baguette, for serving
Instructions:
- Preheat the Oven: Begin by preheating your oven to 375°F (190°C). This guarantees that your oven is at the right temperature when you’re ready to bake the brie.
- Prepare the Puff Pastry: On a lightly floured surface, roll out the puff pastry to guarantee it’s large enough to fully enclose the Brie. Place the wheel of Brie in the center of the pastry.
- Add Toppings: Spread the cranberry sauce over the top of the Brie. Sprinkle the chopped pecans evenly over the cranberry sauce to cover the top of the cheese.
- Wrap the Brie: Carefully fold the edges of the puff pastry over the top of the Brie, guaranteeing it’s fully enclosed. Trim any excess pastry if necessary, and press the edges to seal.
- Brush with Egg Wash: Brush the beaten egg over the pastry. This will give it a beautiful golden color once baked.
- Bake: Place the wrapped Brie on a baking sheet lined with parchment paper. Bake in the preheated oven for 20-25 minutes or until the pastry is golden brown.
- Cool Slightly and Serve: Allow the baked Brie to cool for about 5 minutes before serving. This makes it easier to cut and prevents the cheese from spilling out too quickly.
Extra Tips: When working with puff pastry, keep the pastry cold until you’re ready to use it, as this helps it puff up better in the oven. You can prepare the Brie a few hours in advance and keep it in the refrigerator; just be sure to bake it just before serving for the best texture.
If you want to add a little extra flair, you can drizzle some honey over the top before serving for an additional layer of sweetness.
Gingerbread Cookies

Gingerbread cookies are a quintessential part of traditional Christmas festivities, evoking warm memories of holidays past. These delightful cookies aren’t only fun to bake but also perfect for sharing at a potluck. With their aromatic spices and classic molasses flavor, gingerbread cookies are a treat that everyone can enjoy. They can be decorated with icing and candies to make them as festive as they’re delicious.
Whether you’re an experienced baker or a novice in the kitchen, this recipe is simple to follow and will result in a batch of cookies that will be the highlight of your holiday gathering. The following recipe makes enough gingerbread cookies for a serving size of 4-6 people, making it ideal for a small holiday get-together.
With just a few common pantry ingredients, you can create a batch of cookies that are perfect for a Christmas potluck or as a homemade gift. The key to making the best gingerbread cookies lies in the balance of spices and the right baking time to guarantee they’re chewy and packed with flavor.
Ingredients (Serving Size: 4-6 people):
- 3 cups all-purpose flour
- 3/4 teaspoon baking soda
- 1 tablespoon ground ginger
- 1 tablespoon ground cinnamon
- 1/2 teaspoon ground cloves
- 1/2 teaspoon ground nutmeg
- 1/2 teaspoon salt
- 1/4 teaspoon ground black pepper
- 1/2 cup unsalted butter, softened
- 1/2 cup packed dark-brown sugar
- 1 large egg
- 1/2 cup unsulfured molasses
- 2 teaspoons vanilla extract
Cooking Instructions:
- Preheat the Oven: Begin by preheating your oven to 350°F (175°C). Line two baking sheets with parchment paper to prevent the cookies from sticking.
- Mix Dry Ingredients: In a medium bowl, whisk together the flour, baking soda, ginger, cinnamon, cloves, nutmeg, salt, and black pepper. This guarantees that the spices are evenly distributed throughout the dough.
- Cream Butter and Sugar: In a large mixing bowl, beat the softened butter and brown sugar together until light and fluffy. This should take about 2 minutes using an electric mixer on medium speed.
- Incorporate Wet Ingredients: Add the egg, molasses, and vanilla extract to the butter mixture. Beat until well combined, scraping down the sides of the bowl as needed.
- Combine Dry and Wet Ingredients: Gradually add the dry ingredients to the wet mixture, mixing on low speed until a uniform dough forms.
- Chill the Dough: Divide the dough into two portions, wrap them in plastic wrap, and refrigerate for at least 1 hour. Chilling the dough makes it easier to roll out and cut into shapes.
- Roll and Cut the Dough: On a lightly floured surface, roll out the dough to about 1/4-inch thickness. Use cookie cutters to cut out desired shapes and transfer them to the prepared baking sheets.
- Bake the Cookies: Bake the cookies in the preheated oven for 10-12 minutes or until the edges are firm. Be careful not to overbake, as they should remain slightly soft in the center.
- Cool and Decorate: Allow the cookies to cool on the baking sheets for 5 minutes before transferring them to a wire rack to cool completely. Decorate with icing and sprinkles as desired.
Extra Tips:
For the best results, make sure that your ingredients are at room temperature, as this helps them blend more easily. You can also experiment with different cookie cutter shapes to suit your holiday theme.
If you prefer a softer cookie, slightly underbake them, as they’ll continue to firm up as they cool. Additionally, try adding a pinch of cayenne pepper for a subtle kick of heat that complements the sweet and spicy flavors of the gingerbread. Happy baking!
Traditional Christmas Pudding
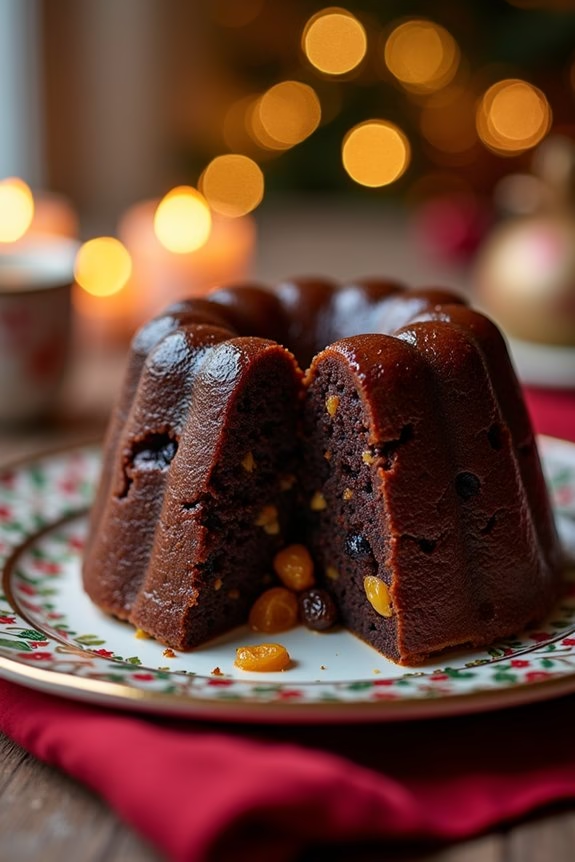
Christmas pudding is a quintessential dessert that graces many tables during the festive season, particularly in the UK. Its origins can be traced back to medieval England, where it was originally a porridge-like dish made with beef and mutton. Over time, it evolved into the rich, fruity dessert we recognize and love today. This steamed pudding is packed with dried fruits, spices, and often a splash of brandy, making it a wonderfully indulgent treat to enjoy at the end of a Christmas meal.
The process of making a Christmas pudding is steeped in tradition, with the stirring of the pudding mixture by each family member for good luck being one of the most cherished customs. It’s customary to make the pudding on “Stir-up Sunday,” the last Sunday before Advent, allowing the flavors to mature over the weeks leading up to Christmas. This recipe will help you create a classic Christmas pudding that serves 4-6 people, bringing warmth and cheer to your holiday celebration.
Ingredients:
- 100g suet or unsalted butter
- 100g plain flour
- 100g fresh white breadcrumbs
- 100g dark brown sugar
- 100g currants
- 100g sultanas
- 100g raisins
- 50g chopped mixed peel
- 50g chopped almonds
- 1 small apple, peeled and grated
- 1 lemon, zest and juice
- 1 orange, zest and juice
- 1 teaspoon ground cinnamon
- 1 teaspoon mixed spice
- ½ teaspoon ground nutmeg
- 2 large eggs
- 150ml stout or dark ale
- 50ml brandy
- Butter, for greasing
Instructions:
- Prepare the Pudding Basin: Start by greasing a 1.2-liter (2 pint) pudding basin with butter. This will prevent the pudding from sticking to the sides when cooking.
- Mix Dry Ingredients: In a large mixing bowl, combine the suet or butter, plain flour, breadcrumbs, and dark brown sugar. Add the currants, sultanas, raisins, mixed peel, and almonds. Grate the apple and add it to the mixture along with the lemon and orange zest.
- Add Spices: Stir in the ground cinnamon, mixed spice, and nutmeg to the dry ingredients. Confirm the spices are evenly distributed.
- Combine Wet Ingredients: In a separate bowl, lightly beat the eggs. Add the stout or dark ale, brandy, and the lemon and orange juice to the eggs. Mix well.
- Combine Mixtures: Make a well in the center of the dry ingredients and pour in the wet mixture. Stir thoroughly until all ingredients are well combined, confirming there are no dry pockets of flour or breadcrumbs.
- Transfer to Basin: Spoon the mixture into the prepared pudding basin. Cover the basin with a layer of baking parchment followed by a layer of foil, creating a pleat in the center to allow for expansion. Secure tightly with string.
- Steam the Pudding: Place the pudding basin in a large saucepan and pour in enough water to come halfway up the sides of the basin. Cover the pan with a lid and bring the water to a gentle simmer. Steam the pudding for 6 hours, checking occasionally to confirm the water level remains constant.
- Cool and Store: Once cooked, remove the pudding from the saucepan and let it cool. Once cooled, replace the parchment and foil with fresh layers and store the pudding in a cool, dry place until Christmas Day.
- Reheat Before Serving: On Christmas Day, steam the pudding again for 2 hours before serving. This reheating process confirms the pudding is warm and moist for serving.
Extra Tips:
When making Christmas pudding, it’s important to allow the flavors to mature over time. If possible, prepare your pudding several weeks in advance to enhance its depth of flavor. If you’re short on time, a few days will still produce a delicious result.
Stirring the pudding with a wooden spoon and making a wish is a delightful tradition, especially for families. When serving, consider flambéing the pudding with a splash of warmed brandy for a dramatic presentation. Always handle the pudding carefully when removing it from the steaming pot to avoid burns.
Eggnog Cheesecake
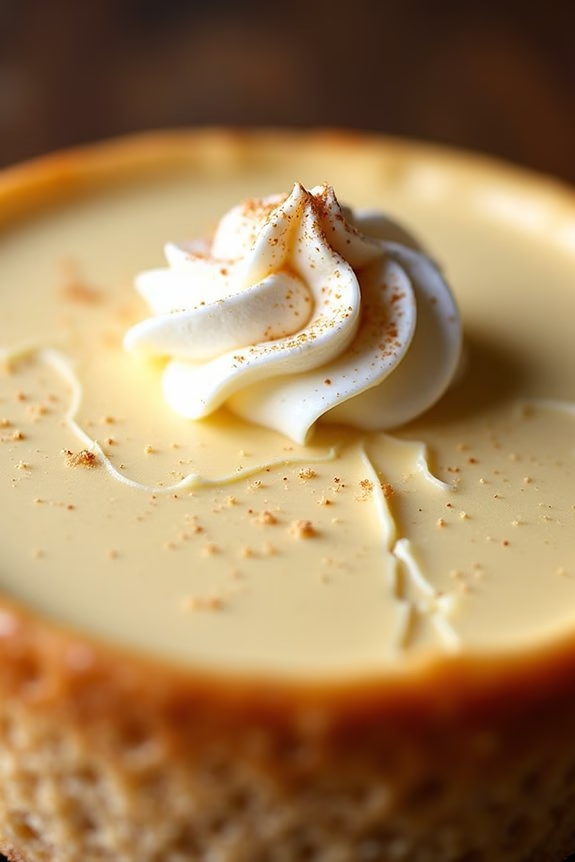
Eggnog Cheesecake is a festive twist on the classic dessert, perfect for a holiday potluck. This creamy, rich cheesecake combines the warm spices and flavors of traditional eggnog with the smooth texture of cheesecake, creating a delightful treat that captures the essence of the holiday season.
Whether you’re a fan of eggnog or just a lover of cheesecake, this dessert is sure to impress your guests and add a touch of elegance to your Christmas gathering.
The recipe involves a buttery graham cracker crust, a creamy eggnog-infused cheesecake filling, and a hint of nutmeg to celebrate the season’s flavors. The cheesecake is baked to perfection and can be topped with a dollop of whipped cream and a sprinkle of nutmeg for an extra touch of holiday spirit.
Designed to serve 4-6 people, this Eggnog Cheesecake is both a visual and culinary delight, promising to be the star of your potluck spread.
Ingredients (Serving Size: 4-6)
- 1 cup graham cracker crumbs
- 2 tablespoons granulated sugar
- 1/4 cup melted butter
- 16 oz cream cheese, softened
- 1 cup granulated sugar
- 2 tablespoons all-purpose flour
- 1/2 cup eggnog
- 2 large eggs
- 2 tablespoons rum or rum extract
- 1 teaspoon vanilla extract
- 1/2 teaspoon ground nutmeg
- Whipped cream (for topping, optional)
- Additional ground nutmeg (for garnish, optional)
Cooking Instructions
- Prepare the Crust: Preheat your oven to 325°F (160°C). In a medium bowl, combine the graham cracker crumbs and 2 tablespoons of granulated sugar. Stir in the melted butter until the mixture resembles wet sand. Press the mixture firmly into the bottom of a 9-inch springform pan to form an even crust.
- Make the Cheesecake Filling: In a large mixing bowl, beat the softened cream cheese until smooth and creamy. Gradually add 1 cup of granulated sugar and the flour, mixing until well combined. Slowly blend in the eggnog, guaranteeing a smooth consistency.
- Incorporate Eggs and Flavors: Add the eggs one at a time, mixing on low speed after each addition just until blended. Stir in the rum or rum extract, vanilla extract, and ground nutmeg until fully incorporated.
- Assemble and Bake: Pour the cheesecake filling over the prepared crust, smoothing the top with a spatula. Bake in the preheated oven for 45-50 minutes or until the center is set but still slightly jiggly. Turn off the oven and crack the door open, allowing the cheesecake to cool gradually for an hour to prevent cracking.
- Chill the Cheesecake: Once cooled, refrigerate the cheesecake for at least 4 hours, or overnight, to allow it to fully set.
- Serve: Before serving, release the cheesecake from the springform pan. Optionally, top with whipped cream and a sprinkle of additional ground nutmeg for garnish.
Extra Tips
To guarantee your Eggnog Cheesecake has a smooth texture, make sure all the ingredients, especially the cream cheese, are at room temperature before you begin mixing. This will help prevent lumps in the batter.
Additionally, avoid over-mixing once the eggs are added, as this can incorporate too much air into the batter and lead to cracks during baking. Finally, for a more pronounced eggnog flavor, you can adjust the amount of nutmeg and rum to suit your personal taste.
Spiced Mulled Wine

Spiced mulled wine is a warm, aromatic beverage perfect for cozying up during the festive season. Originating from European traditions, this delightful drink is often served at holiday gatherings, exuding an inviting aroma of warm spices and citrus.
It’s a wonderful potluck option that not only brings warmth but also adds a touch of elegance to any Christmas celebration. The combination of red wine, spices, and fruit creates a rich, flavorful drink that guests will enjoy sipping on as they mingle and enjoy the holiday cheer.
Preparing spiced mulled wine is a simple yet rewarding process. By gently simmering wine with a blend of spices such as cinnamon, cloves, and star anise, along with citrus fruits like oranges, you create a drink that’s both comforting and indulgent.
The key to a perfect mulled wine lies in balancing the flavors without overpowering the delicate notes of the wine. This recipe serves 4-6 people, making it ideal for small gatherings or as a warm-up to a larger feast.
Ingredients (Serves 4-6):
- 1 bottle (750 ml) of red wine (such as Merlot or Cabernet Sauvignon)
- 1/4 cup brandy
- 1/4 cup honey or sugar
- 1 orange, sliced
- 2 cinnamon sticks
- 5 cloves
- 3 star anise pods
- 1 vanilla pod or 1 teaspoon vanilla extract
- 1/4 teaspoon grated nutmeg
- Optional: 1-2 tablespoons of fresh cranberries or a splash of apple cider
Cooking Instructions:
- Prepare the Ingredients: Begin by slicing the orange into thin rounds. This will allow the orange flavors to infuse more effectively into the wine.
- Combine Ingredients: In a large saucepan, combine the bottle of red wine, brandy, and honey or sugar. Stir gently to dissolve the sweetener.
- Add Spices and Fruit: Add the sliced orange, cinnamon sticks, cloves, star anise, vanilla pod (or extract), and grated nutmeg to the saucepan. If using, add fresh cranberries or apple cider for extra flavor.
- Simmer the Mixture: Place the saucepan over low to medium heat. Allow the mixture to gently simmer for about 20-30 minutes. Be careful not to let it boil, as boiling can evaporate the alcohol and alter the taste.
- Taste and Adjust: After simmering, taste the mulled wine. If desired, adjust the sweetness by adding more honey or sugar. You can also add a splash more brandy for extra warmth.
- Strain and Serve: Once the desired flavor is achieved, strain the mulled wine to remove the spices and fruit. Serve warm in mugs or heatproof glasses, garnished with a fresh slice of orange or a cinnamon stick if desired.
Extra Tips:
To guarantee the best results, use a wine that you enjoy drinking on its own, as its flavors will be enhanced by the mulling process.
Avoid letting the wine boil to preserve its delicate flavors and alcohol content. For a non-alcoholic version, substitute the wine and brandy with grape juice and omit the brandy.
Additionally, mulled wine can be prepared in advance and reheated gently before serving, making it a convenient option for busy holiday preparations.