
With the holiday season just around the corner, I’ve been reminiscing about those comforting, timeless Christmas breakfasts that fill the kitchen with warmth and cheer. From gooey cinnamon rolls to savory sausage casseroles, these dishes have a way of making the morning feel magical. If you’re looking to craft a breakfast spread that truly captures the essence of Christmas, you’re in the perfect place. Join me as I share these classic recipes that are sure to delight every palate. Let’s make this festive season extra special with flavors that never go out of style.
Classic Cinnamon Rolls
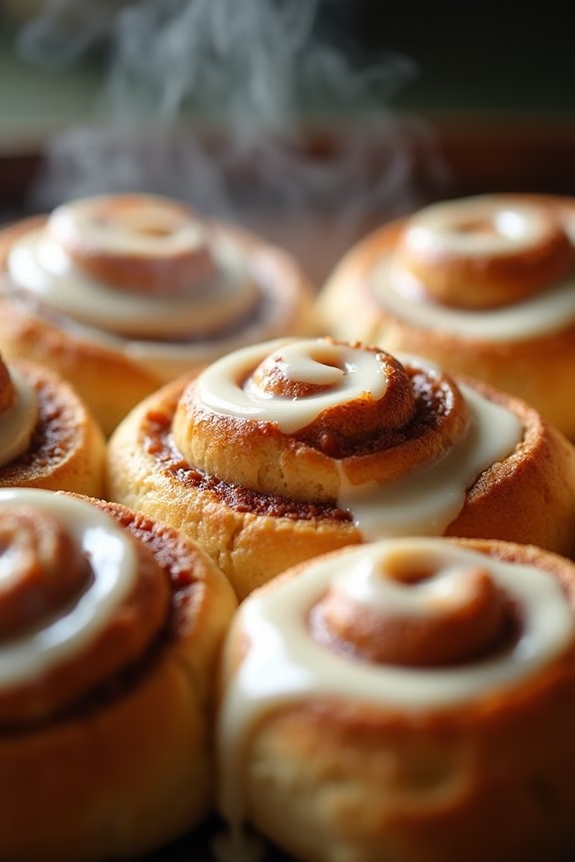
Classic Cinnamon Rolls are a quintessential part of a traditional Christmas breakfast, bringing warmth and sweetness to the holiday morning. With their soft, doughy texture, rich cinnamon flavor, and cream cheese icing, these rolls are a delicious treat that fills the kitchen with an irresistible aroma.
Making these cinnamon rolls from scratch might take a bit of time, but the result is a labor of love that perfectly complements the festive spirit.
The process begins with preparing a soft, pillowy dough, which is generously filled with a cinnamon-sugar mixture. Once baked to golden perfection, the rolls are topped with a smooth and creamy icing that melts into the warm swirls. This recipe serves 4-6 people, making it ideal for a cozy family gathering around the breakfast table on Christmas morning.
Ingredients (Serves 4-6)
- 1 cup warm milk (110°F/45°C)
- 2 1/4 teaspoons active dry yeast
- 1/2 cup granulated sugar
- 1/3 cup unsalted butter, melted
- 1 teaspoon salt
- 2 large eggs
- 4 cups all-purpose flour
- 1 cup packed brown sugar
- 2 1/2 tablespoons ground cinnamon
- 1/3 cup unsalted butter, softened
- 4 ounces cream cheese, softened
- 1/4 cup unsalted butter, softened
- 1 1/2 cups powdered sugar
- 1/2 teaspoon vanilla extract
- Pinch of salt
Instructions
1. Prepare the Dough: In a large mixing bowl, combine warm milk and yeast. Let it sit for about 5 minutes until foamy. Add granulated sugar, melted butter, salt, and eggs, and mix until combined. Gradually add flour, one cup at a time, until a soft dough forms. Knead the dough on a floured surface for about 5-7 minutes until smooth and elastic.
Place the dough in a greased bowl, cover it with a damp cloth, and let it rise in a warm place for about 1 to 1.5 hours or until doubled in size.
2. Make the Filling: In a small bowl, mix brown sugar and cinnamon. Once the dough has risen, roll it out on a lightly floured surface into a rectangle about 16×12 inches. Spread the softened butter over the dough, then evenly sprinkle the cinnamon-sugar mixture over the top, leaving a small border around the edges.
3. Form the Rolls: Starting from the longer side, tightly roll up the dough into a log. Cut the log into 12 equal pieces and place them in a greased 9×13-inch baking dish. Cover with a cloth and let them rise for another 30 minutes until they puff up.
4. Bake the Rolls: Preheat your oven to 350°F (175°C). Bake the Rolls in the preheated oven for 20-25 minutes, or until they’re golden brown.
5. Prepare the Icing: While the rolls are baking, make the icing. In a medium bowl, beat the cream cheese, butter, powdered sugar, vanilla extract, and a pinch of salt until smooth and creamy.
6. Finish the Rolls: Once the rolls are out of the oven, let them cool slightly before spreading the cream cheese icing over the top. Serve warm and enjoy the festive flavors.
Extra Tips
For best results, verify your milk is warm but not hot to activate the yeast without killing it. If you’re preparing the rolls in advance, you can refrigerate the rolled and cut dough overnight before the second rise.
Let them come to room temperature and rise for about 45 minutes in the morning before baking. To add a festive twist, consider adding chopped nuts or dried fruit to the filling for an extra layer of flavor.
Fluffy Pancakes With Maple Syrup
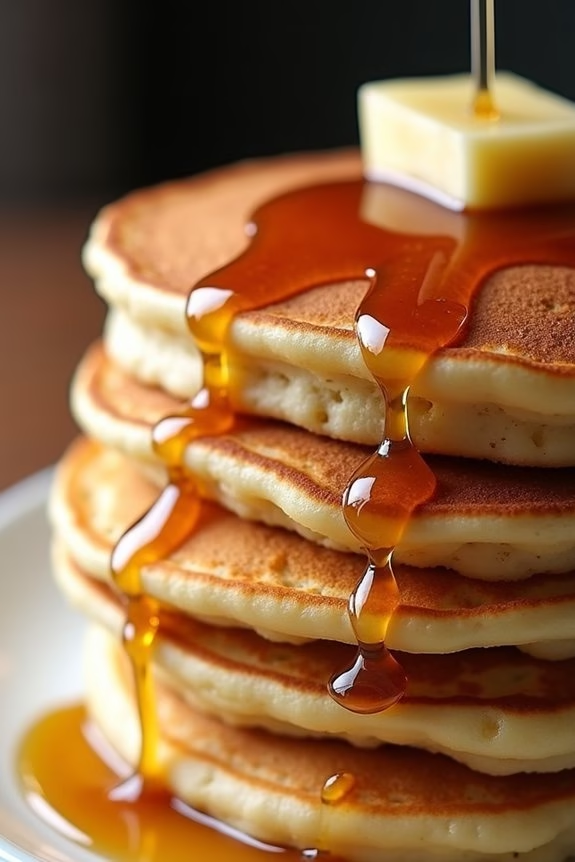
Fluffy Pancakes With Maple Syrup are a delightful treat that can make any Christmas morning feel extra special. Nothing quite matches the comforting aroma of pancakes sizzling on a skillet, filling your home with warmth and anticipation.
This dish is perfect for a festive breakfast, combining the light, airy texture of the pancakes with the rich, sweet flavor of maple syrup. Ideal for serving a family of 4-6, these pancakes will surely be a hit at your holiday table.
Achieving the perfect fluffiness in pancakes is an art, but with the right technique and ingredients, it’s an achievable goal. The key lies in using fresh ingredients and handling the batter gently to retain as much air as possible.
By following this recipe, you’ll be able to serve pancakes that aren’t only delicious but also visually appealing, with a golden-brown exterior and a soft, tender interior. Top them with pure maple syrup for that classic Christmas breakfast touch.
Ingredients (Serves 4-6):
- 2 cups all-purpose flour
- 2 tablespoons granulated sugar
- 2 teaspoons baking powder
- 1/2 teaspoon baking soda
- 1/2 teaspoon salt
- 2 large eggs
- 2 cups buttermilk
- 1/4 cup unsalted butter, melted
- 1 teaspoon vanilla extract
- Maple syrup, for serving
Cooking Instructions:
- Prepare Dry Ingredients: In a large mixing bowl, combine the flour, sugar, baking powder, baking soda, and salt. Whisk these dry ingredients together until they’re well mixed, ensuring that the leavening agents are evenly distributed.
- Mix Wet Ingredients: In a separate bowl, beat the eggs lightly. Add the buttermilk, melted butter, and vanilla extract, stirring until the mixture is smooth and well-combined.
- Combine Mixtures: Pour the wet ingredients into the bowl of dry ingredients. Use a spatula or wooden spoon to gently mix the batter until just combined. It’s okay if there are a few lumps; over-mixing can lead to tough pancakes.
- Heat the Skillet: Preheat a non-stick skillet or griddle over medium heat. To check if the skillet is ready, sprinkle a few drops of water onto the surface. If they sizzle and evaporate quickly, it’s hot enough.
- Cook the Pancakes: Lightly grease the skillet with a small amount of butter or oil. Pour approximately 1/4 cup of batter onto the skillet for each pancake. Cook until bubbles form on the surface and the edges look set, about 2-3 minutes. Flip the pancakes and cook for another 1-2 minutes on the other side until golden brown.
- Serve: Transfer the pancakes to a plate and cover to keep warm while you cook the remaining batter. Serve the pancakes warm, generously drizzled with maple syrup.
Extra Tips:
For even fluffier pancakes, consider separating the egg whites and yolks. Whip the egg whites to soft peaks and fold them into the batter at the end for added lightness.
Always use fresh buttermilk for the best rise and flavor. If you don’t have buttermilk, you can make a substitute by adding 1 tablespoon of lemon juice or vinegar to 2 cups of milk and letting it sit for 5 minutes.
Finally, keep your cooked pancakes warm in an oven set to the lowest temperature until ready to serve. Enjoy your Christmas breakfast!
Savory Sausage and Egg Casserole
Savory Sausage and Egg Casserole is a quintessential dish that perfectly captures the spirit of a traditional Christmas breakfast. This comforting casserole combines the hearty flavors of sausage and cheese with fluffy eggs, making it an ideal dish to serve to family and friends on Christmas morning.
Not only is it delicious, but it can also be prepared ahead of time, allowing you to spend more time enjoying the festivities and less time in the kitchen.
The beauty of this recipe lies in its simplicity and flexibility. You can customize the ingredients to suit your family’s tastes, adding vegetables like bell peppers or mushrooms for extra flavor and nutrition.
The casserole is baked to perfection, with a golden, cheesy crust that will have everyone reaching for seconds. It’s a warm and satisfying way to start a day filled with holiday cheer.
Ingredients (Serves 4-6)
- 1 pound breakfast sausage
- 6 large eggs
- 2 cups milk
- 2 cups shredded cheddar cheese
- 6 slices of bread, cubed
- 1 teaspoon salt
- 1/2 teaspoon black pepper
- 1/2 teaspoon garlic powder
- 1/2 teaspoon onion powder
- 1 tablespoon butter (for greasing the baking dish)
Cooking Instructions
- Preheat the Oven: Begin by preheating your oven to 350°F (175°C). This guarantees that your casserole will cook evenly.
- Cook the Sausage: In a skillet over medium heat, cook the breakfast sausage until browned and fully cooked. Break it into crumbles as it cooks. Once done, drain any excess fat and set aside.
- Prepare the Bread: Cube the bread slices and place them evenly in a greased 9×13-inch baking dish. This will form the base of the casserole.
- Combine Ingredients: In a large mixing bowl, whisk together the eggs, milk, salt, pepper, garlic powder, and onion powder. Stir in the cooked sausage and 1 1/2 cups of the shredded cheddar cheese.
- Assemble the Casserole: Pour the egg and sausage mixture evenly over the cubed bread in the baking dish. Gently press down with a spatula to confirm the bread absorbs the liquid. Sprinkle the remaining 1/2 cup of cheddar cheese on top.
- Bake: Place the casserole in the preheated oven and bake for 40-45 minutes, or until the top is golden brown and the eggs are set. You can test by inserting a knife into the center; it should come out clean.
- Rest and Serve: Allow the casserole to cool for a few minutes before serving. This will help it set further and make it easier to cut into portions.
Extra Tips
For best results, consider preparing the casserole the night before and refrigerating it overnight. This allows the flavors to meld and the bread to fully absorb the egg mixture.
When you’re ready to bake, simply let it sit at room temperature for about 30 minutes before placing it in the oven. If you prefer a bit of heat, add a pinch of cayenne pepper or a few dashes of hot sauce to the egg mixture.
Additionally, feel free to experiment with different types of cheeses or add in your favorite vegetables for added color and flavor.
Traditional French Toast
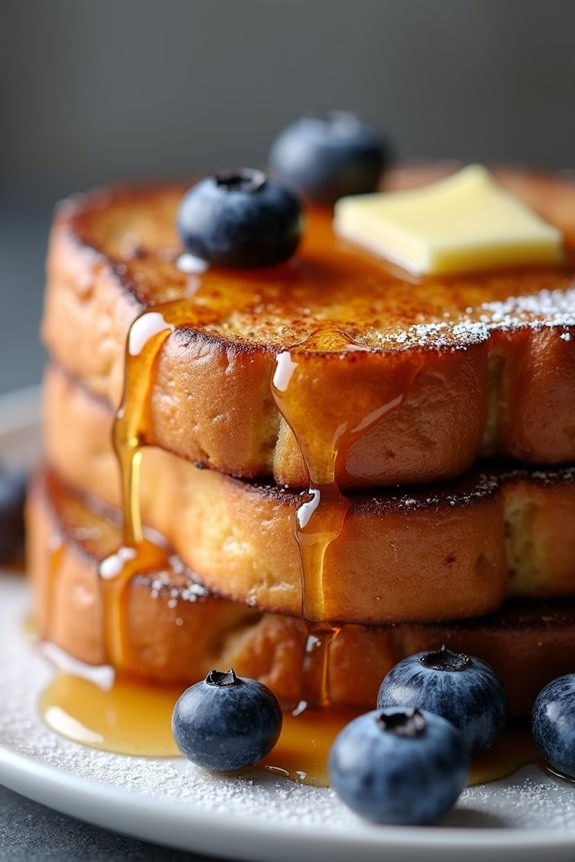
French Toast is a beloved breakfast classic that has been enjoyed for generations, especially during the festive holiday season. This dish, with its perfectly golden-brown exterior and soft, custardy interior, offers a comforting start to Christmas morning. The subtle hints of cinnamon and vanilla in the batter enhance the flavors, making it a delightful treat for the whole family.
French Toast is simple to make yet indulgent enough to feel special, embodying the warmth and joy of a holiday breakfast. Traditional French Toast is perfect for serving 4-6 people, making it ideal for a small family gathering or a cozy Christmas breakfast. It’s a versatile dish that can be easily customized with various toppings, from fresh fruits and berries to whipped cream and maple syrup.
This recipe will guide you through creating the perfect French Toast, guaranteeing a delightful and satisfying start to your Christmas festivities.
Ingredients (Serves 4-6):
- 8 slices of thick-cut bread (brioche or challah recommended)
- 4 large eggs
- 1 cup whole milk
- 1/4 cup heavy cream
- 2 tablespoons granulated sugar
- 1 teaspoon vanilla extract
- 1 teaspoon ground cinnamon
- 1/4 teaspoon salt
- 2 tablespoons unsalted butter
- Maple syrup, for serving
Cooking Instructions:
- Prepare the Batter: In a large mixing bowl, whisk together the eggs, milk, heavy cream, sugar, vanilla extract, cinnamon, and salt until well combined. Confirm that the sugar and cinnamon are fully dissolved into the liquid mixture.
- Soak the Bread: Place the bread slices in a shallow baking dish or on a rimmed baking sheet. Pour the batter over the bread, making sure each slice is thoroughly coated. Allow the bread to soak for about 5 minutes, flipping the slices halfway through to confirm even absorption of the batter.
- Preheat the Pan: Heat a large non-stick skillet or griddle over medium heat. Add the butter to the pan and let it melt completely, swirling the pan to coat the surface evenly.
- Cook the French Toast: Once the butter is sizzling, carefully place the soaked bread slices onto the skillet or griddle. Cook for about 3-4 minutes on each side, or until the bread is golden brown and slightly crispy on the edges. Work in batches if necessary, and add more butter to the pan as needed.
- Serve: Transfer the cooked French Toast to a serving platter. Drizzle with warm maple syrup and serve immediately. Optionally, garnish with fresh fruits, powdered sugar, or whipped cream for an extra festive touch.
Extra Tips:
When making Traditional French Toast, it’s important to choose the right type of bread. Opt for a thick-cut variety such as brioche or challah, which can absorb the batter well without becoming soggy.
Additionally, slightly stale bread works best for French Toast as it holds its shape better when soaked. If your bread is fresh, consider toasting it lightly before using. Always confirm the skillet is adequately heated before cooking, as this will help achieve that perfect golden crust.
Festive Cranberry Orange Scones
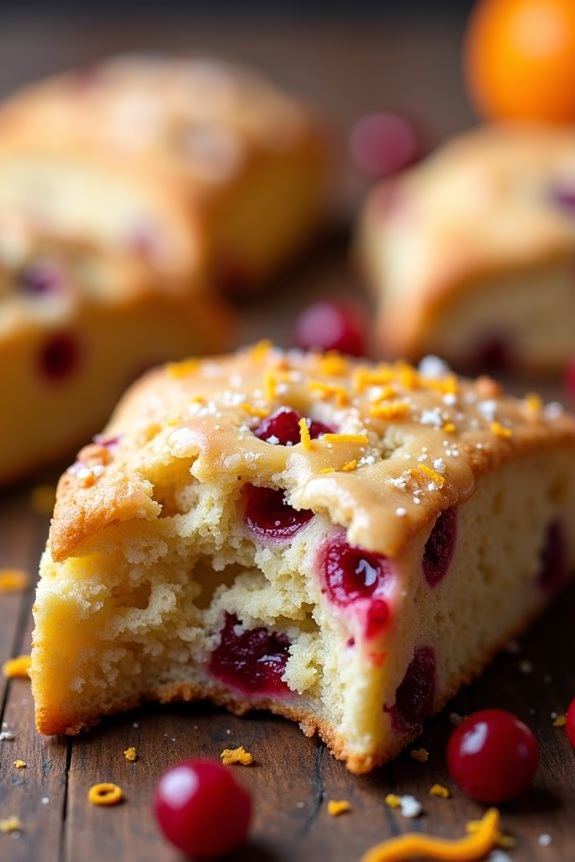
Festive Cranberry Orange Scones are a delightful addition to any traditional Christmas breakfast. These scones combine the tartness of cranberries with the zesty freshness of orange, creating a perfect balance of flavors that complement each other beautifully. Ideal for serving alongside a cup of hot tea or coffee, these scones are sure to become a holiday favorite among family and friends.
Their golden, flaky exterior gives way to a soft, moist crumb inside, filled with bursts of cranberry goodness and a hint of citrus that fills your kitchen with a warm, inviting aroma.
Preparing these scones is a straightforward process, making them an excellent choice for a Christmas morning treat. The key to achieving the perfect texture lies in the quality of the ingredients and the method used to bring them together. By following this recipe, you’ll be able to create scones that aren’t only delicious but also visually appealing, with a delightful drizzle of orange glaze to finish.
Whether enjoyed fresh from the oven or saved for a later snack, these cranberry orange scones are a festive way to start your holiday celebrations.
Ingredients (serves 4-6):
- 2 cups all-purpose flour
- 1/3 cup granulated sugar
- 1 tablespoon baking powder
- 1/2 teaspoon salt
- 1/2 cup unsalted butter, cold and cubed
- 1/2 cup dried cranberries
- Zest of 1 large orange
- 2/3 cup heavy cream
- 1 large egg
- 1 teaspoon vanilla extract
- 1 tablespoon milk (for brushing)
- 1 tablespoon turbinado sugar (optional, for sprinkling)
Instructions:
- Preheat the Oven: Begin by preheating your oven to 400°F (200°C). Line a baking sheet with parchment paper to prevent the scones from sticking.
- Mix Dry Ingredients: In a large mixing bowl, combine the flour, granulated sugar, baking powder, and salt. Mix well to confirm the baking powder is evenly distributed, which will help the scones rise properly.
- Incorporate Butter: Add the cold, cubed butter to the dry ingredients. Using a pastry cutter or your fingers, work the butter into the flour mixture until it resembles coarse crumbs. It’s important to keep the butter cold to achieve a flaky texture.
- Add Cranberries and Orange Zest: Stir in the dried cranberries and orange zest, making sure they’re evenly dispersed throughout the flour mixture.
- Combine Wet Ingredients: In a separate bowl, whisk together the heavy cream, egg, and vanilla extract until well combined. Pour this mixture into the dry ingredients.
- Form the Dough: Gently mix the wet and dry ingredients until a dough forms. Be careful not to overwork the dough, as this will result in tough scones.
- Shape and Cut Scones: Turn the dough out onto a lightly floured surface and gently knead it a few times. Pat the dough into a circle about 1 inch thick. Use a sharp knife or a bench scraper to cut the circle into 8 wedges.
- Prepare for Baking: Place the wedges onto the prepared baking sheet, leaving space between each one. Brush the tops with milk and sprinkle with turbinado sugar if desired for a sweet, crunchy topping.
- Bake: Bake in the preheated oven for 15-20 minutes, or until the scones are golden brown on top. Allow them to cool slightly on a wire rack before serving.
Extra Tips:
For the best results, verify the butter remains cold throughout the preparation process; this will help achieve the desired flaky texture. If you have the time, chill the cut scones in the refrigerator for about 15 minutes before baking. This step helps the butter firm up again, resulting in better rise and texture.
If fresh cranberries are available, they can be used instead of dried cranberries, but be sure to adjust the sugar according to your taste preferences. Enjoy your Festive Cranberry Orange Scones warm with a bit of butter or a drizzle of honey for an extra touch of sweetness.
Holiday Eggnog Muffins
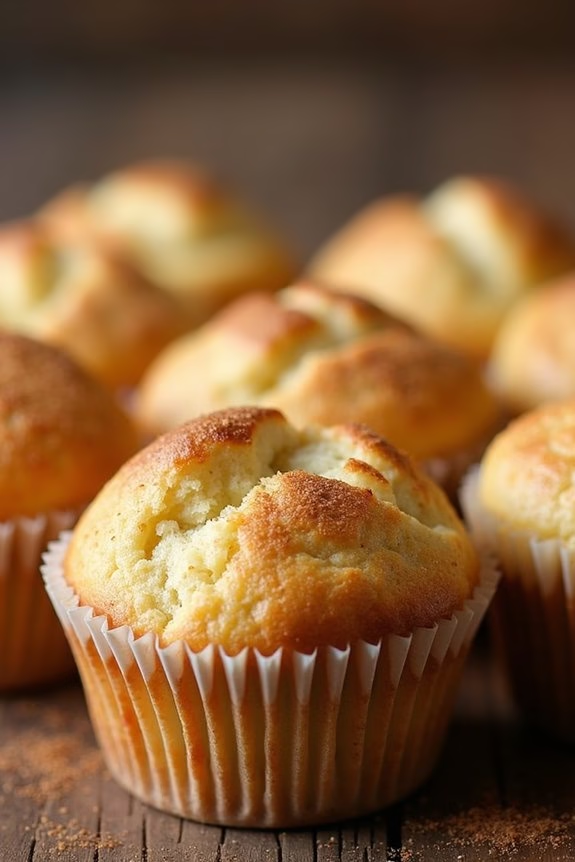
The holiday season is a time for joy, celebration, and, of course, indulging in delicious treats. One delightful way to start your Christmas morning is with Holiday Eggnog Muffins. These muffins capture the essence of the holidays with their moist texture and rich, spiced flavor. Perfectly spiced with nutmeg and cinnamon, and infused with the creamy goodness of eggnog, these muffins will fill your home with the warm scent of holiday cheer.
Ideal for a festive breakfast or a delightful snack, Holiday Eggnog Muffins are a crowd-pleaser that both adults and children will enjoy. Serve them warm with a pat of butter or a drizzle of honey for an extra touch of sweetness. Whether you’re hosting a family breakfast or just want to treat yourself to something special, these muffins are bound to become a holiday tradition.
Ingredients (serves 4-6):
- 2 cups all-purpose flour
- 1 tablespoon baking powder
- 1/2 teaspoon salt
- 1/2 teaspoon ground nutmeg
- 1/2 teaspoon ground cinnamon
- 1/2 cup granulated sugar
- 1/2 cup light brown sugar, packed
- 2 large eggs
- 1 cup eggnog
- 1/2 cup unsalted butter, melted and cooled
- 1 teaspoon vanilla extract
Cooking Instructions:
- Preheat and Prepare: Preheat your oven to 375°F (190°C). Line a muffin tin with paper liners or lightly grease it to prevent the muffins from sticking.
- Mix Dry Ingredients: In a large mixing bowl, combine the all-purpose flour, baking powder, salt, ground nutmeg, and ground cinnamon. Whisk these dry ingredients together to confirm they’re fully integrated.
- Prepare Wet Mixture: In a separate bowl, beat the eggs lightly. Add the granulated sugar, light brown sugar, eggnog, melted butter, and vanilla extract. Mix until the ingredients are well combined and smooth.
- Combine Mixtures: Gradually add the wet mixture to the dry ingredients. Stir gently with a spatula or a wooden spoon until just combined. Be cautious not to overmix, as this can make the muffins tough.
- Fill Muffin Cups: Evenly distribute the muffin batter into the prepared muffin tin, filling each cup about two-thirds full to allow room for the muffins to rise.
- Bake: Place the muffin tin in the preheated oven and bake for 18-20 minutes, or until a toothpick inserted into the center of a muffin comes out clean.
- Cool and Serve: Once baked, remove the muffins from the oven and let them cool in the tin for about 5 minutes. Transfer them to a wire rack to cool completely before serving.
Extra Tips:
For the best results, confirm that all your ingredients, especially the eggnog and eggs, are at room temperature before mixing. This helps the batter to blend more smoothly and results in a more even texture in the muffins.
If you want to add a festive touch, sprinkle a little extra cinnamon or nutmeg on top of the muffins before baking. Additionally, you can experiment by adding mix-ins such as raisins or chopped nuts for added texture and flavor. Enjoy these muffins fresh out of the oven for the most delightful holiday breakfast experience.
Buttery Croissants

There’s something delightfully indulgent about beginning your Christmas morning with the flaky, rich layers of a homemade buttery croissant. This traditional breakfast treat, with its golden-brown crust and soft, buttery interior, is the epitome of holiday luxury.
While it requires a bit of patience and precision, the reward is a basket of freshly baked croissants that fill your kitchen with an irresistible aroma. Perfect for sharing with family and friends, these croissants can be enjoyed plain, or with a spread of jam or butter for a truly decadent breakfast experience.
Making croissants is an art that involves creating a laminated dough, which is achieved by folding butter into the dough multiple times to create thin layers. It’s important to take your time with each step to guarantee the classic flaky texture that croissants are known for.
With a little effort and attention to detail, you can create these delicious pastries that will make your Christmas morning truly special.
Ingredients for 4-6 servings:
- 4 cups all-purpose flour
- 1/2 cup granulated sugar
- 1 tablespoon active dry yeast
- 1 teaspoon salt
- 1 1/4 cups warm milk (110°F)
- 1 cup unsalted butter, softened
- 1 egg, beaten (for egg wash)
Cooking Instructions:
1. Prepare the Dough: In a large mixing bowl, mix together the flour, sugar, yeast, and salt. Gradually add the warm milk and mix until a dough forms. Knead the dough on a floured surface for about 5-7 minutes until it’s smooth and elastic.
Place the dough in a greased bowl, cover with plastic wrap, and let it rise in a warm place for 1-2 hours, or until it has doubled in size.
2. Prepare the Butter: While the dough is rising, shape the softened butter into a 6-inch square by placing it between two sheets of parchment paper and rolling it out. Chill the butter square in the refrigerator until firm, but not hard, about 20 minutes.
3. Laminate the Dough: Once the dough has risen, roll it out on a floured surface into a 12-inch square. Place the chilled butter square diagonally onto the dough. Fold the corners of the dough over the butter to enclose it completely.
Roll out the dough into a rectangle approximately 20 inches long and 10 inches wide.
4. Fold the Dough: Fold the dough into thirds, like a letter. Wrap it in plastic wrap and refrigerate for 30 minutes. Repeat the rolling and folding process two more times, chilling it for 30 minutes between each fold.
5. Shape the Croissants: After the final chill, roll the dough into a 20×10 inch rectangle. Cut the dough into triangles with a base of about 5 inches. Roll each triangle from the base to the tip to form the classic croissant shape.
Place the croissants on a baking sheet lined with parchment paper.
6. Final Rise: Cover the croissants loosely with plastic wrap or a clean kitchen towel and let them rise at room temperature for about 1-2 hours, or until they’ve doubled in size.
7. Bake the Croissants: Preheat the oven to 375°F (190°C). Brush the croissants with the beaten egg to give them a shiny, golden finish. Bake for 15-20 minutes, or until the croissants are golden brown and have a crispy crust.
Remove from the oven and let them cool on a wire rack.
Extra Tips:
For the best results, ascertain all your ingredients are at the correct temperature, particularly the butter and milk. Consistency in temperature helps maintain the structure of the layers during the lamination process.
If your kitchen is warm, you may need to chill the dough more frequently to prevent the butter from melting. Additionally, for a festive touch, consider adding a sprinkle of almond flakes or a dash of cinnamon to the dough before rolling for a unique Christmas flavor.
Scrumptious Breakfast Strata

A breakfast strata is the perfect dish to serve on Christmas morning, as it’s both hearty and comforting. This layered dish combines bread, eggs, cheese, and your choice of meats and vegetables, creating a savory breakfast casserole that’s both filling and delicious.
Its versatility allows you to tailor it to your family’s preferences, making it a beloved tradition for many holiday gatherings. The best part is that it can be prepared the night before, allowing you to enjoy a stress-free morning with your loved ones.
This scrumptious breakfast strata will serve 4-6 people, providing a satisfying and festive start to your holiday celebrations. The combination of flavors and textures can be customized, but this classic version is sure to delight with its balance of savory ingredients and creamy custard.
Whether you opt for sausage, bacon, or a vegetarian version, the strata is a crowd-pleaser that complements any Christmas morning spread.
Ingredients:
- 6 cups cubed French or Italian bread (preferably day-old)
- 1 lb breakfast sausage or bacon, cooked and crumbled
- 1 cup diced bell peppers (red, green, or a mix)
- 1 cup diced onions
- 2 cups shredded cheddar cheese
- 8 large eggs
- 2 cups whole milk
- 1 teaspoon mustard powder
- 1 teaspoon salt
- 1/2 teaspoon black pepper
- 1/4 teaspoon nutmeg
- 2 tablespoons butter, for greasing
Cooking Instructions:
- Prepare the Baking Dish: Grease a 9×13-inch baking dish with butter to make sure the strata doesn’t stick.
- Layer the Ingredients: Spread half of the cubed bread evenly in the bottom of the prepared dish. Distribute half of the cooked sausage or bacon, bell peppers, onions, and shredded cheese over the bread. Repeat the layers with the remaining bread, sausage, bell peppers, onions, and cheese.
- Mix the Custard: In a large mixing bowl, whisk together the eggs, milk, mustard powder, salt, pepper, and nutmeg until well combined.
- Assemble the Strata: Pour the egg mixture evenly over the layered ingredients in the baking dish. Press down gently with a spatula to make sure the bread absorbs the custard.
- Refrigerate Overnight: Cover the dish with plastic wrap and refrigerate for at least 8 hours or overnight. This allows the flavors to meld and the bread to fully soak up the custard.
- Preheat the Oven: When ready to bake, preheat the oven to 350°F (175°C).
- Bake the Strata: Remove the plastic wrap and bake the strata in the preheated oven for 45-55 minutes, or until the top is golden brown and the center is set. A knife inserted into the middle should come out clean.
- Cool and Serve: Let the strata cool for about 10 minutes before slicing and serving. This will make it easier to cut and allow the flavors to settle.
Extra Tips:
For a vegetarian version, simply omit the sausage or bacon and add extra vegetables such as spinach, mushrooms, or tomatoes.
You can also experiment with different cheeses like Swiss or Gouda for a unique flavor profile. If you don’t have day-old bread, you can lightly toast fresh bread cubes to help them absorb the custard better.
Finally, remember to press down the layers firmly to make sure even cooking and a cohesive strata. Enjoy your delicious Christmas morning treat!
Sweet and Spicy Gingerbread Waffles
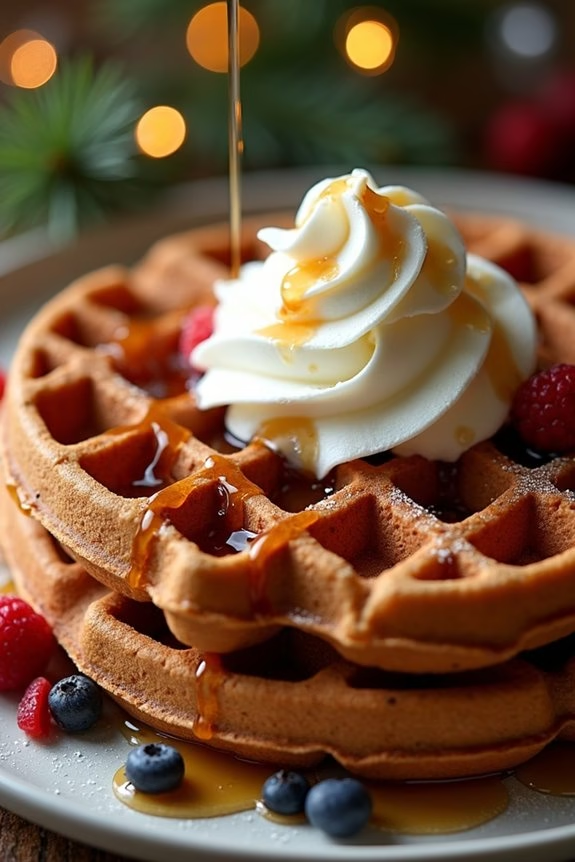
Wake up to the delightful smell of Sweet and Spicy Gingerbread Waffles this Christmas morning. These waffles are infused with the warm flavors of ginger, cinnamon, and nutmeg, offering a festive twist to the classic breakfast staple. With a crispy exterior and a soft, fluffy interior, these waffles are perfect for any holiday breakfast or brunch gathering. Topped with a dollop of whipped cream or a drizzle of maple syrup, they’re certain to become a cherished holiday tradition.
Gingerbread waffles aren’t only delicious but also easy to prepare, making them an ideal choice for a busy holiday morning. The combination of spices with the subtle sweetness of molasses creates a harmonious blend of flavors that’s both comforting and indulgent.
Whether you’re hosting family or enjoying a quiet morning, these waffles will fill your home with the comforting aromas of the season and bring a touch of holiday magic to your breakfast table.
Ingredients (Serves 4-6):
- 2 cups all-purpose flour
- 1 tablespoon baking powder
- 1 teaspoon baking soda
- 1/2 teaspoon salt
- 1 teaspoon ground cinnamon
- 1 teaspoon ground ginger
- 1/4 teaspoon ground nutmeg
- 1/4 teaspoon ground cloves
- 3 large eggs
- 1/4 cup brown sugar, packed
- 1/4 cup unsalted butter, melted
- 1/4 cup molasses
- 1 1/2 cups buttermilk
- 1 teaspoon vanilla extract
Instructions:
- Preheat the Waffle Iron: Begin by preheating your waffle iron to the desired setting. A medium-high setting is usually ideal for achieving a crispy exterior while making sure the inside is cooked through.
- Mix Dry Ingredients: In a large bowl, whisk together the all-purpose flour, baking powder, baking soda, salt, cinnamon, ginger, nutmeg, and cloves. Confirm the spices are evenly distributed throughout the flour mixture.
- Prepare Wet Ingredients: In another bowl, beat the eggs and add the brown sugar, melted butter, molasses, buttermilk, and vanilla extract. Mix until well combined and the mixture is smooth.
- Combine Ingredients: Gradually add the wet ingredients to the dry ingredients, stirring gently until just combined. Be careful not to overmix the batter; a few lumps are fine as they’ll smooth out during cooking.
- Cook the Waffles: Lightly grease the preheated waffle iron if necessary. Pour the batter onto the center of the iron, using enough to fill the grid without overflowing. Close the lid and cook until the waffles are golden brown and crisp, roughly 4-5 minutes, depending on your waffle iron.
- Serve Immediately: Carefully remove the waffles from the iron and serve them immediately to enjoy their crispy texture. Accompany with your favorite toppings such as whipped cream, maple syrup, or fresh berries.
Extra Tips:
For an extra touch of festivity, consider adding a pinch of allspice or cardamom to the spice mix for a more complex flavor profile. You can also make the batter a day ahead and refrigerate it overnight, which can enhance the flavors and save you time on Christmas morning.
If you have leftover waffles, they can be frozen and reheated in a toaster for a quick breakfast on busy days. Remember, the key to perfect waffles is confirming your waffle iron is well preheated, so be patient and allow it to reach the right temperature before starting.
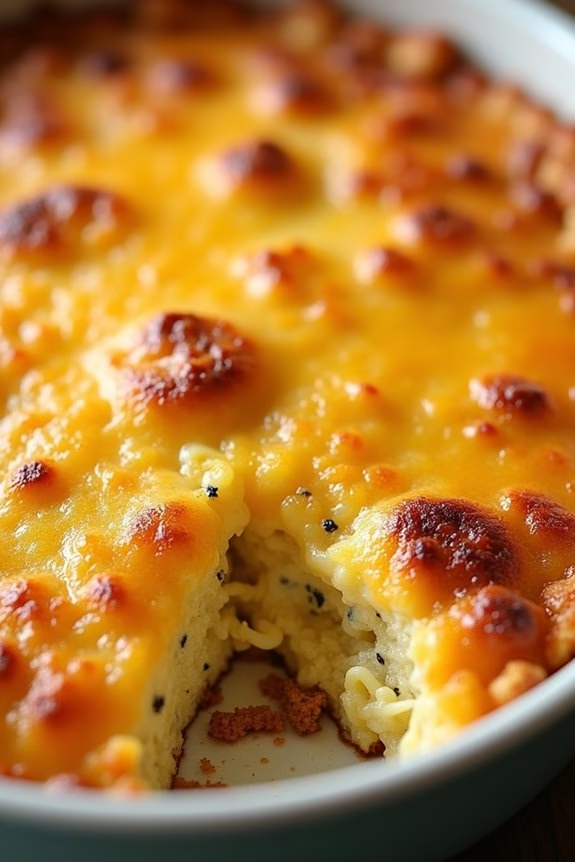
Cheesy Hash Brown Casserole

Cheesy Hash Brown Casserole is a comforting and indulgent dish perfect for a traditional Christmas breakfast. This warm and hearty casserole combines the savory flavors of hash browns, cheese, and creamy soup, making it an irresistible addition to your holiday spread. The golden, bubbly top layer of cheese paired with the soft, flavorful potatoes guarantees that this dish will be a hit with family and guests alike.
Ideal for serving a crowd, this casserole can be prepared in advance, allowing you to enjoy more time with loved ones on Christmas morning. This recipe yields a serving size suitable for 4-6 people, making it an excellent choice for a small family gathering or as part of a larger breakfast buffet. The combination of simple ingredients and easy preparation means that even novice cooks can create this delightful dish with confidence.
Whether you’re starting a new holiday tradition or simply looking for a delicious breakfast option, Cheesy Hash Brown Casserole is sure to become a beloved staple in your Christmas morning repertoire.
Ingredients:
- 1 (30-ounce) package of frozen hash brown potatoes, thawed
- 1 cup sour cream
- 1 (10.5-ounce) can condensed cream of chicken soup
- 2 cups shredded cheddar cheese
- 1/2 cup melted butter
- 1/4 cup chopped onion
- 1/2 teaspoon salt
- 1/4 teaspoon ground black pepper
- 1/2 cup crushed cornflakes (optional, for topping)
- 2 tablespoons melted butter (optional, for topping)
Cooking Instructions:
- Preheat the Oven: Start by preheating your oven to 350°F (175°C). This guarantees that the casserole will cook evenly once it’s placed inside.
- Prepare the Baking Dish: Lightly grease a 9×13-inch baking dish with cooking spray or butter to prevent sticking.
- Mix the Ingredients: In a large mixing bowl, combine the thawed hash browns, sour cream, cream of chicken soup, shredded cheddar cheese, melted butter, chopped onion, salt, and pepper. Stir until all ingredients are well combined.
- Assemble the Casserole: Spread the hash brown mixture evenly into the prepared baking dish, ensuring a uniform layer for even cooking.
- Optional Topping: If desired, mix the crushed cornflakes with 2 tablespoons of melted butter and sprinkle over the top of the hash brown mixture. This will add a crunchy texture to the casserole.
- Bake the Casserole: Place the baking dish in the preheated oven and bake for 45-50 minutes, or until the top is golden brown and the casserole is heated through.
- Cool and Serve: Once baked, remove the casserole from the oven and let it cool for a few minutes before serving. This will help the casserole set and make it easier to slice.
Extra Tips:
For a richer flavor, consider using sharp cheddar cheese, or mix in some Monterey Jack for a bit of variety. If you’re in the mood for a bit more crunch, the cornflake topping is highly recommended, but Panko breadcrumbs can also be used as an alternative.
If you prefer a meatier dish, you can add in some cooked bacon or diced ham for an extra burst of flavor. To save time on Christmas morning, you can prepare the casserole the night before and refrigerate it until you’re ready to bake. Just be sure to let it sit at room temperature for about 30 minutes before placing it in the oven to guarantee even cooking.
Warm Apple Cinnamon Oatmeal

Warm Apple Cinnamon Oatmeal is a comforting and aromatic breakfast dish perfect for Christmas morning. The combination of tender, sweet apples with the warmth of cinnamon makes this oatmeal a true holiday favorite. Not only does it fill your home with a delightful scent, but it also provides a nutritious and satisfying start to your day. This recipe is designed to serve 4-6 people, making it ideal for a family breakfast or a small gathering.
The oatmeal is made with hearty rolled oats cooked in a mixture of milk and water, which creates a creamy texture. Fresh apples are sautéed with cinnamon and a touch of brown sugar to enhance their natural sweetness, and they’re then mixed into the oatmeal. The final touch is a sprinkle of chopped nuts or dried fruits for added texture and flavor, resulting in a breakfast that’s both balanced and indulgent.
Ingredients (Serves 4-6):
- 2 cups rolled oats
- 4 cups milk (or milk alternative)
- 2 cups water
- 2 medium apples, peeled, cored, and chopped
- 1/4 cup brown sugar
- 2 teaspoons ground cinnamon
- 1 teaspoon vanilla extract
- 1/4 teaspoon salt
- 1/2 cup chopped walnuts or pecans (optional)
- 1/4 cup dried cranberries or raisins (optional)
Cooking Instructions:
- Prepare the Apples: In a medium-sized saucepan over medium heat, combine the chopped apples, brown sugar, and cinnamon. Cook for about 5-7 minutes, stirring occasionally, until the apples are tender and coated with the cinnamon-sugar mixture. Remove from heat and set aside.
- Cook the Oats: In a large saucepan, combine the rolled oats, milk, water, and salt. Bring to a gentle boil over medium-high heat, then reduce the heat to medium-low. Stir occasionally to prevent sticking, and cook for about 10-12 minutes until the oats are soft and creamy.
- Combine Ingredients: Once the oats are cooked, stir in the cooked apples, vanilla extract, and any optional nuts or dried fruits you desire. Mix until everything is well incorporated and heated through.
- Serve: Spoon the oatmeal into bowls and top with additional nuts, dried fruits, or a sprinkle of cinnamon if desired. Serve warm and enjoy the comforting flavors of apple and cinnamon.
Extra Tips:
For an added depth of flavor, consider sautéing the apples in a tablespoon of butter before adding the sugar and cinnamon. This will create a richer taste and a slightly caramelized texture.
If you prefer a sweeter oatmeal, adjust the brown sugar to your liking or drizzle some honey or maple syrup over the top before serving.
For those who like a bit of crunch, toasted nuts make a wonderful topping. Additionally, using a combination of different apple varieties can add complexity to the dish, balancing tart and sweet flavors.
Delightful Christmas Morning Frittata

Celebrate Christmas morning with a delightful and satisfying frittata that not only fills the kitchen with a mouthwatering aroma but also brings a festive touch to your breakfast table. This Christmas Morning Frittata is a versatile and colorful dish that combines a medley of fresh vegetables, savory meats, and creamy cheese, all bound together with fluffy eggs. Perfect for serving 4-6 people, this frittata is a wonderful way to kick off the holiday festivities, offering a balance of flavors and textures that will please everyone’s palate.
The beauty of a frittata lies in its simplicity and adaptability, making it an ideal choice for a busy Christmas morning. This recipe embraces seasonal ingredients, allowing for customization based on what you have on hand or prefer. Whether you’re hosting a small family gathering or an intimate brunch, this frittata is sure to impress with its vibrant presentation and delicious taste. Follow this easy recipe to create a memorable breakfast that your family and friends will love.
Ingredients for 4-6 servings:
- 8 large eggs
- 1/4 cup heavy cream
- Salt and pepper, to taste
- 1 tablespoon olive oil
- 1 cup diced bell peppers (red and green for a festive touch)
- 1/2 cup chopped onion
- 1 cup cooked and crumbled sausage or diced ham
- 1 cup fresh spinach leaves
- 1 cup shredded cheddar cheese
- 1/4 cup grated Parmesan cheese
Cooking Instructions:
- Preheat the Oven: Begin by preheating your oven to 375°F (190°C). This guarantees your frittata bakes evenly and achieves a golden top.
- Prepare the Egg Mixture: In a mixing bowl, whisk together the eggs, heavy cream, salt, and pepper until well combined. This mixture forms the base of your frittata, making it rich and fluffy.
- Sauté the Vegetables and Meat: Heat the olive oil in a large ovenproof skillet over medium heat. Add the diced bell peppers and chopped onion, and sauté until they’re soft and fragrant, about 5 minutes. Stir in the cooked sausage or ham and fresh spinach leaves, cooking until the spinach wilts.
- Combine Ingredients: Pour the egg mixture over the sautéed vegetables and meat in the skillet. Gently stir to distribute the ingredients evenly. Sprinkle the shredded cheddar cheese on top, ensuring even coverage.
- Bake the Frittata: Transfer the skillet to the preheated oven and bake for 20-25 minutes, or until the frittata is set and the top is lightly browned. Sprinkle the grated Parmesan cheese over the frittata during the last 5 minutes of baking for a savory finish.
- Serve the Frittata: Once baked, remove the skillet from the oven and let it cool slightly before slicing. Serve warm, garnished with additional cheese or fresh herbs if desired.
Extra Tips:
For best results, use a well-seasoned cast-iron skillet, which will help achieve a nice crust on the bottom of the frittata. Feel free to experiment with different fillings such as mushrooms, tomatoes, or even leftover roasted vegetables. If you prefer a vegetarian version, simply omit the sausage or ham.
Remember that frittatas are forgiving, so you can adapt this recipe to suit your tastes and dietary needs. Enjoy your delightful Christmas frittata with a side of crusty bread or a fresh fruit salad for a well-rounded festive breakfast.
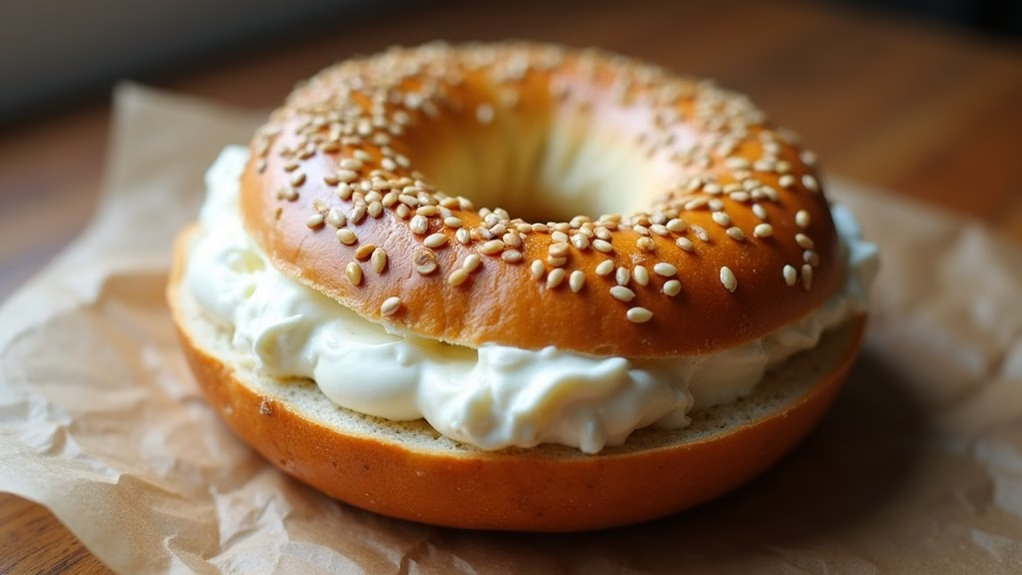
Homemade Bagels With Cream Cheese

Homemade Bagels With Cream Cheese is a delightful treat that can elevate any traditional Christmas breakfast. The process of making bagels from scratch is both rewarding and straightforward, allowing you to enjoy the warm, chewy texture that store-bought versions simply can’t replicate.
Pairing these homemade bagels with a generous spread of cream cheese creates a rich, savory experience that’s perfect for sharing with family and friends on a festive morning.
Bagels aren’t only versatile but also provide a satisfying base for a variety of toppings, including smoked salmon, capers, or even sweet jams if you’re feeling adventurous. By preparing your bagels at home, you have complete control over the ingredients, giving you the opportunity to tailor them to your personal taste preferences.
Whether you prefer them plain, sesame, poppy seed, or everything, this recipe will guide you through the steps to achieve the perfect bagel, ensuring a memorable and delicious Christmas breakfast.
Ingredients (Serves 4-6):
- 4 cups bread flour
- 1 tablespoon sugar
- 1 ½ teaspoons salt
- 1 package active dry yeast (2 ¼ teaspoons)
- 1 ¼ cups warm water (110°F/45°C)
- 2 tablespoons honey
- 1 egg white (for egg wash)
- Sesame seeds, poppy seeds, or everything seasoning (optional)
- 8 ounces cream cheese
Cooking Instructions:
- Prepare the Dough: In a large mixing bowl, combine the bread flour, sugar, and salt. In a small bowl, dissolve the yeast in warm water and let it sit for about 5 minutes until foamy. Mix the yeast mixture into the dry ingredients until a dough forms.
- Knead the Dough: Turn the dough out onto a floured surface and knead for about 10 minutes until smooth and elastic. Place the dough in a lightly oiled bowl, cover it with a damp cloth, and let it rise in a warm area for about 1 hour or until doubled in size.
- Shape the Bagels: Punch down the risen dough and divide it into 8 equal pieces. Roll each piece into a ball, then poke a hole through the center with your finger. Gently stretch the hole until it’s about 1-2 inches wide. Place the shaped bagels on a baking sheet.
- Boil the Bagels: Preheat your oven to 425°F (220°C). Meanwhile, bring a large pot of water to a boil and add the honey. Boil each bagel for 1 minute on each side, then remove with a slotted spoon and return them to the baking sheet.
- Bake the Bagels: Brush the boiled bagels with egg white and sprinkle with your choice of toppings. Bake in the preheated oven for 20-25 minutes or until golden brown. Let cool on a wire rack.
- Serve with Cream Cheese: Once cooled, slice the bagels and generously spread with cream cheese. Serve immediately and enjoy!
Extra Tips: When kneading the dough, make sure to add just enough flour to prevent sticking, but not so much that the dough becomes dry.
For a more flavorful bagel, you can let the shaped bagels rest in the refrigerator overnight before boiling and baking them the next day. This process, known as retarding, develops the dough’s flavor and texture.
If you prefer a softer crust, you can place a pan of water in the oven while the bagels bake to create steam. Enjoy your homemade bagels warm for the best taste and texture.