
There’s something truly magical about starting the day with a delightful pastry that not only warms the kitchen but also the heart. Think flaky almond croissants and luscious blueberry cream cheese danishes gracing your breakfast table. With simple techniques and mouthwatering flavors, even novice bakers can transform any morning into a special occasion. Curious about how these sweet creations come together? Let’s explore these delectable recipes that promise to impress and inspire.
Flaky Almond Croissants
Flaky Almond Croissants are a delightful pastry breakfast option that combines the rich, buttery layers of a traditional croissant with a sweet almond filling. These croissants are perfect for a weekend brunch or a special breakfast gathering, offering a sumptuous taste that pairs well with a cup of coffee or tea.
The process of making these pastries involves creating a laminated dough that results in the characteristic flakiness, along with preparing a smooth almond paste that adds a sweet and nutty flavor to each bite.
Creating Flaky Almond Croissants from scratch requires some patience and precision, but the end result is well worth the effort. Start by preparing the dough a day in advance, which will allow it to develop flavor and achieve the perfect texture. While the croissants bake to golden perfection, the almond filling melts slightly, creating a luscious interior.
With some careful attention to detail and a little practice, you’ll be able to produce croissants that rival those from your favorite bakery.
Ingredients for Serving 4-6 People
- 2 1/4 teaspoons active dry yeast
- 1/4 cup warm water (about 110°F)
- 3 1/2 cups all-purpose flour
- 1/4 cup sugar
- 1 teaspoon salt
- 1 cup cold unsalted butter, cut into small cubes
- 3/4 cup cold whole milk
- 1 egg, beaten (for egg wash)
- 1 cup almond meal (or finely ground almonds)
- 1/2 cup powdered sugar
- 1/4 cup unsalted butter, softened
- 1 egg
- 1 teaspoon almond extract
- Sliced almonds, for topping
Cooking Instructions
- Activate the Yeast: In a small bowl, dissolve the yeast in warm water and let it stand for about 5 minutes until it becomes frothy.
- Prepare the Dough: In a large bowl, mix together the flour, sugar, and salt. Add the yeast mixture and milk, and stir until a dough forms. Knead the dough on a floured surface for about 5 minutes until smooth. Wrap the dough in plastic wrap and refrigerate for at least 1 hour.
- Incorporate the Butter: On a lightly floured surface, roll out the dough into a rectangle about 1/4 inch thick. Distribute the cold butter cubes over two-thirds of the dough, then fold the dough into thirds like a letter. Roll out the dough again into a rectangle, fold again into thirds, and refrigerate for 30 minutes. Repeat this rolling and folding process two more times to create the layers.
- Prepare the Almond Filling: In a medium bowl, mix almond meal, powdered sugar, softened butter, egg, and almond extract until smooth and creamy. Set aside.
- Shape the Croissants: Roll out the dough into a large rectangle about 1/8 inch thick. Cut the dough into triangles (approximately 5 inches wide at the base). Spread a small amount of almond filling onto each triangle. Starting from the base, roll up each triangle and shape them into crescent shapes.
- Proof the Croissants: Place the shaped croissants on a baking sheet lined with parchment paper. Cover with a clean kitchen towel and let them rise at room temperature until doubled in size, about 1 to 2 hours.
- Bake the Croissants: Preheat your oven to 375°F (190°C). Brush each croissant with beaten egg for an even golden color. Sprinkle sliced almonds on top and bake for 15-20 minutes or until golden brown and flaky.
- Cool and Serve: Allow the croissants to cool slightly before serving. Enjoy them warm for the best flavor and texture.
Extra Tips
For the best results, make certain that your butter remains cold throughout the lamination process, as this helps create the layers that make croissants flaky. If you find the dough warming up during rolling and folding, refrigerate it for a few minutes to firm up the butter.
Additionally, when shaping the croissants, make sure to roll them tightly to maintain their shape during baking. If you prefer a stronger almond flavor, you can increase the almond extract slightly.
Finally, these croissants are best enjoyed fresh but can be reheated in a low oven if needed.
Classic Cinnamon Rolls
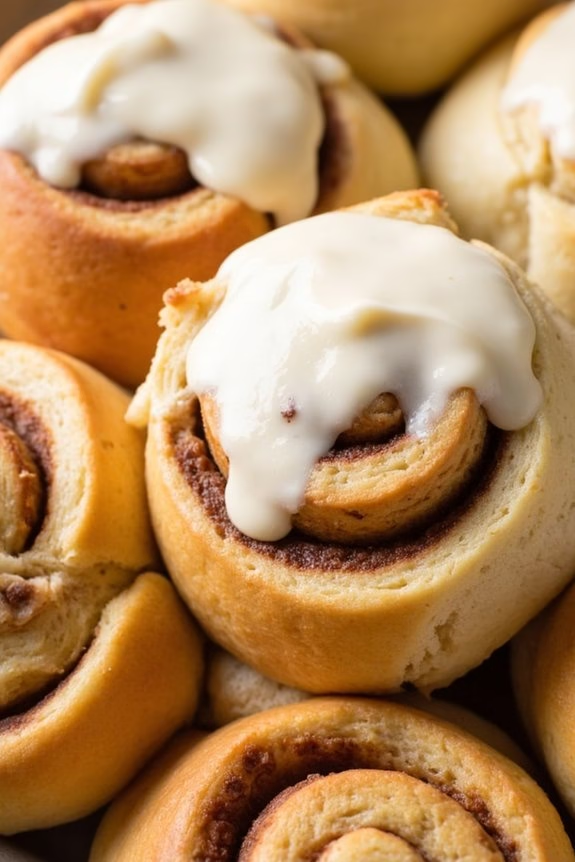
There’s nothing quite like the warm, comforting aroma of freshly baked cinnamon rolls wafting through your kitchen. These Classic Cinnamon Rolls are the perfect indulgence for a weekend breakfast or brunch. Soft, fluffy, and oozing with gooey cinnamon-sugar filling, they’re topped with a luscious cream cheese frosting that melts into every swirl. This recipe is designed to serve 4-6 people, making it perfect for sharing with family or friends.
To make these delightful rolls, you’ll begin by preparing a homemade yeast dough, which provides the perfect foundation for the rich cinnamon filling. The dough is rolled out, generously spread with butter, and sprinkled with a mixture of cinnamon and sugar before being rolled up into a log. Once baked, the cinnamon rolls are topped with a sweet and tangy cream cheese icing that perfectly complements the warm, spiced flavors. Follow the recipe below to bring these irresistible pastries to life.
Ingredients:
- 3 1/2 to 4 cups all-purpose flour
- 1/3 cup granulated sugar
- 2 1/4 teaspoons instant yeast
- 1 teaspoon salt
- 1 cup milk
- 1/4 cup unsalted butter
- 1 large egg
- 1/4 cup unsalted butter, softened (for filling)
- 2/3 cup packed brown sugar
- 1 1/2 tablespoons ground cinnamon
- 4 ounces cream cheese, softened
- 1/4 cup unsalted butter, softened (for frosting)
- 1 1/2 cups powdered sugar
- 1/2 teaspoon vanilla extract
- Pinch of salt
Instructions:
- Prepare the Dough: In a large mixing bowl, combine 2 cups of flour, granulated sugar, yeast, and salt. In a small saucepan, heat the milk and 1/4 cup butter over low heat until warm (about 110°F). Gradually add to dry ingredients, then add the egg. Beat on medium speed until smooth. Stir in enough remaining flour to form a soft dough.
- Knead the Dough: Turn the dough onto a floured surface; knead until smooth and elastic, about 6-8 minutes. Place in a greased bowl, turning once to grease the top. Cover and let rise in a warm place until doubled, about 1 hour.
- Prepare the Filling: Punch the dough down. Roll out into a 16×12-inch rectangle. Spread with softened butter; sprinkle with brown sugar and cinnamon.
- Roll and Cut the Dough: Roll up jelly-roll style, starting with a long side; pinch seam to seal. Cut into 12 slices. Place cut side down in a greased 13×9-inch baking pan. Cover and let rise until doubled, about 30 minutes.
- Bake: Preheat oven to 350°F (175°C). Bake rolls for 20-25 minutes or until golden brown. Remove from pan to a wire rack.
- Make the Frosting: In a small bowl, beat cream cheese and 1/4 cup butter until fluffy. Gradually add powdered sugar, vanilla, and a pinch of salt; beat until smooth. Spread over warm rolls.
Extra Tips:
For the softest cinnamon rolls, make certain the dough isn’t too sticky by gradually adding flour just until the dough is manageable. Avoid adding too much flour, as this can lead to denser rolls.
When letting the dough rise, a warm, draft-free environment speeds up the process. You can preheat your oven to 200°F, turn it off, and let the dough rise in the warm oven.
Remember, spreading the filling evenly will guarantee each bite is as flavorful as the previous one.
Finally, for a make-ahead option, prepare the rolls up to the baking step, cover them tightly, and refrigerate overnight. Let them come to room temperature for about 30 minutes before baking the next morning.
Blueberry Cream Cheese Danishes
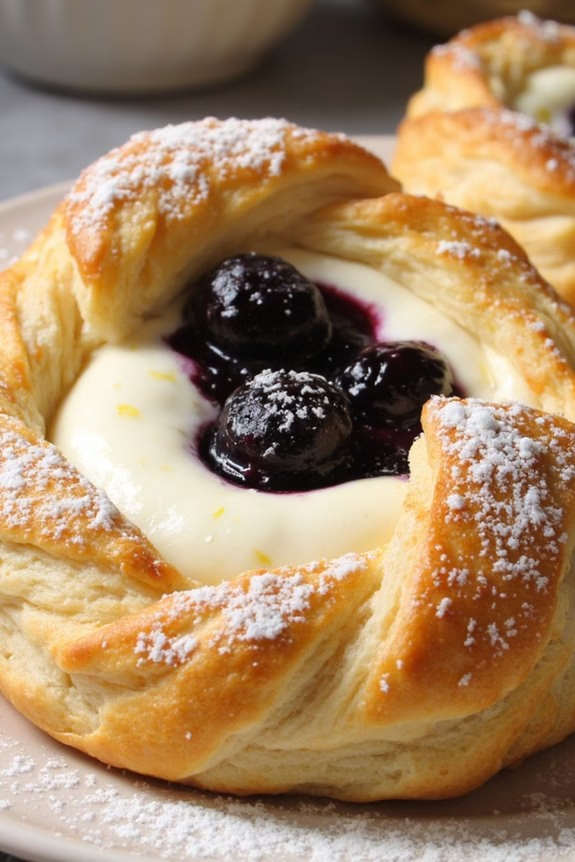
If you’re looking to start your morning with a touch of sweetness, Blueberry Cream Cheese Danishes are the perfect breakfast pastry. These delicious treats combine the tangy flavor of cream cheese with the sweet and slightly tart taste of fresh blueberries, all wrapped in a flaky, buttery pastry. They’re a delightful addition to any breakfast table and can easily be made at home with just a few simple ingredients.
Whether you’re preparing breakfast for your family or hosting a brunch, these danishes will definitely impress.
Making Blueberry Cream Cheese Danishes at home allows you to enjoy a bakery-quality pastry without leaving your kitchen. The preparation involves creating a cream cheese filling, topping it with fresh blueberries, and encasing it all in golden, puffed pastry. The result is a warm, deliciously aromatic treat that’s perfect for slow weekend mornings or special occasions.
Plus, with a serving size of 4-6 people, you can guarantee everyone gets a taste of this delightful breakfast dish.
Ingredients (Serves 4-6):
- 1 sheet of puff pastry, thawed
- 4 oz (113g) cream cheese, softened
- 1/4 cup (50g) granulated sugar
- 1 teaspoon vanilla extract
- 1 cup fresh blueberries
- 1 egg, beaten (for egg wash)
- 1 tablespoon milk
- 1 tablespoon lemon zest (optional)
- Powdered sugar for dusting (optional)
Instructions:
- Preheat the Oven: Preheat your oven to 400°F (200°C). Line a baking sheet with parchment paper for easy cleanup.
- Prepare the Cream Cheese Filling: In a medium bowl, combine the softened cream cheese, granulated sugar, and vanilla extract. Mix until smooth and creamy. If desired, stir in the lemon zest for an additional hint of citrus flavor.
- Prepare the Puff Pastry: On a lightly floured surface, roll out the puff pastry sheet to smooth any creases. Cut the pastry into 4-6 equal squares, depending on your preferred size.
- Assemble the Danishes: Place a spoonful of the cream cheese mixture in the center of each puff pastry square. Top it with a few fresh blueberries. Fold the corners of the pastry over the filling, pressing gently to seal.
- Apply the Egg Wash: In a small bowl, whisk together the beaten egg and milk. Brush this egg wash over the tops of the danishes to give them a golden color once baked.
- Bake the Danishes: Place the assembled pastries onto the prepared baking sheet. Bake in the preheated oven for 15-20 minutes, or until the pastries are puffed and golden brown.
- Cool and Serve: Allow the danishes to cool slightly on a wire rack. Dust with powdered sugar if desired before serving.
Extra Tips:
To guarantee the best results, always work with cold puff pastry; this prevents it from becoming sticky and hard to handle. If the pastry becomes too soft while you’re working with it, return it to the refrigerator for a few minutes.
Additionally, feel free to experiment with other fruit toppings such as raspberries or blackberries if you prefer a variation. For added convenience, you can prepare the cream cheese filling a day in advance and store it in the refrigerator, allowing you to assemble and bake the danishes quickly in the morning.
Enjoy your fresh, homemade Blueberry Cream Cheese Danishes with a hot cup of coffee or tea for a perfect start to your day.
Raspberry Puff Pastry Tarts
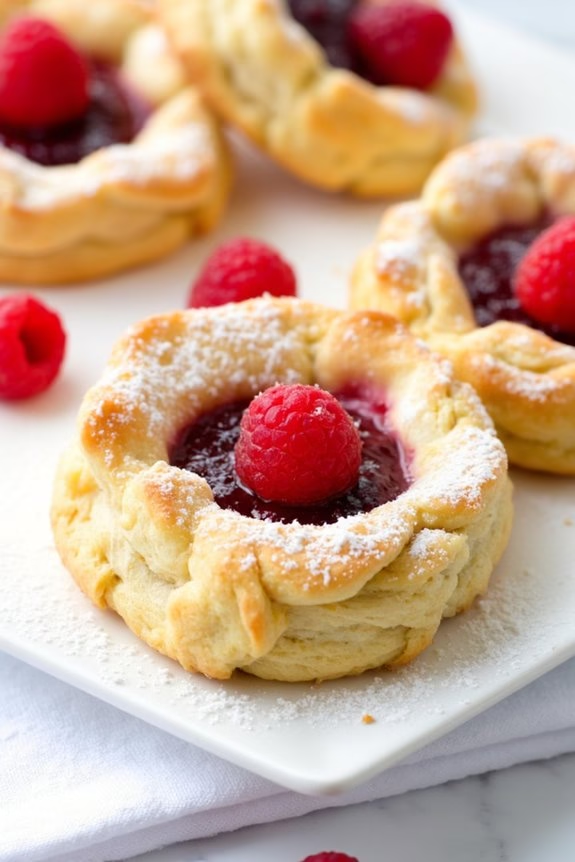
Raspberry Puff Pastry Tarts are a delightful and elegant breakfast treat that combines the buttery flakiness of puff pastry with the sweet and tangy burst of fresh raspberries.
These tarts are perfect for a leisurely weekend brunch or a special occasion breakfast, offering a balance of textures and flavors that are both sophisticated and satisfying. The ease of preparation, using store-bought puff pastry, makes them accessible even for novice bakers, while the vibrant raspberries provide a fresh, gourmet touch.
The tarts can be prepared in advance and baked fresh in the morning, filling your kitchen with the inviting aroma of baked pastry and fruit. Whether served with a sprinkle of powdered sugar, a dollop of whipped cream, or a scoop of vanilla ice cream, these tarts are sure to impress family and friends alike.
Their visually appealing presentation, combined with the delectable taste, makes them a standout addition to any breakfast or brunch table.
Ingredients for 4-6 servings:
- 2 sheets of frozen puff pastry, thawed
- 1 cup fresh raspberries
- 1/4 cup raspberry jam
- 1 tablespoon cornstarch
- 1/4 cup granulated sugar
- 1 teaspoon lemon zest
- 1 egg, beaten
- Powdered sugar for dusting (optional)
Cooking Instructions:
- Preheat the Oven: Begin by preheating your oven to 400°F (200°C). Line a baking sheet with parchment paper to prevent the pastries from sticking during baking.
- Prepare the Puff Pastry: On a lightly floured surface, roll out each sheet of puff pastry to smooth the seams. Using a sharp knife or a pizza cutter, divide each sheet into 4 equal squares, giving you a total of 8 squares.
- Mix the Raspberry Filling: In a medium bowl, combine the fresh raspberries, raspberry jam, cornstarch, granulated sugar, and lemon zest. Stir gently to mix, being careful not to crush the raspberries.
- Assemble the Tarts: Place about a tablespoon of the raspberry mixture in the center of each pastry square. Fold the corners of the pastry towards the center, over the filling, and gently press down to secure them.
- Brush with Egg Wash: Using a pastry brush, lightly brush the edges of the pastry with the beaten egg. This will give the tarts a golden-brown finish when baked.
- Bake the Tarts: Transfer the assembled tarts to the prepared baking sheet. Bake in the preheated oven for 15-20 minutes, or until the pastry is puffed and golden brown.
- Cool and Serve: Remove the tarts from the oven and let them cool on a wire rack for a few minutes. Dust with powdered sugar if desired before serving.
Extra Tips:
For the best results, confirm that your puff pastry is fully thawed but still cold when you start working with it, as this will make it easier to handle and shape.
If using frozen raspberries, make sure to thaw and drain them well to avoid extra moisture that could make the pastry soggy. Feel free to experiment by adding other fruits or a dollop of cream cheese to the filling for a richer flavor profile.
These tarts are equally delicious served warm or at room temperature, so they can be made slightly in advance and kept fresh for guests.
Chocolate-Filled Pastry Twists
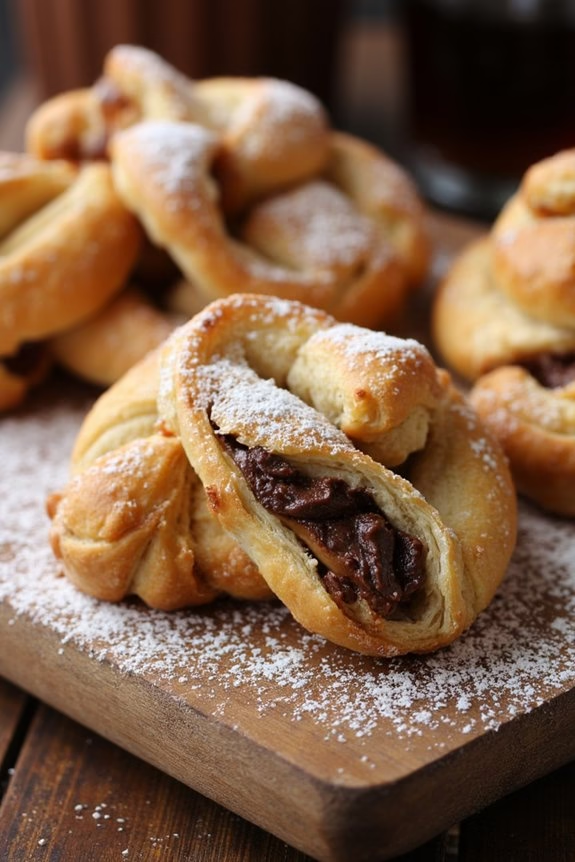
Indulge in the delightful combination of flaky pastry and rich chocolate with these Chocolate-Filled Pastry Twists. Perfect for a special breakfast or brunch, these pastries are sure to impress your family and friends with their elegant appearance and divine taste. The light, buttery layers of puff pastry are filled with smooth, melted chocolate, twisted into a delicate shape, and baked until golden brown.
Whether you’re a chocolate lover or just looking for a sweet treat to start your day, these twists are a perfect choice. The simplicity of this recipe makes it accessible even for novice bakers, yet it yields a result that looks and tastes like it came from a gourmet bakery. By using store-bought puff pastry, you save time and effort while still achieving that perfect flaky texture.
Once baked, these Chocolate-Filled Pastry Twists are best enjoyed warm, allowing the chocolate to remain melty and gooey, contrasting beautifully with the crisp pastry exterior.
Ingredients for 4-6 Servings:
- 1 package of puff pastry (2 sheets), thawed
- 1 cup of semi-sweet chocolate chips
- 1 egg
- 1 tablespoon water
- 2 tablespoons powdered sugar (optional, for dusting)
Cooking Instructions:
- Preheat the Oven: Begin by preheating your oven to 400°F (200°C) to guarantee it reaches the correct temperature by the time you have prepared your pastries.
- Prepare the Egg Wash: In a small bowl, beat the egg with a tablespoon of water to create an egg wash. This will be used to give your pastry a beautiful golden-brown finish.
- Roll Out the Pastry: On a lightly floured surface, roll out each puff pastry sheet to smooth out any creases and guarantee even baking. If the sheets are too thick, gently roll them out to about 1/8 inch thickness.
- Fill with Chocolate: Evenly sprinkle the chocolate chips over one half of each pastry sheet. Fold the other half over the chocolate chips and lightly press down to seal.
- Cut and Twist: Using a sharp knife or pizza cutter, cut the filled pastry into strips about 1 inch wide. Twist each strip gently and place them on a baking sheet lined with parchment paper, leaving some space between each twist.
- Brush with Egg Wash: Lightly brush each twist with the egg wash to promote browning and add a slight sheen to the finished pastry.
- Bake: Place the baking sheet in the preheated oven and bake for 12-15 minutes, or until the pastries are puffed and golden brown.
- Cool and Serve: Allow the pastry twists to cool slightly on a wire rack. If desired, dust with powdered sugar before serving warm.
Extra Tips:
For an extra layer of flavor, consider adding a pinch of cinnamon or a splash of vanilla extract to the chocolate chips before filling the pastry. If you prefer your pastries less sweet, opt for dark chocolate chips instead of semi-sweet.
Make sure to keep the puff pastry cold until you’re ready to use it, as the butter layers in the pastry are essential for achieving that perfect flaky texture. If your kitchen is particularly warm, you may want to chill the twists for a few minutes before baking to prevent the pastry from becoming too soft.
Apple Turnovers With Caramel Glaze

Apple Turnovers With Caramel Glaze are a delightful treat that can elevate any breakfast spread. These pastries feature a flaky, buttery crust filled with a sweet and spiced apple mixture, and are topped with a luscious caramel glaze that adds an extra layer of decadence. Perfect for a weekend brunch or a special occasion, these turnovers are sure to impress family and friends alike.
Making Apple Turnovers With Caramel Glaze is simpler than you might think, especially if you use store-bought puff pastry. The filling is made by cooking apples with sugar and spices until they’re tender and fragrant. Once the turnovers are baked to golden perfection, a homemade caramel glaze is drizzled over them, creating a stunning finish. This recipe serves 4 to 6 people, making it ideal for a small gathering.
Ingredients:
- 2 sheets of puff pastry, thawed
- 4 medium apples, peeled, cored, and diced
- 1/4 cup granulated sugar
- 1 teaspoon ground cinnamon
- 1/4 teaspoon ground nutmeg
- 1 tablespoon lemon juice
- 1 tablespoon cornstarch
- 1 egg (for egg wash)
- 1 tablespoon milk
- 1/2 cup caramel sauce (store-bought or homemade)
- 1 tablespoon unsalted butter
Cooking Instructions:
- Prepare the Filling: In a medium saucepan over medium heat, combine the diced apples, granulated sugar, cinnamon, nutmeg, and lemon juice. Cook for about 5-7 minutes, stirring occasionally until the apples are tender. Stir in the cornstarch and cook for an additional 2 minutes until the mixture thickens. Remove from heat and let it cool.
- Preheat the Oven: Preheat your oven to 400°F (200°C). Line a baking sheet with parchment paper.
- Roll Out the Pastry: On a lightly floured surface, roll out the thawed puff pastry sheets. Cut each sheet into four equal squares.
- Fill the Pastry: Spoon about 2 tablespoons of the apple filling into the center of each pastry square. Be careful not to overfill them.
- Seal the Turnovers: In a small bowl, whisk together the egg and milk to create an egg wash. Brush the edges of the pastry squares with the egg wash. Fold each square into a triangle and press the edges with a fork to seal.
- Bake the Turnovers: Place the turnovers on the prepared baking sheet. Brush the tops with the remaining egg wash. Bake in the preheated oven for 18-20 minutes, or until the pastries are golden brown and puffed.
- Prepare the Caramel Glaze: While the turnovers are baking, heat the caramel sauce and butter in a small saucepan over low heat until the butter has melted and the sauce is smooth. Remove from heat.
- Glaze the Turnovers: Once the turnovers are out of the oven, let them cool for a few minutes on a wire rack. Drizzle the warm caramel glaze over the top of each turnover.
Extra Tips:
For the best results, make sure your puff pastry is cold when you work with it; this guarantees the pastry remains flaky.
If you prefer a homemade caramel sauce, you can make it by melting sugar until it turns amber, then adding cream and butter.
For an added touch, sprinkle a pinch of sea salt over the caramel glaze to create a salted caramel effect. Enjoy these turnovers warm for the ultimate indulgence.
Lemon Poppy Seed Scones
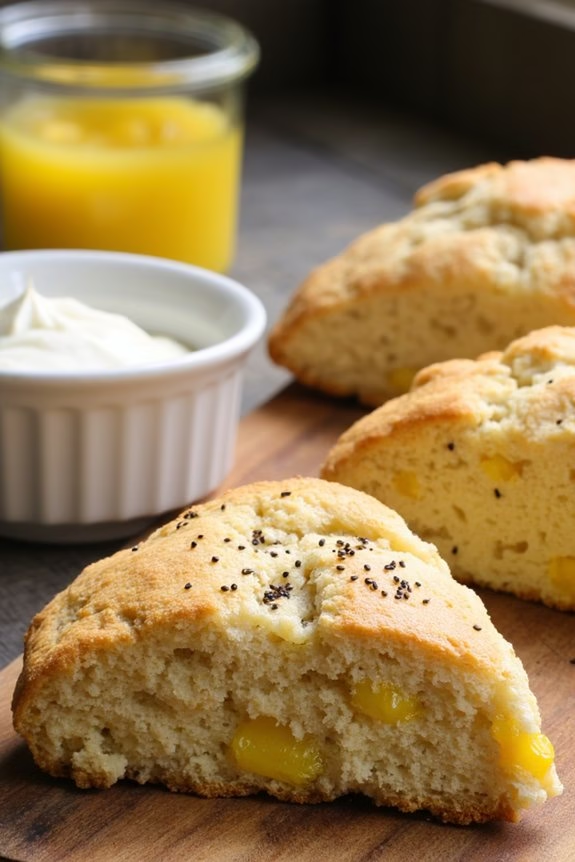
Lemon Poppy Seed Scones are a delightful way to start your morning or to enjoy during a cozy afternoon tea.
These scones are light, fluffy, and bursting with the bright, tangy flavor of lemon complemented by the subtle crunch of poppy seeds. Perfectly paired with a cup of tea or coffee, they make for a delicious and satisfying treat.
Whether you’re hosting a brunch or simply indulging in a homemade pastry, these scones are bound to impress.
Creating these scones from scratch is a straightforward process that yields impressive results. The key is to work quickly and not overwork the dough to guarantee that the scones are tender and flaky.
With the right ingredients and techniques, you’ll have a batch of irresistible Lemon Poppy Seed Scones ready to enjoy in no time.
Ingredients (Serves 4-6):
- 2 cups all-purpose flour
- 1/3 cup granulated sugar
- 1 tablespoon poppy seeds
- 1 tablespoon baking powder
- 1/2 teaspoon salt
- 6 tablespoons cold unsalted butter, cubed
- 1 large egg
- 1/2 cup heavy cream
- Zest of 2 lemons
- 1 tablespoon fresh lemon juice
- 1 teaspoon vanilla extract
- Extra heavy cream and sugar for topping
Cooking Instructions:
- Preheat the Oven: Start by preheating your oven to 400°F (200°C). Line a baking sheet with parchment paper or a silicone baking mat.
- Mix Dry Ingredients: In a large mixing bowl, whisk together the flour, sugar, poppy seeds, baking powder, and salt until well combined.
- Cut in Butter: Add the cold, cubed butter to the dry ingredients. Use a pastry cutter or your fingers to cut the butter into the flour mixture until it resembles coarse crumbs.
- Combine Wet Ingredients: In a separate bowl, whisk together the egg, heavy cream, lemon zest, lemon juice, and vanilla extract.
- Form the Dough: Make a well in the center of the dry ingredients and pour in the wet ingredients. Gently fold the mixture together using a spatula until a soft dough forms. Be careful not to overmix.
- Shape the Scones: Transfer the dough onto a lightly floured surface and gently knead it a few times to bring it together. Pat the dough into a circle about 1-inch thick. Use a sharp knife to cut the circle into 8 wedges.
- Prepare for Baking: Place the scones onto the prepared baking sheet, spacing them about 2 inches apart. Brush the tops with a little extra heavy cream and sprinkle with sugar for a beautiful golden finish.
- Bake: Bake the scones in the preheated oven for 15-18 minutes, or until they’re golden brown on top and cooked through. Remove from the oven and let them cool slightly on a wire rack.
Extra Tips:
For the best texture, make sure that your butter is very cold when you incorporate it into the flour mixture. This will help create those tender, flaky layers.
Additionally, when cutting the scones, try not to twist the knife as this can seal the edges and prevent them from rising properly.
If you prefer a stronger lemon flavor, you can add a bit more lemon zest or a few drops of lemon extract to the dough.
Enjoy your scones fresh from the oven with a dollop of clotted cream or a smear of lemon curd for an extra special treat.
Strawberry Jam-Filled Pastry Bites
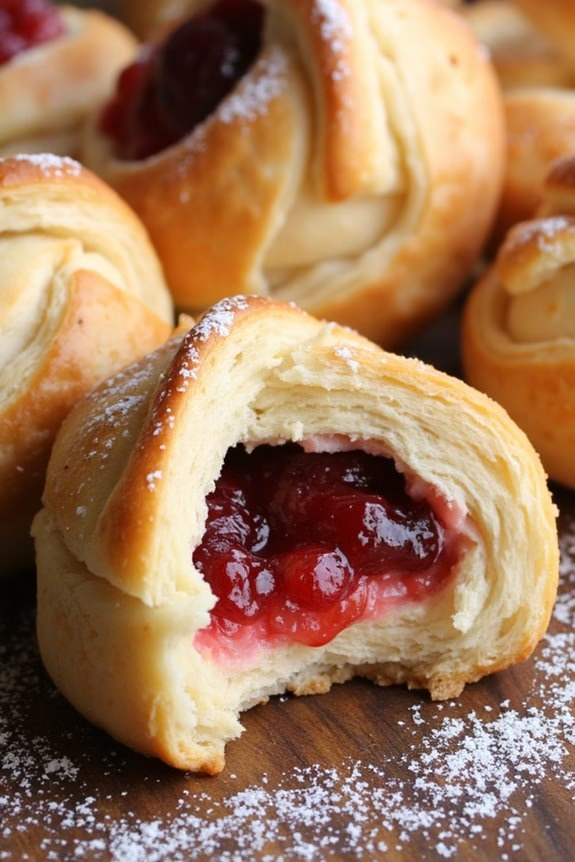
Strawberry Jam-Filled Pastry Bites are a delightful breakfast treat that combines the rich, flaky texture of puff pastry with the sweet, fruity taste of strawberry jam. These bites are perfect for a cozy morning with family or a special brunch gathering.
The recipe is simple enough for beginner bakers, yet impressive enough to satisfy even the most discerning pastry lover. With a golden-brown exterior and a sweet, gooey center, these pastries are sure to become a favorite in your breakfast rotation.
The key to making these pastries truly shine is selecting a high-quality strawberry jam that complements the buttery layers of pastry. The contrast of textures and flavors makes each bite an experience to savor.
These pastries are best enjoyed fresh out of the oven, but they can also be made ahead of time and reheated for a quick breakfast on busy mornings. With just a few ingredients and some easy steps, you can create a batch of these delightful Strawberry Jam-Filled Pastry Bites to serve 4-6 people.
Ingredients for 4-6 servings:
- 1 package of puff pastry (2 sheets)
- 1 cup strawberry jam
- 1 egg (for egg wash)
- 2 tablespoons all-purpose flour (for dusting)
- Powdered sugar (for dusting, optional)
Cooking Instructions:
- Preheat Oven: Begin by preheating your oven to 400°F (200°C). This guarantees that the pastries bake evenly and achieve a perfect golden-brown color.
- Prepare Puff Pastry: On a lightly floured surface, unfold the puff pastry sheets. Use a rolling pin to gently roll each sheet to remove any creases and to make them slightly thinner.
- Cut the Pastry: Cut each pastry sheet into 12 equal squares. This will give you 24 squares in total, which will be enough to make 12 pastry bites.
- Fill with Jam: Place a teaspoon of strawberry jam in the center of 12 of the squares. Be careful not to overfill, as the jam can easily spill over when baking.
- Seal the Pastries: Brush the edges of the squares with a little water. Place another pastry square on top of each jam-filled square. Use a fork to crimp the edges together, making sure that the jam is sealed inside.
- Egg Wash: Whisk the egg in a small bowl. Brush the top of each pastry with the egg wash to give them a shiny, golden finish when baked.
- Bake: Place the pastries on a baking sheet lined with parchment paper. Bake for 15-20 minutes or until the pastries are puffed up and golden brown.
- Cool and Serve: Allow the pastries to cool slightly before serving. If desired, dust with powdered sugar for an extra touch of sweetness.
Extra Tips:
For an extra layer of flavor, you can add a pinch of cinnamon or nutmeg to the strawberry jam before filling the pastries. If you prefer a different fruit flavor, feel free to substitute the strawberry jam with raspberry or apricot preserves.
When sealing the pastries, make sure the edges are tightly crimped to prevent the jam from leaking out during baking. If you find the pastries browning too quickly in the oven, you can cover them loosely with aluminum foil to prevent over-browning.
Enjoy these pastries warm for the best flavor and texture.
Maple Pecan Sticky Buns
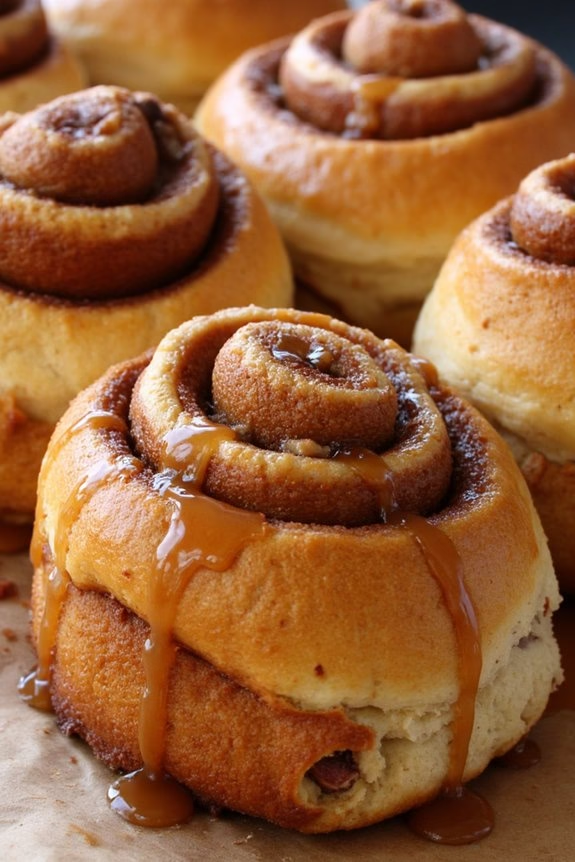
Maple Pecan Sticky Buns are a delightful way to start your morning with a sweet and nutty treat. These buns are made with a soft, buttery dough that’s rolled up with a generous filling of cinnamon sugar and pecans.
Once baked, they’re smothered in a decadent maple syrup glaze that seeps into every crevice, creating a gooey, sticky masterpiece. Perfect for a weekend brunch or a special breakfast occasion, these buns will fill your home with the irresistible aroma of maple and cinnamon.
The key to these buns is in the preparation of the dough, which should be soft and pliable, allowing it to rise beautifully and absorb the flavors of the filling and glaze. The pecans add a delightful crunch, complementing the soft texture of the buns, while the maple syrup glaze enhances the sweetness, making each bite an indulgent experience.
Serve these buns warm from the oven, and watch them disappear in no time.
Ingredients (Serves 4-6):
- 2 1/4 cups all-purpose flour
- 1 packet (2 1/4 teaspoons) active dry yeast
- 1/4 cup granulated sugar
- 1/2 teaspoon salt
- 1/2 cup whole milk
- 1/4 cup unsalted butter, melted
- 1 large egg
- 1 teaspoon vanilla extract
- 1/2 cup light brown sugar
- 2 teaspoons ground cinnamon
- 1 cup pecan halves, roughly chopped
- 1/3 cup unsalted butter, softened
- 1/2 cup maple syrup
Instructions:
- Prepare the Dough: In a large bowl, combine the flour, yeast, granulated sugar, and salt. In a separate bowl, mix the warm milk, melted butter, egg, and vanilla extract. Gradually add the wet ingredients to the dry ingredients, stirring until a dough forms. Knead the dough on a floured surface for about 5-7 minutes until smooth and elastic. Place in a greased bowl, cover, and let rise in a warm spot until doubled in size, about 1-1.5 hours.
- Prepare the Filling: While the dough is rising, mix the brown sugar and cinnamon in a small bowl. Set aside.
- Roll and Fill: Once the dough has risen, punch it down and roll it out on a floured surface into a rectangle about 12×15 inches. Spread the softened butter evenly over the dough, then sprinkle the cinnamon sugar mixture and chopped pecans over the top.
- Shape the Buns: Starting from the long side, roll the dough tightly into a log. Cut the log into 12 equal pieces and place them in a greased baking dish, leaving a little space between each piece. Cover and let rise again for 20-30 minutes.
- Bake: Preheat the oven to 350°F (175°C). Pour the maple syrup evenly over the buns. Bake for 25-30 minutes, or until golden brown and cooked through.
- Serve: Allow the buns to cool in the pan for about 5 minutes before serving. This helps the syrup to thicken slightly and become even stickier.
Extra Tips:
For a more intense pecan flavor, consider toasting the pecans lightly before mixing them into the filling. If you prefer a slightly less sweet version, reduce the amount of maple syrup in the glaze. Confirm all ingredients, especially the milk and butter, are at room temperature before starting to confirm the dough rises adequately.
Finally, for an extra touch of indulgence, drizzle additional maple syrup over the buns just before serving.
Peach and Cream Cheese Pastry Squares

Peach and Cream Cheese Pastry Squares are a delightful and easy-to-make breakfast treat that combines the sweet, juicy flavors of peaches with the creamy richness of cream cheese. These pastries are perfect for a weekend brunch or a special breakfast gathering, as they aren’t only delicious but also visually appealing.
The combination of flaky puff pastry, a creamy filling, and the natural sweetness of peaches makes for a satisfying and indulgent meal that will please both kids and adults alike.
This recipe is designed to serve 4-6 people, making it ideal for a small family or group of friends. The preparation involves simple ingredients that are readily available, and the steps are straightforward, guaranteeing that even novice bakers can achieve bakery-quality results.
The use of store-bought puff pastry considerably cuts down on preparation time, allowing you to focus on assembling the pastries and enjoying them fresh out of the oven.
Ingredients (Serves 4-6):
- 1 sheet of puff pastry (thawed)
- 1/2 cup cream cheese, softened
- 1/4 cup granulated sugar
- 1 teaspoon vanilla extract
- 2 ripe peaches, thinly sliced
- 1 tablespoon honey
- 1 egg (for egg wash)
- Powdered sugar (for dusting, optional)
- Fresh mint leaves (for garnish, optional)
Instructions:
- Preheat the Oven: Start by preheating your oven to 400°F (200°C). This guarantees that the oven is at the right temperature when you’re ready to bake the pastries.
- Prepare the Puff Pastry: Roll out the thawed puff pastry on a lightly floured surface to smooth out any creases. Cut the pastry into 8 equal squares and transfer them to a baking sheet lined with parchment paper.
- Make the Cream Cheese Filling: In a medium bowl, mix together the softened cream cheese, granulated sugar, and vanilla extract until smooth and creamy. This will be the luscious filling for your pastries.
- Assemble the Pastries: Spoon about a tablespoon of the cream cheese mixture onto the center of each puff pastry square. Arrange a few peach slices neatly on top of the cream cheese. Drizzle each pastry with a small amount of honey for added sweetness.
- Egg Wash: In a small bowl, beat the egg and brush it along the edges of each pastry square. This helps the pastries achieve a beautiful golden color when baked.
- Bake: Place the baking sheet in the preheated oven and bake for 15-20 minutes, or until the pastries are puffed up and golden brown. Keep an eye on them to prevent burning.
- Cool and Serve: Once baked, remove the pastries from the oven and allow them to cool slightly on a wire rack. Dust with powdered sugar and garnish with fresh mint leaves if desired. Serve warm or at room temperature.
Extra Tips:
For best results, make sure your puff pastry is properly thawed but still cold when you start working with it. This will make it easier to handle and guarantee it puffs up nicely while baking.
If peaches aren’t in season, you can substitute them with other fruits like nectarines or apricots. Additionally, using a silpat or parchment paper will prevent the pastries from sticking to the baking sheet and make cleanup easier.
Enjoy your Peach and Cream Cheese Pastry Squares with a cup of coffee or tea for a complete breakfast experience.
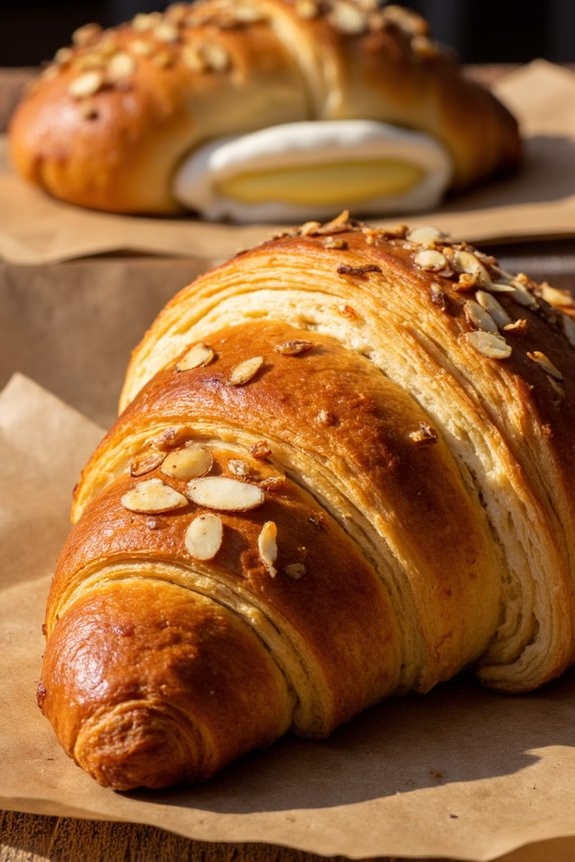
Honey-Glazed Bear Claws
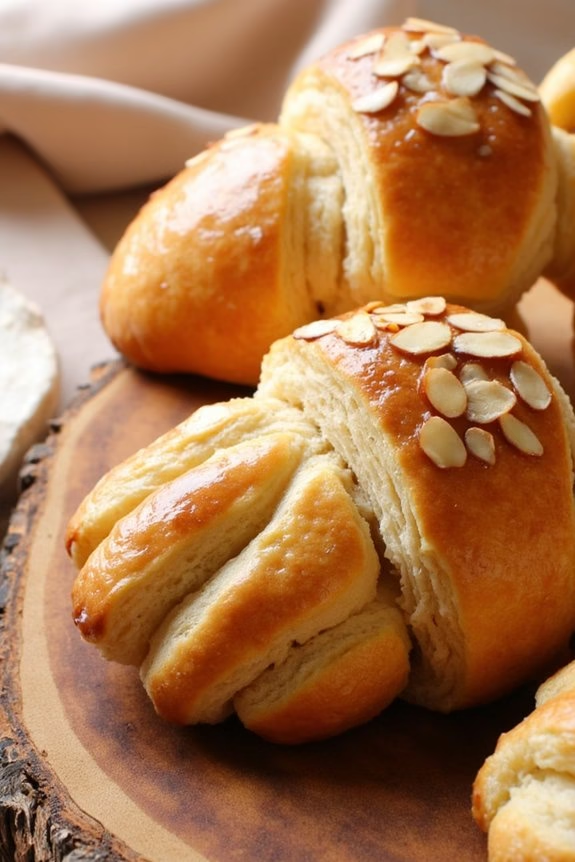
Honey-Glazed Bear Claws are a delectable treat perfect for a sweet breakfast or a tasty snack. These pastries are light, flaky, and filled with a delightful almond paste, then topped with a luscious honey glaze that adds just the right amount of sweetness.
Whether you’re hosting a brunch or just want to indulge in a special morning pastry, these bear claws are certain to impress your family and friends.
This recipe yields enough bear claws to serve 4-6 people, making it ideal for a small gathering or a cozy family breakfast. The process involves preparing a rich and buttery dough from scratch, filling it with a flavorful almond mixture, shaping the pastries into their signature claw shape, and finally, glazing them with honey for a beautiful finish.
With a little time and effort, you’ll have a batch of bakery-quality pastries right from your own kitchen.
Ingredients:
- 2 1/4 cups all-purpose flour
- 1/4 cup granulated sugar
- 1/2 teaspoon salt
- 1 cup unsalted butter, cold and cubed
- 2 1/4 teaspoons active dry yeast
- 1/4 cup warm milk
- 1/4 cup warm water
- 1 large egg
- 1 teaspoon vanilla extract
- 1 cup almond paste
- 1/4 cup honey
- 1/4 cup sliced almonds, toasted
- 1 egg (for egg wash)
- 1 tablespoon milk (for egg wash)
Cooking Instructions:
1. Prepare the Dough: In a large mixing bowl, combine the all-purpose flour, granulated sugar, and salt. Cut in the cold butter cubes using a pastry cutter or your fingers until the mixture resembles coarse crumbs.
In a separate bowl, dissolve the yeast in warm milk and warm water, and let it sit for about 5 minutes until frothy. Add the yeast mixture, egg, and vanilla extract to the flour mixture, and mix until a soft dough forms. Cover and refrigerate the dough for at least 1 hour.
2. Roll Out and Fill: Remove the dough from the refrigerator and roll it out on a floured surface into a large rectangle, about 1/4 inch thick. Spread the almond paste evenly over the surface of the dough.
Fold the dough in thirds like a letter, then turn it 90 degrees and roll it out again. Repeat the folding and rolling process once more.
3. Shape the Bear Claws: Cut the dough into strips about 3 inches wide. Make cuts along one side of each strip, about 1 inch apart, to create the “claw” effect.
Roll each strip from the uncut side towards the cut side to form a claw shape. Place the bear claws on a baking sheet lined with parchment paper.
4. Proof and Bake: Cover the bear claws with a clean kitchen towel and let them proof in a warm place for about 30 minutes. Preheat your oven to 375°F (190°C).
Brush each pastry with the egg wash (beaten egg mixed with a tablespoon of milk) to give them a golden color when baked. Bake for 15-18 minutes or until golden brown.
5. Glaze the Pastries: While the bear claws are baking, heat the honey until it becomes runny. Once the pastries are out of the oven, generously brush them with the warm honey and sprinkle with toasted sliced almonds.
Allow them to cool on a wire rack before serving.
Extra Tips:
For best results, verify that your butter is very cold before incorporating it into the flour mixture. This helps create a flaky texture in the pastry.
If you find the dough difficult to handle, you can refrigerate it for an additional 30 minutes to firm it up before rolling again. Toasting the almonds beforehand enhances their flavor and adds a delightful crunch to the bear claws.
Finally, be sure to serve these pastries slightly warm to enjoy their full flavor and flakiness.
Cherry Almond Breakfast Pastries
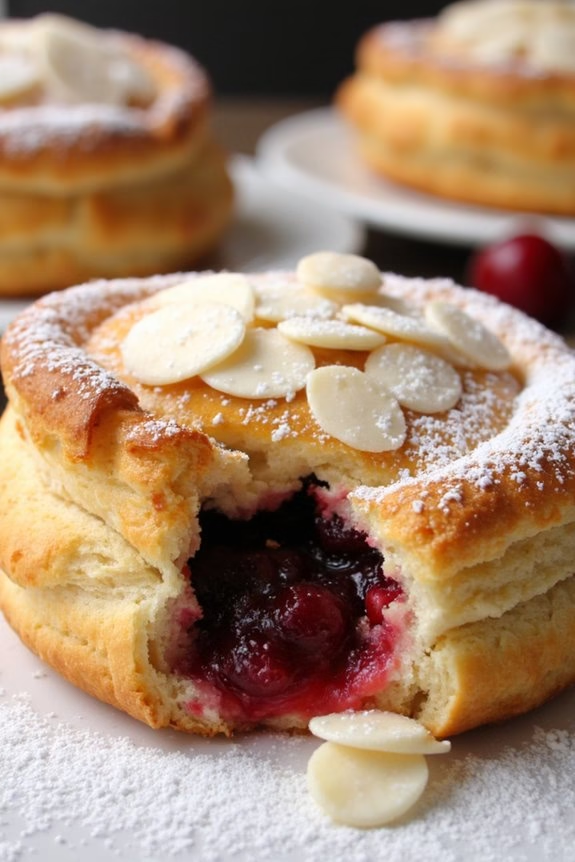
Cherry Almond Breakfast Pastries are a delightful way to start your day with a burst of flavor and a touch of elegance. These pastries combine the tartness of cherries with the nutty richness of almonds, all encased in a buttery, flaky pastry. Perfect for a weekend brunch or a special breakfast treat, these pastries are certain to impress your family or guests with their delicious taste and beautiful presentation.
The combination of sweet cherries and almond filling creates a harmonious blend that complements the light, crisp pastry shell. This recipe is designed to serve 4-6 people, making it ideal for a small gathering or family breakfast. By using pre-made puff pastry, you can save time while still achieving a bakery-quality result at home. Whether you serve them warm out of the oven or slightly cooled, these Cherry Almond Breakfast Pastries are a must-try for any pastry lover.
Ingredients for Cherry Almond Breakfast Pastries (serving size: 4-6 people):
- 1 sheet of puff pastry (thawed)
- 1 cup fresh or frozen cherries (pitted and halved)
- 1/4 cup granulated sugar
- 1 tablespoon cornstarch
- 1/2 teaspoon almond extract
- 1/4 cup almond paste
- 1 egg (beaten, for egg wash)
- 1 tablespoon sliced almonds
- Powdered sugar (for dusting)
Cooking Instructions:
- Prepare the Cherries: In a medium saucepan, combine the cherries, granulated sugar, and cornstarch. Cook over medium heat, stirring frequently, until the mixture thickens and the cherries are softened, about 5-7 minutes. Remove from heat and stir in the almond extract. Let it cool completely.
- Preheat the Oven: Preheat your oven to 400°F (200°C). Line a baking sheet with parchment paper.
- Roll Out the Puff Pastry: On a lightly floured surface, roll out the puff pastry to a 12×12 inch square. Cut the pastry into 4-6 equal squares, depending on the desired size of your pastries.
- Fill the Pastries: Place a small amount of almond paste in the center of each pastry square. Top with a spoonful of the cherry mixture.
- Shape the Pastries: Fold each square in half to form a triangle, or bring the corners to the center to form a parcel. Press the edges gently to seal, using a fork to crimp the edges for a decorative touch.
- Apply Egg Wash: Brush the tops of the pastries with the beaten egg to guarantee a golden-brown finish. Sprinkle a few sliced almonds on top of each pastry.
- Bake the Pastries: Transfer the pastries to the prepared baking sheet. Bake in the preheated oven for 15-18 minutes, or until the pastries are puffed and golden brown.
- Cool and Serve: Allow the pastries to cool slightly on a wire rack. Dust with powdered sugar before serving.
Extra Tips:
For the best results, make sure your puff pastry is properly thawed before use, as this will allow it to rise and puff up nicely in the oven. If using frozen cherries, thaw them beforehand and drain any excess liquid to avoid a soggy filling.
You can also experiment by adding a touch of cinnamon or cardamom to the cherry mixture for an extra layer of flavor. Finally, these pastries can be made ahead of time and reheated gently in the oven before serving for a fresh, warm treat.
Nutella-Stuffed Pastry Pockets

Nutella-Stuffed Pastry Pockets are a delightful treat perfect for breakfast or brunch. These delicious pastries are made with puff pastry sheets filled with rich, creamy Nutella, creating a gooey and indulgent center that pairs perfectly with the flaky, buttery layers of pastry.
Perfectly portable, they make an excellent option for a breakfast on-the-go or a sweet addition to a leisurely weekend brunch at home.
The beauty of Nutella-Stuffed Pastry Pockets lies in their simplicity and versatility. With just a few ingredients, you can create a show-stopping breakfast dish that will impress family and friends.
Whether you’re hosting a brunch or simply want to enjoy a special breakfast at home, these pastry pockets are sure to satisfy any sweet tooth.
Ingredients (Serving Size: 4-6 people):
- 2 sheets of puff pastry, thawed
- 1 cup of Nutella
- 1 egg
- 1 tablespoon of milk
- Powdered sugar, for dusting
- Optional: fresh berries for serving
Cooking Instructions:
- Preheat the Oven: Begin by preheating your oven to 400°F (200°C). This will guarantee that your pastry pockets bake evenly and develop a nice, golden crust.
- Prepare the Pastry: Roll out the thawed puff pastry sheets on a lightly floured surface. Using a sharp knife or round cutter, cut each sheet into six equal squares (for a total of 12 squares).
- Fill the Pastry: Place about a tablespoon of Nutella in the center of half of the pastry squares. Be careful not to overfill, as this can cause the Nutella to leak out during baking.
- Seal the Pockets: Brush the edges of each filled square with a little water. Place another pastry square on top and press the edges together to seal. Use a fork to crimp the edges, ensuring a tight seal.
- Egg Wash: In a small bowl, whisk together the egg and milk to make an egg wash. Brush the top of each pastry pocket with this mixture. This will give the pastries a beautiful golden-brown finish.
- Bake: Place the sealed pastry pockets on a baking sheet lined with parchment paper. Bake in the preheated oven for 15-20 minutes, or until they’re puffed up and golden brown.
- Cool and Serve: Allow the pastry pockets to cool for a few minutes on a wire rack. Dust with powdered sugar before serving. For an extra touch, serve with fresh berries if desired.
Extra Tips:
- Make sure your puff pastry is properly thawed but still cold to guarantee it puffs up nicely in the oven.
- If you prefer a less sweet filling, you can mix the Nutella with a bit of cream cheese to mellow the sweetness.
- These pastries are best enjoyed fresh, but you can store leftovers in an airtight container for up to two days. Reheat them in a warm oven to regain some crispiness.
- Experiment with different fillings like jam, peanut butter, or fruit preserves for variety.
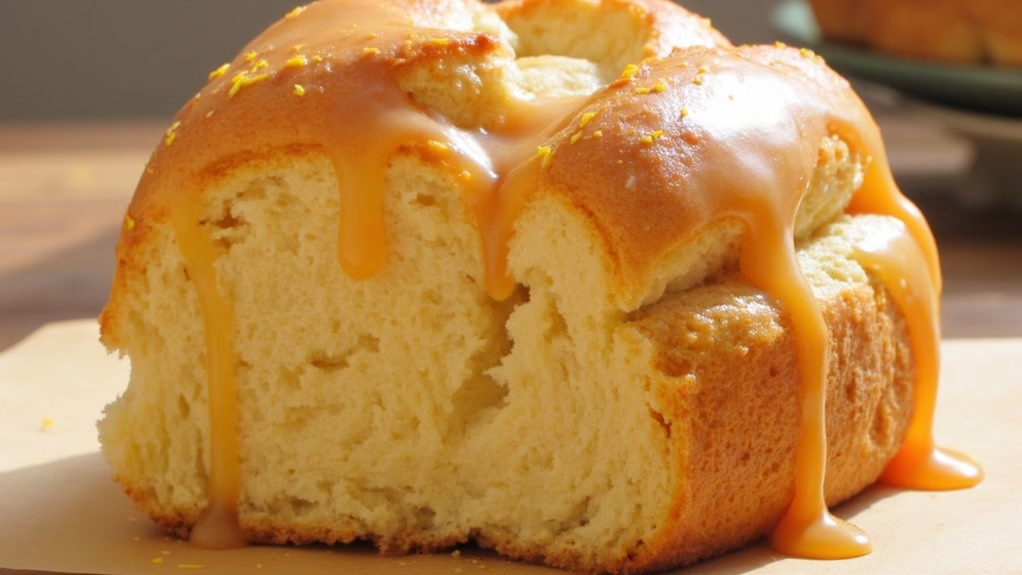
Glazed Orange Sweet Rolls
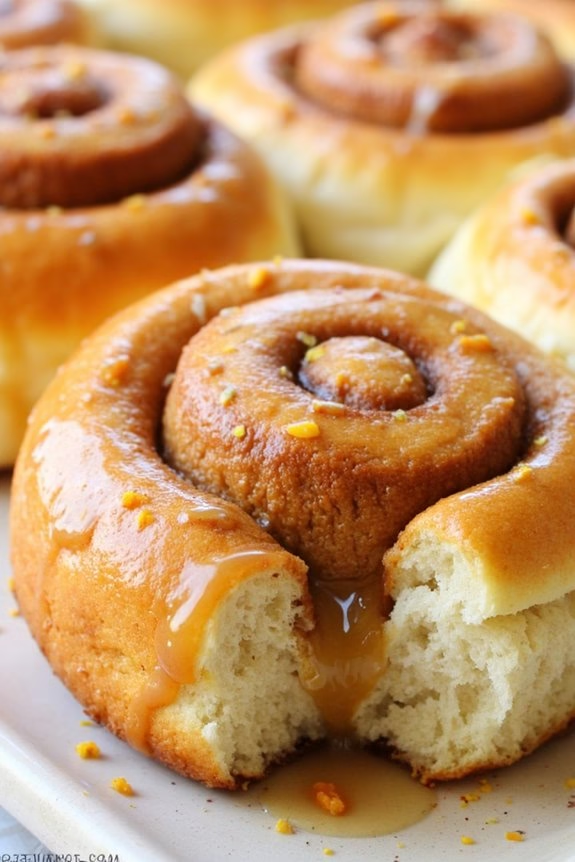
Glazed Orange Sweet Rolls are a delightful breakfast treat that combines the bright, citrusy flavor of oranges with the comforting warmth of freshly baked rolls. These rolls are perfect for a weekend brunch or a special breakfast gathering with family and friends. The soft, fluffy dough is infused with orange zest, and the rolls are topped with a luscious orange glaze that enhances their sweet, tangy flavor.
Whether you enjoy them fresh out of the oven or save some for later, these sweet rolls are bound to brighten your morning.
Preparing Glazed Orange Sweet Rolls involves making a yeast dough, allowing it to rise, and then rolling it out with a delicious orange filling before baking. The process is straightforward and well worth the effort for the delightful results. These rolls can be made in advance and baked fresh in the morning, guaranteeing that your kitchen is filled with the irresistible aroma of fresh pastries.
Here’s how you can make this delectable breakfast dish for a serving size of 4-6 people.
Ingredients:
- 3 1/4 cups all-purpose flour
- 1/4 cup granulated sugar
- 1 packet (2 1/4 tsp) active dry yeast
- 1/2 teaspoon salt
- 1/2 cup milk
- 1/4 cup unsalted butter (melted)
- 1 large egg
- Zest of 1 large orange
- 1/2 cup orange juice
- 1/2 cup brown sugar
- 1 teaspoon cinnamon
- 1/4 cup unsalted butter (softened)
- 1 1/2 cups powdered sugar
- 2 tablespoons orange juice (for glaze)
- 1 teaspoon vanilla extract
Instructions:
- Prepare the Dough: In a large mixing bowl, combine flour, granulated sugar, yeast, and salt. In a separate bowl, mix milk, melted butter, egg, and orange zest. Gradually add the wet mixture to the dry ingredients, stirring until a soft dough forms. Knead the dough on a floured surface for about 5-7 minutes until it’s smooth and elastic.
- First Rise: Place the kneaded dough in a lightly greased bowl, cover it with a clean kitchen towel, and let it rise in a warm place for about 1-1.5 hours, or until it has doubled in size.
- Prepare the Filling: While the dough is rising, mix the brown sugar, cinnamon, and softened butter in a small bowl to create a spreadable paste.
- Roll and Fill the Dough: Once the dough has risen, roll it out on a floured surface into a rectangle about 12×16 inches in size. Spread the brown sugar and cinnamon mixture evenly over the dough, leaving a small border around the edges.
- Shape the Rolls: Starting from one of the longer sides, roll the dough tightly into a log. Cut the log into 12 evenly sized pieces and place them in a greased baking dish.
- Second Rise: Cover the baking dish with a towel and let the rolls rise again for 30 minutes. Preheat your oven to 350°F (175°C) during this time.
- Bake the Rolls: Once the rolls have risen, bake them in the preheated oven for 20-25 minutes or until they’re golden brown and cooked through.
- Make the Glaze: While the rolls are baking, prepare the glaze by mixing powdered sugar, orange juice, and vanilla extract in a small bowl until smooth.
- Glaze the Rolls: Once the rolls are out of the oven, let them cool for about 5 minutes before drizzling the orange glaze over the top. Serve warm.
Extra Tips:
For best results, verify that all your ingredients are at room temperature before you start, as this helps the dough to rise more effectively.
If you prefer a stronger orange flavor, you can add more zest or substitute some of the milk with additional orange juice.
These rolls can be made a day in advance up to the point of the second rise; simply cover them and store them in the refrigerator overnight, then bake fresh in the morning. This makes them a convenient option for busy mornings or when you want to impress guests with minimal effort.