

Who else loves the magic of dump cakes?
These desserts have become my go-to for impressing guests without breaking a sweat.
Just a handful of ingredients, like cake mix and fruit, come together to create a dessert that’s both moist and delightfully crispy on top.
From the zesty Classic Cherry to the decadent Chocolate Peanut Butter Bliss, each recipe brings something unique to the table.
Ready to uncover the little secrets that make each one shine?

Classic Cherry Dump Cake
Classic Cherry Dump Cake Recipe
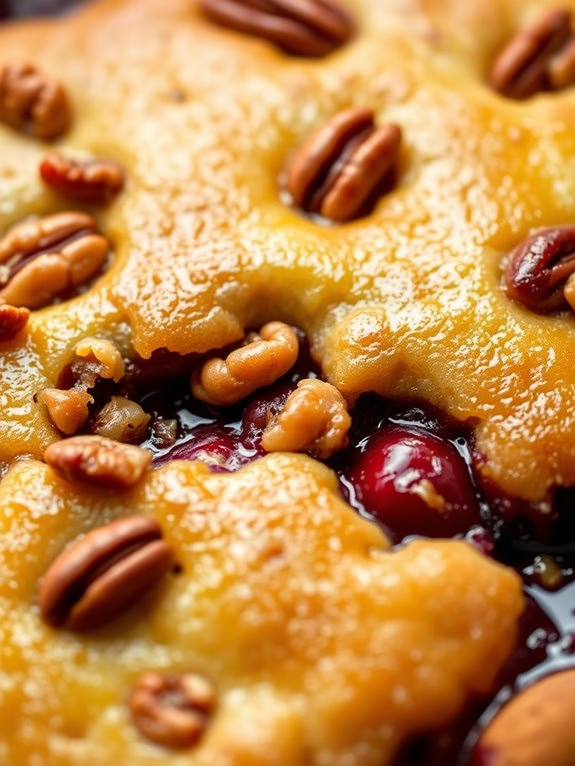
The Classic Cherry Dump Cake is an easy and delightful dessert that requires minimal effort while delivering maximum flavor. This beloved treat combines luscious cherries with a buttery cake mix, creating a moist, fruity cake with a golden, crispy top.
It’s called a “dump” cake because of its simple preparation method—just dump the ingredients into a baking dish, bake, and enjoy. Perfect for family gatherings or potlucks, this cake is sure to be a crowd-pleaser.
Whether you’re a seasoned baker or a kitchen novice, you’ll appreciate the simplicity and convenience of this recipe. In just a few steps, you’ll have a delicious dessert that tastes like it took hours to prepare.
With its sweet, tart cherries and buttery cake layer, this Classic Cherry Dump Cake is a delightful way to end any meal. Serve it warm with a scoop of vanilla ice cream or a dollop of whipped cream for an extra touch of indulgence.
Ingredients for 4-6 Servings:
- 1 (21-ounce) can of cherry pie filling
- 1 (15.25-ounce) box of yellow cake mix
- 1/2 cup unsalted butter, melted
- 1/3 cup chopped pecans (optional)
Cooking Instructions:
- Preheat the Oven: Begin by preheating your oven to 350°F (175°C) to make certain it’s hot and ready for baking.
- Prepare the Baking Dish: Take a 9×13-inch baking dish and lightly grease it with cooking spray or butter. This will prevent the cake from sticking to the dish.
- Add the Cherry Filling: Open the can of cherry pie filling and spread it evenly across the bottom of the greased baking dish. Make sure the cherries are distributed evenly to make certain each bite gets that delicious cherry flavor.
- Layer the Cake Mix: Sprinkle the dry yellow cake mix evenly over the layer of cherry pie filling. Try not to stir or mix the layers; just let the cake mix sit on top of the cherries.
- Add Butter and Nuts: Drizzle the melted butter evenly over the top of the cake mix. If desired, sprinkle the chopped pecans over the top for added texture and flavor.
- Bake the Cake: Place the baking dish in the preheated oven and bake for 40-45 minutes, or until the topping is golden brown and the cherry filling is bubbling at the edges.
- Cool and Serve: Once baked, remove the cake from the oven and let it cool slightly before serving. This will allow the flavors to meld together and make it easier to serve.
Extra Tips:
When preparing your Classic Cherry Dump Cake, be sure to evenly distribute the butter over the cake mix to make certain a perfectly golden crust.
If you prefer a different fruit, feel free to substitute the cherry pie filling with another flavor, such as apple or blueberry. For a richer flavor, try using a white or butter-flavored cake mix instead of yellow.
Finally, storing any leftover cake in the refrigerator will make certain it stays fresh for a few days, and you can reheat it in the microwave for a warm and comforting treat.
Apple Cinnamon Delight
Apple Cinnamon Delight is a delicious and easy-to-make dessert that combines the classic flavors of apple and cinnamon, resulting in a warm and comforting treat. This dump cake is perfect for those who love the simplicity of baking without compromising on taste. The beauty of a dump cake is that you don’t need to be an expert baker to create something wonderful; simply “dump” the ingredients into a baking dish, and let the oven do the work.
Apple Cinnamon Delight is ideal for cozy family gatherings or as a delightful end to any meal. The combination of tart apples, sweet cinnamon, and a buttery cake mix creates a dessert that feels like a warm hug. The apples become tender and juicy as they bake, while the cinnamon infuses the cake with a wonderful aroma and flavor. The top layer becomes golden and slightly crisp, offering a lovely contrast to the soft fruit beneath.
With just a few pantry staples and minimal preparation time, this dessert is perfect for serving 4-6 people, making it a fantastic choice for small gatherings or a family dinner.
Ingredients for a serving size of 4-6 people:
- 2 cans (21 oz each) of apple pie filling
- 1 teaspoon ground cinnamon
- 1 box (15.25 oz) yellow cake mix
- ¾ cup unsalted butter, melted
- ½ cup chopped walnuts (optional)
Cooking Instructions:
- Preheat the Oven: Begin by preheating your oven to 350°F (175°C). This guarantees that the dessert will cook evenly and be ready for serving in a timely manner.
- Prepare the Baking Dish: Lightly grease a 9×13-inch baking dish with butter or non-stick spray. This will prevent the cake from sticking to the dish, making it easier to serve.
- Combine the Filling: In the prepared baking dish, spread the apple pie filling evenly. Sprinkle the ground cinnamon over the apples, guaranteeing an even distribution to enhance the flavor.
- Add the Cake Mix: Evenly sprinkle the dry yellow cake mix over the apple and cinnamon mixture. It’s important not to stir the cake mix into the apples, as this will help create the layered texture of the dump cake.
- Add Butter and Nuts: Drizzle the melted butter over the top of the cake mix, attempting to cover as much of the surface as possible. If using, scatter the chopped walnuts over the top for added crunch and flavor.
- Bake the Cake: Place the baking dish in the preheated oven and bake for 45-50 minutes. The cake is done when the top is golden brown and the filling is bubbling at the edges.
- Cool and Serve: Once baked, remove the dish from the oven and allow it to cool for at least 10 minutes before serving. This will help the filling to set slightly, making it easier to dish out.
Extra Tips: For an added twist, consider incorporating a splash of vanilla extract into the apple pie filling for extra depth of flavor. If you prefer a less sweet dessert, use unsweetened apple pie filling or adjust the amount of cinnamon to suit your taste.
Serve this Apple Cinnamon Delight warm with a scoop of vanilla ice cream or a dollop of whipped cream to complement the flavors beautifully. Enjoy your delicious and easy-to-make dessert!
Peach Cobbler Dump Cake
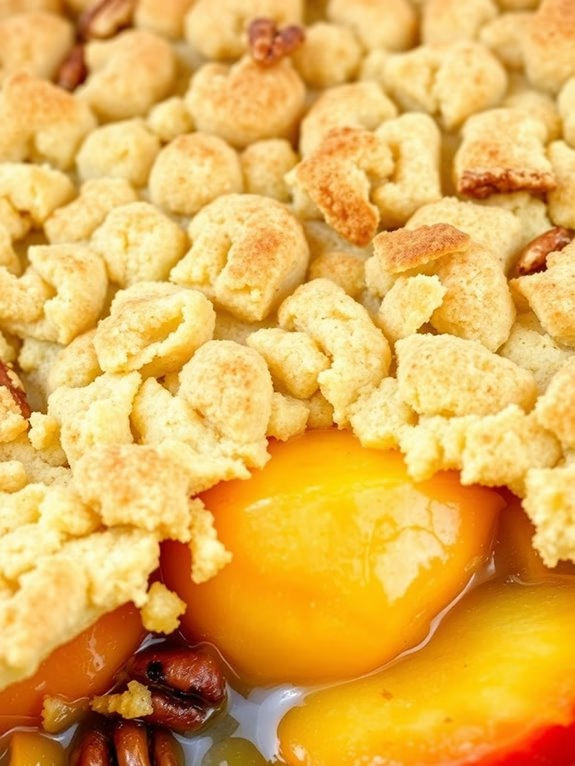
Peach Cobbler Dump Cake is a deliciously easy dessert that combines the sweet taste of ripe peaches with a buttery cake topping. This recipe is perfect for those who crave a warm, comforting treat without the fuss of traditional baking. The beauty of this dish lies in its simplicity—just dump the ingredients into a baking dish, and let the oven do the rest.
With minimal prep time and a straightforward process, this dump cake is ideal for both novice bakers and seasoned cooks looking for a quick and satisfying dessert. The combination of canned peaches, yellow cake mix, and butter creates a harmonious blend of flavors and textures.
The peaches provide a juicy, sweet base, while the cake mix and butter form a golden, crumbly topping. As it bakes, the cake absorbs some of the peach juices, resulting in a moist and flavorful dessert. Perfect for gatherings or a cozy night in, this Peach Cobbler Dump Cake serves 4-6 people and is sure to be a hit with everyone who tries it.
Ingredients:
- 2 cans (15 ounces each) of sliced peaches in syrup
- 1 box (15.25 ounces) of yellow cake mix
- 1/2 cup (1 stick) of unsalted butter
- 1 teaspoon ground cinnamon
- Optional: 1/4 cup chopped pecans or walnuts
Cooking Instructions:
- Preheat the Oven: Start by preheating your oven to 350°F (175°C) to guarantee it’s hot and ready for baking.
- Prepare the Baking Dish: Take a 9×13-inch baking dish and lightly grease it with cooking spray or a small amount of butter to prevent sticking.
- Add the Peaches: Open the cans of peaches and pour them, including the syrup, evenly into the prepared baking dish.
- Sprinkle the Cake Mix: Evenly distribute the dry yellow cake mix over the peaches in the dish. Make sure the entire surface is covered.
- Add Cinnamon and Nuts: Sprinkle the ground cinnamon over the cake mix. If using, add the chopped pecans or walnuts for an extra crunch.
- Top with Butter: Slice the stick of butter into thin pats and place them evenly over the top of the cake mix. This will help create a crispy topping as it bakes.
- Bake: Place the baking dish in the preheated oven and bake for 45-50 minutes, or until the top is golden brown and the peach filling is bubbly.
- Cool and Serve: Allow the cake to cool for a few minutes before serving. This will help it set and make it easier to serve.
Extra Tips: For an extra depth of flavor, consider adding a teaspoon of vanilla extract or a pinch of nutmeg to the peaches before adding the cake mix. If you prefer a less sweet dessert, you can drain one of the cans of peaches before adding them to the dish.
Serve the Peach Cobbler Dump Cake warm with a scoop of vanilla ice cream or a dollop of whipped cream to enhance its deliciousness.
Blueberry Lemon Fusion
Blueberry Lemon Fusion Dump Cake
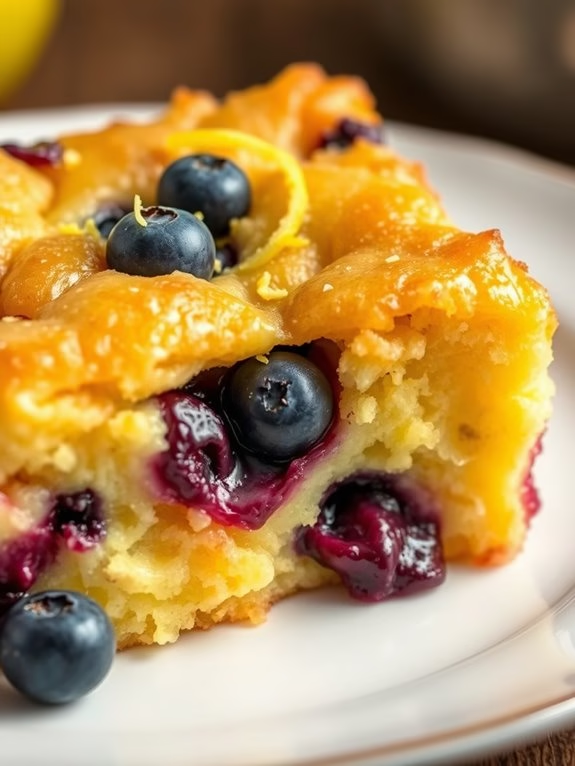
Indulge in the delightful fusion of tangy lemons and sweet blueberries with this simple yet delicious Blueberry Lemon Fusion Dump Cake. This dessert is perfect for those busy days when you crave something sweet but don’t want to spend hours in the kitchen. The combination of juicy blueberries and zesty lemon flavor, all brought together with a buttery cake mix topping, creates a mouthwatering treat that will leave everyone asking for seconds.
This dump cake is incredibly easy to make, requiring minimal ingredients and effort. The beauty of this recipe lies in the “dump” method, where you simply layer the ingredients in a baking dish and let the oven do the work. The result is a warm, gooey, and flavorful cake that’s perfect for any occasion. Whether you’re serving it as a quick weeknight dessert or a sweet finale to a holiday meal, this Blueberry Lemon Fusion Dump Cake is sure to amaze.
Ingredients (serves 4-6):
- 2 cups fresh or frozen blueberries
- 1 box (15.25 oz) lemon cake mix
- 1/2 cup granulated sugar
- 1/2 cup unsalted butter, melted
- 1 tablespoon lemon zest
- 1/4 cup lemon juice
- 1 teaspoon vanilla extract
- 1/2 cup water
Cooking Instructions:
- Preheat the Oven: Begin by preheating your oven to 350°F (175°C) to guarantee it’s ready for baking.
- Prepare the Baking Dish: Grease a 9×13-inch baking dish lightly with butter or non-stick spray to prevent sticking.
- Layer the Blueberries: Evenly spread the blueberries across the bottom of the prepared baking dish. If using frozen blueberries, there’s no need to thaw them.
- Add Lemon and Sugar Mixture: In a small bowl, combine the lemon zest, lemon juice, and granulated sugar. Pour this mixture evenly over the blueberries, giving them a gentle stir to coat.
- Sprinkle the Cake Mix: Open the box of lemon cake mix and sprinkle it evenly over the blueberry layer. Don’t mix; just spread it out to cover the blueberries completely.
- Pour the Liquid Ingredients: In a separate bowl, combine the melted butter, vanilla extract, and water. Pour this liquid evenly over the dry cake mix. Use a spatula to gently spread the liquid if needed, guaranteeing that all the cake mix is moistened.
- Bake the Cake: Place the baking dish in the preheated oven and bake for 40-45 minutes, or until the top is golden brown and the blueberry juices are bubbling around the edges.
- Cool and Serve: Remove the cake from the oven and let it cool for at least 10 minutes before serving. This allows the juices to thicken slightly and makes for easier serving.
Extra Tips:
For an added crunch, consider sprinkling some chopped nuts, such as almonds or pecans, on top of the cake mix before baking. If you’re looking for a richer flavor, try drizzling some cream or serving the cake with a scoop of vanilla ice cream.
Adjust the amount of lemon juice to taste if you prefer a more pronounced lemon flavor. Remember, the cake will firm up as it cools, so don’t worry if it seems a bit soft when fresh out of the oven. Enjoy your Blueberry Lemon Fusion Dump Cake warm or at room temperature for the best experience!
Chocolate Peanut Butter Bliss
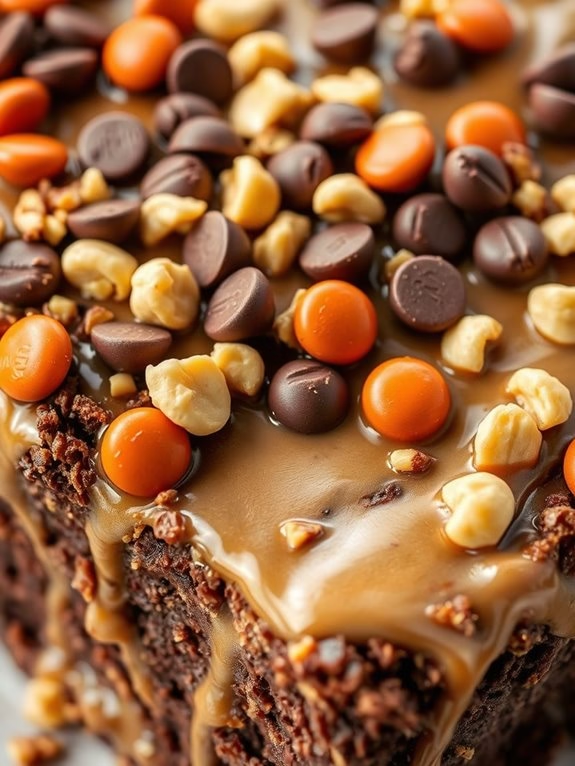
Chocolate Peanut Butter Bliss is a delightful and indulgent dessert that combines the rich flavors of chocolate and peanut butter in a simple and easy-to-make dump cake. This dessert is perfect for those who crave the classic combination of chocolate and peanut butter but want it in the form of a cake that’s both satisfying and easy to prepare.
The beauty of a dump cake lies in its simplicity; you just “dump” the ingredients into a dish, mix, and bake. It’s a no-fuss dessert that requires minimal effort but delivers maximum flavor.
This Chocolate Peanut Butter Bliss dump cake is perfect for any occasion, from casual family gatherings to more formal events. The soft and gooey texture, combined with the rich flavor profile, makes it a crowd favorite. It requires no special skills, making it perfect for both experienced bakers and beginners who want to try their hand at creating a delicious treat.
With this recipe, you can serve a decadent dessert that can satisfy the sweet tooth of 4-6 people.
Ingredients (serving size: 4-6 people):
- 1 box of devil’s food chocolate cake mix
- 1 cup of creamy peanut butter
- 1 can (14 oz) of sweetened condensed milk
- 1/2 cup of butter, melted
- 1/2 cup of semi-sweet chocolate chips
- 1/2 cup of Reese’s Pieces candy
- 1/4 cup of chopped peanuts
Cooking Instructions:
- Preheat the Oven: Start by preheating your oven to 350°F (175°C). This guarantees that the oven is ready and at the right temperature when you’re finished preparing your ingredients.
- Prepare the Baking Dish: Take a 9×13-inch baking dish and lightly grease it with non-stick spray or a thin layer of butter. This will prevent the cake from sticking to the dish.
- Layer the Ingredients: In the prepared baking dish, evenly spread the box of devil’s food chocolate cake mix. Don’t prepare the cake mix as directed on the box; simply use the dry mix.
- Add Peanut Butter: Using a spoon, dollop small amounts of creamy peanut butter across the surface of the dry cake mix. Try to distribute the peanut butter as evenly as possible.
- Pour Sweetened Condensed Milk: Drizzle the can of sweetened condensed milk over the cake mix and peanut butter. This will add moisture and sweetness to the cake.
- Add Melted Butter: Evenly pour the melted butter over the entire mixture. This will help to bind the ingredients together and give the cake a moist texture.
- Sprinkle Toppings: Scatter the semi-sweet chocolate chips, Reese’s Pieces candy, and chopped peanuts over the top of the mixture. These will add extra flavor and texture to the cake.
- Bake the Cake: Place the baking dish in the preheated oven and bake for 30-35 minutes. The cake is done when the top is set and slightly golden. A toothpick inserted into the center should come out mostly clean, with a few crumbs attached.
- Cool and Serve: Allow the cake to cool for at least 10 minutes before serving. This will help it set and make it easier to cut into pieces.
Extra Tips: For an added twist, consider adding a layer of sliced bananas or marshmallows before baking to enhance the flavor and texture. If you prefer a more chocolatey taste, you can substitute dark chocolate chips for the semi-sweet ones.
Pineapple Coconut Dream
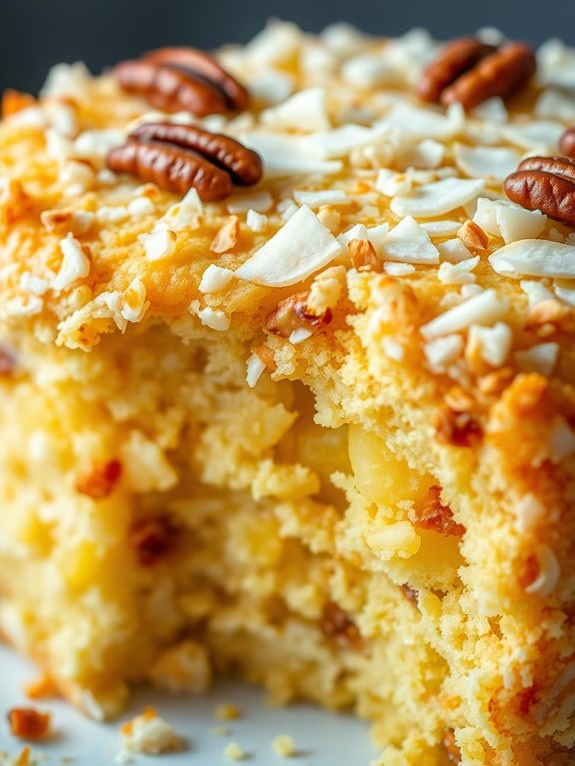
Pineapple Coconut Dream is a heavenly dessert that combines the tropical flavors of pineapple and coconut with the simplicity of a dump cake. This easy-to-make recipe is perfect for those who love the combination of sweet, juicy pineapple with the rich, creamy taste of coconut. The cake is moist and flavorful, with a delightful texture that will have your guests dreaming of sunny beaches and warm breezes.
This Pineapple Coconut Dream dump cake is ideal for any occasion, whether it’s a casual family gathering or a more formal celebration. The best part is that it requires minimal effort and time, making it perfect for busy cooks who want to impress without spending hours in the kitchen. With just a few simple ingredients, you can create a delicious dessert that serves 4-6 people.
Ingredients:
- 1 can (20 oz) crushed pineapple in juice
- 1 can (14 oz) sweetened condensed milk
- 1 package (15.25 oz) yellow cake mix
- 1 cup shredded coconut
- 1/2 cup unsalted butter, melted
- 1/2 cup chopped pecans (optional)
Cooking Instructions:
- Preheat the Oven: Begin by preheating your oven to 350°F (175°C). This will guarantee that the cake bakes evenly.
- Prepare the Baking Dish: Lightly grease a 9×13-inch baking dish with butter or non-stick spray to prevent sticking.
- Layer the Pineapple: Pour the entire can of crushed pineapple, including the juice, into the prepared baking dish. Spread it out evenly with a spatula.
- Add the Condensed Milk: Drizzle the sweetened condensed milk evenly over the pineapple layer. This adds a creamy sweetness to the cake.
- Sprinkle the Cake Mix: Evenly distribute the dry yellow cake mix over the pineapple and condensed milk layers. Don’t stir; just spread it out.
- Add the Coconut and Pecans: Sprinkle the shredded coconut and chopped pecans (if using) over the cake mix layer. This adds texture and flavor to the cake.
- Drizzle with Butter: Pour the melted butter evenly over the entire surface of the cake. This will help create a golden, crispy top.
- Bake the Cake: Place the baking dish in the preheated oven and bake for 45-50 minutes, or until the top is golden brown and the edges are bubbly.
- Cool and Serve: Allow the cake to cool slightly before serving. This will help it set and make it easier to cut into portions.
Extra Tips: When making Pineapple Coconut Dream, feel free to adjust the amount of coconut or pecans based on personal preference. You can also experiment by adding other tropical fruits like mango or papaya for a unique twist.
For an extra decadent touch, serve the cake with a scoop of vanilla ice cream or a dollop of whipped cream. If you prefer a less sweet version, consider using unsweetened coconut or reducing the amount of condensed milk slightly.
Strawberry Shortcake Twist
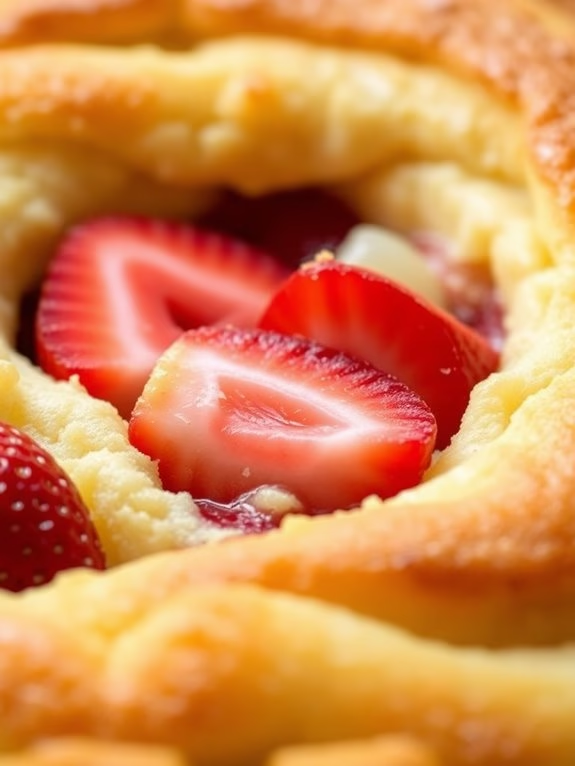
Strawberry Shortcake Twist Dump Cake
The Strawberry Shortcake Twist Dump Cake is an easy and delightful dessert that combines the classic flavors of strawberry shortcake with the simplicity of a dump cake. This dessert is perfect for those who love the sweet and tangy taste of strawberries combined with a moist and buttery cake.
With minimal preparation and a short baking time, this recipe is ideal for a last-minute gathering or a weeknight treat. The result is a deliciously moist cake with a buttery crust, topped with sweet strawberries and a hint of vanilla.
This recipe is designed to serve 4-6 people, making it perfect for a family dessert or a small get-together. The ingredients are simple and easily available, so you won’t need to make a special trip to the store.
The Strawberry Shortcake Twist Dump Cake isn’t only easy to prepare but also allows for some customization, should you wish to add your own personal touch to the dessert.
Ingredients:
- 1 box of white cake mix
- 2 cups of fresh strawberries, sliced
- 1/2 cup of granulated sugar
- 1 teaspoon of vanilla extract
- 1/2 cup of unsalted butter, melted
- 1 1/2 cups of milk
- Whipped cream, for serving (optional)
Instructions:
- Preheat the Oven: Start by preheating your oven to 350°F (175°C). This guarantees that your oven is at the right temperature when you’re ready to bake the cake.
- Prepare the Strawberries: In a medium bowl, combine the sliced strawberries with granulated sugar and vanilla extract. Mix well and set aside. This will allow the strawberries to release their juices and enhance their sweetness.
- Mix the Cake Batter: In a large mixing bowl, combine the white cake mix with the milk. Stir until the batter is smooth and all the ingredients are fully incorporated. The batter should be slightly thick.
- Assemble the Cake: Pour the cake batter into a greased 9×13-inch baking dish, spreading it evenly. Spoon the strawberry mixture over the batter, spreading them evenly across the surface.
- Add the Butter: Drizzle the melted butter evenly over the top of the strawberries and cake batter. This will help create a golden-brown crust as the cake bakes.
- Bake the Cake: Place the baking dish in the preheated oven and bake for 35-40 minutes, or until the top is golden brown and a toothpick inserted into the center comes out clean.
- Cool and Serve: Allow the cake to cool slightly before serving. Serve warm with a dollop of whipped cream, if desired.
Extra Tips:
For an extra burst of flavor, try adding a tablespoon of lemon zest to the strawberry mixture for a zesty note. If fresh strawberries aren’t available, you can use frozen strawberries; just make sure to thaw them and drain any excess liquid before using.
To guarantee even baking, check the cake halfway through the baking time and rotate the dish if necessary. This cake is best enjoyed fresh but can be stored in an airtight container in the refrigerator for up to two days.
Pumpkin Spice Medley
Pumpkin Spice Medley is a delightful autumn dessert that combines the warm flavors of pumpkin spice with the simplicity of a dump cake. This easy-to-make dish is perfect for those cozy fall evenings when you want a sweet treat without spending hours in the kitchen. With a blend of pumpkin puree, spices, and the ease of a cake mix, this dessert is bound to become a family favorite.
The essence of the Pumpkin Spice Medley lies in its rich, spiced pumpkin base topped with a buttery, crumbly crust. As it bakes, the aromas of cinnamon, nutmeg, and cloves fill your kitchen, creating an inviting atmosphere. This dish serves 4-6 people, making it ideal for small gatherings or a special family dessert night.
Ingredients:
- 1 can (15 oz) pumpkin puree
- 1 cup evaporated milk
- 3/4 cup granulated sugar
- 3 large eggs
- 1 teaspoon vanilla extract
- 1 tablespoon pumpkin pie spice
- 1 box (15.25 oz) spice cake mix
- 1 cup (2 sticks) unsalted butter, melted
- 1/2 cup chopped pecans (optional)
Cooking Instructions:
- Preheat the Oven: Preheat your oven to 350°F (175°C). Grease a 9×13 inch baking dish to prevent sticking.
- Prepare the Pumpkin Mixture: In a large mixing bowl, combine the pumpkin puree, evaporated milk, granulated sugar, eggs, vanilla extract, and pumpkin pie spice. Whisk until the mixture is smooth and well combined.
- Pour the Mixture: Pour the pumpkin mixture evenly into the prepared baking dish, spreading it out to cover the bottom completely.
- Add the Cake Mix: Sprinkle the dry spice cake mix evenly over the pumpkin mixture. Don’t stir; just spread it out as evenly as possible.
- Drizzle Butter: Evenly drizzle the melted butter over the top of the cake mix. Make sure all areas are covered to help create a golden, crunchy topping.
- Add Pecans: If desired, sprinkle chopped pecans over the buttered cake mix for added texture and flavor.
- Bake: Place the baking dish in the preheated oven and bake for 50-60 minutes, or until the top is golden brown and the filling is set.
- Cool and Serve: Allow the Pumpkin Spice Medley to cool slightly before serving. It can be enjoyed warm or at room temperature, possibly with a scoop of vanilla ice cream or a dollop of whipped cream.
Extra Tips:
For best results, verify that all ingredients are at room temperature before starting, as this helps them combine more easily.
You can customize the sweetness by adjusting the amount of sugar or by using a different type of cake mix, such as yellow or white, for a milder flavor.
If you don’t have pumpkin pie spice on hand, a combination of cinnamon, nutmeg, ginger, and cloves will work just as well.
Finally, feel free to add a sprinkle of cinnamon sugar on top before baking for an extra layer of flavor and crunch.

Black Forest Indulgence
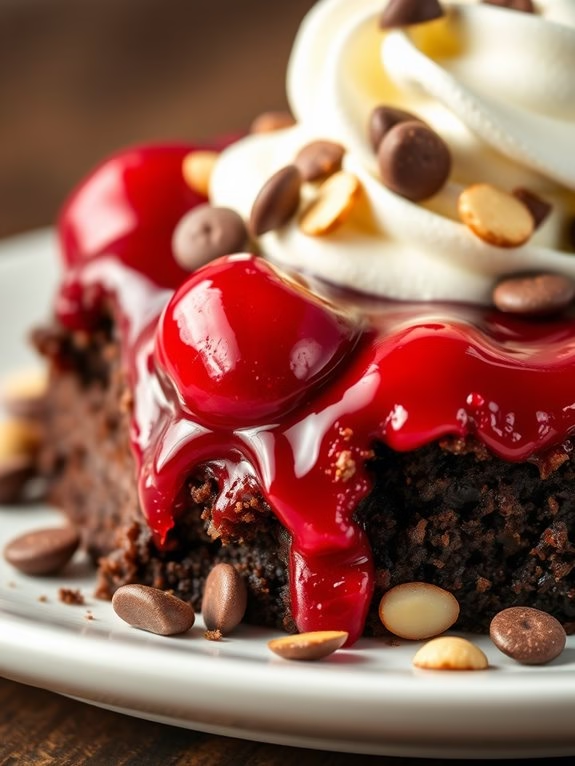
Black Forest Indulgence Dump Cake Recipe
The Black Forest Indulgence Dump Cake is a delightful and easy-to-make dessert that combines the rich flavors of chocolate and cherries with a moist, cake-like texture. Perfect for any occasion, this dessert brings together the classic black forest flavors in a simplified form that even novice bakers can master.
The beauty of this dessert lies in its simplicity, requiring minimal preparation while delivering maximum flavor. This dump cake recipe is designed to serve 4-6 people, making it ideal for small gatherings or family dinners. With just a handful of ingredients and a straightforward baking process, you can create a dessert that will leave everyone asking for seconds.
The combination of sweet cherries, decadent chocolate, and a touch of creaminess from whipped topping makes this dessert a true indulgence.
Ingredients (Serves 4-6)
- 1 (21 oz) can cherry pie filling
- 1 (15 oz) can pitted dark sweet cherries, drained
- 1 (15.25 oz) box chocolate cake mix
- 1/2 cup unsalted butter, melted
- 1/4 cup sliced almonds (optional)
- 1/2 cup semi-sweet chocolate chips
- Whipped cream or vanilla ice cream, for serving
Cooking Instructions
- Preheat the Oven: Start by preheating your oven to 350°F (175°C). This will guarantee the oven is at the right temperature when you’re ready to bake the cake.
- Prepare the Baking Dish: Lightly grease a 9×13-inch baking dish with cooking spray or butter. This helps prevent the cake from sticking to the dish once baked.
- Layer the Fruit: Spread the cherry pie filling evenly across the bottom of the prepared baking dish. Next, scatter the drained dark sweet cherries over the pie filling for an added depth of flavor and texture.
- Add the Cake Mix: Evenly sprinkle the dry chocolate cake mix over the cherry layer. Make sure to cover the cherries completely, as this will form the crust and top layer of the cake.
- Distribute the Butter: Drizzle the melted butter over the entire surface of the cake mix. Try to cover as much of the dry mix as possible, which will help it bake evenly.
- Sprinkle Toppings: If using, sprinkle the sliced almonds and semi-sweet chocolate chips over the top. These add a delightful crunch and extra chocolatey goodness to the dessert.
- Bake the Cake: Place the dish in the preheated oven and bake for 40-45 minutes, or until the top is bubbly and the cake is set. The top should be slightly crispy, and the edges will be golden brown.
- Cool and Serve: Allow the cake to cool for about 10 minutes before serving. Serve warm with a dollop of whipped cream or a scoop of vanilla ice cream for an extra touch of indulgence.
Extra Tips
For an even richer flavor, consider using dark chocolate cake mix instead of regular chocolate. You can also add a splash of almond extract to the cherry layer for a more pronounced nutty flavor.
If you prefer a less sweet dessert, reduce the amount of chocolate chips. Remember, the key to a perfect dump cake isn’t to mix the layers; let the oven do the work for you.
Enjoy your Black Forest Indulgence Dump Cake with friends or save the leftovers for a delightful treat the next day!
Mango Passionfruit Mix
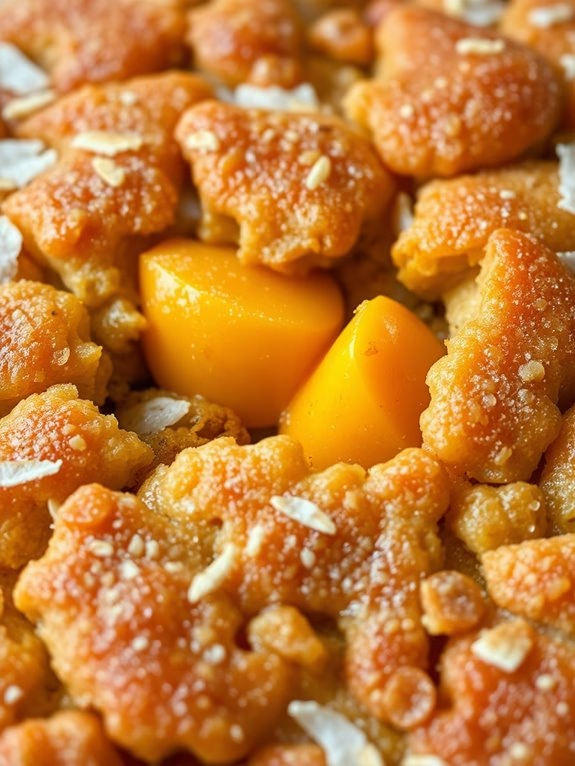
Mango Passionfruit Dump Cake
Transport your taste buds to a tropical paradise with this delightful Mango Passionfruit Dump Cake. Known for its simplicity and rich flavors, this dessert combines the luscious sweetness of ripe mangoes with the tangy zing of passionfruit. The best part is that you don’t need to be a baking expert to whip up this delightful treat. The ‘dump’ in the name refers to the easy method of simply dumping all the ingredients into a baking dish and letting the oven do the work.
The Mango Passionfruit Dump Cake is perfect for those who love a fruity dessert that’s both invigorating and decadent. The cake’s texture is a harmonious blend of moist cake and juicy fruit, creating a balance that will have everyone reaching for seconds. Whether you’re serving this at a summer barbecue or a cozy family dinner, it’s sure to be a hit.
Now, let’s gather our ingredients and get started on this tropical delight!
Ingredients (serves 4-6):
- 2 cups ripe mangoes, diced
- 1 cup passionfruit pulp
- 1 box (about 15.25 oz) yellow cake mix
- 1/2 cup unsalted butter, melted
- 1/2 cup shredded coconut
- 1/4 cup granulated sugar
- 1 teaspoon vanilla extract
- 1/2 teaspoon ground cinnamon
Cooking Instructions:
- Preheat the Oven: Begin by preheating your oven to 350°F (175°C). This guarantees that your cake will bake evenly throughout.
- Prepare the Baking Dish: Grease a 9×13 inch baking dish with butter or non-stick spray. This will help prevent the cake from sticking to the pan.
- Layer the Fruits: Spread the diced mangoes evenly across the bottom of the baking dish. Pour the passionfruit pulp over the mangoes, making sure it’s evenly distributed.
- Add the Cake Mix: Evenly sprinkle the entire box of yellow cake mix over the fruit. Don’t stir the mixture; simply let it sit on top of the fruits.
- Add the Butter and Flavorings: Drizzle the melted butter over the cake mix, covering as much of the surface as possible. Sprinkle the granulated sugar, shredded coconut, vanilla extract, and ground cinnamon on top.
- Bake the Cake: Place the dish in the preheated oven and bake for 45-50 minutes. The cake is done when the top is golden brown and a toothpick inserted into the center comes out clean.
- Cool and Serve: Allow the cake to cool for at least 10 minutes before serving. This will help the flavors to meld together and make it easier to slice.
Extra Tips:
- To enhance the tropical flavors, consider adding a splash of rum or coconut milk to the fruit mixture before adding the cake mix.
- For an extra crunch, you can add a handful of chopped nuts, such as pecans or almonds, on top before baking.
- If you prefer a less sweet dessert, reduce the amount of sugar or opt for unsweetened shredded coconut.
- This cake pairs wonderfully with a scoop of vanilla ice cream or a dollop of whipped cream for an extra special treat.
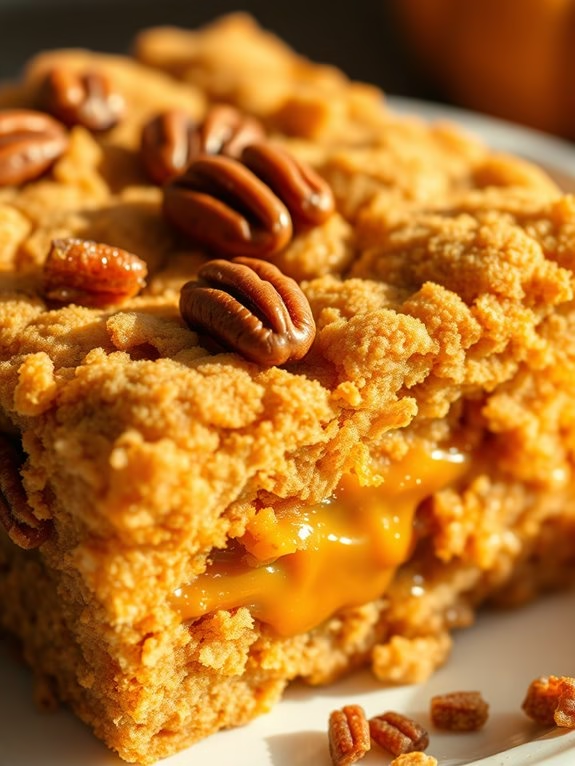
Caramel Apple Sensation
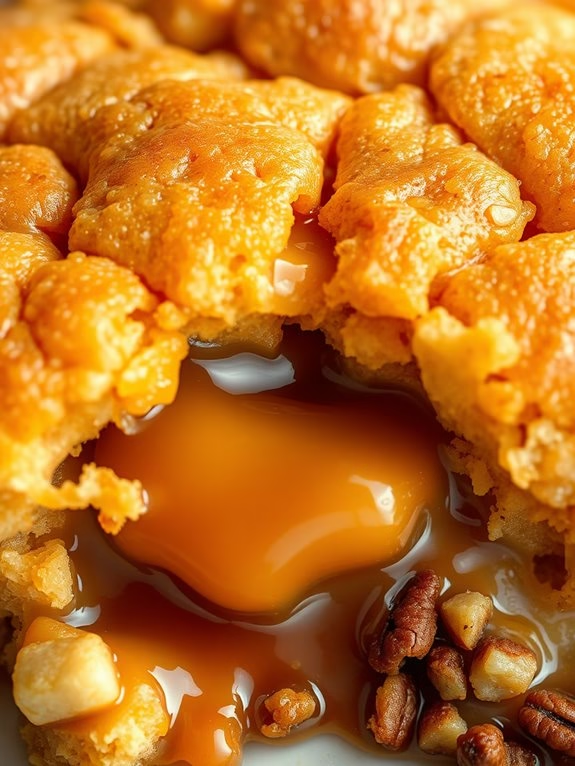
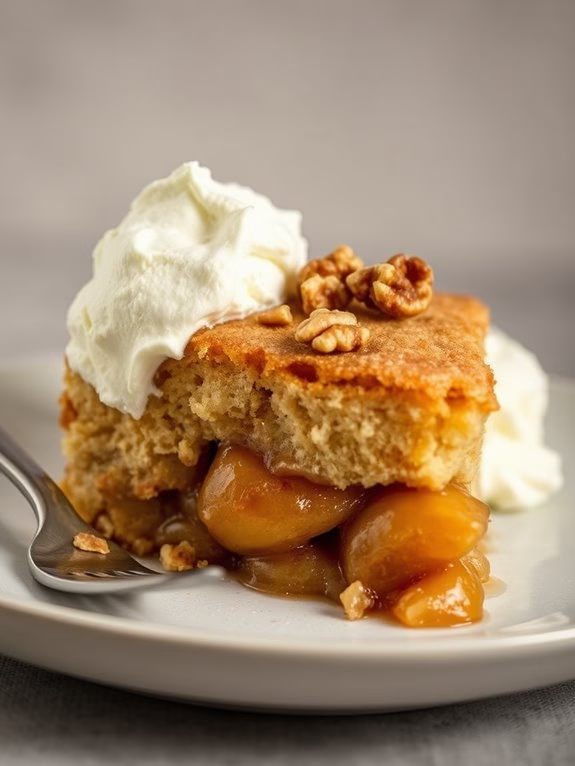
Caramel Apple Sensation is a delightful twist on the classic dump cake, combining the comforting flavors of caramel and apple into a simple yet decadent dessert. This recipe is perfect for fall gatherings, holiday feasts, or any occasion where you want to impress without spending hours in the kitchen. The best part? You don’t need to be a seasoned baker to pull off this mouthwatering treat.
With its straightforward preparation and irresistible flavor, Caramel Apple Sensation is bound to become a family favorite. The magic of this recipe lies in its simplicity. By using a handful of pantry staples, you can create a dessert that tastes like it took much more effort. The combination of tart apples, rich caramel, and a buttery cake topping results in a perfect harmony of flavors and textures.
Serve it warm with a scoop of vanilla ice cream or a dollop of whipped cream for an extra special touch. Designed to serve 4-6 people, this recipe is ideal for cozy gatherings or sweet indulgences on a relaxing evening.
Ingredients (serves 4-6):
- 1 can (21 oz) apple pie filling
- 1/2 cup caramel sauce
- 1 box yellow cake mix
- 1/2 cup unsalted butter, melted
- 1/2 teaspoon ground cinnamon
- 1/4 teaspoon nutmeg
- 1/2 cup chopped pecans (optional)
Cooking Instructions:
- Preheat the Oven: Start by preheating your oven to 350°F (175°C) to guarantee it reaches the desired temperature while you prepare the dish.
- Prepare the Baking Dish: Lightly grease a 9×13-inch baking dish with butter or non-stick cooking spray to prevent sticking and guarantee easy serving.
- Layer the Apples: Pour the apple pie filling evenly into the bottom of the prepared baking dish, spreading it out with a spatula to cover the entire base.
- Add the Caramel: Drizzle the caramel sauce evenly over the apple pie filling, guaranteeing it covers the apples uniformly for a consistent flavor throughout the dish.
- Mix the Dry Ingredients: In a small bowl, mix the yellow cake mix with the ground cinnamon and nutmeg to incorporate the spices evenly throughout the cake mix.
- Layer the Cake Mix: Sprinkle the spiced cake mix evenly over the apple and caramel layers, guaranteeing it covers the entire surface of the dish without mixing it into the fruit layer.
- Add the Butter: Pour the melted butter evenly over the top of the cake mix, covering as much of the surface as possible to guarantee a golden, crispy topping.
- Optional Topping: If using, sprinkle the chopped pecans over the top of the buttered cake mix for added texture and flavor.
- Bake the Cake: Place the baking dish in the preheated oven and bake for 40-45 minutes, or until the top is golden brown and the filling is bubbly around the edges.
- Cool and Serve: Allow the cake to cool for at least 10 minutes before serving to set slightly. Serve warm, optionally with a scoop of vanilla ice cream or whipped cream.
Extra Tips: For an even more intense caramel flavor, consider adding a few extra tablespoons of caramel sauce to the apple pie filling before drizzling it over the cake mix. If you prefer a crunchier topping, add an additional 1/4 cup of melted butter.
This dump cake is versatile; feel free to experiment with different types of pie filling or nuts to suit your taste preferences. Finally, always use a high-quality caramel sauce for the best flavor outcome.
Banana Nut Explosion
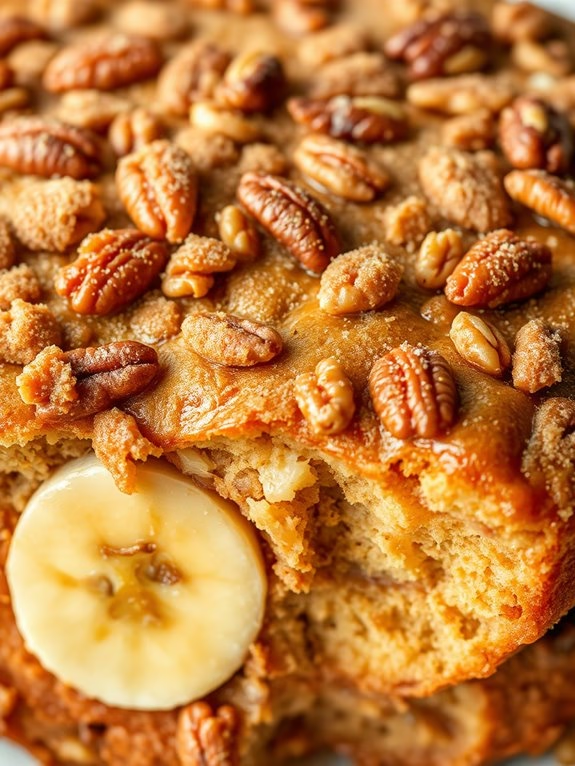
Banana Nut Explosion is a delightful and simple dump cake recipe that brings together the classic flavors of bananas and nuts in a deliciously moist and easy-to-make dessert. Perfect for those who love the combination of sweet bananas and the crunch of nuts, this cake is an ideal choice for casual gatherings or as a sweet ending to a family dinner.
The beauty of dump cakes lies in their simplicity, requiring minimal preparation and cleanup, yet delivering maximum flavor and satisfaction.
To create the Banana Nut Explosion, you simply layer the ingredients and let the oven work its magic. The end result is a tender and flavorful cake that’s reminiscent of a banana nut bread, but with less effort and a more indulgent taste. This recipe is designed to serve 4-6 people, making it perfect for small gatherings or for enjoying with family and friends.
Whether you’re an experienced baker or a novice in the kitchen, you’ll find this recipe both accessible and rewarding.
Ingredients (Serves 4-6)
- 3 ripe bananas, sliced
- 1 cup chopped walnuts or pecans
- 1 box yellow cake mix (about 15.25 oz)
- 1/2 cup melted butter
- 1/2 cup brown sugar
- 1 teaspoon vanilla extract
- 1 teaspoon ground cinnamon
- 1/4 teaspoon salt
Cooking Instructions
- Preheat the Oven: Begin by preheating your oven to 350°F (175°C). This will guarantee that the cake bakes evenly and thoroughly.
- Prepare the Baking Dish: Lightly grease a 9×13-inch baking dish with butter or non-stick cooking spray. This prevents the cake from sticking and makes for easy serving later.
- Layer the Bananas: Evenly spread the sliced bananas at the bottom of the prepared baking dish. This forms the base layer and adds natural sweetness and moisture to the cake.
- Add the Nuts: Sprinkle the chopped walnuts or pecans over the banana slices. The nuts will provide a delightful crunch and nutty flavor to the cake.
- Mix the Dry Ingredients: In a separate bowl, mix the yellow cake mix with the ground cinnamon and salt. Stir well to distribute the spices evenly throughout the cake mix.
- Layer the Cake Mix: Evenly distribute the dry cake mix over the banana and nut layers. Don’t stir, as this is a dump cake and the layers will blend naturally during baking.
- Add the Wet Ingredients: Pour the melted butter evenly over the top of the dry cake mix. This will help to moisten the mix and give the cake a rich, buttery flavor. Drizzle the vanilla extract over the top as well.
- Sprinkle Brown Sugar: Sprinkle the brown sugar evenly across the surface. The sugar will caramelize and create a sweet, crunchy topping.
- Bake the Cake: Place the baking dish in the preheated oven and bake for 35-40 minutes, or until the top is golden brown and a toothpick inserted into the center comes out clean.
- Cool and Serve: Allow the cake to cool for at least 10 minutes before serving. This helps the layers set and makes it easier to slice.
Extra Tips
For an added touch of indulgence, serve the Banana Nut Explosion warm with a scoop of vanilla ice cream or a dollop of whipped cream.
If you prefer a stronger banana flavor, choose overly ripe bananas as they bring out a richer sweetness. Additionally, feel free to experiment with different types of nuts or add a handful of chocolate chips for a more decadent dessert.
Enjoy the versatility of this recipe and make it your own!
Mixed Berry Symphony
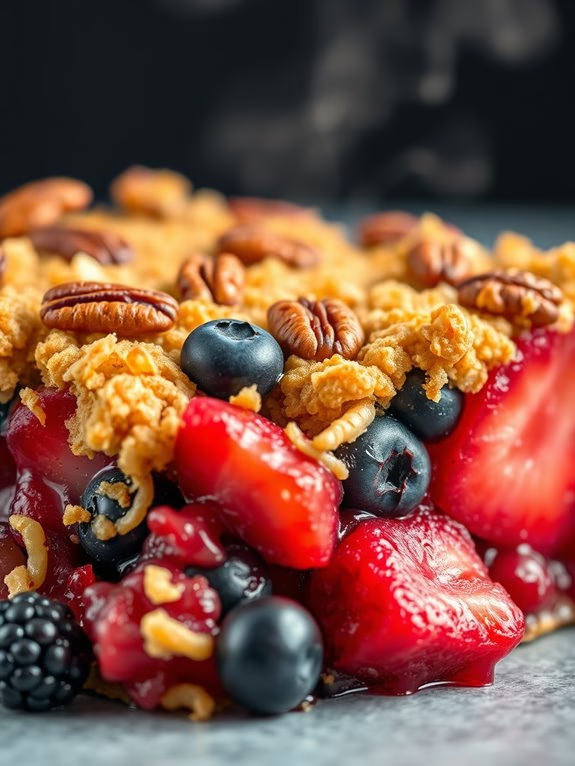
Mixed Berry Symphony Dump Cake
The Mixed Berry Symphony Dump Cake is a delightful and simple dessert that’s perfect for any occasion. This delicious concoction combines the sweet and tart flavors of mixed berries with the buttery richness of a classic cake. The beauty of this recipe lies in its simplicity; it’s called a “dump cake” because all you need to do is dump the ingredients into a baking dish and let the oven work its magic.
Whether you’re hosting a summer barbecue or need a quick dessert for a weeknight dinner, this dump cake is sure to impress with its vibrant flavors and appealing texture. This recipe serves 4-6 people, making it ideal for small gatherings or family meals.
The combination of fresh and frozen berries provides a burst of flavor, while the cake mix and butter create a golden, crispy topping that perfectly complements the juicy fruit beneath. Once baked, the result is a warm, irresistible dessert that can be served on its own or with a scoop of vanilla ice cream for an extra treat.
Ingredients:
- 2 cups mixed fresh berries (such as strawberries, blueberries, raspberries, and blackberries)
- 1 cup frozen mixed berries
- 1/2 cup granulated sugar
- 1 tablespoon cornstarch
- 1 teaspoon vanilla extract
- 1 box (15.25 oz) yellow cake mix
- 1/2 cup unsalted butter, melted
- 1/2 cup chopped pecans (optional)
Instructions:
- Preheat the Oven: Start by preheating your oven to 350°F (175°C). This guarantees that the dessert bakes evenly and achieves the perfect texture.
- Prepare the Berries: In a large mixing bowl, combine the fresh and frozen mixed berries. Add the granulated sugar, cornstarch, and vanilla extract. Stir until the berries are evenly coated and the sugar and cornstarch are well distributed. This mixture will thicken during baking and create a luscious berry filling.
- Assemble the Dump Cake: Pour the berry mixture into a 9×13 inch baking dish, spreading it out evenly. Sprinkle the dry cake mix evenly over the top of the berries. Make sure the cake mix covers the berries completely to guarantee an even bake.
- Add the Butter and Pecans: Drizzle the melted butter over the cake mix, making sure you cover as much of the surface as possible. If you choose to add pecans, sprinkle them over the top at this stage. The butter will help the cake mix form a golden, crunchy topping as it bakes.
- Bake the Cake: Place the baking dish in the preheated oven and bake for 45-50 minutes, or until the top is golden brown and the berries are bubbling around the edges. The aroma will be irresistible!
- Cool and Serve: Once baked, remove the cake from the oven and allow it to cool for at least 10 minutes. This will help the juices settle and make serving easier. Scoop into bowls and serve warm, optionally with a scoop of vanilla ice cream or whipped cream.
Extra Tips:
For an extra burst of flavor, consider adding a pinch of cinnamon or nutmeg to the berry mixture. If you prefer a less sweet dessert, reduce the sugar in the berry mix to 1/3 cup.
Feel free to experiment with different berries depending on what’s in season or your personal preference. Finally, verify that the butter is evenly drizzled over the cake mix to avoid any dry spots in the topping. Enjoy your Mixed Berry Symphony Dump Cake with family and friends and savor the delightful combination of flavors and textures.
Lemon Raspberry Zest
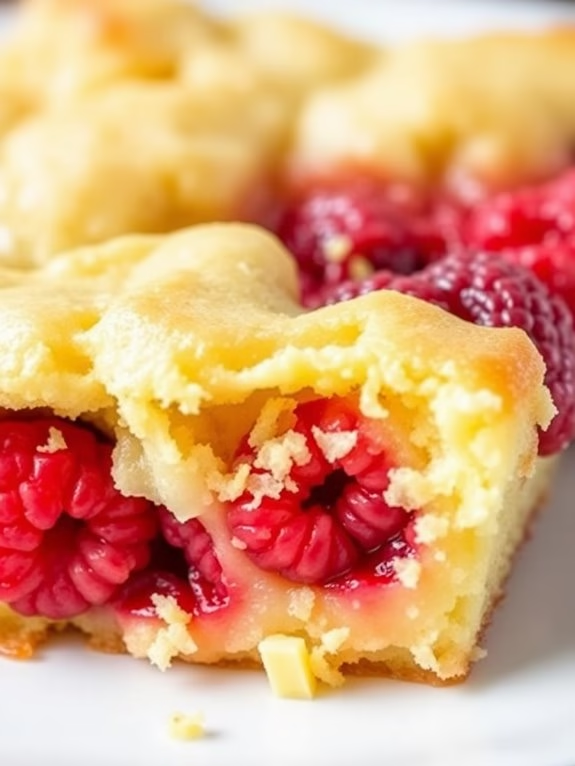
Lemon Raspberry Zest Dump Cake Recipe
Delight your taste buds with the invigorating and tangy combination of lemon and raspberry in this delicious Lemon Raspberry Zest Dump Cake. This simple yet flavorful dessert is perfect for those who love a balance of sweet and tart flavors.
It’s an easy-to-make treat that’s perfect for any occasion, whether you’re hosting a dinner party or simply craving a sweet indulgence. The best part is that this dump cake requires minimal effort, as the name suggests, you simply “dump” the ingredients into a baking dish, bake, and enjoy!
A Lemon Raspberry Zest Dump Cake makes an excellent dessert for 4-6 people, providing a satisfying portion for each guest. The lemon zest adds a burst of citrusy aroma and enhances the overall flavor, while the raspberries provide a juicy contrast.
Serve it warm with a scoop of vanilla ice cream or a dollop of whipped cream for an extra indulgent experience. Follow the steps below to create this delightful dessert in no time.
Ingredients:
- 1 (21 oz) can of raspberry pie filling
- 1 (15.25 oz) box of lemon cake mix
- 1/2 cup unsalted butter, melted
- 1 tablespoon lemon zest
- 1 cup fresh raspberries
- 1/4 cup granulated sugar
Cooking Instructions:
- Preheat the Oven: Begin by preheating your oven to 350°F (175°C). This guarantees that the cake will bake evenly.
- Prepare the Baking Dish: Lightly grease a 9×13-inch baking dish with butter or non-stick spray to prevent sticking.
- Layer the Ingredients: Spread the raspberry pie filling evenly across the bottom of the prepared baking dish.
- Add the Cake Mix: Sprinkle the lemon cake mix evenly over the raspberry pie filling. Make sure it covers the filling completely.
- Incorporate Fresh Raspberries: Gently scatter the fresh raspberries over the layer of cake mix. This will add bursts of fresh fruit throughout the cake.
- Add Lemon Zest and Sugar: Sprinkle the lemon zest and granulated sugar evenly over the cake mix and raspberries. This will enhance the flavor and add a touch of sweetness.
- Pour the Butter: Drizzle the melted butter evenly over the entire mixture. This will help the cake mix bind and brown as it bakes.
- Bake the Cake: Place the baking dish in the preheated oven and bake for 40-45 minutes, or until the top is golden brown and the raspberries are bubbling.
- Cool and Serve: Allow the cake to cool slightly before serving. This will help the flavors meld together and make it easier to serve.
Extra Tips:
For an extra burst of flavor, consider adding a tablespoon of fresh lemon juice to the raspberry pie filling before spreading it in the baking dish.
If you prefer a slightly less sweet dessert, reduce the granulated sugar to 2 tablespoons. Be sure to check the cake as it bakes; if the top is browning too quickly, cover it loosely with foil to prevent burning.
Enjoy your Lemon Raspberry Zest Dump Cake warm or at room temperature, and store any leftovers in the refrigerator for up to three days.