
There’s something truly delightful about beginning your morning with a breakfast that feels like a small treat. The comforting taste of gooey chocolate chip pancakes, or a stack of light ricotta and berry waffles, can make any day feel special. Sweet and savory maple bacon muffins or the fresh zing of a mango and coconut smoothie bowl can elevate your morning routine. Here are 10 sweet breakfast ideas that promise to make your mornings deliciously memorable. Treat yourself to these scrumptious recipes that are sure to start your day on a sweet note.
Decadent Chocolate Chip Pancakes
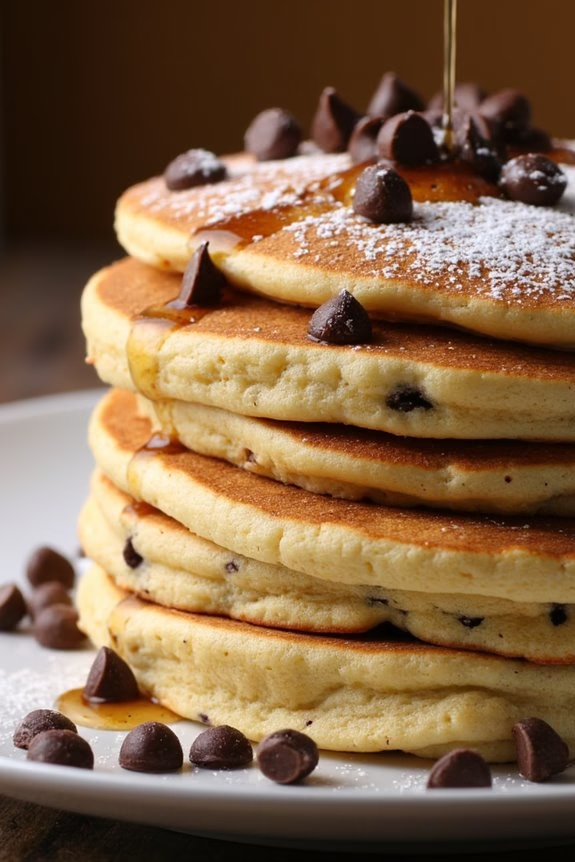
Decadent Chocolate Chip Pancakes are a delightful way to start your morning with a touch of indulgence. Imagine fluffy pancakes generously studded with rich chocolate chips, creating a melty, gooey center in every bite. Perfect for a weekend brunch or a special breakfast treat, these pancakes are certain to satisfy both kids and adults alike.
The combination of the light, airy texture of the pancake and the sweetness of the chocolate chips makes for an irresistible meal that pairs perfectly with a drizzle of syrup or a dusting of powdered sugar.
Not only are these chocolate chip pancakes delicious, but they’re also incredibly easy to make. With a few simple ingredients and a little bit of time, you can whip up a batch of these pancakes that will have everyone at the table asking for seconds.
Whether you’re an experienced cook or a beginner, this recipe is straightforward and forgiving, making it an ideal choice for any home cook. So, gather your ingredients, preheat your griddle, and get ready to enjoy a stack of these delightful pancakes.
Ingredients (for 4-6 servings):
- 2 cups all-purpose flour
- 2 tablespoons granulated sugar
- 2 teaspoons baking powder
- 1 teaspoon baking soda
- 1/2 teaspoon salt
- 2 large eggs
- 2 cups buttermilk
- 1/4 cup unsalted butter, melted
- 1 teaspoon vanilla extract
- 1 cup semi-sweet chocolate chips
- Butter or oil for cooking
Cooking Instructions:
- Prepare the Dry Ingredients: In a large bowl, whisk together the flour, sugar, baking powder, baking soda, and salt. Verify these dry ingredients are well mixed to avoid clumps in your batter.
- Mix the Wet Ingredients: In a separate bowl, beat the eggs, then add the buttermilk, melted butter, and vanilla extract. Stir until the mixture is smooth and well combined.
- Combine Wet and Dry Ingredients: Pour the wet ingredients into the bowl with the dry ingredients. Stir gently until just combined. Be careful not to overmix; it’s okay if there are a few lumps remaining.
- Add Chocolate Chips: Gently fold the chocolate chips into the batter, distributing them evenly throughout.
- Preheat the Griddle: Heat a non-stick griddle or large skillet over medium heat. Lightly grease with butter or oil.
- Cook the Pancakes: Pour 1/4 cup of batter for each pancake onto the hot griddle. Cook until bubbles form on the surface and the edges begin to look set, about 2-3 minutes. Flip the pancakes and cook for an additional 1-2 minutes, until golden brown and cooked through.
- Serve: Transfer the pancakes to a plate and keep warm until ready to serve. Repeat with the remaining batter.
Extra Tips:
For the best results, make sure your griddle is properly heated before pouring the batter, as this guarantees even cooking and a perfect golden finish.
If you prefer your pancakes extra chocolatey, consider using mini chocolate chips, which distribute more evenly throughout the batter. Additionally, if you like a bit of texture variation, you can add chopped nuts or a sprinkle of cinnamon to the batter.
Finally, feel free to get creative with toppings—fresh berries, whipped cream, or a drizzle of caramel sauce can elevate these pancakes to a whole new level of decadence.
Fluffy Ricotta and Berry Waffles
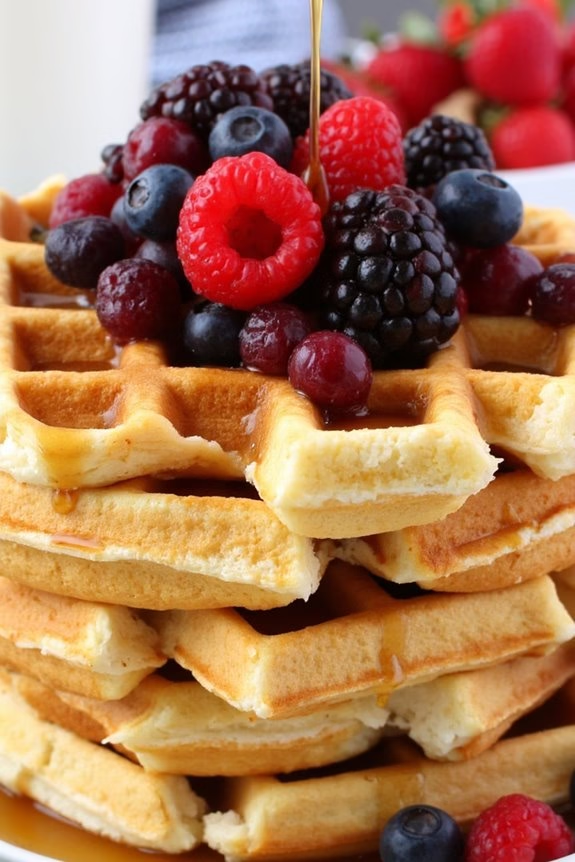
Fluffy Ricotta and Berry Waffles are a delightful breakfast treat that combines the creamy richness of ricotta cheese with the sweet and tangy flavors of fresh berries. These waffles are perfect for a leisurely weekend brunch or a special breakfast occasion. The ricotta adds a unique texture, making the waffles light and fluffy, while the berries provide a fresh burst of flavor that complements the subtle sweetness of the waffles.
Whether you’re a fan of blueberries, strawberries, or raspberries, you can customize these waffles with your favorite berries or a combination of them all.
To make the most of this delicious breakfast dish, it’s crucial to use high-quality ingredients, including fresh ricotta and ripe, juicy berries. The preparation is simple, and these waffles can be made in under 30 minutes, making them an ideal choice for a quick yet indulgent breakfast. The batter is easy to prepare and can be made in advance, allowing you to enjoy more time with your family and friends while the waffles cook to perfection.
Serve them with a drizzle of maple syrup, a sprinkle of powdered sugar, or a dollop of whipped cream for an extra touch of indulgence.
Ingredients (Serving size: 4-6 people)
- 1 ¾ cups all-purpose flour
- 2 tablespoons sugar
- 2 teaspoons baking powder
- ½ teaspoon baking soda
- ¼ teaspoon salt
- 1 cup ricotta cheese
- 1 cup milk
- 2 large eggs
- 1 teaspoon vanilla extract
- 4 tablespoons unsalted butter, melted
- 1 cup mixed fresh berries (blueberries, strawberries, raspberries)
- Additional berries for topping
- Maple syrup or honey (optional for serving)
Cooking Instructions
- Preheat the Waffle Iron: Begin by preheating your waffle iron according to the manufacturer’s instructions. This guarantees that the waffles cook evenly and have a nice, crisp exterior.
- Mix Dry Ingredients: In a large mixing bowl, whisk together the flour, sugar, baking powder, baking soda, and salt. This guarantees that all the dry ingredients are evenly distributed.
- Prepare Wet Ingredients: In another bowl, combine the ricotta cheese, milk, eggs, and vanilla extract. Whisk until smooth and well combined. The ricotta should be fully incorporated into the mixture for a consistent texture.
- Combine Mixtures: Pour the wet ingredients into the bowl with the dry ingredients. Gently stir until just combined. It’s okay if the batter is slightly lumpy; overmixing can lead to tough waffles.
- Add Melted Butter: Gently fold in the melted butter until the batter is smooth. This will add richness and help create a crisp exterior.
- Fold in Berries: Carefully fold in the mixed berries. Be gentle to prevent crushing them, which will help maintain their shape and prevent the batter from becoming discolored.
- Cook Waffles: Lightly grease the waffle iron with a bit of butter or non-stick spray. Pour the batter onto the hot waffle iron, using about ½ cup of batter per waffle (depending on the size of your waffle iron). Cook until the waffles are golden brown and crisp, usually 4-5 minutes.
- Serve and Garnish: Remove the waffles from the iron and keep them warm in a preheated oven if necessary. Serve immediately with additional fresh berries, maple syrup, or honey as desired.
Extra Tips
For the fluffiest waffles, be sure not to overmix the batter; a few lumps are perfectly fine. If you prefer a sweeter waffle, you can add a bit more sugar to the batter.
The type of berries you use can be adjusted based on personal preference or seasonal availability. If you find the berries too tart, you can macerate them in a bit of sugar before adding them to the batter.
For an added touch of flavor, consider adding a teaspoon of lemon zest to the batter, which pairs beautifully with the ricotta and berries.
Stuffed French Toast With Cream Cheese and Berries
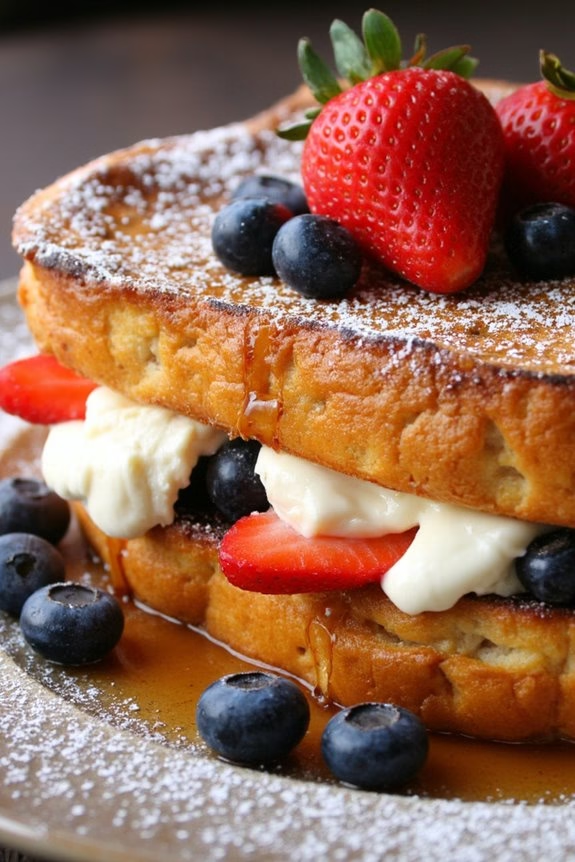
Stuffed French Toast with Cream Cheese and Berries is a delightful breakfast dish that combines the creamy richness of cream cheese with the sweet, tangy flavors of fresh berries. This dish is perfect for a special breakfast or brunch, offering a decadent twist on traditional French toast. The combination of textures and flavors makes this a crowd-pleaser, and it’s surprisingly simple to prepare.
The key to making the perfect Stuffed French Toast with Cream Cheese and Berries lies in the balance of ingredients and the technique used to cook it. The cream cheese provides a smooth and creamy filling that pairs beautifully with the natural sweetness of the berries. The bread should be thick enough to hold the filling without becoming soggy, and the egg mixture should be well-seasoned to enhance the overall flavor of the dish.
When cooked correctly, this dish is both visually appealing and delicious, making it an excellent choice for entertaining guests or treating your family to something special.
Ingredients (Serves 4-6 people)
- 8 slices of brioche or thick-cut white bread
- 1 cup cream cheese, softened
- 1/4 cup powdered sugar
- 1 teaspoon vanilla extract
- 1 cup mixed fresh berries (strawberries, blueberries, raspberries)
- 4 large eggs
- 1 cup milk
- 1 teaspoon cinnamon
- 2 tablespoons butter
- Maple syrup, for serving
- Extra berries, for garnish (optional)
Instructions
- Prepare the Filling:
- In a medium bowl, mix the softened cream cheese, powdered sugar, and vanilla extract until smooth and well combined. Gently fold in the mixed berries, being careful not to crush them.
- Assemble the French Toast:
- Spread a generous amount of the cream cheese mixture onto one side of four slices of bread. Top with the remaining slices to form a sandwich, pressing gently to seal the edges.
- Make the Egg Mixture:
- In a shallow dish, whisk together the eggs, milk, and cinnamon until well combined.
- Dip the Sandwiches:
- Heat a large skillet or griddle over medium heat and melt the butter. Dip each sandwich into the egg mixture, ensuring both sides are coated evenly.
- Cook the French Toast:
- Place the dipped sandwiches onto the skillet. Cook each side for about 3-4 minutes, or until golden brown and the filling is warmed through.
- Serve:
- Transfer the French toast to serving plates. Drizzle with maple syrup and garnish with extra berries if desired. Serve immediately.
Extra Tips
For the best results, use day-old or slightly stale bread, as it will absorb the egg mixture better without becoming too soggy. If fresh berries aren’t available, frozen berries can be used—just make sure to thaw and drain them well to prevent excess moisture.
Adjust the sweetness of the cream cheese filling by adding more or less powdered sugar to your taste. Additionally, for a richer flavor, consider adding a pinch of nutmeg to the egg mixture.
Cinnamon Roll Pastries That Wow
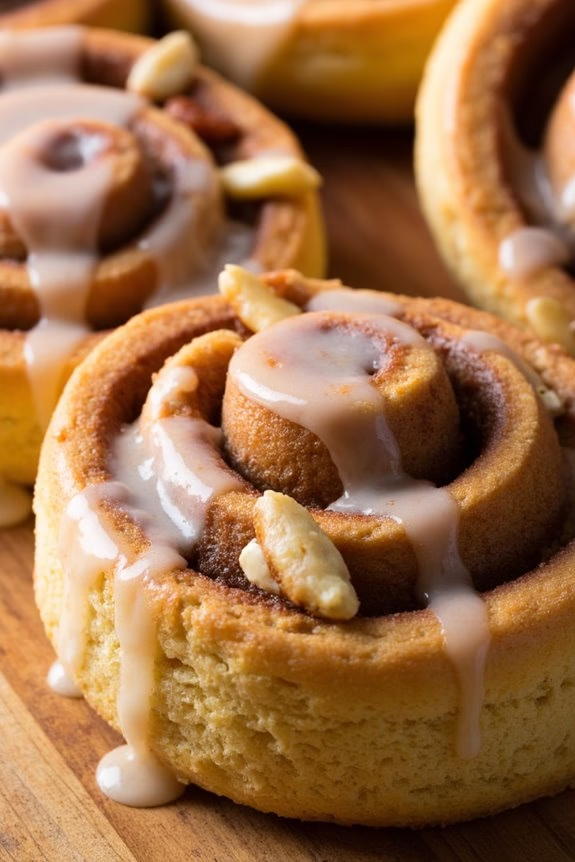
Cinnamon Roll Pastries That Wow are the perfect breakfast treat for those who love the comforting aroma and taste of cinnamon combined with a flaky pastry texture.
These pastries aren’t only delicious but also visually stunning, making them an impressive addition to any brunch table or breakfast spread. With a gooey cinnamon-sugar filling wrapped in a buttery puff pastry and topped with a sweet glaze, these pastries are guaranteed to bring a smile to anyone’s face.
The beauty of these Cinnamon Roll Pastries lies in their simplicity and ease of preparation. By using pre-made puff pastry, you can save time without compromising on flavor or texture.
Whether you’re hosting a brunch for friends or simply want to treat your family to a special breakfast, these pastries are sure to wow everyone with their delightful taste and elegant presentation.
Let’s explore the ingredients and step-by-step instructions to create these scrumptious pastries for 4-6 people.
Ingredients:
- 2 sheets of puff pastry, thawed
- 1/2 cup brown sugar
- 2 tablespoons ground cinnamon
- 1/4 cup unsalted butter, melted
- 1/2 cup powdered sugar
- 2 tablespoons milk
- 1 teaspoon vanilla extract
- 1/4 cup chopped pecans or walnuts (optional)
Instructions:
- Preheat the Oven: Begin by preheating your oven to 400°F (200°C) and line a baking sheet with parchment paper to prevent sticking.
- Prepare the Filling: In a small bowl, mix together the brown sugar and ground cinnamon. This will be the delicious filling that gives the pastries their signature flavor.
- Roll Out the Pastry: On a lightly floured surface, roll out the puff pastry sheets to make sure they’re smooth and even. Brush each sheet with the melted butter, leaving a small border around the edges.
- Add the Filling: Evenly sprinkle the cinnamon-sugar mixture over the buttered pastry sheets. If you’re using nuts, sprinkle them on top of the sugar mixture for added texture and flavor.
- Roll and Slice: Carefully roll each pastry sheet into a tight log, starting from one edge and working your way across. Use a sharp knife to cut each log into 1-inch thick slices.
- Bake the Pastries: Place the slices on the prepared baking sheet, leaving some space between each for expansion. Bake in the preheated oven for 15-20 minutes, or until the pastries are golden brown and puffed.
- Prepare the Glaze: While the pastries are baking, combine the powdered sugar, milk, and vanilla extract in a small bowl to form a smooth glaze.
- Glaze the Pastries: Once the pastries are baked, remove them from the oven and let them cool slightly. Drizzle the glaze over the warm pastries before serving.
Extra Tips:
To make certain your Cinnamon Roll Pastries come out perfectly every time, make sure your puff pastry is fully thawed but still cold to the touch before rolling it out. This helps maintain its flakiness during baking.
If you prefer a richer flavor, you can add a pinch of nutmeg or cardamom to the cinnamon-sugar mixture. Additionally, serve these pastries warm for the best taste experience, as the glaze will slightly melt over the warm rolls, adding an extra layer of sweetness.
Enjoy!
Banana Bread With Sweet Glaze
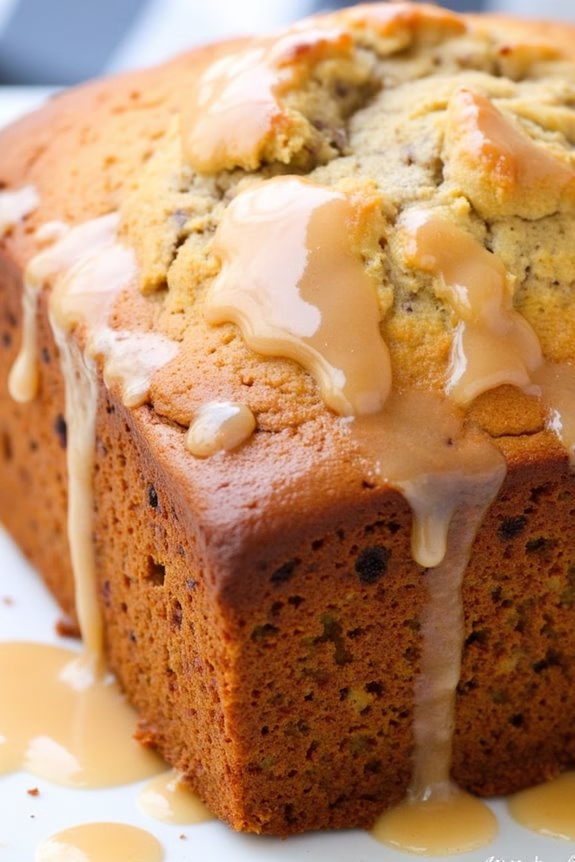
Banana bread is a classic breakfast favorite that combines the natural sweetness of ripe bananas with the comforting, dense texture of homemade bread. It’s a versatile dish that can be enjoyed as a quick breakfast on the go or as a relaxed weekend brunch centerpiece.
The addition of a sweet glaze elevates this traditional treat, making it a delightful option for those with a sweet tooth. The glaze adds a shiny, sugary topping that perfectly complements the rich banana flavor, offering a perfect balance of flavors and textures.
This recipe for Banana Bread with Sweet Glaze is designed to serve 4-6 people, making it an excellent choice for family breakfasts or small gatherings. The moistness of the bread comes from the ripe bananas, while the glaze adds an irresistible sweetness with a hint of vanilla or lemon zest, depending on your preference.
Whether you enjoy it warm from the oven or toasted with a pat of butter, this banana bread is sure to become a beloved breakfast staple.
Ingredients (serving size: 4-6 people)
- 3 ripe bananas, mashed
- 1/3 cup melted butter
- 3/4 cup sugar
- 1 egg, beaten
- 1 teaspoon vanilla extract
- 1 teaspoon baking soda
- Pinch of salt
- 1 1/2 cups all-purpose flour
- 1 cup powdered sugar
- 2 tablespoons milk
- 1/2 teaspoon vanilla extract (for glaze) or lemon zest (optional)
Instructions
- Preheat and Prepare: Preheat your oven to 350°F (175°C). Grease a 9×5 inch loaf pan with butter or non-stick spray to facilitate easy removal of the banana bread after baking.
- Mash Bananas: In a large mixing bowl, mash the ripe bananas with a fork until smooth. The bananas should be as ripe as possible for maximum sweetness and moisture.
- Mix Wet Ingredients: Stir the melted butter into the mashed bananas until well combined. Add the sugar, beaten egg, and vanilla extract, mixing thoroughly to make sure all ingredients are well incorporated.
- Combine Dry Ingredients: In a separate bowl, mix the baking soda, salt, and flour. Gradually add this dry mixture to the wet ingredients, stirring just until the flour is fully mixed in. Be careful not to overmix, as this can lead to dense bread.
- Bake: Pour the batter into the prepared loaf pan. Bake for 50-60 minutes, or until a toothpick inserted into the center comes out clean. Allow the bread to cool in the pan for about 10 minutes before transferring it to a wire rack to cool completely.
- Prepare Glaze: While the bread is cooling, prepare the glaze by whisking together the powdered sugar, milk, and vanilla extract (or lemon zest, if preferred) until smooth. The glaze should be thick but pourable.
- Glaze the Bread: Once the bread has cooled, drizzle the glaze evenly over the top. Let it set for a few minutes before slicing.
Extra Tips
For an extra moist banana bread, opt for overripe bananas with brown spots; they provide the best sweetness and texture. If you prefer a nutty crunch, consider folding in a half cup of chopped walnuts or pecans to the batter before baking.
To prevent the glaze from being too runny, add the milk gradually to achieve your desired consistency. Finally, if you want a citrusy twist, substitute the vanilla extract in the glaze with fresh lemon juice for a invigorating zing.
Enjoy your Banana Bread with Sweet Glaze warm or at room temperature for the best flavor experience.
Nutella-Stuffed Crepes
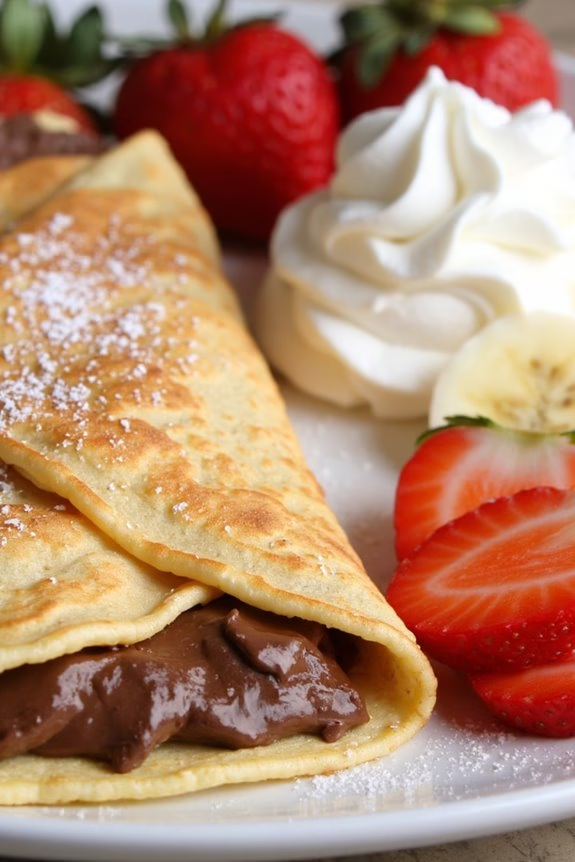
Nutella-Stuffed Crepes are a decadent breakfast treat that combines the delicate texture of crepes with the irresistible taste of creamy Nutella. Perfect for leisurely weekend mornings or special occasions, these crepes make a delightful start to the day. The light and airy crepes are filled with a generous spread of Nutella, then folded or rolled and sprinkled with powdered sugar for a sweet finishing touch.
Whether served with fresh fruit, a dollop of whipped cream, or enjoyed on their own, Nutella-Stuffed Crepes are sure to please both children and adults alike.
Creating the perfect Nutella-Stuffed Crepes involves a few simple steps, and the results are well worth the effort. The key is to prepare a smooth crepe batter and cook it to perfection, so the crepes are thin yet sturdy enough to hold the delicious Nutella filling.
Once you master the art of making crepes, you can experiment with different fillings and toppings. However, the classic combination of Nutella and crepes is a timeless favorite that never fails to impress.
Ingredients (Serves 4-6):
- 1 cup all-purpose flour
- 2 tablespoons granulated sugar
- 1/4 teaspoon salt
- 3 large eggs
- 1 1/2 cups whole milk
- 2 tablespoons unsalted butter, melted
- 1 teaspoon vanilla extract
- 1/2 cup Nutella
- Powdered sugar, for dusting
- Fresh fruit (such as strawberries or bananas), optional
- Whipped cream, optional
Cooking Instructions:
1. Prepare the Crepe Batter: In a medium-sized mixing bowl, whisk together the flour, sugar, and salt. In a separate bowl, beat the eggs and then add the milk, melted butter, and vanilla extract. Gradually add the wet ingredients to the dry ingredients, whisking continuously until you have a smooth, lump-free batter.
Let the batter rest for at least 30 minutes to an hour, allowing the flour to absorb the liquids and resulting in more tender crepes.
2. Cook the Crepes: Heat a non-stick skillet or crepe pan over medium heat. Lightly grease the pan with a small amount of butter or oil. Pour about 1/4 cup of batter into the pan, tilting and swirling the pan immediately to spread the batter evenly into a thin circle.
Cook for about 1-2 minutes, or until the edges start to lift and the bottom is golden brown. Flip the crepe carefully using a spatula and cook for an additional 30 seconds on the other side. Repeat the process with the remaining batter, stacking the crepes on a plate.
3. Fill the Crepes: Once all the crepes are cooked, spread a generous tablespoon of Nutella onto one half of each crepe. Fold the crepe in half over the Nutella, then fold in half again to form a triangle, or roll them up if preferred.
4. Serve and Garnish: Place the Nutella-stuffed crepes on serving plates. Dust with powdered sugar and garnish with fresh fruit or whipped cream if desired. Serve immediately while warm.
Extra Tips:
For the best results, make sure your crepe batter is smooth and free of lumps. If needed, strain the batter through a fine-mesh sieve to remove any lumps.
Letting the batter rest is essential for achieving the perfect texture, so don’t skip this step. If the batter thickens after resting, you can thin it out with a little more milk.
When cooking the crepes, make sure your pan is thoroughly heated and greased to prevent sticking. Practice makes perfect, so don’t be discouraged if your first few crepes aren’t flawless – they still taste delicious!
Fresh Berry and Yogurt Parfaits
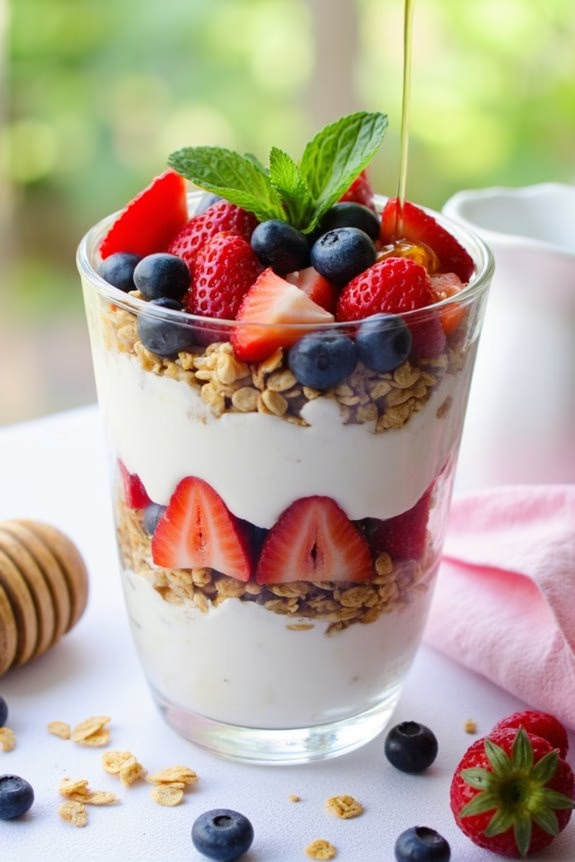
There’s nothing quite like starting your day with an invigorating and nutritious breakfast, and Fresh Berry and Yogurt Parfaits are the perfect choice for a morning pick-me-up.
These parfaits aren’t only visually stunning with their vibrant layers of ripe berries and creamy yogurt, but they’re also packed with essential nutrients that will fuel your day. The combination of sweet and tart berries, creamy yogurt, and the satisfying crunch of granola creates a delightful harmony of flavors and textures in every spoonful.
Ideal for a quick breakfast or a healthy snack, these parfaits can be customized to suit any taste. You can mix and match your favorite berries and even add extras like nuts or seeds for an added boost of nutrition.
Easy to assemble and requiring no cooking, Fresh Berry and Yogurt Parfaits are a wonderful option for those busy mornings when you need something delicious and wholesome in a hurry.
Ingredients for 4-6 servings:
- 3 cups of assorted fresh berries (such as strawberries, blueberries, raspberries)
- 4 cups of Greek yogurt (plain or flavored)
- 2 cups of granola
- 2 tablespoons of honey (optional)
- Mint leaves for garnish (optional)
Instructions:
- Prepare the Berries: Start by rinsing the berries under cold water and patting them dry with a paper towel. If using strawberries, hull and slice them into bite-sized pieces. Set the berries aside.
- Layer the Parfaits: Take a tall glass or a parfait cup and begin by adding a layer of Greek yogurt at the bottom. Use a spoon to smooth it out evenly.
- Add the Berries: On top of the yogurt, add a layer of mixed berries. Aim for an even distribution to guarantee each bite has a good mix of flavors.
- Sprinkle the Granola: Next, sprinkle a layer of granola over the berries. This will add a delightful crunch to your parfait.
- Repeat the Layers: Continue layering yogurt, berries, and granola until the glass is nearly full, finishing with a final layer of berries on top.
- Drizzle with Honey: If you prefer a sweeter parfait, drizzle a small amount of honey over the top layer of berries.
- Garnish and Serve: Garnish with a few mint leaves for an extra touch of invigoration. Serve immediately for the best taste and texture.
Extra Tips:
For a more indulgent version, consider adding a layer of nut butter between the yogurt and berries for a creamy, nutty flavor.
If you’re preparing these parfaits in advance, keep the granola separate and add it just before serving to maintain its crunchiness.
You can also experiment with different types of yogurt, such as flavored or non-dairy alternatives, to cater to dietary preferences or restrictions.
Maple Bacon Muffins
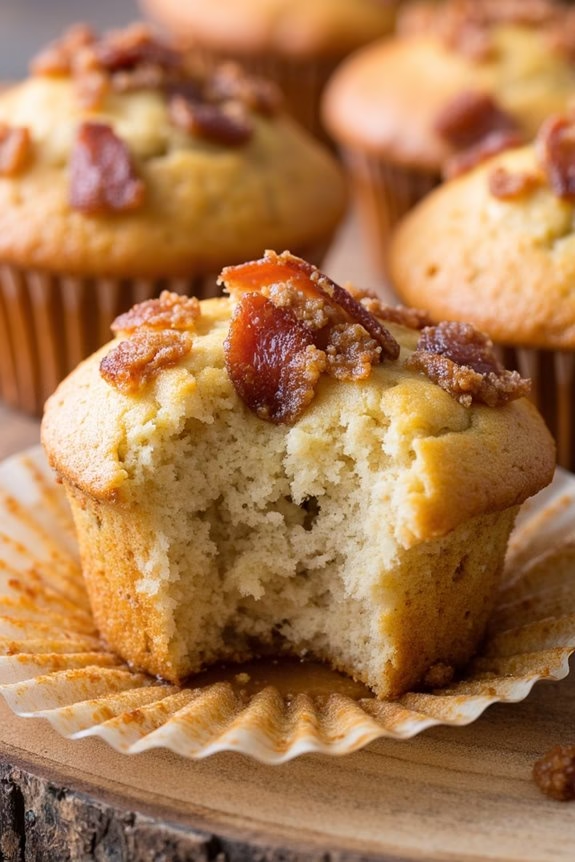
Maple Bacon Muffins are a delightful breakfast treat that marries the savory flavor of crispy bacon with the sweet richness of maple syrup. These muffins are perfect for those who love a sweet and savory combination, making them an excellent option for brunches or a special breakfast occasion.
The aroma of bacon and maple baking in your kitchen is sure to awaken anyone’s appetite, and these muffins are just as delicious as they smell. The base of the muffin is tender and fluffy, providing the perfect canvas for the chunks of bacon and the drizzle of maple syrup. When these ingredients come together, they create a mouthwatering harmony of flavors that are both comforting and indulgent.
Whether you’re serving them fresh out of the oven or packing them for breakfast on-the-go, Maple Bacon Muffins are sure to be a hit with both kids and adults alike.
Ingredients (Serving Size: 4-6 people):
- 2 cups all-purpose flour
- 1 tablespoon baking powder
- 1/2 teaspoon baking soda
- 1/2 teaspoon salt
- 1/2 cup unsalted butter, melted
- 1/2 cup maple syrup
- 1/2 cup milk
- 2 large eggs
- 1 teaspoon vanilla extract
- 8 slices of bacon, cooked and crumbled
- 1/4 cup brown sugar (optional, for topping)
Cooking Instructions:
- Preheat the Oven: Begin by preheating your oven to 375°F (190°C). Line a muffin tin with paper liners or lightly grease the cups to prevent the muffins from sticking.
- Prepare the Dry Ingredients: In a large mixing bowl, combine the all-purpose flour, baking powder, baking soda, and salt. Whisk these ingredients together to verify they’re well-mixed and any lumps are broken up.
- Mix the Wet Ingredients: In another bowl, whisk together the melted butter, maple syrup, milk, eggs, and vanilla extract until the mixture is smooth and homogenous.
- Combine Ingredients: Gradually add the wet ingredients to the dry ingredients, stirring gently until just combined. Be careful not to overmix, as this can make the muffins tough.
- Add the Bacon: Fold the crumbled bacon into the batter, verifying it’s evenly distributed throughout the mixture.
- Fill the Muffin Cups: Spoon the batter into the prepared muffin tin, filling each cup about two-thirds full. If desired, sprinkle a little brown sugar on top of each muffin for an extra touch of sweetness and crunch.
- Bake: Place the muffin tin in the preheated oven and bake for 18-22 minutes, or until a toothpick inserted into the center of a muffin comes out clean.
- Cool and Serve: Remove the muffins from the oven and let them cool in the tin for about 5 minutes before transferring them to a wire rack to cool completely. Serve warm or at room temperature.
Extra Tips:
For the best results, use high-quality maple syrup, as it will greatly impact the flavor of your muffins. If you prefer a stronger bacon flavor, consider using a thicker cut of bacon or adding a bit more than the recipe calls for.
These muffins can be stored in an airtight container at room temperature for up to two days or frozen for longer storage. To reheat, wrap them in a damp paper towel and microwave for 15-20 seconds. Enjoy your Maple Bacon Muffins with a cup of coffee or tea for a perfect breakfast experience.
Lemon and Poppy Seed Scones

Start your day with a delightful twist on a classic breakfast treat by whipping up a batch of Lemon and Poppy Seed Scones. These scones offer a perfect balance of tartness from fresh lemon and a subtle nutty flavor from poppy seeds, making them a revitalizing addition to your morning routine.
With their buttery texture and zesty aroma, these scones are sure to become a family favorite that pairs beautifully with a cup of tea or coffee. Not only are Lemon and Poppy Seed Scones delicious, but they’re also incredibly easy to make.
In just a few simple steps, you can have a warm, homemade treat ready to enjoy. Whether you’re hosting a brunch or just treating yourself to a special breakfast, these scones are a versatile option that can be enjoyed by both kids and adults alike. Here’s how you can make these delightful scones for a serving size of 4-6 people.
Ingredients
- 2 cups all-purpose flour
- 1/3 cup granulated sugar
- 2 teaspoons baking powder
- 1 tablespoon poppy seeds
- Zest of 2 lemons
- 1/2 teaspoon salt
- 1/2 cup unsalted butter, cold and cut into small cubes
- 2/3 cup heavy cream
- 1 large egg
- 1 teaspoon vanilla extract
- Juice of 1 lemon
Cooking Instructions
- Preheat the Oven: Begin by preheating your oven to 400°F (200°C). Line a baking sheet with parchment paper or a silicone baking mat.
- Mix Dry Ingredients: In a large bowl, whisk together the all-purpose flour, granulated sugar, baking powder, poppy seeds, lemon zest, and salt until well combined.
- Cut in the Butter: Add the cold, cubed butter to the dry ingredients. Use a pastry cutter or your fingertips to cut the butter into the flour mixture until it resembles coarse crumbs.
- Prepare the Wet Ingredients: In a separate bowl, whisk together the heavy cream, egg, vanilla extract, and lemon juice until well blended.
- Combine Mixtures: Pour the wet ingredients into the dry ingredients. Stir gently with a spatula until the dough just comes together. Be careful not to overmix, as this can make the scones tough.
- Shape the Dough: Transfer the dough onto a floured surface and gently knead it a few times until it holds together. Shape the dough into a circle about 1 inch thick. Cut into 8 wedges and place them on the prepared baking sheet.
- Bake the Scones: Brush the tops of the scones with a little extra heavy cream for a golden finish. Bake in the preheated oven for 15-18 minutes or until the scones are lightly golden and a toothpick inserted into the center comes out clean.
- Cool and Serve: Allow the scones to cool on the baking sheet for a few minutes before transferring them to a wire rack. Serve warm or at room temperature with butter or your favorite jam.
Extra Tips
For the best results, make sure that your butter is very cold before adding it to the dough, as this helps create a flaky texture. You can also chill the scones in the refrigerator for about 15 minutes before baking to help them rise better.
If you prefer, you can add a simple glaze made of powdered sugar and lemon juice drizzled over the top for an extra touch of sweetness. Enjoy these scones fresh for the best flavor, but they can also be stored in an airtight container for up to two days.
Mango and Coconut Smoothie Bowl
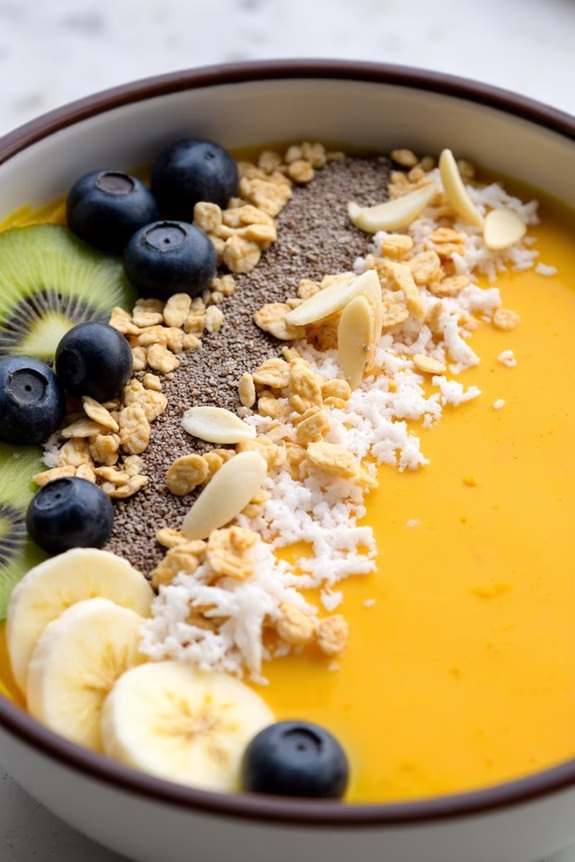
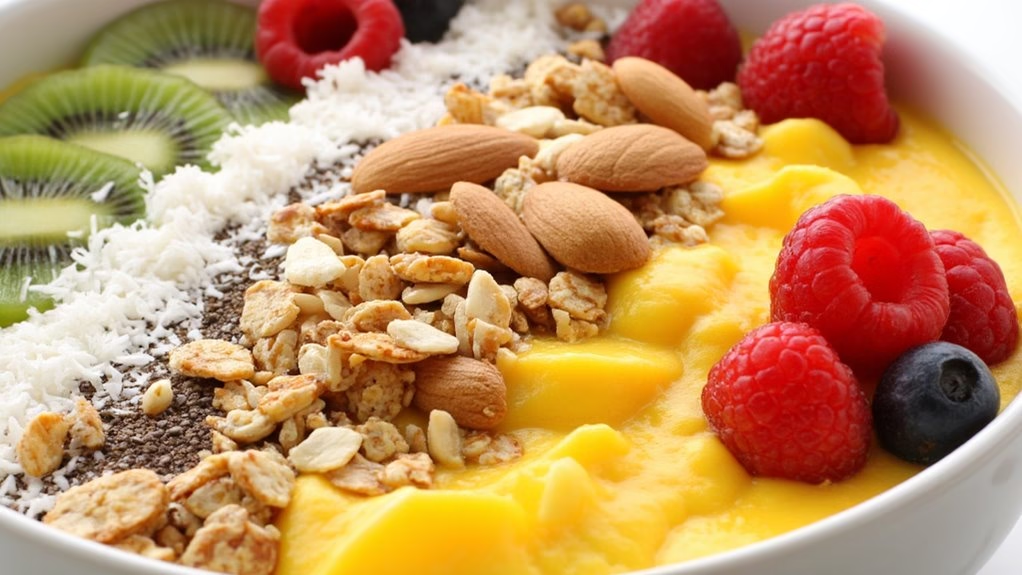
A Mango and Coconut Smoothie Bowl is a rejuvenating and delightful breakfast option that combines the tropical flavors of mango and coconut. This vibrant dish isn’t only visually appealing but also packed with nutrients that provide a great start to your day.
The creamy texture of the smoothie pairs perfectly with the crunchy toppings, making each bite a balance of flavors and textures. This smoothie bowl is ideal for those who enjoy a light yet filling breakfast that can be prepared in minutes.
Making a Mango and Coconut Smoothie Bowl is a simple process that involves blending ripe mangoes with creamy coconut milk and Greek yogurt to achieve a smooth consistency. This mixture is then topped with a variety of delicious toppings such as sliced fruits, nuts, seeds, and granola, allowing you to customize the bowl to your taste preferences.
Perfect for serving 4-6 people, this dish is sure to be a hit at your breakfast table.
Ingredients:
- 3 ripe mangoes, peeled and diced
- 1 ½ cups coconut milk
- 1 cup Greek yogurt
- 2 tablespoons honey or maple syrup
- 1 teaspoon vanilla extract
- 1 cup granola
- ½ cup shredded coconut
- ¼ cup chia seeds
- ¼ cup sliced almonds
- Fresh fruit for topping (such as sliced bananas, berries, or kiwis)
Cooking Instructions:
- Prepare the Base: In a blender, combine the diced mangoes, coconut milk, Greek yogurt, honey (or maple syrup), and vanilla extract. Blend on high speed until the mixture is smooth and creamy.
- Adjust Consistency: If the smoothie is too thick, add a little more coconut milk and blend again until you reach the desired consistency.
- Chill the Mixture: Pour the smoothie mixture into a large bowl and refrigerate it for about 10 minutes to allow it to thicken slightly and enhance the flavors.
- Assemble the Bowls: Once the smoothie base is ready, divide it evenly among 4-6 serving bowls.
- Add Toppings: Top each bowl with granola, shredded coconut, chia seeds, sliced almonds, and your choice of fresh fruit.
- Serve Immediately: Serve the smoothie bowls immediately for the best texture and freshness.
Extra Tips:
To make your Mango and Coconut Smoothie Bowl even more nutritious, consider adding a scoop of protein powder or a tablespoon of nut butter to the smoothie base before blending.
You can also experiment with different toppings like cacao nibs or goji berries for an added superfood boost. If you prefer a sweeter bowl, adjust the sweetness by adding more honey or syrup to the smoothie base.
To save time in the morning, you can prepare the smoothie mixture the night before and store it in the refrigerator, then simply add your toppings when ready to serve.