
Mornings can be a whirlwind, and the idea of a wholesome breakfast might seem like a luxury. But what if there are clever, quick options that bring that homemade feel straight to your busy routine? Think overnight oats with fresh fruits or a smoked salmon bagel—all without sacrificing time. Ready to explore these delicious possibilities? Let’s get started on a journey where convenience meets culinary comfort.
Overnight Oats With Fresh Fruits
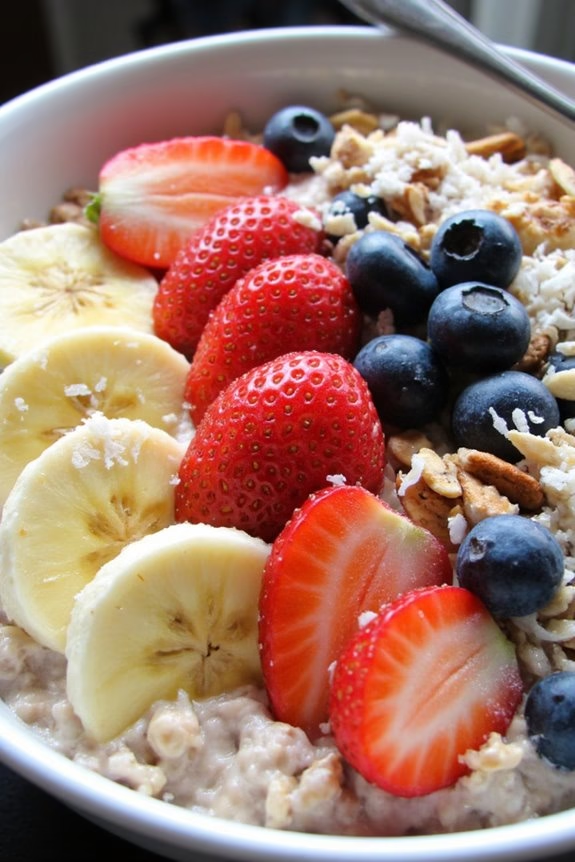
Overnight oats with fresh fruits are a perfect breakfast option for those busy mornings when you need something quick, healthy, and satisfying. This no-cook recipe allows you to prepare your breakfast the night before, so you can just grab it and go in the morning. The combination of creamy oats soaked in milk or yogurt and topped with a variety of fresh fruits provides a balanced meal with essential nutrients, fiber, and natural sweetness.
The beauty of overnight oats is their versatility. You can customize the flavors and toppings based on what you have on hand or what you’re in the mood for. Whether you prefer berries, bananas, or tropical fruits, the choice is yours. This particular recipe serves 4-6 people, making it ideal for a family breakfast or meal prep for a few days.
Let’s explore the ingredients and steps for making this delicious breakfast.
Ingredients for 4-6 servings:
- 2 cups old-fashioned rolled oats
- 2 cups milk (dairy or non-dairy)
- 1 cup Greek yogurt
- 2 tablespoons chia seeds
- 1 teaspoon vanilla extract
- 2 tablespoons honey or maple syrup
- 1 cup strawberries, sliced
- 1 cup blueberries
- 1 banana, sliced
- 1/4 cup almonds or walnuts, chopped
- 1/4 cup shredded coconut (optional)
Cooking Instructions:
- Combine the Base Ingredients: In a large mixing bowl, combine the rolled oats, milk, Greek yogurt, chia seeds, vanilla extract, and honey or maple syrup. Stir well to guarantee all the oats are evenly coated and the mixture is homogeneous.
- Refrigerate Overnight: Cover the bowl with a lid or plastic wrap and place it in the refrigerator. Let the oats soak overnight or for at least 6 hours. This allows the oats and chia seeds to absorb the liquid and become soft and creamy.
- Prepare the Fruits and Nuts: Before serving, wash and prepare your fruits. Slice the strawberries, banana, and chop the nuts if you haven’t already done so. This can be done the night before for added convenience.
- Assemble the Oats: When ready to serve, give the oats a good stir. If they seem too thick, you can add a splash of milk to loosen them up. Divide the oat mixture evenly into bowls or jars.
- Add Toppings: Top each serving with a generous amount of fresh fruits, a sprinkle of nuts, and a touch of shredded coconut if desired. Feel free to drizzle a little extra honey or syrup on top for added sweetness.
- Serve or Store: Serve immediately for a revitalizing breakfast or store in the refrigerator for up to 3 days. If storing, keep the toppings separate until ready to eat to maintain freshness.
Extra Tips:
For the creamiest and most flavorful overnight oats, use old-fashioned rolled oats rather than instant oats, which can become too mushy.
Feel free to experiment with different combinations of fruits and nuts to keep things interesting. If you prefer a vegan option, simply substitute Greek yogurt with a plant-based yogurt and use maple syrup instead of honey.
Finally, if you like a bit of spice, consider adding a pinch of cinnamon or nutmeg to the oat mixture for an extra layer of flavor.
Savory Breakfast Muffins

Start your day with a delicious and convenient breakfast option that’s perfect for busy mornings. Savory breakfast muffins are packed with protein and vegetables, making them a wholesome choice that’s both satisfying and nutritious.
These muffins aren’t only quick to prepare but also versatile, allowing you to customize the ingredients based on your preferences or what you have on hand. Whether you’re heading to work, school, or just need a quick bite before a workout, these muffins are your go-to solution for a healthy breakfast on the go.
The beauty of savory breakfast muffins lies in their simplicity and adaptability. You can enjoy them warm right out of the oven, or make a batch ahead of time and store them in the fridge or freezer for a quick heat-and-eat meal. Plus, they’re an excellent way to use up leftover vegetables or meats you have in your fridge.
With a serving size of 4-6 people, this recipe is perfect for feeding the whole family or having extras for the week.
Ingredients (for 4-6 servings):
- 1 cup all-purpose flour
- 1 teaspoon baking powder
- 1/2 teaspoon baking soda
- 1/4 teaspoon salt
- 1/4 teaspoon black pepper
- 1/4 teaspoon garlic powder
- 3 large eggs
- 1/2 cup milk
- 1/4 cup olive oil
- 1 cup shredded cheddar cheese
- 1/2 cup cooked and crumbled bacon (or diced ham)
- 1/2 cup chopped spinach
- 1/4 cup diced bell peppers
- 1/4 cup chopped green onions
Cooking Instructions:
- Preheat and Prepare: Preheat your oven to 375°F (190°C). Line a muffin tin with paper liners or lightly grease each cup to guarantee the muffins don’t stick.
- Mix Dry Ingredients: In a large bowl, whisk together the flour, baking powder, baking soda, salt, black pepper, and garlic powder. This guarantees the leavening agents are evenly distributed, leading to consistent muffin texture.
- Combine Wet Ingredients: In another bowl, beat the eggs until they’re well mixed. Add the milk and olive oil, and stir until combined. This mixture will help to blend the dry ingredients smoothly.
- Combine All Ingredients: Pour the wet ingredients into the bowl with the dry ingredients. Stir gently with a spatula until just combined; be careful not to overmix. Fold in the shredded cheddar cheese, bacon, spinach, bell peppers, and green onions until evenly distributed.
- Fill the Muffin Tins: Divide the batter evenly among the prepared muffin cups, filling each about 3/4 full. This allows room for the muffins to rise without overflowing.
- Bake: Place the muffin tin in the preheated oven and bake for 18-22 minutes, or until a toothpick inserted into the center of a muffin comes out clean. The top should be golden brown.
- Cool and Serve: Remove the muffins from the oven and let them cool in the tin for about 5 minutes. Then, transfer them to a wire rack to cool slightly before serving.
Extra Tips:
Feel free to experiment with different ingredients to suit your taste or dietary needs. You can substitute the bacon with turkey bacon or sausage for a different flavor profile.
To make the muffins gluten-free, use a gluten-free flour blend. If you prefer a vegetarian option, simply omit the meat and add extra vegetables such as diced tomatoes or mushrooms.
Greek Yogurt Parfait
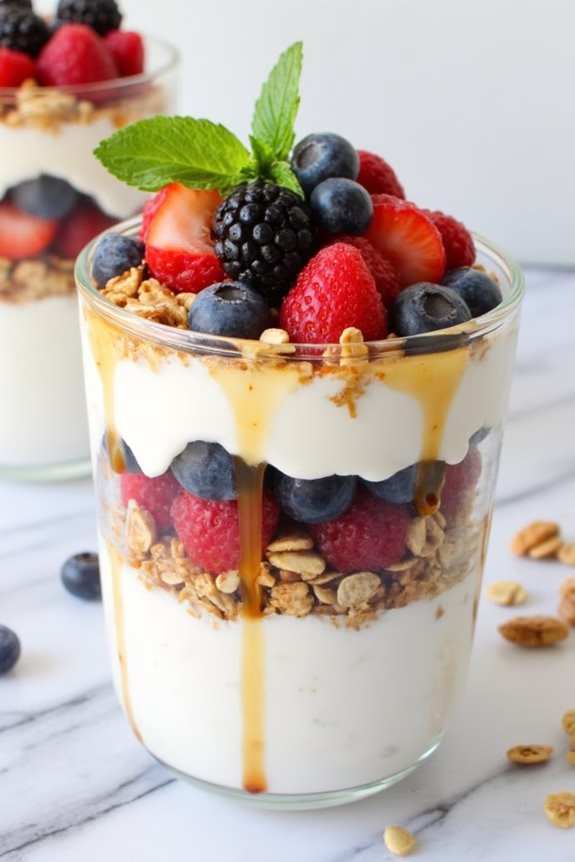
A Greek Yogurt Parfait is a quick and nutritious breakfast option perfect for those hectic mornings when you need something both delicious and convenient. This layered breakfast treat combines creamy Greek yogurt with fresh fruit, crunchy granola, and a hint of sweetness, offering a delightful balance of flavors and textures.
Whether you’re preparing breakfast for the family or simply want to treat yourself to a healthy start to the day, this parfait can be effortlessly tailored to your taste preferences.
This recipe serves approximately 4-6 people, making it ideal for a family meal or for preparing a few servings in advance for the week. The beauty of the Greek Yogurt Parfait lies in its versatility; you can mix and match fruits, nuts, and sweeteners to suit your dietary needs or seasonal availability.
Below, you’ll find the ingredients and step-by-step instructions to craft this delightful morning treat.
Ingredients:
- 6 cups Greek yogurt
- 2 cups granola
- 2 cups mixed berries (such as strawberries, blueberries, and raspberries)
- 1/2 cup honey or maple syrup
- 1/2 cup chopped nuts (such as almonds or walnuts)
- 1 teaspoon vanilla extract (optional)
- Fresh mint leaves for garnish (optional)
Instructions:
- Prepare the Ingredients: Begin by gathering all the ingredients needed for the parfait. Wash the mixed berries thoroughly and pat them dry with a paper towel. If desired, chop the larger fruits such as strawberries into bite-sized pieces.
- Mix the Yogurt: In a medium bowl, combine the Greek yogurt with the vanilla extract if using. Stir well to make certain the vanilla is evenly distributed throughout the yogurt. This step adds an extra layer of flavor to your parfait.
- Layer the Parfait: Take serving glasses or bowls and start by adding a generous spoonful of the Greek yogurt at the bottom. Follow this with a layer of granola, then a layer of mixed berries. Repeat these layers until you reach the top of the glass, leaving enough room for a drizzle of honey or maple syrup.
- Add the Finishing Touches: Drizzle honey or maple syrup over the top layer of mixed berries to add sweetness to the parfait. Sprinkle the chopped nuts on top for added crunch and texture. For a touch of elegance and freshness, garnish with a few fresh mint leaves.
- Serve and Enjoy: Serve the Greek Yogurt Parfait immediately to maintain the crunchiness of the granola. If preparing in advance, store in the refrigerator and add the granola just before serving to prevent it from becoming soggy.
Extra Tips:
For an even healthier option, consider using low-fat Greek yogurt and reducing the amount of honey or maple syrup based on your sweetness preference.
You can also experiment with different fruit combinations based on seasonal availability or dietary restrictions. For a nut-free version, simply omit the nuts or replace them with seeds like sunflower or pumpkin seeds.
Additionally, if you’re preparing these parfaits for a busy week ahead, layer them in mason jars with airtight lids, making certain the granola is stored separately until ready to serve to keep it crisp and crunchy.
Nut Butter and Banana Wrap
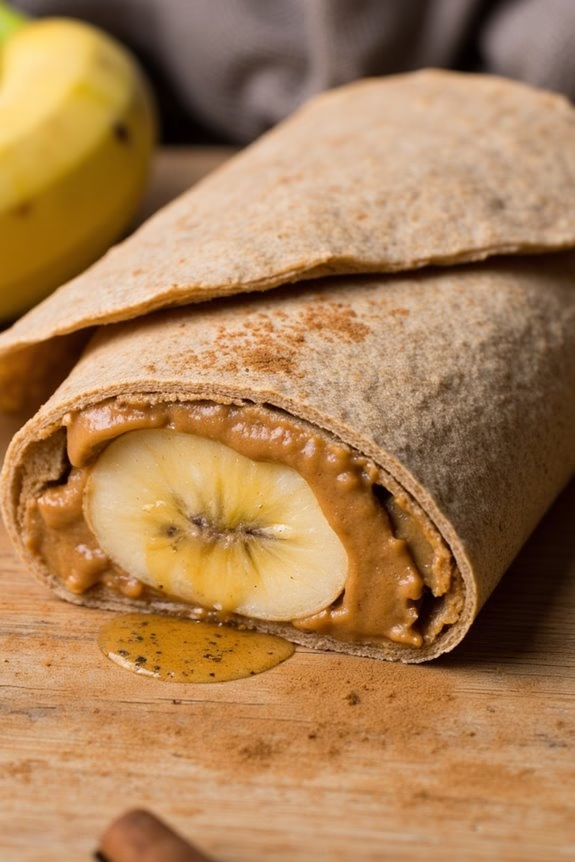
When you’re rushing out the door but still crave a nutritious breakfast, the Nut Butter and Banana Wrap is a perfect solution. This quick, satisfying, and energy-boosting meal combines the creamy richness of your favorite nut butter with the natural sweetness of ripe bananas, all wrapped up in a soft tortilla. Ideal for busy mornings, this dish can be prepared in just a few minutes and eaten on the go, making it a convenient option for both adults and children.
The beauty of the Nut Butter and Banana Wrap lies in its simplicity and versatility. You can customize it to suit your taste preferences by choosing from a variety of nut butters, such as almond, peanut, or cashew, and add optional toppings like honey, chia seeds, or cinnamon for extra flavor and nutrition.
Whether you’re looking for a post-workout snack or a quick breakfast that keeps you full until lunch, this wrap is sure to become a staple in your meal rotation.
Ingredients (Serves 4-6):
- 4-6 whole wheat tortillas
- 1 cup of nut butter (e.g., almond, peanut, or cashew)
- 4-6 ripe bananas
- Optional: 2 tablespoons honey
- Optional: 2 tablespoons chia seeds
- Optional: 1 teaspoon ground cinnamon
Cooking Instructions:
- Prepare the Ingredients: Begin by laying out all your ingredients on a clean workspace. Make sure to have your nut butter ready for spreading, and peel the bananas.
- Warm the Tortillas: Warm the tortillas to make them more pliable. You can do this by heating them in a dry skillet over medium heat for about 10-15 seconds on each side, or by wrapping them in a damp paper towel and microwaving them for about 20-30 seconds.
- Spread the Nut Butter: With a butter knife or spatula, spread a generous layer of nut butter evenly over each tortilla, leaving about a 1/2-inch border around the edges to prevent overflow when rolling.
- Add the Banana: Place a peeled banana horizontally on one end of each tortilla. If the bananas are large, you can slice them in half lengthwise to make them easier to roll.
- Optional Toppings: If desired, drizzle a small amount of honey over the banana for added sweetness. Sprinkle chia seeds and a dash of cinnamon over the nut butter for an extra nutritional boost and flavor.
- Roll the Wrap: Starting from the end with the banana, gently roll the tortilla tightly around the banana. Make sure the seam is on the bottom to help keep it closed.
- Slice and Serve: If you’re serving immediately, slice each wrap diagonally into halves or thirds for easier handling. If taking them on the go, wrap individually in parchment paper or foil to maintain freshness.
Extra Tips:
For an even more nutritious version of the Nut Butter and Banana Wrap, consider using whole-grain or gluten-free tortillas based on your dietary needs.
If you’re planning to prepare these wraps in advance, they can be stored in the refrigerator for up to 24 hours. Simply wrap them tightly in plastic wrap or foil to keep them from drying out.
This dish is also a great way to use overripe bananas, and you can experiment with different nut butters or add-ins to suit your taste preferences.
Quinoa Breakfast Bowl
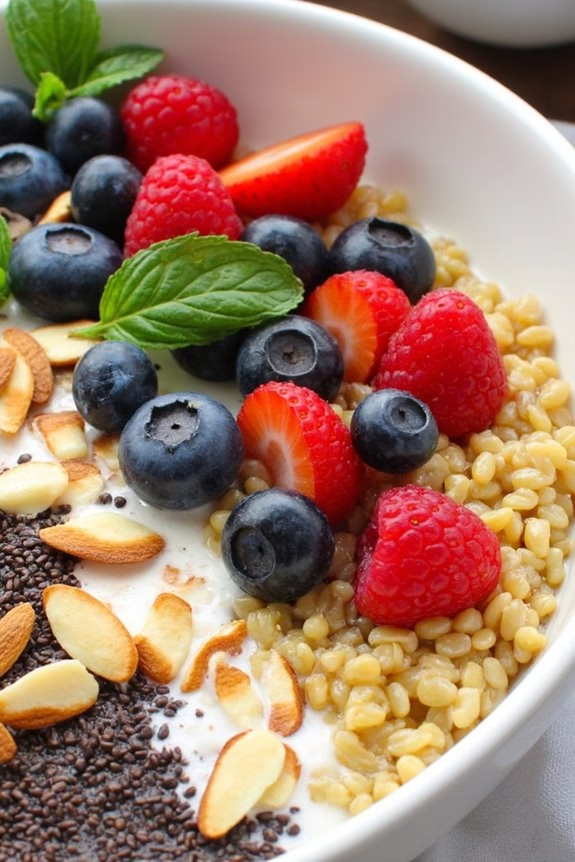
Start your day off right with a Quinoa Breakfast Bowl, a nutritious and satisfying meal that’s perfect for busy mornings. This dish combines the protein-rich benefits of quinoa with the sweet and savory flavors of fresh fruits, nuts, and a hint of cinnamon. Not only is it quick to prepare, but it also offers a versatile base that can be customized to suit your taste preferences.
Whether you’re rushing out the door or enjoying a leisurely morning, this breakfast bowl will keep you energized and ready for the day ahead.
The Quinoa Breakfast Bowl is an excellent choice for those seeking a balanced meal that can be enjoyed on the go. It’s packed with fiber, essential vitamins, and minerals, making it a wholesome option for breakfast. By preparing a larger batch, you can have multiple servings ready for the week, making it a convenient and healthy option for meal prepping.
Let’s explore the ingredients and steps needed to create this delightful breakfast dish that serves 4-6 people.
Ingredients:
- 2 cups quinoa
- 4 cups water
- 1/2 teaspoon salt
- 1 teaspoon ground cinnamon
- 2 tablespoons honey or maple syrup
- 1 cup almond milk or any milk of your choice
- 1 cup mixed berries (such as blueberries, strawberries, raspberries)
- 1/2 cup sliced almonds or any nuts of your choice
- 1/4 cup chia seeds
- 1/4 cup shredded coconut (optional)
- Fresh mint leaves for garnish (optional)
Cooking Instructions:
- Rinse the Quinoa: Start by rinsing the quinoa under cold water using a fine mesh sieve. This helps remove any bitterness from the quinoa’s natural coating.
- Cook the Quinoa: In a medium-sized pot, bring 4 cups of water to a boil. Add the quinoa and salt, then reduce the heat to low. Cover the pot and let the quinoa simmer for about 15 minutes or until all the water is absorbed and the quinoa is tender. Fluff it with a fork.
- Flavor the Quinoa: Once cooked, add ground cinnamon and honey (or maple syrup) to the quinoa. Stir well to combine, ensuring the flavors are evenly distributed throughout the quinoa.
- Prepare the Milk Mixture: In a separate saucepan, gently warm the almond milk over low heat. This step is optional, but warming the milk adds a comforting touch to the dish.
- Assemble the Bowls: Divide the cooked quinoa into individual serving bowls. Pour a desired amount of warm almond milk over each portion.
- Add Toppings: Top the quinoa with mixed berries, sliced almonds, chia seeds, and shredded coconut, if using. Feel free to add any other toppings you enjoy, like sliced bananas or dried fruits.
- Garnish and Serve: Garnish each bowl with fresh mint leaves if desired, and serve immediately. Enjoy your nutritious Quinoa Breakfast Bowl warm or cold.
Extra Tips:
For added convenience, cook the quinoa the night before and store it in the refrigerator. In the morning, simply reheat the quinoa with a splash of almond milk.
Feel free to experiment with different types of milk or sweeteners to suit your dietary preferences. If you prefer a different texture, you can toast the nuts beforehand to enhance their flavor. This recipe is easily adaptable, so get creative with your toppings and find the perfect combination that works for you!
Chia Seed Pudding
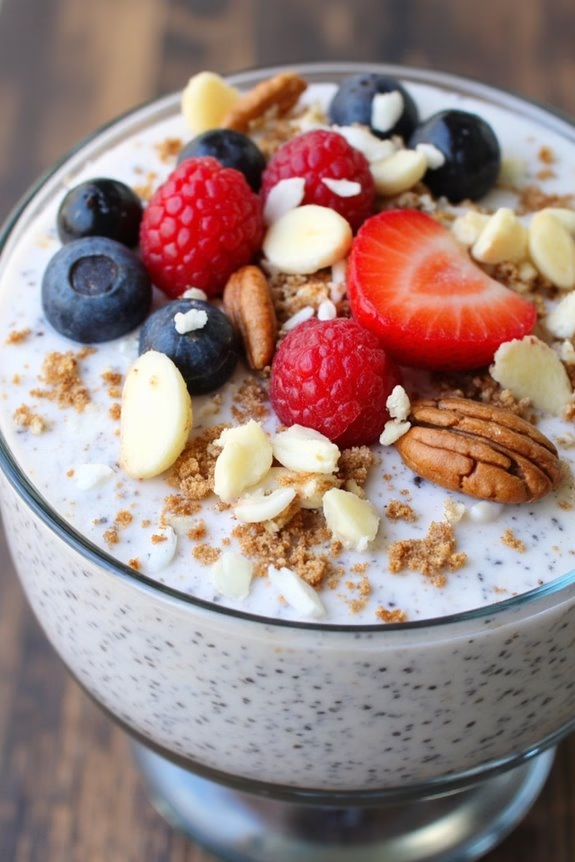
Chia Seed Pudding is a fantastic breakfast option for those hectic mornings when you need a nutritious meal that can be prepared in advance.
It’s a versatile dish that combines the tiny but mighty chia seeds with a creamy base, creating a satisfying and energizing start to your day. Packed with fiber, omega-3 fatty acids, and protein, this pudding will keep you full and focused throughout the morning.
Plus, it’s easy to customize with various flavors and toppings to suit your taste preferences.
To make this dish, you simply need to mix chia seeds with your choice of milk or milk alternative and a natural sweetener. The magic happens as the seeds absorb the liquid, expanding to form a gel-like consistency reminiscent of tapioca pudding.
This recipe serves 4-6 people, making it perfect for meal prep or sharing with family. Enjoy it chilled straight from the fridge or grab it on your way out the door for a nutritious breakfast on the go.
Ingredients for 4-6 servings:
- 1 cup chia seeds
- 4 cups almond milk (or any milk of your choice)
- 1/4 cup maple syrup or honey
- 1 teaspoon vanilla extract
- Pinch of salt
- Optional toppings: fresh fruit, nuts, seeds, coconut flakes, or granola
Cooking Instructions:
- Mix the Ingredients: In a large mixing bowl, combine the chia seeds, almond milk, maple syrup, vanilla extract, and a pinch of salt. Stir well to guarantee the chia seeds are evenly distributed and begin to absorb the liquid.
- Refrigerate: Cover the bowl with a lid or plastic wrap and place it in the refrigerator. Allow the mixture to chill for at least 4 hours or overnight. This resting time is vital as it allows the chia seeds to absorb the liquid and achieve the desired pudding-like consistency.
- Stir Again: After the resting period, give the pudding a good stir to break up any clumps and guarantee an even texture. If the pudding is too thick for your liking, you can add a little more milk and stir until you reach the desired consistency.
- Serve and Enjoy: Divide the pudding into individual serving bowls or jars. Top with your choice of fresh fruit, nuts, seeds, coconut flakes, or granola. Serve immediately or store in the refrigerator for quick and easy access throughout the week.
Extra Tips:
For an even creamier texture, consider using coconut milk or mixing in a few tablespoons of Greek yogurt.
You can also experiment with different flavorings such as cocoa powder for a chocolate twist, or add a dash of cinnamon or nutmeg for warmth.
Remember that chia pudding can be stored in the refrigerator for up to 5 days, making it an excellent option for meal prep. Enjoy customizing it to your taste and dietary preferences!
Spinach and Feta Wrap
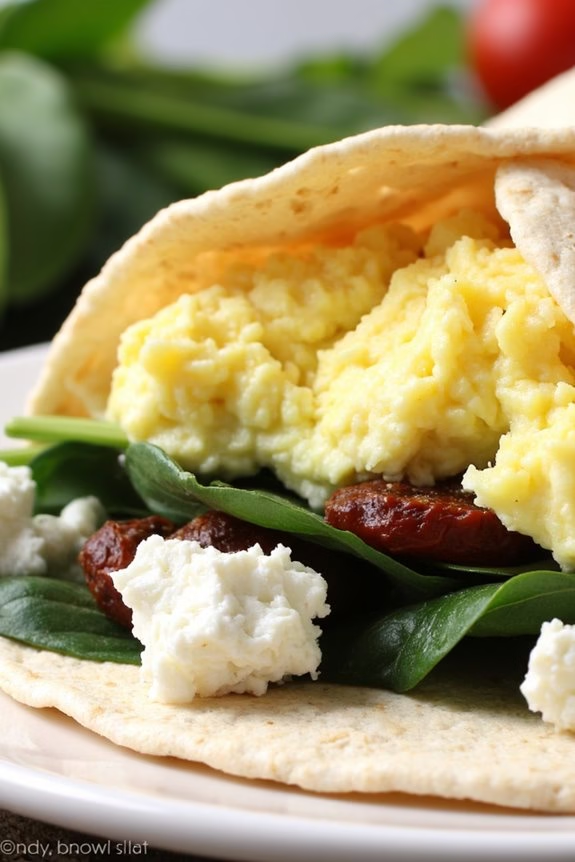
Start your day off right with a nutritious and delicious Spinach and Feta Wrap, perfect for those mornings when you’re rushing out the door. This breakfast wrap is filled with a delightful combination of fresh spinach, creamy feta cheese, and scrambled eggs, all wrapped up in a warm and soft tortilla.
It’s a satisfying meal that provides a good balance of protein, fiber, and flavor, keeping you energized and full until your next meal.
Whether you’re preparing breakfast for your family or need a quick meal for yourself, this Spinach and Feta Wrap recipe is both quick and easy to make. With a few simple ingredients and minimal preparation time, you can have a wholesome breakfast ready in no time. This recipe makes 4-6 servings, guaranteeing there’s enough to share or to save for later in the week.
Ingredients:
- 6 large eggs
- 1/4 cup milk
- Salt and pepper to taste
- 2 tablespoons olive oil
- 2 cups fresh spinach leaves
- 1 cup crumbled feta cheese
- 6 large flour tortillas
- 1/4 cup sun-dried tomatoes, chopped (optional)
Instructions:
- Prepare the Eggs: In a medium-sized bowl, whisk together the eggs, milk, salt, and pepper until well combined. This will guarantee the eggs are light and fluffy when cooked.
- Cook the Eggs: Heat 1 tablespoon of olive oil in a large non-stick skillet over medium heat. Pour in the egg mixture and cook, stirring frequently, until the eggs are softly scrambled and just cooked through. Remove from heat and set aside.
- Sauté the Spinach: In the same skillet, add the remaining tablespoon of olive oil. Once hot, add the fresh spinach leaves and cook for 2-3 minutes, stirring constantly, until wilted. This adds a beautiful green color and a dose of vitamins to your wrap.
- Assemble the Wraps: Lay out the tortillas on a flat surface. Evenly distribute the scrambled eggs, wilted spinach, and crumbled feta cheese onto each tortilla. If using, sprinkle the chopped sun-dried tomatoes over the top.
- Wrap and Serve: Carefully fold in the sides of each tortilla and then roll it up tightly from the bottom to the top. Serve immediately while warm, or wrap each in foil or parchment paper for an easy breakfast on the go.
Extra Tips:
To make these wraps even more convenient for busy mornings, consider preparing the ingredients the night before. You can scramble the eggs and sauté the spinach, then store them separately in airtight containers in the refrigerator.
In the morning, simply reheat the ingredients in the microwave, assemble the wraps, and you’re ready to go. For a little extra flavor, try adding a pinch of red pepper flakes or a splash of hot sauce to the scrambled eggs before cooking.
These wraps can also be frozen for up to a month; just wrap them tightly in plastic wrap and foil before storing in the freezer.
Avocado Toast With Poached Egg
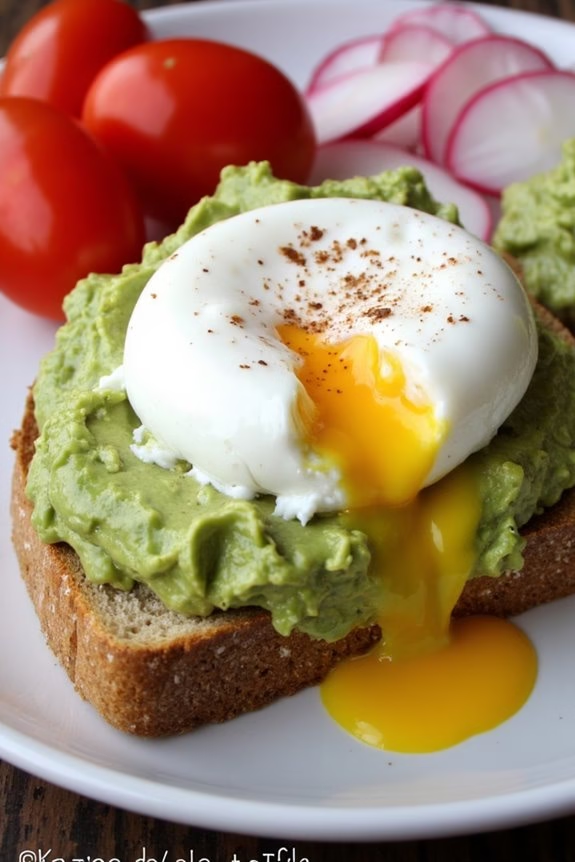
Avocado Toast With Poached Egg is a delicious and nutritious breakfast option that’s perfect for those mornings when you’re on the go but still want something satisfying. This dish combines the creamy texture of ripe avocados with the richness of perfectly poached eggs, all served on a slice of crisp toast. It’s not only quick to prepare but also packed with healthy fats and proteins, making it an ideal way to start your day with energy and vigor.
The beauty of Avocado Toast With Poached Egg lies in its simplicity and versatility. You can customize it with a variety of toppings, such as cherry tomatoes, radishes, or a sprinkle of red pepper flakes, to suit your taste preferences. Whether you’re preparing breakfast for your family or hosting a brunch, this dish is sure to impress with its vibrant presentation and delicious flavors.
Here’s how to make it for 4-6 people:
Ingredients (Serves 4-6):
- 4-6 slices of whole-grain or sourdough bread
- 3 ripe avocados
- 6 eggs
- 1 tablespoon white vinegar
- Salt and pepper, to taste
- Lemon juice, to taste
- Optional toppings: cherry tomatoes, radish slices, red pepper flakes, chopped herbs
Instructions:
- Prepare the Avocados: Cut the avocados in half, remove the pits, and scoop the flesh into a bowl. Mash the avocados to your desired consistency using a fork. Add a squeeze of lemon juice, and season with salt and pepper to taste. Set aside.
- Toast the Bread: Place the slices of bread in a toaster or under a broiler until they’re golden brown and crisp. This should take about 3-4 minutes. Keep an eye on them to prevent burning.
- Poach the Eggs: Fill a saucepan with water and bring it to a gentle simmer over medium heat. Add the tablespoon of white vinegar to the water, which helps the egg whites coagulate. Crack each egg into a small cup or ramekin. Create a gentle whirlpool in the water using a spoon and carefully slide the eggs into the water one by one. Poach for about 3-4 minutes until the whites are set but the yolks remain runny. Use a slotted spoon to remove the eggs and place them on a plate lined with paper towels to drain.
- Assemble the Toasts: Spread a generous layer of mashed avocado onto each slice of toasted bread. Top each with a poached egg. Season with additional salt and pepper, if desired, and add any optional toppings for extra flavor and color.
- Serve: Arrange the Avocado Toast With Poached Egg on a platter and serve immediately while the eggs are still warm.
Extra Tips:
For perfectly poached eggs, make sure the water is at a gentle simmer and not boiling, as too much agitation can cause the eggs to break apart. Using fresh eggs will also help the whites hold their shape better.
If you’re making this dish for a larger group, you can poach the eggs in batches and keep them warm in a bowl of hot water until ready to serve. Finally, play around with the toppings to find your favorite combination — a little bit of feta cheese or a drizzle of balsamic glaze can elevate the dish to a whole new level!
Smoked Salmon and Cream Cheese Bagel
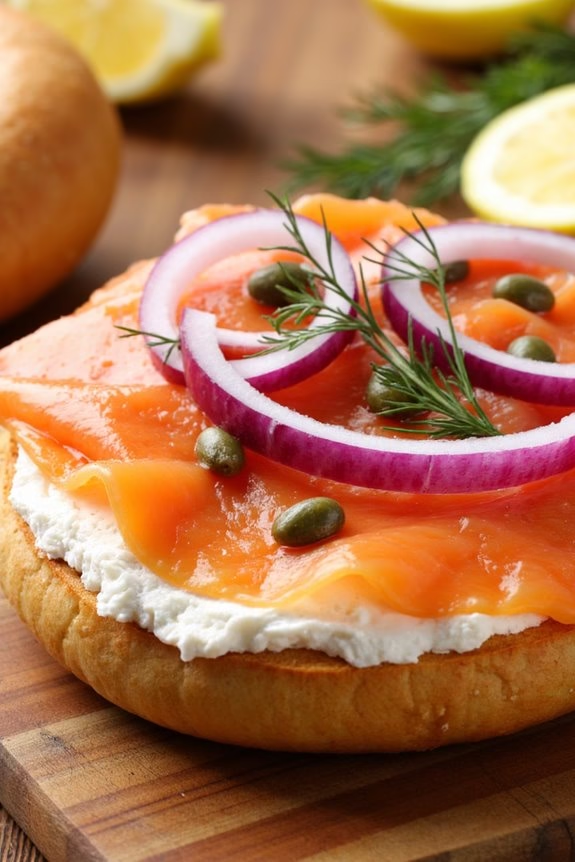
A smoked salmon and cream cheese bagel is a classic breakfast option that’s both delicious and satisfying. Perfect for those busy mornings when you need something quick yet gourmet, this dish combines the rich flavors of smoked salmon with the creamy texture of cream cheese, all nestled within a toasted bagel. Not only is it a feast for the taste buds, but it’s also a feast for the eyes, making it a great choice for a leisurely brunch or a grab-and-go breakfast.
This recipe serves 4-6 people, making it ideal for a family breakfast or a small gathering with friends. The combination of fresh ingredients like capers, red onions, and dill adds a burst of flavor and a touch of elegance. Whether you’re a seasoned cook or a kitchen novice, this simple yet sophisticated recipe will have you serving up a delightful meal in no time.
Ingredients (for 4-6 people):
- 6 bagels, sliced in half
- 8 oz cream cheese, softened
- 12 oz smoked salmon, thinly sliced
- 1 small red onion, thinly sliced
- 1/4 cup capers, drained
- 1/2 cup fresh dill, chopped
- 1 lemon, cut into wedges
- Salt and pepper to taste
Cooking Instructions:
- Prepare the Bagels: Begin by preheating your oven to 350°F (175°C). Place the bagel halves on a baking sheet. Toast them in the oven for about 5-7 minutes, or until they’re golden and crisp. This step guarantees that the bagels have a nice crunch, which complements the creamy and smooth toppings.
- Spread the Cream Cheese: Once the bagels are toasted, remove them from the oven and let them cool slightly. Using a butter knife or spatula, evenly spread the softened cream cheese over each half of the bagel. Make sure to cover the entire surface to make certain every bite is flavorful.
- Layer with Salmon: Next, layer the thinly sliced smoked salmon over the cream cheese. Aim for an even distribution, so each bite contains a good amount of salmon.
- Add the Toppings: Sprinkle the sliced red onions and capers over the salmon. These add a wonderful crunch and a burst of tangy flavor.
- Garnish with Dill: Finish off with a generous sprinkle of chopped fresh dill. This herb adds an aromatic freshness that complements the smoked salmon perfectly.
- Serve with Lemon: Serve the bagels with lemon wedges on the side. Encourage diners to squeeze a bit of lemon juice over their bagels before eating for an added zest.
Extra Tips:
For the best flavor, use high-quality smoked salmon and fresh bagels from a local bakery if possible. If you prefer a more intense flavor, consider using flavored cream cheese, such as chive or garlic. If you have extra time, you can make the bagels more indulgent by adding slices of ripe avocado or a handful of arugula for a peppery kick.
Confirm all your ingredients are fresh for the best taste experience. If you’re preparing this dish in advance, keep the components separate and assemble just before serving to prevent the bagels from becoming soggy.
Breakfast Burrito

Breakfast burritos are a delicious and convenient option for starting your day with a hearty meal. Packed with proteins, veggies, and just the right amount of cheese, these burritos can be made ahead of time and enjoyed on the go. Whether you’re rushing out the door for work or need a quick refuel after a morning workout, a breakfast burrito is a versatile choice that can be customized to fit your taste preferences.
The combination of scrambled eggs, savory sausage or bacon, and fresh vegetables wrapped snugly in a warm tortilla makes for a satisfying breakfast experience.
To make breakfast burritos for 4-6 people, you can easily adjust the ingredients to cater to more or fewer servings. This recipe provides a balance of flavors and textures, ensuring each bite is as delightful as the final one. By preparing all the components and assembling the burritos, you’ll have a ready-to-eat meal that holds up well for a busy morning. Plus, these burritos can be frozen and reheated, making them an excellent option for meal prep enthusiasts.
Ingredients (serving size: 4-6 people):
- 8 large eggs
- 1/4 cup milk
- Salt and pepper to taste
- 1 tablespoon butter
- 1 pound breakfast sausage or bacon
- 1 cup shredded cheddar cheese
- 1 cup diced bell peppers
- 1/2 cup diced onions
- 1 cup diced tomatoes
- 1/4 cup chopped fresh cilantro (optional)
- 6 large flour tortillas
- Salsa for serving (optional)
Cooking Instructions:
- Cook the Meat: In a large skillet over medium heat, cook the breakfast sausage or bacon until browned and cooked through. If using bacon, cook until crispy. Remove from the skillet and drain on paper towels. If you’re using sausage, break it into small pieces while cooking.
- Prepare the Eggs: In a mixing bowl, whisk together the eggs, milk, salt, and pepper until well combined. In the same skillet you used for the meat, melt the butter over medium heat. Pour in the egg mixture and cook, stirring gently, until the eggs are scrambled and just set. Remove from heat.
- Sauté the Vegetables: In another skillet, sauté the diced bell peppers and onions over medium heat until they’re soft and fragrant, about 5 minutes. Add the diced tomatoes and cook for an additional 2 minutes. Remove from heat.
- Assemble the Burritos: Lay out the flour tortillas on a clean surface. Evenly distribute the scrambled eggs onto each tortilla, followed by the cooked meat, sautéed vegetables, and shredded cheese. Sprinkle chopped cilantro on top if using.
- Wrap the Burritos: Fold in the sides of each tortilla, then roll them up tightly from the bottom to form a burrito.
- Warm and Serve: If desired, place the assembled burritos back in the skillet or in a preheated oven at 350°F (175°C) for a few minutes to warm through and slightly crisp the tortillas. Serve with salsa on the side.
Extra Tips:
For a spicier kick, consider adding diced jalapeños or a splash of hot sauce to the scrambled eggs. You can also experiment with different types of cheese, such as Monterey Jack or pepper jack, for a unique flavor profile.
If you’re planning to freeze the burritos, wrap each one individually in foil and store them in a resealable plastic bag. Reheat them in the oven or microwave until heated through before serving.
Ultimately, to keep your tortillas from tearing, warm them briefly in the microwave or on a dry skillet before assembling the burritos.
Protein-Packed Smoothie
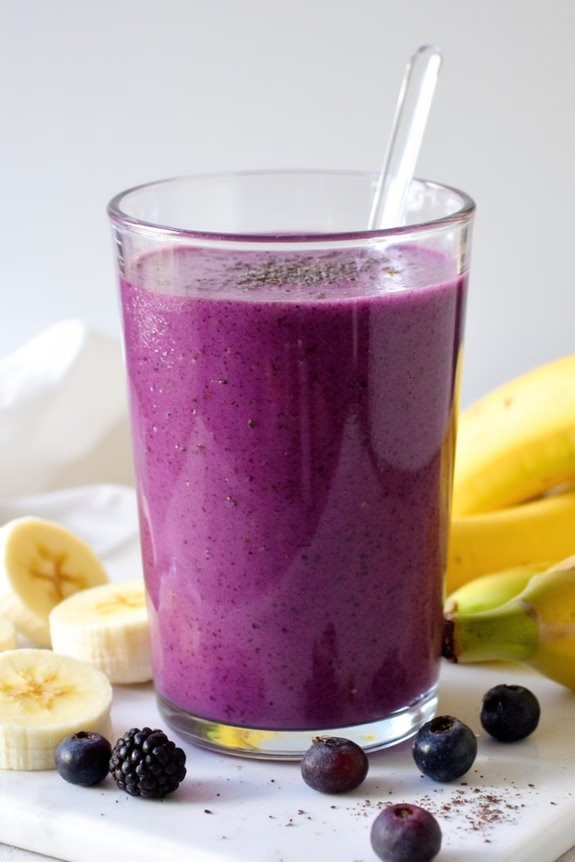
For those mornings when you’re rushing out the door but still want a nutritious breakfast, a Protein-Packed Smoothie is a perfect solution. This smoothie isn’t only quick to make but also provides a substantial amount of protein to keep you energized throughout the morning. It combines a delicious blend of fruits, yogurt, and protein powder, making it both tasty and nutritious.
This smoothie is an excellent choice for anyone looking to add more protein to their diet in an easy and delicious way. The recipe is versatile and can be customized to your taste preferences or dietary needs. Whether you’re heading to work, school, or the gym, this Protein-Packed Smoothie will keep you full and focused.
Ingredients for 4-6 Servings:
- 2 cups of almond milk (or preferred milk)
- 2 cups of frozen mixed berries
- 2 ripe bananas
- 1 cup of Greek yogurt
- 4 tablespoons of protein powder (vanilla or unflavored)
- 2 tablespoons of chia seeds
- 1 tablespoon of honey (optional)
- Ice cubes (as needed for desired thickness)
Instructions:
- Prepare the Blender: Begin by ensuring your blender is clean and ready for use. This will prevent any unwanted flavors from previous blends.
- Add the Liquid Base: Pour 2 cups of almond milk into the blender. This will be the base of your smoothie, providing a creamy consistency.
- Add Fruits: Add 2 cups of frozen mixed berries and 2 ripe bananas to the blender. The berries will give a tart, yet sweet flavor, while the bananas will add natural sweetness and creaminess.
- Incorporate Protein: Add 1 cup of Greek yogurt and 4 tablespoons of protein powder. The yogurt adds creaminess and additional protein, while the protein powder boosts the overall protein content of the smoothie.
- Boost with Superfoods: Add 2 tablespoons of chia seeds. These seeds are rich in omega-3 fatty acids and will add a slight crunch to your smoothie.
- Sweeten to Taste: Add 1 tablespoon of honey if you prefer a sweeter smoothie. This step is optional and can be adjusted based on your preference.
- Blend the Ingredients: Place the lid on the blender and blend on high speed for about 1-2 minutes, or until the mixture is smooth and creamy. If the smoothie is too thick, add more almond milk and blend again.
- Adjust Consistency: If you prefer a thicker smoothie, add a handful of ice cubes and blend again until the ice is fully crushed and incorporated.
- Serve: Pour the smoothie into glasses and serve immediately for the freshest taste and texture. If you have leftovers, store them in a sealed container in the refrigerator for up to 24 hours.
Extra Tips:
To enhance the flavor of your Protein-Packed Smoothie, consider adding a dash of cinnamon or a splash of vanilla extract before blending.
If you prefer a vegan option, use a plant-based protein powder and replace Greek yogurt with a non-dairy yogurt alternative.
For a nutty flavor, try adding a tablespoon of almond butter or peanut butter.
Remember that the ripeness of bananas can affect the sweetness, so adjust the honey accordingly. Enjoy experimenting with different fruits and flavors to find your perfect blend.
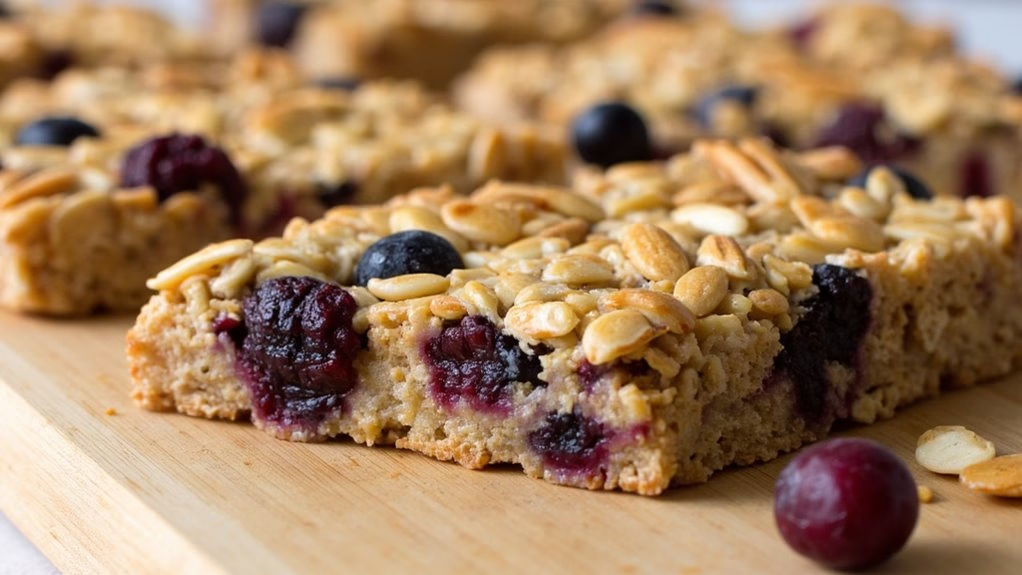
Granola Bars With Nuts and Berries
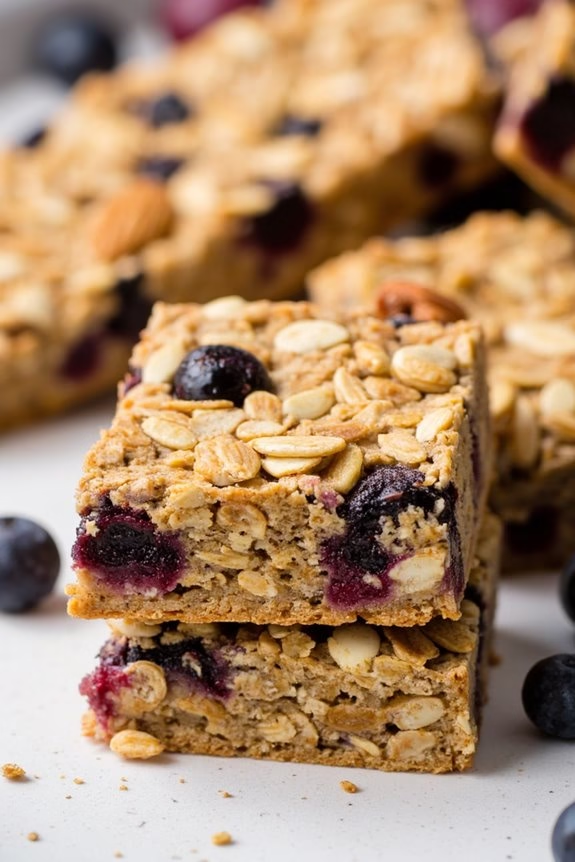
Granola Bars With Nuts and Berries are a fantastic breakfast option for those who are constantly on the move. These bars aren’t only delicious but also packed with nutrients, providing the perfect morning energy boost to kickstart your day. The combination of crunchy nuts and tangy berries creates a delightful texture and flavor profile that keeps you coming back for more.
These bars are easy to make in advance, making them a convenient choice for busy mornings when you need a quick, satisfying breakfast.
The beauty of Granola Bars With Nuts and Berries lies in their versatility. You can customize them with your favorite nuts and berries or whatever ingredients you have on hand. Whether you’re a fan of almonds, walnuts, cranberries, or blueberries, this recipe can be tailored to suit your taste preferences.
Plus, making them at home allows you to control the sugar content and avoid any unwanted preservatives typically found in store-bought bars.
Ingredients (Serves 4-6):
- 2 cups rolled oats
- 1 cup mixed nuts (almonds, walnuts, pecans)
- 1 cup mixed dried berries (cranberries, blueberries, cherries)
- 1/2 cup honey or maple syrup
- 1/4 cup coconut oil or unsalted butter
- 1/2 teaspoon vanilla extract
- 1/4 teaspoon salt
Cooking Instructions:
- Preheat the Oven: Start by preheating your oven to 350°F (175°C). This will guarantee that it’s hot enough to bake the granola bars evenly.
- Prepare the Baking Pan: Line a 9×13-inch baking pan with parchment paper or lightly grease it with oil. This will prevent the bars from sticking to the pan and make them easier to remove once baked.
- Toast the Oats and Nuts: In a large mixing bowl, combine the rolled oats and mixed nuts. Spread them out on a baking sheet and toast in the preheated oven for about 10 minutes, stirring halfway through, until they’re lightly golden and fragrant.
- Combine Wet Ingredients: In a small saucepan over low heat, melt the coconut oil or butter. Add the honey or maple syrup, vanilla extract, and salt. Stir until well combined and remove from heat.
- Mix All Ingredients: In a large bowl, combine the toasted oats and nuts with the dried berries. Pour the warm honey mixture over the dry ingredients and mix thoroughly until everything is evenly coated.
- Press into the Pan: Transfer the mixture to the prepared baking pan. Use a spatula or the back of a spoon to press the mixture firmly and evenly into the pan. This step is essential to guarantee the bars hold together once cooled.
- Bake the Bars: Place the pan in the oven and bake for 20-25 minutes, or until the edges are golden brown. Keep an eye on them to make sure they don’t over-bake, as this can make the bars too hard.
- Cool and Cut: Remove the pan from the oven and allow the bars to cool in the pan for at least 30 minutes. Once cooled, lift the bars out of the pan using the parchment paper and cut them into desired sizes.
Extra Tips:
When mixing the ingredients, make sure they’re well combined for even distribution of flavors. For a chewier texture, you can slightly reduce the baking time.
Store the granola bars in an airtight container at room temperature for up to a week, or freeze them for longer storage. If you prefer a sweeter bar, consider adding a handful of chocolate chips to the mix before baking.