

I know planning a Christmas dinner can feel challenging, but it doesn’t have to be.
Visualize serving Herb-Crusted Prime Rib or Honey-Glazed Roast Ham effortlessly.
Pair these delicious mains with sides like Creamy Garlic Mashed Potatoes and Balsamic Brussels Sprouts with Bacon.
It’s all about creating a festive feast without the stress.
Ready to craft a memorable holiday table that wows your guests?
Herb-Crusted Prime Rib
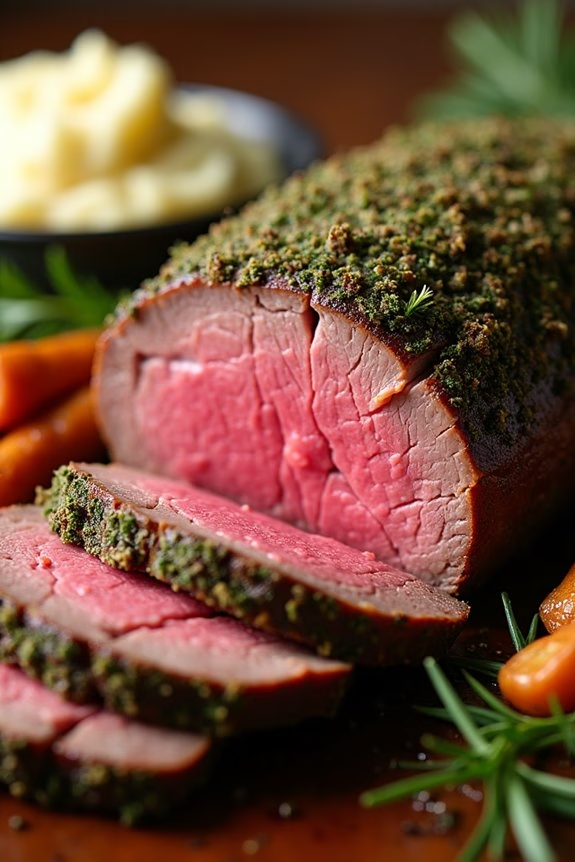
Herb-Crusted Prime Rib is a show-stopping centerpiece perfect for a memorable Christmas dinner. This luxurious cut of beef is elevated with a fragrant herb crust that adds layers of flavor and a delightful texture. When prepared correctly, the meat is tender, juicy, and full of savory goodness, making it an ideal choice for any festive gathering.
Whether you’re a seasoned chef or a home cook looking to impress, this recipe will guide you through the process to guarantee a perfectly cooked prime rib. The key to a successful Herb-Crusted Prime Rib is selecting a high-quality cut of beef and allowing it to roast slowly to achieve that perfect medium-rare finish.
The herb crust is a blend of fresh herbs, garlic, and seasoning that complements the rich flavor of the prime rib. Paired with classic sides like creamy mashed potatoes or roasted vegetables, this dish is guaranteed to satisfy everyone at the table. This recipe is designed for a serving size of 4-6 people, providing a generous portion for each guest.
Ingredients for Herb-Crusted Prime Rib (Serves 4-6):
- 1 (4-5 pound) bone-in prime rib roast
- 2 tablespoons olive oil
- 4 cloves garlic, minced
- 2 tablespoons fresh rosemary, chopped
- 2 tablespoons fresh thyme, chopped
- 1 tablespoon fresh parsley, chopped
- 1 tablespoon kosher salt
- 1 teaspoon black pepper
- 1 tablespoon Dijon mustard
Cooking Instructions:
- Prepare the Prime Rib: Remove the prime rib from the refrigerator and let it sit at room temperature for about 1 hour. This helps the meat cook more evenly.
- Preheat the Oven: Preheat your oven to 450°F (232°C). This initial high heat will help form a crust on the outside of the roast.
- Make the Herb Mixture: In a small bowl, combine the minced garlic, chopped rosemary, thyme, parsley, olive oil, kosher salt, black pepper, and Dijon mustard. Mix until a paste-like consistency is achieved.
- Apply the Herb Crust: Pat the prime rib dry with paper towels. Rub the herb mixture evenly over the entire surface of the roast, ensuring all sides are coated.
- Roast the Prime Rib: Place the prime rib on a rack in a roasting pan, fat side up. Insert a meat thermometer into the thickest part of the roast. Roast in the preheated oven for 20 minutes.
- Reduce Heat and Continue Roasting: Lower the oven temperature to 325°F (163°C) and continue roasting until the internal temperature reaches 120°F (49°C) for medium-rare, approximately 1.5 to 2 hours, depending on the size of the roast.
- Rest the Meat: Remove the prime rib from the oven and tent it with aluminum foil. Let it rest for at least 20 minutes. During this time, the internal temperature will continue to rise to about 130°F (54°C).
- Carve and Serve: Once rested, carve the prime rib into slices of desired thickness. Serve immediately with your choice of sides.
Extra Tips: For the best results, confirm your prime rib is at room temperature before roasting, as this helps with even cooking. Using a meat thermometer is vital to avoid overcooking.
Remember that the meat will continue to cook as it rests, so it’s better to err on the side of slightly underdone. If you prefer a different doneness level, adjust the target internal temperature accordingly.
Finally, letting the meat rest before carving allows the juices to redistribute, guaranteeing each slice is juicy and flavorful.
Honey-Glazed Roast Ham
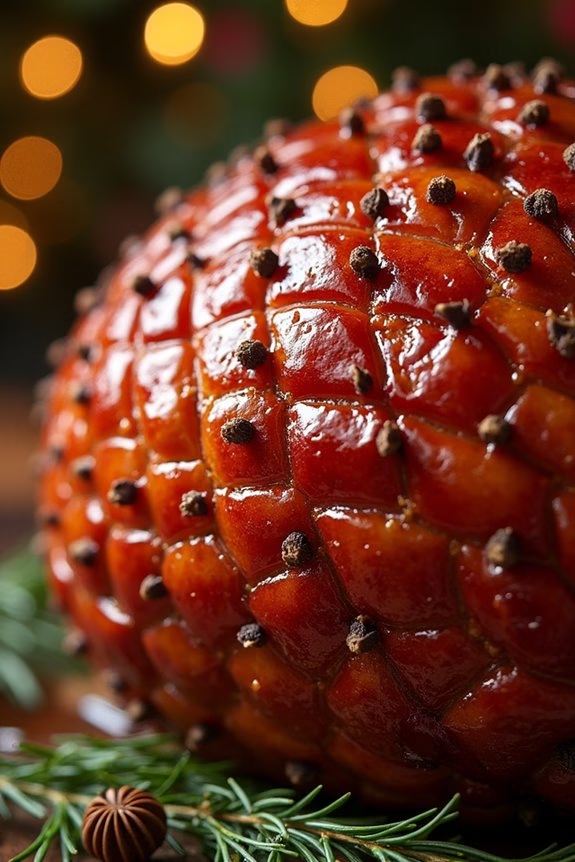
Honey-Glazed Roast Ham is a festive favorite that brings warmth and joy to your Christmas dinner table. This classic dish features a succulent ham, beautifully glazed with a luscious honey mixture, creating a perfect balance of savory and sweet flavors. The ham is roasted to perfection, guaranteeing a tender and juicy center with a mouthwatering caramelized crust.
Whether served as the main attraction or as part of a larger spread, Honey-Glazed Roast Ham is sure to become a cherished tradition in your holiday celebrations.
Preparing this dish is both straightforward and rewarding, making it an excellent choice for cooks of any skill level. The honey glaze, enhanced with aromatic spices and tangy mustard, infuses the ham with rich flavors and a stunning glossy finish.
The roasting process allows the glaze to seep into the meat, enhancing its natural taste while creating a delightful aroma that fills your home. With just a few ingredients and some simple steps, you can create a memorable centerpiece that will impress your guests and leave everyone craving more.
Ingredients (serves 4-6 people):
- 1 (4-5 pound) bone-in ham
- 1 cup honey
- 1/4 cup Dijon mustard
- 1/4 cup brown sugar
- 1/4 cup apple cider vinegar
- 1 teaspoon ground cinnamon
- 1/2 teaspoon ground cloves
- 1/2 teaspoon ground nutmeg
- Whole cloves (optional, for studding)
- Salt and pepper to taste
Cooking Instructions:
- Preheat the Oven: Preheat your oven to 325°F (165°C) to guarantee it’s ready for roasting the ham.
- Prepare the Ham: Place the ham on a sturdy roasting rack in a large roasting pan. If using whole cloves, you can lightly score the surface of the ham in a diamond pattern and stud with cloves for added flavor and decoration.
- Make the Glaze: In a medium saucepan, combine the honey, Dijon mustard, brown sugar, apple cider vinegar, ground cinnamon, ground cloves, and ground nutmeg. Heat the mixture over medium heat, stirring constantly, until the sugar dissolves and the glaze thickens slightly, about 5 minutes.
- Glaze the Ham: Generously brush the prepared glaze over the entire surface of the ham, guaranteeing it gets into the scored cuts for maximum flavor absorption. Reserve some glaze for basting.
- Roast the Ham: Place the ham in the preheated oven. Roast for about 1.5 to 2 hours, or until the internal temperature reaches 140°F (60°C), basting with the reserved glaze every 30 minutes to keep it moist and flavorful.
- Rest the Ham: Once cooked, remove the ham from the oven and let it rest for 15-20 minutes. This resting period allows the juices to redistribute throughout the meat, guaranteeing a juicy and tender result.
- Slice and Serve: Carve the ham into slices and serve warm, drizzled with any remaining glaze or pan juices.
Extra Tips:
For added flavor, consider placing a few apple slices or orange segments in the roasting pan while cooking the ham. This not only enhances the flavor but also adds a delightful aroma.
If you’re short on time, you can prepare the glaze a day in advance and store it in the refrigerator. Guarantee the ham is at room temperature before roasting to promote even cooking.
Finally, if you prefer a thicker glaze, allow it to simmer a bit longer until it reaches your desired consistency.
Garlic Butter Roasted Turkey
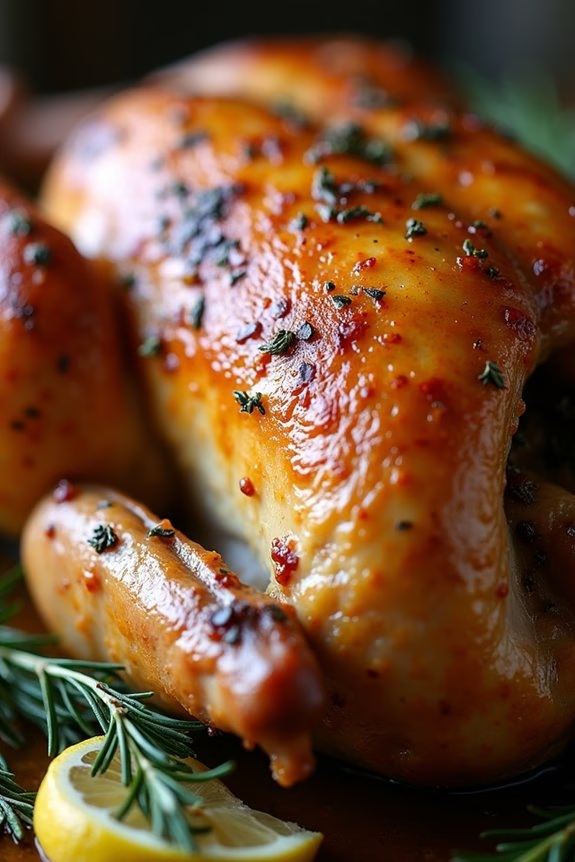
Garlic Butter Roasted Turkey is a showstopper centerpiece that will elevate your Christmas dinner to a new level of deliciousness. This dish combines the succulent flavors of roasted turkey with the rich and savory essence of garlic-infused butter, resulting in a perfectly golden and juicy bird.
Whether you’re hosting an intimate gathering or a festive family feast, this recipe is sure to impress your guests with its mouthwatering aroma and delightful taste.
The secret to this exquisite turkey lies in the careful preparation and the infusion of flavors. The garlic butter not only bastes the turkey to perfection but also seeps into the meat, guaranteeing each bite is bursting with flavor.
The turkey is roasted until it achieves a crisp, golden-brown skin while maintaining its moist, tender interior. This recipe will provide you with a serving size suited for 4-6 people, making it an ideal choice for a cozy holiday celebration.
Ingredients:
- 1 whole turkey (10-12 pounds)
- 1 cup unsalted butter, softened
- 6 cloves garlic, minced
- 2 teaspoons salt
- 1 teaspoon black pepper
- 1 tablespoon fresh thyme leaves
- 1 tablespoon fresh rosemary, chopped
- 1 tablespoon fresh sage, chopped
- 1 lemon, halved
- 1 onion, quartered
- 2 cups chicken broth
Cooking Instructions:
- Prepare the Turkey: Preheat your oven to 325°F (165°C). Remove the turkey giblets and pat the turkey dry with paper towels. Place the turkey on a roasting rack inside a large roasting pan.
- Make the Garlic Butter: In a bowl, combine the softened butter, minced garlic, salt, black pepper, thyme, rosemary, and sage. Mix until well combined.
- Butter the Turkey: Carefully separate the skin from the turkey breast using your fingers, creating pockets. Spread half of the garlic butter mixture under the skin of the turkey breast. Rub the remaining garlic butter all over the outside of the turkey.
- Stuff the Turkey: Insert the lemon halves and onion quarters into the cavity of the turkey. These aromatics will add extra flavor to the meat.
- Roast the Turkey: Pour the chicken broth into the bottom of the roasting pan. This will keep the turkey moist during cooking. Place the turkey in the preheated oven and roast for about 3 to 3.5 hours, or until the internal temperature in the thickest part of the thigh reaches 165°F (75°C).
- Baste Occasionally: Every 45 minutes, baste the turkey with the juices that accumulate in the bottom of the pan to guarantee a moist and evenly cooked turkey.
- Rest the Turkey: Once fully cooked, remove the turkey from the oven and let it rest for at least 20-30 minutes before carving. This allows the juices to redistribute throughout the meat, ensuring juicy slices.
Extra Tips:
To prevent the skin from over-browning, you can tent the turkey with aluminum foil during the final hour of roasting.
Also, be sure to have a reliable meat thermometer on hand to check the turkey’s internal temperature for doneness.
If you’re making gravy, the drippings from the roasting pan can be used as a flavorful base.
Finally, customizing the herb blend in the garlic butter to suit your taste can add a personal touch to this classic holiday dish.
Cranberry Pecan Stuffed Chicken
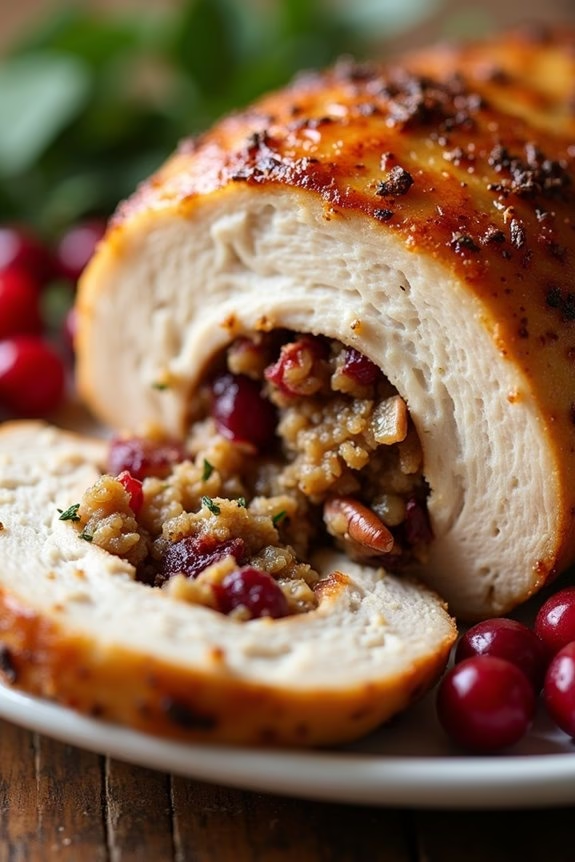
This Christmas, elevate your holiday dinner with the delightful flavors of Cranberry Pecan Stuffed Chicken. A festive twist on a classic dish, this recipe combines the tartness of cranberries with the rich, nutty taste of pecans, all wrapped in succulent chicken breasts.
It’s a perfect main course that not only looks impressive on the dining table but also tantalizes the taste buds with its blend of sweet, savory, and nutty elements. Whether you’re hosting a grand family gathering or an intimate dinner, this dish is sure to be a hit with guests of all ages.
Preparing this dish involves a few simple steps, but the result is a memorable meal that captures the essence of Christmas. The stuffing is made with a mix of dried cranberries, crunchy pecans, and a touch of aromatic herbs, which infuse the chicken with a depth of flavor.
Baked to perfection, the chicken remains moist and tender, with a slight crispness on the outside. Let’s plunge into the details of creating this festive masterpiece that serves 4-6 people.
Ingredients:
- 4-6 boneless, skinless chicken breasts
- 1 cup dried cranberries
- 1 cup chopped pecans
- 1 cup breadcrumbs
- 1/4 cup butter, melted
- 1/4 cup chicken broth
- 1 teaspoon dried thyme
- 1 teaspoon dried rosemary
- Salt and pepper to taste
- 2 tablespoons olive oil
- 1/2 cup white wine (optional)
Cooking Instructions:
- Preheat the Oven: Begin by preheating your oven to 375°F (190°C) to make sure it’s ready for baking once the chicken is prepared.
- Prepare the Stuffing: In a large mixing bowl, combine the dried cranberries, chopped pecans, breadcrumbs, melted butter, chicken broth, thyme, rosemary, salt, and pepper. Mix well until the ingredients are evenly combined and the stuffing is moist.
- Prepare the Chicken Breasts: Take each chicken breast and, using a sharp knife, make a pocket by slicing it horizontally without cutting all the way through. Be gentle to avoid tearing the meat.
- Stuff the Chicken: Carefully fill each chicken breast pocket with the cranberry pecan stuffing. Use toothpicks or kitchen twine to secure the opening to prevent the stuffing from spilling out during cooking.
- Sear the Chicken: Heat olive oil in a large oven-safe skillet over medium-high heat. Add the stuffed chicken breasts and sear for about 3-4 minutes on each side, or until they’re golden brown.
- Bake the Chicken: If you’re using white wine, pour it into the skillet to deglaze, stirring to scrape any bits from the bottom. Transfer the skillet to the preheated oven and bake for 25-30 minutes, or until the chicken is cooked through and reaches an internal temperature of 165°F (74°C).
- Rest and Serve: Allow the chicken to rest for a few minutes after removing it from the oven. This helps the juices redistribute, keeping the meat tender. Slice and serve warm, garnished with extra cranberries and pecans if desired.
Extra Tips:
To make certain the chicken breasts cook evenly, consider pounding them to an even thickness before creating the pockets. If you don’t have an oven-safe skillet, sear the chicken in a regular pan and then transfer it to a baking dish for the oven step.
For an added layer of flavor, consider marinating the chicken in a mixture of olive oil, lemon juice, and herbs for a few hours before stuffing. Adjust seasoning to taste, and feel free to experiment with other nuts or dried fruits in the stuffing to suit your preference.
Lemon Herb Baked Salmon
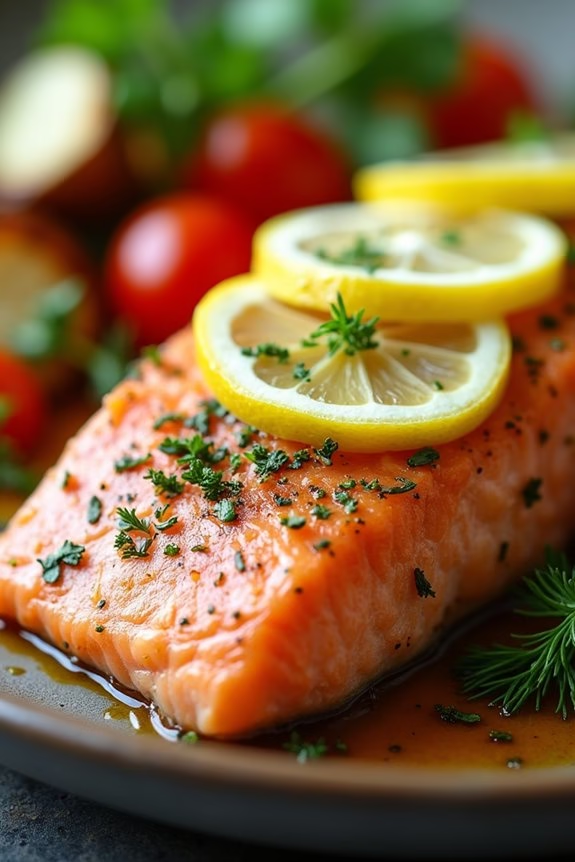
For a festive and flavorful Christmas dinner, try making Lemon Herb Baked Salmon. This dish combines the delicate taste of salmon with the invigorating flavors of lemon, garlic, and a blend of aromatic herbs.
Perfectly baked to a tender finish, this main course will delight your guests and provide a healthy option amidst the holiday indulgence. Whether you’re a seasoned chef or a home cook, this recipe is straightforward and sure to impress.
The lemon herb seasoning provides a zesty contrast to the rich, buttery texture of salmon, making it a standout dish on any holiday table. The recipe is designed for a serving size of 4-6 people, guaranteeing that everyone gets to enjoy this delicious entrée.
With a short preparation time and simple ingredients, you can spend more time celebrating and less time in the kitchen.
Ingredients for 4-6 servings:
- 2 lbs salmon fillet
- 3 tablespoons olive oil
- 3 cloves garlic, minced
- 1 lemon, thinly sliced
- 1 tablespoon fresh dill, chopped
- 1 tablespoon fresh parsley, chopped
- 1 teaspoon salt
- 1/2 teaspoon black pepper
- 1/2 teaspoon paprika
- Lemon wedges, for serving
Cooking Instructions:
- Preheat Oven: Preheat your oven to 375°F (190°C) to make sure it’s hot enough to properly bake the salmon.
- Prepare the Baking Dish: Lightly grease a baking dish with a tablespoon of olive oil or line it with parchment paper for easy cleanup.
- Season the Salmon: Place the salmon fillet in the prepared baking dish. Drizzle the remaining olive oil over the salmon. Sprinkle garlic, salt, black pepper, and paprika evenly over the top.
- Add Herbs and Lemon: Sprinkle the chopped dill and parsley over the salmon. Arrange the lemon slices over the top of the fillet to cover it evenly.
- Bake the Salmon: Place the baking dish in the preheated oven. Bake for 20-25 minutes, or until the salmon is cooked through and flakes easily with a fork.
- Check for Doneness: If you have a meat thermometer, the internal temperature should reach 145°F (63°C). This confirms the salmon is safely cooked.
- Serve: Once done, remove the salmon from the oven. Allow to rest for a couple of minutes before serving. Garnish with extra lemon wedges if desired.
Extra Tips:
When preparing Lemon Herb Baked Salmon, consider using fresh herbs for the best flavor, though dried herbs can be substituted in a pinch.
If using a thicker fillet, you may need to extend the cooking time slightly. You can also add a dash of white wine or a splash of lemon juice to the baking dish for an extra layer of flavor.
Finally, pairing the salmon with a side of roasted vegetables or a fresh salad can create a balanced and nutritious meal perfect for the holiday season.
Maple Dijon Roasted Carrots
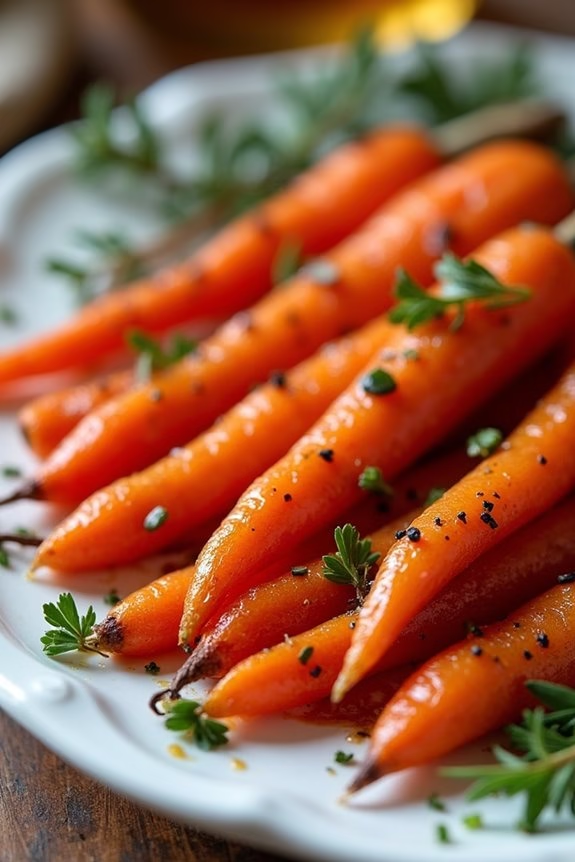
Maple Dijon Roasted Carrots are a delightful addition to any Christmas dinner table. This dish combines the natural sweetness of carrots with the rich, tangy flavor of Dijon mustard and the deep, earthy sweetness of maple syrup. The roasting process caramelizes the sugars on the carrots’ surface, creating a deliciously sticky glaze that’s both visually appealing and incredibly tasty.
Not only is this dish simple to prepare, but it also brings a vibrant splash of color to your holiday spread, making it as pleasing to the eye as it’s to the palate.
When preparing Maple Dijon Roasted Carrots, it’s important to select fresh, high-quality carrots to guarantee the best flavor and texture. Carrots are inherently sweet, and the roasting process enhances this sweetness, creating a beautiful contrast with the mustard’s sharpness and the syrup’s richness. This dish can be served as a side to a variety of main courses, seamlessly complementing both traditional and modern Christmas dinner options.
The following recipe serves 4-6 people, making it perfect for a festive family gathering or holiday party.
Ingredients (Serves 4-6):
- 2 pounds of carrots, peeled and cut into sticks
- 3 tablespoons olive oil
- 3 tablespoons maple syrup
- 2 tablespoons Dijon mustard
- 1 teaspoon salt
- 1/2 teaspoon black pepper
- 1 teaspoon garlic powder
- 1 tablespoon fresh thyme leaves (optional)
- 1 tablespoon chopped fresh parsley for garnish
Instructions:
- Preheat the Oven: Start by preheating your oven to 400°F (200°C). This temperature is ideal for roasting, allowing the carrots to cook evenly and develop a caramelized exterior.
- Prepare the Carrots: Peel the carrots and cut them into uniform sticks, approximately 2-3 inches long. Uniformity guarantees that the carrots cook at the same rate.
- Make the Glaze: In a large mixing bowl, combine the olive oil, maple syrup, Dijon mustard, salt, black pepper, and garlic powder. Whisk together until the ingredients are well blended to form a smooth glaze.
- Coat the Carrots: Add the carrot sticks to the bowl containing the glaze. Toss the carrots thoroughly until they’re evenly coated with the mixture.
- Arrange for Roasting: Spread the coated carrots in a single layer on a baking sheet lined with parchment paper or foil. Confirm the carrots aren’t overcrowded to allow them to roast properly.
- Roast the Carrots: Place the baking sheet in the preheated oven and roast the carrots for 25-30 minutes. Halfway through the cooking time, toss the carrots gently to guarantee even roasting. The carrots should be tender and caramelized when done.
- Garnish and Serve: Remove the carrots from the oven and transfer them to a serving platter. Sprinkle fresh thyme leaves and chopped parsley over the top for a burst of flavor and color. Serve warm as a side dish.
Extra Tips:
When selecting the carrots, try to choose ones that are roughly the same size to guarantee even cooking. If using larger carrots, you may need to adjust the cooking time slightly.
For additional flavor, you can add a pinch of cayenne pepper to the glaze for a subtle heat or sprinkle some toasted nuts, like pecans or walnuts, for added texture. This dish can also be made ahead of time; simply reheat in the oven before serving to crisp them up again.
Enjoy your Maple Dijon Roasted Carrots as a sweet and savory highlight of your Christmas feast!
Creamy Garlic Mashed Potatoes
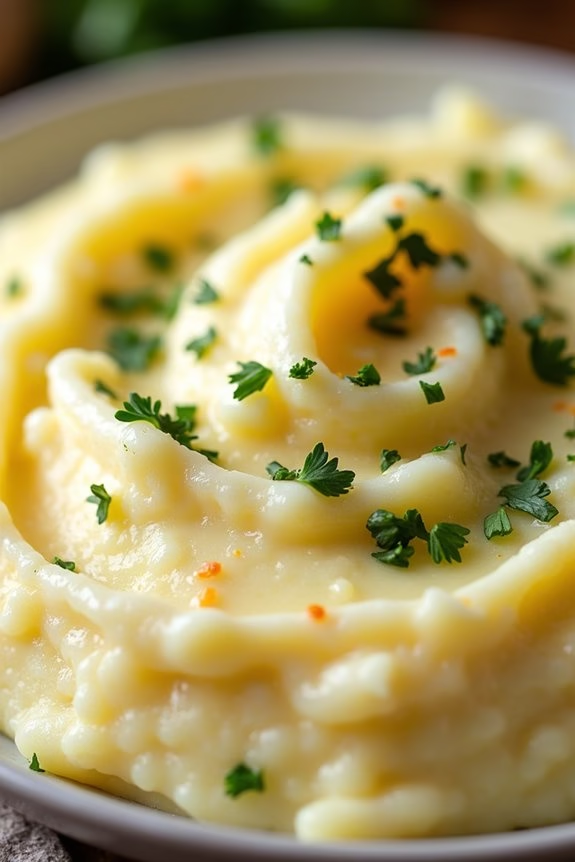
Creamy Garlic Mashed Potatoes are a timeless classic and a must-have at any Christmas dinner table. This dish combines the comforting, velvety texture of mashed potatoes with the rich and robust flavor of garlic, creating a side that beautifully complements any main course. The secret to perfect mashed potatoes lies in the balance of creaminess and flavor, guaranteeing each bite melts in your mouth while delivering a delightful garlicky punch.
To achieve this, the potatoes are cooked to tender perfection, then mashed with butter, cream, and roasted garlic, creating a harmonious blend of flavors and textures. By using Yukon Gold or Russet potatoes, you guarantee a fluffy texture, while the addition of roasted garlic adds depth and aromatic intensity. Whether served alongside a holiday roast or enjoyed on its own, these Creamy Garlic Mashed Potatoes are sure to be a hit with family and friends.
Ingredients (Serves 4-6):
- 3 pounds Yukon Gold or Russet potatoes
- 1 head of garlic
- 1/2 cup unsalted butter
- 1 cup heavy cream
- Salt, to taste
- Freshly ground black pepper, to taste
- Fresh parsley, for garnish (optional)
Cooking Instructions:
- Prepare the Garlic: Preheat your oven to 400°F (200°C). Cut the top off the head of garlic to expose the cloves. Drizzle with olive oil, wrap in foil, and roast in the oven for 30-35 minutes until the cloves are soft. Let it cool before squeezing the roasted garlic out of the skins.
- Cook the Potatoes: Peel and chop the potatoes into evenly sized chunks. Place them in a large pot, cover with cold water, and add a pinch of salt. Bring to a boil over medium-high heat, then reduce to a simmer. Cook until the potatoes are fork-tender, about 15-20 minutes.
- Drain and Mash: Drain the cooked potatoes and return them to the pot. Add the roasted garlic, butter, and heavy cream. Use a potato masher or hand mixer to mash until smooth and creamy. Season generously with salt and freshly ground black pepper to taste.
- Adjust Consistency: If the potatoes are too thick, add a bit more cream until you reach your desired consistency. Continue mashing until everything is well combined and smooth.
- Serve: Transfer the mashed potatoes to a serving dish. Garnish with freshly chopped parsley if desired. Serve hot alongside your favorite Christmas dinner mains.
Extra Tips:
For an even creamier texture, consider using a potato ricer instead of a masher to break down the potatoes. Always start with cold water when boiling potatoes to guarantee even cooking. Additionally, be careful not to overmix or over-mash the potatoes, as this can make them gluey. If you prefer a stronger garlic flavor, you can add more roasted garlic cloves according to your taste. Enjoy the festive blend of flavors with your loved ones!
Balsamic Brussels Sprouts With Bacon
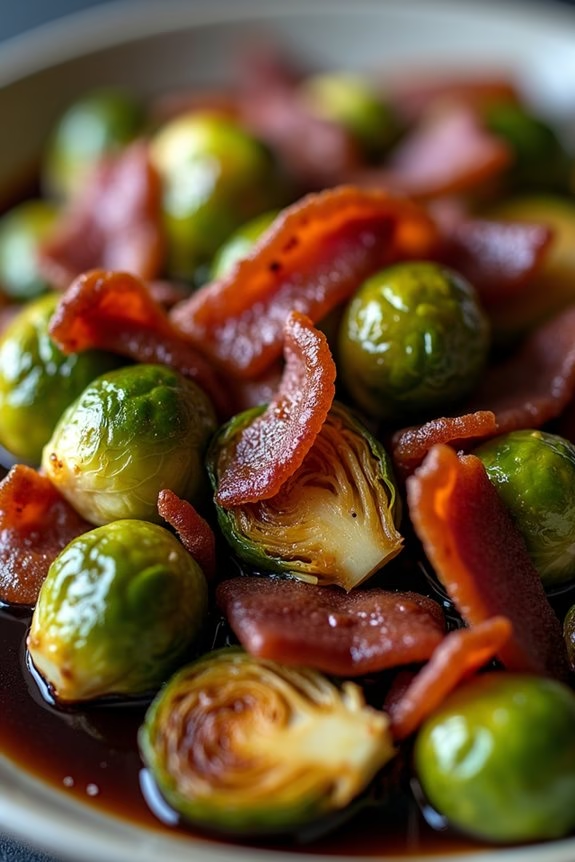
Balsamic Brussels Sprouts With Bacon is a delightful and savory dish that perfectly complements any Christmas dinner spread. The combination of tender Brussels sprouts with crispy bacon and a rich balsamic glaze creates a flavorful side dish that even those who typically shy away from Brussels sprouts will enjoy. This recipe isn’t only delicious but also simple to prepare, making it an excellent choice for both novice and experienced cooks looking to impress their holiday guests.
The secret to this dish lies in the balance of flavors and textures. The natural sweetness of the balsamic reduction pairs beautifully with the salty, crisp bacon and the earthy taste of the Brussels sprouts. By roasting the sprouts, you enhance their natural flavor and guarantee a tender yet slightly crispy texture. This dish serves 4-6 people, making it perfect for a family gathering or a festive dinner party.
Ingredients for 4-6 servings:
- 1 1/2 pounds Brussels sprouts, trimmed and halved
- 4 slices of bacon, chopped
- 3 tablespoons olive oil
- Salt and pepper, to taste
- 1/4 cup balsamic vinegar
- 1 tablespoon honey
- 1 teaspoon garlic powder
Cooking Instructions:
- Preheat the Oven: Begin by preheating your oven to 400°F (200°C). This guarantees that the Brussels sprouts will roast evenly and develop a nice, golden color.
- Prepare the Brussels Sprouts: Wash and trim the Brussels sprouts, removing any yellow or damaged leaves. Cut them in half lengthwise to ensure even cooking.
- Cook the Bacon: In a large oven-safe skillet or pan, cook the chopped bacon over medium heat until it becomes crispy. Once cooked, remove the bacon and place it on a paper towel-lined plate to drain excess fat. Leave about one tablespoon of bacon fat in the pan.
- Season the Sprouts: Add the Brussels sprouts to the pan with the reserved bacon fat. Drizzle with olive oil, sprinkle with garlic powder, salt, and pepper. Toss to combine, guaranteeing all sprouts are well-coated.
- Roast the Sprouts: Transfer the skillet or pan to the preheated oven. Roast the Brussels sprouts for 20-25 minutes, stirring halfway through, until they’re tender and browned at the edges.
- Prepare the Balsamic Glaze: While the Brussels sprouts are roasting, prepare the balsamic glaze. In a small saucepan over medium heat, combine the balsamic vinegar and honey. Bring the mixture to a simmer, then reduce the heat to low and cook until it thickens slightly, about 5 minutes.
- Combine and Serve: Once the Brussels sprouts are roasted, remove them from the oven. Drizzle the balsamic glaze over the sprouts and sprinkle the crispy bacon pieces on top. Toss gently to combine all the flavors. Serve immediately while warm.
Extra Tips: When preparing this dish, make sure to choose Brussels sprouts that are roughly the same size to guarantee even cooking. If some are particularly large, you may want to quarter them instead of halving.
Additionally, for a more pronounced flavor, consider marinating the Brussels sprouts in the olive oil and seasoning mix for about 15 minutes before roasting. If you prefer a sweeter glaze, adjust the honey to taste. Finally, this dish is best served fresh, as the crispiness of the bacon and the roasted texture of the Brussels sprouts are at their peak when hot.
Classic Yorkshire Pudding
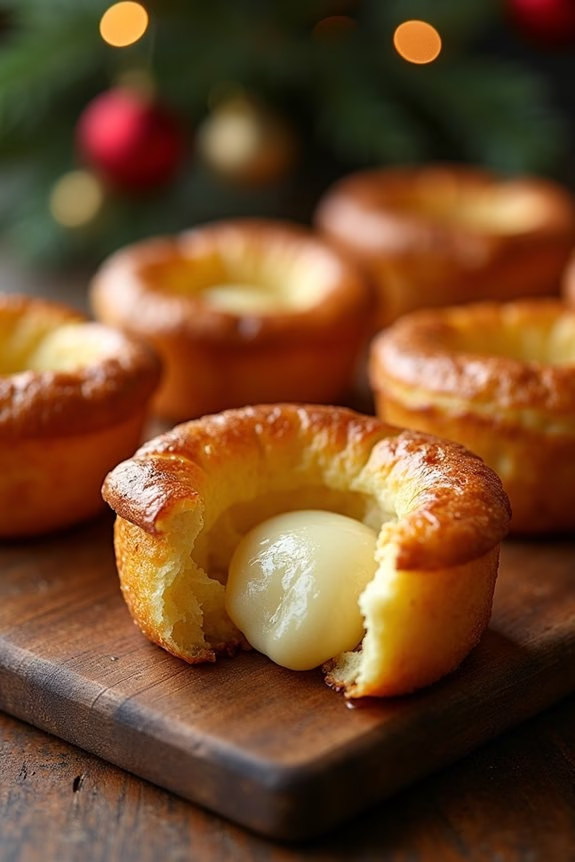
Yorkshire Pudding is a fundamental British side dish that perfectly complements any Christmas dinner. Traditionally served with roast beef, this fluffy, golden-brown delight is fundamentally a baked batter made from simple ingredients. It’s a comforting addition to the holiday table, with its light and airy texture providing a delightful contrast to rich and savory meats and gravies.
Whether you’re a newcomer or a seasoned cook, this classic recipe will help you create the perfect Yorkshire Pudding that your family and friends will love.
The secret to a successful Yorkshire Pudding is making sure that your batter is smooth and well-rested, and that your oven is preheated to the right temperature for the perfect rise. This recipe serves 4-6 people, providing each guest with a delicious portion.
When done correctly, the puddings will puff up beautifully and have a crispy exterior with a soft, doughy center, making them an irresistible accompaniment to your festive feast.
Ingredients for 4-6 servings:
- 1 cup all-purpose flour
- 1 cup whole milk
- 3 large eggs
- 1/2 teaspoon salt
- 1/4 cup beef drippings or vegetable oil
Instructions:
- Prepare the Batter: In a mixing bowl, combine the flour and salt. In a separate bowl, whisk together the eggs and milk until well blended. Gradually add the wet ingredients to the dry ingredients, whisking until the batter is smooth and free of lumps. Let the batter rest for at least 30 minutes at room temperature. Resting the batter allows the flour to absorb the liquid fully, resulting in a lighter pudding.
- Preheat the Oven: Preheat your oven to 425°F (220°C). While the oven is heating, place a muffin tin with 12 cups in the oven to preheat as well. Preheating the tin is vital for achieving a good rise.
- Add Drippings or Oil: Once the oven and tin are fully preheated, carefully remove the tin and add about a teaspoon of beef drippings or vegetable oil to each cup. Return the tin to the oven for a few minutes until the oil is very hot and slightly smoking.
- Pour the Batter: Quickly and carefully pour the batter into the hot muffin tin, filling each cup about halfway. The batter should sizzle as it hits the hot oil, which helps create the signature puffiness of Yorkshire Pudding.
- Bake the Puddings: Place the tin back in the oven and bake for 20-25 minutes, or until the puddings are puffed and golden brown. Resist the temptation to open the oven door during baking, as this can cause the puddings to deflate.
- Serve Immediately: Once baked, remove the puddings from the oven and serve immediately with your Christmas roast and gravy. Yorkshire Pudding is best enjoyed fresh when they’re at their fluffiest.
Extra Tips:
To make sure your Yorkshire Puddings rise perfectly, make sure the oil or drippings in the muffin tin are very hot before adding the batter. This initial heat is vital for the puddings to puff up properly.
Additionally, avoid opening the oven door during baking as this can cause them to collapse. If you want to add an extra touch of flavor, consider seasoning the batter with a bit of black pepper or fresh herbs.
Finally, if you’re using vegetable oil, a high-smoke-point oil like canola or sunflower is ideal for achieving the desired result.
Festive Pomegranate Salad
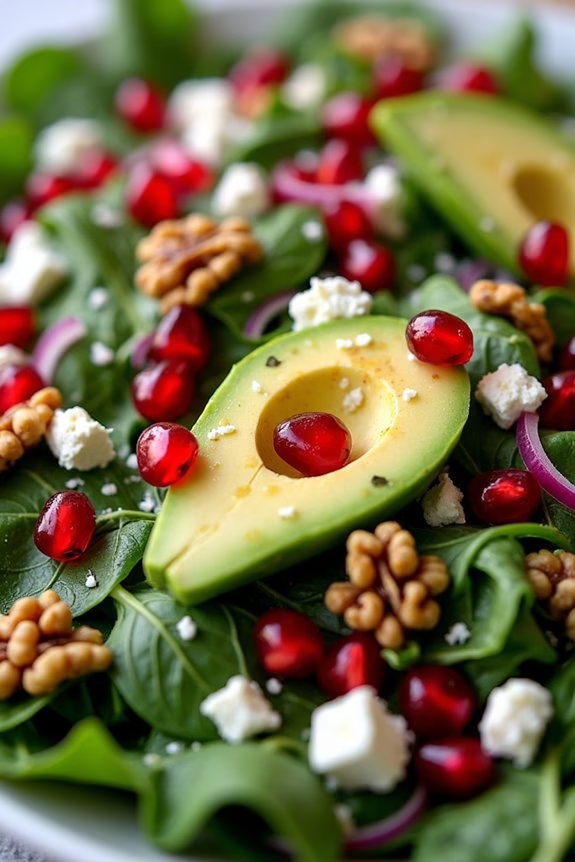
Celebrate the holiday season with a vibrant and invigorating Festive Pomegranate Salad that will add a pop of color to your Christmas dinner table. This salad combines the sweet and tart flavors of pomegranate seeds with the crispness of fresh greens and the creaminess of avocados, creating a delightful contrast of textures and tastes.
The addition of tangy feta cheese and crunchy toasted walnuts brings a rich depth to the dish, making it a perfect festive starter or a side dish that complements any holiday main course. The Festive Pomegranate Salad not only pleases the palate but also presents a visually stunning dish that’s sure to impress your guests.
Pomegranate seeds, with their jewel-like appearance, are especially fitting for the holiday season, symbolizing prosperity and abundance. This easy-to-make salad isn’t only nutritious but also a feast for the eyes, making it an ideal choice for those looking to serve something light yet indulgent during Christmas celebrations.
Ingredients (serves 4-6):
- 6 cups mixed salad greens (such as arugula, spinach, and kale)
- 1 cup pomegranate seeds
- 1 large avocado, sliced
- 1/2 cup crumbled feta cheese
- 1/3 cup walnuts, toasted
- 1/4 cup red onion, thinly sliced
- 3 tablespoons olive oil
- 1 tablespoon balsamic vinegar
- 1 teaspoon honey
- Salt and pepper to taste
Cooking Instructions:
- Prepare the Salad Base: In a large salad bowl, combine the mixed salad greens. These greens will serve as the base of your salad, providing a fresh and crisp texture.
- Add the Fruits and Cheese: Gently scatter the pomegranate seeds over the greens. Next, add the sliced avocado, arranging it evenly across the salad. Sprinkle the crumbled feta cheese on top to add a creamy and tangy flavor to the mix.
- Incorporate the Crunch: Add the toasted walnuts to the salad for a nutty crunch. If you haven’t toasted your walnuts yet, simply place them in a dry skillet over medium heat and stir occasionally until they’re golden and fragrant.
- Add the Onions: Thinly slice the red onion and distribute the slices evenly over the salad. This will add a subtle sharpness to the dish.
- Make the Dressing: In a small bowl, whisk together the olive oil, balsamic vinegar, honey, and a pinch of salt and pepper. This simple dressing enhances the salad’s flavors without overpowering them.
- Dress and Toss: Drizzle the dressing over the salad just before serving. Gently toss the salad to guarantee all ingredients are well coated with the dressing.
Extra Tips:
To enhance the flavors of your Festive Pomegranate Salad, consider using a high-quality extra virgin olive oil for the dressing, as its richness can greatly elevate the dish.
If pomegranates aren’t readily available, you can substitute them with dried cranberries for a similar tart and sweet profile. For a vegan version, simply omit the feta cheese or replace it with a non-dairy alternative.
Finally, prepare the salad just before serving to ensure the greens remain crisp and the avocados stay fresh and vibrant.