
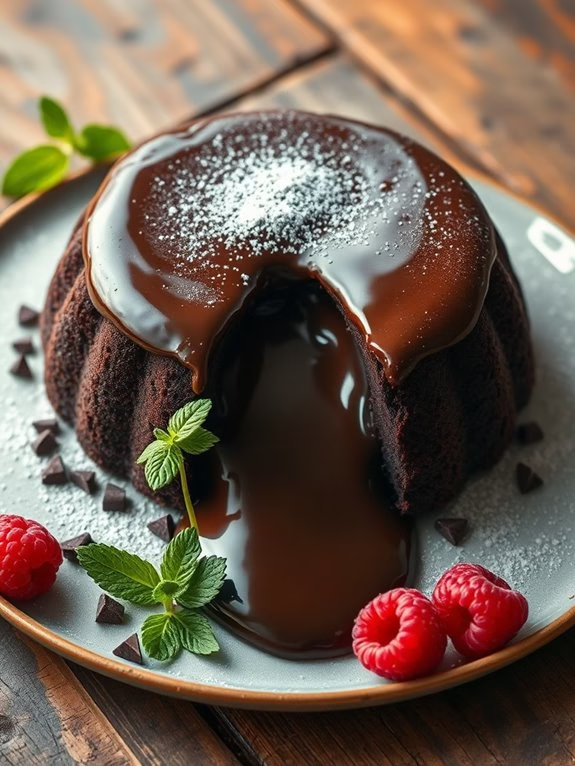
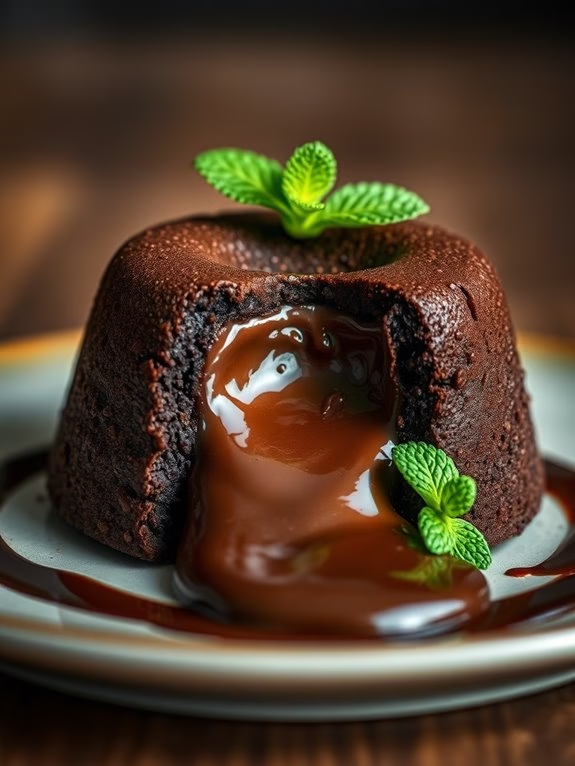
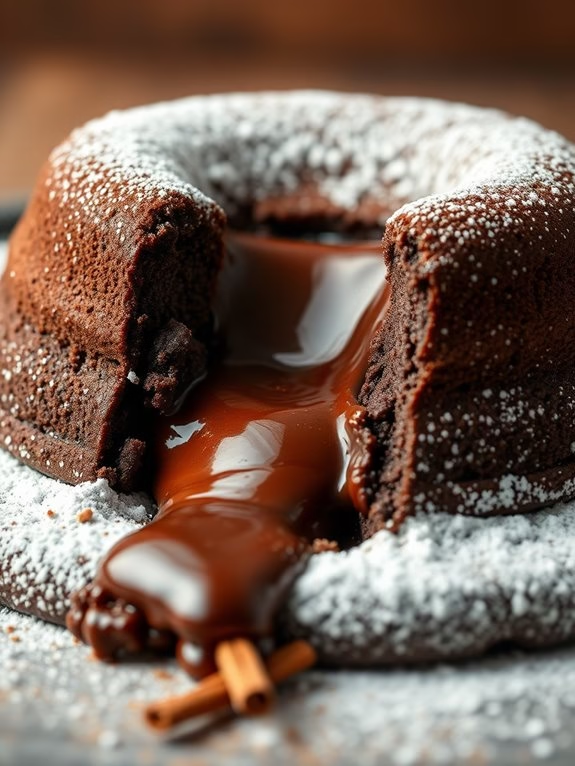
Oh, the joy of slicing into a lava chocolate cake and watching the molten center cascade onto the plate.
It’s a moment of sheer delight, one that I’ve been perfecting in my kitchen for years.
Whether you’re into classic dark chocolate or something a bit more adventurous like raspberry-infused or spicy chili, I’ve crafted the perfect recipe for you.
Pair it with a scoop of vanilla ice cream, and you’ve got a match made in dessert heaven.
And don’t miss out on the surprise ingredient in one of these recipes—it’s a real game-changer!
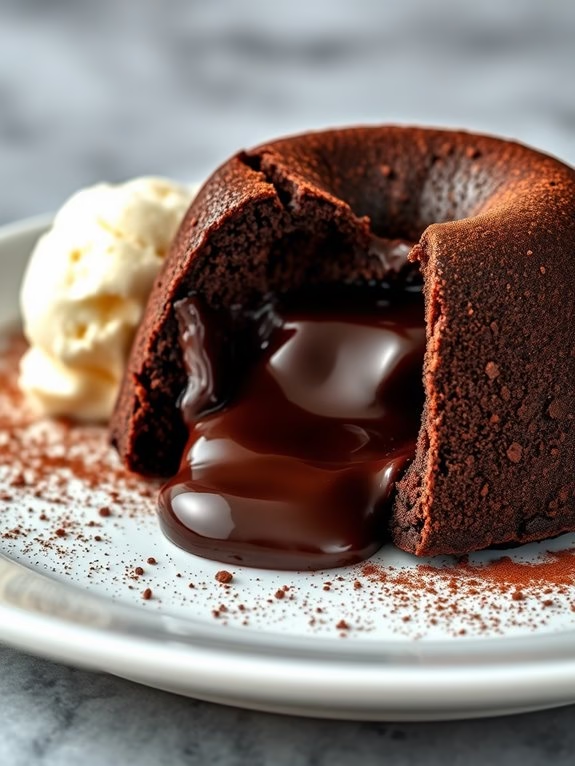
Classic Dark Chocolate Lava Cake

Classic Dark Chocolate Lava Cake Recipe
Indulge your taste buds with the rich, decadent delight of a Classic Dark Chocolate Lava Cake. This dessert is known for its gooey, molten chocolate center that oozes out with each forkful, providing a luxurious experience for any chocolate lover.
Whether you’re hosting a dinner party or simply treating yourself, this elegant dessert is surprisingly easy to make and promises to impress. This recipe serves 4-6 people, making it perfect for gatherings or special occasions.
With high-quality dark chocolate as the star ingredient, each bite of the cake will be densely chocolatey, complemented by the lightly baked outer layer. The key to achieving the perfect lava center lies in the precise baking time, guaranteeing that the exterior is set while the interior remains molten.
Ingredients:
- 1 cup (170g) high-quality dark chocolate, chopped
- 1/2 cup (113g) unsalted butter
- 1 cup (120g) powdered sugar
- 2 large eggs
- 2 large egg yolks
- 1 teaspoon vanilla extract
- 1/4 cup (30g) all-purpose flour
- Pinch of salt
- Cocoa powder or butter for greasing ramekins
Cooking Instructions:
- Preheat the Oven: Begin by preheating your oven to 425°F (220°C). This high temperature is essential for cooking the outsides quickly while keeping the center molten.
- Prepare the Ramekins: Grease four to six ramekins with butter or sprinkle with cocoa powder. This will prevent the cakes from sticking and enhance their chocolatey flavor.
- Melt Chocolate and Butter: In a microwave-safe bowl, combine the chopped dark chocolate and butter. Microwave in 30-second intervals, stirring in between until the mixture is smooth and fully melted.
- Mix Dry Ingredients: In a small bowl, whisk together the powdered sugar, all-purpose flour, and a pinch of salt. Set aside.
- Combine Wet Ingredients: In a separate mixing bowl, whisk the eggs, egg yolks, and vanilla extract together until well blended.
- Create Batter: Gradually add the melted chocolate mixture to the egg mixture, stirring constantly to create a smooth batter. Slowly incorporate the dry ingredients until just combined, being careful not to overmix.
- Pour and Bake: Divide the batter evenly among the prepared ramekins. Place them on a baking sheet and bake for 12-14 minutes, or until the edges appear firm but the center remains soft.
- Cool and Serve: Allow the cakes to cool in the ramekins for 1 minute, then run a knife around the edges and invert onto serving plates. Serve immediately for the best molten effect.
Extra Tips:
For the best results, use high-quality dark chocolate with a cocoa content of at least 70%. This will guarantee a rich flavor and smooth texture.
Timing is essential when baking these cakes, so keep a close eye on them to avoid overbaking. To add a touch of elegance, consider serving with a dusting of powdered sugar, a scoop of vanilla ice cream, or a handful of fresh berries.
Enjoy the delightful contrast between the warm, gooey center and the crisp, slightly chewy crust.
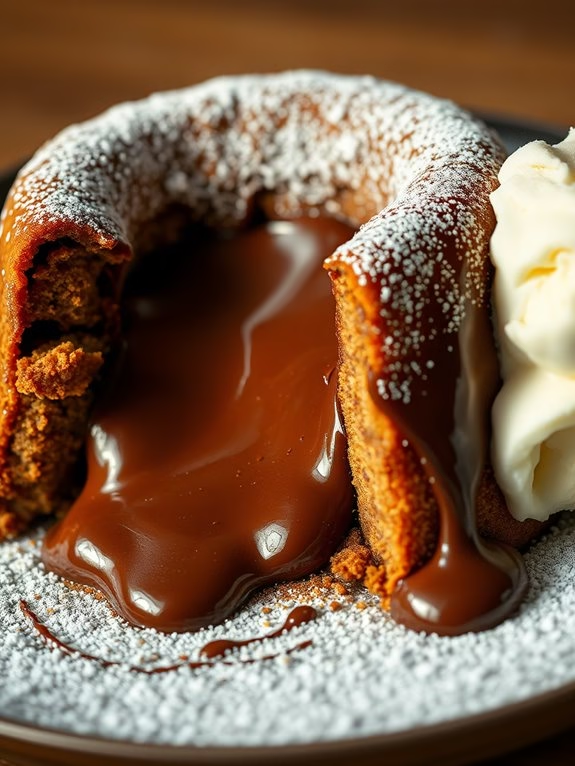
Salted Caramel Lava Cake
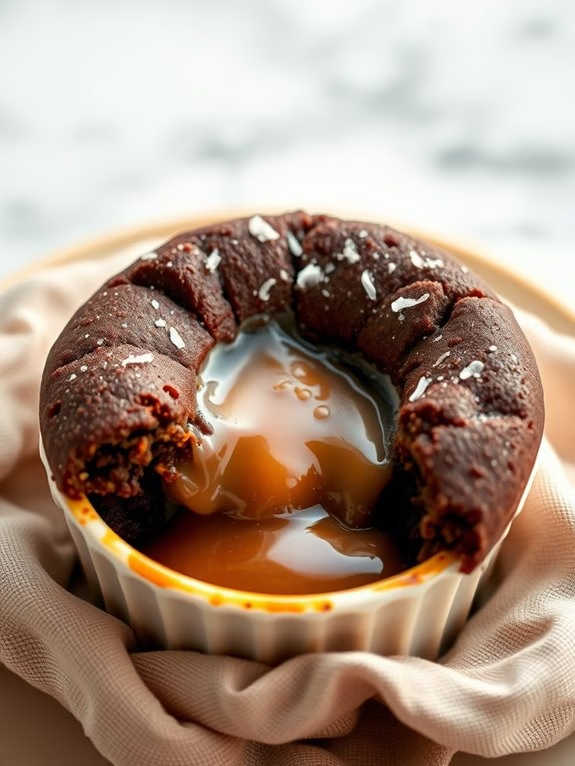
Salted Caramel Lava Cake is a decadent and indulgent dessert that perfectly combines the richness of molten chocolate with the sweet and salty flavors of caramel. This dessert is the ultimate treat for chocolate lovers and is sure to impress guests at any dinner party. With its gooey center and delicate balance of flavors, this cake isn’t only delicious but also visually stunning when served, as the caramel sauce oozes out of the center upon cutting.
This recipe for Salted Caramel Lava Cake serves 4-6 people, making it perfect for a small gathering or a special family dinner. The preparation involves creating a rich chocolate batter that encases a luscious caramel filling, guaranteeing each bite is a delightful explosion of flavor. With a few simple ingredients and easy-to-follow steps, you can create this impressive dessert right in your own kitchen.
Ingredients:
- 1 cup (170g) of semi-sweet chocolate chips
- 1/2 cup (113g) of unsalted butter
- 2 large eggs
- 2 large egg yolks
- 1/4 cup (50g) of granulated sugar
- 1/4 cup (32g) of all-purpose flour
- 1/4 teaspoon of salt
- 1/4 cup (60ml) of salted caramel sauce
- Additional sea salt flakes for garnish
Instructions:
- Preheat and Prepare Ramekins: Preheat your oven to 425°F (220°C). Butter four to six individual ramekins and place them on a baking sheet. This will guarantee even baking and make it easier to transfer them in and out of the oven.
- Melt Chocolate and Butter: In a medium heat-proof bowl, combine the semi-sweet chocolate chips and unsalted butter. Melt them together using a double boiler or by microwaving in 20-second intervals, stirring in between, until smooth and fully combined.
- Mix Eggs and Sugar: In a separate large mixing bowl, whisk together the eggs, egg yolks, and granulated sugar until the mixture is pale and thick. This will incorporate air into the mixture, contributing to the cake’s light texture.
- Combine Chocolate and Egg Mixtures: Slowly pour the melted chocolate mixture into the egg mixture, whisking constantly to guarantee a smooth blend. Be sure to combine thoroughly to create a homogenous batter.
- Add Flour and Salt: Gently fold in the all-purpose flour and salt using a spatula. Mix until just combined, being careful not to overmix, as this can result in a denser cake.
- Fill Ramekins: Spoon a small amount of the batter into each prepared ramekin, filling them halfway. Add a tablespoon of salted caramel sauce to the center of each ramekin, then top with the remaining batter until the ramekins are about three-quarters full.
- Bake the Cakes: Bake in the preheated oven for 12-14 minutes, or until the edges are firm but the center is still soft. The timing can vary slightly depending on your oven, so keep an eye on the cakes to avoid overcooking.
- Serve and Garnish: Allow the cakes to cool for 1-2 minutes, then carefully invert each ramekin onto a serving plate. Sprinkle the tops with sea salt flakes for an extra burst of flavor and serve immediately.
Extra Tips:
To guarantee the perfect molten center, avoid overbaking the cakes. The edges should be set, but the center should remain soft to allow the caramel to flow when cut. If you prefer a firmer cake, bake for an additional 1-2 minutes.
Additionally, the quality of chocolate and caramel sauce will greatly affect the taste of the final dish, so choose high-quality products for the best results. Finally, these cakes can be prepared a few hours in advance and stored in the refrigerator; simply bring them to room temperature before baking.
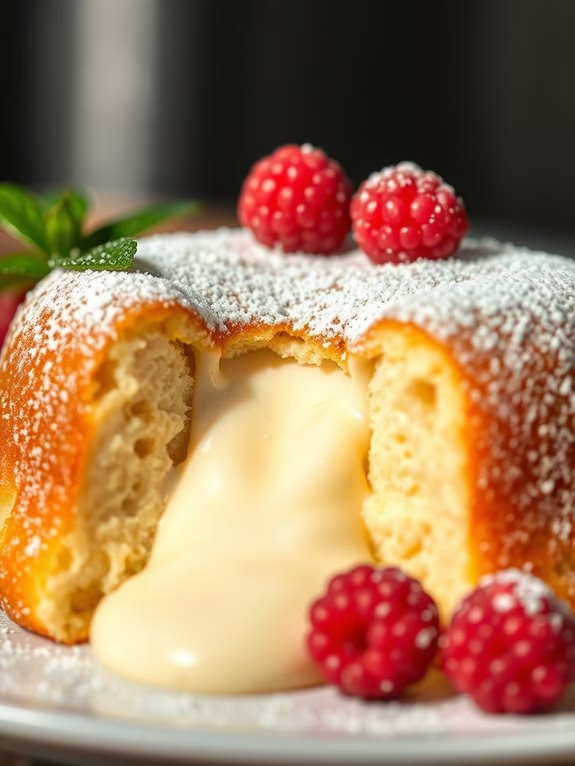
Raspberry-Infused Lava Cake
Raspberry-Infused Lava Cake
Indulge in the decadent delight of Raspberry-Infused Lava Cakes, a dessert that perfectly marries rich chocolate with the tangy sweetness of raspberries. These individual cakes offer an elegant presentation with their molten centers that ooze out when sliced open, creating a truly unforgettable experience for the palate.
Perfect for special occasions or simply to satisfy a luxurious craving, these lava cakes are simple to make yet impressive to serve. The essence of the dessert lies in the infusion of fresh raspberries, which bring a revitalizing contrast to the rich, velvety chocolate. The raspberry note adds a layer of complexity that elevates the traditional lava cake to a gourmet level.
Whether you’re an experienced baker or a novice, this recipe will guide you through creating a sophisticated dessert that’s bound to dazzle your family and friends.
Ingredients (Serves 4-6):
- 1/2 cup unsalted butter
- 1 cup bittersweet chocolate chips or chopped chocolate
- 2 large eggs
- 2 large egg yolks
- 1/4 cup granulated sugar
- 1 teaspoon vanilla extract
- 1/4 cup all-purpose flour
- 1/4 teaspoon salt
- 1/2 cup fresh raspberries
- 2 tablespoons raspberry jam
- Powdered sugar for dusting (optional)
Cooking Instructions:
- Preheat the Oven: Begin by preheating your oven to 425°F (220°C). Grease four to six ramekins with butter and dust them lightly with flour to prevent sticking.
- Melt the Chocolate and Butter: In a medium saucepan over low heat, melt the butter and chocolate together, stirring until smooth. Remove from heat and allow it to cool slightly.
- Prepare the Raspberry Mixture: In a small bowl, mash the fresh raspberries with the raspberry jam until slightly chunky. Set aside.
- Mix the Batter: In a large bowl, whisk together the eggs, egg yolks, and sugar until well combined. Stir in the vanilla extract. Gradually fold in the melted chocolate mixture, followed by the flour and salt, until smooth.
- Assemble the Cakes: Divide half of the batter evenly among the prepared ramekins. Spoon a tablespoon of the raspberry mixture into the center of each, then cover with the remaining batter.
- Bake the Cakes: Place the ramekins on a baking sheet and bake for 12-14 minutes, or until the edges are firm but the center is still soft. Remove from oven and let them cool for 1 minute.
- Serve: Carefully run a knife around the edges of each cake to loosen, then invert onto dessert plates. Dust with powdered sugar if desired and serve immediately.
Extra Tips:
For the best results, use high-quality chocolate as it greatly affects the taste and texture of your lava cakes. Confirm that the baking time isn’t exceeded to maintain the gooey center characteristic of lava cakes.
If you prefer a more intense raspberry flavor, increase the quantity of raspberry jam slightly. Experiment with adding a splash of raspberry liqueur for an adult twist.
White Chocolate Lava Cake
White Chocolate Lava Cake is a delightful twist on the traditional molten chocolate cake, offering a rich and creamy center that oozes out when you cut into it. Perfect for white chocolate lovers, this dessert is a showstopper that combines a delicate cake exterior with a luscious flowing center.
It’s surprisingly easy to prepare and makes for an impressive end to any meal, leaving your guests keen for more. The key to a successful White Chocolate Lava Cake lies in its baking time and the quality of white chocolate used. The cakes should be just firm enough to hold their shape but still have a gooey center.
It’s crucial to keep an eye on them while they bake to make sure they don’t overcook. This recipe serves 4-6 people, making it an ideal choice for a small gathering or family dinner.
Ingredients for White Chocolate Lava Cake (Serves 4-6):
- 1 cup white chocolate chips
- 1/2 cup unsalted butter
- 3 large eggs
- 1/2 cup granulated sugar
- 1/3 cup all-purpose flour
- 1 teaspoon vanilla extract
- A pinch of salt
- Powdered sugar for dusting (optional)
- Fresh berries for garnish (optional)
Cooking Instructions:
- Preheat and Prepare: Preheat your oven to 425°F (220°C). Grease four to six ramekins with butter and lightly dust with flour, tapping out any excess.
- Melt Chocolate and Butter: In a microwave-safe bowl, combine the white chocolate chips and butter. Microwave in 20-second intervals, stirring after each, until completely melted and smooth. Set aside to cool slightly.
- Mix Eggs and Sugar: In a separate bowl, whisk together the eggs and granulated sugar until the mixture is thick and pale. This should take about 3-4 minutes of vigorous whisking.
- Combine Ingredients: Gradually fold the melted white chocolate mixture into the egg and sugar mixture. Add the vanilla extract and a pinch of salt, continuing to fold until well combined.
- Add Flour: Sift in the flour and gently fold it into the batter until just combined. Be careful not to overmix.
- Fill Ramekins: Divide the batter evenly among the prepared ramekins, filling each about three-quarters full.
- Bake: Place the ramekins on a baking sheet and bake for 10-12 minutes, or until the edges are set but the centers still look slightly soft and undercooked.
- Serve: Remove from the oven and let the cakes sit for 1-2 minutes. Carefully run a knife around the edges of each ramekin and invert them onto serving plates. Dust with powdered sugar and garnish with fresh berries if desired. Serve immediately to enjoy the molten center.
Extra Tips:
To make sure your White Chocolate Lava Cake has the perfect molten center, avoid overbaking. The cakes should look set on the outside but still jiggle slightly in the center when you move them.
You can prepare the batter ahead of time and refrigerate it until ready to bake, just add an extra minute or two to the baking time if baking straight from the fridge. Using high-quality white chocolate will enhance the flavor of the cake, so choose a brand you enjoy eating on its own.
If you find the cakes difficult to remove from the ramekins, serve them directly in the ramekins with a spoon for a more rustic presentation.
Peanut Butter Lava Cake

Peanut Butter Lava Cake is a decadent dessert that combines the rich, gooey goodness of a classic chocolate lava cake with the creamy, nutty flavor of peanut butter. Perfect for any occasion, this indulgent treat is a crowd-pleaser that will leave your guests in awe. The molten center is infused with peanut butter, creating a delicious blend of flavors that explode with every bite.
Whether you’re a chocolate lover, a peanut butter fanatic, or both, this dessert is certain to satisfy your sweet tooth.
The beauty of Peanut Butter Lava Cake lies in its simplicity and elegance. Despite its impressive appearance, this dessert is surprisingly easy to make and requires just a few basic ingredients that are likely already in your pantry. The key to a successful lava cake is timing; with just the right amount of baking, the outer cake will be perfectly set while the center remains irresistibly oozy.
Serve it warm, ideally with a scoop of vanilla ice cream, to elevate the experience even further.
Ingredients (serving size: 4-6 people):
- 1 cup semisweet chocolate chips
- 1/2 cup unsalted butter
- 1 cup confectioners’ sugar
- 2 large eggs
- 2 large egg yolks
- 1/2 cup all-purpose flour
- 1/4 teaspoon salt
- 1/2 cup creamy peanut butter
Cooking Instructions:
- Preheat the Oven and Prepare Ramekins: Preheat your oven to 425°F (220°C). Grease four to six ramekins (depending on size) with butter and lightly dust with flour to prevent sticking.
- Melt Chocolate and Butter: In a microwave-safe bowl, combine the chocolate chips and butter. Microwave in 30-second intervals, stirring between each, until the mixture is smooth and fully melted.
- Mix Sugar, Eggs, and Yolks: In a separate bowl, whisk together the confectioners’ sugar, eggs, and egg yolks until the mixture is smooth and slightly thickened.
- Combine Ingredients: Gradually add the melted chocolate mixture to the egg mixture, stirring continuously until well combined. Gently fold in the flour and salt until just incorporated.
- Prepare Peanut Butter Centers: Divide the peanut butter into equal portions and roll them into balls. Place the peanut butter balls in the center of each prepared ramekin.
- Fill Ramekins: Pour the chocolate batter over the peanut butter balls, filling each ramekin about three-fourths full.
- Bake the Cakes: Place the ramekins on a baking sheet and bake in the preheated oven for 12-14 minutes. The edges should be firm, but the center should still be soft.
- Serve Immediately: Allow the cakes to cool for 1 minute, then carefully invert onto serving plates. Serve warm, ideally with a scoop of vanilla ice cream or a dollop of whipped cream.
Extra Tips:
For the best lava flow, it’s important to avoid overbaking your cakes. Keep a close eye on them during the final minutes of baking to guarantee the centers remain soft.
If you prefer a more pronounced peanut butter flavor, consider adding a teaspoon of peanut butter to the batter before baking. Additionally, you can prepare the batter ahead of time and refrigerate it until you’re ready to bake, making this an excellent make-ahead dessert option for dinner parties.
Espresso Lava Cake
Espresso Lava Cake
If you’re looking to impress your guests with a dessert that’s both decadent and sophisticated, consider making Espresso Lava Cake. This indulgent treat combines the rich flavors of dark chocolate and espresso to create a molten center that oozes with each forkful.
Perfect for any occasion, this dessert is sure to satisfy chocolate lovers and coffee enthusiasts alike. The combination of intense flavors and gooey texture makes it an irresistible choice for anyone with a sweet tooth.
Espresso Lava Cake isn’t only a delight to taste but also surprisingly easy to make. With just a few ingredients and some careful attention to baking time, you’ll have a dessert that’s restaurant-quality ready. This recipe serves 4-6 people, making it ideal for a small dinner party or family gathering.
The key to its success lies in using high-quality chocolate and freshly brewed espresso, which together create a rich and velvety experience.
Ingredients (Serves 4-6):
- 1 cup (about 170g) dark chocolate chips or chopped dark chocolate
- 1/2 cup (115g) unsalted butter
- 2 large eggs
- 2 large egg yolks
- 1/4 cup (50g) granulated sugar
- 2 teaspoons (10ml) freshly brewed espresso
- 1 teaspoon (5ml) vanilla extract
- 1/4 cup (32g) all-purpose flour
- A pinch of salt
- Cocoa powder (for dusting)
- Butter (for greasing ramekins)
Cooking Instructions:
- Prepare the Ramekins: Preheat your oven to 425°F (220°C). Grease 4 to 6 ramekins with butter and dust lightly with cocoa powder. This prevents the cakes from sticking and helps them come out easily once baked.
- Melt Chocolate and Butter: In a microwave-safe bowl or using a double boiler, melt the chocolate and butter together. Stir until smooth and let it cool slightly.
- Mix Eggs and Sugar: In a separate bowl, whisk together the eggs, egg yolks, and sugar until pale and slightly thickened. This process is essential for incorporating air into the batter.
- Combine Ingredients: Gently fold the melted chocolate mixture into the egg mixture. Add the espresso and vanilla extract, mixing until combined.
- Incorporate Dry Ingredients: Sift the flour and salt into the chocolate mixture, gently folding until no lumps remain. Be careful not to overmix.
- Pour and Bake: Divide the batter evenly among the prepared ramekins. Place them on a baking sheet and bake in the preheated oven for 10-12 minutes. The edges should be firm, but the center should be soft and jiggly.
- Cool and Serve: Allow the cakes to cool for 1 minute before carefully inverting them onto serving plates. Serve immediately while the centers are still molten, optionally garnished with a dusting of cocoa powder or a scoop of vanilla ice cream.
Extra Tips:
To guarantee the perfect molten center, be attentive to the baking time. Every oven is different, so check the cakes a minute or two before the recommended time.
If the edges are set and the center is slightly wobbly, they’re done. Using high-quality chocolate will make a noticeable difference in flavor, so choose a brand you enjoy eating.
Finally, if you don’t have espresso on hand, you can substitute with instant coffee dissolved in hot water for a similar effect.
Mint Chocolate Lava Cake
Mint Chocolate Lava Cake is a delightful twist on the classic molten chocolate cake, perfect for those who enjoy the invigorating taste of mint combined with rich, gooey chocolate. This dessert is ideal for special occasions or when you simply want to treat yourself to something extraordinary.
The molten center of the cake, along with the hint of mint, creates a sensational flavor experience that’s sure to impress your guests. Creating Mint Chocolate Lava Cake is surprisingly simple, and it doesn’t require a lot of time. The key is to bake the cakes just long enough to set the edges while keeping the center delectably molten.
By combining high-quality dark chocolate with fresh mint, you elevate this dessert to a gourmet level. Whether serving it with a scoop of vanilla ice cream or a dollop of whipped cream, this dessert is bound to be a crowd-pleaser.
Ingredients (Serves 4-6)
- 1/2 cup unsalted butter
- 1 cup bittersweet chocolate chips or chopped chocolate
- 2 large eggs
- 2 large egg yolks
- 1/4 cup granulated sugar
- 2 tablespoons all-purpose flour
- 1/4 teaspoon salt
- 1/2 teaspoon peppermint extract
- Fresh mint leaves (optional, for garnish)
Cooking Instructions
- Preheat the Oven: Begin by preheating your oven to 425°F (220°C). This high temperature is essential for baking the cakes quickly, which helps achieve the molten center.
- Prepare Ramekins: Take 4 to 6 ramekins and grease them thoroughly with butter. For added ease in removing the cakes, you can dust the insides with cocoa powder.
- Melt Chocolate and Butter: In a medium-sized microwave-safe bowl, combine the unsalted butter and bittersweet chocolate. Microwave in short increments of 20-30 seconds, stirring in between, until the mixture is completely smooth and melted.
- Mix Eggs and Sugar: In another bowl, whisk together the eggs, egg yolks, and granulated sugar until the mixture is pale and slightly thickened.
- Combine Mixtures: Slowly pour the melted chocolate mixture into the egg mixture, whisking constantly to combine. Be careful not to add the chocolate too quickly, as you don’t want to cook the eggs.
- Add Dry Ingredients: Gently fold in the all-purpose flour and salt until just combined. Stir in the peppermint extract to infuse the mint flavor.
- Fill Ramekins: Divide the batter evenly among the prepared ramekins, filling them about three-quarters full.
- Bake: Place the ramekins on a baking sheet and bake in the preheated oven for 10-12 minutes. The edges should be firm while the center remains soft.
- Cool Briefly: Remove the cakes from the oven and let them cool for about 1 minute before running a knife around the edges to loosen them.
- Serve: Invert each ramekin onto a dessert plate, giving it a gentle shake to release the cake. Garnish with fresh mint leaves if desired, and serve immediately.
Extra Tips
For the best results, use high-quality chocolate, as it will greatly impact the flavor and texture of your Mint Chocolate Lava Cake.
Make sure to bake the cakes just until the edges are set; overbaking will result in losing the molten center. If you prefer a stronger mint flavor, increase the peppermint extract slightly, but be cautious as it can quickly become overpowering.
If not serving immediately, you can prepare the batter ahead of time and refrigerate it in the ramekins, then bake just before serving.
Hazelnut Lava Cake
Hazelnut Lava Cake is a decadent dessert that combines the rich, velvety texture of molten chocolate with the nutty flavor of hazelnuts. This dessert is perfect for special occasions or whenever you want to indulge in a little luxury. The warm, flowing chocolate center is sure to impress, making it the ultimate treat for chocolate lovers.
Whether you’re hosting a dinner party or simply looking to surprise your family with a delightful dessert, Hazelnut Lava Cake is a surefire way to satisfy any sweet tooth. This recipe yields 4-6 servings, making it ideal for a small gathering.
With its crisp outer layer and gooey center, this cake is best served fresh out of the oven, paired with a scoop of vanilla ice cream or a dollop of whipped cream to balance the intense chocolate flavor. Follow the instructions below to create a perfect Hazelnut Lava Cake that will leave your guests craving more.
Ingredients:
- 1 cup semi-sweet chocolate chips
- 1/2 cup unsalted butter
- 2 large eggs
- 2 large egg yolks
- 1/4 cup granulated sugar
- 2 tablespoons all-purpose flour
- 1/4 cup finely ground hazelnuts
- 1 teaspoon vanilla extract
- Pinch of salt
Cooking Instructions:
- Preheat the Oven: Start by preheating your oven to 425°F (220°C). This guarantees that the oven is hot enough to quickly cook the outside of the cakes while keeping the center molten.
- Melt Chocolate and Butter: In a medium-sized microwave-safe bowl, combine the chocolate chips and butter. Melt them together in the microwave in 30-second intervals, stirring after each interval until the mixture is smooth and fully combined. Set aside to cool slightly.
- Prepare the Batter: In a separate mixing bowl, whisk together the eggs, egg yolks, and granulated sugar until the mixture is pale and thick. This should take about 3-4 minutes. Gradually fold in the melted chocolate mixture, making sure it’s well incorporated.
- Add Dry Ingredients: Gently fold in the all-purpose flour, ground hazelnuts, vanilla extract, and a pinch of salt into the chocolate mixture. Mix until just combined; be careful not to overmix.
- Prepare Ramekins: Grease 4-6 ramekins with butter and lightly dust with flour. This will help the cakes easily release after baking.
- Fill the Ramekins: Divide the batter evenly among the prepared ramekins, filling each about 3/4 full. Place the ramekins on a baking sheet for easy handling.
- Bake: Bake in the preheated oven for 12-14 minutes, or until the edges are firm but the center is still soft. The key is to bake them just long enough for the outer layer to set while keeping the center molten.
- Serve: Once baked, let the cakes cool for a minute or two. Run a knife around the edges of the ramekins to loosen the cakes, then invert onto individual serving plates. Serve immediately, optionally with a scoop of vanilla ice cream or a dusting of powdered sugar.
Extra Tips:
When making Hazelnut Lava Cake, it’s important to use high-quality chocolate, as it greatly impacts the flavor and texture of the dessert. If you don’t have ground hazelnuts, you can substitute with almond meal or finely chopped nuts for a similar texture.
Be cautious not to overbake the cakes; the center should remain soft to achieve that perfect lava flow. If you prefer a stronger hazelnut flavor, consider adding a splash of hazelnut liqueur or extract to the batter.
Finally, if you’re preparing in advance, you can refrigerate the batter in the ramekins and bake just before serving; simply add an extra minute or two to the baking time.
Orange Zest Lava Cake
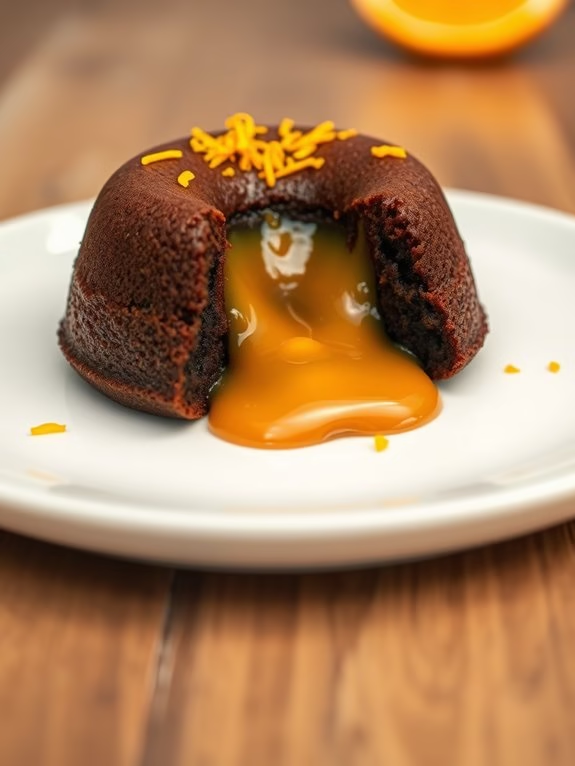
Orange Zest Lava Cake is a delightful twist on the classic molten chocolate cake, infusing it with a rejuvenating citrus flavor. The combination of rich, gooey chocolate and vibrant orange zest results in a dessert that’s both indulgent and invigorating. Perfect for a special occasion or a simple weeknight treat, this recipe is sure to impress your family and friends with its balance of sweetness and zest.
The key to mastering Orange Zest Lava Cake is achieving that perfect molten center while keeping the outer cake moist and fluffy. The orange zest not only adds a fragrant aroma but also enhances the chocolate’s depth, creating a harmonious blend of flavors. With a few simple ingredients and straightforward steps, you can create this decadent dessert in the comfort of your own kitchen.
Ingredients (Serves 4-6):
- 1/2 cup unsalted butter
- 4 ounces bittersweet chocolate, chopped
- 1 cup powdered sugar
- 2 large eggs
- 2 large egg yolks
- 1 teaspoon vanilla extract
- 1 tablespoon orange zest
- 1/4 cup all-purpose flour
- A pinch of salt
- Butter and cocoa powder for ramekin preparation
Cooking Instructions:
- Preheat the Oven: Start by preheating your oven to 425°F (220°C). This high temperature is essential for creating the lava-like center while baking the exterior of the cake.
- Prepare the Ramekins: Thoroughly butter four to six ramekins and dust them with cocoa powder. This prevents the cakes from sticking and adds an extra layer of chocolate flavor to the crust.
- Melt the Chocolate and Butter: In a microwave-safe bowl, combine the unsalted butter and chopped bittersweet chocolate. Microwave in 30-second intervals, stirring each time, until the mixture is smooth and fully melted.
- Mix Wet Ingredients: In a separate large mixing bowl, whisk together the eggs, egg yolks, and powdered sugar until the mixture is pale and slightly thickened.
- Combine Ingredients: Gradually add the melted chocolate mixture to the egg mixture, stirring constantly to combine. Mix in the vanilla extract and orange zest, verifying the zest is evenly distributed throughout the batter.
- Add Dry Ingredients: Sift the flour and salt over the chocolate mixture and gently fold in until just combined. Be careful not to overmix to maintain the batter’s lightness.
- Fill Ramekins: Divide the batter evenly among the prepared ramekins, filling each about three-quarters full to allow room for the cakes to rise.
- Bake: Place the ramekins on a baking sheet and bake in the preheated oven for 12-14 minutes. The edges should be firm, but the center should remain soft.
- Serve: Allow the cakes to rest for 1 minute before inverting each ramekin onto a serving plate. Serve immediately while the center is still molten, garnished with additional orange zest or a dusting of powdered sugar if desired.
Extra Tips:
For the best results, verify all ingredients are at room temperature before starting. This helps the batter mix more smoothly and bake evenly.
Using high-quality chocolate can make a significant difference in flavor, so choose a bittersweet chocolate with at least 60% cocoa content.
If you don’t have ramekins, you can use oven-safe mugs or aluminum cupcake liners.
Finally, be mindful of baking time, as even a minute too long can solidify the center, losing the lava effect.
Spicy Chili Lava Cake
Spicy Chili Lava Cake
Spicy Chili Lava Cake is a tantalizing twist on the classic molten chocolate cake that incorporates a hint of chili to give it a unique kick. This dessert is perfect for those who love a bit of heat with their sweets, as the chili subtly complements the rich, gooey chocolate center. The combination of flavors is both surprising and delightful, making it an ideal choice for dinner parties or special occasions where you want to impress your guests with something a little different.
The secret to a perfect lava cake lies in achieving that gooey center, and with the addition of chili, you add an unexpected layer of complexity to this beloved dessert. The heat from the chili isn’t overpowering but rather it enhances the depth of the chocolate, creating a balanced flavor profile. Serve it warm with a scoop of vanilla ice cream or a dollop of whipped cream to elevate the experience even further.
Ingredients for 4-6 servings:
- 1 cup (170g) bittersweet chocolate chips
- 1/2 cup (113g) unsalted butter
- 3 large eggs
- 1/2 cup (100g) granulated sugar
- 1/4 cup (30g) all-purpose flour
- 1 teaspoon vanilla extract
- 1/2 teaspoon ground cinnamon
- 1/4 teaspoon cayenne pepper
- 1/4 teaspoon salt
- Butter or non-stick spray for greasing ramekins
- Cocoa powder for dusting
Cooking Instructions:
- Preheat and Prepare Ramekins: Preheat your oven to 425°F (220°C). Grease 4-6 ramekins thoroughly with butter or non-stick spray, then dust with cocoa powder. This will help the cakes to release easily once baked.
- Melt Chocolate and Butter: In a microwave-safe bowl, combine the bittersweet chocolate chips and unsalted butter. Microwave in 30-second intervals, stirring between each, until both are completely melted and smooth. Allow it to cool slightly.
- Mix Eggs and Sugar: In a separate bowl, whisk together the eggs and granulated sugar until the mixture is light and fluffy.
- Combine Ingredients: Gradually add the melted chocolate mixture to the egg mixture, stirring continuously until well combined. Stir in the vanilla extract, ground cinnamon, cayenne pepper, and salt.
- Add Flour: Gently fold in the flour until just combined, being careful not to overmix.
- Fill Ramekins: Divide the batter evenly among the prepared ramekins, filling each about three-quarters full.
- Bake: Place the ramekins on a baking sheet and bake in the preheated oven for 12-14 minutes, until the edges are firm but the center remains soft.
- Serve: Allow the cakes to cool for 1 minute before running a knife around the edges to loosen them. Invert the ramekins onto serving plates and gently lift them off. Serve immediately.
Extra Tips:
For the best results, use high-quality chocolate, as it greatly influences the flavor and texture of the cake. Adjust the amount of cayenne pepper to suit your taste preference; if you’re sensitive to spice, start with a smaller amount and increase gradually.
Make sure not to overbake the cakes, as this will prevent the signature molten center from forming. If you don’t have ramekins, you can use a muffin tin, but be sure to adjust the baking time accordingly.
Coconut Lava Cake

Coconut Lava Cake is a delightful twist on the classic molten chocolate cake, infusing the rich and creamy flavors of coconut into the decadent chocolate dessert. This recipe promises an indulgent experience with its oozy center that spills out as you break into its soft, cake-like exterior. The pairing of chocolate and coconut creates a tropical sensation that balances sweetness with a touch of exotic flair, perfect for satisfying your dessert cravings.
The preparation of Coconut Lava Cake is simple yet requires a bit of careful attention to achieve the desired molten center. By combining high-quality dark chocolate with coconut milk and shredded coconut, this recipe delivers a luscious texture that’s both moist and flavorful. Baking these cakes just until the edges are firm and the center is still slightly jiggly is key to attaining the perfect lava-like consistency. This dessert is ideal for special occasions or as a luxurious treat to end any meal.
Ingredients (serving size: 4-6 people):
- 1 cup dark chocolate chips or chopped dark chocolate
- 1/2 cup unsalted butter
- 1/4 cup coconut milk
- 1/2 cup granulated sugar
- 2 large eggs
- 2 egg yolks
- 1/4 cup all-purpose flour
- 1/4 cup unsweetened shredded coconut
- 1/2 teaspoon vanilla extract
- Pinch of salt
- Powdered sugar and toasted coconut flakes for garnish (optional)
Cooking Instructions:
- Preheat and Prepare Ramekins: Preheat your oven to 425°F (220°C). Grease 4-6 ramekins (depending on the size) with butter and lightly dust with flour, shaking out the excess. This helps the cakes release easily once baked.
- Melt Chocolate and Butter: In a heatproof bowl, combine the dark chocolate and unsalted butter. Melt them together over a simmering pot of water (a double boiler setup) or in the microwave in 30-second intervals, stirring in between until smooth and well combined.
- Incorporate Coconut Milk: Stir the coconut milk into the melted chocolate mixture until smooth. This will add a rich, creamy texture to the batter.
- Mix Eggs and Sugar: In a separate bowl, whisk together the granulated sugar, eggs, and egg yolks until the mixture is pale and slightly thickened. This step guarantees the cakes are light and airy.
- Combine Ingredients: Gradually fold the chocolate mixture into the egg mixture. Add the flour, shredded coconut, vanilla extract, and a pinch of salt, gently folding until all ingredients are well incorporated.
- Fill and Bake: Divide the batter evenly among the prepared ramekins. Place them on a baking sheet and bake for 10-12 minutes, or until the edges are firm but the center is still soft and jiggly.
- Cool and Serve: Allow the cakes to cool for a minute before carefully inverting them onto serving plates. Serve warm, optionally dusted with powdered sugar and garnished with toasted coconut flakes.
Extra Tips:
For the best results, verify all ingredients are at room temperature before beginning, as this will help them combine more smoothly.
Be careful not to overbake the cakes; the key to a perfect lava cake lies in its slightly undercooked center.
If you prefer a more pronounced coconut flavor, consider using coconut extract in place of vanilla.
Finally, serve these cakes immediately after baking to enjoy the perfect molten center.
Almond Lava Cake
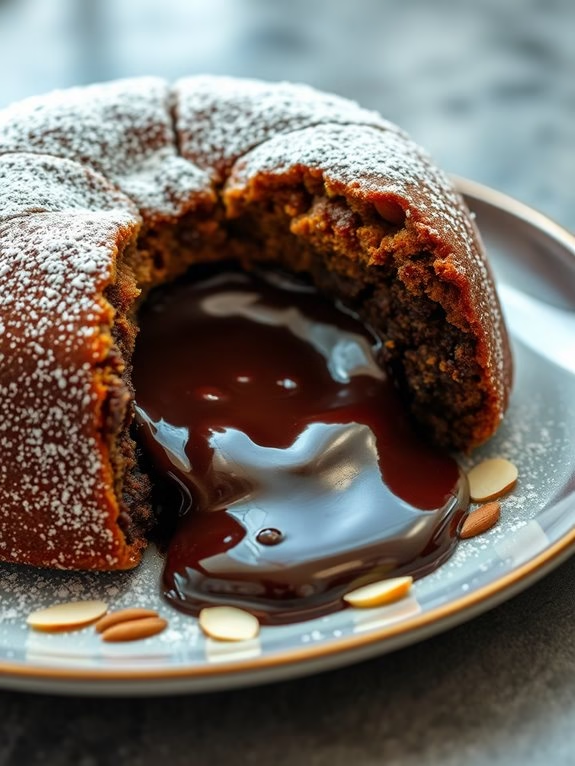
Almond Lava Cake is a delightful twist on the classic chocolate lava cake, incorporating the nutty flavor of almonds to enhance its rich, gooey center. This dessert is perfect for any occasion where you want to impress your guests with a sophisticated yet simple treat. The combination of molten chocolate and the subtle taste of almonds creates a symphony of flavors that will leave everyone craving more.
The warm, flowing center contrasts beautifully with the soft, cake-like exterior, making each bite an indulgent experience. Creating Almond Lava Cake is a straightforward process that doesn’t require an extensive list of ingredients or advanced baking skills. It’s a great recipe to try if you’re looking to make something special without spending hours in the kitchen.
This dessert can be prepared in advance and baked just before serving, guaranteeing it’s fresh and perfectly cooked for your guests. Whether you’re hosting a dinner party or simply treating yourself to a decadent dessert, this recipe is sure to become a favorite.
Ingredients for Almond Lava Cake (serving size: 4-6 people):
- 6 ounces dark chocolate, chopped
- 1/2 cup unsalted butter
- 2 large eggs
- 2 large egg yolks
- 1/4 cup granulated sugar
- 1/4 cup all-purpose flour
- 1/4 cup almond flour
- 1/4 teaspoon salt
- 1 teaspoon almond extract
- Powdered sugar for dusting (optional)
- Sliced almonds for garnish (optional)
Cooking Instructions:
- Preheat and Prepare: Preheat your oven to 425°F (220°C). Grease four to six ramekins and place them on a baking sheet for easy handling.
- Melt Chocolate and Butter: In a microwave-safe bowl or using a double boiler, melt the dark chocolate and butter together, stirring occasionally until smooth. Allow it to cool slightly.
- Mix Eggs and Sugar: In a separate large bowl, whisk together the eggs, egg yolks, and granulated sugar until the mixture becomes thick and pale.
- Combine Ingredients: Gently fold the melted chocolate mixture into the egg mixture. Add in the all-purpose flour, almond flour, and salt, and stir until just combined. Then, mix in the almond extract.
- Fill Ramekins: Divide the batter evenly among the prepared ramekins, filling each about three-quarters full.
- Bake: Place the ramekins in the preheated oven and bake for about 12-14 minutes, or until the edges are firm but the center is soft. Be careful not to overbake, as this will result in a less gooey center.
- Serve: Allow the cakes to cool for 1 minute, then carefully invert them onto plates. Dust with powdered sugar and garnish with sliced almonds if desired. Serve immediately to enjoy the gooey center.
Extra Tips:
For the best results, make sure your eggs are at room temperature before mixing, as this will help the batter blend more smoothly. If you prefer a less sweet dessert, consider using a higher percentage of cocoa in your dark chocolate.
To achieve the perfect lava consistency, it’s vital not to overbake the cakes; start checking them at the 12-minute mark. Finally, you can prepare the batter ahead of time and refrigerate it in the ramekins; just add an extra minute or two to the baking time if baking directly from the refrigerator.