
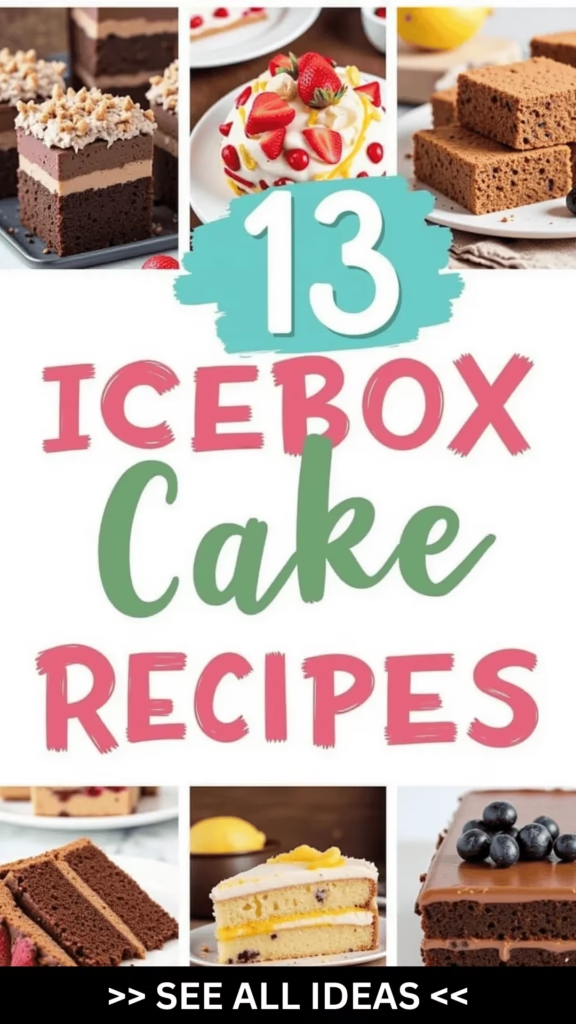
When the weather warms up, my sweet tooth yearns for something easy and refreshing. Icebox cakes are the answer!
Layers of creamy goodness paired with cookies or wafers make each bite a cool, delightful treat. Whether you love the classic richness of chocolate or the zesty pop of lemon blueberry, there’s something here for everyone.
Let’s explore these scrumptious recipes and embrace the sweet magic of the fridge.
Classic Chocolate Icebox Cake

Classic Chocolate Icebox Cake is a delightful no-bake dessert that layers rich chocolate flavor with the creamy texture of whipped cream, all nestled between crisp chocolate wafer cookies. This cake is perfect for those warm days when you want to enjoy a sweet treat without turning on the oven.
The simplicity of its ingredients belies the complexity of its flavor, as the chocolate wafers soften over time, melding beautifully with the cream to create a cake-like texture. This dessert isn’t only easy to make but also a crowd-pleaser for gatherings and family dinners.
The Classic Chocolate Icebox Cake requires just a few hours in the fridge to set, which allows the flavors to meld together into a harmonious blend. Whether you’re a seasoned dessert maker or a beginner, this recipe will guide you through creating a delectable treat that will impress your friends and family.
Ingredients for 4-6 servings:
- 2 cups heavy whipping cream
- 1/4 cup powdered sugar
- 1 teaspoon vanilla extract
- 2 packages (about 9 ounces each) chocolate wafer cookies
- 1/2 cup semi-sweet chocolate shavings or curls (optional for topping)
Instructions:
- Prepare the Whipped Cream:
- In a large mixing bowl, combine the heavy whipping cream, powdered sugar, and vanilla extract. Use an electric mixer on medium-high speed to whip the cream until it forms stiff peaks. Be careful not to over-whip, as it can turn into butter.
- Layer the Cake:
- On a flat serving platter, spread a small dollop of whipped cream to anchor the first layer of cookies. Arrange a single layer of chocolate wafer cookies (about 5-6 cookies, depending on the size of your platter) in a circle, with one cookie in the center. Spread a generous layer of whipped cream over the cookies, making sure they’re completely covered.
- Continue Layering:
- Repeat the layering process, alternating between cookies and whipped cream, until you have used up all the cookies and whipped cream. The final layer should be whipped cream.
- Chill the Cake:
- Cover the cake loosely with plastic wrap and refrigerate for at least 4 hours, or overnight. This allows the cookies to absorb moisture from the whipped cream and soften, creating a cake-like texture.
- Decorate and Serve:
- Before serving, decorate the top of the cake with semi-sweet chocolate shavings or curls. Slice the cake with a sharp knife, wiping the blade clean between cuts to maintain neat slices.
Extra Tips:
For best results, allow the icebox cake to chill overnight to guarantee the cookies are fully softened and the flavors are well-integrated.
If you’re short on time, you can use pre-whipped cream, but freshly whipped cream provides the best texture and flavor. To make neat slices, use a serrated knife and cut with a gentle sawing motion.
Finally, feel free to experiment with different flavors; add a layer of your favorite fruit or use flavored extracts in the whipped cream for a unique twist.
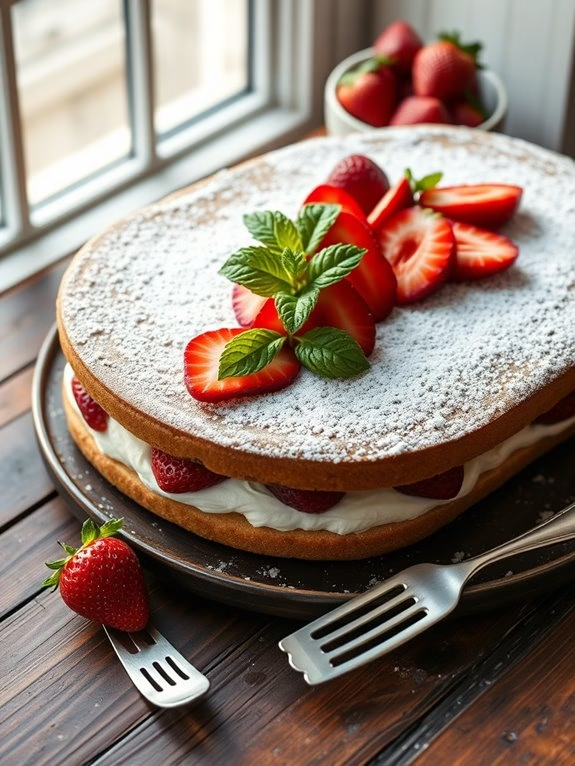
Strawberry Shortcake Icebox Delight
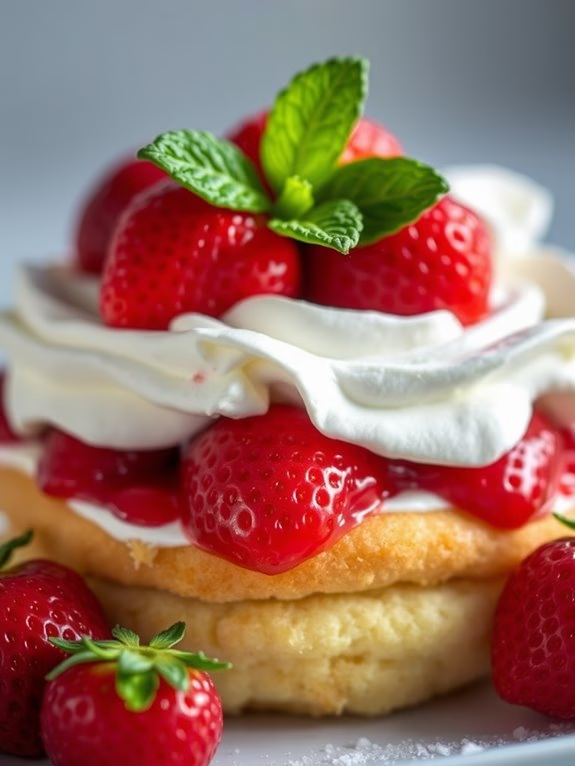
Strawberry Shortcake Icebox Delight is a delicious no-bake dessert that’s perfect for warm weather gatherings or as an easy, make-ahead treat. This recipe layers sweet and juicy strawberries with creamy whipped filling and soft sponge cake, creating a delightful medley of textures and flavors. The beauty of this icebox cake lies in its simplicity and the capacity to customize it according to your taste preferences, all while capturing the classic essence of strawberry shortcake.
This dessert isn’t only visually stunning but also incredibly easy to assemble. With just a few ingredients and minimal preparation, you can create a show-stopping dessert that will impress your friends and family. The Strawberry Shortcake Icebox Delight should be prepared in advance, allowing it to chill in the refrigerator for several hours or overnight. This resting period allows the flavors to meld together beautifully and the cake layers to soften, resulting in a melt-in-your-mouth experience.
Ingredients (serving size: 4-6 people):
- 1 pound fresh strawberries, hulled and sliced
- 2 tablespoons granulated sugar
- 1 teaspoon vanilla extract
- 2 cups heavy whipping cream
- 1/2 cup powdered sugar
- 1 package (12 oz) ladyfingers or sponge cake slices
- 1/4 cup strawberry jam
- Fresh mint leaves for garnish (optional)
Cooking Instructions:
- Prepare the Strawberries: In a medium bowl, combine the sliced strawberries with the granulated sugar and vanilla extract. Stir gently and let them sit for about 15 to 20 minutes, allowing the strawberries to release their natural juices.
- Whip the Cream: In a large mixing bowl, pour in the heavy whipping cream. Use an electric mixer to beat the cream on medium speed until soft peaks form. Gradually add the powdered sugar and continue to beat until stiff peaks form. Be careful not to overbeat.
- Layer the Cake: Spread a thin layer of strawberry jam on the bottom of a 9×9-inch square baking dish. Arrange a layer of ladyfingers or sponge cake slices over the jam, breaking them as needed to fit snugly.
- Add Strawberries and Cream: Spread half of the whipped cream over the layer of cake. Then, layer half of the strawberry mixture over the whipped cream, ensuring the strawberries are evenly distributed.
- Repeat Layers: Add another layer of ladyfingers or sponge cake slices, followed by the remaining whipped cream and strawberries. Smooth the top layer with a spatula.
- Chill the Cake: Cover the baking dish with plastic wrap or foil and refrigerate for at least 4 hours, preferably overnight. This allows the cake to absorb the flavors and soften.
- Serve and Garnish: Before serving, let the cake sit at room temperature for about 10 minutes. Garnish with fresh mint leaves if desired and cut into squares to serve.
Extra Tips:
For a more intense strawberry flavor, consider using macerated strawberries or adding a layer of strawberry puree between the cake layers. You can also experiment with other fruits such as raspberries or blueberries for a different twist.
If you prefer a lighter version, substitute part of the whipped cream with Greek yogurt. Make sure to use fresh, ripe strawberries for the best results, as they’ll provide the sweetest and juiciest flavor.
Finally, confirm the cake is well chilled before serving for the perfect texture.
Lemon Blueberry Refresh
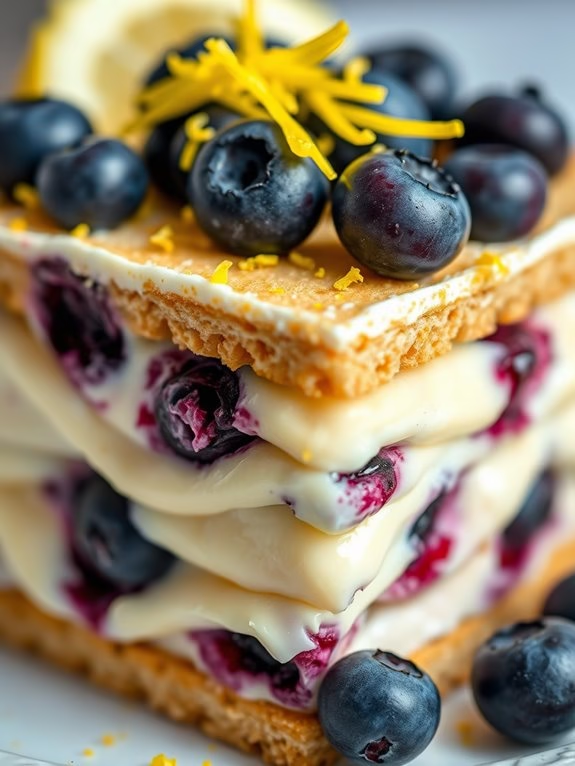
Lemon Blueberry Invigorating Icebox Cake Recipe
The Lemon Blueberry Invigorating Icebox Cake is a delightful, no-bake dessert that combines the zesty flavor of lemon with the sweet and slightly tart burst of blueberries. This cake is perfect for summer gatherings or any occasion where you want a light and invigorating treat.
The layers of creamy lemon filling, fresh blueberries, and crisp graham crackers meld together beautifully, creating a deliciously textured cake that feels indulgent yet invigorating. This recipe is designed to serve 4-6 people and is ideal for making in advance, as the flavors only improve with a little time spent in the fridge.
The simplicity of the ingredients allows the fresh flavors to shine, making it a go-to dessert for anyone who loves the combination of lemon and blueberry. Follow the steps below to create this easy and delicious dessert.
Ingredients:
- 2 cups fresh blueberries
- 1 cup lemon curd
- 1 cup heavy whipping cream
- 1 teaspoon vanilla extract
- 1 tablespoon powdered sugar
- 1 package (about 9 ounces) of graham crackers
- Zest of 1 lemon
- Fresh mint leaves for garnish (optional)
Instructions:
1. Prepare the Lemon Whipped Cream: In a large mixing bowl, pour in the heavy whipping cream. Add the vanilla extract and powdered sugar to the bowl. Using an electric mixer, whip the cream on medium speed until soft peaks form.
Gently fold in the lemon curd until fully combined, being careful not to deflate the whipped cream too much.
2. Assemble the Cake: In a 9×9-inch baking dish, spread a thin layer of the lemon whipped cream mixture to cover the bottom. Place a layer of graham crackers over the whipped cream, breaking them as needed to fit the dish.
Spread a generous layer of lemon whipped cream over the graham crackers, followed by a layer of fresh blueberries. Repeat the layers, ending with a layer of whipped cream.
3. Chill the Cake: Cover the dish with plastic wrap and refrigerate for at least 4 hours, or overnight if possible. This chilling time allows the graham crackers to soften and absorb the flavors from the lemon cream and blueberries.
4. Serve: Before serving, add a final sprinkle of lemon zest over the top of the cake for an extra burst of citrus flavor. Garnish with additional blueberries and fresh mint leaves if desired.
Slice into squares and serve chilled.
Extra Tips:
For the best results, make sure your ingredients are well-chilled before you begin assembling the cake. This will help the whipped cream maintain its structure.
Feel free to customize the recipe by adding other berries or a splash of limoncello to the whipped cream for an adult twist. If you’re making the cake ahead of time, it can be stored in the refrigerator for up to two days, making it a convenient dessert for entertaining.
Cookies and Cream Sensation

Cookies and Cream Sensation Icebox Cake
The Cookies and Cream Sensation Icebox Cake is a delightful dessert that perfectly combines the classic flavors of chocolate and cream. This no-bake dessert isn’t only easy to make but also delivers a rich, creamy texture that melts in your mouth with every bite.
Whether you’re hosting a dinner party or simply craving a sweet treat, this icebox cake is sure to impress your guests and satisfy your sweet tooth.
This recipe features layers of chocolate cookies alternated with creamy whipped filling, creating a harmonious blend of textures and flavors. The beauty of this dessert lies in its simplicity and the fact that it requires minimal ingredients, making it an ideal choice for those who want to whip up something delicious without spending hours in the kitchen.
With just a little preparation and some time in the refrigerator, you’ll have a stunning dessert ready to be devoured by 4-6 people.
Ingredients (Serving Size: 4-6 people):
- 2 cups heavy whipping cream
- 1/4 cup powdered sugar
- 1 teaspoon vanilla extract
- 1 package (about 14 ounces) chocolate wafer cookies
- 1/2 cup crushed chocolate cookies (for topping)
- Optional: 1/4 cup mini chocolate chips or chocolate shavings for garnish
Cooking Instructions:
- Prepare the Whipped Cream: In a large mixing bowl, combine the heavy whipping cream, powdered sugar, and vanilla extract. Using an electric mixer, beat the mixture on medium-high speed until stiff peaks form. This should take about 3-4 minutes. Be careful not to overbeat as this can cause the cream to turn into butter.
- Layer the Cookies and Cream: In a 9-inch springform pan, spread a thin layer of whipped cream on the bottom. Place a single layer of chocolate wafer cookies on top of the cream, covering the entire surface. It’s fine if the cookies overlap slightly.
- Build the Cake: Spread a generous layer of whipped cream over the cookies, ensuring they’re completely covered. Repeat the process of adding layers of cookies followed by whipped cream until you have used up all the cookies and cream. End with a layer of whipped cream on top.
- Chill the Cake: Cover the springform pan with plastic wrap or aluminum foil and refrigerate the cake for at least 4 hours, or overnight if possible. This allows the cookies to soften and the flavors to meld together beautifully.
- Finish and Serve: Before serving, remove the cake from the refrigerator. Gently run a knife around the edge of the cake to loosen it from the pan, then carefully remove the springform ring. Sprinkle the crushed chocolate cookies and optional chocolate chips or shavings on top for decoration. Slice and serve chilled.
Extra Tips:
For the best flavor and texture, it’s crucial to allow the cake to chill for at least 4 hours, but overnight is even better. This gives the cookies enough time to soften and absorb the flavors of the cream.
If you want to add a little extra flair, consider drizzling some chocolate syrup or adding a layer of crushed cookies between the layers. Remember that the quality of the chocolate wafer cookies will greatly affect the final taste, so choose a brand you enjoy.
Finally, if you prefer a less sweet dessert, you can reduce the amount of powdered sugar in the whipped cream to suit your taste.
Tropical Mango Coconut Cake
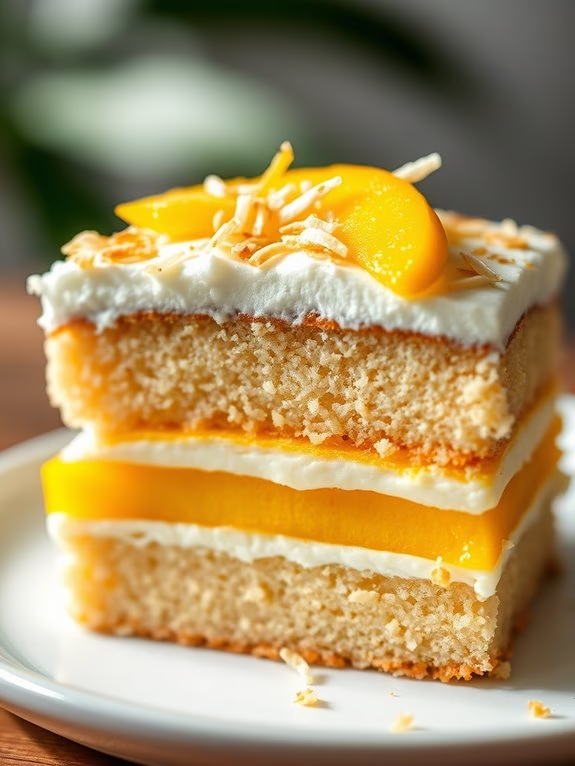
Tropical Mango Coconut Icebox Cake is a revitalizing, no-bake dessert that’s perfect for warm weather. This indulgent treat combines the rich flavors of ripe mangoes and creamy coconut, layered with crispy graham crackers for a delightful tropical experience. The cake is easy to assemble, requires minimal ingredients, and doesn’t need an oven, making it a go-to dessert for summer gatherings or when you want a taste of the tropics.
The magic of this Tropical Mango Coconut Icebox Cake lies in its simplicity and the way it melds flavors over time. As the cake rests in the fridge, the graham crackers soften, absorbing the coconut cream and mango, resulting in a cake-like texture. Each bite offers a balance of sweetness from the mango, creaminess from the coconut, and a hint of crunch from the graham crackers, providing a revitalizing escape with every forkful.
Ingredients for a serving size of 4-6 people:
- 2 cups ripe mango, peeled and thinly sliced
- 2 cups coconut cream
- 1 teaspoon vanilla extract
- 1/4 cup honey or maple syrup
- 2 packs (about 14 oz) graham crackers
- 1 cup unsweetened coconut flakes, toasted
- 1/2 cup chopped fresh mint (optional, for garnish)
Cooking Instructions:
- Prepare the Coconut Cream Mixture: In a large mixing bowl, combine the coconut cream, vanilla extract, and honey or maple syrup. Whisk until everything is well blended and smooth.
- Assemble the First Layer: In a 9×9-inch square baking dish, spread a thin layer of the coconut cream mixture evenly on the bottom. This will help the graham crackers stick to the dish.
- Layer the Graham Crackers: Place a layer of graham crackers over the coconut cream, breaking them as necessary to fit them into the corners and cover the entire surface.
- Add Mango Slices: Arrange a layer of mango slices over the graham crackers, ensuring the fruit is evenly distributed.
- Repeat Layers: Spread another layer of the coconut cream mixture over the mangoes, followed by another layer of graham crackers. Repeat the layering process (coconut cream, mangoes, graham crackers) until you have used all the ingredients, finishing with a layer of coconut cream on top.
- Top with Coconut Flakes: Sprinkle the toasted coconut flakes generously over the top layer of coconut cream for added texture and flavor.
- Chill the Cake: Cover the dish with plastic wrap or foil and refrigerate for at least 4 hours, or overnight if possible. This allows the flavors to meld and the graham crackers to soften.
- Garnish and Serve: Before serving, optionally sprinkle with chopped fresh mint for an added touch of freshness. Cut into squares and serve chilled.
Extra Tips:
For the best results, use fully ripe mangoes as they provide the sweetest flavor and softest texture. If coconut cream is unavailable, you can use full-fat coconut milk, but be sure to refrigerate it overnight and scoop out the solidified cream from the top.
Toasting the coconut flakes enhances their flavor and adds a nice crunch to the cake. This cake is highly versatile, so feel free to experiment with other tropical fruits like pineapple or passion fruit for a different twist.
Peanut Butter Dream
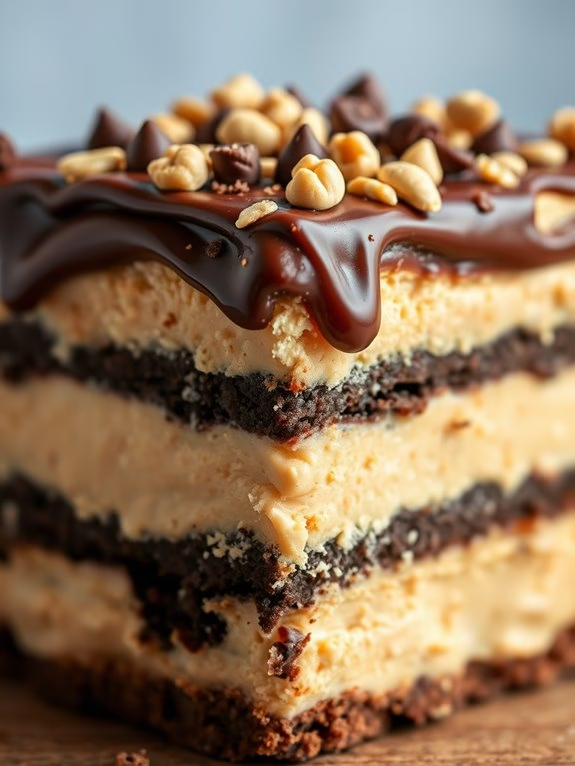
Peanut Butter Dream Icebox Cake
Indulge in the rich, creamy, and decadent Peanut Butter Dream Icebox Cake, a no-bake dessert that effortlessly combines layers of peanut butter goodness with a touch of chocolate. This cake is the perfect treat for peanut butter lovers and is ideal for any occasion, from casual gatherings to formal dinners.
The best part? It’s incredibly easy to prepare, requiring just a few simple ingredients and minimal effort, yet it delivers maximum flavor with every bite.
This Peanut Butter Dream Icebox Cake is composed of alternating layers of creamy peanut butter filling and chocolate wafer cookies, which soften in the refrigerator to create a cake-like texture. The luscious peanut butter filling is a delightful blend of cream cheese, peanut butter, and whipped cream, resulting in a silky-smooth consistency that’s both rich and satisfying.
Topped with a drizzle of chocolate and a sprinkle of crushed peanuts, this dessert is sure to be a crowd-pleaser.
Ingredients (Serves 4-6):
- 1 cup creamy peanut butter
- 8 oz cream cheese, softened
- 1 cup powdered sugar
- 1 teaspoon vanilla extract
- 2 cups heavy whipping cream
- 2 tablespoons granulated sugar
- 1 package (about 9 oz) chocolate wafer cookies
- 1/4 cup mini chocolate chips
- 1/4 cup crushed peanuts
Cooking Instructions:
- Prepare the Peanut Butter Filling: In a large mixing bowl, beat the softened cream cheese, peanut butter, vanilla extract, and powdered sugar using an electric mixer until smooth and well combined. Set aside.
- Whip the Cream: In a separate bowl, whip the heavy whipping cream and granulated sugar until stiff peaks form. This should take about 3-5 minutes. Gently fold the whipped cream into the peanut butter mixture until fully incorporated.
- Layer the Cake: In a 9×5 inch loaf pan, spread a thin layer of the peanut butter filling on the bottom. Place a layer of chocolate wafer cookies over the filling, breaking them if necessary to fit. Spread another layer of peanut butter filling over the cookies, guaranteeing they’re completely covered.
- Continue Layering: Repeat the layering process, alternating between the wafer cookies and peanut butter filling, until all the filling is used, finishing with a layer of filling on top.
- Chill the Cake: Cover the loaf pan with plastic wrap and refrigerate the cake for at least 4 hours, or overnight, to allow the cookies to soften and the flavors to meld.
- Garnish and Serve: Before serving, sprinkle the top of the cake with mini chocolate chips and crushed peanuts. Cut into slices and enjoy!
Extra Tips:
To make the Peanut Butter Dream Icebox Cake even more indulgent, consider adding a layer of chocolate ganache on top before garnishing with chocolate chips and peanuts.
For a smoother filling, verify that the cream cheese is fully softened before mixing, which will help prevent any lumps. Additionally, if you prefer a slightly less sweet dessert, you can reduce the amount of powdered sugar in the peanut butter filling.
This cake can also be prepared a day in advance, making it a convenient choice for entertaining.
Mocha Espresso Indulgence
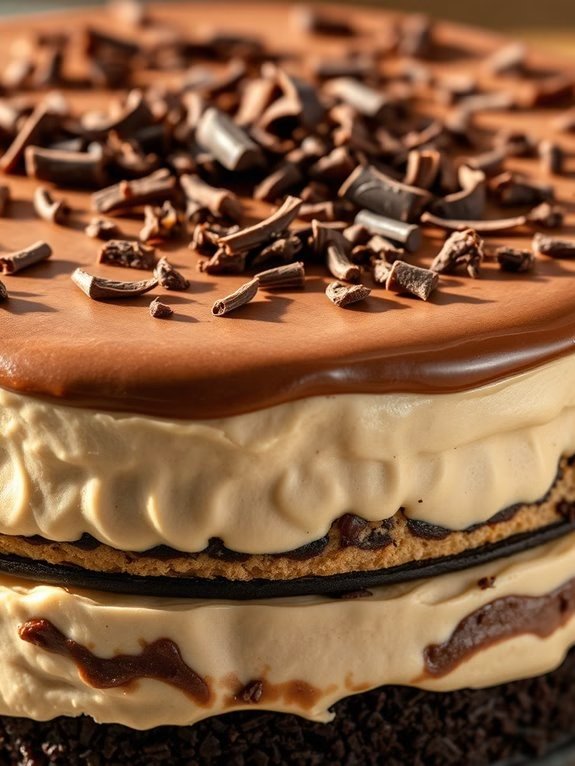
Mocha Espresso Indulgence Icebox Cake Recipe
Indulge in the rich, creamy, and decadent world of Mocha Espresso Indulgence Icebox Cake, a no-bake dessert that combines the bold flavors of espresso and chocolate. This dessert is perfect for coffee lovers and those who enjoy a touch of sweetness balanced with a hint of bitterness.
The layers of coffee-soaked cookies and luscious mocha cream make for a sophisticated treat that’s sure to impress at any gathering or dinner party. This icebox cake is easy to prepare and requires no baking, making it an ideal dessert to whip up in advance.
As it chills in the refrigerator, the flavors meld together beautifully, resulting in a cake that’s both creamy and satisfying. It serves 4-6 people, making it perfect for sharing with friends and family.
Ingredients:
- 2 cups heavy cream
- 1/4 cup sugar
- 2 tablespoons cocoa powder
- 1 tablespoon instant espresso powder
- 1 teaspoon vanilla extract
- 1/4 cup strong brewed coffee, cooled
- 24 chocolate wafer cookies
- 1/4 cup chocolate shavings or cocoa powder for garnish
Instructions:
- Prepare the Mocha Cream: In a large mixing bowl, combine the heavy cream, sugar, cocoa powder, instant espresso powder, and vanilla extract. Use an electric mixer to beat the mixture on medium-high speed until stiff peaks form. This will take about 3-5 minutes.
- Layer the Cookies and Cream: In a 9-inch springform pan or a similar-sized dish, spread a thin layer of mocha cream on the bottom to help the cookies adhere. Dip each chocolate wafer cookie briefly into the cooled brewed coffee to soak them slightly, and then arrange them in a single layer over the cream in the pan.
- Build the Layers: Spread a generous layer of mocha cream over the cookies, smoothing it out with a spatula. Repeat the process: dip more cookies in coffee, layer them over the cream, and spread another layer of cream. Continue this layering process until you have used all the cookies and cream, finishing with a layer of mocha cream on top.
- Chill the Cake: Cover the pan with plastic wrap and refrigerate for at least 4 hours, or overnight if possible. This chilling time allows the cookies to soften and absorb the flavors from the cream, resulting in a cake-like texture.
- Garnish and Serve: Before serving, remove the cake from the refrigerator and run a knife along the edges to loosen it from the pan. Carefully remove the springform ring. Garnish the top of the cake with chocolate shavings or a dusting of cocoa powder for an extra touch of elegance. Slice and serve chilled.
Extra Tips:
For best results, verify that your heavy cream is very cold before whipping; this helps achieve a stable whipped cream. If you find the mocha cream too sweet or too bitter, adjust the sugar and espresso powder to your liking.
Additionally, experiment with different brands of chocolate wafer cookies to find the taste and texture that you prefer. For a more intense coffee flavor, consider adding a splash of coffee liqueur to the brewed coffee before soaking the cookies.
Raspberry Cheesecake Layers
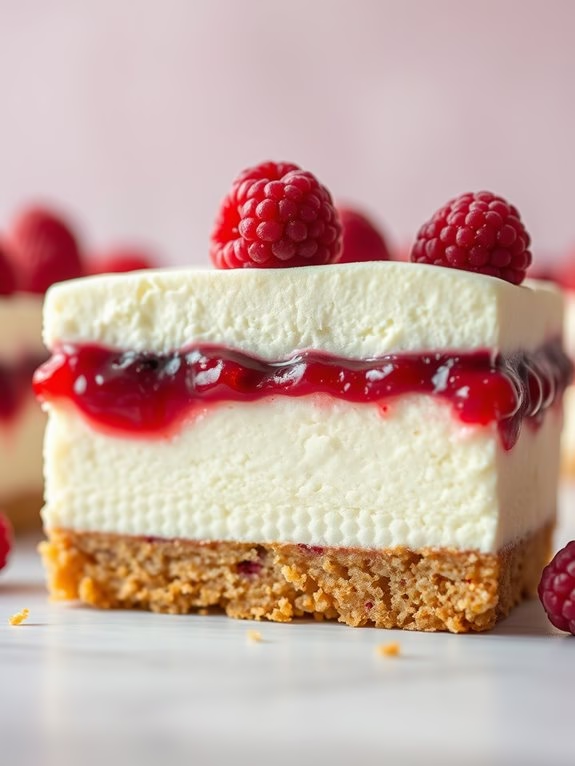
Raspberry Cheesecake Icebox Cake is a delightful, no-bake dessert that combines the creamy richness of cheesecake with the sweet, tangy flavor of raspberries. This recipe is perfect for those who want to make a stunning dessert without spending hours in the kitchen. The layers of graham crackers, raspberry cheesecake mousse, and fresh raspberries come together to create a mouthwatering treat that’s sure to impress family and friends.
The beauty of this dessert is in its simplicity and the way the flavors meld together as it sets in the refrigerator. The graham crackers soften to form a cake-like texture, while the raspberry cheesecake layer becomes firm yet creamy. This dessert is best made a day in advance to allow the flavors to fully develop, making it an ideal choice for a stress-free dinner party or holiday gathering.
Ingredients for 4-6 Servings:
- 2 cups fresh raspberries, plus extra for garnish
- 1 cup granulated sugar
- 2 cups heavy whipping cream
- 8 oz cream cheese, softened
- 1 teaspoon vanilla extract
- 1 package (about 14.4 oz) of graham crackers
- 1 tablespoon lemon juice
- 1 tablespoon cornstarch
- 1/4 cup water
Instructions:
- Prepare Raspberry Sauce: In a small saucepan, combine 2 cups of fresh raspberries, 1/2 cup of sugar, lemon juice, cornstarch, and water. Cook over medium heat, stirring frequently, until the raspberries break down and the mixture thickens, about 5-7 minutes. Remove from heat and let cool.
- Whip Cream: In a large mixing bowl, beat the heavy whipping cream with an electric mixer on medium-high speed until stiff peaks form. Set aside.
- Make Cheesecake Mixture: In another bowl, beat the softened cream cheese with the remaining 1/2 cup sugar and vanilla extract until smooth and creamy. Gently fold the whipped cream into the cream cheese mixture until fully combined.
- Assemble Layers: In a 9×13-inch baking dish, spread a thin layer of the cheesecake mixture on the bottom. Place a single layer of graham crackers over the cheesecake mixture. Spread a layer of the cheesecake mixture over the graham crackers, followed by a layer of raspberry sauce. Repeat the layers (graham crackers, cheesecake mixture, raspberry sauce) until all the ingredients are used, finishing with a layer of cheesecake mixture on top.
- Chill: Cover the dish with plastic wrap and refrigerate for at least 4 hours, preferably overnight, to allow the layers to set and flavors to meld.
- Serve: Before serving, garnish with additional fresh raspberries on top for extra flavor and color.
Extra Tips:
For a smoother raspberry sauce, you can strain the mixture through a mesh sieve to remove the seeds after cooking. This step is optional but can enhance the texture for those who prefer a seedless sauce.
Additionally, feel free to experiment with other berries such as strawberries or blackberries if raspberries aren’t available. Make sure to allow ample time for the cake to chill in the refrigerator as this is essential for achieving the perfect texture.
Mint Chocolate Chip Chill
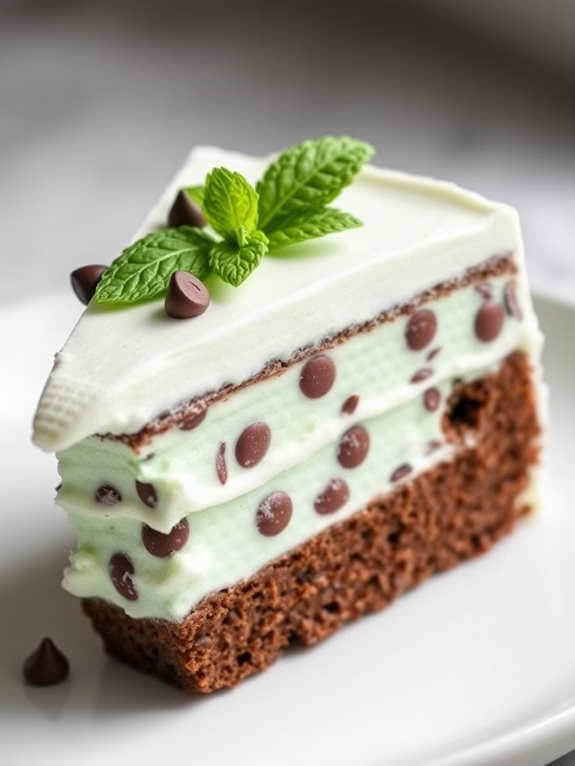
Mint Chocolate Chip Chill is a revitalizing and indulgent dessert that combines the classic flavors of mint and chocolate in a no-bake, easy-to-assemble icebox cake. Perfect for warm days or any time you’re craving a sweet treat with a hint of minty freshness, this dessert is sure to impress your friends and family.
Layers of mint-infused whipped cream, chocolate graham crackers, and chocolate chips come together to create a creamy, chilled delight that’s as satisfying to eat as it’s simple to make.
This recipe for Mint Chocolate Chip Chill serves 4-6 people, making it an ideal choice for small gatherings or family meals. Allowing the cake to chill in the refrigerator overnight is key to achieving the perfect texture, as it gives the graham crackers time to soften and meld with the creamy layers. The result is a beautifully layered cake that slices easily and looks stunning on a plate.
Now, let’s explore the ingredients and step-by-step instructions to create this delightful dessert.
Ingredients:
- 2 cups heavy whipping cream
- 1/4 cup powdered sugar
- 1 teaspoon peppermint extract
- 1 cup mini chocolate chips
- 1 package (9 ounces) chocolate graham crackers
- Fresh mint leaves for garnish (optional)
Instructions:
- Prepare the Whipped Cream: In a large mixing bowl, combine the heavy whipping cream, powdered sugar, and peppermint extract. Use an electric mixer to beat the mixture on medium-high speed until stiff peaks form. This should take about 3-5 minutes. Be careful not to overbeat, as the cream can turn into butter.
- Fold in Chocolate Chips: Gently fold in the mini chocolate chips into the whipped cream using a spatula. Confirm the chips are evenly distributed throughout the whipped cream mixture.
- Assemble the First Layer: In a 9×5-inch loaf pan, spread a thin layer of the whipped cream mixture to cover the bottom of the pan. This will help the first layer of graham crackers stick.
- Layer the Graham Crackers: Place a single layer of chocolate graham crackers over the whipped cream. Break the crackers as needed to fit the pan snugly.
- Add the Cream Layer: Spread about one-third of the remaining whipped cream mixture over the graham crackers, ensuring it’s evenly distributed.
- Repeat Layers: Continue layering the graham crackers and whipped cream. You should have enough for three layers of each, ending with a layer of whipped cream on top.
- Chill the Cake: Cover the loaf pan with plastic wrap and refrigerate the cake for at least 6 hours, preferably overnight. This allows the graham crackers to soften and absorb the flavors.
- Serve the Cake: Once the cake has set, remove it from the refrigerator. Use a sharp knife to cut slices, and garnish with fresh mint leaves, if desired, before serving.
Extra Tips:
For the best results, confirm your mixing bowl and beaters are well-chilled before whipping the cream, as this helps the cream thicken more quickly and evenly.
If you prefer a stronger mint flavor, you can adjust the peppermint extract to taste, but be cautious as it can quickly become overpowering.
Additionally, for a fun twist, try adding a layer of mint chocolate candy pieces between the layers for an extra burst of flavor.
Peach Melba Surprise
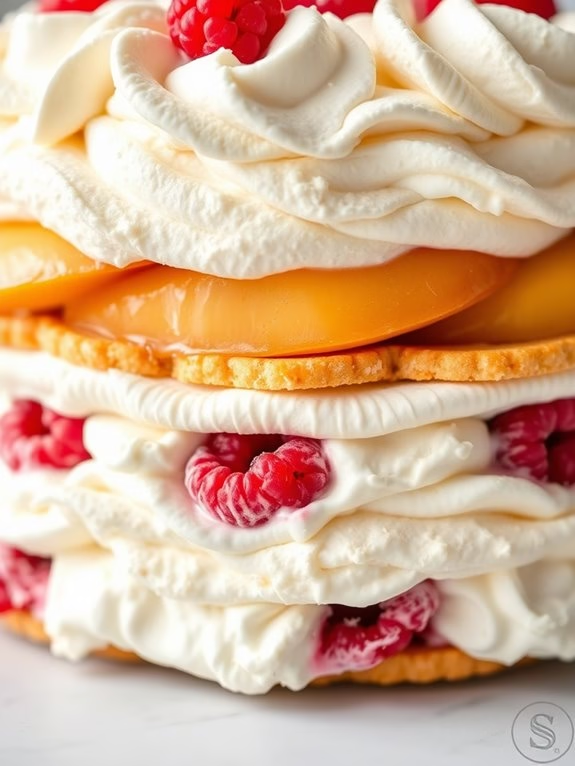
Peach Melba Surprise is a delightful twist on the classic icebox cake, combining the invigorating flavors of peaches, raspberries, and creamy layers into a no-bake dessert that’s perfect for summer gatherings.
Originally inspired by the famous Peach Melba dessert created by chef Auguste Escoffier, this recipe brings together the sweetness of ripe peaches and the tartness of fresh raspberries, all layered with vanilla cookies and a luscious cream filling.
The surprise element of this dish lies in the unexpected burst of flavor and texture as you dig into the creamy layers with hints of fruit and crunch.
This Peach Melba Surprise icebox cake isn’t only visually stunning with its vibrant layers but also incredibly easy to prepare, making it an ideal choice for both novice and experienced cooks.
It’s a make-ahead dessert that benefits from chilling, allowing the flavors to meld together beautifully. This recipe serves 4-6 people, making it a great option for family dinners or small parties.
Serve this chilled, and watch it disappear as guests savor each spoonful of this summery delight.
Ingredients (Serves 4-6):
- 2 cups heavy cream
- 1/4 cup powdered sugar
- 1 teaspoon vanilla extract
- 1 package of vanilla wafer cookies
- 4 ripe peaches, peeled and sliced
- 1 cup fresh raspberries
- 1/4 cup peach preserves
- 1 tablespoon lemon juice
- Fresh mint leaves for garnish (optional)
Cooking Instructions:
1. Prepare the Cream Filling: In a large mixing bowl, combine the heavy cream, powdered sugar, and vanilla extract. Use an electric mixer to whip the mixture until stiff peaks form. Set the whipped cream aside.
2. Layer the Cookies: In a 9×9-inch square baking dish, arrange a layer of vanilla wafer cookies on the bottom, making sure they’re closely packed together.
3. Prepare the Peach Mixture: In a separate bowl, combine the sliced peaches, peach preserves, and lemon juice. Gently toss to coat the peaches evenly with the preserves and juice.
4. Assemble the Layers: Spread a third of the whipped cream over the layer of cookies in the baking dish. Evenly distribute half of the peach mixture over the whipped cream. Add a layer of raspberries on top of the peaches.
5. Repeat the layers: Another layer of cookies, another third of the whipped cream, and the remaining peach mixture and raspberries.
6. Final Layer and Chill: Top with the final layer of cookies and the remaining whipped cream. Smooth the top with a spatula, cover the dish with plastic wrap, and refrigerate for at least 4 hours or overnight.
This allows the cookies to soften and the flavors to meld together.
7. Serve: Before serving, garnish with fresh mint leaves if desired. Cut into squares and serve chilled.
Extra Tips:
To guarantee the best results, use ripe, juicy peaches as they provide the most flavor and sweetness.
If fresh peaches aren’t in season, canned peaches can be used as a substitute, but be sure to drain them well.
For added texture, you can lightly toast the vanilla wafer cookies before layering to give them a bit of crunch that contrasts with the creamy and fruity layers.
Experiment with other fruits such as strawberries or blueberries for a different twist on the classic Peach Melba flavors.
Caramel Apple Crumble

Caramel Apple Crumble Icebox Cake
Indulge in the delightful layers of this Caramel Apple Crumble Icebox Cake, where the sweetness of caramel meets the crisp freshness of apples, all enveloped in creamy layers of cake. This no-bake dessert is perfect for those who love the comforting flavors of apple crumble, yet seek the cool, invigorating texture of an icebox cake. Ideal for summertime gatherings or whenever you crave a dessert that combines the best of both worlds, this recipe will surely become a favorite.
The Caramel Apple Crumble Icebox Cake is a feast for the senses, with its luscious layers of graham crackers, smooth caramel pudding, cinnamon-spiced apples, and a topping of crunchy oat crumble. It serves 4-6 people, making it perfect for a family dinner or a small party. Prepare this cake ahead of time to let the flavors meld beautifully, and serve it chilled for the ultimate dessert experience.
Ingredients:
- 2 cups graham crackers, crushed
- 1/2 cup unsalted butter, melted
- 1 cup caramel pudding
- 3 medium apples, peeled, cored, and thinly sliced
- 1 tablespoon lemon juice
- 1/2 cup granulated sugar
- 1 tablespoon ground cinnamon
- 1 cup heavy whipping cream
- 1 tablespoon vanilla extract
- 1/2 cup all-purpose flour
- 1/2 cup rolled oats
- 1/4 cup brown sugar
- 1/4 cup unsalted butter, cold and cubed
Instructions:
- Prepare the Base: In a large mixing bowl, combine the crushed graham crackers and melted butter until well incorporated. Press the mixture firmly into the bottom of an 8×8-inch square baking dish to form the base layer.
- Cook the Apples: Toss the sliced apples with lemon juice, granulated sugar, and cinnamon in a medium saucepan. Cook over medium heat for about 10 minutes, stirring occasionally, until the apples are tender and the sugar has dissolved into a syrup. Remove from heat and allow to cool completely.
- Make the Whipped Cream: In a separate bowl, whip the heavy cream until soft peaks form. Add vanilla extract and continue whipping until stiff peaks form. Be careful not to over-whip, as this can turn the cream into butter.
- Assemble the Layers: Spread half of the caramel pudding over the graham cracker base. Layer with half of the cooked apples, followed by half of the whipped cream. Repeat with the remaining caramel pudding, apples, and whipped cream, spreading each layer evenly.
- Prepare the Crumble Topping: In a bowl, mix together the flour, oats, brown sugar, and cold cubed butter using your fingers or a pastry cutter until the mixture resembles coarse crumbs. Sprinkle this evenly over the top layer of whipped cream.
- Chill the Cake: Cover the dish with plastic wrap and refrigerate for at least 4 hours or overnight. This allows the cake to set properly, and for the flavors to meld together beautifully.
Extra Tips:
For the best flavor, use tart apples like Granny Smith to balance the sweetness of the caramel and sugar. Make sure the pudding is well-chilled before spreading it, as it will help the layers hold together better. If you prefer a firmer texture, consider adding a bit of gelatin to the whipped cream before assembling.
Finally, for a decorative touch, drizzle extra caramel sauce over the top just before serving. Enjoy your Caramel Apple Crumble Icebox Cake at its finest!
Pistachio Pudding Pleasure
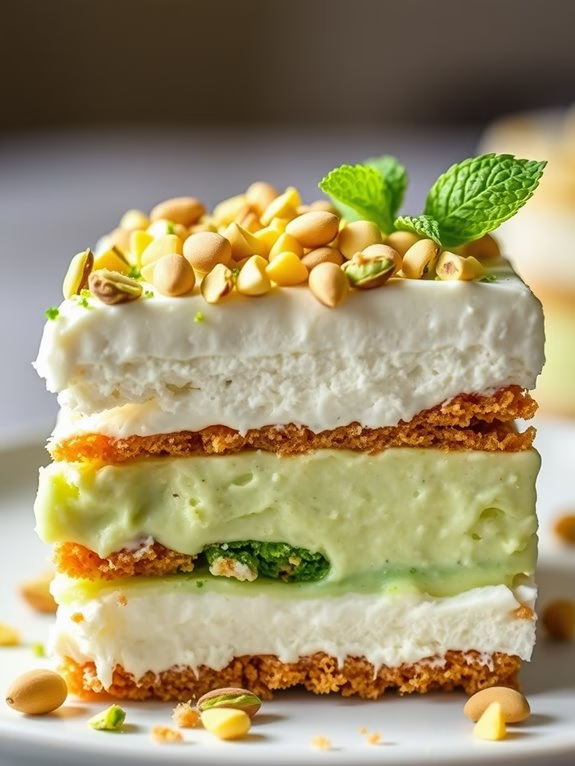
Pistachio Pudding Pleasure Icebox Cake
Indulge in the creamy, nutty delight of a Pistachio Pudding Pleasure Icebox Cake. This no-bake dessert is perfect for those who crave an easy yet luxurious treat. With layers of pistachio pudding, whipped cream, and graham crackers, this cake is a delightful combination of textures and flavors.
The cool, revitalizing taste of pistachio pudding paired with the crunch of graham crackers creates a harmonious balance that will have your taste buds dancing.
The Pistachio Pudding Pleasure Icebox Cake is ideal for family gatherings or a simple weeknight dessert, serving 4-6 people. It’s a fantastic make-ahead option, as it needs time to chill and meld the flavors together. This allows the graham crackers to soften and absorb the creamy pistachio pudding, resulting in a cake-like consistency without any baking required.
Ingredients:
- 2 cups cold milk
- 2 packages (3.4 oz each) instant pistachio pudding mix
- 2 cups heavy whipping cream
- 1/4 cup powdered sugar
- 1 teaspoon vanilla extract
- 1 package (about 14.4 oz) graham crackers
- 1/2 cup chopped pistachios
- Optional: fresh mint leaves for garnish
Instructions:
- Prepare the Pudding: In a medium-sized bowl, whisk together the cold milk and instant pistachio pudding mix until smooth and thick. This should take about 2 minutes. Set the pudding aside to firm up while you prepare the whipped cream.
- Make the Whipped Cream: In a large mixing bowl, combine the heavy whipping cream, powdered sugar, and vanilla extract. Use an electric mixer to beat the mixture until stiff peaks form. This will take approximately 3-4 minutes. Be careful not to overbeat, as it can turn into butter.
- Assemble the Cake: In a 9×13 inch dish, spread a thin layer of pistachio pudding on the bottom to prevent the crackers from sliding. Place a layer of graham crackers over the pudding, breaking them as necessary to fit.
- Layer the Ingredients: Spread half of the remaining pistachio pudding over the graham crackers, followed by half of the whipped cream. Repeat the layers with another layer of graham crackers, the remaining pudding, and the remaining whipped cream.
- Top and Chill: Sprinkle the chopped pistachios evenly over the top layer of whipped cream. Cover the dish with plastic wrap and refrigerate for at least 4 hours, or overnight for best results. This allows the graham crackers to soften and the flavors to meld together.
- Serve and Garnish: Once chilled, slice the cake into squares and serve. Garnish with fresh mint leaves if desired for an extra pop of color and freshness.
Extra Tips:
For a more intense pistachio flavor, consider adding a few drops of pistachio extract to the pudding mix. If you prefer a sweeter dessert, increase the powdered sugar in the whipped cream to taste.
To make serving easier, dip your knife in hot water before slicing the cake. This will help cut through the layers smoothly without dragging the crackers. For a decorative touch, you can lightly dust the top with cocoa powder or add a drizzle of chocolate syrup before serving.
Black Forest Bliss

Black Forest Bliss Icebox Cake Recipe
Indulge in the decadent allure of a classic Black Forest Cake with a modern twist in this scrumptious icebox version. The Black Forest Bliss Icebox Cake marries the rich flavors of dark chocolate, the tartness of cherries, and the lightness of whipped cream layered between crisp chocolate wafer cookies. This no-bake dessert is perfect for any occasion, requiring minimal effort while delivering maximum flavor.
As the cake chills, the layers meld into a luscious, cake-like consistency that will leave your taste buds singing. Ideal for serving 4-6 people, this Black Forest Bliss Icebox Cake is a fantastic make-ahead dessert, allowing you to focus on entertaining rather than being stuck in the kitchen.
Its simple yet elegant presentation is sure to impress your guests, making it a delightful centerpiece for any gathering. Let’s explore the ingredients and steps needed to create this heavenly dessert.
Ingredients:
- 2 cups heavy cream
- 1/4 cup powdered sugar
- 1 teaspoon vanilla extract
- 1 package (about 9 ounces) chocolate wafer cookies
- 2 cups pitted and halved fresh cherries (or canned cherries, drained)
- 1/4 cup cherry syrup (reserved from canned cherries or homemade)
- 1/4 cup dark chocolate shavings or curls
- Fresh cherries for garnish (optional)
Instructions:
- Prepare the Whipped Cream: In a large mixing bowl, combine the heavy cream, powdered sugar, and vanilla extract. Using an electric mixer, beat the mixture on medium speed until stiff peaks form. This should take about 3-5 minutes. Be careful not to overbeat the cream.
- Layer the Cake: Begin by spreading a thin layer of whipped cream on the bottom of a 9-inch springform pan or a deep dish. This will help hold the first layer of cookies in place. Arrange a single layer of chocolate wafer cookies over the cream, breaking them if necessary to fit.
- Add Cherry Layer: Evenly distribute half of the halved cherries over the layer of cookies. Drizzle half of the cherry syrup over the cherries to infuse more flavor into the cake.
- Repeat Layers: Add another layer of whipped cream over the cherries, followed by another layer of cookies. Repeat the cherry and syrup layer as before. Continue layering until all ingredients are used, finishing with a layer of whipped cream on top.
- Chill the Cake: Cover the icebox cake with plastic wrap and refrigerate for at least 6 hours, or overnight if possible. The chilling allows the cookies to soften and all the flavors to meld beautifully.
- Garnish and Serve: Before serving, remove the cake from the refrigerator and carefully remove the springform pan. Sprinkle the top with dark chocolate shavings or curls and garnish with fresh cherries if desired. Slice and serve chilled.
Extra Tips:
For a more intense chocolate flavor, try incorporating a layer of chocolate ganache between the cookies and cherries. If fresh cherries aren’t in season, use high-quality canned cherries or frozen cherries, ensuring they’re thoroughly drained to avoid excess moisture.
For an added touch of sophistication, consider adding a tablespoon of Kirsch (cherry liqueur) to the cherry syrup. This will enhance the traditional Black Forest flavor profile.
Finally, remember that patience is key; allowing the cake to chill adequately is essential for achieving the perfect texture.