
Mornings can be hectic, but that doesn’t mean you have to skip a sweet start to your day.
I’ve curated a list of 10 quick and delightful breakfast ideas perfect for those rushed moments.
From creamy overnight oats to speedy banana pancakes, these options are sure to satisfy your sweet tooth.
Let’s explore how you can add a touch of sweetness to your busy mornings with these tasty delights.
Overnight Oats for a Fast-Paced Morning
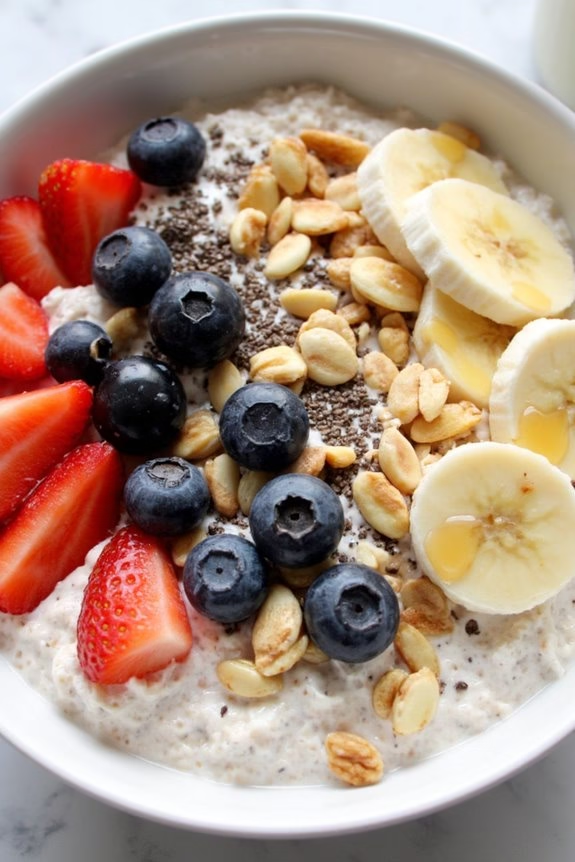
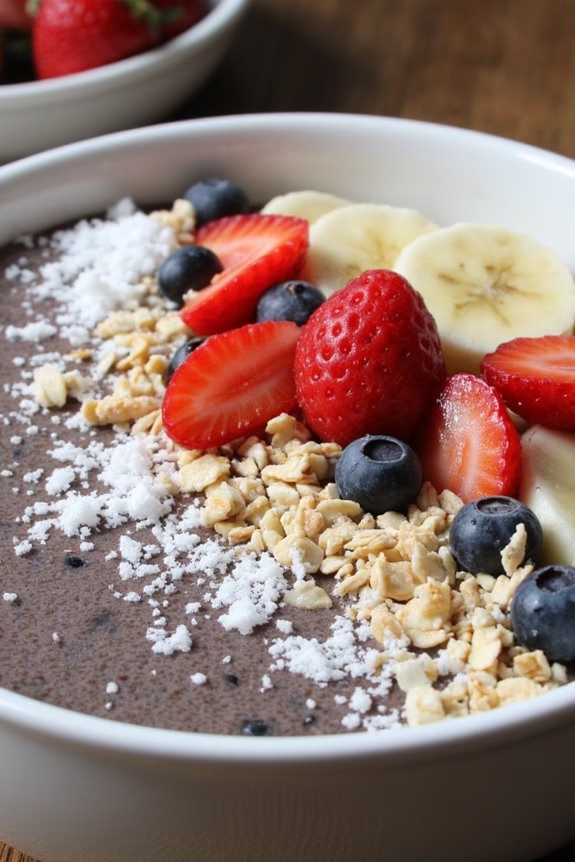
Mornings can be a whirlwind of activity, leaving little time for a nutritious breakfast. Enter Classic Overnight Oats, a lifesaver for those busy mornings. This dish requires just a few minutes of preparation the night before, allowing you to wake up to a ready-made, healthy breakfast.
Overnight oats aren’t only convenient but also highly customizable, making it easy to cater to different taste preferences and dietary needs. The beauty of overnight oats lies in their simplicity and versatility. By soaking rolled oats in your choice of milk or yogurt overnight, they become soft and creamy, ready to be enjoyed cold or heated slightly in the morning.
You can enhance the flavor with a variety of toppings, such as fresh fruits, nuts, seeds, or a drizzle of honey. This recipe serves 4-6 people, perfect for a family breakfast or meal prep for the week.
Ingredients (Serving Size: 4-6 people):
- 3 cups rolled oats
- 3 cups milk (dairy or plant-based)
- 1 cup Greek yogurt
- 2 tablespoons chia seeds
- 2 tablespoons honey or maple syrup
- 1 teaspoon vanilla extract
- 1 teaspoon ground cinnamon
- A pinch of salt
- Assorted toppings: fresh berries, sliced bananas, chopped nuts, seeds, or dried fruits
Instructions:
- Combine the Base Ingredients: In a large mixing bowl, combine the rolled oats, milk, Greek yogurt, chia seeds, honey or maple syrup, vanilla extract, ground cinnamon, and a pinch of salt. Stir the mixture well to guarantee that the oats are evenly coated and the chia seeds are distributed throughout.
- Mix Thoroughly: Use a spatula or large spoon to guarantee all ingredients are well mixed. This helps the oats to absorb the liquid evenly, preventing clumps from forming.
- Divide into Containers: Pour the mixture into individual serving jars or airtight containers. This is a great way to have portioned servings ready to grab and go in the morning.
- Refrigerate Overnight: Seal the containers with lids and place them in the refrigerator. Allow the oats to soak for at least 6 hours, preferably overnight. This process softens the oats and allows the flavors to meld together.
- Add Toppings and Serve: In the morning, give the oats a good stir. Add your choice of toppings like fresh berries, sliced bananas, chopped nuts, seeds, or dried fruits. If you prefer your oats warm, you can microwave them for 30-60 seconds.
Extra Tips:
When making overnight oats, feel free to experiment with different flavors and textures. You can switch up the type of milk or yogurt to suit your taste or dietary requirements.
For added protein, consider mixing in a spoonful of nut butter or a scoop of protein powder before refrigerating. If you like your oats sweeter, adjust the amount of honey or maple syrup to your liking.
Quick Smoothie Blends for a Sweet Start

Mornings can be a whirlwind of activity, making it vital to have a quick and nourishing breakfast option at your fingertips. The Tropical Sunrise Smoothie is a delightful blend that promises a sweet start to your day, providing essential nutrients and a burst of energy.
This smoothie combines a variety of tropical fruits with creamy yogurt and a hint of honey, creating a revitalizing drink that’s both delicious and filling. Perfect for rushed mornings, this smoothie is easy to prepare, requiring only a few minutes of your time.
Packed with vitamins and minerals, the Tropical Sunrise Smoothie isn’t just a treat for your taste buds but also a boon for your health. The combination of fruits like mango, pineapple, and banana guarantees you get a good dose of vitamin C, potassium, and antioxidants, while the yogurt adds a dose of protein and probiotics.
This recipe is designed to serve 4-6 people, making it ideal for family breakfasts or a group of friends sharing a morning meal together.
Ingredients (Serves 4-6):
- 2 cups fresh or frozen mango chunks
- 2 cups fresh or frozen pineapple chunks
- 2 ripe bananas
- 2 cups plain Greek yogurt
- 1 cup orange juice
- 2 tablespoons honey
- 1 cup ice cubes
- Optional: fresh mint leaves for garnish
Instructions:
- Prepare the Fruits: If using fresh mango and pineapple, peel and chop them into chunks. If using frozen, measure out the required amount and allow them to thaw slightly if desired for easier blending.
- Add Ingredients to Blender: In a high-speed blender, combine the mango chunks, pineapple chunks, and bananas. Pour in the Greek yogurt and orange juice, followed by the honey and ice cubes.
- Blend Until Smooth: Secure the lid on the blender and start blending on a low speed. Gradually increase the speed to high, blending until all the ingredients are fully incorporated and the mixture is smooth and creamy. This should take about 1-2 minutes.
- Taste and Adjust: Pause the blender and taste the smoothie. If you prefer it a bit sweeter, add more honey as needed and blend again briefly to mix.
- Serve: Pour the smoothie into glasses, dividing it evenly. For an added touch, garnish each glass with a sprig of fresh mint if desired.
Extra Tips:
For a thicker smoothie, consider using less orange juice or more yogurt. If you prefer a thinner consistency, simply add a bit more juice or water.
Feel free to experiment with different fruits based on availability or personal preference; for instance, adding berries or swapping out the orange juice for coconut water can offer a new flavor profile.
To save time, you can pre-portion and freeze the fruit in smoothie bags, ready to blend. For those who enjoy a protein boost, a scoop of protein powder can be added to the blender.
Enjoy your Tropical Sunrise Smoothie as a revitalizing breakfast or a quick snack throughout the day!
Yogurt Parfaits: Easy Layered Breakfasts
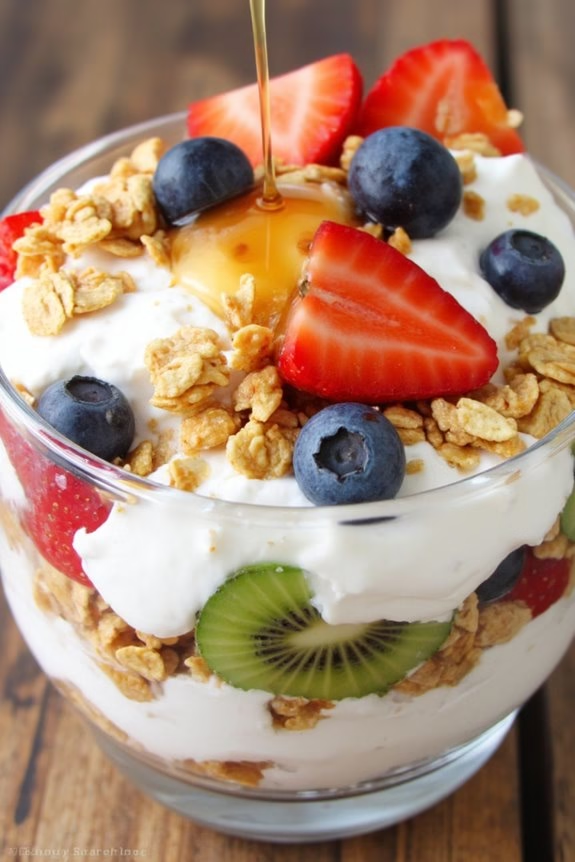
For those hectic mornings when time is scarce yet you yearn for a nutritious and delicious meal, yogurt parfaits are the perfect solution. These easy-to-make layered breakfasts combine creamy yogurt with crunchy granola and fresh fruits, offering a delightful blend of textures and tastes. Not only are they simple to prepare, but they also provide a balanced mix of protein, fiber, and essential vitamins to keep you energized throughout the day.
Plus, their customizable nature allows you to tailor them to your family’s preferences or whatever ingredients you have on hand. Yogurt parfaits can be prepared in advance, making them an excellent option for meal prepping. You can whip up a batch on the weekend and have breakfast ready for those busy weekday mornings.
The beauty of these parfaits lies in their versatility; whether you prefer Greek yogurt for its rich texture and high protein content or a flavored variety for added sweetness, the choice is yours. Paired with layers of your favorite fruits and granola, these parfaits will quickly become a breakfast staple for your household.
Ingredients (serves 4-6):
- 4 cups of plain or flavored Greek yogurt
- 2 cups of granola
- 2 cups of mixed fresh fruits (such as berries, bananas, or kiwi)
- 1 tablespoon of honey or maple syrup (optional)
- 1 teaspoon of vanilla extract (optional)
Cooking Instructions:
- Prepare Ingredients: Begin by washing and slicing your chosen fruits into bite-sized pieces. Set them aside in a bowl.
- Mix Yogurt: In a separate bowl, combine the Greek yogurt with honey or maple syrup and vanilla extract if you’re using them. Stir until the ingredients are well blended to enhance the yogurt’s flavor.
- Layer Parfaits: Take 4-6 clear glasses or jars for serving. Start by spooning a layer of yogurt into the bottom of each glass, followed by a layer of granola. Add a layer of mixed fruits on top of the granola. Repeat this layering process until the glasses are filled, typically ending with a fruit layer.
- Chill and Serve: If you’re preparing these parfaits ahead of time, cover each glass or jar with a lid or plastic wrap and refrigerate. When ready to serve, you can add an additional drizzle of honey or a sprinkle of granola on top for extra crunch.
Extra Tips:
To keep the granola crunchy, it’s best to add it right before serving if you’re making the parfaits in advance. You can also experiment with different types of yogurt, granola, and fruits to create endless variations of this breakfast treat.
For added nutrition, consider incorporating nuts or seeds such as almonds, chia seeds, or flaxseeds into your parfaits. Finally, if you’re dairy-free, substitute traditional yogurt with coconut or almond milk yogurt alternatives.
Fast and Fluffy Banana Pancakes
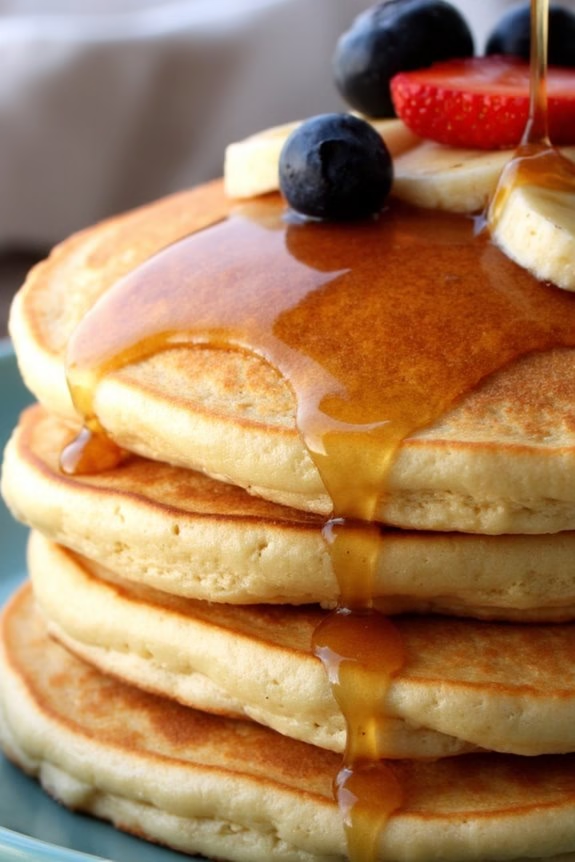
In the hustle and bustle of rushed mornings, a quick yet satisfying breakfast can set the right tone for the rest of the day. Fast and Fluffy Banana Pancakes are a delightful option that combines the comfort of traditional pancakes with the natural sweetness of ripe bananas. These pancakes aren’t only quick to prepare but are also light and airy, making them a perfect morning treat for families or individuals on the go.
With a few simple ingredients, you can whip up a batch that will leave everyone asking for more. The magic of these pancakes lies in their ability to be both nutritious and flavorful without requiring too much time or effort. Bananas provide natural sweetness, allowing you to cut down on added sugars, while also adding a wonderful moist texture.
The batter comes together in minutes and with a few flips in the pan, you’ll have a stack of golden, fluffy pancakes ready to be devoured. Perfect for a serving size of 4-6 people, this recipe is ideal whether you’re feeding a family or looking to have leftovers for another day.
Ingredients (Serves 4-6):
- 2 ripe bananas
- 2 cups all-purpose flour
- 2 tablespoons sugar
- 2 teaspoons baking powder
- 1/2 teaspoon baking soda
- 1/2 teaspoon salt
- 1 3/4 cups milk
- 2 large eggs
- 1 teaspoon vanilla extract
- 1/4 cup melted butter (plus extra for cooking)
Cooking Instructions:
- Mash the Bananas: Begin by peeling the ripe bananas and mashing them in a large bowl using a fork or potato masher until smooth.
- Mix Dry Ingredients: In a separate bowl, combine the all-purpose flour, sugar, baking powder, baking soda, and salt. Stir until well mixed.
- Combine Wet Ingredients: To the mashed bananas, add the milk, eggs, vanilla extract, and melted butter. Whisk these ingredients together until they’re well combined.
- Create the Batter: Gradually add the dry ingredients to the wet ingredients, stirring gently until just combined. Be careful not to overmix; a few lumps are okay as they help keep the pancakes fluffy.
- Preheat Skillet: Heat a non-stick skillet or griddle over medium heat. Add a small amount of butter to grease the pan lightly.
- Cook the Pancakes: Pour about 1/4 cup of batter onto the skillet for each pancake. Cook for 2-3 minutes, or until bubbles form on the surface and the edges appear set. Flip the pancakes and cook for another 2 minutes or until golden brown.
- Serve Warm: Remove the pancakes from the skillet and serve immediately with your choice of toppings such as maple syrup, fresh fruits, or a dusting of powdered sugar.
Extra Tips:
For an even fluffier texture, let the batter rest for about 5-10 minutes before cooking. This allows the baking powder to activate fully, resulting in lighter pancakes. If you find the batter too thick, you can add a little more milk to reach your desired consistency.
Additionally, using a ripe banana is essential as it enhances the sweetness and flavor of the pancakes. If you’re looking to add a bit of crunch, consider mixing in some chopped nuts or a handful of chocolate chips into the batter before cooking.
Nut Butter and Honey Toast
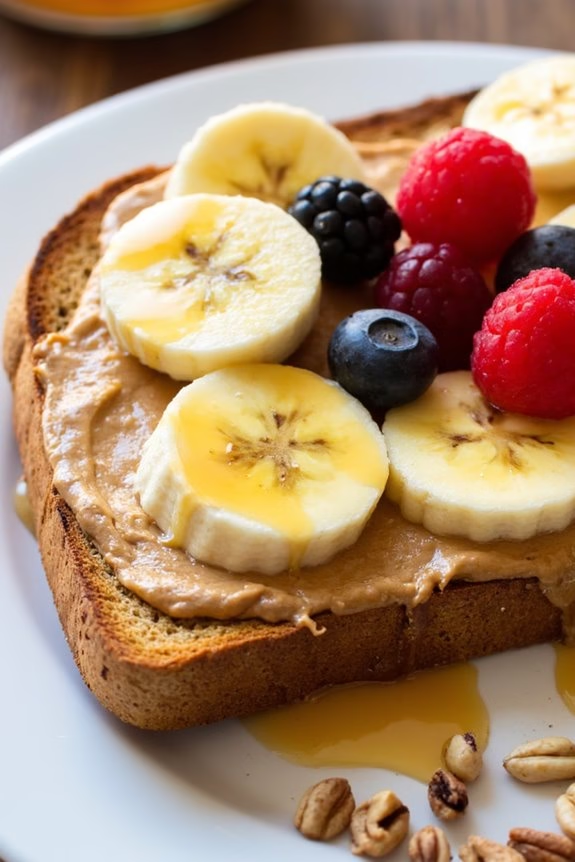
For those mornings when time is of the essence, Nut Butter and Honey Toast offers a quick yet satisfying breakfast solution. This simple yet delicious dish combines the creamy richness of nut butter with the natural sweetness of honey, all atop a crunchy slice of toasted bread.
Perfect for individuals or families who need a nutritious start without spending precious minutes in the kitchen, Nut Butter and Honey Toast is versatile and can be easily customized to cater to different taste preferences or dietary needs.
Not only is this dish easy to prepare, but it also packs a nutritional punch, providing protein, healthy fats, and energy-boosting carbohydrates to keep you fueled throughout the morning. Whether you’re rushing out the door or need a quick snack before a workout, this recipe can be whipped up in no time, offering both convenience and flavor.
Here’s how you can prepare this delightful breakfast for a serving size of 4-6 people.
Ingredients (serving size: 4-6 people):
- 8 slices of whole-grain bread
- 1 cup of your choice of nut butter (e.g., almond, peanut, or cashew)
- 6 tablespoons of honey
- 1 teaspoon of cinnamon (optional)
- 1 cup of sliced bananas or berries (optional topping)
- 1/4 cup of chopped nuts (optional topping)
Instructions:
- Toast the Bread: Begin by placing the slices of whole-grain bread in a toaster or under a preheated broiler until they’re golden brown and crispy. This should take about 3-5 minutes depending on your toaster’s settings.
- Prepare the Nut Butter Mixture: While the bread is toasting, in a small bowl, mix the nut butter with cinnamon if you’re using it. This will enhance the flavor profile of the nut butter, giving it a warm, sweet-spicy kick.
- Spread the Nut Butter: Once the bread is toasted to your desired level of crispiness, use a butter knife to generously spread the nut butter mixture evenly over each slice.
- Drizzle with Honey: Using a spoon or a squeeze bottle, drizzle about one tablespoon of honey over each slice of nut butter-covered toast. Confirm the honey is well distributed for a consistent taste.
- Add Toppings: If you’re using optional toppings, arrange the sliced bananas or berries on top of the honey-drizzled toast. Sprinkle with chopped nuts for an added crunch.
- Serve Immediately: Serve the Nut Butter and Honey Toast warm to enjoy the perfect balance of creamy, crunchy, and sweet elements.
Extra Tips:
For an added layer of flavor, you can lightly sprinkle a pinch of sea salt over the top of the honey, which can enhance the sweetness of the dish.
If you’re preparing this breakfast in advance, consider storing the toasted bread separately and only adding the nut butter, honey, and toppings right before serving to maintain the best texture.
Additionally, feel free to experiment with different types of nut butters and toppings to create your personalized version of this quick breakfast classic.
Sweet Breakfast Muffins for Busy Days
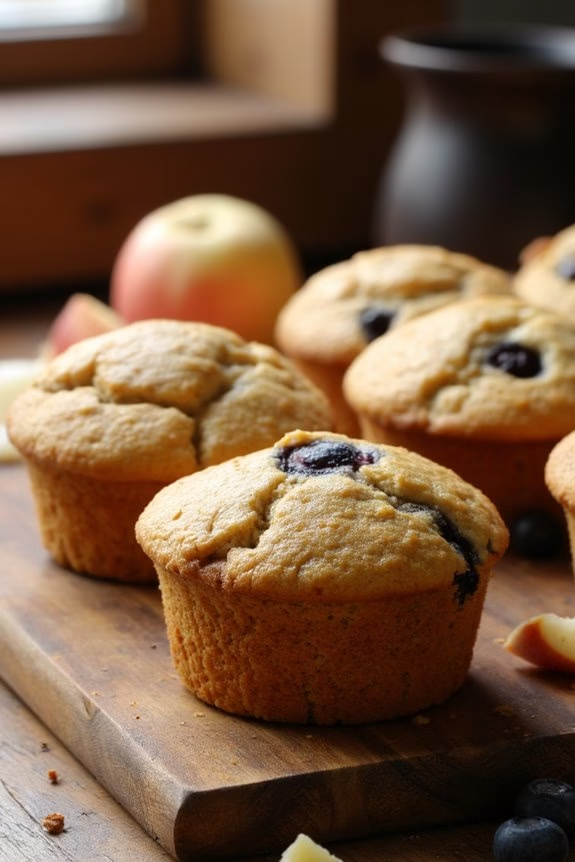
When you’re rushing through your morning routine, a nutritious breakfast is often the first thing that gets neglected. Sweet Breakfast Muffins are a perfect solution for those hectic mornings. These muffins aren’t only quick to prepare but also incredibly delicious and satisfying. Packed with wholesome ingredients, they offer a delightful combination of sweetness and nourishment that will keep you energized throughout the morning.
These Sweet Breakfast Muffins are ideal for preparing in advance. You can easily make a batch on the weekend and have a grab-and-go breakfast ready for the week ahead. With a perfect balance of natural sweetness from fruits and a hint of spice, these muffins are sure to become a family favorite. They’re also versatile enough to be adjusted to your personal taste preferences or dietary needs.
Ingredients for 4-6 servings:
- 2 cups all-purpose flour
- 1 teaspoon baking powder
- 1/2 teaspoon baking soda
- 1/4 teaspoon salt
- 1 teaspoon ground cinnamon
- 1/2 cup unsalted butter, melted
- 3/4 cup brown sugar
- 2 large eggs
- 1 teaspoon vanilla extract
- 1 cup mashed ripe bananas (about 2 medium bananas)
- 1/2 cup plain Greek yogurt
- 1/2 cup honey
- 1 cup fresh blueberries or diced apples
Cooking Instructions:
- Preheat the Oven: Start by preheating your oven to 350°F (175°C). This guarantees that the oven is at the right temperature when you’re ready to bake.
- Prepare the Muffin Tin: Line a 12-cup muffin tin with paper liners or lightly grease them with cooking spray to prevent sticking.
- Mix Dry Ingredients: In a large bowl, whisk together the flour, baking powder, baking soda, salt, and ground cinnamon. This step guarantees that the dry ingredients are evenly distributed.
- Combine Wet Ingredients: In another bowl, whisk together the melted butter and brown sugar until smooth. Then, add the eggs and vanilla extract, and continue to whisk until well combined.
- Add Bananas and Yogurt: Stir in the mashed bananas and Greek yogurt into the wet mixture. This adds moisture and flavor to the muffins.
- Combine Wet and Dry Ingredients: Gradually add the dry ingredients to the wet mixture, stirring gently until just combined. Be careful not to over-mix to avoid tough muffins.
- Fold in Fruit: Gently fold in the blueberries or diced apples into the batter. This adds natural sweetness and a burst of flavor to the muffins.
- Fill the Muffin Cups: Divide the batter evenly among the prepared muffin cups, filling each about 3/4 full.
- Bake the Muffins: Place the muffin tin in the preheated oven and bake for 18-20 minutes, or until a toothpick inserted into the center of a muffin comes out clean.
- Cool and Serve: Allow the muffins to cool in the tin for about 5 minutes, then transfer them to a wire rack to cool completely. Enjoy warm or store for later.
Extra Tips:
To make these muffins even more delicious, consider adding a sprinkle of oats or a handful of chopped nuts on top before baking for a crunchy texture. If you’re using frozen blueberries, don’t thaw them before adding to the batter to prevent them from bleeding into the mix.
For a healthier alternative, you can substitute whole wheat flour for half of the all-purpose flour. These muffins freeze well, so feel free to make a double batch and store them in the freezer for those extra busy mornings. Simply reheat them in the microwave for a quick and easy breakfast on the go.
Avocado Toast With Honey: a Sweet Morning Twist
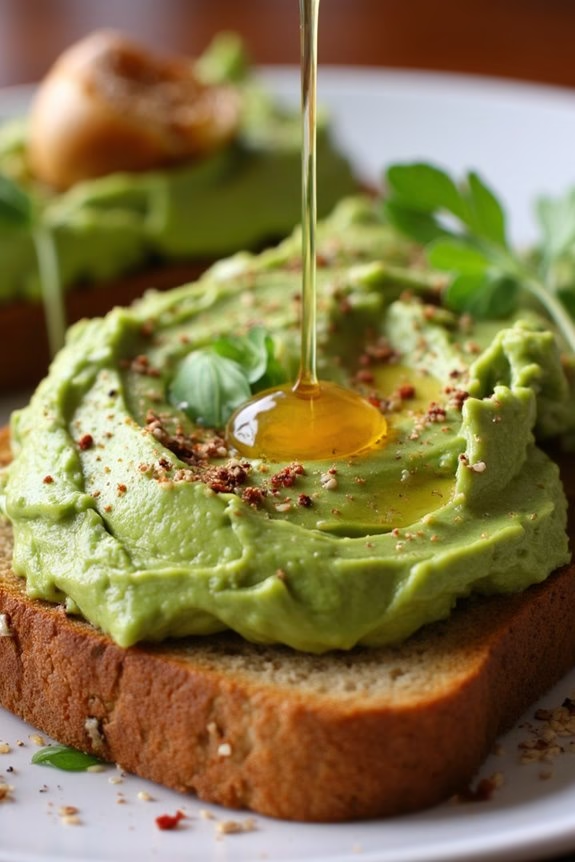
Avocado Toast With Honey is a delightful breakfast option that combines the creamy richness of avocado with the natural sweetness of honey, creating a perfect harmony of flavors. This simple yet satisfying dish is ideal for those rushed mornings when you need a quick and nutritious meal to kickstart your day.
The addition of honey adds a unique twist to the traditional avocado toast, making it not only delicious but also a visually appealing dish that you can enjoy any day of the week.
This recipe is designed for a serving size of 4-6 people, making it perfect for a family breakfast or a small gathering. It’s a versatile dish that can easily be adjusted to accommodate different taste preferences. Whether you’re a fan of the classic avocado toast or looking to try something new, this version with honey is sure to become a favorite.
With just a few simple steps, you can prepare a breakfast that’s both nourishing and delightful.
Ingredients:
- 4-6 slices of whole-grain or sourdough bread
- 3 ripe avocados
- 2 tablespoons of lemon juice
- Salt and pepper to taste
- 4 tablespoons of honey
- Optional: red pepper flakes, sesame seeds, or microgreens for garnish
Cooking Instructions:
- Prepare the Avocados: Begin by cutting the avocados in half, removing the pits, and scooping the flesh into a bowl. Use a fork to mash the avocados until they reach your desired texture, whether you prefer it chunky or smooth.
- Season the Avocado: Add the lemon juice to the mashed avocado to enhance the flavor and prevent browning. Season with salt and pepper to taste, mixing well to make sure the seasoning is evenly distributed.
- Toast the Bread: While preparing the avocado mixture, toast the slices of bread to your preferred level of crispiness. You can use a toaster or an oven set to broil for a few minutes.
- Assemble the Toast: Once the bread is toasted, generously spread the avocado mixture over each slice. Be sure to cover the entire surface for a full burst of flavor in every bite.
- Drizzle with Honey: Using a spoon or honey dipper, drizzle the honey evenly over the avocado-topped toast. This adds a beautiful sheen and a sweet contrast to the creamy avocado.
- Garnish (Optional): For added flavor and visual appeal, sprinkle red pepper flakes, sesame seeds, or microgreens on top of the toast.
Extra Tips:
When selecting avocados, choose ones that are ripe but still firm to the touch, as overripe avocados can become mushy and difficult to work with.
If you’re planning to serve the toast later, prepare the avocado mixture in advance and store it in an airtight container with a layer of plastic wrap pressed against the surface to minimize browning.
For a gluten-free version, use gluten-free bread, and feel free to experiment with different types of honey, such as clover or wildflower, to discover your preferred flavor profile.
Homemade Fruit and Nut Energy Bars
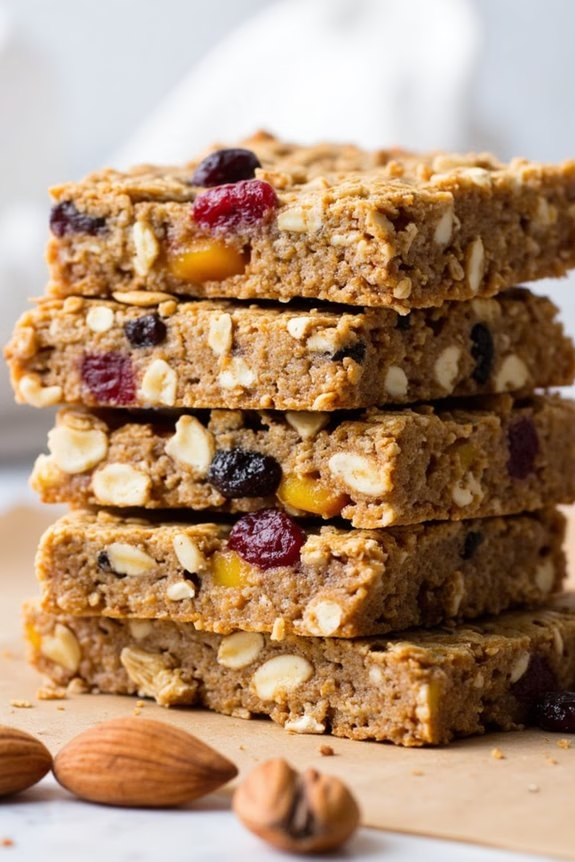
Homemade Fruit and Nut Energy Bars are the perfect breakfast solution for those busy mornings when you’re on the go and need a quick, nutritious boost.
These bars are packed with wholesome ingredients like oats, nuts, and dried fruits, providing a balance of carbohydrates, healthy fats, and proteins to keep you energized throughout the day. Not only are they easy to make, but they can also be customized to include your favorite nuts and fruits, making each batch a unique treat.
These energy bars are ideal for a meal prep session and can be made in advance, stored in the refrigerator, or even frozen for extended shelf life. Whether you enjoy them as a breakfast option or a midday snack, these bars are sure to satisfy your cravings while keeping you full and focused.
Making a batch yields about 12-15 bars, serving approximately 4-6 people, depending on how generously you slice them.
Ingredients (Serving size: 4-6 people)
- 2 cups rolled oats
- 1 cup mixed nuts (such as almonds, walnuts, and cashews)
- 1 cup mixed dried fruits (such as cranberries, raisins, and apricots)
- 1/2 cup honey or maple syrup
- 1/4 cup nut butter (such as almond or peanut butter)
- 1 teaspoon vanilla extract
- 1/2 teaspoon salt
- 1/4 teaspoon cinnamon (optional)
Instructions
- Preheat the Oven: Begin by preheating your oven to 350°F (175°C). Line an 8×8 inch baking dish with parchment paper, making certain there’s some overhang for easy removal later.
- Prepare the Dry Ingredients: In a large mixing bowl, combine the rolled oats, mixed nuts, and dried fruits. If you prefer smaller pieces, roughly chop the nuts and fruits before adding them to the bowl.
- Mix the Wet Ingredients: In a small saucepan over low heat, combine the honey or maple syrup, nut butter, vanilla extract, salt, and cinnamon. Stir continuously until the mixture is smooth and well combined.
- Combine Ingredients: Pour the wet mixture over the dry ingredients in the mixing bowl. Use a spatula to thoroughly mix until all the dry ingredients are evenly coated with the wet mixture.
- Press into Baking Dish: Transfer the mixture into the prepared baking dish. Use the back of a spoon or a spatula to press the mixture firmly and evenly into the dish. This ascertains the bars will hold together well once baked.
- Bake the Bars: Place the baking dish in the preheated oven and bake for 20-25 minutes, or until the edges are lightly golden brown. This will give the bars a nice, chewy texture.
- Cool and Slice: Remove the baking dish from the oven and allow the bars to cool completely in the dish. Once cooled, use the parchment paper overhang to lift the bars out. Place on a cutting board and slice into bars of your desired size.
Extra Tips
For added texture and flavor, consider toasting the oats and nuts in the oven for about 10 minutes before mixing them with the other ingredients.
If you’d like your energy bars to be even denser in nutrients, you can add extras like chia seeds, flaxseeds, or a handful of dark chocolate chips.
Be sure to store the bars in an airtight container in the refrigerator to maintain freshness, and they should last up to a week. If you need them to last longer, individually wrap each bar and store them in the freezer for up to three months.
Enjoy them straight from the fridge or at room temperature for a convenient, satisfying breakfast or snack.
Personalize Store-Bought Pastries for a Sweet Touch

Mornings can be hectic, leaving little time for a well-prepared breakfast. Luckily, store-bought pastries can be quickly transformed into delicious, personalized treats with just a few simple ingredients.
By adding a homemade glaze and some fresh toppings, you can elevate these pastries to a new level, making them not only convenient but also uniquely delightful. These personalized pastries will make your rushed mornings feel a bit more special, providing a sweet touch that pairs perfectly with a cup of coffee or tea.
Whether you’re grabbing croissants, danishes, or even plain old donuts, there are endless ways to add a personal touch to these breakfast staples. This recipe will guide you through making a simple yet delicious glaze and suggest some toppings that will complement your pastries beautifully.
With just a few easy steps, you’ll have a breakfast that looks and tastes like it came from a gourmet bakery, all while fitting perfectly into your busy schedule.
Ingredients (Serves 4-6):
- 6 store-bought pastries (such as croissants, danishes, or donuts)
- 1 cup powdered sugar
- 2 tablespoons milk (or water for a lighter glaze)
- 1 teaspoon vanilla extract
- Fresh berries (such as strawberries, blueberries, or raspberries)
- 1/4 cup chopped nuts (such as almonds or walnuts)
- 1/4 cup chocolate chips or shavings
- Optional: edible flowers for garnish
Instructions:
- Prepare the Glaze: In a medium-sized bowl, combine the powdered sugar, milk, and vanilla extract. Whisk the mixture until it’s smooth and lump-free. Adjust the consistency by adding more milk if it’s too thick or more powdered sugar if it’s too thin. The glaze should be thick enough to coat the back of a spoon.
- Glaze the Pastries: Arrange your store-bought pastries on a wire rack placed over a baking sheet (to catch any drips). Using a spoon or a pastry brush, generously apply the glaze over each pastry. Verify that each pastry is evenly coated for the best flavor.
- Add Fresh Toppings: While the glaze is still wet, sprinkle fresh berries over the pastries. You can use a combination of strawberries, blueberries, or raspberries for a colorful and tasty topping.
- Add Crunch and Chocolate: Scatter the chopped nuts and chocolate chips or shavings over the glazed pastries. The nuts add a nice crunch, while the chocolate adds a rich, decadent touch.
- Garnish (Optional): If desired, garnish the pastries with edible flowers for an extra special presentation. Allow the glaze to set for a few minutes before serving.
Extra Tips:
For an additional burst of flavor, consider incorporating lemon or orange zest into the glaze. This will add a fresh, citrusy note that pairs well with the sweetness of the pastries.
If you’re using fruits with high water content, such as strawberries, be sure to pat them dry before placing them on the pastries to prevent the glaze from becoming too runny.
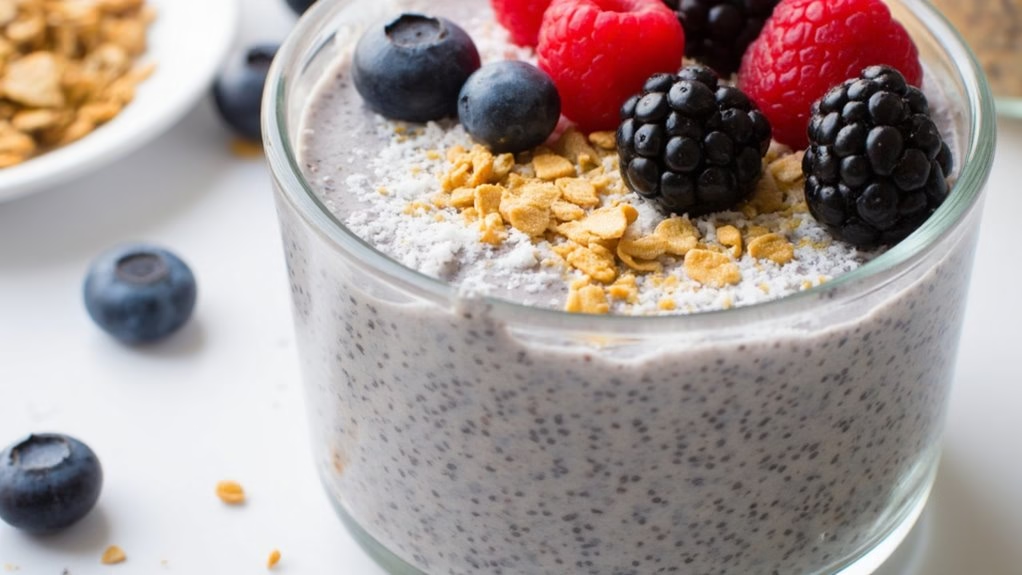
Easy Chia Seed Pudding for a Sweet Reward
Chia seed pudding is an incredibly versatile and nutritious breakfast option that’s perfect for those hectic mornings when time seems to slip away. With its creamy texture and naturally sweet flavor, this dish feels like a treat while still being packed with healthy omega-3 fatty acids, fiber, and protein. The best part? You can prepare it the night before, allowing you to simply grab and go as you head out the door.
This recipe isn’t only easy to make but also highly customizable, making it a hit for the whole family.
The base of chia seed pudding is made by combining chia seeds with a liquid of your choice—such as almond milk or coconut milk—which allows the seeds to expand and create a pudding-like consistency. For added flavor and sweetness, you can incorporate ingredients like vanilla extract, honey, or maple syrup.
Once the base is ready, feel free to get creative with toppings, using anything from fresh fruits and nuts to granola and shredded coconut. Here’s how you can make this delicious breakfast for 4-6 people.
Ingredients:
- 1 cup chia seeds
- 4 cups almond milk (or milk of choice)
- 1/4 cup honey or maple syrup
- 1 teaspoon vanilla extract
- Fresh fruit (such as berries or banana slices) for topping
- Nuts or granola for topping (optional)
- Shredded coconut for topping (optional)
Instructions:
- Prepare the Base: In a large mixing bowl, combine the chia seeds, almond milk, honey or maple syrup, and vanilla extract. Stir the mixture thoroughly to ascertain the chia seeds are evenly distributed and not clumping together.
- Refrigerate the Mixture: Cover the bowl with a lid or plastic wrap and place it in the refrigerator. Allow the mixture to set for at least 4 hours, or preferably overnight. This will give the chia seeds enough time to absorb the liquid and thicken into a pudding-like consistency.
- Stir Before Serving: Once the chia seed pudding has set, give it a good stir to break any remaining clumps and ascertain a smooth texture.
- Assemble and Serve: Divide the pudding into individual serving bowls or jars. Top with fresh fruit, nuts, granola, and shredded coconut as desired. Serve immediately or store in the refrigerator until ready to eat.
Extra Tips:
For a creamier texture, consider blending the almond milk with a banana or a few tablespoons of yogurt before mixing with the chia seeds. This can also add a touch of natural sweetness.
If you prefer your pudding a bit sweeter, adjust the amount of honey or maple syrup to your liking. Chia seed pudding can be stored in the refrigerator for up to 5 days, making it a perfect make-ahead breakfast.
Additionally, consider experimenting with different flavors by adding cocoa powder for a chocolate version or a pinch of cinnamon for a hint of spice.