
There’s something special about the cozy aroma of cranberry orange muffins baking in the oven on a festive morning. Imagine gingerbread pancakes stacked high, topped with a drizzle of maple syrup. Or the indulgent taste of holiday eggnog French toast. These quick and flavorful recipes bring warmth and joy to any Christmas morning. Let’s explore these delightful dishes and make your holiday breakfast unforgettable.
Festive Cranberry Orange Muffins
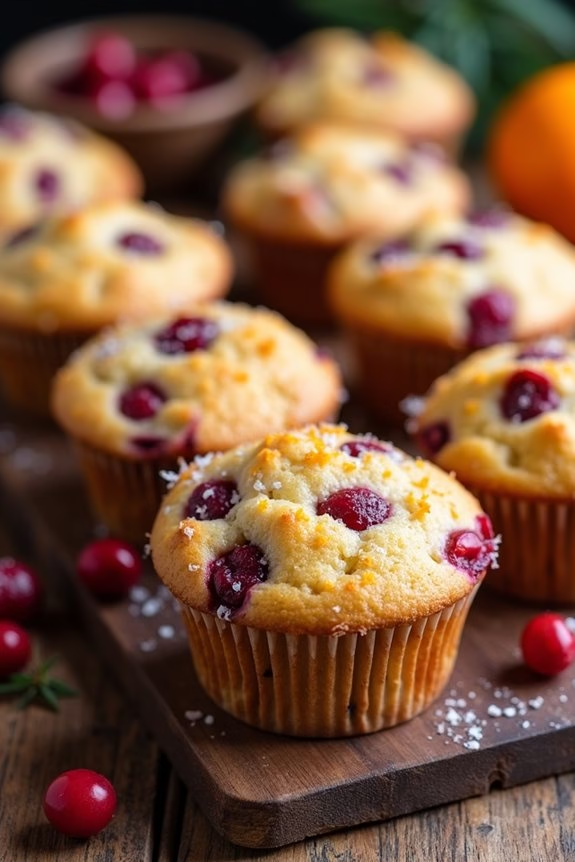
Start your Christmas morning with the delightful aroma of freshly baked Cranberry Orange Muffins. These muffins combine the tartness of cranberries with the bright, citrusy flavor of oranges, making them the perfect festive treat.
The balance of sweet and tangy flavors will brighten your holiday breakfast table, and the soft, moist texture of the muffins will have everyone reaching for seconds. Whether enjoyed warm with a pat of butter or as a quick grab-and-go option, these muffins are certain to become a holiday favorite.
Perfect for a serving size of 4-6 people, this recipe is easy to whip up and offers a wonderful way to incorporate seasonal ingredients into your Christmas breakfast. Fresh cranberries and orange zest provide a burst of flavor in each bite, while the use of Greek yogurt guarantees the muffins are delectably moist.
Pair them with a hot cup of cocoa or coffee for a cozy, festive experience.
Ingredients:
- 1 3/4 cups all-purpose flour
- 1/2 cup granulated sugar
- 1/4 cup brown sugar
- 2 teaspoons baking powder
- 1/2 teaspoon baking soda
- 1/4 teaspoon salt
- 1/2 cup Greek yogurt
- 1/3 cup orange juice (freshly squeezed)
- 1/4 cup unsalted butter, melted
- 1 large egg
- 1 teaspoon vanilla extract
- Zest of 1 large orange
- 1 1/4 cups fresh cranberries
Instructions:
- Preheat the Oven: Begin by preheating your oven to 375°F (190°C). Line a 12-cup muffin tin with paper liners or lightly grease with cooking spray to prevent sticking.
- Mix Dry Ingredients: In a large mixing bowl, whisk together the flour, granulated sugar, brown sugar, baking powder, baking soda, and salt until well combined.
- Prepare Wet Ingredients: In another bowl, combine the Greek yogurt, orange juice, melted butter, egg, vanilla extract, and orange zest. Whisk until the mixture is smooth and all ingredients are fully incorporated.
- Combine Mixtures: Gradually add the wet ingredients to the dry ingredients, stirring gently with a spatula until just combined. Be careful not to overmix, as this can lead to dense muffins.
- Fold in Cranberries: Gently fold the fresh cranberries into the batter, ensuring they’re evenly distributed throughout.
- Fill Muffin Cups: Spoon the batter into the prepared muffin tin, filling each cup about 3/4 full.
- Bake: Place the muffin tin in the preheated oven and bake for 18-20 minutes, or until a toothpick inserted into the center of a muffin comes out clean.
- Cool and Serve: Allow the muffins to cool in the tin for about 5 minutes before transferring them to a wire rack to cool completely. Serve warm or at room temperature.
Extra Tips:
For an added festive touch, you can sprinkle a little coarse sugar on top of the muffins before baking to give them a sparkling finish.
If fresh cranberries are unavailable, you can use frozen cranberries—just be sure to thaw and drain them well before adding to the batter.
These muffins can be stored in an airtight container for up to three days or frozen for up to a month. To refresh them, simply warm them in the oven for a few minutes before serving.
Gingerbread Pancakes With Maple Syrup
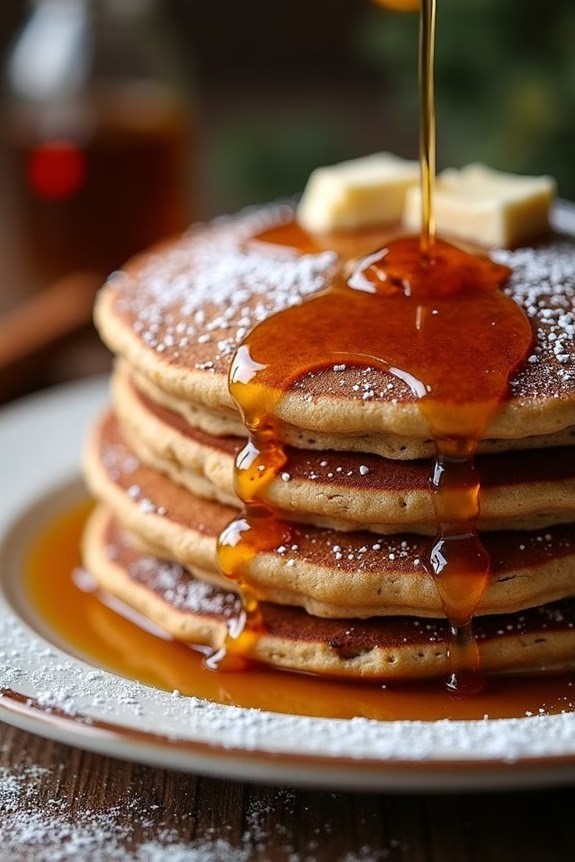
Gingerbread Pancakes With Maple Syrup are the perfect festive breakfast dish to start your Christmas morning with warmth and cheer. These pancakes bring together the comforting flavors of ginger, cinnamon, and nutmeg, creating an aromatic experience that fills your kitchen with the scents of the holiday season.
Topped with rich maple syrup, they offer a delightful balance of spice and sweetness that will surely become a family favorite. Perfect for a breakfast gathering of 4-6 people, these pancakes are fluffy and flavorful, making them an ideal addition to your Christmas breakfast spread.
The recipe is simple enough for anyone to follow, yet impressive enough to wow your guests. Gather your ingredients and follow the instructions below to create this delicious holiday treat.
Ingredients:
- 2 cups all-purpose flour
- 1/4 cup brown sugar, packed
- 1 tablespoon baking powder
- 1/2 teaspoon baking soda
- 1 teaspoon ground cinnamon
- 1 teaspoon ground ginger
- 1/4 teaspoon ground nutmeg
- 1/4 teaspoon ground cloves
- 1/2 teaspoon salt
- 2 large eggs
- 1 1/2 cups milk
- 1/4 cup unsulfured molasses
- 1/4 cup unsalted butter, melted
- 1 teaspoon vanilla extract
- Maple syrup, for serving
Instructions:
1. Prepare the Dry Ingredients:
In a large mixing bowl, whisk together the all-purpose flour, brown sugar, baking powder, baking soda, ground cinnamon, ground ginger, ground nutmeg, ground cloves, and salt. Make sure all the spices are evenly distributed throughout the flour mixture to guarantee consistent flavor in each pancake.
2. Combine the Wet Ingredients:
In a separate bowl, beat the eggs until frothy. Add the milk, molasses, melted butter, and vanilla extract. Whisk the mixture until it’s smooth and all the ingredients are well combined.
3. Mix the Batter:
Slowly pour the wet ingredients into the bowl containing the dry ingredients. Gently fold the mixture with a spatula until just combined. Be careful not to overmix, as this can lead to dense pancakes. Some lumps in the batter are perfectly fine.
4. Cook the Pancakes:
Heat a non-stick skillet or griddle over medium heat. Lightly grease it with butter or cooking spray. Pour 1/4 cup of batter onto the skillet for each pancake. Cook until bubbles form on the surface and the edges appear set, about 2-3 minutes. Flip and cook for an additional 2-3 minutes until golden brown.
5. Serve:
Transfer the cooked pancakes to a warm plate and cover them with a clean kitchen towel to keep them warm while you cook the remaining batter. Serve the pancakes hot, drizzled generously with maple syrup.
Extra Tips:
For the fluffiest pancakes, make sure your baking powder is fresh and active. You can test this by adding a bit of it to hot water—if it bubbles, it’s good to use.
If you prefer a stronger ginger flavor, consider grating fresh ginger into the batter. Additionally, if you want to make the pancakes ahead of time, you can keep them warm in a 200°F oven until ready to serve.
Finally, feel free to add a dollop of whipped cream or a sprinkle of powdered sugar for an extra festive touch.
Christmas Morning Breakfast Casserole

Start your Christmas morning with a delicious and hearty breakfast casserole that’s both easy to prepare and guaranteed to please the whole family. This dish combines classic breakfast ingredients like eggs, sausage, and cheese, all baked together with bread cubes to create a savory, filling meal. Perfect for serving after opening presents, this casserole can be prepared the night before, allowing you to relax and enjoy the festivities without the stress of morning cooking.
This Christmas Morning Breakfast Casserole is designed to serve 4-6 people, making it ideal for a family gathering or a small group of friends. The comforting flavors of this dish will fill your home with the delightful aroma of a holiday breakfast, bringing warmth and joy to your Christmas celebration. With minimal prep time and easy steps, this recipe is a wonderful way to spend more time with your loved ones and less time in the kitchen.
Ingredients (Serves 4-6):
- 1 pound breakfast sausage
- 6 large eggs
- 2 cups milk
- 1 teaspoon salt
- 1/2 teaspoon black pepper
- 1 teaspoon dry mustard
- 2 cups shredded cheddar cheese
- 4 cups cubed day-old bread
- 1/2 cup chopped green onions
- 1/4 cup chopped red bell pepper
- 1/4 cup chopped green bell pepper
- 1/2 teaspoon garlic powder
Instructions:
- Preheat the Oven: Begin by preheating your oven to 350°F (175°C). This guarantees that your casserole will cook evenly once it’s assembled and placed in the oven.
- Cook the Sausage: In a large skillet over medium heat, cook the breakfast sausage until it’s browned and cooked through. Break it into small crumbles with a spatula as it cooks. Once done, drain any excess fat and set aside.
- Mix Eggs and Spices: In a large mixing bowl, whisk together the eggs, milk, salt, black pepper, dry mustard, and garlic powder until well combined. This mixture forms the base of your casserole and provides the savory, creamy flavor.
- Assemble the Casserole: In a greased 9×13-inch baking dish, layer the cubed bread, cooked sausage, shredded cheddar cheese, chopped green onions, red and green bell peppers. Pour the egg mixture evenly over the top, guaranteeing all the ingredients are soaked.
- Bake the Casserole: Place the baking dish in the preheated oven and bake for 45-50 minutes, or until the top is golden brown and a knife inserted in the center comes out clean. If needed, you can cover the casserole with foil during the last 10 minutes to prevent over-browning.
- Let it Cool: Once baked, remove the casserole from the oven and let it cool for about 5 minutes before slicing and serving. This allows the flavors to settle and makes it easier to serve.
Extra Tips:
For an added touch of flavor, consider using a variety of cheeses like gouda or mozzarella in place of or in addition to the cheddar. If you prefer a spicier dish, you can add a pinch of cayenne pepper or a few dashes of hot sauce to the egg mixture.
For a make-ahead option, assemble the casserole the night before, cover it with plastic wrap, and refrigerate. In the morning, remove it from the fridge while the oven preheats, then bake as directed.
This casserole is also quite versatile; feel free to add or substitute other ingredients such as mushrooms, spinach, or cooked bacon to suit your taste preferences.
Snowflake Cinnamon Rolls

Snowflake Cinnamon Rolls are a delightful and festive treat perfect for Christmas morning. These rolls aren’t only delicious, but their unique snowflake design adds a touch of holiday magic to your breakfast table.
With a sweet cinnamon filling wrapped in a soft, buttery dough, these rolls are bound to become a family favorite. The icing drizzled on top completes the dish with just the right amount of sweetness, making them irresistible to both kids and adults alike.
Perfect for serving a crowd, this recipe makes enough Snowflake Cinnamon Rolls to serve 4-6 people. The preparation process is easy and enjoyable, making it a great activity to do with family or friends during the holiday season.
Whether you enjoy them fresh out of the oven or save a few for later, these cinnamon rolls are a comforting and festive way to start your Christmas day.
Ingredients:
- 4 cups all-purpose flour
- 1/4 cup granulated sugar
- 2 1/4 teaspoons active dry yeast
- 1 teaspoon salt
- 1 cup warm milk (about 110°F)
- 1/4 cup unsalted butter, melted
- 1 large egg
- 1/4 cup unsalted butter, softened (for filling)
- 3/4 cup brown sugar
- 2 tablespoons ground cinnamon
- 1 cup powdered sugar (for icing)
- 2-3 tablespoons milk (for icing)
- 1 teaspoon vanilla extract (for icing)
Instructions:
- Prepare the Dough: In a large mixing bowl, combine the warm milk, yeast, and granulated sugar. Let the mixture sit for about 5 minutes until it becomes frothy. Add the melted butter, egg, and salt. Gradually add the flour, mixing until a dough forms. Knead for about 5-7 minutes until the dough is smooth and elastic.
- First Rise: Place the dough in a lightly greased bowl, cover with a damp cloth, and let it rise in a warm place for about 1-1.5 hours, or until it doubles in size.
- Prepare the Filling: In a small bowl, mix the softened butter, brown sugar, and cinnamon until well combined.
- Shape the Snowflake: Punch down the risen dough and roll it out on a floured surface into a large rectangle, approximately 16×20 inches. Spread the cinnamon filling evenly over the dough. Roll the dough tightly starting from the longer side to form a log. Cut the log into 12 equal pieces.
- Form the Snowflake Pattern: Arrange the pieces in a circle on a parchment-lined baking sheet, with one roll in the center and the others around it, leaving some space between them for expansion. Gently twist and slightly flatten each roll to create a snowflake shape.
- Second Rise: Cover the shaped rolls with a cloth and let them rise again for about 30 minutes until puffy.
- Bake: Preheat your oven to 350°F (175°C). Bake the rolls for 20-25 minutes, or until golden brown. Remove from the oven and let them cool slightly on a wire rack.
- Prepare the Icing: While the rolls are cooling, whisk together the powdered sugar, milk, and vanilla extract until smooth. Adjust the consistency by adding more milk if necessary.
- Drizzle and Serve: Drizzle the icing over the warm rolls before serving.
For the best results, verify that your yeast is fresh and active to help the dough rise properly. Make sure the milk used is warm, not hot, to avoid killing the yeast.
If you prefer a richer flavor, you can add a bit of nutmeg or cardamom to the filling. These rolls can be prepared the night before; simply cover and refrigerate after shaping them, then let them rise for a bit longer in the morning before baking.
Enjoy your Snowflake Cinnamon Rolls with a hot cup of cocoa or coffee for a truly cozy Christmas breakfast.
Holiday Eggnog French Toast

Begin your Christmas morning with a delightful twist on a classic breakfast favorite – Holiday Eggnog French Toast. This festive dish combines the rich, creamy taste of eggnog with the comforting flavors of traditional French toast. Perfect for a family breakfast or brunch, this recipe is certain to bring warmth and cheer to your holiday festivities.
The golden, slightly crisp exterior and the soft, custardy interior make this dish a comforting and decadent treat. Holiday Eggnog French Toast is ideal for serving 4-6 people, making it perfect for a family gathering. The combination of warm spices and sweet maple syrup will fill your home with the aroma of the holidays, enticing everyone to the breakfast table.
Whether you’re a seasoned cook or a kitchen novice, this recipe is simple to follow and promises a delicious outcome every time.
Ingredients:
- 8 slices of thick-cut bread (such as brioche or challah)
- 2 cups of eggnog
- 4 large eggs
- 1 teaspoon vanilla extract
- 1 teaspoon ground cinnamon
- 1/2 teaspoon ground nutmeg
- 2 tablespoons unsalted butter
- Maple syrup (for serving)
- Powdered sugar (for serving, optional)
Instructions:
- Prepare the Custard Mixture: In a large mixing bowl, whisk together the eggnog, eggs, vanilla extract, ground cinnamon, and ground nutmeg until well combined. This creates a rich, spiced custard base that will soak into the bread and give it a festive flavor.
- Soak the Bread: Arrange the bread slices in a single layer in a shallow dish. Pour the eggnog custard mixture over the bread slices, making sure each piece is fully submerged. Allow the bread to soak for about 5 minutes, turning once to guarantee even absorption.
- Preheat the Skillet: Heat a large non-stick skillet or griddle over medium heat. Add 1 tablespoon of butter and allow it to melt and coat the pan evenly.
- Cook the French Toast: Working in batches, use a spatula to carefully transfer the soaked bread slices to the skillet. Cook each side for about 3-4 minutes, or until golden brown and slightly crisp. Add more butter to the skillet as needed for additional batches.
- Serve: Once cooked, transfer the French toast to a serving platter. Drizzle with maple syrup and dust with powdered sugar, if desired. Serve warm and enjoy the holiday flavors.
Extra Tips:
For best results, use day-old bread, as it absorbs the custard mixture better without becoming too soggy. If you prefer a more robust spice flavor, feel free to adjust the amount of cinnamon and nutmeg to taste.
Additionally, if you’re preparing this dish for a larger crowd, you can keep the cooked French toast slices warm in a 200°F (93°C) oven while finishing the remaining batches. This guarantees everyone enjoys a hot, delicious breakfast together.
Santa Hat Fruit Skewers
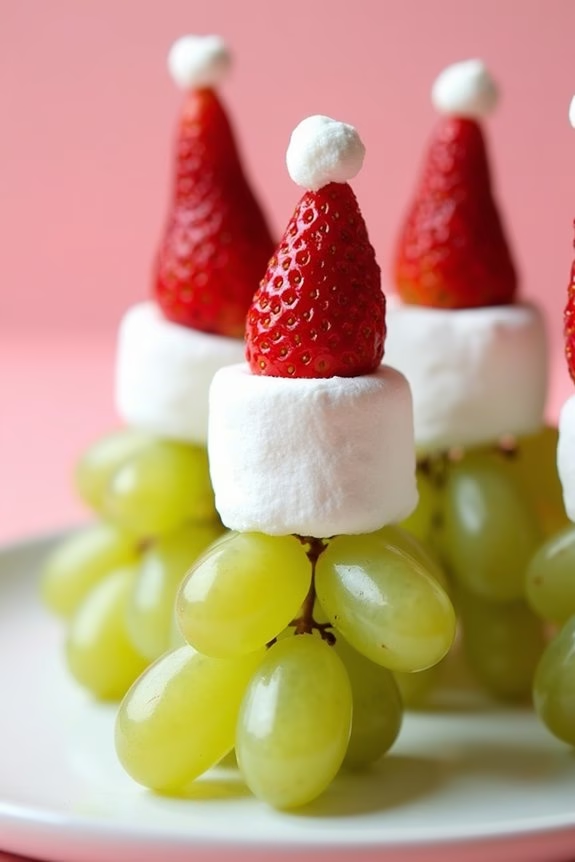
Santa Hat Fruit Skewers are a delightful and festive addition to any Christmas breakfast spread. These skewers aren’t only visually appealing but also healthy and incredibly easy to make. They’re the perfect combination of sweet strawberries, fluffy marshmallows, and juicy grapes, making them a hit with both kids and adults alike.
Whether you’re hosting a holiday brunch or just want to add a touch of Christmas cheer to your morning, these skewers are sure to impress.
The charm of Santa Hat Fruit Skewers lies in their simplicity and the way they resemble Santa’s iconic hat. The red strawberries act as the hat, the marshmallows as the fluffy rim, and the grapes as the base. This dish isn’t only a treat for the taste buds but also a feast for the eyes.
It’s an excellent way to get children involved in the kitchen, as they can easily help assemble the skewers. Let’s explore the ingredients and steps to create these fun and festive fruit skewers for 4-6 people.
Ingredients:
- 20 fresh strawberries
- 20 large marshmallows
- 20 green grapes
- 20 wooden skewers (approximately 6 inches in length)
Instructions:
- Prepare the Ingredients: Wash the strawberries and grapes thoroughly under cold running water. Pat them dry with a paper towel to remove any excess moisture. Remove the green leaves from the strawberries, making sure the tops are flat for easy stacking.
- Assemble the Skewers: Take a wooden skewer and start by sliding a green grape onto the pointed end. This will serve as the base of the Santa Hat.
- Add the Marshmallow: Next, slide a large marshmallow onto the skewer, positioning it snugly against the grape. The marshmallow will act as the fluffy rim of Santa’s hat.
- Finish with a Strawberry: Finally, add a strawberry on top of the marshmallow with the pointed end facing up, resembling the tip of Santa’s hat. Press it gently to guarantee all components are tightly stacked together.
- Repeat the Process: Continue the process for the remaining skewers until you have used all the strawberries, marshmallows, and grapes.
Extra Tips: When selecting strawberries, aim for medium-sized ones that are uniformly red for the best visual effect. If the skewers are too long, you can trim them to a shorter length to better support the fruit.
Additionally, if you’re preparing these skewers in advance, store them in an airtight container in the refrigerator to keep the fruit fresh until serving. For a fun variation, you can use banana slices instead of marshmallows for a healthier option, though they should be prepared closer to serving time to avoid browning.
Quick Quiche Lorraine Bites

Quick Quiche Lorraine Bites are a delightful addition to your Christmas breakfast spread. These bite-sized treats are packed with rich flavors from bacon, cheese, and a creamy egg mixture, all nestled in a buttery, flaky pastry.
They’re perfect for serving to your family and guests during the festive season, as they can be made in advance and simply reheated before serving. Their petite size makes them easy to handle, allowing everyone to enjoy them at their leisure while unwrapping gifts or enjoying a holiday movie.
These quiche bites aren’t only delicious but also versatile. You can customize them by adding your favorite ingredients, like sautéed mushrooms or spinach, to suit everyone’s taste. They’re a great option for a quick and easy breakfast that doesn’t compromise on taste or presentation.
With just a few simple steps, you can create a memorable Christmas morning meal that everyone will love.
Ingredients (Serves 4-6):
- 1 package of refrigerated pie crusts (2 crusts)
- 6 slices of bacon
- 1 cup shredded Gruyère cheese
- 4 large eggs
- 1 cup heavy cream
- 1/4 cup chopped green onions
- Salt and pepper to taste
- 1 tablespoon unsalted butter
Cooking Instructions:
- Preheat and Prepare: Preheat your oven to 375°F (190°C). Grease a mini muffin tin with the unsalted butter to guarantee the quiche bites don’t stick.
- Prepare the Crusts: Roll out the refrigerated pie crusts on a lightly floured surface. Use a round cookie cutter or a glass to cut circles from the dough. Press the dough circles into the mini muffin tin wells, making sure they cover the bottom and sides. Set aside.
- Cook the Bacon: In a skillet over medium heat, cook the bacon until crispy. Remove from the skillet and drain on paper towels. Once cooled, crumble the bacon into small pieces.
- Mix the Filling: In a large bowl, whisk together the eggs and heavy cream until well combined. Stir in the crumbled bacon, shredded Gruyère cheese, chopped green onions, salt, and pepper.
- Fill the Shells: Carefully spoon the egg mixture into each pastry shell in the muffin tin. Fill each shell to just below the top, as the mixture will puff up while baking.
- Bake the Quiches: Place the muffin tin in the preheated oven and bake for 18-20 minutes, or until the quiche bites are golden on top and the filling is set. Remove from the oven and let cool slightly before removing from the tin.
Extra Tips:
To guarantee the Quick Quiche Lorraine Bites maintain their shape and don’t stick, make sure the pie crust is pressed firmly into the mini muffin wells.
If you want to prepare these ahead of time, they can be frozen after baking. Simply allow them to cool completely, then place them in an airtight container and freeze. When ready to serve, reheat them in the oven at 350°F (175°C) for about 10 minutes or until warmed through.
You can also experiment with different cheeses or add a dash of nutmeg to the egg mixture for a unique twist.
Peppermint Mocha Overnight Oats
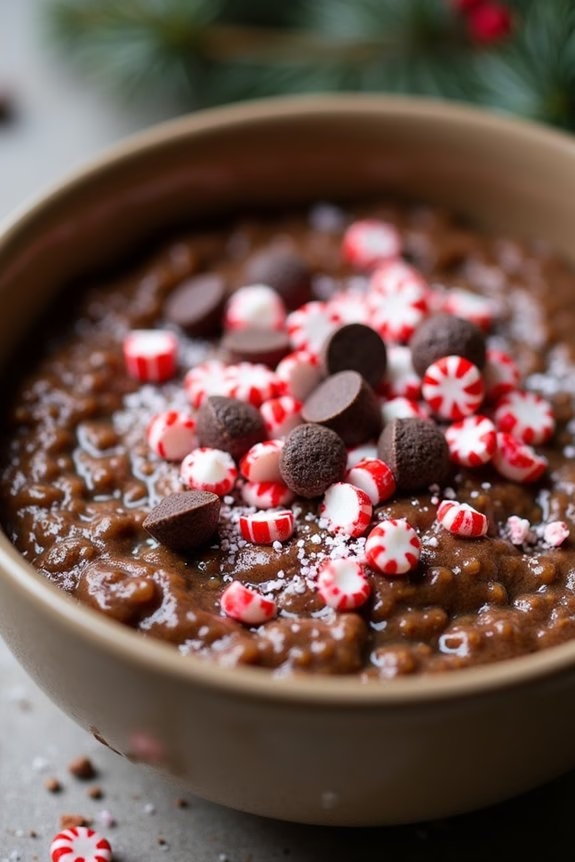
This recipe serves 4-6 people and is perfect for sharing with family or guests. The oats soak overnight, absorbing the flavors, so they’re ready to eat first thing in the morning. The addition of chocolate and coffee gives the oats a mocha twist, making them a comforting and indulgent breakfast choice. Garnish with your favorite toppings to add a personal touch.
Ingredients:
- 2 cups rolled oats
- 2 cups unsweetened almond milk (or milk of choice)
- 1/2 cup brewed coffee, cooled
- 1/2 cup Greek yogurt
- 1/4 cup cocoa powder
- 1/4 cup maple syrup
- 1 teaspoon peppermint extract
- 1/2 teaspoon vanilla extract
- Pinch of salt
- Chocolate chips, to garnish
- Crushed peppermint candies, to garnish
Instructions:
- Combine Dry Ingredients: In a large mixing bowl, combine the rolled oats, cocoa powder, and a pinch of salt. Mix well to guarantee the cocoa powder is evenly distributed among the oats. This base will give the oats their rich chocolate flavor.
- Add Wet Ingredients: Pour the almond milk, brewed coffee, Greek yogurt, maple syrup, peppermint extract, and vanilla extract into the bowl. Stir until all ingredients are well combined, making sure the oats are fully submerged in the liquid mixture.
- Mix Thoroughly: Use a whisk or a spatula to mix everything together, assuring there are no lumps of cocoa powder and that the peppermint and coffee flavors are evenly distributed throughout the mixture.
- Refrigerate Overnight: Cover the bowl with plastic wrap or transfer the mixture into airtight containers. Place in the refrigerator and let the oats soak overnight, at least 8 hours, to allow the flavors to meld and the oats to soften.
- Serve and Garnish: In the morning, give the oats a good stir and taste. Adjust sweetness if necessary by adding a bit more maple syrup. Spoon the oats into bowls and garnish with chocolate chips and crushed peppermint candies for a festive touch.
Extra Tips:
For those who prefer a sweeter breakfast, consider adding a banana or a drizzle of honey when serving.
If you like a stronger coffee flavor, increase the amount of brewed coffee slightly, but be mindful of the liquid-to-oat ratio.
Feel free to experiment with different milk options and toppings like whipped cream or nuts to suit your taste preferences.
Remember, the key to great overnight oats is allowing enough time for the oats to soak and the flavors to develop fully.
Enjoy your Peppermint Mocha Overnight Oats as a invigorating and delightful start to your Christmas morning!
Savory Spinach and Feta Frittata

Savory Spinach and Feta Frittata is a delightful dish that combines the rich flavors of eggs, fresh spinach, and tangy feta cheese into a breakfast favorite that’s perfect for Christmas morning.
This frittata isn’t only easy to prepare but also visually appealing, with vibrant green spinach and creamy white feta creating a festive look. It’s a versatile dish that can be served hot or cold, making it a great option for a leisurely holiday breakfast.
This frittata is perfect for serving 4-6 people, making it ideal for family gatherings during the festive season. It’s a wholesome dish that combines protein-rich eggs with nutrient-dense spinach, guaranteeing a nutritious start to the day.
The feta cheese adds a delightful creaminess and a burst of flavor that complements the earthiness of the spinach. Adding a touch of herbs and spices elevates the dish, making it a crowd-pleaser that everyone will love.
Ingredients (serves 4-6):
- 8 large eggs
- 1 cup fresh spinach, roughly chopped
- 1/2 cup crumbled feta cheese
- 1/4 cup milk
- 1 small onion, finely chopped
- 1 clove garlic, minced
- 1 tablespoon olive oil
- Salt and pepper, to taste
- 1/4 teaspoon dried oregano
- 1/4 teaspoon red pepper flakes (optional)
Cooking Instructions:
- Preheat the Oven: Begin by preheating your oven to 375°F (190°C). This guarantees that the frittata cooks evenly and achieves a golden-brown finish.
- Prepare the Egg Mixture: In a large bowl, whisk together the eggs, milk, salt, pepper, and oregano. Whisk until the mixture is well combined and slightly frothy. This will guarantee a light and fluffy texture for the frittata.
- Sauté the Vegetables: Heat the olive oil in an oven-safe skillet over medium heat. Add the chopped onion and cook until translucent, about 3-4 minutes. Add the garlic and cook for another minute until fragrant.
- Add Spinach: Stir in the chopped spinach and cook until wilted, about 2-3 minutes. Make sure the spinach is evenly distributed in the skillet.
- Combine with Egg Mixture: Pour the egg mixture into the skillet over the sautéed vegetables. Gently stir to combine, ensuring that the vegetables are evenly distributed throughout the eggs.
- Add Feta Cheese: Sprinkle the crumbled feta cheese over the top of the egg mixture. You can also add red pepper flakes at this stage if you desire a bit of heat.
- Bake the Frittata: Transfer the skillet to the preheated oven and bake for 20-25 minutes, or until the eggs are set and the top is lightly golden. You can check for doneness by inserting a knife into the center; it should come out clean.
- Cool and Serve: Allow the frittata to cool slightly before slicing. Serve warm or at room temperature, garnished with additional feta or fresh herbs if desired.
Extra Tips:
For a more flavorful frittata, consider adding other vegetables such as bell peppers or mushrooms. Guarantee your skillet is well-oiled to prevent sticking, especially if it’s not non-stick.
If you don’t have an oven-safe skillet, you can transfer the sautéed vegetables and egg mixture into a greased baking dish before adding the cheese and baking.
Finally, remember that the frittata will continue to cook slightly even after being removed from the oven, so avoid overbaking.
Nutella and Banana Crepes
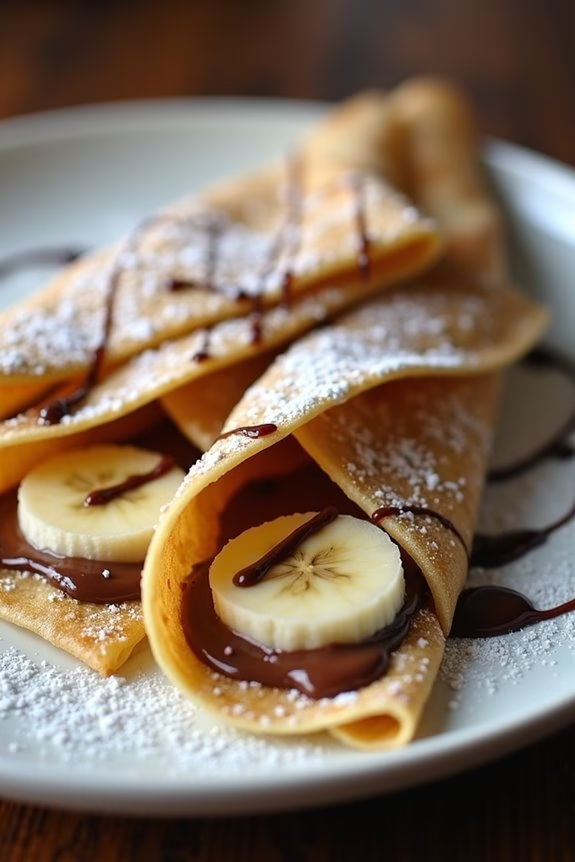
Nutella and Banana Crepes are a delightful treat perfect for a festive Christmas breakfast. These warm, thin crepes filled with creamy Nutella and topped with fresh slices of banana are sure to satisfy both children and adults alike. The combination of the rich chocolate hazelnut spread and the sweetness of ripe bananas creates a harmonious blend of flavors that’s both decadent and comforting.
Whether you’re hosting a large family gathering or having a cozy breakfast with loved ones, these crepes can be a delightful centerpiece to your morning meal.
Making these crepes is a fun and rewarding process that can bring everyone together in the kitchen. With a few simple ingredients and some basic cooking skills, you can whip up a batch of these delicious crepes in no time. The preparation involves making a smooth crepe batter, cooking the crepes until golden brown, and then filling them with Nutella and bananas.
Once you serve these beautifully arranged crepes, garnished with a dusting of powdered sugar or a drizzle of chocolate syrup, your guests will be impressed not only by the taste but also the effort and love put into making them.
Ingredients for 4-6 servings:
- 1 cup all-purpose flour
- 2 tablespoons granulated sugar
- 1/4 teaspoon salt
- 3 large eggs
- 2 cups whole milk
- 1 teaspoon vanilla extract
- 2 tablespoons unsalted butter, melted
- 1/2 cup Nutella
- 3 ripe bananas, sliced
- Butter or oil, for cooking
- Powdered sugar, for serving (optional)
- Chocolate syrup, for serving (optional)
Instructions:
- Prepare the Batter: In a large mixing bowl, whisk together the flour, sugar, and salt. In a separate bowl, beat the eggs and then add the milk and vanilla extract. Gradually add the wet ingredients to the dry ingredients, whisking until you have a smooth batter. Stir in the melted butter until well combined. Let the batter rest for at least 30 minutes to an hour.
- Cook the Crepes: Heat a non-stick skillet or crepe pan over medium heat and lightly grease it with butter or oil. Pour about 1/4 cup of batter into the pan, swirling to evenly coat the bottom. Cook for about 1-2 minutes until the edges start to lift and the bottom is golden brown. Carefully flip the crepe and cook for another 30 seconds to 1 minute. Repeat with the remaining batter, greasing the pan as needed.
- Assemble the Crepes: Spread about 1-2 tablespoons of Nutella over one half of each crepe. Arrange a few slices of banana over the Nutella. Fold the crepe in half, and then fold again to form a triangle.
- Serve: Place the crepes on a serving plate. Optionally, dust with powdered sugar or drizzle with chocolate syrup before serving.
Extra Tips:
For the best crepe texture, make certain your batter is lump-free; you can use a blender for an ultra-smooth consistency. Allowing the batter to rest is essential as it lets the flour fully hydrate, resulting in more tender crepes.
If your first crepe turns out less than perfect, don’t worry – it’s often referred to as the “tester” crepe to adjust the pan’s heat. Also, be gentle when flipping the crepes; using a thin spatula will help.
Finally, if you’re preparing for a larger crowd, keep the cooked crepes warm in a low oven while you finish cooking the rest.
Smoked Salmon and Cream Cheese Bagels
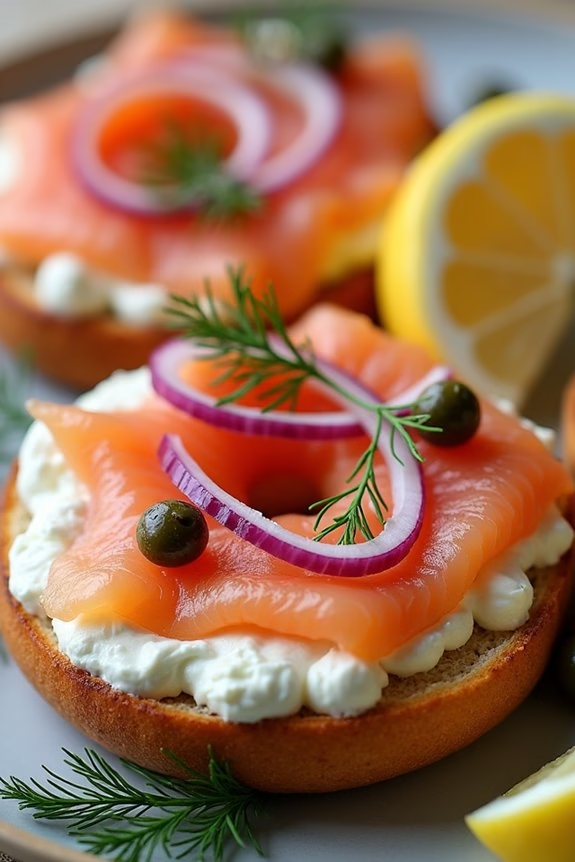
Smoked Salmon and Cream Cheese Bagels are a delightful and elegant breakfast option that exudes festive cheer. Perfect for a Christmas morning meal, these bagels combine the rich, smoky flavor of salmon with the creamy texture of cream cheese, offering a luxurious yet simple dish that can be prepared in just a few minutes.
This dish isn’t only delicious but also visually appealing, making it a great choice for impressing family and guests during the holiday season. The contrasting textures and flavors of the crunchy bagel, smooth cream cheese, and tender salmon create a harmonious blend that’s both satisfying and nutritious.
This recipe serves 4-6 people, guaranteeing there’s enough for everyone at the breakfast table. The versatility of this dish allows you to customize it with additional toppings or sides, making it a versatile option for those looking to add a personal touch. Whether you’re a seasoned chef or a beginner in the kitchen, these Smoked Salmon and Cream Cheese Bagels are easy to assemble and will surely become a holiday favorite.
Ingredients (serving size: 4-6 people):
- 6 bagels, sliced in half
- 12 oz smoked salmon
- 8 oz cream cheese
- 1 small red onion, thinly sliced
- 1/4 cup capers
- 1 lemon, cut into wedges
- Fresh dill for garnish
- Salt and pepper to taste
Cooking Instructions:
- Prepare the Bagels: Begin by slicing the bagels in half. Toast them to your desired level of crispness, either in a toaster or under a grill. Toasting enhances the flavor and adds a pleasant crunch to the bagels.
- Spread the Cream Cheese: Once the bagels are toasted, generously spread cream cheese on each half. Confirm the cream cheese is softened to room temperature for easy spreading.
- Layer the Salmon: Take slices of smoked salmon and lay them evenly over the cream cheese on each bagel half. Adjust the amount of salmon according to your preference; typically, one to two slices per bagel half are ideal.
- Add the Toppings: Top the salmon with a few slices of red onion and a sprinkle of capers. The onions add a sharp bite, while the capers introduce a tangy, salty flavor that complements the salmon.
- Garnish and Season: Garnish each bagel half with fresh dill for an aromatic finish. Season with salt and pepper to taste. If desired, you can squeeze a wedge of lemon over the top for a fresh, citrusy hint.
- Serve: Arrange the bagels on a platter, and serve immediately. These bagels pair wonderfully with a side salad or fresh fruit for a complete breakfast experience.
Extra Tips:
To elevate the presentation, consider using different types of bagels, such as sesame or everything bagels, which can add additional layers of flavor.
If you want to add a little heat, a sprinkle of red pepper flakes or a dash of hot sauce can add a kick to your bagels. For a healthier version, opt for whole grain or gluten-free bagels, and use light cream cheese.
Remember to keep the smoked salmon refrigerated until you’re ready to serve, as it tastes best when it’s fresh and chilled.
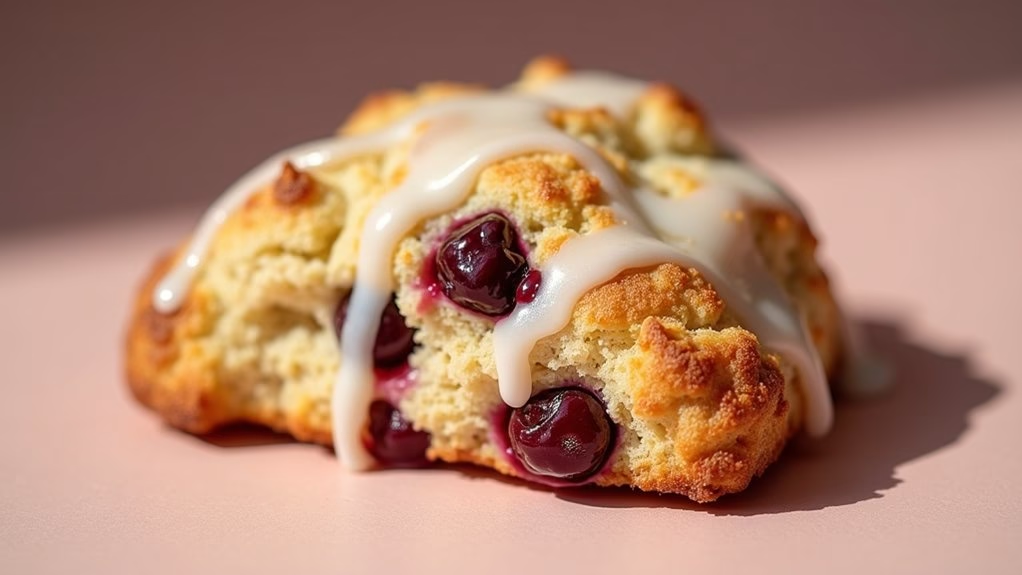
Cherry Almond Scones
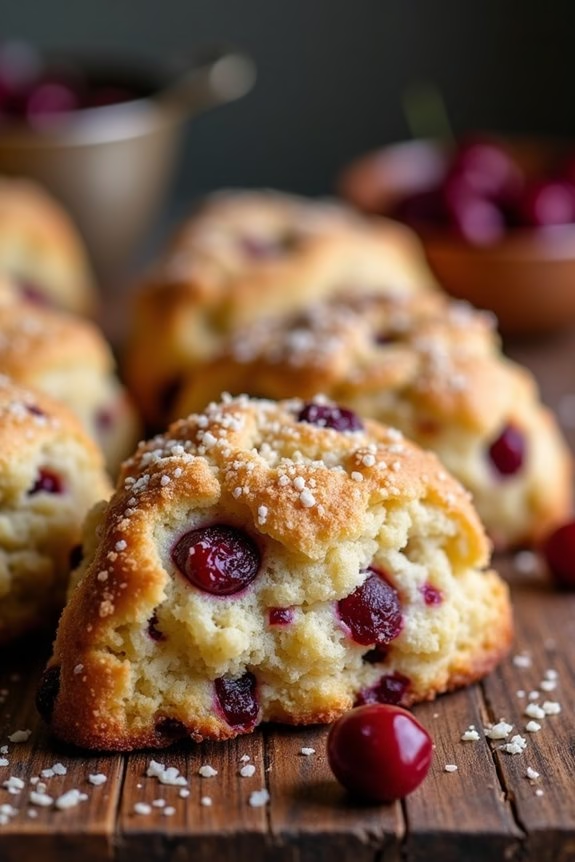
Cherry Almond Scones are a delightful addition to your Christmas breakfast table. These scones are light, fluffy, and packed with the sweet and tart flavor of cherries, complemented by the nutty undertones of almonds. Perfect for a cozy morning with family, these scones offer a satisfying crunch from the almond topping and a burst of flavor from the juicy cherries. The combination of these ingredients creates a festive treat that’s certain to please both adults and children alike.
Preparing Cherry Almond Scones is a simple yet rewarding process that fills your kitchen with the warm, inviting aroma of freshly baked goods. The dough comes together quickly, requiring minimal mixing to achieve the perfect tender texture. Baking them until golden brown guarantees they’ve a lovely crust, while the inside remains moist. Serve them warm with a pat of butter or a dollop of cream for the perfect holiday breakfast indulgence.
Ingredients (serving size: 4-6 people):
- 2 cups all-purpose flour
- 1/3 cup granulated sugar
- 1 tablespoon baking powder
- 1/2 teaspoon salt
- 1/2 cup unsalted butter, cold and diced
- 1/2 cup dried cherries
- 1/4 cup slivered almonds
- 1/2 teaspoon almond extract
- 2/3 cup heavy cream
- 1 large egg
- 1 tablespoon milk (for brushing)
- 1 tablespoon turbinado sugar (for topping)
Instructions:
- Preheat Oven: Preheat your oven to 400°F (200°C) and line a baking sheet with parchment paper to prevent the scones from sticking.
- Mix Dry Ingredients: In a large bowl, whisk together the flour, granulated sugar, baking powder, and salt until well combined.
- Cut in Butter: Add the cold, diced butter to the flour mixture. Using a pastry cutter or your fingers, blend the butter into the flour until the mixture resembles coarse crumbs.
- Add Cherries and Almonds: Gently fold in the dried cherries and slivered almonds, making sure they’re evenly distributed throughout the flour mixture.
- Combine Wet Ingredients: In a small bowl, whisk together the heavy cream, egg, and almond extract until smooth.
- Form Dough: Pour the wet ingredients into the dry ingredients, stirring gently until just combined. Don’t overwork the dough; it should be slightly sticky.
- Shape Scones: Turn the dough out onto a lightly floured surface. Pat it into a round disc about 1 inch thick. Use a sharp knife to cut the disc into 8 wedges.
- Prepare for Baking: Place the wedges on the prepared baking sheet, spacing them slightly apart. Brush the tops with milk and sprinkle with turbinado sugar for added crunch.
- Bake: Bake in the preheated oven for 15-18 minutes, or until the scones are golden brown and a toothpick inserted into the center comes out clean.
- Cool and Serve: Allow the scones to cool on a wire rack for a few minutes before serving. Enjoy them warm with your favorite spread.
Extra Tips:
For best results, verify that your butter is very cold, as this helps create flaky layers in the scones. If your dough feels too sticky to handle, lightly dust your hands and the surface with flour.
The scones can be made in advance and frozen; simply thaw and warm them in the oven before serving. To add a touch of zest, consider incorporating a teaspoon of lemon zest into the dough for an extra burst of flavor that pairs beautifully with the cherries and almonds.