
Are you planning to host a breakfast gathering and want to impress your guests with a delightful spread? I’ve got you covered with a range of practical and scrumptious breakfast ideas that will keep everyone happy. Think build-your-own breakfast burrito bar with all the fixings or classic French toast paired with fresh fruit. From mini quiches to overnight oats, there’s something for everyone. Let’s get started on making your morning gathering a memorable one.
Build-Your-Own Breakfast Burrito Bar

A Build-Your-Own Breakfast Burrito Bar is an excellent way to impress your guests with a personalized and interactive breakfast experience. By setting up a variety of fillings and toppings, you allow everyone to create their own ideal breakfast burrito, catering to different tastes and dietary preferences.
This versatile setup isn’t only delicious but also encourages creativity and conversation at the breakfast table. Set up your burrito bar with an array of classic and unique ingredients to give your guests plenty of options. From scrambled eggs and crispy bacon to sautéed vegetables and spicy salsa, there’s something for everyone.
It’s a great way to accommodate various dietary needs, whether your guests are meat lovers, vegetarians, or gluten-free. Plus, with everything ready in advance, you can enjoy the morning with your guests rather than being stuck in the kitchen.
Ingredients (serving size: 4-6 people):
- 12 large flour tortillas
- 12 eggs
- 1 cup shredded cheddar cheese
- 1 cup cooked bacon, chopped
- 1 cup cooked sausage, crumbled
- 1 cup diced bell peppers
- 1 cup diced onions
- 1 cup cooked and seasoned black beans
- 1 cup diced tomatoes
- 1 cup salsa
- 1 cup guacamole
- 1 cup sour cream
- Salt and pepper to taste
- 2 tablespoons olive oil
Cooking Instructions:
- Prepare the Eggs: Crack the eggs into a bowl, season with salt and pepper, and whisk until well combined. Heat a non-stick skillet over medium heat and add a tablespoon of olive oil. Pour in the whisked eggs and cook, stirring gently, until they’re scrambled and fully cooked. Transfer to a serving bowl and keep warm.
- Cook the Vegetables: In the same skillet, add another tablespoon of olive oil. Add the diced bell peppers and onions, and sauté until they’re softened and slightly caramelized. Transfer to a separate serving bowl.
- Prepare the Meat: Verify the bacon and sausage are cooked. Chop the cooked bacon into bite-sized pieces and crumble the sausage. Place each in separate serving bowls.
- Warm the Tortillas: Wrap the tortillas in aluminum foil and place them in a preheated oven at 350°F (175°C) for about 10 minutes to warm them through.
- Set Up the Burrito Bar: Arrange all ingredients in separate bowls or containers on a counter or table. Include the shredded cheese, cooked black beans, diced tomatoes, salsa, guacamole, and sour cream.
- Invite Guests to Build Their Burritos: Allow your guests to customize their burritos by choosing their favorite fillings and toppings. Encourage them to start with a tortilla and layer their chosen ingredients, then fold the tortilla to enclose the fillings.
Extra Tips:
For a more vibrant and flavorful burrito bar, consider adding extra options like hot sauce, pickled jalapeños, or fresh cilantro. To save time, many ingredients such as the cheese, salsa, and guacamole can be prepared or purchased in advance.
Keep the burrito bar neat by providing small spoons or tongs for each ingredient. If you have vegetarian or vegan guests, verify there are plenty of plant-based options like sautéed mushrooms or tofu crumbles. Enjoy this interactive breakfast experience with your guests, and encourage them to get creative with their burrito combinations!
Classic French Toast With Fresh Fruit
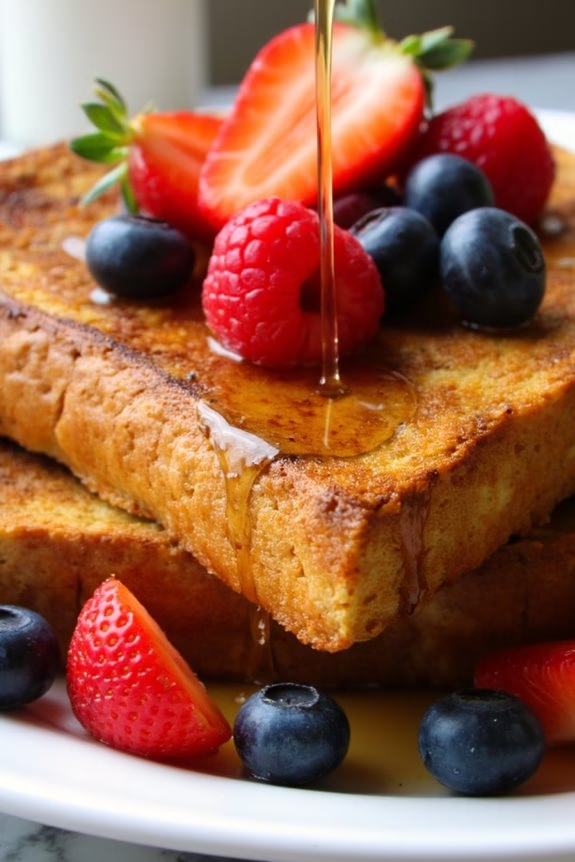
There’s nothing quite like serving up a plate of Classic French Toast with Fresh Fruit to impress your guests during breakfast. This dish combines the rich, comforting flavors of French toast with the invigorating zest of seasonal fruits, creating a balance that’s both satisfying and delicious.
Perfect for a leisurely morning, this recipe brings a touch of elegance to the table, making it ideal for special occasions or just when you want to treat your loved ones to a hearty breakfast.
Preparing Classic French Toast with Fresh Fruit is incredibly simple and requires only a few basic ingredients. The key is to use thick slices of good-quality bread and fresh, ripe fruits to guarantee the best flavor. This recipe serves 4-6 people, making it perfect for a small gathering. With a few easy steps, you’ll have a delightful breakfast option that’s sure to please everyone.
Ingredients:
- 6 large eggs
- 1 cup whole milk
- 2 tablespoons granulated sugar
- 1 teaspoon vanilla extract
- 1/2 teaspoon ground cinnamon
- Pinch of salt
- 8 slices of thick-cut bread (such as brioche or challah)
- 4 tablespoons unsalted butter
- 1 cup sliced strawberries
- 1 cup blueberries
- 1 cup raspberries
- Maple syrup, for serving
Instructions:
- Prepare the Egg Mixture: In a large mixing bowl, whisk together the eggs, milk, sugar, vanilla extract, cinnamon, and salt until well combined. This mixture should be smooth and slightly frothy.
- Soak the Bread: Dip each slice of bread into the egg mixture, making sure both sides are evenly coated. Let the slices soak for about 20-30 seconds to absorb the flavors, but be careful not to let them become too soggy.
- Preheat the Skillet: Heat a large non-stick skillet or griddle over medium heat. Add 1 tablespoon of butter and allow it to melt, swirling it around to coat the surface.
- Cook the French Toast: Place 2-3 slices of soaked bread onto the skillet (depending on the size of your skillet), and cook for about 3-4 minutes on each side, or until golden brown and cooked through. Repeat this process, adding more butter as needed, until all slices are cooked.
- Prepare the Fresh Fruit: While the toast is cooking, wash and prepare the fresh fruit. Slice the strawberries and mix them with the blueberries and raspberries in a serving bowl.
- Assemble and Serve: Arrange the cooked French toast slices on a serving platter. Top with the mixed fresh fruit and drizzle with maple syrup before serving.
Extra Tips: For an added layer of flavor, consider adding a splash of orange juice or zest to the egg mixture. This will give the French toast a subtle citrus note that pairs beautifully with the fresh fruit.
Additionally, using day-old bread can help the slices hold up better when soaking in the egg mixture. If you’re expecting a larger crowd, this recipe can easily be doubled.
Finally, keep the cooked French toast warm in a low oven while you prepare the rest of the slices to guarantee everything is hot and ready to serve at the same time.
Mini Quiche Assortment

Mini quiches are a delightful and versatile breakfast idea, perfect for serving guests. These bite-sized treats can be easily customized with a variety of fillings to cater to different tastes. Whether you prefer a classic combination of spinach and cheese or more adventurous flavors like smoked salmon and dill, mini quiches offer an elegant and delicious start to the day.
They’re also convenient to prepare ahead of time, making them an ideal choice for stress-free entertaining. This recipe will guide you through creating a mini quiche assortment that serves 4-6 people. The quiches are baked in a muffin tin, guaranteeing they’re perfectly portioned and easy to serve. Feel free to mix and match fillings to create a variety of flavors, assuring that there’s something for everyone to enjoy.
Ingredients (serves 4-6 people):
- 1 package of pre-made pie crust
- 6 large eggs
- 1 cup whole milk
- 1 cup of shredded cheese (such as cheddar, Swiss, or Gruyère)
- 1 cup of assorted fillings (e.g., cooked bacon, spinach, mushrooms, tomatoes)
- Salt and pepper to taste
- 2 tablespoons of chopped fresh herbs (e.g., parsley, chives, or dill)
- Cooking spray
Cooking Instructions:
- Preheat and Prepare the Oven: Preheat your oven to 375°F (190°C). Lightly spray a 12-cup muffin tin with cooking spray to prevent sticking.
- Prepare the Pie Crust: Roll out the pre-made pie crust on a lightly floured surface. Using a round cookie cutter or a glass roughly the size of the muffin cup, cut out circles. Gently press each circle into the muffin tin cups, ensuring the crust lines the bottom and sides.
- Prepare the Egg Mixture: In a large mixing bowl, whisk together the eggs and milk until well combined. Season with salt and pepper. Stir in the shredded cheese and fresh herbs for added flavor.
- Assemble the Fillings: Divide your assorted fillings among the crusts in the muffin tin. Ensure each cup has a balanced amount of ingredients.
- Pour the Egg Mixture: Carefully pour the egg mixture over the fillings in each muffin cup, filling them about 3/4 full. The mixture will puff up as it bakes.
- Bake: Place the muffin tin in the preheated oven and bake for 20-25 minutes or until the quiches are set and slightly golden on top. A toothpick inserted into the center should come out clean.
- Cool and Serve: Allow the quiches to cool in the tin for a few minutes before removing them. Serve warm, garnished with additional fresh herbs if desired.
Extra Tips: To save time on the day of serving, you can prepare the pie crusts and fillings the night before. Simply store the filled crusts in the refrigerator and add the egg mixture just before baking.
Additionally, consider using silicone muffin liners for easy removal and less cleanup. Experiment with different cheese varieties and fillings to create unique flavor combinations, and don’t hesitate to make extra, as these mini quiches freeze well and can be reheated for a quick breakfast option later.
Avocado Toast With Toppings
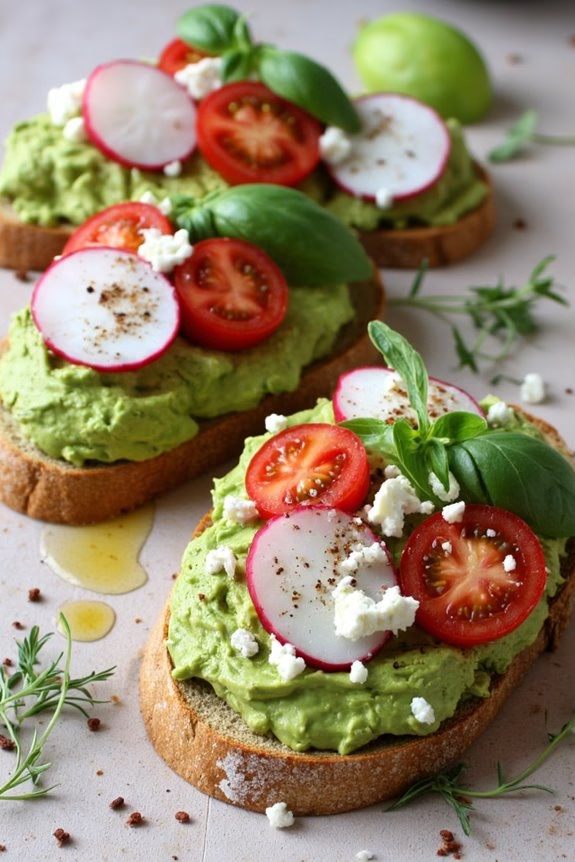
Avocado Toast With Toppings is a delightful and versatile breakfast option that’s sure to impress your guests. This dish combines the creamy richness of ripe avocados with a variety of flavorful toppings that cater to different taste preferences.
Whether you’re hosting a casual brunch or a more formal breakfast gathering, avocado toast offers a perfect balance of nutrition, taste, and visual appeal.
The beauty of avocado toast lies in its adaptability. You can customize it with a variety of toppings to suit any dietary needs or taste preferences. From fresh vegetables and herbs to cheeses and proteins, the options are endless.
This recipe is designed to serve 4-6 people, making it an ideal choice for a small group of guests. Let’s plunge into the ingredients and steps required to create this delightful breakfast dish.
Ingredients for 4-6 servings:
- 4-6 slices of whole-grain or sourdough bread
- 3 ripe avocados
- 1 lemon, juiced
- Salt and pepper to taste
- 1 cup cherry tomatoes, halved
- 1/4 cup radish, thinly sliced
- 1/4 cup feta cheese, crumbled
- 1/4 cup fresh basil leaves, chopped
- 1/4 cup microgreens (optional)
- 2 tablespoons extra virgin olive oil
- 1/4 teaspoon red pepper flakes (optional)
Cooking Instructions:
- Prepare the Avocado Mixture: Cut the avocados in half, remove the pits, and scoop the flesh into a bowl. Add the lemon juice, salt, and pepper. Use a fork to mash the avocado, leaving it slightly chunky for texture. Adjust the seasoning as needed.
- Toast the Bread: While prepping the avocado, set your oven to broil or use a toaster. Toast the slices of bread until they’re golden brown and crisp, taking care not to burn them.
- Assemble the Toast: Spread a generous amount of the mashed avocado onto each slice of toasted bread. Make sure to cover the surface evenly to guarantee each bite is flavorful.
- Add Toppings: Sprinkle the halved cherry tomatoes, sliced radishes, and crumbled feta cheese over the avocado layer. Add the fresh basil leaves and microgreens on top for added flavor and color.
- Finish with Seasoning: Drizzle a small amount of extra virgin olive oil over each toast. If desired, sprinkle with red pepper flakes for a hint of heat.
- Serve Immediately: Arrange the avocado toasts on a serving platter and serve immediately to make sure the bread remains crisp.
Extra Tips:
To keep avocados from browning, prepare the avocado mixture just before serving. If you’re making this dish in advance, keep the avocado mixture covered with plastic wrap pressed directly onto the surface to minimize air exposure.
Additionally, you can experiment with different toppings such as poached eggs, smoked salmon, or different herbs and spices to cater to different tastes. For a gluten-free option, use gluten-free bread or offer a lettuce wrap version.
Yogurt Parfait Station
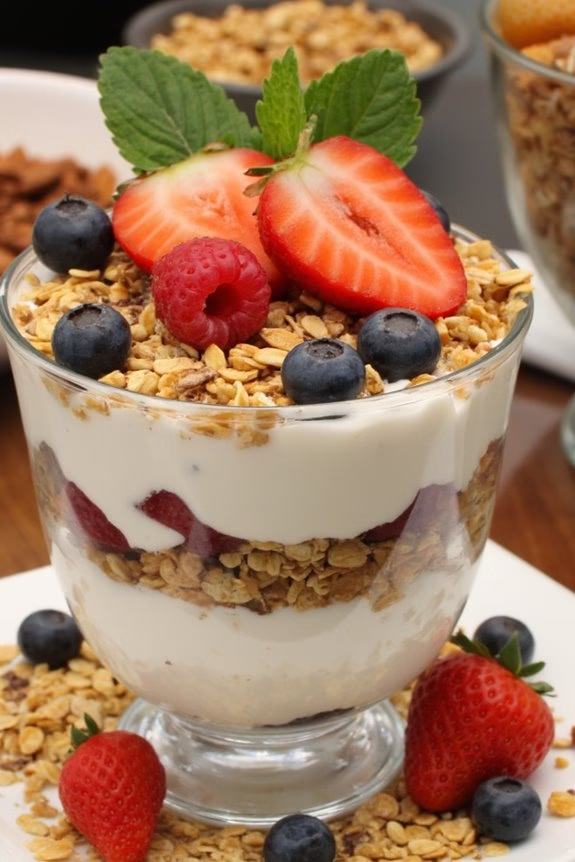
Creating a yogurt parfait station is an excellent way to delight your guests with a customizable and nutritious breakfast option. This interactive setup allows your guests to build their own parfaits according to their taste preferences. A yogurt parfait station isn’t only visually appealing but also offers a healthy and satisfying start to the day, making it perfect for any gathering or brunch event.
To set up a yogurt parfait station for 4-6 people, all you need are a few fresh ingredients and some creativity in presentation. You’ll offer a variety of yogurt flavors, granola, and a selection of toppings including fresh fruits, nuts, seeds, and sweeteners. By preparing these ingredients in advance and arranging them attractively, you guarantee your guests have a memorable and enjoyable breakfast experience.
Ingredients (serving size: 4-6 people):
- 6 cups of plain or flavored yogurt (such as vanilla or Greek)
- 3 cups of granola
- 2 cups of fresh berries (strawberries, blueberries, raspberries)
- 2 bananas, sliced
- 1 cup of chopped nuts (almonds, walnuts, or pecans)
- 1/2 cup of seeds (chia seeds or flaxseeds)
- 1/4 cup of honey or maple syrup
- Optional: shredded coconut, dried fruits, and chocolate chips
Instructions:
- Prepare the Yogurt: Decide whether you’ll use plain or flavored yogurt. If using plain yogurt, consider offering a sweetener option such as honey or maple syrup for guests to add to their preference. Place the yogurt in a large bowl with a serving spoon.
- Set Up the Granola: In a separate bowl, place the granola. Make sure it’s easily accessible and provide a scoop for serving.
- Prepare Fresh Fruits: Wash the berries thoroughly and slice the bananas. Arrange these fruits in separate bowls or a divided serving tray for easy selection by guests.
- Arrange the Toppings: In small bowls, arrange the nuts, seeds, and any other toppings such as shredded coconut or chocolate chips. Provide small spoons for each topping.
- Sweetener Station: Place honey or maple syrup in a small pitcher or jar with a spoon, allowing guests to drizzle over their parfaits if desired.
- Arrange the Station: Set up a table or counter with all the ingredients arranged in a logical order: yogurt, granola, fruits, nuts, seeds, and sweeteners. Provide bowls and spoons for guests to assemble their parfaits.
Extra Tips:
For a more personalized touch, consider labeling each ingredient with small name cards or signs. This not only adds a decorative element but also helps guests identify ingredients, especially if there are dietary considerations involved.
You can also offer alternative yogurt options, such as dairy-free or low-fat varieties, to cater to guests with specific dietary needs. To maintain freshness, keep perishable items like yogurt and fruits chilled until serving time.
Finally, encourage guests to be creative with their parfait combinations, and don’t forget to provide napkins and trash bins nearby for easy cleanup.
Savory Breakfast Casserole

Hosting a breakfast gathering and want to impress your guests with a hearty and delicious meal? Search no further than this savory breakfast casserole. This dish combines the rich flavors of eggs, sausage, cheese, and vegetables, all baked into a comforting and satisfying casserole. It’s the perfect way to start the day and is sure to be a crowd-pleaser.
One of the best things about this savory breakfast casserole is its versatility. You can prepare it the night before and simply pop it into the oven in the morning, making it an ideal choice for a stress-free breakfast. Plus, it serves 4-6 people, making it perfect for small gatherings. The combination of ingredients guarantees a delightful mix of flavors and textures that will leave your guests asking for seconds.
Ingredients for 4-6 Servings:
- 8 large eggs
- 1 cup milk
- 1 lb breakfast sausage
- 1 medium onion, chopped
- 1 red bell pepper, chopped
- 2 cups shredded cheddar cheese
- 4 cups cubed bread (such as French or Italian bread)
- 1 teaspoon salt
- 1/2 teaspoon black pepper
- 1/2 teaspoon garlic powder
- 1/2 teaspoon dried oregano
- Cooking spray
Cooking Instructions:
- Preheat the Oven: Set your oven to 350°F (175°C) to preheat while you prepare the casserole ingredients.
- Cook the Sausage: In a large skillet over medium heat, cook the breakfast sausage until it’s browned and cooked through. Use a spatula to break it into smaller pieces as it cooks. Once done, drain any excess fat and set the sausage aside.
- Sauté Vegetables: In the same skillet, add the chopped onion and red bell pepper. Sauté them over medium heat until they’re tender and the onion is translucent, about 5-7 minutes.
- Prepare the Egg Mixture: In a large mixing bowl, whisk together the eggs, milk, salt, black pepper, garlic powder, and dried oregano until well combined.
- Combine Ingredients: In a greased 9×13 inch baking dish, layer the cubed bread, cooked sausage, sautéed vegetables, and shredded cheddar cheese. Pour the egg mixture evenly over the top, making sure all the bread is soaked in the mixture.
- Bake the Casserole: Place the baking dish in the preheated oven and bake for 35-40 minutes, or until the casserole is set and the top is golden brown. You can insert a knife into the center of the casserole to check if it comes out clean, indicating it’s fully cooked.
- Serve: Allow the casserole to cool slightly before slicing and serving. Enjoy it warm for the best flavor.
Extra Tips:
For added flavor, consider incorporating other ingredients such as mushrooms, spinach, or different types of cheese. If you prefer a spicier kick, add a pinch of cayenne pepper to the egg mixture or use spicy sausage.
This dish is also great for using up leftover bread. Simply adjust the seasoning to taste, making sure the balance of flavors suits your preference. If you’re prepping the casserole the night before, cover it and store it in the refrigerator, then bake it fresh in the morning.
Pancake Stack With Assorted Syrups
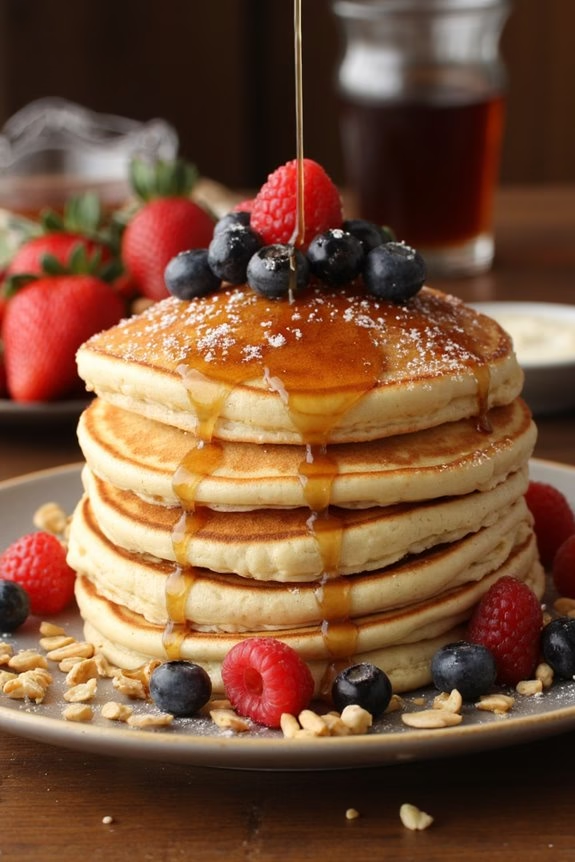
When hosting guests for breakfast, a pancake stack with assorted syrups can be an impressive and delicious centerpiece. This dish offers a delightful combination of fluffy pancakes and a variety of syrups, allowing your guests to customize their meal to their liking. The pancakes are easy to make from scratch, and the assortment of syrups—such as maple, berry, and chocolate—adds a touch of elegance and flavor variety that can cater to different palates.
Serving a pancake stack with assorted syrups isn’t only about providing a tasty breakfast option but also creating a warm and inviting atmosphere. The preparation can be a fun and engaging activity, especially when guests participate in selecting their favorite syrups. The stack can be garnished with fresh fruits or nuts for added texture and presentation. Whether you’re hosting a small gathering or accommodating a larger group, this dish is sure to be a hit with everyone.
Ingredients for 4-6 people:
- 2 cups all-purpose flour
- 2 tablespoons granulated sugar
- 2 teaspoons baking powder
- 1/2 teaspoon baking soda
- 1/2 teaspoon salt
- 2 large eggs
- 2 cups buttermilk
- 1/4 cup unsalted butter, melted
- 1 teaspoon vanilla extract
- Assorted syrups: maple syrup, berry syrup, chocolate syrup
- Optional garnishes: fresh berries, sliced bananas, chopped nuts, whipped cream
Cooking Instructions:
- Prepare the Batter: In a large mixing bowl, whisk together the flour, sugar, baking powder, baking soda, and salt. In another bowl, beat the eggs and combine them with the buttermilk, melted butter, and vanilla extract. Slowly pour the wet ingredients into the dry ingredients, stirring gently until just combined. Be careful not to overmix; a few lumps are fine.
- Preheat the Griddle: Heat a non-stick griddle or large skillet over medium heat. Once hot, lightly grease it with butter or cooking spray to make sure the pancakes don’t stick.
- Cook the Pancakes: Pour about 1/4 cup of batter onto the griddle for each pancake. Cook until bubbles form on the surface and the edges appear set, about 2-3 minutes. Flip the pancakes and cook for an additional 1-2 minutes, until golden brown and cooked through. Adjust the heat as necessary to avoid burning.
- Keep Pancakes Warm: Transfer the cooked pancakes to a plate and cover them with a clean kitchen towel to keep warm while you finish cooking the rest of the batter. Alternatively, keep them warm in a low oven (around 200°F).
- Serve with Assorted Syrups: Stack the pancakes on a serving platter and provide an assortment of syrups in small bowls or ramekins. Allow guests to drizzle their preferred syrups over their pancakes. Offer optional garnishes like fresh berries, sliced bananas, chopped nuts, or whipped cream for added flair.
Extra Tips:
To guarantee your pancakes are light and fluffy, resist the urge to overmix the batter; this can lead to tough pancakes. If you don’t have buttermilk, you can make a substitute by mixing 2 cups of milk with 2 tablespoons of lemon juice or vinegar and letting it sit for 5 minutes.
When cooking, keep an eye on the heat to prevent burning—adjust it as needed. Finally, you can prepare the syrups in advance if you’re making homemade versions, or simply purchase a selection of high-quality store-bought options to save time.
Smoked Salmon and Bagel Platter
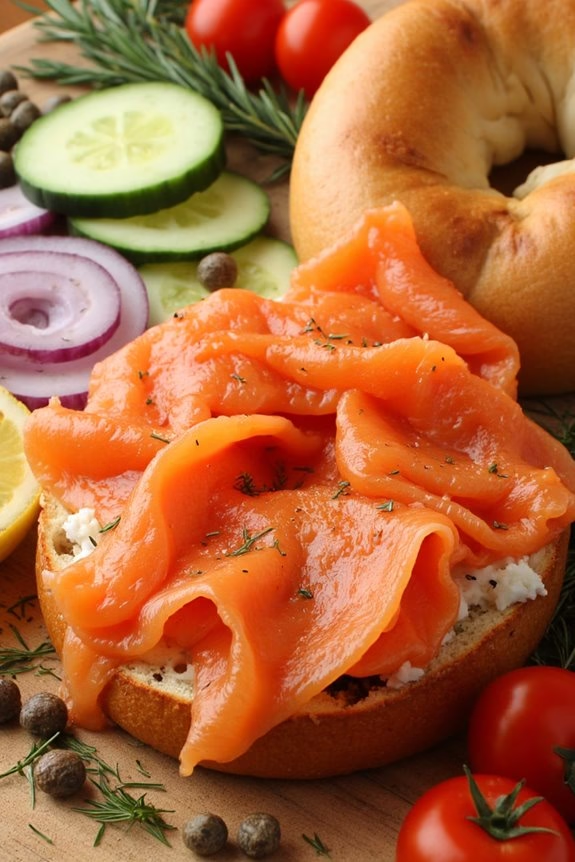
A Smoked Salmon and Bagel Platter is a delightful breakfast option that’s both elegant and straightforward to prepare. Perfect for entertaining guests, this dish brings together a variety of flavors and textures, combining the rich, smoky taste of salmon with the freshness of vegetables and the satisfying chew of a bagel.
This platter isn’t only visually appealing but also offers a range of options that guests can customize to their preference. This dish is best served as a buffet-style spread, allowing guests to assemble their bagels with an assortment of toppings, including cream cheese, capers, red onions, and more.
It provides a gourmet experience without the need for extensive cooking, making it an ideal choice for hosts who want to impress without spending hours in the kitchen. The following recipe serves 4-6 people, making it perfect for a small gathering or brunch with friends and family.
Ingredients:
- 6 bagels (assorted varieties)
- 12 ounces of smoked salmon
- 8 ounces of cream cheese
- 1 small red onion, thinly sliced
- 1 lemon, cut into wedges
- 1/4 cup capers
- 1 cucumber, thinly sliced
- 1/2 cup cherry tomatoes, halved
- 1/2 cup fresh dill
- Salt and pepper to taste
Instructions:
- Prepare the Ingredients: Begin by slicing the bagels in half and setting them aside. Thinly slice the red onion and cucumber, and halve the cherry tomatoes. Cut the lemon into wedges and set aside.
- Arrange the Platter: On a large serving platter, neatly arrange the smoked salmon slices. Place the bagel halves around the platter, ensuring there’s enough space for each topping.
- Add the Toppings: In separate sections of the platter, arrange the sliced red onions, cucumbers, cherry tomatoes, and capers. Place the lemon wedges around the smoked salmon for added visual appeal.
- Present the Cream Cheese: Use a small bowl to serve the cream cheese, allowing guests to spread it easily on their bagels.
- Garnish with Fresh Herbs: Sprinkle fresh dill over the smoked salmon and the platter for an aromatic finish. Season lightly with salt and pepper.
- Serve and Enjoy: Allow guests to assemble their own bagels by choosing their preferred toppings, creating a personalized breakfast experience.
Extra Tips:
To enhance the flavors of your Smoked Salmon and Bagel Platter, consider offering a variety of cream cheese flavors, such as chive or garlic herb.
If possible, toast the bagels just before serving to give them a warm, crisp texture. Additionally, offering whole grain or gluten-free bagels can accommodate different dietary preferences among your guests.
Finally, if you have extra time, marinate the sliced red onions in a bit of vinegar and sugar for a quick pickled effect that adds a tangy twist to the dish.
Overnight Oats Buffet
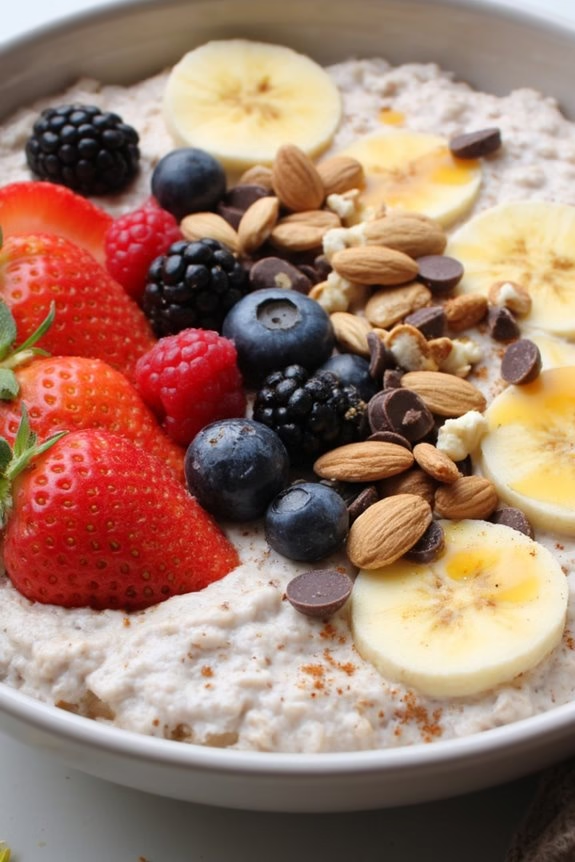
Creating a delightful breakfast experience for your guests can be both simple and enjoyable with an Overnight Oats Buffet. This easy-to-prepare breakfast option isn’t only nutritious but also allows your guests to customize their bowls to their liking. Prepare the base the night before, and in the morning, set up a spread of delicious toppings for a wholesome and interactive breakfast experience.
The versatility of overnight oats makes them perfect for accommodating different dietary preferences and tastes. An Overnight Oats Buffet is ideal for serving 4-6 people. The creamy oats serve as a canvas, and your guests can choose from a variety of toppings, including fresh fruits, nuts, and sweeteners. Whether your guests prefer something sweet, nutty, or fruity, this buffet-style breakfast guarantees everyone starts their day with a meal they love. It’s a perfect way to gather around the breakfast table, sharing good food and even better company.
Ingredients for 4-6 servings:
- 3 cups rolled oats
- 3 cups milk (dairy or non-dairy)
- 1 cup Greek yogurt
- 3 tablespoons chia seeds
- 2 tablespoons honey or maple syrup
- 1 teaspoon vanilla extract
- 1 teaspoon ground cinnamon
Toppings:
- Fresh berries (strawberries, blueberries, raspberries)
- Sliced bananas
- Chopped nuts (almonds, walnuts, pecans)
- Dried fruits (raisins, cranberries)
- Shredded coconut
- Nut butter (peanut butter, almond butter)
- Chocolate chips
- Additional honey or maple syrup for drizzling
Cooking Instructions:
- Prepare the Oat Base: In a large mixing bowl, combine the rolled oats, milk, Greek yogurt, chia seeds, honey or maple syrup, vanilla extract, and ground cinnamon. Stir thoroughly until all ingredients are well incorporated.
- Refrigerate Overnight: Transfer the oat mixture into an airtight container or individual mason jars. Seal tightly and refrigerate overnight, allowing the oats to soak and the flavors to meld together.
- Set Up the Buffet: In the morning, stir the oat mixture to guarantee an even consistency. Arrange a variety of toppings in small bowls or dishes, and set them out on a table or counter alongside the oat base. Provide spoons for easy serving.
- Serve: Invite your guests to create their personalized bowls by spooning the oat mixture into their bowls and adding their choice of toppings. Encourage creativity and taste exploration.
- Enjoy: As everyone enjoys their customized oats, offer additional honey or maple syrup for those who prefer a sweeter breakfast.
Extra Tips:
To guarantee the Overnight Oats Buffet is a hit, consider preparing a variety of toppings to cater to different dietary needs and preferences, such as gluten-free, vegan, or nut-free options. You can also prepare labels for each topping to guide your guests.
If you have leftovers, overnight oats can be stored in the refrigerator for up to 3 days, making them a convenient option for breakfast throughout the week. Additionally, allowing guests to mix their toppings themselves can create a more engaging and social breakfast atmosphere.
Egg and Cheese Breakfast Sandwiches

Egg and cheese breakfast sandwiches are a classic and delightful option for serving guests in the morning. These sandwiches are versatile, allowing you to customize them with various toppings and bread options to suit everyone’s taste. Perfect for a casual brunch with family or a more formal breakfast gathering with friends, these sandwiches are sure to please.
They’re easy to prepare and can be assembled quickly, making them ideal for entertaining without spending too much time in the kitchen. The combination of fluffy scrambled eggs, melted cheese, and a buttery toasted bun makes these sandwiches irresistible.
You can choose your favorite type of bread, whether it be a soft brioche, a crunchy ciabatta, or a classic English muffin. Pair the sandwich with a side of fresh fruit or a simple salad to complete the meal. Whether you’re catering to vegetarian guests or adding some crispy bacon or sausage for meat lovers, these egg and cheese breakfast sandwiches are a surefire hit.
Ingredients (Serving Size: 4-6 people):
- 6 large eggs
- 6 slices of cheese (cheddar, American, or your choice)
- 6 English muffins or preferred bread/buns
- 4 tablespoons butter
- Salt and pepper to taste
- Optional: 6 slices of cooked bacon or sausage patties
- Optional: Sliced avocado, tomato, or spinach
Cooking Instructions:
- Prepare the Bread: Preheat your oven to 350°F (175°C) or use a toaster. Split the English muffins or your chosen bread in half and lightly butter each side. Place them on a baking sheet or directly in the toaster. Toast until they’re golden brown and crispy.
- Cook the Eggs: In a medium bowl, whisk together the eggs with a pinch of salt and pepper. Melt 2 tablespoons of butter in a non-stick skillet over medium heat. Pour in the eggs and gently stir with a spatula until they’re scrambled to your desired consistency, ensuring they remain soft and fluffy. Remove from heat.
- Assemble the Sandwiches: Layer the bottom half of each toasted bread with a slice of cheese. Spoon a generous portion of scrambled eggs onto the cheese. If desired, add a slice of cooked bacon or sausage patty on top of the eggs. Place additional toppings like avocado or tomato slices if using.
- Melt the Cheese: Place the assembled sandwiches back in the oven for 2-3 minutes, or until the cheese starts to melt and the sandwich is warmed through. Keep an eye on them to prevent over-toasting.
- Serve: Top each sandwich with the remaining half of the bread. Serve immediately while warm, alongside your choice of sides.
Extra Tips:
To elevate the flavors of your egg and cheese breakfast sandwiches, consider adding a dash of hot sauce or a spread of homemade herb mayo for an extra kick. If you’re preparing these sandwiches ahead of time, you can keep them warm in the oven at a low temperature until ready to serve.
Additionally, for a healthier option, use whole-grain bread and substitute butter with olive oil or a low-fat spread. Don’t be afraid to get creative with the fillings based on your guests’ preferences or dietary restrictions.
Homemade Granola With Milk or Yogurt
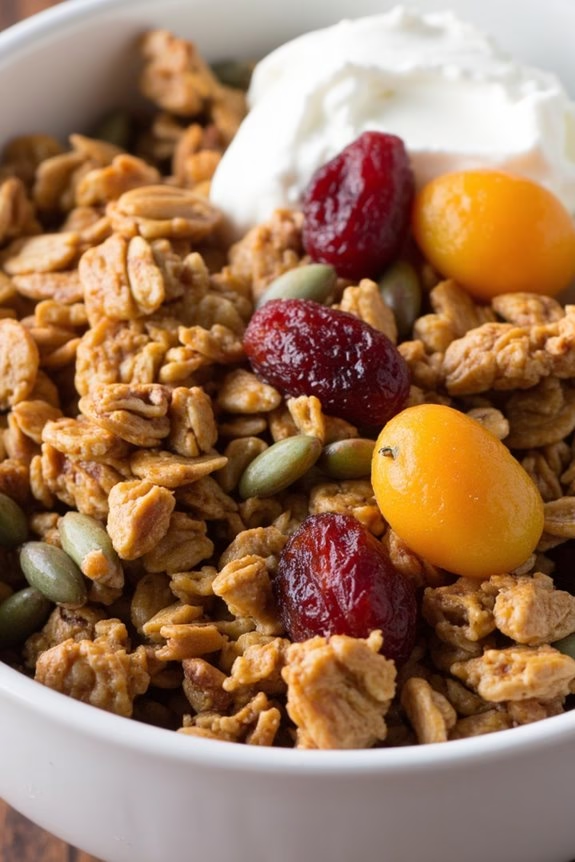
Homemade granola is a delightful and versatile breakfast option that can be tailored to meet individual tastes and dietary preferences. It’s a perfect dish to serve guests, offering a crunchy, flavorful start to the day. The combination of rolled oats, nuts, seeds, and a touch of sweetness creates a satisfying base that pairs beautifully with milk or yogurt.
Whether you serve it in a bowl or as a topping, homemade granola is bound to impress your guests with its wholesome appeal and homemade charm.
Making homemade granola isn’t only easy but also allows you to control the ingredients, guaranteeing a healthy and nutritious meal. This recipe yields a generous amount, making it suitable for serving 4-6 people. The sweet and nutty aroma that fills your kitchen while baking is an added bonus.
Once prepared, store the granola in an airtight container, and it will stay fresh for weeks, ready to be enjoyed whenever you like.
Ingredients (Serves 4-6):
- 4 cups rolled oats
- 1 cup chopped nuts (such as almonds, walnuts, or pecans)
- 1/2 cup seeds (such as pumpkin or sunflower seeds)
- 1 cup dried fruit (such as raisins, cranberries, or apricots)
- 1/2 cup honey or maple syrup
- 1/4 cup coconut oil or vegetable oil
- 1 teaspoon vanilla extract
- 1 teaspoon ground cinnamon
- 1/2 teaspoon salt
- Milk or yogurt for serving
Instructions:
- Preheat the Oven: Start by preheating your oven to 325°F (160°C). This moderate temperature guarantees the granola bakes evenly without burning.
- Mix Dry Ingredients: In a large mixing bowl, combine the rolled oats, chopped nuts, seeds, ground cinnamon, and salt. Stir these dry ingredients until they’re well mixed.
- Prepare Wet Ingredients: In a small saucepan over low heat, melt the coconut oil. Once melted, remove from heat and stir in the honey (or maple syrup) and vanilla extract. Mix until well combined.
- Combine Wet and Dry Ingredients: Pour the wet mixture over the dry ingredients in the bowl. Stir thoroughly to guarantee all the oats and nuts are evenly coated with the oil and honey mixture.
- Spread on Baking Sheet: Line a large baking sheet with parchment paper. Spread the granola mixture evenly across the sheet, pressing down lightly to create an even layer.
- Bake the Granola: Place the baking sheet in the preheated oven and bake for about 25-30 minutes. Stir the granola halfway through to guarantee even baking. Keep an eye on it to prevent burning, and bake until it’s golden brown.
- Cool and Add Dried Fruit: Once baked, remove the granola from the oven and allow it to cool on the baking sheet. As it cools, it will become crisp. After cooling, mix in the dried fruit.
- Serve: Serve the granola with milk or a dollop of yogurt. You can also serve it with fresh fruit for an added burst of flavor.
Extra Tips:
For a more personalized granola, feel free to experiment with different nuts, seeds, and dried fruits to suit your guests’ preferences. Adding a pinch of nutmeg or ginger can add an extra layer of spice.
If you prefer a less sweet granola, reduce the amount of honey or maple syrup. Remember, granola can be stored in an airtight container for up to two weeks, making it a convenient breakfast option. Enjoy the flexibility and creativity that comes with making homemade granola!
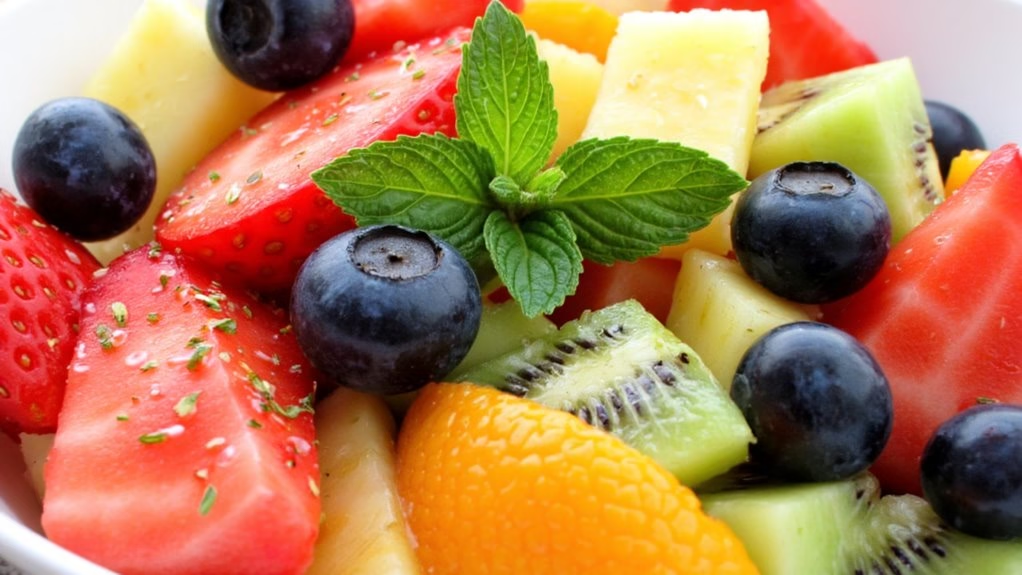
Seasonal Fruit Salad With Mint
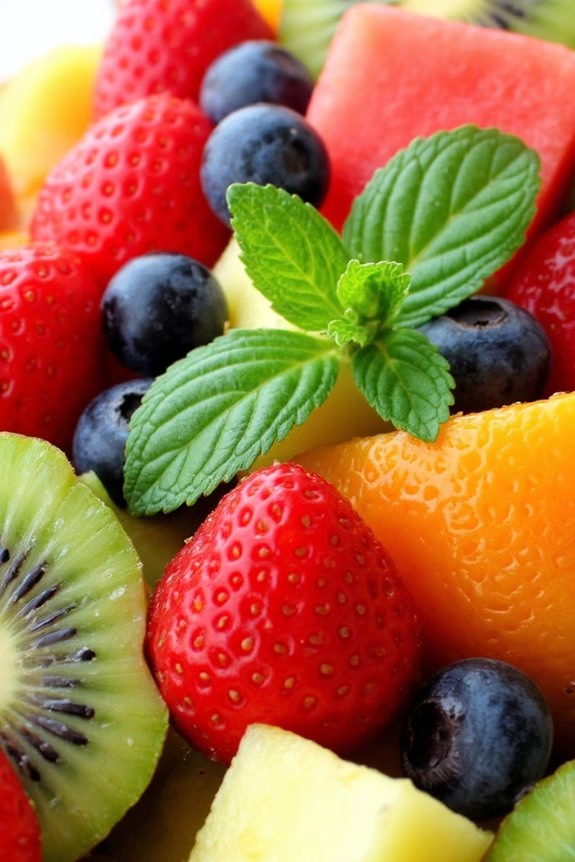
Treat your guests to a revitalizing and vibrant Seasonal Fruit Salad with Mint, a perfect addition to any breakfast spread. This simple yet elegant dish brings together a medley of fresh, juicy fruits that are in season, complemented by the aromatic touch of fresh mint. The combination of natural sweetness and invigorating minty notes makes this salad not only delicious but also visually appealing.
Whether you’re hosting a brunch or a casual breakfast gathering, this fruit salad is sure to be a hit with guests of all ages.
The beauty of this recipe lies in its versatility and ease of preparation. You can choose a variety of fruits based on what’s available and in season, guaranteeing maximum freshness and flavor. The addition of mint leaves adds a revitalizing twist, enhancing the natural sweetness of the fruits.
This fruit salad is perfect for feeding a crowd, serving 4-6 people, and can easily be adjusted to accommodate more guests if needed.
Ingredients (Serving Size: 4-6 people):
- 2 cups strawberries, hulled and sliced
- 2 cups blueberries
- 2 cups watermelon, cubed
- 2 cups pineapple, cubed
- 2 kiwi fruits, peeled and sliced
- 1 orange, peeled and segmented
- 2 tablespoons fresh mint leaves, chopped
- 1 tablespoon honey (optional)
- 1 tablespoon fresh lime juice
Instructions:
- Prepare the fruits: Begin by washing all the fruits thoroughly under cold running water. Pat them dry with a clean kitchen towel or paper towels to remove excess moisture.
- Slice and dice: Hull and slice the strawberries, cube the watermelon and pineapple, slice the kiwi, and segment the orange. Confirm all pieces are bite-sized for easy eating.
- Mix the fruits: In a large serving bowl, combine the strawberries, blueberries, watermelon, pineapple, kiwi slices, and orange segments.
- Add mint and dressing: Sprinkle the chopped mint leaves over the fruit mixture. In a small bowl, whisk together the honey (if using) and lime juice until well combined. Drizzle the honey-lime dressing over the fruit and gently toss everything together to confirm the fruits are evenly coated.
- Chill and serve: Cover the bowl with plastic wrap or a lid, and refrigerate the fruit salad for at least 30 minutes before serving. This allows the flavors to meld together. Serve chilled, and enjoy the revitalizing taste!
Extra Tips:
When preparing the Seasonal Fruit Salad with Mint, feel free to get creative with the fruit selection based on what’s in season and your personal preferences. For added crunch, consider adding a handful of nuts like almonds or walnuts.
If you prefer a sweeter salad, adjust the amount of honey to your liking, or try using agave syrup as an alternative. Remember to add the mint just before serving to keep its flavor fresh and vibrant. Enjoy your fruit salad as a healthy breakfast option or as a revitalizing snack throughout the day.