

As the holiday season approaches, I’m thrilled to share some festive meal inspiration that balances flavor with a health-conscious twist. Picture a succulent herb-crusted prime rib roast filling your kitchen with its savory aroma. Or a sweet maple-glazed turkey breast that’s golden and mouth-watering. These dishes, made with wholesome Paleo ingredients, promise a nourishing feast. Let’s explore how these recipes can make your holiday table both clean and delightful.
Herb-Crusted Prime Rib Roast

Herb-Crusted Prime Rib Roast is a show-stopping centerpiece for your Paleo Christmas dinner. This delectable roast is infused with a blend of aromatic herbs, offering a burst of flavor with every bite. Perfect for a festive gathering, this dish brings a touch of elegance and tradition to your holiday table while adhering to Paleo dietary principles. The emphasis on fresh ingredients and simple yet impactful seasonings allows the natural richness of the prime rib to shine.
The herb crust not only adds a delightful texture but also creates a beautiful presentation that’s sure to impress your guests. By choosing a prime rib, you’re opting for a cut of meat that’s both tender and flavorful, guaranteeing a memorable dining experience. This recipe is designed to serve 4-6 people, making it ideal for an intimate holiday celebration or as a part of a larger spread.
Ingredients for 4-6 people:
- 1 (5-pound) bone-in prime rib roast
- 4 tablespoons olive oil
- 5 cloves garlic, minced
- 2 tablespoons fresh rosemary, chopped
- 2 tablespoons fresh thyme, chopped
- 1 tablespoon fresh sage, chopped
- 1 tablespoon sea salt
- 1 teaspoon black pepper
Cooking Instructions:
- Preheat the Oven: Begin by preheating your oven to 450°F (232°C). This high temperature will help create a beautifully seared crust on the roast.
- Prepare the Herb Mixture: In a small bowl, combine the olive oil, minced garlic, rosemary, thyme, and sage. Mix well to form a paste-like consistency. This will be your herb crust spread.
- Season the Roast: Place the prime rib roast on a rack in a roasting pan. Pat the roast dry with paper towels to confirm the herb mixture adheres properly. Season the entire roast generously with sea salt and black pepper.
- Apply the Herb Crust: Using your hands, spread the herb mixture evenly over the entire surface of the roast. Make sure to cover all sides for maximum flavor infusion.
- Roast the Prime Rib: Place the roast in the preheated oven and cook at 450°F (232°C) for 20 minutes. This initial high heat sears the roast, locking in juices and flavor.
- Adjust the Temperature: After 20 minutes, reduce the oven temperature to 325°F (163°C). Continue roasting for an additional 1.5 to 2 hours, or until the internal temperature reaches 130°F (54°C) for medium-rare, or your desired level of doneness.
- Rest the Roast: Once cooked, remove the roast from the oven and transfer it to a cutting board. Tent it loosely with aluminum foil and let it rest for at least 20 minutes. This resting period allows the juices to redistribute throughout the meat.
- Carve and Serve: After resting, carve the roast into thick slices and serve immediately. The herb-crusted exterior, combined with the tender, juicy interior, will delight your guests.
Extra Tips:
When cooking a prime rib roast, it’s important to use a meat thermometer to confirm accurate doneness. If you prefer your roast more well-done, adjust the cooking time accordingly.
For a more pronounced herb flavor, prepare the herb paste a day in advance and let it marinate on the roast overnight in the refrigerator. Always remember to let the roast come to room temperature before cooking, as this guarantees even cooking throughout.
Enjoy your Herb-Crusted Prime Rib Roast as the centerpiece of a memorable Paleo Christmas dinner!
Maple-Glazed Turkey Breast
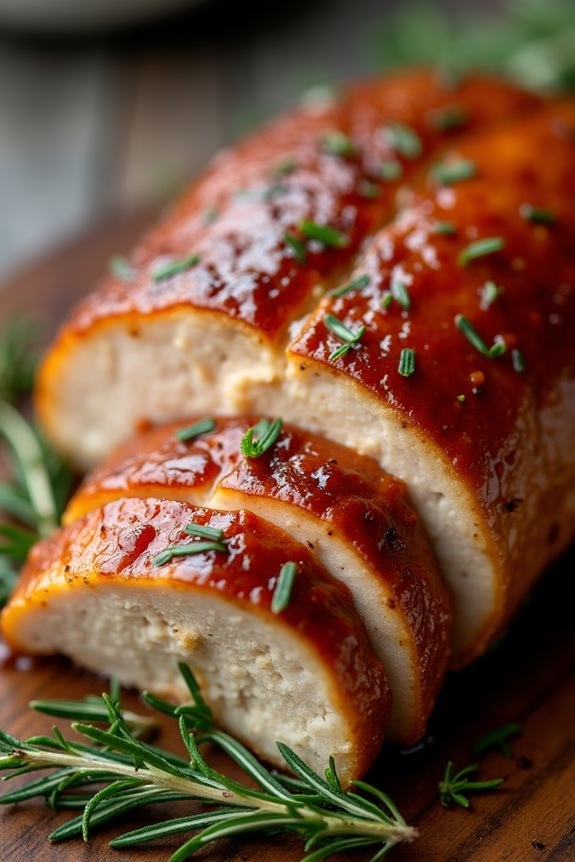
Maple-Glazed Turkey Breast is a delightful and festive dish that brings a touch of sweetness to your Paleo Christmas dinner table. This recipe features a succulent turkey breast coated with a rich, maple glaze that enhances the natural flavors of the meat. The glaze, made with pure maple syrup, mustard, and a hint of fresh herbs, caramelizes beautifully during roasting, providing a visually appealing and mouthwatering centerpiece for your holiday meal.
Perfect for those following a Paleo lifestyle, this dish is both nourishing and delicious, guaranteeing that everyone at the table can enjoy the seasonal feast. Turkey breast is an excellent choice for a Christmas dinner, as it’s lean yet flavorful and can be prepared relatively quickly compared to a whole turkey. This recipe serves 4-6 people, making it ideal for intimate gatherings or smaller family celebrations.
The preparation is straightforward, allowing you to spend more time enjoying the company of your loved ones and less time in the kitchen. With its harmonious blend of savory and sweet, this Maple-Glazed Turkey Breast is sure to become a new holiday favorite.
Ingredients for Maple-Glazed Turkey Breast (serves 4-6):
- 1 (3-4 pound) boneless turkey breast
- 1/2 cup pure maple syrup
- 2 tablespoons Dijon mustard
- 1 tablespoon apple cider vinegar
- 2 tablespoons olive oil
- 2 teaspoons fresh thyme leaves
- 2 teaspoons fresh rosemary, chopped
- 4 cloves garlic, minced
- Salt and pepper to taste
Cooking Instructions:
- Preheat the oven: Begin by preheating your oven to 350°F (175°C) to guarantee it reaches the right temperature for roasting the turkey breast.
- Prepare the glaze: In a small bowl, combine the maple syrup, Dijon mustard, apple cider vinegar, olive oil, fresh thyme, rosemary, and minced garlic. Mix well until all the ingredients are thoroughly combined to form a smooth glaze.
- Season the turkey breast: Pat the turkey breast dry with paper towels and season generously with salt and pepper on all sides. This will enhance the flavor of the turkey and help the glaze adhere better.
- Apply the glaze: Place the turkey breast on a roasting rack in a baking dish. Brush the maple glaze evenly over the entire turkey breast, ensuring it’s well coated.
- Roast the turkey: Transfer the baking dish to the preheated oven. Roast the turkey breast for about 1.5 to 2 hours, or until a meat thermometer inserted into the thickest part of the breast registers 165°F (74°C).
- Baste during cooking: Every 30 minutes, baste the turkey breast with the juices and glaze from the bottom of the pan to keep it moist and flavorful.
- Rest before serving: Once cooked, remove the turkey breast from the oven and let it rest for 15 minutes before slicing. This allows the juices to redistribute, guaranteeing the meat remains juicy and tender.
Extra Tips:
For an even more flavorful dish, consider marinating the turkey breast in the glaze mixture for a few hours or overnight in the refrigerator before cooking. This will allow the flavors to penetrate deeper into the meat.
Additionally, if you prefer a crispier skin, you can broil the turkey breast for the last 5 minutes of cooking, keeping a close eye on it to prevent burning. Remember to always use a meat thermometer to check for doneness, as oven temperatures may vary.
Enjoy your Maple-Glazed Turkey Breast with your favorite Paleo side dishes for a complete and satisfying holiday meal.
Garlic and Rosemary Lamb Chops
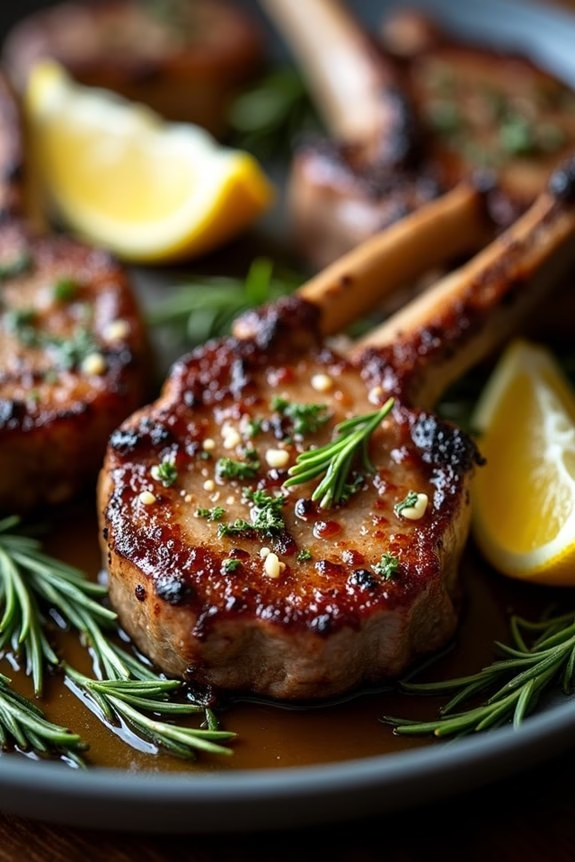
Celebrate the holiday season with a delectable Paleo Christmas dinner by serving Garlic and Rosemary Lamb Chops. This dish combines the robust flavors of garlic and rosemary with the rich, savory taste of lamb, creating a meal that’s both elegant and satisfying.
Perfect for those following a Paleo diet, this recipe focuses on using wholesome, natural ingredients that enhance the natural flavors of the meat. These lamb chops are ideal for a festive gathering, as they aren’t only delicious but also relatively simple to prepare.
The combination of fresh herbs and garlic infuses the lamb with a depth of flavor that’s sure to impress your guests. Best served alongside roasted vegetables or a fresh salad, these chops will make your holiday meal both nutritious and memorable.
Ingredients (Serves 4-6):
- 8 lamb chops
- 4 cloves garlic, minced
- 2 tablespoons fresh rosemary, finely chopped
- 2 tablespoons olive oil
- Salt and pepper to taste
- 1 lemon, cut into wedges
Cooking Instructions:
- Prepare the Marinade: In a small bowl, combine the minced garlic, chopped rosemary, and olive oil. Mix well to form a paste. This will serve as the marinade for the lamb, infusing it with aromatic flavors.
- Season the Lamb Chops: Place the lamb chops on a large plate or shallow dish. Generously season both sides of the chops with salt and pepper. Then, coat each chop with the garlic and rosemary paste, guaranteeing an even distribution over the meat.
- Marinate the Chops: Cover the lamb chops with plastic wrap or transfer them to a sealable plastic bag. Let them marinate in the refrigerator for at least 1 hour, allowing the flavors to penetrate the meat. For best results, marinate overnight.
- Preheat the Grill or Pan: About 30 minutes before cooking, remove the lamb chops from the refrigerator to bring them to room temperature. Preheat your grill or a heavy skillet over medium-high heat for about 5 minutes.
- Cook the Lamb Chops: Place the lamb chops on the hot grill or skillet. Cook for about 3-4 minutes on each side for medium-rare, or adjust the cooking time to your preferred level of doneness. Use tongs to flip the chops, avoiding piercing the meat to retain juices.
- Rest and Serve: Once cooked, remove the lamb chops from the heat and let them rest for about 5 minutes. This allows the juices to redistribute throughout the meat. Serve the chops with lemon wedges for an added burst of freshness.
Extra Tips:
For a more intense flavor, consider adding a splash of balsamic vinegar to the marinade, which complements the earthiness of rosemary and the richness of the lamb.
If grilling, guarantee the grill grates are well-oiled to prevent sticking. Always use a meat thermometer to check the internal temperature of the lamb; it should reach about 145°F (63°C) for medium-rare.
Letting the meat rest is essential, as it guarantees the lamb remains juicy and tender when served.
Balsamic Glazed Brussels Sprouts
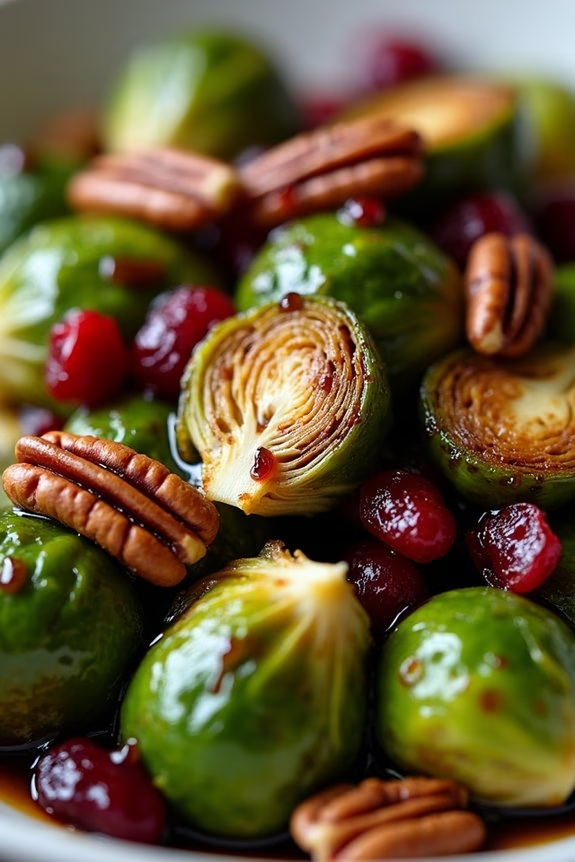
Elevate your Paleo Christmas dinner with a dish that balances the natural bitterness of Brussels sprouts with the sweet tanginess of balsamic glaze. Balsamic Glazed Brussels Sprouts aren’t only a visually appealing addition to your holiday table but also a flavorful one. This dish brings together the hearty texture of Brussels sprouts with the rich, complex flavors of balsamic vinegar, creating a side that complements any Paleo main course.
The crispy outer leaves, tender centers, and caramelized glaze make this a favorite among both sprout lovers and skeptics alike. The magic of this recipe lies in its simplicity and the quality of its ingredients. By roasting the Brussels sprouts, you enhance their natural flavors, while the balsamic glaze adds a sophisticated touch.
This dish is perfect for those who want to enjoy a festive meal without compromising their dietary preferences. It’s nutritious, easy to prepare, and sure to impress your guests with its delightful combination of flavors.
Ingredients (Serves 4-6):
- 2 pounds Brussels sprouts, trimmed and halved
- 3 tablespoons olive oil
- Salt, to taste
- Freshly ground black pepper, to taste
- 1/2 cup balsamic vinegar
- 1 tablespoon honey (optional, for added sweetness)
- 1/4 cup toasted pecans (optional for garnish)
- 2 tablespoons dried cranberries (optional for garnish)
Cooking Instructions:
- Preheat the Oven: Begin by preheating your oven to 400°F (200°C). This temperature guarantees the Brussels sprouts roast evenly, giving you that desired crispy edge.
- Prepare the Brussels Sprouts: Rinse the Brussels sprouts under cold water, trim the ends, and cut them in half. This uniform size helps them cook evenly.
- Season the Brussels Sprouts: In a large mixing bowl, toss the halved Brussels sprouts with olive oil, salt, and freshly ground black pepper. Confirm they’re well-coated for even roasting.
- Roast the Brussels Sprouts: Spread the seasoned Brussels sprouts in a single layer on a baking sheet. Roast them in the preheated oven for about 20-25 minutes, stirring halfway through, until they’re golden brown and tender.
- Prepare the Balsamic Glaze: While the Brussels sprouts are roasting, pour the balsamic vinegar into a small saucepan. Add honey if you prefer a sweeter glaze. Heat over medium heat, stirring occasionally, until it reduces to about half its original volume and thickens slightly, about 10 minutes.
- Combine and Serve: Once the Brussels sprouts are roasted to perfection, transfer them to a serving dish. Drizzle the balsamic glaze over the top, ensuring an even coating. For extra flair, sprinkle toasted pecans and dried cranberries over the dish for added texture and flavor.
Extra Tips:
When selecting Brussels sprouts, opt for smaller ones as they tend to be sweeter and more tender. If your balsamic glaze becomes too thick, simply warm it slightly and add a splash of water to achieve the desired consistency.
For additional flavor, consider adding a pinch of chili flakes to the glaze for a subtle heat. Remember not to overcrowd the baking sheet; giving each sprout space ensures they roast rather than steam, achieving the perfect crispy texture.
Cauliflower and Parsnip Mash
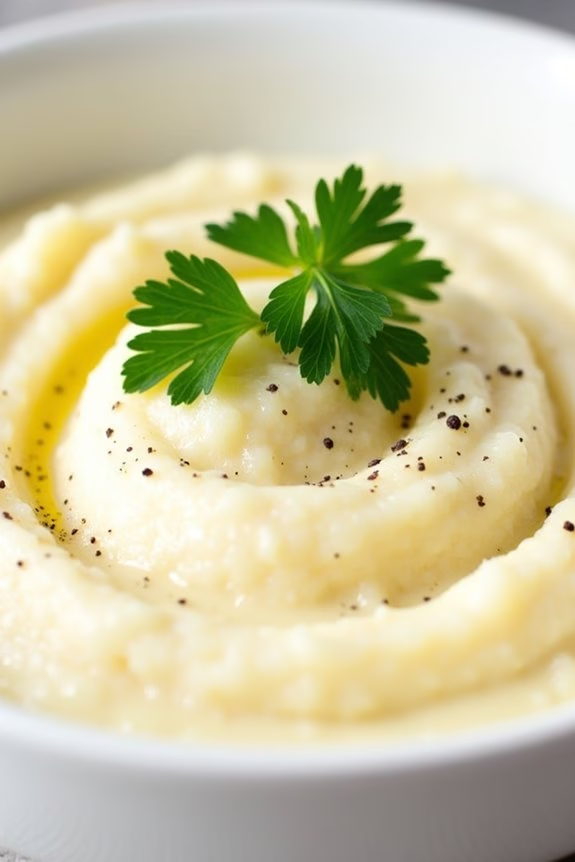
This Paleo-friendly Cauliflower and Parsnip Mash is a creamy and delicious alternative to traditional mashed potatoes, perfect for your holiday feast. The combination of cauliflower and parsnips not only offers a unique and slightly sweet taste but also provides a nutrient-rich side dish that complements any main course.
The dish can be seasoned to your preference, allowing you to experiment with flavors while maintaining a healthy and satisfying dish that aligns with Paleo dietary guidelines. The smooth texture of the mash is achieved by blending cooked cauliflower and parsnips with rich, full-fat coconut milk and a touch of garlic for depth.
This side dish is designed to be the perfect accompaniment to your Christmas meal, adding a light yet flavorful option to your festive table. Not only is this dish easy to prepare, but it can also be made ahead of time, allowing you to focus on other holiday preparations.
Ingredients (Serves 4-6):
- 1 large head of cauliflower, chopped into florets
- 3 medium parsnips, peeled and chopped
- 3 cloves of garlic, minced
- 1/2 cup full-fat coconut milk
- 2 tablespoons extra virgin olive oil
- Salt and pepper to taste
- Fresh parsley, chopped, for garnish
Instructions:
- Prepare the Vegetables: Begin by washing and chopping the cauliflower into florets. Peel the parsnips and chop them into evenly sized pieces to guarantee uniform cooking.
- Cook the Vegetables: In a large pot, add the cauliflower florets and parsnip pieces. Cover them with water and bring to a boil over medium-high heat. Cook until both the cauliflower and parsnips are tender, about 15-20 minutes. You should be able to easily pierce them with a fork.
- Drain the Vegetables: Once cooked, drain the water from the pot and return the vegetables to the pot. Allow them to steam dry for a minute over low heat to remove excess moisture.
- Blend the Vegetables: Add the minced garlic, coconut milk, and olive oil to the pot. Using an immersion blender or a food processor, blend the ingredients until smooth and creamy. If the mash is too thick, you can add a little more coconut milk to reach your desired consistency.
- Season the Mash: Once blended, season the mash with salt and pepper to taste. Stir well to make sure the seasoning is evenly distributed throughout.
- Serve: Transfer the mash to a serving bowl and garnish with freshly chopped parsley. Serve warm as a delightful side dish to your Paleo Christmas dinner.
Extra Tips:
When preparing the Cauliflower and Parsnip Mash, make certain that the vegetables are cooked thoroughly, as undercooked parsnips can result in a lumpy mash. If you prefer a richer flavor, consider roasting the garlic before adding it to the mash.
Additionally, you can customize the seasoning by adding herbs such as thyme or rosemary for an aromatic touch. For an even smoother texture, pass the mash through a fine-mesh sieve before serving. Reheating leftovers is simple—just add a splash of coconut milk to restore the creamy consistency.
Sweet Potato Casserole With Pecan Topping
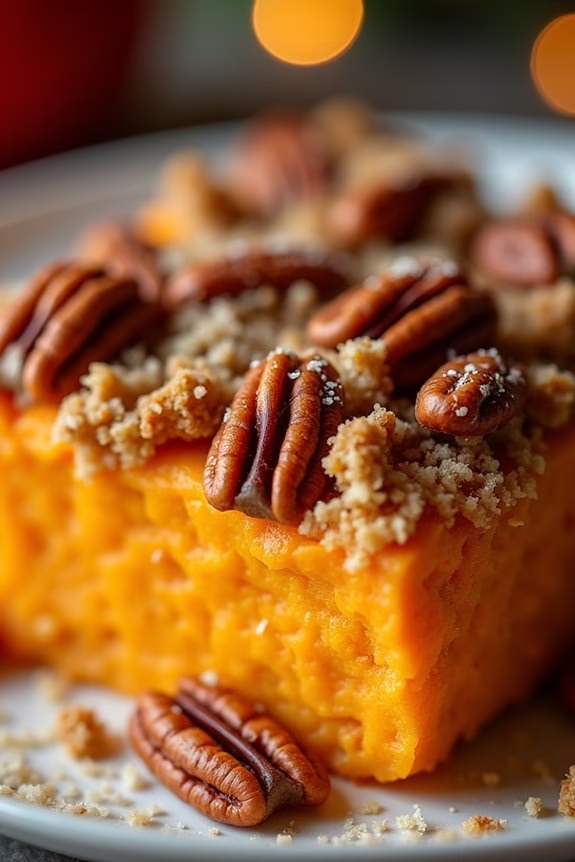
Sweet Potato Casserole With Pecan Topping is a delightful addition to any Paleo Christmas dinner, offering a naturally sweet and nutty taste that complements the festive season. This dish combines the creamy texture of sweet potatoes with a crunchy pecan topping, making it a crowd-pleaser that’s both nutritious and satisfying.
By using natural ingredients and avoiding refined sugars and grains, this Paleo-friendly recipe guarantees that you can indulge in holiday flavors while sticking to your dietary preferences.
The casserole features a smooth sweet potato base, enhanced with a hint of spices, and is crowned with a generous layer of pecans that provide a delightful crunch. This dish can easily be prepared ahead of time, allowing you to focus on other holiday preparations.
Whether you’re serving it as a side dish or as a part of a larger festive spread, Sweet Potato Casserole With Pecan Topping is sure to be a hit with family and friends alike.
Ingredients (serves 4-6):
- 4 large sweet potatoes
- 1/4 cup coconut milk
- 1/4 cup coconut oil, melted
- 1/4 cup maple syrup
- 1 teaspoon vanilla extract
- 1 teaspoon ground cinnamon
- 1/2 teaspoon nutmeg
- 1/4 teaspoon salt
Topping:
- 1 cup pecans, chopped
- 3 tablespoons almond flour
- 3 tablespoons coconut sugar
- 3 tablespoons coconut oil, melted
Instructions:
- Prepare Sweet Potatoes: Preheat your oven to 375°F (190°C). Wash the sweet potatoes thoroughly and pierce them with a fork. Place them on a baking sheet lined with foil or parchment paper and bake for about 45-60 minutes, or until they’re soft and easily pierced with a knife.
- Make the Sweet Potato Mash: Once the sweet potatoes are cooked, allow them to cool slightly before peeling. Place the peeled sweet potatoes in a large mixing bowl. Add the coconut milk, melted coconut oil, maple syrup, vanilla extract, cinnamon, nutmeg, and salt. Use a potato masher or an electric mixer to blend until the mixture is smooth and creamy.
- Prepare the Pecan Topping: In a separate bowl, combine the chopped pecans, almond flour, coconut sugar, and melted coconut oil. Mix well until all the ingredients are evenly coated and form a crumbly mixture.
- Assemble the Casserole: Spoon the sweet potato mixture into a greased 9×13 inch baking dish, smoothing the top with a spatula. Evenly distribute the pecan topping over the sweet potato layer.
- Bake the Casserole: Place the assembled casserole in the oven and bake for an additional 20-25 minutes, or until the topping is golden brown and crisp. Allow it to cool slightly before serving.
Extra Tips:
For added flavor, consider adding a dash of ginger or allspice to the sweet potato mixture. If you prefer a less sweet topping, reduce the amount of coconut sugar or replace it with additional almond flour.
To save time, you can bake the sweet potatoes a day in advance and store them in the refrigerator until you’re ready to prepare the rest of the dish. When serving, garnish with a sprinkle of extra chopped pecans or a drizzle of maple syrup for an extra festive touch.
Cranberry-Orange Relish
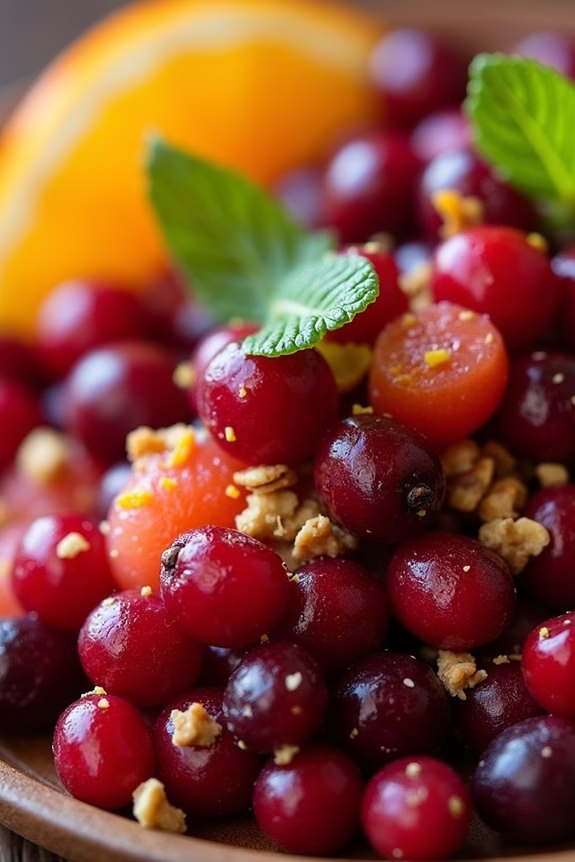
Cranberry-Orange Relish is a delightful accompaniment to any Paleo Christmas dinner, offering a crisp and tangy burst of flavors that perfectly balances the richness of the main course. This relish isn’t only a feast for the palate but also a vibrant addition to your holiday table, with its deep red hues and zesty citrus notes.
By using simple ingredients that adhere to Paleo principles, this dish maintains its natural sweetness and tartness, making it a healthy and delicious choice for those following a Paleo lifestyle. The combination of cranberries and oranges creates a harmonious blend that highlights the natural sweetness of the oranges with the tartness of the cranberries.
This relish is incredibly easy to prepare and can be made ahead of time, allowing the flavors to meld beautifully. Served cold or at room temperature, it pairs wonderfully with roasted meats and veggies, adding a crisp contrast to heavier dishes.
Ingredients (Serves 4-6):
- 12 ounces fresh cranberries
- 1 large orange (organic, if possible)
- 1/2 cup raw honey or maple syrup (adjust for sweetness)
- 1/4 teaspoon ground cinnamon
- 1/8 teaspoon ground cloves
- 1/8 teaspoon sea salt
- 1/2 cup chopped walnuts (optional)
- 1/4 cup chopped fresh mint leaves (optional for garnish)
Cooking Instructions:
- Prepare the Orange: Begin by thoroughly washing the orange. Zest the orange using a microplane or zester, taking care not to include the bitter white pith. Once zested, peel the orange and separate it into segments, removing any seeds.
- Blend Ingredients: In a food processor, combine the fresh cranberries, orange zest, and orange segments. Pulse until the mixture is coarsely chopped. Avoid over-processing, as you want to maintain some texture in the relish.
- Sweeten the Relish: Add the raw honey or maple syrup, ground cinnamon, ground cloves, and sea salt to the cranberry-orange mixture in the food processor. Pulse a few more times until everything is well mixed.
- Chill the Relish: Transfer the relish to a serving bowl. Cover it with plastic wrap or a lid and refrigerate for at least 2 hours. This resting time allows the flavors to meld and the relish to thicken slightly.
- Optionally Add Nuts: Before serving, stir in the chopped walnuts if using. They add a delightful crunch and complement the flavors of the relish.
- Garnish and Serve: Just before serving, garnish the top of the relish with chopped fresh mint leaves if desired. This adds a nice pop of color and a crisp aroma.
Extra Tips:
When preparing the Cranberry-Orange Relish, consider the sweetness of your chosen sweetener, as cranberries can be quite tart. If you prefer a less sweet relish, start with a smaller amount of honey or syrup, tasting as you go, and adjust to your preference.
This relish can be made up to three days in advance, making it an excellent make-ahead dish for the busy holiday season. Additionally, for a nuttier flavor, lightly toast the walnuts before adding them to the relish. This simple step enhances their natural oils and adds a deliciously warm flavor to the dish.
Roasted Butternut Squash Salad
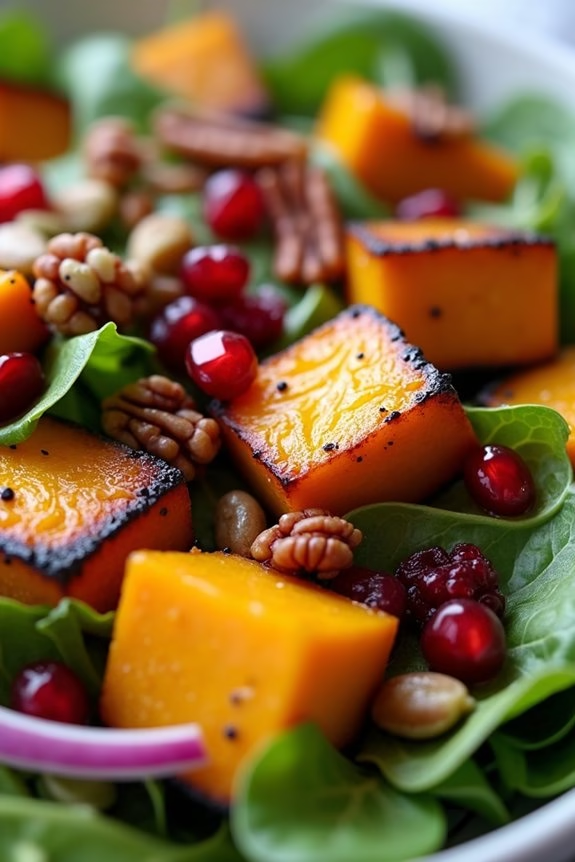
If you’re looking for a delicious and healthy dish to serve as part of your Paleo Christmas dinner, the Roasted Butternut Squash Salad is a perfect choice. This salad combines the sweet and nutty flavors of roasted butternut squash with a variety of fresh and vibrant ingredients, making it a standout dish on any holiday table.
Not only is it full of flavor, but it’s also packed with nutrients, guaranteeing you and your guests enjoy a wholesome meal that aligns with Paleo dietary principles. The combination of roasted squash, crunchy nuts, fresh greens, and a tangy vinaigrette brings together a symphony of textures and tastes that are sure to delight your palate.
This salad isn’t only visually appealing but also offers a satisfying and filling option for those adhering to a Paleo lifestyle. With its warm colors and seasonal flavors, this dish is bound to become a new holiday favorite.
Ingredients for 4-6 servings:
- 1 large butternut squash, peeled and cubed
- 2 tablespoons olive oil
- Salt and pepper to taste
- 1/2 teaspoon ground cinnamon
- 5 ounces mixed salad greens (such as spinach, arugula, and kale)
- 1/2 cup pomegranate seeds
- 1/4 cup pecans, roughly chopped
- 1/4 cup pumpkin seeds
- 1/4 cup dried cranberries
- 1/4 cup red onion, thinly sliced
For the Vinaigrette:
- 3 tablespoons apple cider vinegar
- 1 tablespoon honey or maple syrup
- 1 teaspoon Dijon mustard
- 1/3 cup olive oil
- Salt and pepper to taste
Cooking Instructions:
- Prepare the Oven and Squash: Preheat your oven to 400°F (200°C). Peel and cube the butternut squash into bite-sized pieces, then place them on a baking sheet lined with parchment paper.
- Season and Roast: Drizzle 2 tablespoons of olive oil over the squash cubes, and season with salt, pepper, and ground cinnamon. Toss the squash to guarantee an even coating. Roast in the preheated oven for 25-30 minutes, or until the squash is tender and lightly caramelized, stirring halfway through.
- Prepare the Vinaigrette: While the squash is roasting, prepare the vinaigrette by whisking together apple cider vinegar, honey or maple syrup, Dijon mustard, and olive oil in a small bowl. Season with salt and pepper to taste. Set aside.
- Assemble the Salad: In a large bowl, combine the mixed salad greens, pomegranate seeds, chopped pecans, pumpkin seeds, dried cranberries, and thinly sliced red onion.
- Add Roasted Squash: Once the butternut squash is done roasting, allow it to cool slightly before adding it to the salad mixture.
- Dress the Salad: Drizzle the prepared vinaigrette over the salad and gently toss to combine all the ingredients, guaranteeing the dressing evenly coats the salad.
- Serve Immediately: Transfer the salad to a serving platter or individual plates and serve immediately for the best taste and texture.
Extra Tips:
When preparing the Roasted Butternut Squash Salad, it’s important to cut the squash into uniform pieces to guarantee even roasting.
Feel free to experiment with other nuts and seeds if you prefer different textures or flavors. Toasting the pecans and pumpkin seeds can add an extra layer of flavor.
For those avoiding sweeteners, the honey or maple syrup in the vinaigrette can be omitted or replaced with a sweeter fruit like dates.
Finally, this salad can be made in advance, but wait to dress it until just before serving to keep the greens fresh and crisp.
Almond-Crusted Salmon
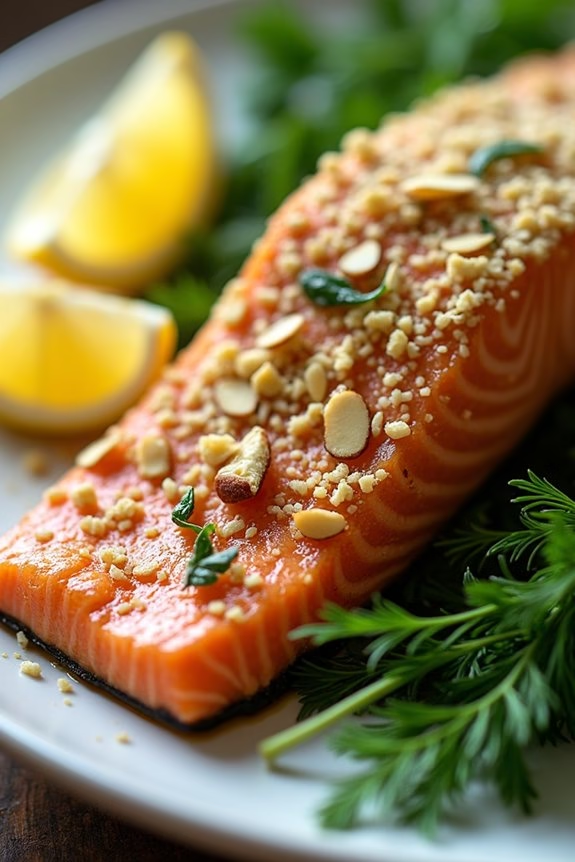
Almond-Crusted Salmon is a delightful and healthy dish that fits perfectly into a Paleo Christmas Dinner. This recipe combines the rich flavors of salmon with the crunchy texture of almonds, creating a dish that’s both satisfying and nutritious. The almond crust adds a wonderful nuttiness and enhances the natural flavors of the salmon, making it a standout dish on your holiday table.
This recipe isn’t only pleasing to the palate but also adheres to the principles of a Paleo diet, guaranteeing you can indulge in festive flavors without compromising your dietary preferences.
Perfect for serving 4-6 people, this Almond-Crusted Salmon is easy to prepare and cook, allowing you to spend more time enjoying the holiday with your loved ones. The combination of fresh herbs, lemon zest, and almonds creates a delicious crust that seals in the moisture of the salmon, resulting in a tender and juicy main course.
Paired with your favorite Paleo-friendly sides, this dish is sure to be a crowd pleaser at your Christmas dinner.
Ingredients:
- 4-6 salmon fillets (6-8 ounces each)
- 1 cup almonds, finely chopped or ground
- 2 tablespoons fresh parsley, chopped
- 1 tablespoon fresh dill, chopped
- Zest of 1 lemon
- 2 tablespoons olive oil
- Salt and pepper to taste
- Lemon wedges for serving
Instructions:
- Preheat the Oven: Start by preheating your oven to 400°F (200°C). This will guarantee that the salmon cooks evenly and the almond crust becomes nicely golden and crisp.
- Prepare the Almond Mixture: In a bowl, combine the finely chopped almonds, parsley, dill, lemon zest, salt, and pepper. Mix well to guarantee that the flavors are evenly distributed throughout the almond mixture.
- Coat the Salmon: Pat the salmon fillets dry with a paper towel to remove any excess moisture. Brush each fillet with olive oil to help the almond mixture adhere better. Press the almond mixture onto the top of each salmon fillet, guaranteeing that it forms a thick, even layer.
- Bake the Salmon: Place the coated salmon fillets on a baking sheet lined with parchment paper or a non-stick baking mat. Bake in the preheated oven for about 12-15 minutes, or until the salmon flakes easily with a fork and the almond crust is golden brown.
- Serve: Once cooked, remove the salmon from the oven and let it rest for a few minutes. Serve with lemon wedges on the side to squeeze over the top, which will enhance the flavors of the dish.
Extra Tips:
When preparing the almond crust, make sure the almonds are finely chopped or ground to guarantee they adhere well to the salmon. If you prefer a finer texture, a food processor can be used to achieve this consistency.
Additionally, feel free to customize the herbs used in the crust to match your taste preferences, such as adding thyme or basil for a different flavor profile.
Finally, if you find that the almond crust is browning too quickly in the oven, you can loosely cover the salmon with aluminum foil to prevent it from burning while the fish continues to cook.
Stuffed Acorn Squash

Stuffed acorn squash is a delightful and hearty dish that makes for a perfect centerpiece on a Paleo Christmas dinner table. This dish combines the warm, nutty flavors of acorn squash with a savory and aromatic filling, creating a satisfying meal that’s both nutritious and festive. The stuffing, typically a mixture of ground meat, vegetables, nuts, and herbs, is nestled within the roasted halves of acorn squash, which are naturally sweet and tender.
Not only is this dish visually appealing, but it also delivers a rich flavor profile and a variety of textures that will impress your guests.
This recipe for stuffed acorn squash is designed to serve 4-6 people, making it an ideal choice for a small family gathering or an intimate holiday dinner. By incorporating wholesome, Paleo-friendly ingredients, this dish guarantees a healthy yet indulgent meal for those following a Paleo diet.
Whether you’re new to Paleo cooking or a seasoned pro, this recipe will offer a festive touch to your holiday menu without compromising on flavor or nutrition.
Ingredients:
- 3 medium acorn squashes
- 1 pound ground turkey or beef
- 1 medium onion, diced
- 2 cloves garlic, minced
- 1 cup mushrooms, chopped
- 1 cup spinach, chopped
- 1/2 cup pecans, chopped
- 1/4 cup dried cranberries
- 1 teaspoon dried thyme
- 1 teaspoon dried sage
- Salt and pepper to taste
- 2 tablespoons olive oil
Cooking Instructions:
- Prepare the Squash: Preheat your oven to 400°F (200°C). Cut each acorn squash in half lengthwise and remove the seeds. Brush the cut sides with olive oil and place them cut-side down on a baking sheet. Roast in the preheated oven for 25-30 minutes, or until the flesh is tender.
- Cook the Filling: While the squash is roasting, heat 1 tablespoon of olive oil in a large skillet over medium heat. Add the diced onion and minced garlic, sautéing until the onion is translucent. Add the ground turkey or beef, breaking it up with a spoon, and cook until browned.
- Add Vegetables and Nuts: Stir in the chopped mushrooms, spinach, pecans, and dried cranberries. Season with thyme, sage, salt, and pepper. Cook the mixture for an additional 5-7 minutes, or until the vegetables are tender and the flavors are well combined.
- Stuff the Squash: Once the acorn squash is done roasting, remove it from the oven. Carefully flip each half over and fill the cavity with the prepared stuffing mixture, packing it in tightly.
- Bake the Stuffed Squash: Return the stuffed squash halves to the oven and bake for an additional 15 minutes, allowing the flavors to meld and the top to become slightly crispy.
- Serve and Enjoy: Remove the stuffed acorn squash from the oven and allow them to cool slightly before serving. Enjoy this dish warm as a main course or a hearty side.
Extra Tips:
When selecting your acorn squash, look for ones that are firm with a smooth, dark green skin. This indicates ripeness and will guarantee a sweet, tender flesh.
If you prefer a slightly sweeter stuffing, consider adding a drizzle of maple syrup over the top before the final bake. Additionally, feel free to experiment with different types of ground meat or add other vegetables like bell peppers or zucchini to the stuffing for a personalized touch.
Chocolate Avocado Mousse
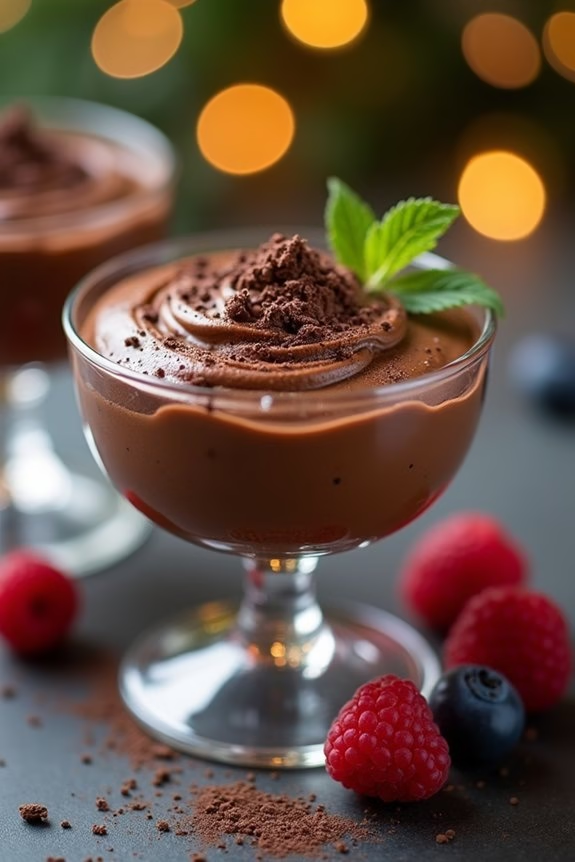
This delectable Chocolate Avocado Mousse is the perfect paleo-friendly dessert to add to your Christmas dinner menu. It’s rich, creamy, and incredibly satisfying, making it a delightful treat for those who are looking to enjoy a guilt-free dessert during the festive season.
The use of avocados not only gives this mousse its silky texture but also provides a healthy dose of good fats, vitamins, and minerals. Combined with cocoa powder, this dessert offers a chocolatey indulgence that will appeal to everyone, from health-conscious eaters to traditional dessert lovers.
The beauty of this recipe lies in its simplicity and the use of natural, wholesome ingredients. This mousse is naturally sweetened with honey or maple syrup, guaranteeing that it remains free from refined sugars, fitting perfectly into a paleo diet.
It’s quick to prepare and can be made ahead of time, making it a convenient choice for holiday gatherings. Whether you’re serving it as a festive end to your Christmas dinner or simply enjoying it as a treat during the holiday season, this Chocolate Avocado Mousse is sure to impress.
Ingredients for 4-6 people:
- 4 ripe avocados
- 1 cup unsweetened cocoa powder
- 1 cup honey or maple syrup
- 1 tablespoon vanilla extract
- 1/4 teaspoon sea salt
- 1/4 cup coconut milk
- Dark chocolate shavings (optional, for garnish)
- Fresh berries (optional, for garnish)
Cooking Instructions:
- Prepare the Avocados: Begin by cutting the avocados in half and removing the pits. Use a spoon to scoop the flesh into a food processor or blender. Confirm that the avocados are ripe and free from any brown spots to achieve the creamiest texture.
- Add the Dry Ingredients: To the avocados, add the unsweetened cocoa powder and sea salt. These ingredients will give the mousse its rich chocolate flavor, so make sure you use high-quality cocoa powder for the best results.
- Sweeten the Mousse: Pour in the honey or maple syrup, along with the vanilla extract. These ingredients will add sweetness and depth of flavor to the mousse.
- Blend Until Smooth: Add the coconut milk to the mixture, then blend all the ingredients together until smooth and creamy. You may need to stop and scrape down the sides of the blender to confirm everything is well mixed.
- Adjust Consistency: If the mousse is too thick, you can add a little more coconut milk to reach your desired consistency. Blend again until the mousse is silky and smooth.
- Chill the Mousse: Once blended, transfer the mousse to a bowl or individual serving cups. Cover with plastic wrap and refrigerate for at least 2 hours, allowing the flavors to meld and the mousse to set.
- Garnish and Serve: Before serving, garnish the mousse with dark chocolate shavings or fresh berries for a festive touch. These optional toppings can add a contrasting texture and a pop of color to your dessert.
Extra Tips:
When making Chocolate Avocado Mousse, it’s essential to use ripe avocados as they provide the best creamy texture and mild flavor. If your avocados aren’t ripe enough, they may impart a slightly bitter taste.
Additionally, feel free to adjust the sweetness to your preference by adding more or less honey or maple syrup. For a more intense chocolate flavor, you can increase the cocoa powder slightly.
Remember that the mousse can be made a day in advance, making it a stress-free addition to your holiday meal prep. Enjoy your healthy and delicious paleo dessert!
Grain-Free Gingerbread Cookies

Gingerbread cookies are a classic holiday treat, and with this grain-free version, you can enjoy the festive flavors while complying with a paleo diet. These cookies are made with almond and coconut flours, which give them a delightful texture and a nutty undertone. The warm spices of ginger, cinnamon, and cloves create an aromatic experience that fills your kitchen with the essence of Christmas.
This recipe is perfect for sharing with family and friends, as it yields enough cookies for 4-6 people. Whether you shape them into traditional gingerbread men or use other festive cookie cutters, these grain-free gingerbread cookies are sure to be a hit. Plus, they’re easy to make and can be customized with your favorite decorations, such as paleo-friendly icing or a sprinkle of coconut sugar.
Ingredients (Serving Size: 4-6 people):
- 2 cups almond flour
- 1/4 cup coconut flour
- 1/2 teaspoon baking soda
- 1 tablespoon ground ginger
- 1 teaspoon ground cinnamon
- 1/4 teaspoon ground cloves
- 1/4 teaspoon salt
- 1/4 cup coconut oil, melted
- 1/4 cup maple syrup
- 1 teaspoon vanilla extract
- 1 large egg
Cooking Instructions:
- Prepare the Dry Ingredients: In a large bowl, whisk together the almond flour, coconut flour, baking soda, ground ginger, cinnamon, cloves, and salt until well combined. This guarantees that the spices and leavening agent are evenly distributed.
- Mix Wet Ingredients: In a separate bowl, combine the melted coconut oil, maple syrup, vanilla extract, and egg. Whisk until the mixture is smooth and the egg is fully incorporated.
- Combine Wet and Dry Ingredients: Gradually add the wet ingredients to the dry ingredients, stirring with a spatula or wooden spoon until a dough forms. The dough should be thick and slightly sticky.
- Chill the Dough: Wrap the dough in plastic wrap and refrigerate for at least 30 minutes. Chilling the dough helps it firm up, making it easier to roll out and cut into shapes.
- Preheat the Oven: Preheat your oven to 350°F (175°C) and line a baking sheet with parchment paper.
- Roll Out the Dough: On a lightly floured surface (using additional coconut flour), roll out the chilled dough to about 1/4 inch thickness. Use cookie cutters to cut out your desired shapes, then transfer them to the prepared baking sheet.
- Bake the Cookies: Bake in the preheated oven for 8-10 minutes, or until the edges are lightly golden. Keep an eye on them to prevent over-baking.
- Cool the Cookies: Allow the cookies to cool on the baking sheet for a few minutes before transferring them to a wire rack to cool completely. This helps them firm up and achieve a perfect texture.
Extra Tips:
When making grain-free gingerbread cookies, it’s important to handle the dough gently to prevent it from becoming too crumbly. If you find the dough too sticky to roll out, lightly dust your rolling pin and surface with coconut flour.
Additionally, these cookies can be stored in an airtight container for up to a week, making them a great make-ahead option for your holiday gatherings. If you wish to decorate your cookies, consider making a simple icing with coconut butter or use melted dark chocolate for a paleo-friendly option.