

As Christmas gets closer, the excitement of holiday potlucks fills the air. Gathering around a beautifully set table is a lovely tradition, but the thought of cleanup can be daunting. That’s why I’ve put together these 13 one-pan recipes that make life so much easier. From a Baked Cranberry Brie Bread Bowl to Herb-Roasted Chicken with colorful veggies, these dishes offer delicious flavors with minimal fuss. You’ll have more time to enjoy the festive season with loved ones.
Baked Cranberry Brie Bread Bowl
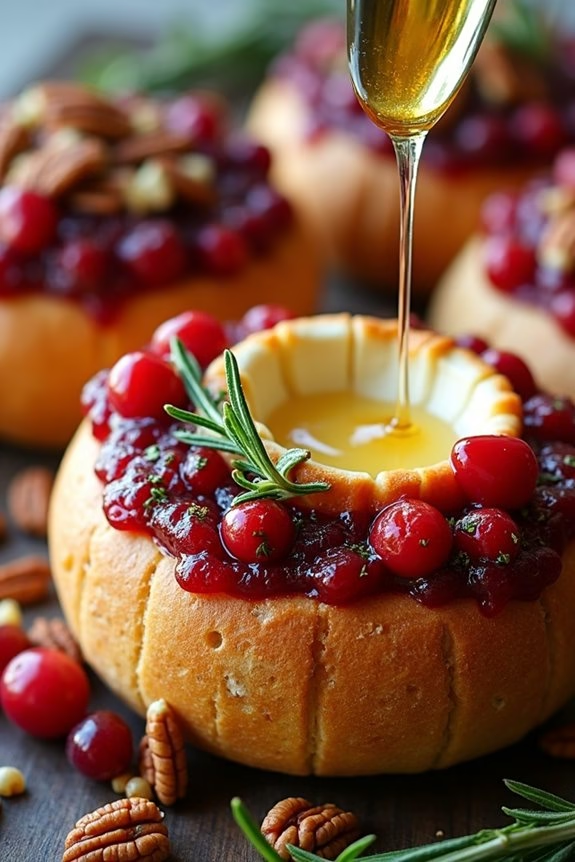
Baked Cranberry Brie Bread Bowl is a festive and delicious appetizer that’s perfect for any Christmas potluck. This dish combines the creamy richness of brie cheese with the sweet tartness of cranberries, all nestled inside a warm, crusty bread bowl.
It’s easy to prepare and makes a stunning centerpiece for your holiday table. The gooey cheese oozing from the bread bowl paired with the cranberries’ bright flavor will surely make it a crowd favorite.
This recipe is designed to serve 4-6 people, making it ideal for small gatherings or as part of a larger spread. By using a single pan, you minimize cleanup, allowing you to enjoy more time with family and friends.
The combination of textures and flavors makes this dish both satisfying and elegant, and it’s sure to impress your guests with minimal effort.
Ingredients:
- 1 round sourdough bread loaf
- 1 wheel of brie cheese (approximately 8 ounces)
- 1/2 cup cranberry sauce (homemade or store-bought)
- 1/4 cup chopped pecans
- 1 tablespoon fresh rosemary, finely chopped
- 1 tablespoon honey
- Olive oil for brushing
- Salt and pepper to taste
Cooking Instructions:
- Preheat and Prep: Preheat your oven to 350°F (175°C). Prepare a baking sheet by lining it with parchment paper for easy cleanup.
- Prepare the Bread Bowl: Cut the top off the sourdough loaf and scoop out the center to create a bowl, leaving about 1-inch thick walls. Be careful not to cut all the way through the bottom. Set aside the bread you removed for serving.
- Prepare the Brie: Place the wheel of brie inside the bread bowl. Use a small knife to score the top of the brie in a crisscross pattern, which will allow the cheese to melt more evenly.
- Add Toppings: Spread the cranberry sauce over the top of the brie. Sprinkle chopped pecans and fresh rosemary over the cranberry sauce. Drizzle the honey on top for an added touch of sweetness.
- Season and Brush: Lightly brush the outside of the bread with olive oil and season with a pinch of salt and pepper. This will help the bread become golden and crisp as it bakes.
- Bake the Bread Bowl: Place the bread bowl on the prepared baking sheet and bake in the preheated oven for 20-25 minutes, or until the brie is melted and bubbling and the bread is toasted.
- Serve: Remove from the oven and let it cool for a few minutes before serving. Use the reserved bread pieces for dipping into the melted brie or serve with crackers or sliced vegetables.
Extra Tips: For an added layer of flavor, consider toasting the pecans lightly before adding them to the bread bowl. This will enhance their natural nuttiness.
If you prefer a more complex cranberry flavor, mix in a pinch of cinnamon or orange zest into the cranberry sauce before topping the brie. Finally, if you find the bread bowl becoming too dark during baking, tent it with aluminum foil to prevent further browning while allowing the brie to fully melt.
Enjoy this delightful dish warm for the best texture and taste!
Herb-Roasted Sheet Pan Chicken With Vegetables
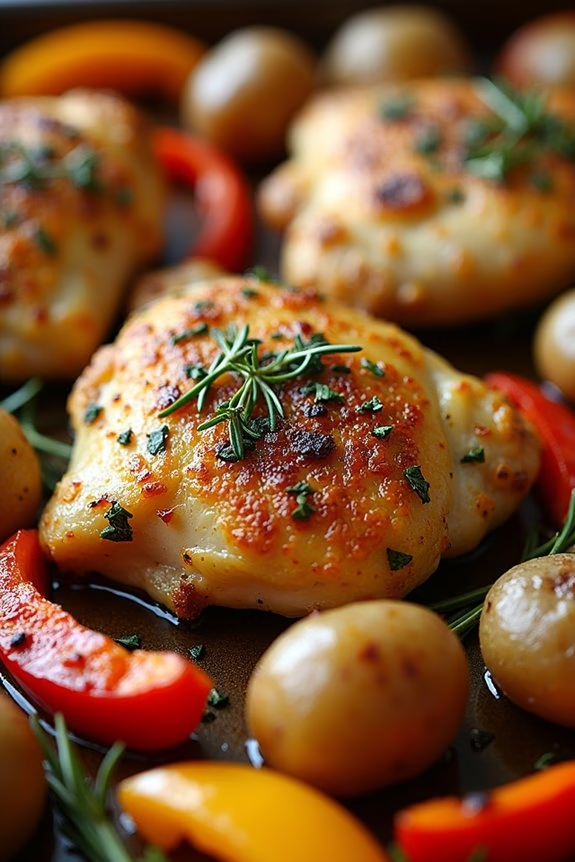
Herb-Roasted Sheet Pan Chicken With Vegetables is a delightful and easy-to-make dish that’s perfect for a Christmas potluck. This recipe combines tender, juicy chicken with a medley of colorful, roasted vegetables, all seasoned with aromatic herbs that bring a festive flair to your table.
The best part is that everything is cooked on one sheet pan, making cleanup a breeze and allowing you to spend more time enjoying the holiday with friends and family.
This dish isn’t only visually appealing but also packed with flavor. The chicken is marinated with a blend of herbs that infuse it with a savory richness, while the vegetables caramelize beautifully, adding a slight sweetness to the dish.
It’s a well-balanced meal that can be easily adjusted to suit personal preferences by adding or substituting your favorite vegetables. This recipe serves 4-6 people, making it an ideal choice for gatherings.
Ingredients:
- 4-6 bone-in, skin-on chicken thighs
- 1 pound of baby potatoes, halved
- 1 red bell pepper, sliced
- 1 yellow bell pepper, sliced
- 1 red onion, cut into wedges
- 2 tablespoons olive oil
- 3 cloves garlic, minced
- 1 tablespoon fresh rosemary, chopped
- 1 tablespoon fresh thyme, chopped
- 1 teaspoon dried oregano
- Salt and pepper to taste
- Lemon wedges for serving
Instructions:
- Preheat the Oven: Preheat your oven to 425°F (220°C). This high temperature will help the chicken skin to become crispy and the vegetables to caramelize.
- Prepare the Chicken: Pat the chicken thighs dry with paper towels. In a large bowl, combine the olive oil, minced garlic, rosemary, thyme, oregano, salt, and pepper. Add the chicken thighs to the bowl and toss to coat them evenly with the herb mixture.
- Prepare the Vegetables: In another bowl, toss the baby potatoes, bell peppers, and red onion with a bit of olive oil, salt, and pepper, ensuring they’re well coated.
- Assemble on Sheet Pan: Arrange the chicken thighs on a large sheet pan. Scatter the prepared vegetables around the chicken in a single layer, making sure not to overcrowd the pan to allow even roasting.
- Roast the Dish: Place the sheet pan in the preheated oven and roast for about 35-40 minutes. Check for doneness by ensuring the chicken reaches an internal temperature of 165°F (75°C) and the vegetables are tender and slightly caramelized.
- Serve: Once cooked, remove the sheet pan from the oven. Let the dish rest for a few minutes before serving. Garnish with fresh lemon wedges for a zesty finish.
Extra Tips: For an even more flavorful dish, consider marinating the chicken overnight in the herb mixture. This allows the flavors to penetrate deeper into the meat.
You can also experiment with different vegetables like carrots, Brussels sprouts, or zucchini, based on your preference. If you notice the vegetables or chicken browning too quickly, cover them loosely with foil and continue roasting until they’re fully cooked.
One-Pan Garlic Butter Shrimp and Broccoli
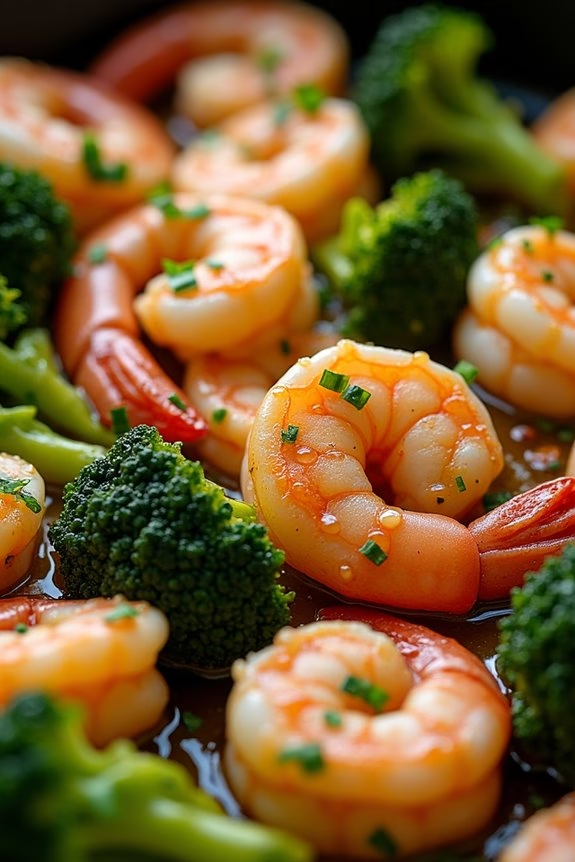
Searching for a crowd-pleasing dish that’s both delicious and easy to prepare for your Christmas potluck? Seek no further than the One-Pan Garlic Butter Shrimp and Broccoli. This dish combines succulent shrimp with vibrant, tender broccoli, all drenched in a rich garlic butter sauce.
It’s a perfect choice for those who want to enjoy a flavorful meal without spending hours in the kitchen. The use of a single pan not only simplifies the cooking process but also makes cleanup a breeze, giving you more time to enjoy the festivities.
This recipe serves 4-6 people, making it ideal for family gatherings or holiday parties. The shrimp are seasoned just right, offering a delightful burst of flavor in every bite, while the broccoli adds a nutritious touch to the meal. The garlic butter sauce ties everything together, providing a luscious, savory coating that enhances the natural flavors of the ingredients.
With its quick preparation time and delectable taste, this dish is sure to be a hit at your Christmas potluck.
Ingredients:
- 1.5 pounds large shrimp, peeled and deveined
- 3 cups broccoli florets
- 5 tablespoons unsalted butter
- 6 garlic cloves, minced
- 1 tablespoon olive oil
- 1 lemon, juiced
- Salt and pepper to taste
- 1 teaspoon red pepper flakes (optional)
- 2 tablespoons chopped fresh parsley
Cooking Instructions:
- Prepare the Ingredients: Start by rinsing the shrimp under cold water and pat them dry with paper towels. Trim the broccoli into bite-sized florets if necessary. This guarantees everything cooks evenly.
- Heat the Pan: In a large skillet or sauté pan, heat the olive oil over medium-high heat. Add 3 tablespoons of butter and let it melt completely, creating a rich base for the dish.
- Cook the Shrimp: Add the minced garlic to the pan and sauté for about 30 seconds until fragrant. Then, place the shrimp in a single layer in the pan. Cook for 2-3 minutes on each side until they turn pink and opaque. Remove the shrimp from the pan and set aside.
- Sauté the Broccoli: In the same pan, add the remaining 2 tablespoons of butter. Once melted, add the broccoli florets. Season with salt and pepper to taste. Cook for 5-7 minutes until the broccoli is tender-crisp, stirring occasionally.
- Combine Ingredients: Return the shrimp to the pan with the broccoli. Pour in the lemon juice and sprinkle with red pepper flakes if using. Toss everything together to coat the shrimp and broccoli in the garlic butter sauce.
- Garnish and Serve: Remove the pan from heat and sprinkle the dish with chopped parsley. Serve immediately while hot, making sure to scoop up plenty of the delightful garlic butter sauce with each serving.
Extra Tips:
For an added depth of flavor, consider marinating the shrimp for 15 minutes in a mixture of lemon juice, garlic, and olive oil before cooking. You can also substitute the broccoli with other vegetables like asparagus or bell peppers for variety.
When handling shrimp, verify they’re completely thawed and dry before cooking to achieve the best sear. Adjust the red pepper flakes according to your spice preference, or omit them entirely for a milder dish. Enjoy your One-Pan Garlic Butter Shrimp and Broccoli with a side of crusty bread or over quinoa for a complete meal.
Cheesy Spinach and Artichoke Stuffed Mushrooms

Cheesy Spinach and Artichoke Stuffed Mushrooms are a delightful addition to any Christmas potluck, bringing together the classic flavors of a spinach and artichoke dip with the earthy goodness of mushrooms.
These bite-sized treats are perfect as appetizers or side dishes, offering a rich, creamy filling that’s both satisfying and festive. The cheesy, garlicky mixture is perfectly balanced with the hearty texture of the mushrooms, making it an irresistible bite that will be the highlight of your holiday gathering.
The beauty of this recipe lies in its simplicity, as it only requires a single pan for preparation, guaranteeing minimal cleanup without compromising on flavor. The spinach and artichoke filling is mixed with cream cheese and mozzarella, creating a smooth and savory stuffing for your mushrooms.
Once baked to golden perfection, these mushrooms will be a crowd-pleaser, inviting guests to indulge in their creamy, cheesy goodness. Here’s how you can make this delicious dish for 4-6 people.
Ingredients:
- 24 large button mushrooms
- 1 cup fresh spinach, chopped
- 1 cup canned artichoke hearts, drained and chopped
- 4 oz cream cheese, softened
- 1 cup shredded mozzarella cheese
- 1/4 cup grated Parmesan cheese
- 2 cloves garlic, minced
- 1/4 teaspoon salt
- 1/4 teaspoon black pepper
- 2 tablespoons olive oil
Instructions:
- Preheat the Oven: Start by preheating your oven to 375°F (190°C) to guarantee it’s hot and ready for baking.
- Prepare the Mushrooms: Gently clean the mushrooms with a damp cloth to remove any dirt. Carefully remove the stems, creating a cavity for the filling. Set the mushroom caps aside and finely chop the stems.
- Cook the Filling: In a large skillet over medium heat, add the olive oil. Once hot, add the chopped mushroom stems, minced garlic, and chopped spinach. Sauté for about 3-4 minutes until the spinach wilts and the mixture is fragrant.
- Mix the Filling: In a mixing bowl, combine the sautéed spinach mixture with the chopped artichoke hearts, cream cheese, mozzarella cheese, Parmesan cheese, salt, and pepper. Mix until everything is well combined and creamy.
- Stuff the Mushrooms: Using a spoon, generously fill each mushroom cap with the spinach and artichoke mixture, pressing down slightly to guarantee it’s packed in.
- Bake the Mushrooms: Arrange the stuffed mushrooms on a baking sheet lined with parchment paper. Bake in the preheated oven for 20-25 minutes, or until the tops are golden brown and the mushrooms are tender.
- Serve: Once baked, remove from the oven and let cool slightly. Arrange on a serving platter and enjoy warm.
Extra Tips:
For the best results, choose mushrooms that are similar in size to guarantee even cooking. If you want a bit of a kick, consider adding a pinch of red pepper flakes to the filling.
These mushrooms can be prepared a day in advance and stored in the refrigerator; simply bake them when ready to serve. If you find any leftover filling, it can be used as a delicious dip with crackers or bread.
Maple Glazed Pork Tenderloin With Apples
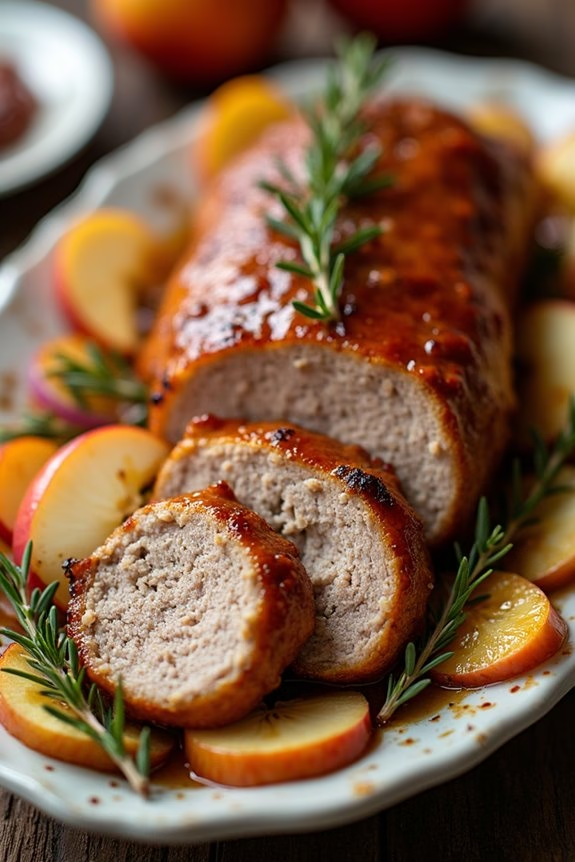
Maple Glazed Pork Tenderloin With Apples is the perfect dish to bring to a Christmas potluck. This recipe combines the rich, savory flavors of pork with the sweetness of maple syrup and the tartness of apples, creating a harmonious balance that will delight any holiday crowd.
The best part? It’s all cooked in one pan, making it easy to prepare and clean up. This dish showcases the beautiful contrast of textures and flavors, with the tender pork, the caramelized apples, and the sticky maple glaze, guaranteeing every bite is a festive delight.
This recipe serves 4-6 people, making it ideal for a small gathering or as part of a larger potluck spread. The combination of ingredients not only infuses the pork with a sweet and tangy flavor but also creates a stunning presentation, with the apples adding a pop of color and a hint of freshness.
The maple glaze not only elevates the taste but also adds a lovely sheen to the dish that makes it look as good as it tastes.
Ingredients:
- 2 pork tenderloins (about 1 pound each)
- 2 tablespoons olive oil
- Salt and pepper to taste
- 1/2 cup pure maple syrup
- 1/4 cup Dijon mustard
- 2 tablespoons apple cider vinegar
- 3 large apples, cored and sliced
- 1 large onion, thinly sliced
- 2 tablespoons butter
- Fresh thyme sprigs for garnish (optional)
Cooking Instructions:
- Preheat Oven: Preheat your oven to 375°F (190°C) to get it ready for roasting the pork to perfection.
- Prepare Pork Tenderloins: Pat the pork tenderloins dry with paper towels. Season them generously with salt and pepper on all sides.
- Sear Pork: In a large oven-safe skillet, heat olive oil over medium-high heat. Add the pork tenderloins and sear them on all sides until browned, about 3-4 minutes per side. Remove the pork from the skillet and set aside.
- Prepare Maple Glaze: In a small bowl, whisk together the maple syrup, Dijon mustard, and apple cider vinegar until well combined. Set aside.
- Caramelize Apples and Onion: In the same skillet, add butter and let it melt. Add the apple slices and onion, and cook until they start to soften and caramelize, about 5-7 minutes.
- Combine and Glaze: Return the pork tenderloins to the skillet, nestled among the apples and onions. Pour the maple glaze over the pork and apples, making sure everything is well-coated.
- Roast in Oven: Transfer the skillet to the preheated oven. Roast for about 20-25 minutes, or until the pork reaches an internal temperature of 145°F (63°C).
- Rest and Serve: Remove the skillet from the oven and let the pork rest for about 5 minutes before slicing. Garnish with fresh thyme sprigs if desired, and serve the pork alongside the apples and onions.
Extra Tips:
When cooking the Maple Glazed Pork Tenderloin With Apples, make certain that you don’t overcook the pork to keep it juicy and tender. A meat thermometer will help you achieve the perfect internal temperature.
If you prefer a thicker glaze, you can simmer the leftover juices from the pan on the stove for a few minutes until it thickens to your liking. Also, consider using a mix of apple varieties for a more complex flavor profile.
Finally, this dish pairs beautifully with a simple green salad or roasted vegetables for a complete meal.
One-Pot Creamy Mushroom Risotto
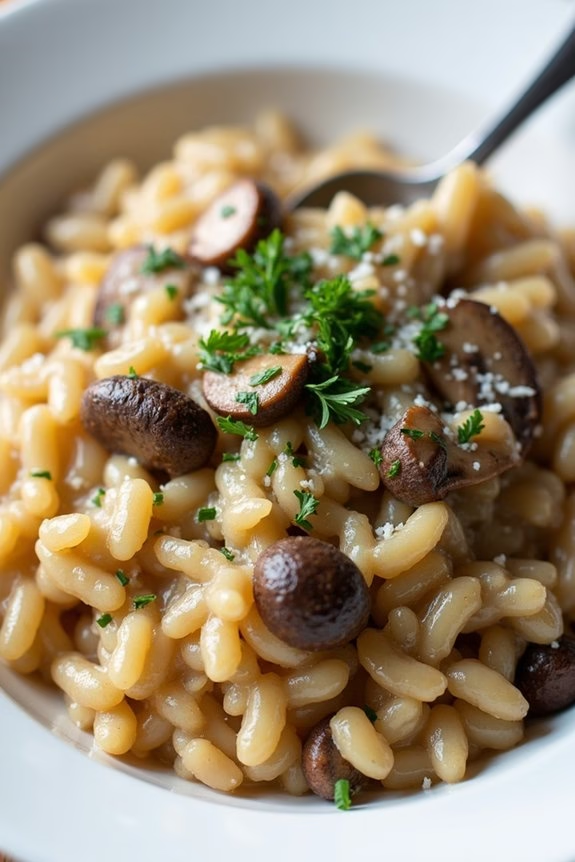
Looking for a delicious, creamy, and comforting dish to bring to your Christmas potluck? This One-Pot Creamy Mushroom Risotto is the perfect choice! Not only is it packed with savory flavors and a rich, velvety texture, but it also simplifies the cooking process by using just one pot. This means less time spent on cleanup and more time to enjoy the festive season with family and friends.
The combination of earthy mushrooms, aromatic herbs, and creamy arborio rice will make this dish a standout at any gathering. This risotto is designed to serve 4-6 people, making it an ideal option for a small to medium-sized group.
Whether you’re a seasoned risotto maker or trying your hand at it for the first time, this recipe is straightforward and easy to follow. The key to a perfect risotto lies in the gradual addition of broth and constant stirring, which helps to release the starches from the rice, creating that signature creamy consistency. With this recipe, you’re sure to impress your guests with a dish that’s both elegant and comforting.
Ingredients:
- 1 ½ cups arborio rice
- 1 pound mushrooms (such as cremini or button), sliced
- 1 medium onion, finely chopped
- 3 cloves garlic, minced
- 4 cups vegetable or chicken broth
- 1 cup dry white wine
- 1 cup grated Parmesan cheese
- 2 tablespoons olive oil
- 2 tablespoons unsalted butter
- Salt and pepper to taste
- 2 tablespoons fresh parsley, chopped
- Optional: 1/4 cup heavy cream for extra creaminess
Instructions:
- Prepare the Ingredients: Begin by chopping the onion and slicing the mushrooms. Mince the garlic and set all ingredients aside.
- Cook the Mushrooms: In a large pan, heat the olive oil over medium heat. Add the mushrooms and cook until they’re golden brown and softened, about 5-7 minutes. Remove the mushrooms from the pan and set aside.
- Sauté the Aromatics: In the same pan, add the butter and allow it to melt. Add the chopped onion and garlic, and sauté until the onion is translucent and fragrant, about 3-4 minutes.
- Toast the Rice: Add the arborio rice to the pan with the onions and garlic. Stir constantly for about 2 minutes, ensuring the rice is well-coated with the butter and oil mixture.
- Deglaze with Wine: Pour in the white wine and stir until the liquid is absorbed by the rice. This step adds depth of flavor to the risotto.
- Add Broth Gradually: Begin adding the broth, one cup at a time, stirring continuously. Allow each addition of broth to be absorbed before adding the next. This process should take about 20-25 minutes, and the rice should be tender and creamy.
- Incorporate Mushrooms and Cheese: Once the rice is cooked, add the cooked mushrooms back into the pan. Stir in the Parmesan cheese until the risotto becomes creamy. Season with salt and pepper to taste.
- Finish with Parsley: Remove the risotto from the heat and stir in the fresh parsley. If you prefer an extra creamy texture, you can also stir in the optional heavy cream at this point.
Extra Tips:
When making risotto, patience is key. Take your time with each step, especially when adding the broth slowly and stirring frequently. This technique helps build the risotto’s creamy texture.
If possible, use warm broth to maintain a consistent temperature and help the rice cook evenly. Feel free to experiment with different types of mushrooms for varied flavors and textures, and remember that the quality of your Parmesan cheese can greatly enhance the overall taste of the dish.
Enjoy your One-Pot Creamy Mushroom Risotto as a delightful addition to your Christmas potluck!
Roasted Butternut Squash and Brussels Sprouts
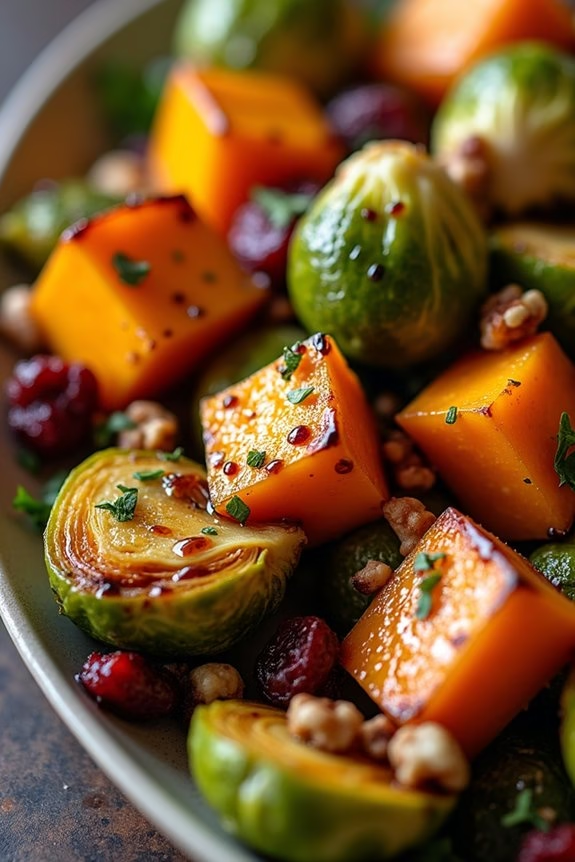
Roasted Butternut Squash and Brussels Sprouts is a delightful and colorful dish perfect for any Christmas potluck. It combines the natural sweetness of butternut squash with the earthy flavors of Brussels sprouts, all brought together with a hint of thyme and a touch of balsamic glaze.
The dish isn’t only visually appealing but also packed with nutrients, making it a healthy addition to your holiday spread. Its simplicity and one-pan preparation make it a convenient choice when you’re juggling multiple dishes during the festive season.
This recipe is designed to serve 4-6 people, making it ideal for small to medium gatherings. The combination of vibrant vegetables and aromatic herbs makes it a standout dish on any holiday table. The roasting process enhances the flavors, creating a caramelized exterior while keeping the vegetables tender inside.
Whether you’re hosting or attending a potluck, this dish will surely impress and satisfy your guests.
Ingredients:
- 1 large butternut squash, peeled and cubed
- 500 grams Brussels sprouts, trimmed and halved
- 3 tablespoons olive oil
- 1 teaspoon salt
- 1/2 teaspoon black pepper
- 1 teaspoon dried thyme
- 2 tablespoons balsamic glaze
- 1/4 cup pecans, roughly chopped (optional)
- 1/4 cup dried cranberries (optional)
Cooking Instructions:
- Preheat the Oven: Begin by preheating your oven to 400°F (200°C). This guarantees that your vegetables roast evenly and develop a nice golden color.
- Prepare the Vegetables: Peel and cube the butternut squash into 1-inch pieces. Trim the Brussels sprouts and cut them in half. Make sure all pieces are roughly the same size to guarantee even cooking.
- Season the Vegetables: In a large mixing bowl, combine the cubed butternut squash and halved Brussels sprouts. Drizzle with olive oil, then sprinkle with salt, black pepper, and dried thyme. Toss everything together until the vegetables are well coated with the seasoning.
- Arrange on Baking Sheet: Spread the seasoned vegetables in a single layer on a large baking sheet. Make sure they aren’t overcrowded to allow proper roasting.
- Roast the Vegetables: Place the baking sheet in the preheated oven and roast for 25-30 minutes. Halfway through the cooking time, stir the vegetables to guarantee they roast evenly on all sides.
- Add Finishing Touches: Once the vegetables are tender and slightly caramelized, remove from the oven. Drizzle the balsamic glaze over the roasted vegetables and toss to coat. If desired, sprinkle with chopped pecans and dried cranberries for added texture and flavor.
- Serve: Transfer the roasted vegetables to a serving dish and serve hot as a delightful accompaniment to your Christmas meal.
Extra Tips:
To make peeling the butternut squash easier, you can microwave it for a minute or two to soften the skin slightly before peeling.
If you prefer a sweeter glaze, you can mix the balsamic glaze with a touch of honey. Keeping the vegetables in a single layer on the baking sheet is essential to achieving a nice roast; overcrowding can lead to steaming instead.
Feel free to adjust the seasoning to your taste, and add more herbs like rosemary or sage for a more aromatic dish.
Skillet Sausage and Potato Hash
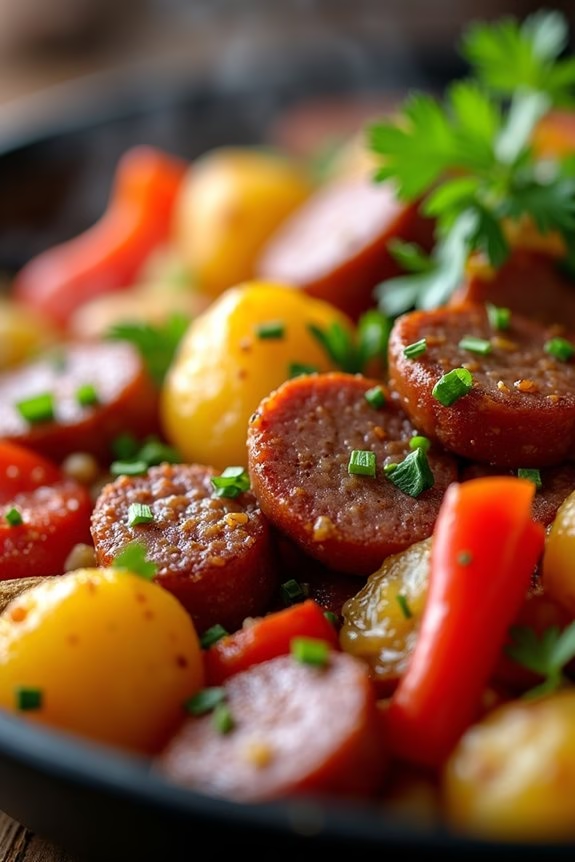
Skillet Sausage and Potato Hash is a delightful, hearty dish that’s perfect for a Christmas potluck. With its blend of savory sausage, crispy potatoes, and colorful vegetables, this one-pan wonder isn’t only easy to prepare but also packed with flavor.
The beauty of this dish lies in its simplicity and the way it brings together the warmth of the season. Whether you’re serving it as a side or a main course, this dish is sure to be a crowd-pleaser.
The key to a great Skillet Sausage and Potato Hash is using quality ingredients and a good cast-iron skillet. The skillet helps achieve a nice, even cook and a satisfying crispiness on the potatoes. This recipe is perfect for serving 4 to 6 people, making it an ideal choice for a festive gathering.
Plus, with minimal clean-up required, you’ll have more time to enjoy the holiday festivities with family and friends.
Ingredients:
- 1 pound of sausage (your choice of mild, spicy, or smoked)
- 4 medium-sized potatoes, diced
- 1 medium onion, chopped
- 1 red bell pepper, chopped
- 1 green bell pepper, chopped
- 2 cloves of garlic, minced
- 2 tablespoons olive oil
- Salt and pepper to taste
- 1 teaspoon paprika
- 1 teaspoon dried thyme
- ¼ cup chopped fresh parsley (optional for garnish)
Cooking Instructions:
- Prepare the Ingredients: Begin by gathering all your ingredients and prepping them. Dice the potatoes into small, uniform cubes so they cook evenly. Chop the onion and bell peppers, and mince the garlic.
- Cook the Sausage: Heat a large cast-iron skillet over medium heat. Add the sausage and cook until browned and cooked through, about 7-10 minutes. Break it up into smaller pieces with a spatula as it cooks. Once done, remove the sausage from the skillet and set it aside.
- Sauté the Vegetables: In the same skillet, add 2 tablespoons of olive oil. Add the diced potatoes and cook for about 10 minutes, stirring occasionally, until they start to brown and soften.
- Add Aromatics: Add the chopped onion, red and green bell peppers, and minced garlic to the potatoes. Season with salt, pepper, paprika, and dried thyme. Stir everything together and cook for another 5-7 minutes until the vegetables are tender.
- Combine and Finish: Return the cooked sausage to the skillet and mix it with the vegetables and potatoes. Continue to cook for an additional 5 minutes, allowing the flavors to meld together. Adjust seasoning if necessary.
- Garnish and Serve: Once everything is well combined and heated through, remove from heat. Garnish with chopped fresh parsley if desired, and serve hot.
Extra Tips:
For an added layer of flavor, consider using a mix of different sausages, such as chorizo and Italian sausage, to give the dish a unique twist.
If you prefer a bit of heat, add a pinch of red pepper flakes while cooking the vegetables. To guarantee the potatoes are perfectly crispy, avoid overcrowding the skillet, and let them cook undisturbed for a few minutes before stirring.
This dish can also be made ahead of time and reheated, making it a convenient option for busy holiday schedules.
Cranberry Orange Glazed Salmon

Looking for a festive and delicious dish to bring to your holiday potluck? This Cranberry Orange Glazed Salmon is the perfect option! Not only is it incredibly flavorful with its sweet and tangy glaze, but it’s also simple to prepare and cook. The combination of cranberries and oranges brings a delightful holiday twist to the succulent salmon, making it a standout dish on any Christmas table.
What makes this recipe even more appealing for a potluck is that it’s a one-pan wonder. This means less cleanup and more time to enjoy the festivities with friends and family. The savory salmon is complemented by the vibrant and zesty glaze, which caramelizes beautifully in the oven, infusing the fish with a rich, festive flavor. Whether you’re a seasoned cook or a beginner, this recipe is sure to impress.
Ingredients (Serves 4-6):
- 2 pounds salmon fillets
- Salt and pepper to taste
- 1 cup fresh cranberries
- 1/2 cup orange juice
- 1/4 cup honey
- 2 tablespoons soy sauce
- 2 teaspoons orange zest
- 1 tablespoon olive oil
- 1 teaspoon minced garlic
- 1 tablespoon chopped fresh rosemary (optional)
Instructions:
- Preheat the Oven: Preheat your oven to 400°F (200°C). This will guarantee the salmon cooks evenly and the glaze caramelizes perfectly.
- Prepare the Glaze: In a small saucepan over medium heat, combine the cranberries, orange juice, honey, soy sauce, orange zest, olive oil, and minced garlic. Cook, stirring occasionally, until the cranberries begin to burst and the mixture thickens slightly, about 10 minutes.
- Season the Salmon: While the glaze is cooking, place the salmon fillets on a baking sheet lined with parchment paper. Season them generously with salt and pepper on both sides.
- Apply the Glaze: Once the glaze is ready, pour it over the salmon fillets, guaranteeing they’re well-coated. Reserve a little glaze for basting later if desired.
- Bake the Salmon: Place the baking sheet in the preheated oven and bake for 15-20 minutes, or until the salmon is cooked through and flakes easily with a fork. Halfway through the baking time, baste the salmon with more glaze for added flavor.
- Add Final Touches: If using, sprinkle the chopped fresh rosemary over the salmon in the last few minutes of baking for an aromatic finish.
- Serve: Once cooked, remove the salmon from the oven and let it rest for a few minutes. Transfer to a serving platter and enjoy!
Extra Tips:
For the best flavor, try to use fresh ingredients whenever possible. Fresh cranberries and fresh squeezed orange juice will enhance the taste considerably.
If you’re preparing this dish ahead of time, you can make the glaze in advance and store it in the refrigerator for up to two days. Just reheat it slightly before using.
Additionally, if you prefer a smoother glaze, you can blend the cranberry mixture after cooking. This dish pairs wonderfully with a simple green salad or roasted vegetables, complementing the rich flavors of the salmon beautifully.
One-Pan Balsamic Chicken and Veggies
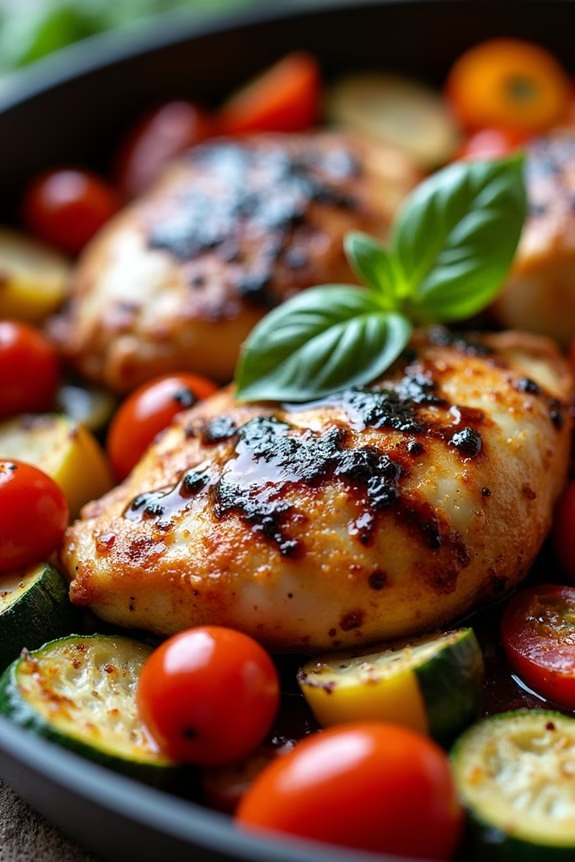
One-Pan Balsamic Chicken and Veggies is a delightful and easy-to-make dish that brings together the rich flavors of balsamic vinegar with tender, juicy chicken and a medley of fresh vegetables.
This recipe is perfect for a Christmas potluck where you want to impress guests with a delicious meal without spending hours in the kitchen. The beauty of this dish lies in its simplicity and the fact that it can be made using just one pan, reducing the amount of cleanup afterward.
Ideal for serving 4-6 people, this one-pan wonder isn’t only convenient but also nutritious, making it a great option for a festive gathering. The balsamic glaze adds a sweet and tangy dimension to the chicken, while the vegetables roast to perfection, absorbing the flavors of the marinade.
It’s a versatile recipe that allows you to use your favorite seasonal vegetables, making it adaptable to what’s available in your fridge or at the market.
Ingredients
- 4-6 boneless, skinless chicken breasts
- 1/3 cup balsamic vinegar
- 1/4 cup olive oil
- 2 tablespoons honey
- 3 cloves garlic, minced
- 1 teaspoon dried Italian herbs
- Salt and pepper to taste
- 2 cups cherry tomatoes, halved
- 1 red bell pepper, sliced
- 1 yellow bell pepper, sliced
- 1 zucchini, sliced
- 1 red onion, sliced
- Fresh basil leaves for garnish (optional)
Cooking Instructions
1. Preheat the Oven: Start by preheating your oven to 400°F (200°C). This guarantees that the oven is hot enough to roast the chicken and vegetables evenly.
2. Prepare the Marinade: In a small bowl, whisk together the balsamic vinegar, olive oil, honey, minced garlic, Italian herbs, salt, and pepper. This mixture will serve as both the marinade for the chicken and the dressing for the vegetables.
3. Marinate the Chicken: Place the chicken breasts in a large resealable plastic bag or a shallow dish. Pour half of the balsamic marinade over the chicken, reserving the other half for the vegetables.
Seal the bag or cover the dish, and let it marinate in the refrigerator for at least 30 minutes, or up to 2 hours for more flavor.
4. Prepare the Vegetables: In a large mixing bowl, combine the cherry tomatoes, red and yellow bell peppers, zucchini, and red onion. Drizzle the reserved balsamic marinade over the vegetables and toss until they’re well coated.
5. Arrange in the Pan: Remove the chicken from the marinade and place it in a large baking pan or sheet. Arrange the marinated vegetables around the chicken in a single layer, ensuring the pan isn’t overcrowded to allow even roasting.
6. Bake the Dish: Place the pan in the preheated oven and bake for 25-30 minutes, or until the chicken is cooked through and the vegetables are tender. The chicken should reach an internal temperature of 165°F (75°C).
7. Serve: Once cooked, remove the pan from the oven. Garnish with fresh basil leaves if desired, and serve the chicken and veggies directly from the pan for a rustic, family-style presentation.
Extra Tips
To guarantee the chicken is juicy, don’t overbake it. Keep an eye on the oven towards the end of the cooking time and use a meat thermometer for accuracy.
Feel free to swap out the vegetables for seasonal favorites like Brussels sprouts or carrots. If you prefer a spicier kick, add a pinch of red pepper flakes to the marinade.
This dish can be prepped in advance by marinating the chicken and chopping the vegetables the day before, saving you time on the day of your potluck.
Easy Caprese Stuffed Peppers
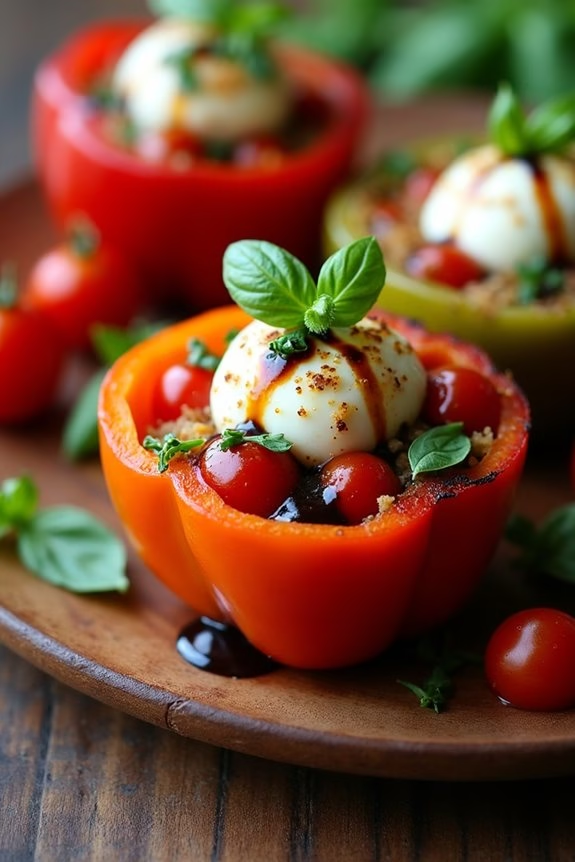
If you’re looking for a delightful and visually appealing dish to bring to your Christmas potluck, Easy Caprese Stuffed Peppers are the perfect choice. This recipe combines the classic Italian flavors of a Caprese salad with the comforting warmth of roasted bell peppers. The vibrant colors of the red and green peppers, filled with juicy cherry tomatoes, creamy mozzarella, and fragrant basil, will add a festive touch to any holiday table.
Best of all, this dish is prepared in just one pan, making it both convenient and easy to clean up after all the festivities.
These Easy Caprese Stuffed Peppers aren’t only delicious but also healthy and satisfying. They can be served as a main dish or as a side, catering to both vegetarians and meat-lovers alike. The combination of fresh ingredients and the simplicity of the preparation make these stuffed peppers a crowd-pleaser.
Whether you’re a seasoned chef or a beginner in the kitchen, this recipe is straightforward and requires minimal effort, which means you can spend more time enjoying the company of friends and family.
Ingredients (Serves 4-6):
- 3 large bell peppers (red and green)
- 2 cups cherry tomatoes, halved
- 8 oz fresh mozzarella balls (bocconcini), halved
- 1/4 cup fresh basil leaves, chopped
- 2 tablespoons olive oil
- 2 tablespoons balsamic glaze
- Salt and pepper to taste
Cooking Instructions:
- Preheat the Oven: Begin by preheating your oven to 375°F (190°C) to make certain it’s hot enough to properly roast the peppers.
- Prepare the Peppers: Cut the bell peppers in half lengthwise and remove the seeds and membranes. This creates a perfect pocket for stuffing with the Caprese filling.
- Assemble the Filling: In a large mixing bowl, combine the halved cherry tomatoes, mozzarella balls, and chopped basil. Drizzle with olive oil, add salt and pepper to taste, and toss everything gently to make sure even coating.
- Stuff the Peppers: Arrange the pepper halves in a single layer on a baking sheet or ovenproof dish. Fill each half generously with the Caprese mixture, making sure the ingredients are evenly distributed.
- Bake the Peppers: Place the baking sheet in the preheated oven and bake for 25-30 minutes, or until the peppers are tender and the mozzarella is melted and slightly bubbly.
- Drizzle with Balsamic Glaze: Once baked, remove the peppers from the oven and drizzle the balsamic glaze over the top. This adds a touch of sweetness and acidity, enhancing the flavors of the dish.
- Serve and Enjoy: Transfer the stuffed peppers to a serving platter and garnish with additional fresh basil if desired. Serve warm or at room temperature.
Extra Tips:
To make certain the best flavor, opt for ripe and juicy cherry tomatoes and fresh mozzarella cheese. You can also experiment with different types of peppers for a variety of color and taste.
If you prefer a bit of spice, try adding a pinch of red pepper flakes to the filling before baking. The balsamic glaze is key to elevating the dish, so don’t skip it! If you have extra time, you can make your own glaze by reducing balsamic vinegar over low heat until it thickens.
These stuffed peppers can also be made ahead of time; simply store them in the refrigerator and reheat before serving.
Sheet Pan Roasted Herb-Crusted Lamb
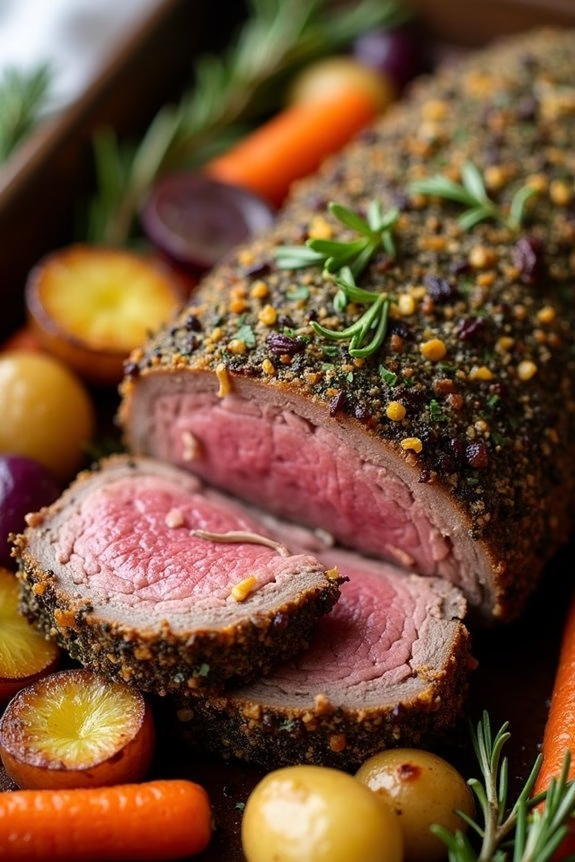
Celebrate the festive season with the delightful and aromatic flavors of Sheet Pan Roasted Herb-Crusted Lamb. This dish is a perfect centerpiece for your Christmas potluck, bringing together the warmth and richness of tender lamb with a fragrant herb crust that will tantalize your taste buds.
The beauty of this recipe lies in its simplicity and minimal cleanup, as everything is cooked on a single sheet pan. Whether you’re an experienced cook or a kitchen novice, this dish is accessible and sure to impress your guests.
The combination of fresh herbs, garlic, and lemon zest creates a flavorful crust that enhances the natural taste of the lamb, while the roasting process locks in its juices, resulting in a succulent and flavorful dish.
The addition of seasonal vegetables roasted alongside the lamb creates a beautiful and colorful presentation, making it a feast for both the eyes and the palate. Perfect for serving 4-6 people, this one-pan wonder is an ideal choice for a hassle-free yet elegant holiday feast.
Ingredients:
- 1 rack of lamb (about 2 pounds), frenched
- 2 tablespoons olive oil
- 4 cloves garlic, minced
- 1 tablespoon fresh rosemary, chopped
- 1 tablespoon fresh thyme, chopped
- 1 tablespoon fresh parsley, chopped
- Zest of 1 lemon
- Salt and pepper, to taste
- 1 pound baby potatoes, halved
- 1 pound carrots, peeled and cut into sticks
- 1 red onion, cut into wedges
- 1 tablespoon balsamic vinegar
Cooking Instructions:
- Preheat the Oven: Begin by preheating your oven to 425°F (220°C). This temperature will help achieve a nice crust on the lamb while allowing the vegetables to roast perfectly.
- Prepare the Herb Mixture: In a small bowl, combine the minced garlic, chopped rosemary, thyme, parsley, lemon zest, salt, and pepper. Mix these ingredients well to form a fragrant herb mixture.
- Season the Lamb: Rub the rack of lamb with olive oil to coat it lightly. Then, apply the herb mixture evenly over the lamb, pressing it down to confirm it adheres well to the meat.
- Prepare the Vegetables: On a large sheet pan, arrange the halved baby potatoes, carrot sticks, and red onion wedges. Drizzle them with olive oil and balsamic vinegar, and season with salt and pepper to taste. Toss the vegetables to coat them evenly.
- Roast the Lamb and Vegetables: Place the herb-crusted lamb in the center of the sheet pan, arranging the vegetables around it. Transfer the pan to the preheated oven and roast for 25-30 minutes, or until the lamb reaches your desired level of doneness (145°F for medium-rare).
- Rest and Serve: Once cooked, remove the lamb from the oven and let it rest for 10-15 minutes before slicing. This resting period allows the juices to redistribute throughout the meat. Serve the sliced lamb alongside the roasted vegetables.
Extra Tips:
For the best results, confirm that the lamb is at room temperature before cooking to promote even cooking.
If you prefer your lamb cooked to a different level of doneness, adjust the cooking time accordingly, but remember that lamb can easily become overcooked.
Additionally, feel free to customize the vegetables based on what you have on hand or prefer, as this recipe is very versatile. Enjoy this delightful holiday dish with your loved ones!
One-Pan Chocolate Peppermint Brownies

One-Pan Chocolate Peppermint Brownies are a delightful holiday treat that combines the rich, fudgy texture of classic brownies with a revitalizing hint of peppermint. Perfect for Christmas potlucks, these brownies are easy to make and require minimal cleanup since everything is prepared in just one pan.
The combination of chocolate and peppermint isn’t only festive but also a flavor pairing that’s sure to please a crowd. Whether you’re hosting a gathering or attending one, these brownies are a surefire way to impress your friends and family with a homemade dessert that feels indulgent yet effortless.
This recipe is designed to serve 4-6 people, making it ideal for small gatherings or as a part of a larger dessert spread. The key to these brownies is using quality chocolate and a touch of peppermint extract to achieve the perfect balance of flavors.
With just a few simple ingredients and steps, you can whip up this delicious treat in no time. The best part is that you won’t need to worry about a pile of dishes afterward, as everything is mixed and baked in the same pan.
Ingredients (serving size: 4-6 people):
- 1/2 cup (1 stick) unsalted butter
- 1 cup granulated sugar
- 2 large eggs
- 1 teaspoon vanilla extract
- 1/2 teaspoon peppermint extract
- 1/3 cup unsweetened cocoa powder
- 1/2 cup all-purpose flour
- 1/4 teaspoon salt
- 1/4 teaspoon baking powder
- 1/2 cup semi-sweet chocolate chips
- 1/4 cup crushed peppermint candies or candy canes
Instructions:
- Preheat and Prepare: Preheat your oven to 350°F (175°C). Grease a 9×9-inch baking pan with butter or line it with parchment paper for easy removal.
- Melt the Butter: In the baking pan, melt the 1/2 cup of butter over low heat on the stove. Once melted, remove the pan from heat.
- Mix the Wet Ingredients: Stir in 1 cup of granulated sugar into the melted butter until well combined. Add the two eggs one at a time, mixing well after each addition. Stir in the vanilla and peppermint extracts.
- Incorporate Dry Ingredients: Add the cocoa powder, flour, salt, and baking powder to the wet mixture. Stir until just combined, taking care not to overmix as this can make the brownies tough.
- Add Chocolate and Peppermint: Fold in the semi-sweet chocolate chips and half of the crushed peppermint candies into the batter until evenly distributed.
- Bake: Pour the brownie batter evenly into the prepared pan. Sprinkle the remaining crushed peppermint candies on top for a festive touch. Bake in the preheated oven for 20-25 minutes, or until a toothpick inserted into the center comes out with a few moist crumbs.
- Cool and Serve: Allow the brownies to cool in the pan for at least 10 minutes before cutting into squares. Serve warm or at room temperature.
For extra tips, make sure to use room temperature eggs, as they blend more smoothly with the melted butter and sugar. If you prefer a more pronounced peppermint flavor, you can increase the peppermint extract slightly, but be cautious as it can easily overpower the chocolate.
For a variation, consider adding a handful of chopped nuts or white chocolate chips to the batter. When cutting the brownies, use a sharp knife and clean the blade between cuts to achieve neat squares.
Enjoy your one-pan chocolate peppermint brownies as a delightful end to your Christmas potluck!