
Mornings can be hectic, but a nourishing breakfast can make all the difference. Starting the day with low-carb and low-calorie choices can give you that boost you need. Think avocado and egg breakfast bowls or Greek yogurt topped with fresh berries and nuts. These options are packed with protein and healthy fats, making them both satisfying and delicious. Ready to discover more breakfast ideas that will transform your mornings?
Avocado and Egg Breakfast Bowl
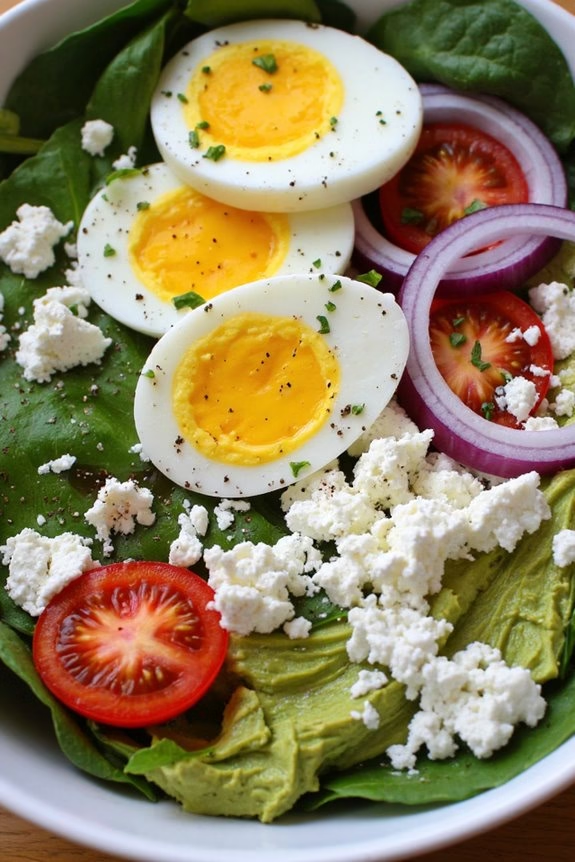
Start your morning with a nutritious and delicious Avocado and Egg Breakfast Bowl. This low-carb dish is perfect for those who want to start their day with a healthy, fulfilling meal without sacrificing flavor. The combination of creamy avocado, protein-packed eggs, and fresh vegetables makes for a balanced breakfast that will keep you energized throughout the morning.
Plus, it’s easy to customize with your favorite toppings or spices, guaranteeing that you can enjoy a different variation every day. This recipe is designed to serve 4-6 people, making it perfect for a family breakfast or a small gathering.
The Avocado and Egg Breakfast Bowl is also quick and straightforward to prepare, requiring minimal cooking and cleanup. You’ll appreciate how easily this dish comes together, leaving you more time to enjoy your morning routine or spend with loved ones. With simple ingredients and a few easy steps, you’ll have a satisfying breakfast bowl ready in no time.
Ingredients:
- 6 large eggs
- 3 ripe avocados
- 1 cup cherry tomatoes, halved
- 1 cup baby spinach
- 1/2 cup feta cheese, crumbled
- 1/4 cup red onion, finely chopped
- 1 tablespoon olive oil
- 1 tablespoon lemon juice
- Salt and pepper to taste
- Optional: hot sauce, fresh herbs (such as cilantro or parsley), and seeds for garnish
Cooking Instructions:
- Prepare the Eggs: Begin by boiling the eggs. Place the eggs in a saucepan and cover them with water. Bring the water to a boil over medium-high heat. Once boiling, remove the saucepan from heat, cover it with a lid, and let the eggs sit for about 10-12 minutes for hard-boiled eggs. Then, transfer the eggs to an ice bath to cool before peeling.
- Prepare the Avocados: While the eggs are cooling, cut the avocados in half, remove the pits, and scoop the flesh into a medium bowl. Add the lemon juice, salt, and pepper. Mash the avocado with a fork until you reach your desired consistency. You can leave it slightly chunky or smooth, depending on your preference.
- Assemble the Bowl: In a large serving bowl, layer the baby spinach as the base. Next, evenly distribute the mashed avocado on top of the spinach. Add the halved cherry tomatoes, crumbled feta cheese, and finely chopped red onion.
- Add the Eggs: Once the eggs are peeled, slice them into halves or quarters and arrange them on top of the avocado mixture in the bowl. Drizzle with olive oil and season with additional salt and pepper to taste.
- Garnish and Serve: To finish, sprinkle with fresh herbs, seeds, or a dash of hot sauce if desired. Serve immediately and enjoy your wholesome Avocado and Egg Breakfast Bowl.
Extra Tips:
For perfectly boiled eggs, make sure not to overcook them, as this can result in a rubbery texture. The ice bath is essential to stop the cooking process and make peeling easier.
When choosing avocados, opt for ones that are ripe but firm to guarantee they mash well and maintain texture. Feel free to experiment with additional toppings like sliced radishes, bell peppers, or nuts for added crunch and flavor.
If you prefer a warm dish, you can lightly sauté the spinach before assembling the bowl.
Greek Yogurt With Berries and Nuts
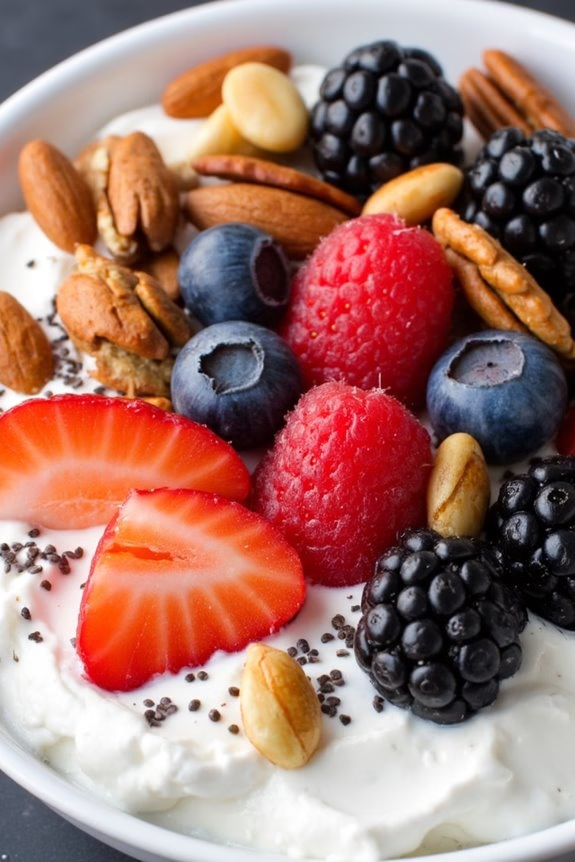
Greek yogurt with berries and nuts is a delicious and nutritious low-carb breakfast option that’s both satisfying and easy to prepare. This dish combines the creamy texture of Greek yogurt with the natural sweetness of fresh berries and the satisfying crunch of nuts. It’s perfect for those who are looking to start their day with a meal that’s high in protein and packed with antioxidants.
The inclusion of diverse berries adds a burst of color and flavor, while the nuts provide healthy fats and an extra layer of texture. This breakfast idea isn’t only quick to assemble but also highly customizable. You can choose your favorite berries and nuts, or even add a sprinkle of seeds for added nutrition.
The dish is naturally sweetened by the berries, making it an excellent choice for those who are reducing their sugar intake. Whether you’re rushing out the door or enjoying a leisurely morning at home, Greek yogurt with berries and nuts is a versatile and wholesome breakfast that will keep you energized and satisfied.
Ingredients for 4-6 servings:
- 4 cups Greek yogurt (plain, full-fat or low-fat based on preference)
- 2 cups mixed fresh berries (such as strawberries, blueberries, raspberries, and blackberries)
- 1 cup mixed nuts (such as almonds, walnuts, and pecans)
- 2 tablespoons chia seeds (optional)
- 1 teaspoon vanilla extract (optional)
- Honey or low-carb sweetener to taste (optional)
Cooking Instructions:
- Prepare the Berries: Begin by washing all the berries thoroughly under cold running water. Pat them dry with paper towels. If using larger berries like strawberries, hull and slice them into bite-sized pieces.
- Mix the Yogurt: In a large mixing bowl, add the Greek yogurt. If you prefer a sweeter taste, mix in the vanilla extract and a drizzle of honey or your choice of low-carb sweetener. Stir well until the yogurt is smooth and the sweetener is fully incorporated.
- Combine Ingredients: Gently fold the prepared berries into the yogurt, making sure they’re evenly distributed throughout the mixture.
- Add the Nuts: Roughly chop the mixed nuts and sprinkle them over the yogurt and berry mixture. If you’re using chia seeds, sprinkle them in as well. Mix everything just enough to combine, ensuring the nuts are spread evenly.
- Serve: Divide the yogurt mixture into individual bowls or jars for serving. If desired, garnish with a few extra berries or a sprinkle of chopped nuts on top for presentation.
Extra Tips:
When preparing Greek yogurt with berries and nuts, consider using seasonal berries for the best flavor and freshness. If you’re using frozen berries, allow them to thaw and drain excess liquid to prevent the yogurt from becoming watery.
For added creaminess, opt for full-fat Greek yogurt, but if you’re watching your calorie intake, low-fat versions work just as well. Feel free to experiment with different nut varieties or even seeds like flaxseeds or sunflower seeds for extra texture and nutrients.
Spinach and Mushroom Omelette

Spinach and Mushroom Omelette is a delightful low-carb breakfast option that’s both nutritious and satisfying. This dish perfectly combines the earthy flavors of mushrooms with the subtle bitterness of spinach, all enveloped in a fluffy, protein-packed omelette.
It’s a quick and easy recipe that can be whipped up in under 30 minutes, making it perfect for busy mornings or lazy weekend brunches. Whether you’re on a low-carb diet or just looking for a delicious way to start your day, this omelette is sure to become a favorite.
The beauty of this Spinach and Mushroom Omelette lies in its simplicity and versatility. You can easily adapt the recipe to suit your taste by adding other vegetables or cheese. This recipe is designed to serve 4-6 people, making it ideal for a family breakfast or a gathering with friends.
With a few basic ingredients and minimal preparation, you can create a nutritious meal that will keep you energized throughout the morning.
Ingredients (Serving Size: 4-6 people):
- 12 large eggs
- 1 cup fresh spinach leaves, chopped
- 1 cup mushrooms, sliced
- 1/2 cup bell peppers, diced (optional)
- 1/2 cup shredded cheese (cheddar, feta, or mozzarella)
- 1/4 cup milk or cream
- 2 tablespoons butter or olive oil
- Salt and pepper to taste
- Fresh herbs (parsley or chives) for garnish
Cooking Instructions:
- Preparation: Begin by cracking the eggs into a large mixing bowl. Add the milk or cream, salt, and pepper. Whisk the mixture until the eggs are fully beaten and the ingredients are well combined.
- Prepare the Vegetables: Heat 1 tablespoon of butter or olive oil in a non-stick skillet over medium heat. Add the sliced mushrooms and sauté until they’re golden brown and tender, about 5 minutes. Add the chopped spinach and optional bell peppers, cooking until the spinach has wilted. Remove the vegetables from the skillet and set aside.
- Cook the Omelette: In the same skillet, add the remaining butter or olive oil. Pour the egg mixture into the skillet and let it cook undisturbed for a minute or two, until the edges start to set.
- Add the Fillings: Once the edges of the omelette have set, evenly distribute the sautéed vegetables and shredded cheese over one half of the omelette. Allow it to cook for another 2-3 minutes until the cheese begins to melt.
- Fold the Omelette: Using a spatula, carefully fold the unfilled half of the omelette over the filling. Press gently to seal the edges. Continue to cook the omelette for an additional 2 minutes to ascertain it’s cooked through.
- Serve: Slide the omelette onto a serving plate and garnish with fresh herbs. Serve hot and enjoy!
Extra Tips: To guarantee the perfect omelette, use a non-stick skillet and cook over medium heat to prevent sticking and burning. If you prefer a fluffier omelette, you can separate the egg whites from the yolks and whip them separately before folding them back together.
Additionally, feel free to experiment with different cheeses or add-ins like cooked bacon or onions to customize your omelette. Finally, remember to season your vegetables and eggs well to enhance the overall flavor of the dish.
Cottage Cheese With Fresh Fruit
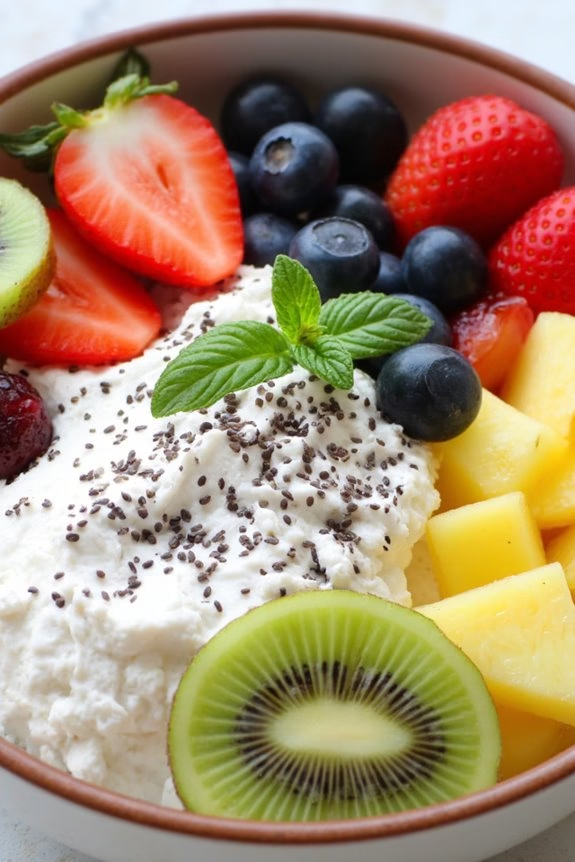
Cottage Cheese With Fresh Fruit is a delightful and nutritious low-carb breakfast option that combines the creamy texture of cottage cheese with the natural sweetness of fresh fruit. This dish is perfect for those who are looking to start their day with a healthy and satisfying meal. Not only is it quick to prepare, but it also offers a wealth of nutrients, including protein, vitamins, and minerals.
With a variety of fruits to choose from, you can customize this breakfast to suit your personal taste and dietary preferences. The creamy cottage cheese serves as a perfect base, providing a mild flavor that complements the vibrant and juicy fruit. You can choose from an array of fruits like berries, peaches, or kiwi to enhance the flavor profile of the dish.
This recipe is designed to serve 4-6 people, making it ideal for a family breakfast or a gathering with friends. It isn’t only delicious but also visually appealing, with the bright colors of the fruit creating a beautiful presentation.
Ingredients:
- 3 cups of cottage cheese
- 1 cup of fresh strawberries, hulled and sliced
- 1 cup of blueberries
- 1 cup of diced pineapple
- 1 kiwi, peeled and sliced
- 1 tablespoon of honey (optional)
- 1 tablespoon of chia seeds
- Fresh mint leaves for garnish
Instructions:
- Prepare the Fruits: Start by washing the strawberries and blueberries under cold water. Hull and slice the strawberries, then dice the pineapple into small chunks. Peel the kiwi and slice it into thin rounds. Set the prepared fruits aside.
- Assemble the Base: In a large mixing bowl, add the cottage cheese. If desired, drizzle a tablespoon of honey over the cottage cheese to add a touch of sweetness. Mix gently to combine.
- Add the Fruits: Gently fold the prepared strawberries, blueberries, pineapple, and kiwi into the cottage cheese. Make sure that the fruits are evenly distributed throughout the mixture.
- Serve: Divide the cottage cheese and fruit mixture among 4-6 serving bowls. Sprinkle each serving with chia seeds for added texture and nutritional benefits.
- Garnish: Add a few fresh mint leaves on top of each bowl for a revitalizing garnish. The mint will also enhance the fragrance of the dish, making it more inviting.
Extra Tips:
To make the Cottage Cheese With Fresh Fruit even more exciting, consider experimenting with different fruit combinations based on your preferences or seasonal availability. You can also add a handful of nuts or seeds for extra crunch and nutrition.
If you prefer a sweeter taste without using honey, try adding a sprinkle of cinnamon or a splash of vanilla extract to the cottage cheese. For those who are lactose intolerant, lactose-free cottage cheese can be used as an alternative. Remember to adjust the portion sizes and ingredients if serving a larger group.
Zucchini and Tomato Frittata

A Zucchini and Tomato Frittata is a delightful and nutritious low-carb breakfast option that’s perfect for a weekend brunch or a quick weekday meal. This frittata is packed with fresh vegetables, offering a burst of flavor and color to your morning routine. Zucchini provides a subtle sweetness and a tender texture, while tomatoes add a juicy tanginess that pairs wonderfully with eggs.
The frittata is a versatile dish that can be served warm or at room temperature, making it ideal for gatherings or meal prepping for the week. This recipe is designed to serve 4-6 people and is simple enough for beginner cooks, yet impressive enough for entertaining guests. By using a combination of eggs, cheese, and fresh vegetables, this frittata isn’t only filling but also a healthy start to your day.
The preparation is straightforward, and the ingredients are easily accessible, guaranteeing you can whip this up at any time.
Ingredients for 4-6 servings:
- 8 large eggs
- 1 cup grated Parmesan cheese
- 1 medium zucchini, thinly sliced
- 1 cup cherry tomatoes, halved
- 1 small onion, finely chopped
- 2 cloves garlic, minced
- 2 tablespoons olive oil
- Salt and pepper to taste
- Fresh basil leaves, for garnish
Cooking Instructions:
1. Preheat and Prepare Pan:
Preheat your oven to 350°F (175°C). Heat the olive oil in a large, ovenproof skillet over medium heat. Confirm the pan is well-coated with oil to prevent sticking.
2. Sauté Vegetables:
Add the chopped onion and garlic to the skillet. Sauté for about 2-3 minutes until the onion becomes translucent and the garlic is fragrant. Add the sliced zucchini and cook for an additional 5 minutes until the zucchini is tender.
3. Add Tomatoes:
Stir in the cherry tomatoes and cook for another 2 minutes. The tomatoes should start to soften but not lose their shape completely.
4. Whisk Eggs and Cheese:
In a separate bowl, whisk together the eggs, grated Parmesan cheese, salt, and pepper. Make certain the mixture is well combined to guarantee the frittata cooks evenly.
5. Combine and Cook:
Pour the egg mixture over the sautéed vegetables in the skillet. Gently stir to distribute the vegetables evenly throughout the eggs.
6. Bake the Frittata:
Transfer the skillet to the preheated oven. Bake for 20-25 minutes, or until the frittata is set and the top is lightly golden. You can check for doneness by inserting a knife into the center; it should come out clean.
7. Serve and Garnish:
Remove the frittata from the oven and let it cool slightly. Garnish with fresh basil leaves before slicing. Serve warm or at room temperature.
Extra Tips:
For a creamier texture, you can add a splash of milk or cream to the egg mixture before baking. Feel free to experiment with different cheeses like feta or goat cheese for added flavor.
If you don’t have an ovenproof skillet, you can transfer the mixture to a greased baking dish before baking. Be sure to let the frittata cool slightly before slicing to help it set completely. Enjoy your delicious, low-carb Zucchini and Tomato Frittata!
Smoked Salmon and Cucumber Roll-Ups

Smoked Salmon and Cucumber Roll-Ups are a delightful, low-carb breakfast option that combines the savory flavors of smoked salmon with the rejuvenating crunch of cucumber. Perfect for a quick and easy breakfast, these roll-ups aren’t only nutritious but also visually appealing, making them a great choice for a brunch gathering or a light, satisfying start to your day.
With minimal ingredients and preparation time, this dish offers a gourmet experience without the fuss, guaranteeing you stay on track with your low-carb goals while still enjoying a delicious meal.
The combination of creamy cheese, aromatic fresh dill, and the unique taste of smoked salmon creates a harmony of flavors that are perfectly balanced by the crispness of fresh cucumber. These roll-ups aren’t only low in carbohydrates but also high in protein and healthy fats, making them an ideal choice for anyone following a low-carb or ketogenic diet.
For a serving size of 4-6 people, this recipe is sure to impress your family or guests with its elegance and simplicity.
Ingredients for 4-6 people:
- 8 ounces smoked salmon
- 2 large cucumbers
- 8 ounces cream cheese, softened
- 2 tablespoons fresh dill, chopped
- 1 tablespoon lemon juice
- Salt and pepper to taste
Cooking Instructions:
- Prepare the Cucumber: Start by washing the cucumbers thoroughly. Using a vegetable peeler or a mandoline slicer, slice the cucumbers lengthwise into thin strips. These strips will be used to wrap the smoked salmon, so aim for a consistent thickness to guarantee even rolling.
- Make the Cream Cheese Spread: In a medium bowl, combine the softened cream cheese, chopped fresh dill, and lemon juice. Mix well until all ingredients are fully incorporated, creating a smooth and creamy spread. Add salt and pepper to taste, adjusting the seasoning according to your preference.
- Assemble the Roll-Ups: On a clean surface, lay out a slice of cucumber. Spread a thin layer of the cream cheese mixture over the cucumber slice, ensuring it’s evenly coated. Place a strip of smoked salmon on top of the cream cheese. Carefully roll the cucumber slice from one end to the other, securing the ingredients inside.
- Secure the Roll-Ups: To keep the roll-ups intact, you can use a toothpick to hold them together. Repeat the process with the remaining cucumber slices, cream cheese, and smoked salmon until all ingredients are used up.
- Serve and Enjoy: Arrange the smoked salmon and cucumber roll-ups on a serving platter. Garnish with additional dill or a twist of lemon for extra flavor and presentation. Serve immediately to enjoy the fresh, crisp taste.
Extra Tips:
When preparing Smoked Salmon and Cucumber Roll-Ups, use a mandoline slicer to achieve uniform cucumber slices, as this will make rolling easier and result in a more polished presentation.
For added flavor, consider incorporating other herbs such as chives or parsley into the cream cheese spread. If you wish to prepare these roll-ups in advance, store them in the refrigerator and cover them with plastic wrap to maintain freshness and prevent the cucumbers from drying out.
Chia Seed Pudding With Almond Milk
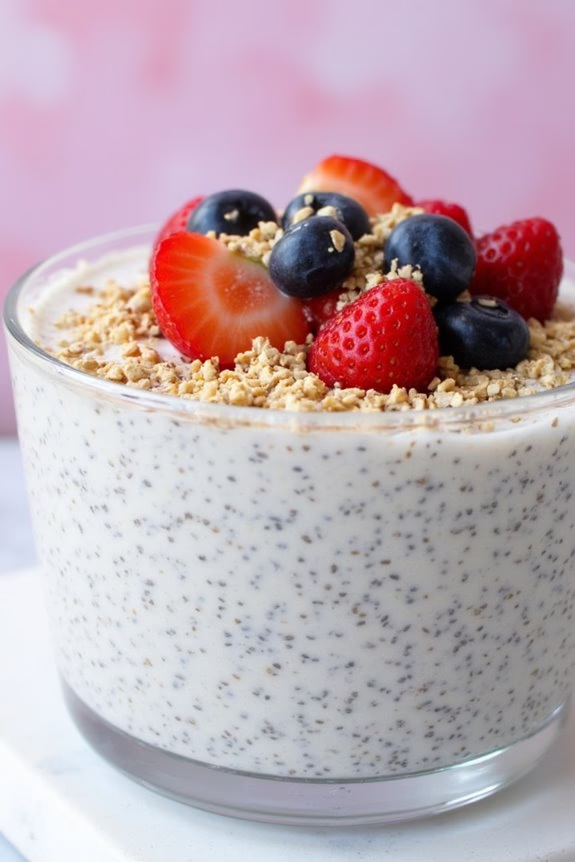
Chia Seed Pudding With Almond Milk is a delicious and nutritious low-carb breakfast option that’s perfect for those looking to start their day with something healthy yet satisfying.
This dish combines the creamy texture of almond milk with the nutrient-rich goodness of chia seeds, creating a pudding that’s both filling and versatile. It’s an excellent choice for those on a low-carb diet, as chia seeds are high in fiber and low in carbohydrates, while almond milk adds a subtle nutty flavor without the added sugars found in traditional dairy milk.
This recipe isn’t only easy to prepare but also allows for customization based on personal preferences. You can add your favorite toppings like fresh berries, nuts, or a sprinkle of cinnamon to enhance the flavor. The pudding can be prepared the night before, making it a convenient option for busy mornings. Simply mix the ingredients, let them sit overnight, and wake up to a ready-made breakfast that will keep you energized throughout the day.
Ingredients for 4-6 people:
- 1 cup chia seeds
- 4 cups unsweetened almond milk
- 1 teaspoon vanilla extract
- 2 tablespoons maple syrup or low-carb sweetener (optional)
- A pinch of salt
- Fresh berries for topping (optional)
- Nuts or seeds for topping (optional)
Cooking Instructions:
- Combine Ingredients: In a large mixing bowl, combine 1 cup of chia seeds and 4 cups of unsweetened almond milk. Stir well to guarantee that the chia seeds are evenly distributed throughout the milk.
- Add Flavoring: Add 1 teaspoon of vanilla extract and 2 tablespoons of maple syrup or your preferred low-carb sweetener to the mixture. Add a pinch of salt to enhance the flavors. Stir the mixture thoroughly until all the ingredients are well combined.
- Refrigerate: Cover the bowl with a lid or plastic wrap and place it in the refrigerator. Let the mixture sit for at least 4 hours, or ideally overnight, to allow the chia seeds to absorb the liquid and swell, forming a pudding-like consistency.
- Stir Before Serving: Before serving, give the chia seed pudding a good stir to break up any clumps and guarantee a smooth texture.
- Serve and Garnish: Divide the pudding into individual serving bowls. Top with fresh berries, nuts, or seeds for added flavor and texture, if desired.
Extra Tips:
For an even creamier texture, consider blending a portion of the pudding before serving. This can help integrate the flavors and give the pudding a smoother consistency.
If you’re looking to add a bit more sweetness without increasing the sugar content, try adding a few drops of liquid stevia or a dash of cinnamon.
Additionally, this pudding can be stored in the refrigerator for up to five days, making it a great option for meal prep. Feel free to experiment with different flavorings such as cocoa powder or coconut flakes to keep your breakfasts exciting and varied.
Cauliflower Hash Browns

Cauliflower Hash Browns are a delicious low-carb breakfast alternative that will satisfy your cravings for something crispy and savory. This dish is perfect for those who are following a low-carb diet or simply want to incorporate more vegetables into their meals.
Made with cauliflower instead of potatoes, these hash browns are packed with nutrients and flavor, making them a healthy start to your day. They’re easy to prepare and can be served alongside eggs, bacon, or any other breakfast favorite.
The key to achieving the perfect texture for Cauliflower Hash Browns is making sure that the cauliflower is well-drained, which helps them crisp up beautifully in the pan. You can enjoy these hash browns with a variety of toppings such as avocado, cheese, or fresh herbs.
Whether you’re cooking for a crowd or just for yourself, this recipe is sure to become a staple in your breakfast repertoire.
Ingredients for 4-6 Servings:
- 1 large head of cauliflower
- 2 large eggs
- 1/2 cup shredded cheddar cheese
- 1/4 cup almond flour
- 2 tablespoons chopped fresh chives (optional)
- 1 teaspoon garlic powder
- Salt and pepper to taste
- Olive oil or cooking spray for frying
Cooking Instructions:
- Prepare the Cauliflower: Begin by cutting the cauliflower into smaller florets. Place them in a food processor and pulse until they resemble rice grains. Alternatively, you can use pre-riced cauliflower from the store.
- Drain the Cauliflower: Transfer the riced cauliflower to a clean kitchen towel. Gather the towel around the cauliflower and squeeze out as much moisture as possible. This step is essential to guarantee your hash browns aren’t soggy.
- Mix the Ingredients: In a large mixing bowl, combine the drained cauliflower, eggs, cheddar cheese, almond flour, chives, garlic powder, salt, and pepper. Stir until all ingredients are thoroughly mixed and the mixture holds together.
- Shape the Hash Browns: Take a small handful of the mixture and form it into a patty, about 1/4 inch thick. Repeat this process until all the mixture is used.
- Cook the Hash Browns: Heat a non-stick skillet over medium heat and add a little olive oil or spray the pan with cooking spray. Place the cauliflower patties in the skillet, making sure not to overcrowd the pan. Cook for about 3-4 minutes on each side or until they’re golden brown and crispy.
- Serve and Enjoy: Once cooked, remove the hash browns from the skillet and place them on a paper towel-lined plate to absorb any excess oil. Serve them hot with your choice of toppings or sides.
Extra Tips:
For best results, make sure the cauliflower is as dry as possible after ricing it; excess moisture can prevent the hash browns from crisping up.
If you prefer a cheesier flavor, you can add more cheddar cheese to the mixture. Additionally, feel free to experiment with different herbs and spices to customize the flavor to your liking.
If you find that the hash browns aren’t holding together well, try adding a little more almond flour or an extra egg to help bind the mixture. Enjoy your Cauliflower Hash Browns fresh out of the pan for maximum crispiness.
Almond Flour Pancakes
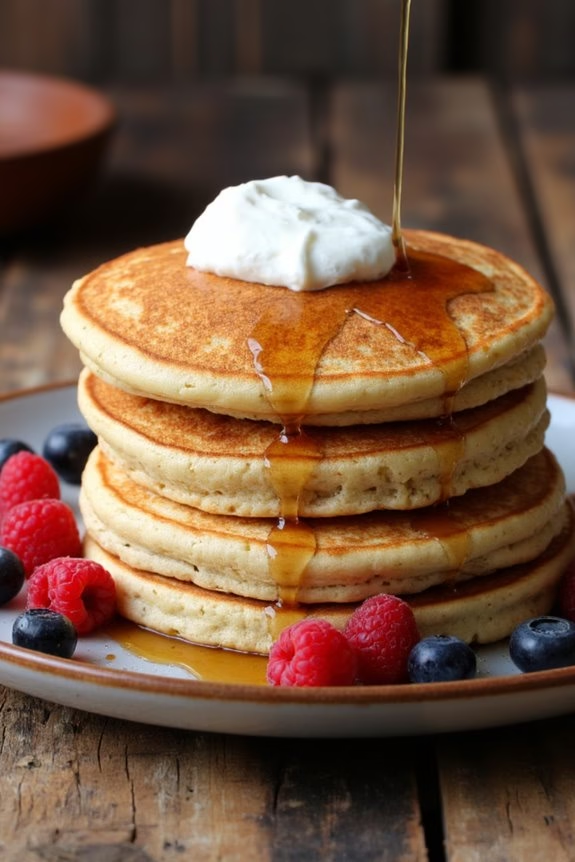
Almond Flour Pancakes are the perfect low-carb breakfast option that combines the delightful fluffiness of traditional pancakes with the nutritional benefits of almond flour. These pancakes aren’t only gluten-free but also rich in healthy fats and protein, making them an excellent choice for anyone looking to start their day with a nourishing meal.
With a subtle nutty flavor and a soft, tender texture, almond flour pancakes can easily become a staple in your breakfast rotation. Making Almond Flour Pancakes is a straightforward process that requires only a few ingredients and minimal preparation time. This recipe is ideal for serving 4 to 6 people, making it perfect for a family breakfast or a brunch gathering.
With the right balance of ingredients, you can create pancakes that are both satisfying and delicious, keeping you full and energized throughout the morning.
Ingredients (for 4-6 servings):
- 2 cups almond flour
- 4 large eggs
- 1/4 cup unsweetened almond milk
- 2 tablespoons melted coconut oil
- 2 tablespoons honey or maple syrup
- 1 teaspoon vanilla extract
- 1/2 teaspoon baking powder
- 1/4 teaspoon salt
- Coconut oil or butter for cooking
Cooking Instructions:
- Prepare the Batter: In a large mixing bowl, combine the almond flour, baking powder, and salt. In a separate bowl, whisk together the eggs, almond milk, melted coconut oil, honey (or maple syrup), and vanilla extract until well combined. Gradually add the wet ingredients to the dry ingredients, stirring until you achieve a smooth batter without lumps.
- Preheat the Pan: Heat a non-stick skillet or griddle over medium heat. Add a small amount of coconut oil or butter to the pan to prevent sticking. Allow the oil to heat up until it’s shimmering but not smoking.
- Cook the Pancakes: Pour about 1/4 cup of batter onto the skillet for each pancake. Cook the pancakes for 2-3 minutes on one side, or until bubbles form on the surface and the edges begin to set. Gently flip the pancakes and cook for an additional 2 minutes on the other side, or until they’re golden brown and fully cooked.
- Serve and Enjoy: Once cooked, transfer the pancakes to a plate and keep them warm while you cook the remaining batter. Serve the pancakes with your favorite low-carb toppings, such as fresh berries, a dollop of Greek yogurt, or a drizzle of sugar-free syrup.
Extra Tips:
When making Almond Flour Pancakes, it’s important to keep the heat at a medium level to guarantee even cooking without burning the pancakes. If you find the batter too thick, you can add a little more almond milk to reach your desired consistency.
Additionally, it’s essential to let the pancakes set before flipping to prevent them from breaking apart. For added flavor, consider incorporating a pinch of cinnamon or nutmeg into the batter. Finally, almond flour can vary in texture, so if your pancakes are too dense, try sifting the flour before using it to achieve a lighter result.
Egg Muffins With Bell Peppers

Egg Muffins With Bell Peppers are a delicious and convenient option for those looking to enjoy a low-carb breakfast. Packed full of flavor and nutrients, these muffins are easy to make and perfect for meal prep. They combine the protein of eggs with the vibrant taste of bell peppers, guaranteeing that you start your day with a satisfying and energizing meal.
Whether you’re rushing out the door or looking for a leisurely breakfast option, these egg muffins can be prepared ahead of time and kept in the refrigerator for a quick grab-and-go meal.
The beauty of egg muffins lies in their versatility. You can customize them to suit your taste by adding different vegetables, cheese, or spices. In this recipe, we focus on the classic combination of eggs and bell peppers, with a hint of onion and cheese for added flavor.
These muffins are baked, which means you can avoid the greasy mess of frying while still enjoying a fluffy, tender texture. This recipe is designed to serve 4-6 people, making it ideal for family breakfasts or brunch gatherings.
Ingredients:
- 10 large eggs
- 1 cup bell peppers (red, yellow, or green), diced
- 1 cup shredded cheddar cheese
- 1/2 cup diced onion
- 1/4 cup milk or cream
- 1 teaspoon salt
- 1/2 teaspoon black pepper
- 1/2 teaspoon garlic powder
- A sprinkle of fresh parsley or chives for garnish (optional)
Cooking Instructions:
- Preheat the Oven: Start by preheating your oven to 350°F (175°C). This guarantees your muffins will cook evenly.
- Prepare the Muffin Tin: Lightly grease a 12-cup muffin tin with cooking spray or olive oil to prevent the egg muffins from sticking.
- Mix the Ingredients: In a large mixing bowl, crack the eggs and whisk them together with the milk or cream until well combined. Add in the salt, black pepper, and garlic powder, and whisk until the seasonings are evenly distributed.
- Add Vegetables and Cheese: Stir in the diced bell peppers, onion, and shredded cheddar cheese. Mix until all ingredients are evenly coated with the egg mixture.
- Fill the Muffin Cups: Carefully pour the egg mixture into the prepared muffin tin, filling each cup about 3/4 full. This allows room for the muffins to rise as they bake.
- Bake: Place the muffin tin in the preheated oven and bake for 20-25 minutes, or until the egg muffins are set and lightly golden on top. To check for doneness, insert a toothpick into the center of a muffin; it should come out clean.
- Cool and Serve: Once baked, remove the tin from the oven and let the muffins cool for a few minutes before gently removing them from the tin. Garnish with fresh parsley or chives if desired and serve warm.
Extra Tips:
For the best texture, avoid over-mixing the eggs as this can lead to tough, rubbery muffins. If you prefer a little spice, consider adding chopped jalapeños or a dash of hot sauce to the egg mixture.
These egg muffins can be stored in an airtight container in the refrigerator for up to 5 days or frozen for up to a month. Simply reheat them in the microwave or oven for a quick breakfast solution.
Coconut Flour Waffles

Coconut flour waffles are a delicious and nutritious low-carb breakfast option that’s perfect for those who are following a keto or paleo diet. Made with coconut flour, these waffles are rich in fiber and healthy fats, which can help keep you full and satisfied throughout the morning. They’ve a subtle coconut flavor that pairs well with a variety of toppings, from fresh berries and whipped cream to savory options like avocado and bacon.
This recipe makes waffles for 4-6 people, offering a perfect breakfast solution for family gatherings or meal prep. Coconut flour can be a bit tricky to work with due to its high absorbency, but with the right balance of ingredients, you’ll create waffles that are crispy on the outside and fluffy on the inside. Let’s explore the ingredients and instructions to make these delightful coconut flour waffles.
Ingredients:
- 1 cup coconut flour
- 1/2 teaspoon baking powder
- 1/4 teaspoon salt
- 6 large eggs
- 1 cup coconut milk (or almond milk)
- 1/4 cup melted coconut oil
- 2 tablespoons honey or maple syrup (optional for sweetness)
- 1 teaspoon vanilla extract
Cooking Instructions:
1. Preheat the Waffle Maker:
Begin by preheating your waffle maker according to the manufacturer’s instructions. Lightly grease the plates with coconut oil or a non-stick cooking spray to prevent sticking.
2. Mix Dry Ingredients:
In a large mixing bowl, combine the coconut flour, baking powder, and salt. Stir well to guarantee the baking powder is evenly distributed throughout the flour.
3. Whisk Wet Ingredients:
In a separate bowl, whisk together the eggs, coconut milk, melted coconut oil, honey (if using), and vanilla extract until well combined. Make sure the eggs are fully incorporated and the mixture is smooth.
4. Combine Mixtures:
Gradually add the wet ingredients to the dry ingredients, stirring continuously to avoid lumps. The batter will be thick, but continue mixing until everything is well combined. If the batter seems too thick, add a little more coconut milk to reach the desired consistency.
5. Cook the Waffles:
Pour the batter into the preheated waffle maker, spreading it evenly over the surface. Close the lid and cook according to your waffle maker’s instructions, usually about 4-5 minutes, or until the waffles are golden brown and cooked through.
6. Serve:
Carefully remove the waffles from the waffle maker and serve immediately with your choice of toppings. Enjoy them warm with fresh fruit, syrup, or any of your favorite low-carb toppings.
Extra Tips:
When working with coconut flour, it’s important to remember that it absorbs more liquid compared to other flours, so the batter will be thicker than traditional waffle batters. If necessary, you can adjust the batter consistency by adding more coconut or almond milk, a tablespoon at a time.
Additionally, verify that your waffle maker is well-greased to prevent sticking, as coconut flour tends to be more prone to sticking than other flours. Finally, these waffles freeze well, so you can make a batch ahead of time and reheat them for a quick breakfast on busy mornings.
Turkey and Cheese Lettuce Wraps
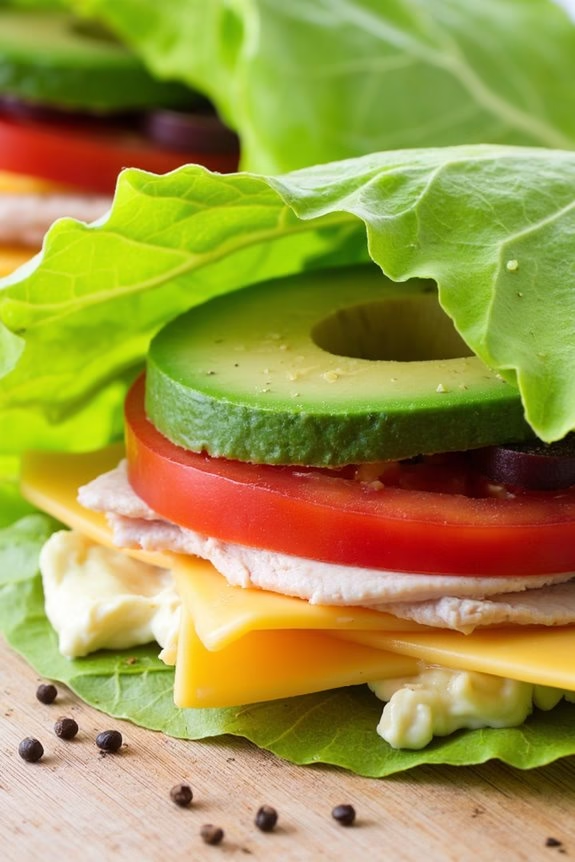
Start your day with a revitalizing and satisfying breakfast by making Turkey and Cheese Lettuce Wraps. These wraps are an excellent low-carb option, perfect for those looking to maintain energy levels without a heavy meal. They’re quick to prepare and can be customized to suit various tastes, making them a versatile breakfast choice.
With a delightful combination of savory turkey, creamy cheese, and crisp lettuce, these wraps are bound to become a breakfast favorite. Turkey and Cheese Lettuce Wraps aren’t only delicious but also nutritious, providing a good source of protein and essential vitamins. The use of lettuce as a wrap keeps the dish light while adding a fresh crunch.
This recipe is designed to serve 4-6 people, making it ideal for family breakfasts or even a brunch gathering. Whether you’re on a low-carb diet or simply want a lighter meal, these wraps are sure to satisfy your morning cravings.
Ingredients (Serves 4-6):
- 1 pound of sliced turkey breast
- 12 large lettuce leaves (such as Romaine or Butterhead)
- 6 slices of cheddar cheese
- 1 ripe avocado, sliced
- 1 medium tomato, sliced
- 1/2 cup of mayonnaise
- 1 tablespoon of Dijon mustard
- Salt and pepper to taste
Cooking Instructions:
- Prepare the Sauce: In a small bowl, combine the mayonnaise and Dijon mustard. Mix well until smooth. This will serve as a flavorful spread for the wraps.
- Prepare the Lettuce: Wash the lettuce leaves thoroughly and pat them dry with a paper towel. This guarantees that the leaves are clean and crisp, which is essential for wrapping.
- Layer the Ingredients: Lay a lettuce leaf flat on a clean surface. Spread a spoonful of the mayonnaise and mustard mixture evenly over the leaf. This will add flavor and help hold the other ingredients in place.
- Add the Fillings: Place a slice of cheddar cheese on top of the lettuce, followed by a few slices of turkey breast. Then add a couple of avocado slices and tomato slices. Season lightly with salt and pepper.
- Wrap it Up: Carefully roll the lettuce leaf around the fillings, folding in the sides as you go to create a neat wrap. Repeat the process with the remaining ingredients to make additional wraps.
- Serve: Arrange the wraps on a plate and serve immediately. Enjoy them as they’re or cut them in half for easier handling.
Extra Tips:
For a more flavorful wrap, consider adding a sprinkle of your favorite herbs, such as basil or cilantro. If you prefer a bit of heat, try adding a dash of hot sauce to the mayonnaise and mustard mixture.
To keep the wraps together, use toothpicks to secure them if needed. If you have any dietary restrictions, feel free to substitute the cheese or turkey with your preferred alternatives. These wraps are also great for meal prep; simply store them in an airtight container in the refrigerator for up to two days.
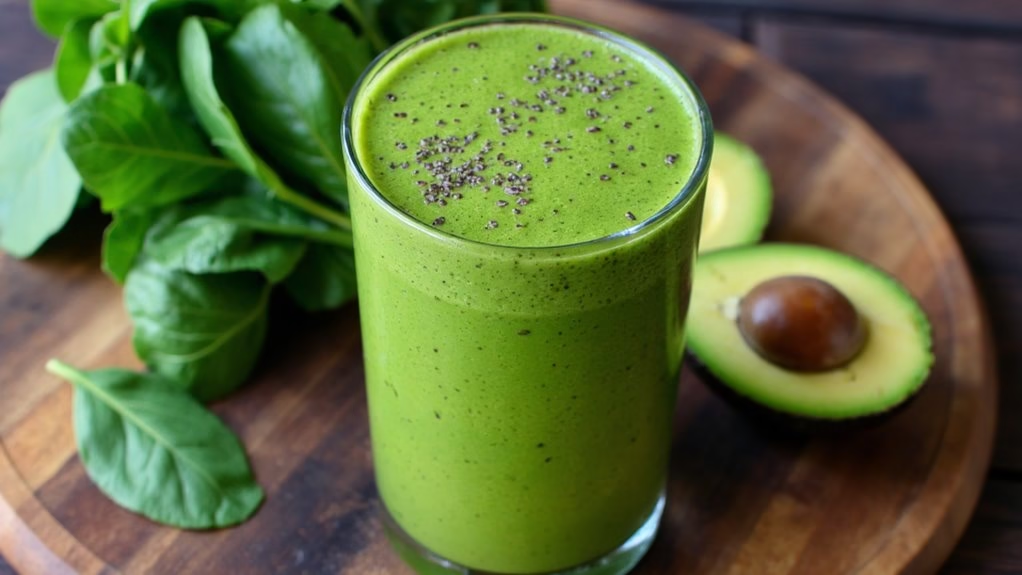
Green Smoothie With Protein Powder
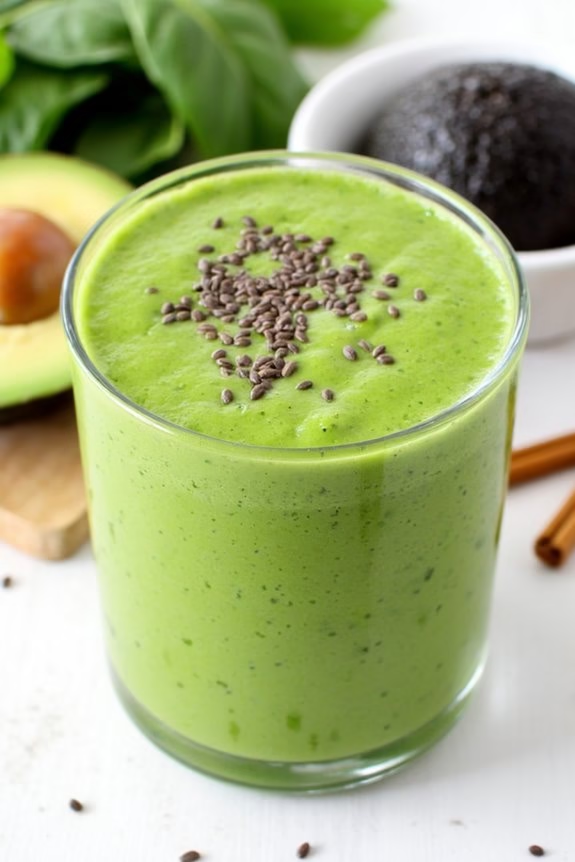
Start your day with a nutritious and energizing Green Smoothie With Protein Powder. This low carb breakfast option is perfect for those who want to fuel their morning with a blend of fresh greens, creamy avocado, and a boost of protein.
Whether you’re on the go or enjoying a leisurely morning, this smoothie is easy to prepare and packed with essential nutrients that will keep you satisfied until lunch.
Combining fresh spinach, kale, and the natural sweetness of ripe bananas, this smoothie isn’t only delicious but also a powerhouse of vitamins and minerals. The addition of protein powder guarantees that you get your necessary protein intake, while almond milk provides a creamy base without the extra carbs.
This recipe serves 4-6 people, making it ideal for family breakfasts or meal prepping for the week.
Ingredients:
- 2 cups fresh spinach
- 2 cups kale, stems removed
- 2 ripe bananas
- 1 avocado
- 2 scoops protein powder (vanilla or unflavored)
- 2 cups unsweetened almond milk
- 2 tablespoons chia seeds
- 1 tablespoon flaxseed meal
- 1 cup ice cubes
Instructions:
- Prepare the Greens: Rinse the spinach and kale thoroughly under cold water. Remove any tough stems from the kale to guarantee a smooth texture in the smoothie.
- Blend the Base: In a large blender, combine the almond milk, spinach, kale, and bananas. Blend on high speed until the mixture is smooth and creamy, with no visible chunks of greens.
- Add the Protein: Cut the avocado in half, remove the pit, and scoop the flesh into the blender. Add the protein powder, chia seeds, and flaxseed meal. Blend again until all the ingredients are well incorporated.
- Chill the Smoothie: Add the ice cubes to the blender and blend on high until the mixture is cold and frothy. If the smoothie is too thick for your liking, you can add a little more almond milk to reach your desired consistency.
- Serve: Pour the smoothie into glasses and serve immediately. If you prefer a sweeter taste, feel free to add a natural sweetener like stevia or honey, but keep in mind this may increase the carb content.
Extra Tips:
To make this smoothie even more nutrient-dense, consider adding a tablespoon of nut butter for healthy fats or a handful of berries for added antioxidants.
If you want to meal prep, you can freeze individual portions of the smoothie mixture in airtight containers and thaw them in the refrigerator overnight for a quick breakfast option. Remember to adjust the liquid content if using frozen ingredients to achieve the perfect thickness.