
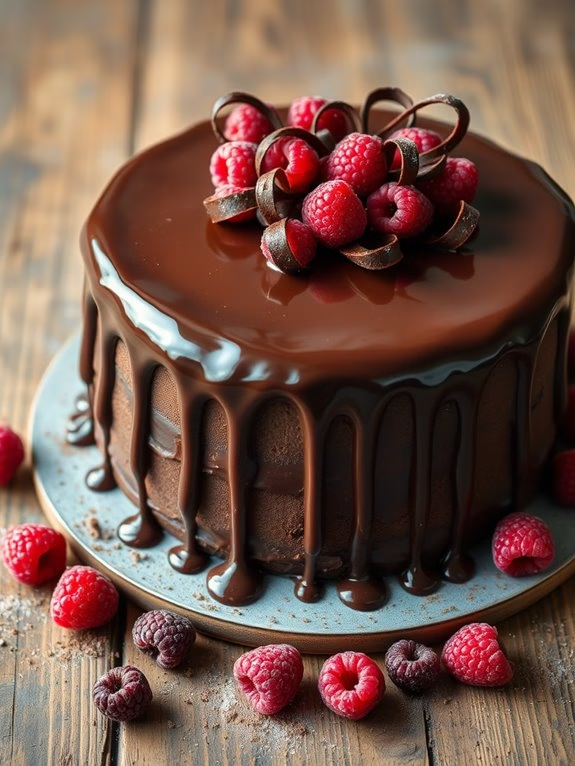
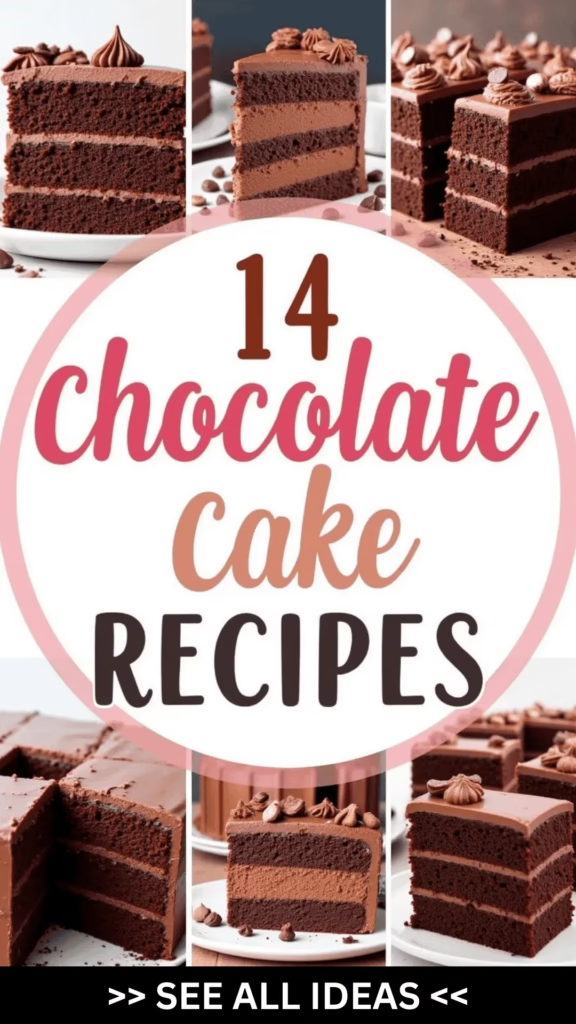
There’s something magical about the way a good chocolate cake can elevate an ordinary day.
Picture a slice of classic fudgy cake that simply melts in your mouth.
And let’s not forget the thrill of discovering the molten center of a decadent chocolate lava cake.
From flourless wonders that defy expectations to vegan delights that never compromise on taste, each recipe offers its own unique charm.
Let’s embark on this sweet journey and uncover what makes each cake irresistibly tempting!
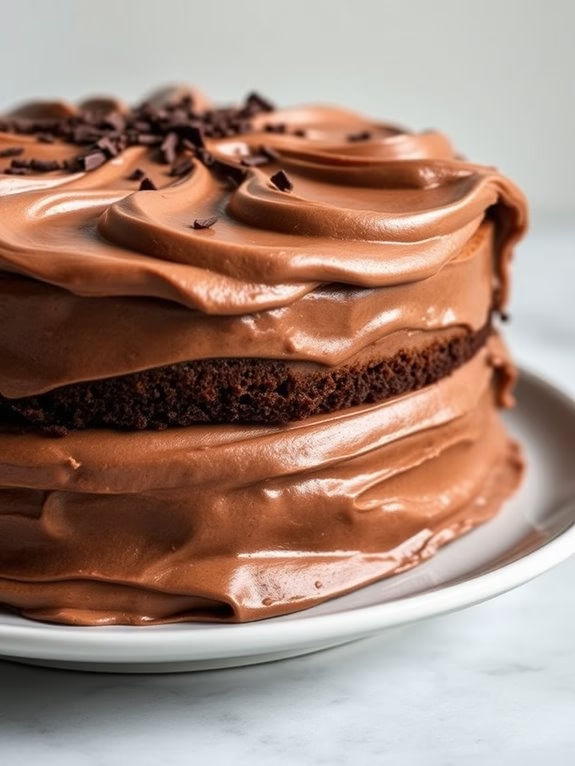
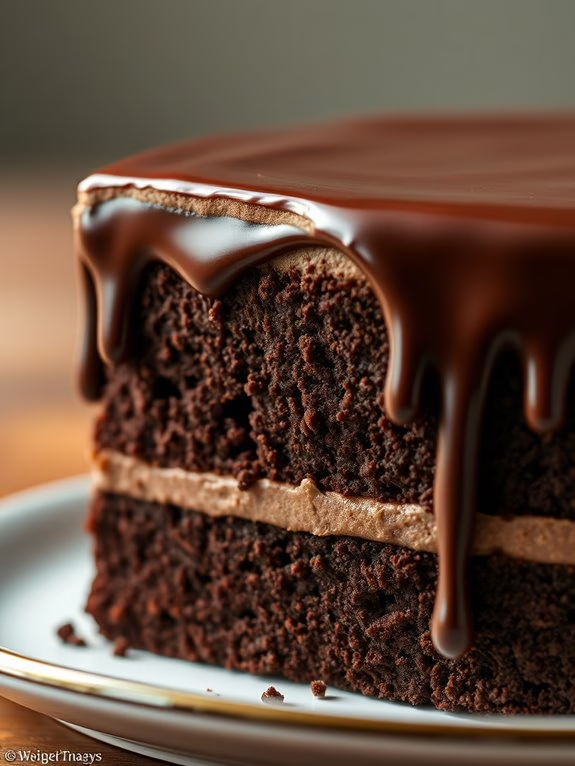
Classic Chocolate Fudge Cake
Classic Chocolate Fudge Cake
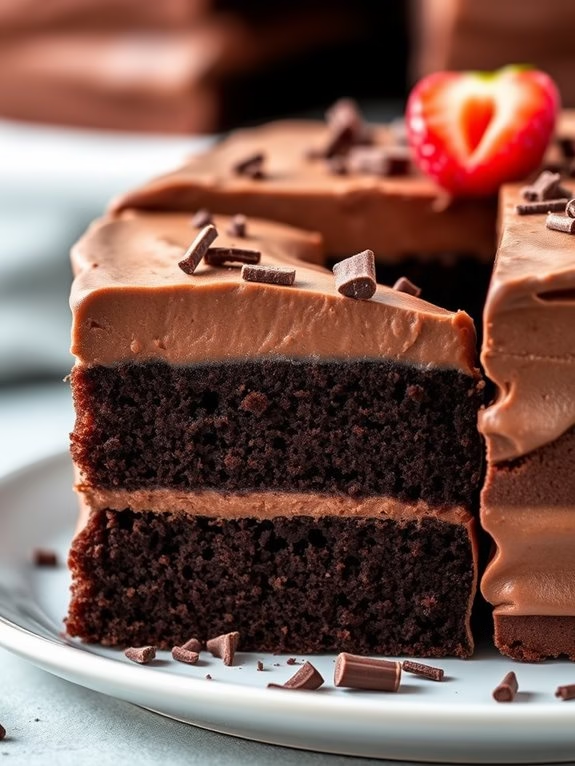
Indulge in the rich, velvety taste of a Classic Chocolate Fudge Cake, a timeless dessert that never fails to impress. This decadent cake features layers of moist chocolate sponge embraced by a luscious, creamy chocolate fudge frosting. Perfect for any occasion, this cake brings together the deep flavors of cocoa and the sweetness of sugar to create a treat that’s both comforting and luxurious.
Whether you’re serving it at a birthday party or a casual family dinner, this Classic Chocolate Fudge Cake is sure to be a crowd-pleaser.
The secret to achieving the perfect texture lies in the balance of ingredients and careful baking. Using high-quality cocoa powder and fresh ingredients will elevate the flavor, while the method of mixing guarantees a fluffy, yet dense cake that holds its shape.
The chocolate fudge frosting, made from a blend of chocolate and cream, adds an extra layer of indulgence, making this cake an irresistible choice for chocolate lovers. Follow this detailed recipe to create your own show-stopping Classic Chocolate Fudge Cake.
Ingredients (Serving size: 4-6 people)
- 1 3/4 cups all-purpose flour
- 3/4 cup unsweetened cocoa powder
- 2 cups granulated sugar
- 1 1/2 teaspoons baking powder
- 1 1/2 teaspoons baking soda
- 1 teaspoon salt
- 2 large eggs
- 1 cup whole milk
- 1/2 cup vegetable oil
- 2 teaspoons vanilla extract
- 1 cup boiling water
- 1/2 cup unsalted butter (for frosting)
- 2/3 cup unsweetened cocoa powder (for frosting)
- 3 cups powdered sugar (for frosting)
- 1/3 cup whole milk (for frosting)
- 1 teaspoon vanilla extract (for frosting)
Cooking Instructions
- Preheat Oven and Prepare Pans: Preheat your oven to 350°F (175°C). Grease and flour two 9-inch round cake pans. This guarantees the cake layers won’t stick and will easily release from the pans.
- Mix Dry Ingredients: In a large mixing bowl, whisk together the flour, cocoa powder, sugar, baking powder, baking soda, and salt until well combined. This step guarantees even distribution of the leavening agents and cocoa throughout the batter.
- Combine Wet Ingredients: In another bowl, beat the eggs, milk, oil, and vanilla extract together until smooth. Gradually add the wet mixture to the dry ingredients, mixing until just combined. The batter will be thick at this stage.
- Add Boiling Water: Carefully stir in the boiling water. The batter will become thin, but this is expected. The hot water helps to deepen the chocolate flavor and creates a moist crumb.
- Bake the Cake: Divide the batter evenly between the prepared pans. Bake in the preheated oven for 30-35 minutes, or until a toothpick inserted into the center comes out clean. Allow the cakes to cool in the pans for about 10 minutes, then transfer to a wire rack to cool completely.
- Prepare the Frosting: In a medium saucepan over low heat, melt the butter. Stir in the cocoa powder until smooth. Remove from heat and gradually add the powdered sugar and milk, alternating between them while stirring continuously. Mix in the vanilla extract until the frosting is smooth and spreadable.
- Assemble the Cake: Once the cakes are completely cool, place one layer on a serving plate. Spread a generous amount of frosting on top. Place the second cake layer on top and frost the top and sides of the cake with the remaining frosting.
Extra Tips
For the best results, make sure the cakes are completely cool before frosting them to prevent the frosting from melting. If you prefer a more intense chocolate flavor, consider adding a teaspoon of instant coffee granules to the boiling water before mixing it into the batter.
For an extra touch of elegance, garnish the cake with chocolate shavings or fresh berries. Remember, patience is key when frosting the cake—take your time to achieve a smooth, even coating. Enjoy your Classic Chocolate Fudge Cake with a glass of cold milk or a cup of hot coffee for a delightful experience.
Decadent Chocolate Lava Cake
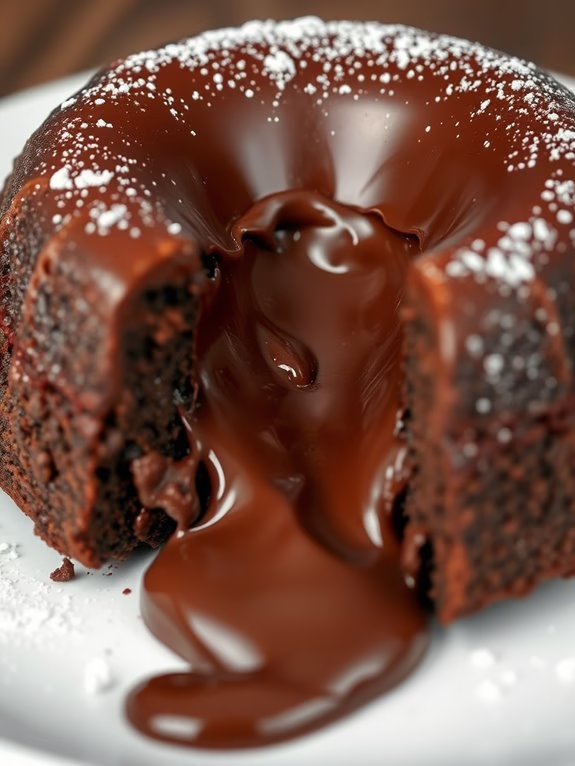
Decadent Chocolate Lava Cake is an indulgent dessert that combines the richness of a chocolate cake with a molten chocolate center. This gourmet treat is perfect for special occasions or when you simply want to impress your guests with a luxurious dessert. The key to a successful lava cake lies in its gooey center, achieved by baking the cake just long enough for the outer layer to set while leaving the middle molten.
This recipe serves 4-6 people and requires high-quality chocolate to enhance the dessert’s flavor. The preparation is straightforward, but timing is essential to guarantee the perfect lava-like consistency. By following the step-by-step instructions carefully, you can create a luscious dessert that’s sure to delight and satisfy any chocolate lover’s cravings.
Ingredients:
- 1 cup (175g) good quality dark chocolate, chopped
- 1/2 cup (115g) unsalted butter
- 2 large eggs
- 2 large egg yolks
- 1/4 cup (50g) granulated sugar
- 2 teaspoons vanilla extract
- 1/4 cup (30g) all-purpose flour
- A pinch of salt
- Cocoa powder for dusting
- Powdered sugar for garnish (optional)
Cooking Instructions:
- Prepare the Ramekins: Preheat your oven to 425°F (220°C). Lightly butter 4-6 ramekins and dust them with cocoa powder, tapping out the excess. This will help prevent the cakes from sticking and give them a nice outer coating.
- Melt Chocolate and Butter: In a medium heatproof bowl, combine the chopped dark chocolate and unsalted butter. Place the bowl over a pot of simmering water (double boiler) and stir until completely melted and smooth. Remove from heat and let it cool slightly.
- Mix Eggs and Sugar: In a separate bowl, whisk together the eggs, egg yolks, and granulated sugar until pale and thick. This should take about 3-4 minutes if using an electric mixer.
- Combine Mixtures: Gradually add the melted chocolate mixture to the egg mixture, stirring continuously until well combined. Stir in the vanilla extract.
- Add Dry Ingredients: Gently fold in the all-purpose flour and a pinch of salt into the chocolate mixture, making sure there are no lumps.
- Fill the Ramekins: Divide the batter evenly among the prepared ramekins, filling each about three-quarters full.
- Bake the Cakes: Place the ramekins on a baking tray and bake in the preheated oven for about 12-14 minutes. The edges should be firm while the center remains soft.
- Serve Immediately: Once baked, let the cakes sit for 1 minute before carefully inverting them onto serving plates. Dust with powdered sugar if desired and serve immediately while the center is still molten.
Extra Tips: To achieve the perfect molten center, keep a close eye on the baking time. If your oven runs hot, check the cakes a minute early. Use good quality chocolate for the best flavor.
Additionally, you can prepare the batter ahead of time and refrigerate it; just add an extra minute or two to the baking time if baking straight from the fridge. Remember, the cakes should be served immediately to enjoy the molten center at its best.
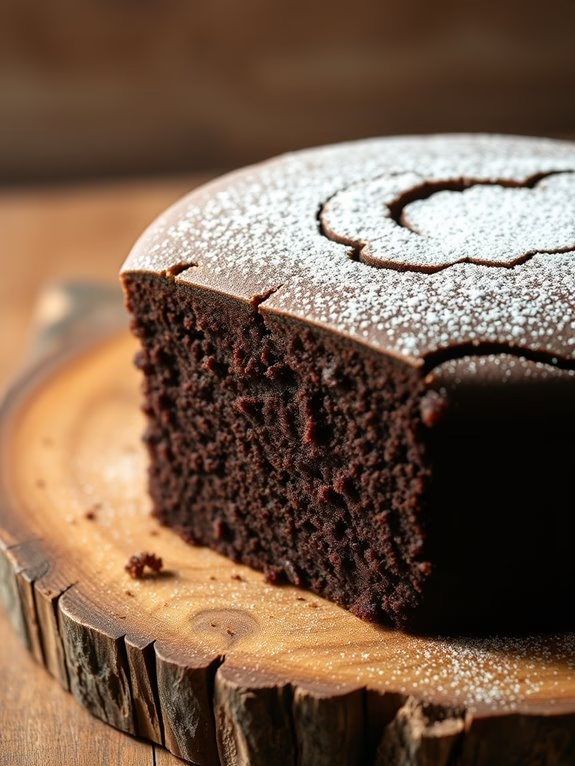
Flourless Chocolate Cake

Recipe: Flourless Chocolate Cake****
Flourless Chocolate Cake is a decadent dessert that’s perfect for chocolate lovers and those following a gluten-free diet. This rich and moist cake is made with only a few simple ingredients, allowing the intense chocolate flavor to shine through.
Whether you’re serving it at a dinner party or enjoying it as a special treat at home, this cake is bound to impress with its fudgy texture and deep cocoa taste. This recipe serves 4-6 people and is ideal for those who want to indulge in a luxurious dessert without the need for flour.
The cake can be topped with a dusting of powdered sugar, a dollop of whipped cream, or fresh berries for a touch of elegance. With its simple preparation and remarkable results, this Flourless Chocolate Cake is a must-try for any dessert enthusiast.
Ingredients:
- 1 cup (6 ounces) semisweet or bittersweet chocolate, chopped
- ½ cup (1 stick) unsalted butter, cut into pieces
- ¾ cup granulated sugar
- ¼ teaspoon salt
- 1 teaspoon pure vanilla extract
- 3 large eggs
- ½ cup unsweetened cocoa powder
Cooking Instructions:
1. Preheat the Oven: Begin by preheating your oven to 375°F (190°C). Prepare an 8-inch round cake pan by greasing it well. Line the bottom with parchment paper for easy removal later.
2. Melt Chocolate and Butter: In a medium heatproof bowl, combine the chopped chocolate and butter. Set the bowl over a pot of simmering water (double boiler method) and stir until both ingredients are fully melted and smooth.
Alternatively, you can melt them in a microwave, stirring every 30 seconds until smooth.
3. Mix in Sugar and Salt: Remove the bowl from the heat and whisk in the sugar and salt until the mixture is well combined. The mixture should be warm but not hot when you add the next ingredients.
4. Add Vanilla and Eggs: Stir in the vanilla extract. Add the eggs one at a time, whisking well after each addition, verifying each egg is fully incorporated before adding the next.
5. Incorporate Cocoa Powder: Sift the cocoa powder over the chocolate mixture to avoid lumps. Gently fold the cocoa into the batter until just combined, being careful not to overmix.
6. Transfer to Pan: Pour the batter into the prepared cake pan. Smooth the top with a spatula to confirm even baking.
7. Bake the Cake: Place the cake pan in the preheated oven and bake for 25 minutes. The cake is done when the top has formed a thin crust, and a toothpick inserted in the center comes out with a few moist crumbs clinging to it.
8. Cool and Serve: Allow the cake to cool in the pan on a wire rack for 10 minutes. Run a knife around the edge of the cake, invert it onto a serving plate, and remove the parchment paper. Serve warm or at room temperature, topped with your choice of garnish.
Extra Tips:
When making a Flourless Chocolate Cake, it’s important to use high-quality chocolate, as it greatly impacts the flavor and texture of the final product.
Confirm that all ingredients are at room temperature before beginning to help them blend together more smoothly. This cake can be stored in an airtight container at room temperature for up to 3 days, or refrigerated for up to a week.
Always allow the cake to come to room temperature before serving, as the flavors and textures are more pronounced when it’s not too cold.
Chocolate Espresso Layer Cake
Indulge in the rich and decadent flavors of a Chocolate Espresso Layer Cake, a dessert that perfectly marries the deep, intense notes of espresso with luscious chocolate. This cake is an excellent choice for chocolate lovers who crave a sophisticated twist to their dessert experience.
With its moist layers of chocolate cake infused with espresso and a smooth, creamy espresso buttercream frosting, every bite offers a harmonious blend of flavors and textures. This cake is ideal for special occasions or any day you want to treat yourself to something extraordinary.
Perfect for serving 4-6 people, this Chocolate Espresso Layer Cake isn’t only a delight to eat but also a joy to make. Each layer is carefully crafted to guarantee the right balance of flavors, and the final result is as pleasing to the eye as it’s to the palate.
Whether you’re an experienced baker or a beginner looking to impress, this recipe will guide you through the process, guaranteeing a show-stopping dessert for your table.
Ingredients:
- 1 ¾ cups all-purpose flour
- 1 ½ cups granulated sugar
- ¾ cup unsweetened cocoa powder
- 2 teaspoons baking soda
- 1 teaspoon baking powder
- 1 teaspoon salt
- 2 large eggs
- 1 cup whole milk
- ½ cup vegetable oil
- 2 teaspoons vanilla extract
- 1 cup freshly brewed espresso, cooled
- 1 cup unsalted butter, softened
- 3 cups powdered sugar
- 2 tablespoons instant espresso powder
- 2 tablespoons hot water
Cooking Instructions:
- Prepare the oven and pans: Preheat your oven to 350°F (175°C). Grease and flour two 9-inch round cake pans, then line the bottoms with parchment paper for easy removal.
- Mix dry ingredients: In a large mixing bowl, whisk together the flour, granulated sugar, cocoa powder, baking soda, baking powder, and salt. Make sure all the ingredients are well combined.
- Combine wet ingredients: In another bowl, beat the eggs, then add the milk, vegetable oil, and vanilla extract. Mix until well blended.
- Incorporate espresso: Slowly add the cooled brewed espresso to the wet ingredients, stirring continuously to combine.
- Combine wet and dry mixtures: Gradually add the wet ingredients to the dry ingredients, mixing just until combined. Avoid overmixing to guarantee a tender cake.
- Bake the cakes: Divide the batter evenly between the prepared cake pans. Bake in the preheated oven for 30-35 minutes, or until a toothpick inserted into the center comes out clean. Let the cakes cool in the pans for 10 minutes, then turn them out onto wire racks to cool completely.
- Make the buttercream frosting: In a bowl, beat the softened butter with an electric mixer until creamy. Gradually add the powdered sugar, beating well after each addition.
- Dissolve espresso powder: In a small bowl, dissolve the instant espresso powder in the hot water. Once dissolved, add this mixture to the buttercream, and beat until smooth and fluffy.
- Assemble the cake: Place one cake layer on a serving platter. Spread a generous amount of espresso buttercream over the top. Place the second cake layer on top and spread the remaining buttercream over the top and sides of the cake.
- Chill before serving: Refrigerate the cake for at least 30 minutes before serving to allow the flavors to meld and the frosting to firm up slightly.
Extra Tips:
For an extra layer of flavor, consider adding a tablespoon of coffee liqueur to the cake batter or frosting. If you want a more intense espresso flavor, increase the amount of espresso powder in the buttercream.
When dissolving the espresso powder, make sure the water is hot enough to fully dissolve the granules for a smooth frosting. Finally, for a decorative touch, use chocolate shavings or cocoa powder to garnish the cake just before serving.
Vegan Chocolate Cake
Vegan Chocolate Cake
Indulge in the rich, velvety goodness of a Vegan Chocolate Cake, a delightful dessert that guarantees everyone at the table can enjoy a slice of heaven without compromising their dietary preferences. This cake isn’t only free from animal products but also incredibly moist and flavorful, thanks to the perfect blend of plant-based ingredients.
Whether you’re catering to vegan guests or simply exploring plant-based baking, this recipe will guide you to create a chocolate masterpiece that melts in your mouth and satisfies your sweet tooth.
This vegan chocolate cake is perfect for any occasion, be it a birthday party, family gathering, or just a weekend treat. The ingredients are simple and likely already in your pantry, making it a convenient option for spontaneous baking.
With the right balance of cocoa and sweetness, this cake promises not only to be a hit among vegans but also among those who aren’t necessarily following a vegan diet. Immerse yourself in this easy-to-follow recipe and discover how effortless it’s to create a vegan dessert that doesn’t compromise on taste or texture.
Ingredients (Serves 4-6)
- 1 ½ cups all-purpose flour
- 1 cup granulated sugar
- 1/3 cup unsweetened cocoa powder
- 1 tsp baking soda
- 1/2 tsp salt
- 1 cup water
- 1/3 cup vegetable oil
- 1 tbsp apple cider vinegar
- 1 tsp vanilla extract
Instructions
1. Preheat the Oven:
Preheat your oven to 350°F (175°C). This guarantees that by the time you’re ready to bake, the oven is at the perfect temperature.
2. Prepare the Baking Pan:
Lightly grease an 8-inch round cake pan with vegetable oil or line it with parchment paper. This will prevent the cake from sticking and make it easier to remove once baked.
3. Mix Dry Ingredients:
In a large mixing bowl, combine the flour, sugar, cocoa powder, baking soda, and salt. Use a whisk to blend these dry ingredients thoroughly, ensuring there are no lumps.
4. Combine Wet Ingredients:
In a separate bowl, mix together the water, vegetable oil, apple cider vinegar, and vanilla extract. Make sure the mixture is well-blended.
5. Create the Batter:
Slowly pour the wet ingredients into the bowl with the dry ingredients. Stir gently until everything is just combined, making sure not to over-mix, as this can result in a dense cake.
6. Pour Batter into Pan:
Pour the batter into the prepared cake pan, spreading it evenly with a spatula to ensure a uniform bake.
7. Bake the Cake:
Place the cake in the preheated oven and bake for 30-35 minutes, or until a toothpick inserted into the center comes out clean. This indicates that the cake is fully baked.
8. Cool and Serve:
Let the cake cool in the pan for about 10 minutes before transferring it to a wire rack to cool completely. Once cooled, it’s ready to be frosted or served as is.
Extra Tips
To enhance the chocolate flavor, consider adding a teaspoon of instant coffee granules to the dry ingredients, which brings out the richness of the cocoa.
For a more decadent experience, serve the cake with a scoop of vegan ice cream or a dollop of coconut whipped cream. If you wish to frost the cake, a vegan chocolate ganache or a simple dusting of powdered sugar can elevate its presentation and taste.
Chocolate Peanut Butter Cake
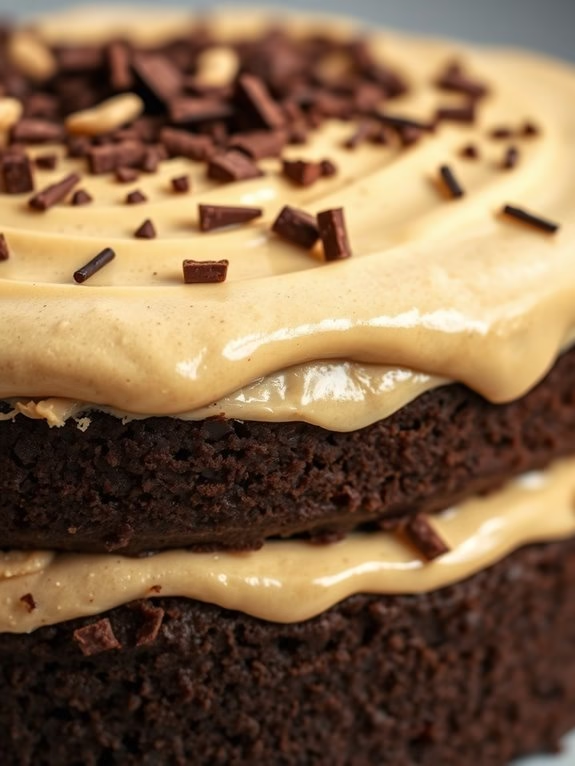
Chocolate Peanut Butter Cake
Indulge in the rich and decadent flavors of a Chocolate Peanut Butter Cake that combines two of the most beloved flavors into one irresistible dessert. This cake is perfect for any occasion, offering a moist chocolate base layered with creamy peanut butter frosting, creating a harmonious blend of sweet and savory. Not only is this cake a treat for the taste buds, but it also presents beautifully, making it a showstopper at any gathering or dinner party.
The Chocolate Peanut Butter Cake is designed to serve 4-6 people, making it an ideal size for intimate celebrations or family gatherings. Each bite promises a delightful experience, balancing the richness of the chocolate with the smooth, nutty essence of peanut butter. Whether you’re a seasoned baker or a beginner looking to impress, this recipe is straightforward and rewarding, guaranteeing a cake that not only tastes divine but also looks stunning.
Ingredients for 4-6 people:
- 1 cup all-purpose flour
- 1 cup granulated sugar
- 1/3 cup unsweetened cocoa powder
- 1 teaspoon baking powder
- 1/2 teaspoon baking soda
- 1/4 teaspoon salt
- 1/2 cup whole milk
- 1/4 cup vegetable oil
- 1 large egg
- 1 teaspoon vanilla extract
- 1/2 cup boiling water
- 1/2 cup creamy peanut butter
- 1/4 cup unsalted butter, softened
- 2 cups powdered sugar
- 1/4 cup heavy cream
- 1/2 teaspoon vanilla extract
Cooking Instructions:
- Preheat the Oven: Begin by preheating your oven to 350°F (175°C). Prepare an 8-inch round cake pan by greasing it with butter or non-stick spray, then line the bottom with parchment paper for easy removal.
- Mix Dry Ingredients: In a large bowl, whisk together the flour, granulated sugar, cocoa powder, baking powder, baking soda, and salt until well combined. This guarantees even distribution of the leavening agents and cocoa powder.
- Combine Wet Ingredients: In a separate bowl, mix the milk, vegetable oil, egg, and vanilla extract. Stir the wet ingredients into the dry mixture until just combined. Be careful not to overmix, which can result in a dense cake.
- Add Boiling Water: Carefully stir in the boiling water until the batter is smooth. The batter will be thin, but this is normal for a moist chocolate cake.
- Bake the Cake: Pour the batter into the prepared cake pan and bake in the preheated oven for 30-35 minutes. Check for doneness by inserting a toothpick into the center of the cake; it should come out clean or with a few moist crumbs.
- Cool the Cake: Allow the cake to cool in the pan for 10 minutes before transferring it to a wire rack to cool completely.
- Prepare Peanut Butter Frosting: While the cake cools, beat the peanut butter and softened butter together in a mixing bowl until creamy. Gradually add the powdered sugar, followed by the heavy cream and vanilla extract, beating until smooth and fluffy.
- Assemble the Cake: Once the cake is completely cool, spread the peanut butter frosting evenly over the top and sides of the cake. Use a spatula to create swirls or decorative patterns if desired.
- Serve and Enjoy: Slice the cake into pieces and serve. Enjoy the rich flavors of chocolate and peanut butter in every bite.
Extra Tips:
For an extra touch of elegance, consider topping the cake with chocolate shavings or a sprinkle of chopped peanuts for added texture and flavor.
If you find the frosting too thick to spread easily, add a little more cream, one teaspoon at a time, until you reach the desired consistency.
Additionally, for a richer chocolate flavor, use high-quality cocoa powder. Always ascertain the cake is fully cooled before frosting to prevent the frosting from melting.
Red Velvet Chocolate Cake
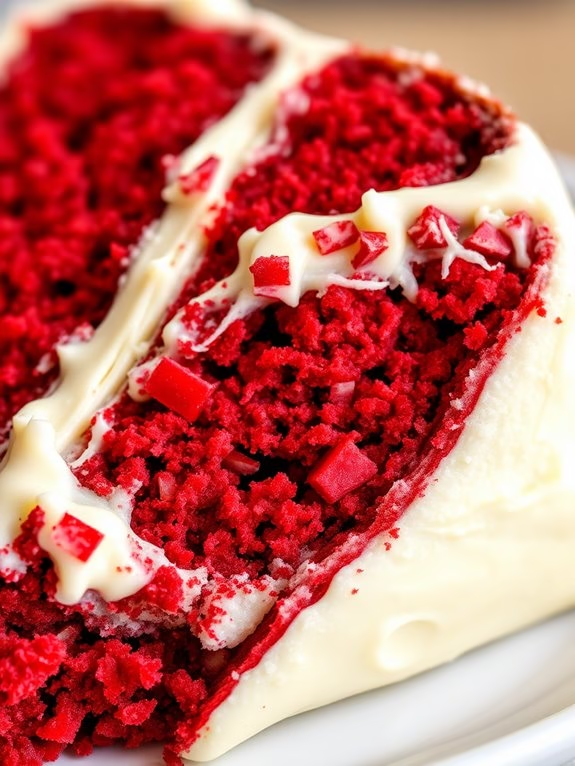
Red Velvet Chocolate Cake is a delightful twist on the traditional red velvet cake, incorporating rich chocolate flavors to create an indulgent dessert that’s perfect for any occasion. This cake is renowned for its striking red color and moist, tender crumb, which is complemented by a subtle hint of cocoa.
Whether you’re celebrating a special event or simply wanting to treat yourself, this Red Velvet Chocolate Cake will impress your taste buds with its perfect balance of sweetness and chocolatey goodness.
The cake is typically layered with a creamy frosting, often cream cheese, which adds a tangy contrast to the sweetness of the cake. The combination of the cake’s velvety texture and the smooth, luscious frosting makes each bite a delectable experience.
This recipe serves 4-6 people, making it ideal for small gatherings or family dinners. Follow these instructions to bake a delicious Red Velvet Chocolate Cake that will certainly become a favorite in your dessert repertoire.
Ingredients:
- 2 ½ cups all-purpose flour
- 1 ½ cups granulated sugar
- 1 teaspoon baking soda
- 1 teaspoon salt
- 1 tablespoon cocoa powder
- 1 ½ cups vegetable oil
- 1 cup buttermilk, room temperature
- 2 large eggs, room temperature
- 1 tablespoon red food coloring
- 1 teaspoon vanilla extract
- 1 teaspoon white vinegar
- ½ cup unsalted butter, softened
- 8 ounces cream cheese, softened
- 3 ½ cups powdered sugar
- 1 teaspoon vanilla extract (for frosting)
Instructions:
- Preheat the Oven: Start by preheating your oven to 350°F (175°C). Grease and flour two 8-inch round cake pans to prevent the cake from sticking.
- Mix Dry Ingredients: In a large bowl, whisk together the all-purpose flour, granulated sugar, baking soda, salt, and cocoa powder until well combined.
- Combine Wet Ingredients: In another bowl, whisk together the vegetable oil, buttermilk, eggs, red food coloring, vanilla extract, and white vinegar until the mixture is smooth and uniform in color.
- Create the Batter: Gradually add the wet ingredients to the dry ingredients, mixing until just combined. Be careful not to overmix, as this can result in a dense cake.
- Bake the Cake: Divide the batter evenly between the prepared cake pans. Bake in the preheated oven for 25-30 minutes, or until a toothpick inserted in the center of the cakes comes out clean.
- Cool the Cake: Allow the cakes to cool in the pans for about 10 minutes, then remove from pans and transfer to a wire rack to cool completely.
- Prepare the Frosting: In a large bowl, beat the softened butter and cream cheese together until smooth and creamy. Gradually add the powdered sugar and vanilla extract, beating until the frosting is light and fluffy.
- Assemble the Cake: Once the cakes are completely cool, place one cake layer on a serving plate. Spread a layer of frosting over the top, then place the second cake layer on top. Use the remaining frosting to cover the top and sides of the cake.
Extra Tips:
For the best results, make sure all your ingredients are at room temperature before you start preparing the cake. This helps guarantee that the batter mixes evenly, resulting in a smoother texture.
If you prefer a deeper red color, you can adjust the amount of food coloring to your liking. Also, when frosting the cake, use a crumb coat (a thin layer of frosting) first to catch any loose crumbs, then chill the cake for about 20 minutes before applying the final layer of frosting for a cleaner finish.
Chocolate Mousse Cake
Chocolate mousse cake is a delightful dessert that combines the rich, velvety texture of chocolate mousse with the moist, decadent layers of chocolate cake. Perfect for special occasions or simply indulging your sweet tooth, this cake is bound to impress with its luxurious taste and presentation.
The key to a successful chocolate mousse cake is achieving the right balance of flavors and textures, guaranteeing that each bite is a harmonious blend of creamy mousse and tender cake layers.
This recipe will guide you through the process of creating a chocolate mousse cake that serves 4-6 people. The cake features a base of moist chocolate cake, topped with a smooth and airy chocolate mousse, and finished with a glossy chocolate ganache. With a little patience and attention to detail, you can create a show-stopping dessert that will leave your guests wanting more.
Ingredients:
- 1 cup all-purpose flour
- 1/2 cup cocoa powder
- 1 teaspoon baking powder
- 1/2 teaspoon baking soda
- 1/4 teaspoon salt
- 2/3 cup granulated sugar
- 2/3 cup buttermilk
- 1/4 cup vegetable oil
- 1 teaspoon vanilla extract
- 2 large eggs
- 1 cup heavy whipping cream
- 1 cup semisweet chocolate chips
- 1/4 cup unsalted butter
- 1/4 cup powdered sugar
- 1 teaspoon gelatin
- 2 tablespoons cold water
Instructions:
- Preheat the Oven and Prepare the Cake Pan: Preheat your oven to 350°F (175°C). Grease and line the bottom of a 9-inch round cake pan with parchment paper to prevent sticking.
- Mix Dry Ingredients: In a medium-sized bowl, whisk together the flour, cocoa powder, baking powder, baking soda, and salt until well combined.
- Combine Wet Ingredients: In a separate large bowl, beat the eggs and granulated sugar until light and fluffy. Add the buttermilk, vegetable oil, and vanilla extract, and mix until smooth.
- Create Cake Batter: Gradually add the dry ingredients to the wet mixture, stirring gently until just combined. Be careful not to overmix as this can lead to a dense cake.
- Bake the Cake: Pour the batter into the prepared cake pan and bake for 25-30 minutes, or until a toothpick inserted into the center comes out clean. Allow the cake to cool completely in the pan before removing.
- Prepare the Chocolate Mousse: While the cake is cooling, sprinkle the gelatin over the cold water in a small bowl and let it sit for about 5 minutes to bloom. Melt the chocolate chips and butter together in a microwave-safe bowl, stirring every 30 seconds until smooth. Allow to cool slightly.
- Whip the Cream: In a chilled mixing bowl, whip the heavy cream and powdered sugar until soft peaks form. Gently fold in the melted chocolate mixture followed by the gelatin mixture until fully incorporated.
- Assemble the Cake: Once the cake has cooled, spread the chocolate mousse evenly over the top of the cake. Refrigerate for at least 2 hours to allow the mousse to set.
- Make the Chocolate Ganache: In a small saucepan, heat 1/2 cup of heavy cream over medium heat until it begins to simmer. Remove from heat and pour over 1 cup of chocolate chips in a bowl. Let it sit for a minute, then stir until smooth. Allow the ganache to cool slightly before pouring over the mousse layer.
- Chill and Serve: Return the cake to the refrigerator for another hour until the ganache is set. Slice and serve chilled for the best texture and flavor.
Extra Tips:
For the best results, make certain all ingredients are at room temperature before starting, as this helps the batter mix evenly and the mousse set properly.
When folding the mousse ingredients, use gentle motions to keep the air in the whipped cream, which contributes to a light and airy texture.
If you’re short on time, you can prepare the cake layers a day in advance and assemble them with the mousse and ganache when ready to serve.
Additionally, for a more personalized touch, consider adding a layer of fresh berries or nuts between the mousse and cake layers for added flavor and texture.
Chocolate Peppermint Cake
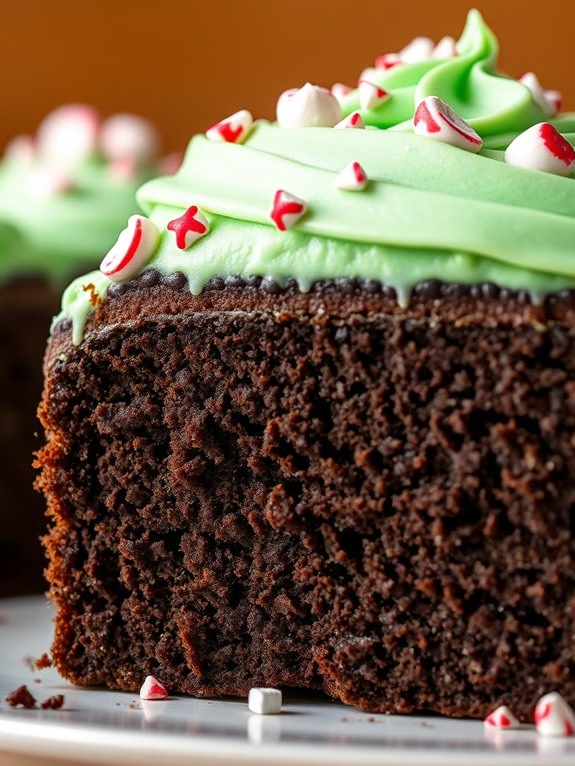
Recipe: Chocolate Peppermint Cake****
Indulge in the delightful combination of rich chocolate and invigorating peppermint with this Chocolate Peppermint Cake. Perfect for holiday gatherings or any special occasion, this cake brings together the decadent taste of chocolate with a hint of minty freshness.
The moist and fluffy texture of the cake pairs beautifully with the creamy peppermint frosting, creating a dessert that’s sure to impress your family and friends. This recipe is designed for a serving size of 4-6 people, making it an ideal treat for a small group.
Whether you’re an experienced baker or a novice in the kitchen, this recipe is straightforward and easy to follow. Gather your ingredients and prepare to create a cake that not only tastes amazing but also fills your home with the enchanting aroma of chocolate and peppermint.
Ingredients:
- 1 cup all-purpose flour
- 1 cup granulated sugar
- 1/2 cup unsweetened cocoa powder
- 1 teaspoon baking powder
- 1/2 teaspoon baking soda
- 1/4 teaspoon salt
- 1/2 cup buttermilk
- 1/4 cup vegetable oil
- 1 large egg
- 1 teaspoon vanilla extract
- 1/2 cup boiling water
- 1/2 teaspoon peppermint extract
For the Peppermint Frosting:
- 1/2 cup unsalted butter, softened
- 2 cups powdered sugar
- 2 tablespoons heavy cream
- 1/4 teaspoon peppermint extract
- 2-3 drops green food coloring (optional)
- Crushed peppermint candies for garnish
Instructions:
- Preheat the Oven and Prepare the Pan: Preheat your oven to 350°F (175°C). Grease and flour a 9-inch round cake pan, or line it with parchment paper to prevent sticking.
- Mix Dry Ingredients: In a large mixing bowl, combine the flour, sugar, cocoa powder, baking powder, baking soda, and salt. Whisk together until well combined.
- Combine Wet Ingredients: In another bowl, whisk together the buttermilk, vegetable oil, egg, and vanilla extract until smooth. Gradually add this mixture to the dry ingredients, stirring until just combined.
- Incorporate Boiling Water and Peppermint: Carefully stir in the boiling water and peppermint extract. The batter will be thin, but this step guarantees a moist cake.
- Bake the Cake: Pour the batter into the prepared cake pan. Bake in the preheated oven for 30-35 minutes, or until a toothpick inserted into the center comes out clean. Allow the cake to cool in the pan for 10 minutes before transferring it to a wire rack to cool completely.
- Prepare the Peppermint Frosting: In a medium bowl, beat the softened butter until creamy. Gradually add the powdered sugar, heavy cream, peppermint extract, and food coloring (if using). Beat until smooth and fluffy.
- Frost the Cake: Once the cake is completely cooled, spread the peppermint frosting evenly over the top and sides of the cake. Garnish with crushed peppermint candies for an extra festive touch.
Extra Tips:
For an even richer chocolate flavor, consider adding a handful of chocolate chips to the batter before baking. To enhance the peppermint flavor, you can add a few more drops of peppermint extract to the frosting, but be cautious as it can become overpowering.
For a neat presentation, use a serrated knife to level the top of the cake before frosting, guaranteeing a smooth and even surface. Store any leftovers in an airtight container to maintain freshness. Enjoy your delicious creation!
German Chocolate Cake

German Chocolate Cake Recipe
German Chocolate Cake is a classic dessert that’s cherished for its rich and decadent flavors. Originating from the United States rather than Germany, this cake is named after Samuel German, an Englishman who developed a type of dark-baking chocolate for the Baker’s Chocolate Company.
This cake is characterized by its moist chocolate layers, filled and topped with a luscious coconut-pecan frosting. The combination of flavors, from the bittersweet chocolate to the sweet and nutty frosting, makes it a wonderful treat for any special occasion or gathering.
To create this indulgent dessert, you’ll need to prepare both the cake layers and the frosting. The chocolate cake layers are made with a combination of cocoa powder and melted chocolate, giving them a deep chocolate flavor, while the frosting is made by cooking together evaporated milk, sugar, egg yolks, butter, sweetened shredded coconut, and chopped pecans until thick and creamy.
This recipe serves 4-6 people and is perfect for those looking to enjoy a slice of traditional German Chocolate Cake.
Ingredients:
- 1 cup granulated sugar
- 1/2 cup unsalted butter, softened
- 1 cup buttermilk
- 2 large eggs
- 1 teaspoon vanilla extract
- 1 cup all-purpose flour
- 1/3 cup unsweetened cocoa powder
- 1/2 teaspoon baking soda
- 1/4 teaspoon salt
- 1/2 cup Baker’s German’s Sweet Chocolate, melted
For the Coconut-Pecan Frosting:
- 3/4 cup evaporated milk
- 3/4 cup granulated sugar
- 3 egg yolks
- 1/4 cup unsalted butter
- 1 teaspoon vanilla extract
- 1 cup sweetened shredded coconut
- 3/4 cup chopped pecans
Instructions:
- Preheat the Oven: Set your oven to 350°F (175°C). Grease and flour two 9-inch round cake pans to prevent the cake from sticking.
- Prepare the Cake Batter: Cream together the granulated sugar and softened butter in a large mixing bowl until light and fluffy. Add in the eggs, one at a time, beating well after each addition. Stir in the vanilla extract and melted chocolate.
- Combine Dry Ingredients: In a separate bowl, sift together the all-purpose flour, cocoa powder, baking soda, and salt. Gradually add the dry ingredients to the creamed mixture alternately with the buttermilk, beginning and ending with the dry ingredients.
- Bake the Cake: Pour the batter evenly into the prepared cake pans. Bake in the preheated oven for 25-30 minutes, or until a toothpick inserted into the center comes out clean. Allow the cakes to cool in the pans for 10 minutes before transferring to a wire rack to cool completely.
- Make the Frosting: In a medium saucepan, whisk together the evaporated milk, sugar, egg yolks, butter, and vanilla extract over medium heat. Cook, stirring constantly, until the mixture thickens and turns golden brown, about 10-12 minutes. Remove from heat and stir in the coconut and pecans. Let the frosting cool slightly before spreading.
- Assemble the Cake: Place one cake layer on a serving plate. Spread a generous amount of coconut-pecan frosting over the top. Place the second cake layer on top and spread the remaining frosting over the top and sides of the cake.
Extra Tips:
For an even richer flavor, try using high-quality chocolate and fresh pecans.
When making the frosting, confirm you stir constantly to prevent the eggs from curdling. If you find the frosting too thick, a tablespoon of milk can help achieve the desired consistency.
To enhance the cake’s texture, toast the pecans lightly before adding them to the frosting, as this will bring out their nutty flavor.
Finally, let the cake sit for a few hours or overnight to allow the flavors to meld together beautifully.
Chocolate Hazelnut Cake
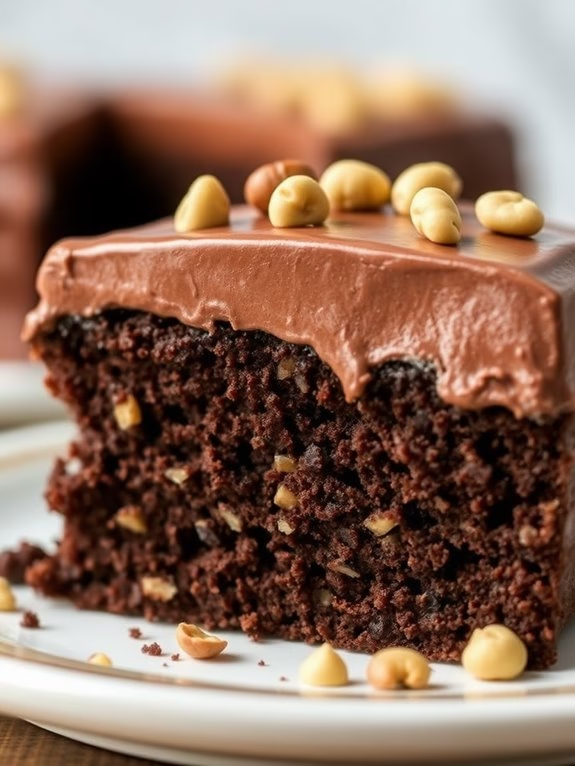
Chocolate Hazelnut Cake
Indulge in the rich flavors of this Chocolate Hazelnut Cake, a delightful treat that combines the nutty essence of hazelnuts with the deep, luscious taste of chocolate. Perfect for any special occasion or simply as a sumptuous dessert, this cake is sure to impress your family and friends.
The moist texture of the cake, coupled with the creamy chocolate hazelnut frosting, creates a delightful harmony of flavors that will satisfy any sweet tooth. This recipe serves 4-6 people, making it an ideal choice for small gatherings or a cozy family dessert.
With its elegant presentation and decadent taste, the Chocolate Hazelnut Cake is a delightful way to end any meal. Gather your ingredients, follow the step-by-step instructions, and enjoy baking this exquisite cake that will surely become a favorite in your recipe collection.
Ingredients:
- 1 cup all-purpose flour
- 1/3 cup unsweetened cocoa powder
- 1 tsp baking powder
- 1/2 tsp baking soda
- 1/4 tsp salt
- 3/4 cup granulated sugar
- 1/2 cup unsalted butter, softened
- 2 large eggs
- 1 tsp vanilla extract
- 1/2 cup buttermilk
- 1/2 cup chopped hazelnuts
- 1/2 cup chocolate hazelnut spread
- 1/2 cup heavy cream
- 1/4 cup powdered sugar
Instructions:
- Preheat and Prepare Pans: Preheat your oven to 350°F (175°C). Grease and flour two 8-inch round cake pans to prevent the cake from sticking.
- Mix Dry Ingredients: In a medium bowl, sift together the flour, cocoa powder, baking powder, baking soda, and salt. Set aside.
- Cream Butter and Sugar: In a large mixing bowl, cream the softened butter and granulated sugar together using an electric mixer on medium speed until the mixture is light and fluffy, about 3-5 minutes.
- Add Eggs and Vanilla: Beat in the eggs one at a time, guaranteeing each is fully incorporated before adding the next. Mix in the vanilla extract.
- Combine Wet and Dry Ingredients: Gradually add the dry ingredients to the wet mixture, alternating with the buttermilk, starting and ending with the dry ingredients. Mix until just combined, being careful not to overmix. Fold in the chopped hazelnuts.
- Bake the Cake: Divide the batter evenly between the prepared cake pans. Bake in the preheated oven for 25-30 minutes, or until a toothpick inserted into the center comes out clean. Allow the cakes to cool in the pans for 10 minutes, then transfer them to a wire rack to cool completely.
- Prepare the Frosting: In a medium bowl, combine the chocolate hazelnut spread, heavy cream, and powdered sugar. Beat with an electric mixer on medium speed until smooth and creamy.
- Assemble the Cake: Once the cakes are completely cooled, spread a generous layer of frosting on top of one of the cakes. Place the second cake on top and cover the entire cake with the remaining frosting. Garnish with additional chopped hazelnuts if desired.
Extra Tips:
When making the Chocolate Hazelnut Cake, verify that all ingredients, especially the butter and eggs, are at room temperature for easier mixing and a smoother batter.
To enhance the flavor, you can lightly toast the hazelnuts in a dry skillet over medium heat until fragrant before chopping and adding them to the batter. If the frosting appears too thick, you can adjust the consistency by adding a small amount of additional heavy cream until the desired texture is achieved.
For a more refined presentation, consider using a serrated knife to level the cake layers before frosting.
Chocolate Orange Cake
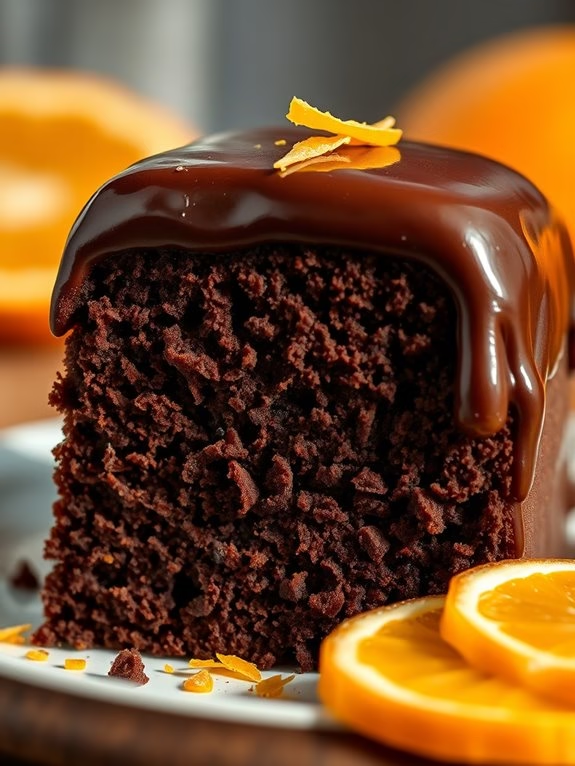
Chocolate Orange Cake is a delightful fusion of rich chocolate and zesty orange flavors. This cake is perfect for any occasion, whether you’re hosting a dinner party or simply indulging your sweet tooth. The moist, chocolatey base is complemented by a hint of orange, creating a harmonious balance of flavors that’s both invigorating and decadent. Topping it with a luscious chocolate ganache makes it even more irresistible, guaranteeing that your guests will be coming back for seconds.
The combination of chocolate and orange is a classic pairing that brings out the best in both ingredients. The citrusy notes from the orange cut through the richness of the chocolate, making each bite a perfect blend of sweet and tangy. This recipe is designed to serve 4-6 people, making it an ideal choice for a family gathering or a small celebration. Whether you’re an experienced baker or a novice in the kitchen, this Chocolate Orange Cake is sure to impress and satisfy.
Ingredients (serves 4-6):
- 1 1/2 cups all-purpose flour
- 1 cup granulated sugar
- 1/2 cup unsweetened cocoa powder
- 1 1/2 teaspoons baking powder
- 1/2 teaspoon baking soda
- 1/4 teaspoon salt
- 2 large eggs
- 3/4 cup milk
- 1/2 cup vegetable oil
- 1 teaspoon vanilla extract
- Zest of 1 orange
- 1/2 cup freshly squeezed orange juice
- 1 cup semi-sweet chocolate chips
- 1/2 cup heavy cream
Cooking Instructions:
- Preheat the Oven: Start by preheating your oven to 350°F (175°C). Grease and flour a 9-inch round cake pan to prevent the cake from sticking.
- Mix Dry Ingredients: In a large bowl, whisk together the flour, sugar, cocoa powder, baking powder, baking soda, and salt until well combined.
- Combine Wet Ingredients: In another bowl, beat the eggs and then add in the milk, vegetable oil, and vanilla extract. Stir in the orange zest and orange juice, mixing until fully incorporated.
- Combine and Mix: Gradually add the wet ingredients to the dry ingredients, mixing gently until there are no lumps. Be careful not to overmix as this can make the cake dense.
- Bake the Cake: Pour the batter into the prepared cake pan and smooth the top. Bake in the preheated oven for 30-35 minutes or until a toothpick inserted into the center comes out clean.
- Prepare the Ganache: While the cake is baking, heat the heavy cream in a small saucepan over medium heat until it begins to simmer. Pour the hot cream over the chocolate chips in a heatproof bowl and let it sit for a minute. Stir until the chocolate is completely melted and the mixture is smooth.
- Cool and Frost: Once the cake is done, remove it from the oven and let it cool in the pan for about 10 minutes before transferring it to a wire rack to cool completely. Once cooled, pour the chocolate ganache over the top, allowing it to drip down the sides.
- Serve: Slice the cake and serve it with a dollop of whipped cream or a scoop of vanilla ice cream for an extra treat.
Extra Tips:
When making the ganache, guarantee that the cream is hot enough to melt the chocolate but not boiling, as this can cause the chocolate to seize.
For an added burst of flavor, you can sprinkle additional orange zest on top of the ganache before it sets. If you prefer a more intense orange flavor, consider adding a few drops of orange extract to the cake batter.
Finally, for a more decorative presentation, garnish the cake with candied orange slices or chocolate shavings.
Dark Chocolate Raspberry Cake
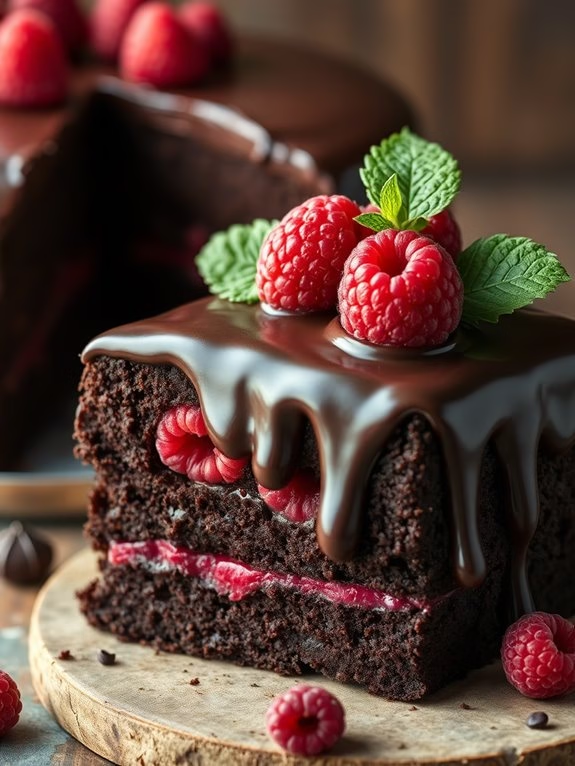
Dark Chocolate Raspberry Cake is a decadent dessert that combines the rich, bold flavors of dark chocolate with the sweet and tangy essence of fresh raspberries. This cake is perfect for special occasions or when you simply want to indulge in a luxurious treat.
The moist, dense cake layers are complemented by a smooth raspberry filling and finished with a glossy chocolate ganache, making each bite an exquisite experience. The combination of dark chocolate and raspberries not only provides a delightful flavor profile but also an impressive visual appeal with its deep, dark layers contrasted by the vibrant red of the raspberries.
This cake serves 4-6 people, making it an ideal choice for intimate gatherings or family celebrations. When prepared with quality ingredients, this Dark Chocolate Raspberry Cake is certain to impress both the eyes and the palate.
Ingredients (serving size: 4-6 people):
- 1 1/2 cups all-purpose flour
- 1 cup granulated sugar
- 1/2 cup unsweetened cocoa powder
- 1 teaspoon baking powder
- 1/2 teaspoon baking soda
- 1/2 teaspoon salt
- 2 large eggs
- 1/2 cup buttermilk
- 1/2 cup vegetable oil
- 1 teaspoon vanilla extract
- 3/4 cup hot water
- 1 cup fresh raspberries
- 1/2 cup raspberry jam
- 1 cup heavy cream
- 8 ounces dark chocolate, chopped
Cooking Instructions:
- Preheat the Oven: Preheat your oven to 350°F (175°C). Grease and flour two 8-inch round cake pans. This will guarantee the cakes don’t stick when removed.
- Mix Dry Ingredients: In a large bowl, sift together the flour, sugar, cocoa powder, baking powder, baking soda, and salt. This helps to evenly distribute the leavening agents and cocoa powder in the batter.
- Prepare Wet Ingredients: In a separate bowl, whisk together the eggs, buttermilk, vegetable oil, and vanilla extract until well combined.
- Combine and Add Water: Gradually add the wet ingredients to the dry ingredients, mixing until just combined. Slowly add the hot water to the batter, stirring until smooth. The batter will be quite thin, which is normal.
- Bake the Cakes: Divide the batter evenly between the prepared pans. Bake in the preheated oven for 25-30 minutes, or until a toothpick inserted into the center comes out clean. Allow cakes to cool in the pans for 10 minutes, then turn out onto a wire rack to cool completely.
- Prepare Raspberry Filling: In a small saucepan, gently warm the raspberry jam over low heat until it becomes more fluid. Remove from heat and stir in the fresh raspberries, carefully mashing some of them to release their juices.
- Make Chocolate Ganache: In a heatproof bowl, bring the heavy cream to a simmer over medium heat. Pour it over the chopped dark chocolate and let sit for 2 minutes. Stir until smooth and glossy. Allow the ganache to cool slightly until it thickens to a spreadable consistency.
- Assemble the Cake: Place one cake layer on a serving platter. Spread the raspberry filling over the top, then place the second cake layer on top. Pour the cooled ganache over the top of the cake, allowing it to drip down the sides.
- Chill and Serve: Transfer the assembled cake to the refrigerator for at least 30 minutes to set the ganache. Bring the cake to room temperature before serving for the best flavor.
Extra Tips:
When making Dark Chocolate Raspberry Cake, make sure your ingredients are at room temperature for easier mixing and a smoother batter. If fresh raspberries aren’t in season, you can use frozen raspberries, just be sure to thaw and drain them before using.
For an added decorative touch, garnish the cake with additional fresh raspberries or chocolate shavings. Additionally, for those who enjoy an extra burst of flavor, consider adding a splash of raspberry liqueur to the jam filling for a more sophisticated taste.
Chocolate Banana Cake

Chocolate Banana Cake
Chocolate Banana Cake is a delightful fusion of two beloved flavors that results in a moist, rich, and aromatic dessert perfect for any occasion. This cake is an excellent way to use up ripe bananas while satisfying your chocolate cravings. The natural sweetness and moisture from the bananas not only enhance the chocolate flavor but also guarantee a tender crumb.
Whether you’re serving it at a family gathering, a party, or just as a special treat, this cake is sure to impress. The recipe combines the simplicity of banana bread with the decadence of a chocolate cake, creating a perfect balance that’s both comforting and indulgent.
With its soft and fluffy texture, this cake can be enjoyed on its own, or you can take it up a notch by adding a chocolate glaze or a scoop of vanilla ice cream on top. Let’s plunge into this easy and delightful recipe that serves 4-6 people.
Ingredients:
- 1 and 1/2 cups all-purpose flour
- 1/2 cup unsweetened cocoa powder
- 1 teaspoon baking soda
- 1/4 teaspoon salt
- 1/2 cup unsalted butter, softened
- 1 cup granulated sugar
- 2 large eggs
- 1 teaspoon vanilla extract
- 3 ripe bananas, mashed
- 1/2 cup sour cream or yogurt
- 1 cup semi-sweet chocolate chips
Cooking Instructions:
- Preheat the Oven: Start by preheating your oven to 350°F (175°C). Grease a 9×5 inch loaf pan or line it with parchment paper to prevent the cake from sticking.
- Mix Dry Ingredients: In a medium-sized bowl, whisk together the flour, cocoa powder, baking soda, and salt. Set this mixture aside as it will be combined with the wet ingredients later.
- Cream Butter and Sugar: In a large mixing bowl, use an electric mixer to cream the softened butter and sugar until light and fluffy, which should take about 2-3 minutes. This step helps to incorporate air into the mixture, resulting in a light cake texture.
- Add Eggs and Vanilla: Beat in the eggs one at a time, making certain each egg is fully incorporated before adding the next. Then, add the vanilla extract and mix well.
- Incorporate Bananas and Sour Cream: Stir in the mashed bananas and sour cream (or yogurt) into the butter mixture. Mix until everything is well combined. The bananas add moisture and flavor, while the sour cream provides richness.
- Combine with Dry Ingredients: Gradually add the dry ingredient mixture to the wet ingredients, mixing until just combined. Be careful not to overmix, as this can result in a dense cake.
- Fold in Chocolate Chips: Gently fold in the chocolate chips with a spatula, making sure they’re evenly distributed throughout the batter.
- Pour and Bake: Pour the batter into the prepared loaf pan and smooth the top with a spatula. Bake in the preheated oven for 50-60 minutes, or until a toothpick inserted into the center comes out clean.
- Cool and Serve: Allow the cake to cool in the pan for about 10 minutes before transferring it to a wire rack to cool completely. Slice and serve as desired.
Extra Tips:
When baking Chocolate Banana Cake, be certain the bananas you use are ripe, as this will enhance the cake’s sweetness and flavor. If you prefer a more decadent version, consider adding a chocolate ganache or dusting with powdered sugar for a simple yet elegant finish.
The cake can be stored in an airtight container at room temperature for up to three days, or you can refrigerate it for longer shelf life. To make this recipe even more indulgent, try adding a handful of chopped nuts, such as walnuts or pecans, for added texture and flavor.