
The holiday season is almost here, and I love finding ways to make Christmas dinner both scrumptious and healthy. Balancing indulgence with nutrition can feel like a challenge, right? Picture a table filled with colorful, nutritious dishes like roasted lemon herb turkey breast and balsamic glazed Brussels sprouts. These recipes are like little treasures, bursting with flavor minus the guilt. Curious about treating your taste buds while sticking to your health goals?
Roasted Lemon Herb Turkey Breast
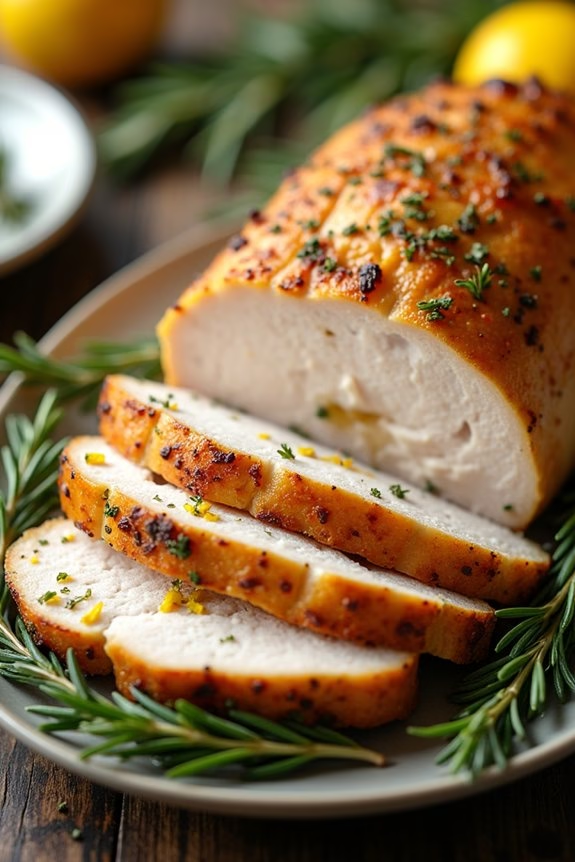
Roasted Lemon Herb Turkey Breast is a delightful and healthier alternative to the traditional whole turkey for your Christmas dinner. This dish offers the perfect blend of citrus and aromatic herbs, making it a flavorful centerpiece for your holiday table without overwhelming you with leftover turkey.
By focusing on the turkey breast, you enjoy a leaner cut of meat that’s both tender and succulent, ideal for those looking to maintain healthier eating habits during the festive season.
This recipe is designed to serve 4-6 people and requires only a handful of fresh ingredients to bring out the best in the turkey breast. The combination of lemon, garlic, and herbs like rosemary and thyme infuses the meat with a revitalizing zest, while roasting guarantees that it remains juicy and full of flavor.
Whether you’re hosting a small gathering or simply wish to enjoy a simpler holiday meal, this dish provides a satisfying and wholesome option.
Ingredients:
- 1 (3 to 4-pound) turkey breast, bone-in, skin-on
- 2 lemons, zested and juiced
- 3 tablespoons olive oil
- 1 tablespoon fresh rosemary, chopped
- 1 tablespoon fresh thyme, chopped
- 4 cloves garlic, minced
- Salt and pepper to taste
- 1 cup low-sodium chicken broth
Instructions:
- Preheat the Oven: Begin by preheating your oven to 375°F (190°C). This will guarantee that the oven is at the right temperature when you’re ready to roast the turkey breast.
- Prepare the Marinade: In a small mixing bowl, combine the lemon zest, lemon juice, olive oil, rosemary, thyme, minced garlic, salt, and pepper. Mix until well blended to create a fragrant marinade.
- Season the Turkey Breast: Place the turkey breast on a roasting pan or a baking dish. Use your hands to rub the marinade all over the turkey breast, ensuring even coverage under the skin as well as on top.
- Add Chicken Broth: Pour the chicken broth into the bottom of the roasting pan. This helps to keep the turkey moist during cooking and adds flavor to the drippings.
- Roast the Turkey: Place the turkey breast in the preheated oven. Roast for approximately 1.5 to 2 hours, or until the internal temperature reaches 165°F (74°C) when measured with a meat thermometer inserted into the thickest part of the breast.
- Rest the Turkey: Once cooked, remove the turkey breast from the oven and let it rest for at least 10 minutes before carving. This allows the juices to redistribute throughout the meat, ensuring a juicy and tender result.
Extra Tips:
For an even richer flavor, consider marinating the turkey breast overnight in the refrigerator.
If you prefer a crisper skin, increase the oven temperature to 425°F (220°C) for the last 15 minutes of roasting.
Make sure to baste the turkey breast occasionally with the pan juices to enhance moisture and flavor.
Additionally, using a digital meat thermometer is highly recommended to guarantee the turkey is cooked perfectly without drying out.
Balsamic Glazed Brussels Sprouts With Pomegranate Seeds
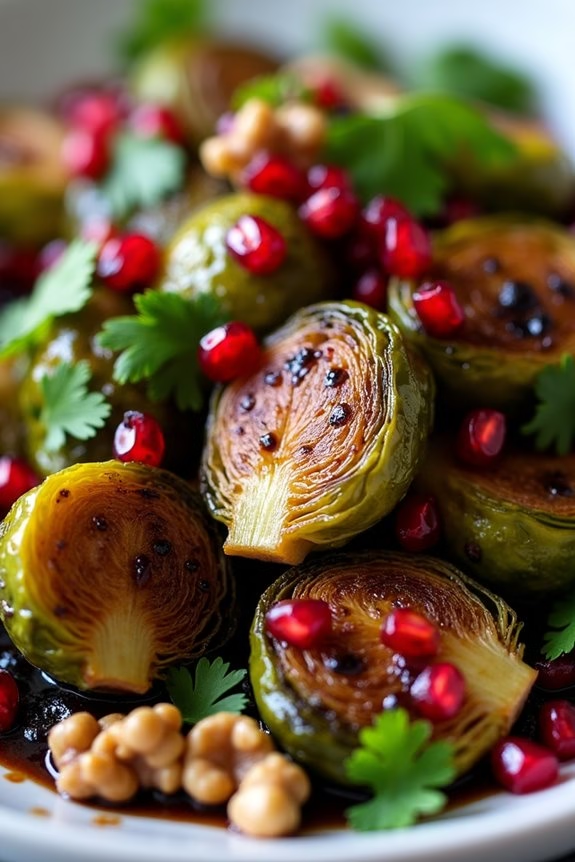
Balsamic Glazed Brussels Sprouts With Pomegranate Seeds is a delightful dish that combines the savory flavors of roasted Brussels sprouts with the sweet and tangy notes of balsamic glaze, all complemented by the burst of freshness from pomegranate seeds. This dish is a perfect addition to your Christmas dinner, offering a healthy and vibrant side that will impress your family and guests.
The Brussels sprouts are roasted to perfection, creating a caramelized exterior while maintaining a tender interior, and the pomegranate seeds add a festive touch of color and flavor.
This recipe isn’t only delicious but also packed with nutrients, guaranteeing that you can enjoy the holiday season guilt-free. Brussels sprouts are an excellent source of vitamin K, vitamin C, and dietary fiber, while pomegranate seeds are rich in antioxidants and vitamin C. This combination makes for a nutritious and satisfying side dish that pairs well with a variety of main courses.
Whether you’re hosting a holiday feast or simply looking to add some festive flair to your dinner table, Balsamic Glazed Brussels Sprouts With Pomegranate Seeds is sure to be a hit.
Ingredients (Serves 4-6):
- 1 1/2 pounds Brussels sprouts, trimmed and halved
- 2 tablespoons olive oil
- Salt and freshly ground black pepper, to taste
- 1/3 cup balsamic vinegar
- 2 tablespoons honey
- 1/2 cup pomegranate seeds
- 1/4 cup chopped walnuts (optional)
- Fresh parsley, chopped, for garnish
Cooking Instructions:
- Preheat the Oven: Start by preheating your oven to 400°F (200°C). This guarantees that it’s at the right temperature for roasting the Brussels sprouts.
- Prepare the Brussels Sprouts: Rinse the Brussels sprouts thoroughly under cold water, then trim off the ends and halve them. This will help them cook evenly and absorb the glaze better.
- Season and Roast: Place the halved Brussels sprouts in a large bowl and drizzle with olive oil. Add salt and freshly ground black pepper to taste. Toss the sprouts until they’re well coated. Spread them in a single layer on a baking sheet lined with parchment paper.
- Roast the Sprouts: Place the baking sheet in the preheated oven and roast the Brussels sprouts for 20-25 minutes, or until they’re tender and have a nice caramelized color. Be sure to stir them halfway through the cooking time to guarantee even roasting.
- Prepare the Balsamic Glaze: While the Brussels sprouts are roasting, combine the balsamic vinegar and honey in a small saucepan over medium heat. Stir the mixture and let it simmer until it reduces and thickens slightly, about 5-7 minutes. Remove from heat and set aside.
- Combine and Serve: Once the Brussels sprouts are done roasting, remove them from the oven and transfer them to a serving dish. Drizzle the balsamic glaze over the roasted sprouts and gently toss to coat them evenly. Sprinkle pomegranate seeds and chopped walnuts over the top. Garnish with fresh parsley.
- Final Touches: Adjust seasoning if necessary, and serve warm as a delicious and healthy side dish.
Extra Tips:
When selecting Brussels sprouts, look for ones that are firm to the touch and bright green. Smaller sprouts tend to be sweeter and more tender, so they’re often preferred for roasting.
If you find the balsamic glaze too thick after reducing, you can add a teaspoon of water to achieve the desired consistency. Additionally, feel free to substitute maple syrup for honey if you prefer a slightly different sweetness.
This dish can be prepared in advance, with the Brussels sprouts roasted and the glaze made a day ahead, then combined and reheated just before serving.
Herb-Crusted Salmon With Asparagus
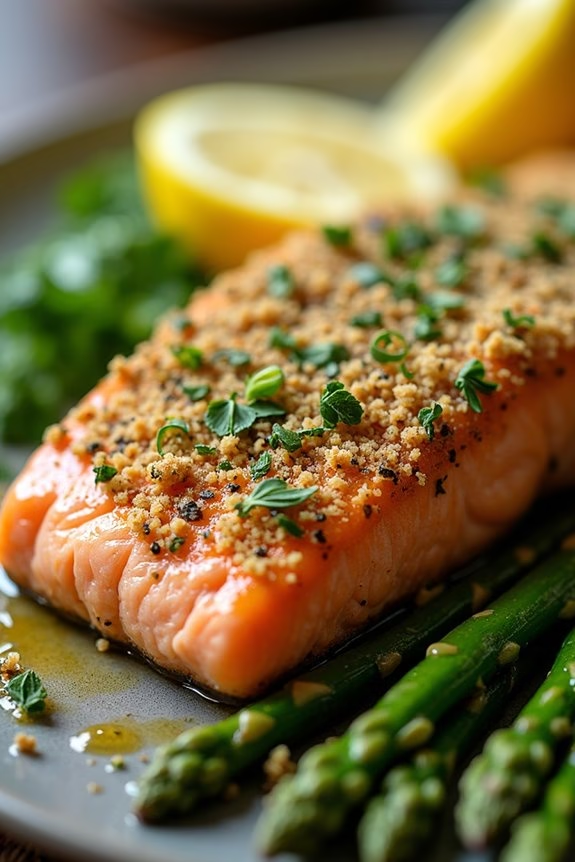
Herb-Crusted Salmon With Asparagus is a delightful and nutritious option for a healthy Christmas dinner. This dish combines the rich flavors of fresh herbs with the tender and flaky texture of salmon, creating a perfect balance that’s guaranteed to impress your holiday guests.
The accompanying asparagus adds a vibrant green touch and a subtle crunch, making it not only a feast for the taste buds but also a visually appealing centerpiece for your festive table.
This recipe is designed to serve 4-6 people, making it ideal for a small family gathering or a cozy dinner with close friends. The preparation is straightforward, yet the end result is nothing short of gourmet. With easy-to-find ingredients and a simple cooking method, this Herb-Crusted Salmon With Asparagus is a stress-free way to enjoy a healthy and delicious Christmas meal.
Ingredients:
- 4-6 salmon fillets (depending on size)
- 1 bunch of fresh asparagus
- 1/4 cup of fresh parsley, chopped
- 1/4 cup of fresh dill, chopped
- 1/4 cup of fresh chives, chopped
- 2 cloves of garlic, minced
- 1 lemon, zested and juiced
- 1/4 cup of olive oil
- Salt and black pepper to taste
- 1/4 cup of breadcrumbs
- Lemon wedges for serving
Cooking Instructions:
- Preheat the Oven: Start by preheating your oven to 400°F (200°C). This will guarantee that it reaches the right temperature by the time you’re ready to bake the salmon.
- Prepare the Herb Crust: In a small bowl, combine the chopped parsley, dill, chives, minced garlic, lemon zest, and breadcrumbs. Add a pinch of salt and black pepper to taste. Mix well to create a uniform herb crust mixture.
- Season the Salmon: Place the salmon fillets on a baking sheet lined with parchment paper. Drizzle olive oil over each fillet, then season with salt and black pepper. Squeeze a bit of lemon juice over the top for an extra burst of flavor.
- Apply the Herb Crust: Generously press the herb mixture onto the top of each salmon fillet, ensuring it sticks well. The olive oil will help the crumbs adhere to the fish.
- Prepare the Asparagus: Trim the tough ends off the asparagus and arrange them around the salmon on the baking sheet. Drizzle with a bit more olive oil and season with salt and pepper.
- Bake the Salmon and Asparagus: Place the baking sheet in the preheated oven and bake for about 15-20 minutes, or until the salmon is cooked through and flakes easily with a fork. The asparagus should be tender but still crisp.
- Serve: Carefully transfer the salmon and asparagus to a serving platter. Garnish with additional lemon wedges for squeezing over the top before serving.
Extra Tips:
When selecting salmon, opt for wild-caught varieties for a richer flavor and higher omega-3 content. If you’re preparing this dish in advance, you can make the herb crust mixture a day ahead and store it in the refrigerator.
Additionally, be mindful not to overcook the salmon; it should remain moist and tender. For an extra festive touch, consider garnishing with a sprinkle of pomegranate seeds or a few sprigs of fresh rosemary just before serving. These simple additions can elevate the presentation and add a pop of color to your holiday table.
Quinoa Stuffed Bell Peppers
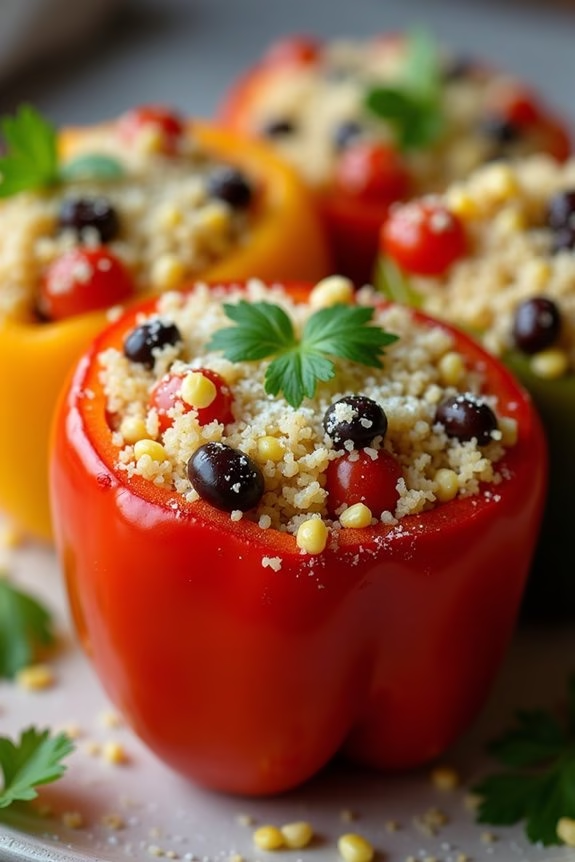
Quinoa Stuffed Bell Peppers are a delightful and healthy option for your Christmas dinner spread. This dish combines vibrant bell peppers with a flavorful quinoa filling, making it both visually appealing and nutritious. Quinoa is a high-protein grain that adds a hearty, satisfying texture, while the bell peppers lend their natural sweetness and are packed with vitamins.
This vegetarian dish is perfect for those looking to indulge in a wholesome holiday meal without compromising on taste or nutrition. The stuffing for these bell peppers is a delightful mix of quinoa, vegetables, herbs, and spices, resulting in a dish that’s both filling and full of flavor.
It’s an excellent way to incorporate more plant-based options into your Christmas feast, guaranteeing that everyone at the table, from vegetarians to meat-eaters, will be pleased. Prepare these quinoa stuffed bell peppers as a main course or a side dish, and enjoy a festive meal that’s as healthy as it’s delicious.
Ingredients for 4-6 servings:
- 6 large bell peppers (any color)
- 1 cup quinoa
- 2 cups vegetable broth
- 1 medium onion, diced
- 2 cloves garlic, minced
- 1 cup cherry tomatoes, halved
- 1 cup canned black beans, rinsed and drained
- 1 cup corn kernels (fresh or frozen)
- 1 teaspoon ground cumin
- 1 teaspoon smoked paprika
- Salt and pepper to taste
- 1 cup shredded cheese (optional, for topping)
- 2 tablespoons olive oil
- Fresh cilantro or parsley for garnish
Cooking Instructions:
- Prepare the Quinoa: Rinse the quinoa under cold water. In a medium saucepan, combine quinoa and vegetable broth. Bring to a boil, reduce heat to low, cover, and simmer for about 15 minutes or until the quinoa is cooked and the liquid is absorbed. Fluff with a fork and set aside.
- Preheat the Oven: Preheat your oven to 375°F (190°C).
- Prepare the Bell Peppers: Cut the tops off the bell peppers and remove the seeds and membranes. Lightly oil a baking dish and place the peppers cut side up in the dish.
- Sauté the Vegetables: In a large skillet, heat olive oil over medium heat. Add the diced onion and garlic, and sauté until the onion becomes translucent. Add the cherry tomatoes, black beans, and corn to the skillet, cooking for an additional 3-5 minutes.
- Mix the Stuffing: In a large bowl, combine the cooked quinoa with the sautéed vegetables. Stir in the cumin, smoked paprika, salt, and pepper. Mix until all ingredients are well combined.
- Stuff the Peppers: Spoon the quinoa mixture into each bell pepper, packing it down tightly. If using cheese, sprinkle a generous amount on top of each stuffed pepper.
- Bake the Peppers: Cover the baking dish with foil and bake in the preheated oven for 30 minutes. Remove the foil and bake for an additional 10-15 minutes, or until the peppers are tender and the tops are slightly browned.
- Garnish and Serve: Remove the peppers from the oven and let them cool slightly. Garnish with fresh cilantro or parsley before serving.
Extra Tips: When selecting bell peppers, try to choose ones that are uniform in size to guarantee even cooking. If you prefer a spicier dish, consider adding chopped jalapeños or a dash of cayenne pepper to the quinoa mixture.
For a vegan version, simply omit the cheese or replace it with a plant-based cheese alternative. These stuffed peppers can be prepared ahead of time and baked just before serving, making them a convenient option for a stress-free Christmas dinner.
Cauliflower Mash With Garlic and Chives
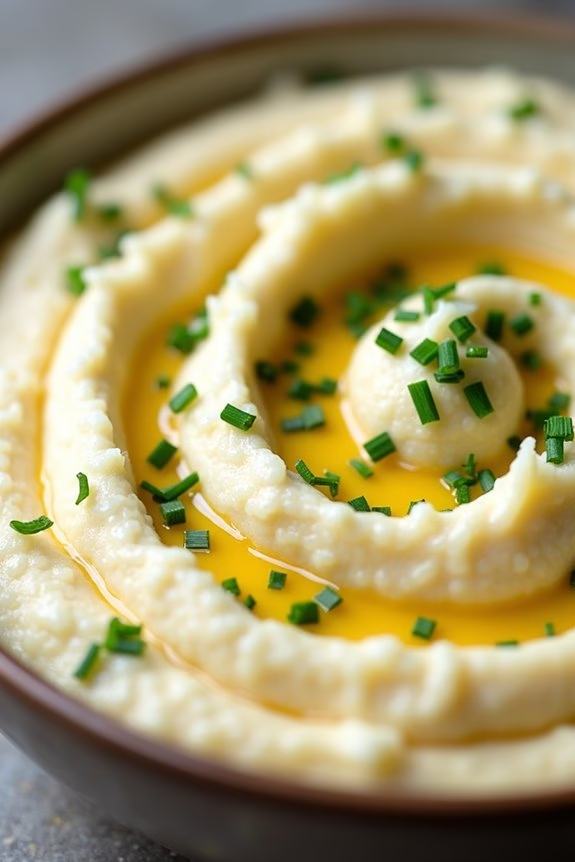
Cauliflower Mash With Garlic and Chives is a delicious and healthy alternative to traditional mashed potatoes, offering a lower-carb option that doesn’t skimp on flavor. This dish is perfect for a Christmas dinner, allowing you to enjoy the creamy texture and savory taste without the heaviness of potatoes. The addition of garlic and chives enhances the flavor profile, making it a perfect side dish to accompany any festive main course.
The recipe is simple to make and can be prepared in under 30 minutes, making it a convenient choice for busy holiday cooks. The creamy consistency of the cauliflower mash pairs well with roasted meats, and the aromatic garlic and fresh chives add a delightful dimension to the dish. Whether you’re catering to dietary restrictions or simply looking to incorporate more vegetables into your holiday meal, Cauliflower Mash With Garlic and Chives is sure to be a hit with your guests.
Ingredients (Serves 4-6):
- 1 large head of cauliflower, cut into florets
- 3 cloves garlic, minced
- 1/4 cup unsalted butter
- 1/4 cup heavy cream
- 1/4 cup grated Parmesan cheese
- Salt and pepper to taste
- 2 tablespoons fresh chives, chopped
Instructions:
- Prepare the Cauliflower: Begin by washing the cauliflower thoroughly and cutting it into uniform florets. This guarantees even cooking, which is essential for achieving a smooth mash.
- Cook the Cauliflower: In a large pot, bring water to a boil and add a pinch of salt. Add the cauliflower florets and cook for about 10-12 minutes, or until they’re tender enough to be pierced easily with a fork. Drain the cauliflower well to remove excess water.
- Sauté the Garlic: While the cauliflower is cooking, melt the butter in a small skillet over medium heat. Add the minced garlic and sauté for about 1-2 minutes until fragrant, being careful not to burn the garlic.
- Blend the Ingredients: In a food processor or blender, combine the cooked cauliflower, sautéed garlic with butter, heavy cream, Parmesan cheese, and a pinch of salt and pepper. Blend until smooth and creamy. You may need to do this in batches depending on the size of your processor.
- Adjust Seasoning: Taste the mash and adjust the seasoning as necessary, adding more salt or pepper if needed.
- Serve: Transfer the cauliflower mash to a serving bowl and sprinkle the chopped chives over the top. Serve hot as a side dish.
For the best results, confirm that the cauliflower is drained thoroughly after boiling, as any excess water can make the mash too runny. If you prefer a thicker consistency, reduce the amount of heavy cream or add more Parmesan cheese.
This dish can also be made ahead of time and reheated gently on the stove or in the microwave before serving. Adding a touch of nutmeg or a squeeze of lemon juice can also enhance the flavor, offering a unique twist to this classic dish.
Honey Mustard Glazed Carrots
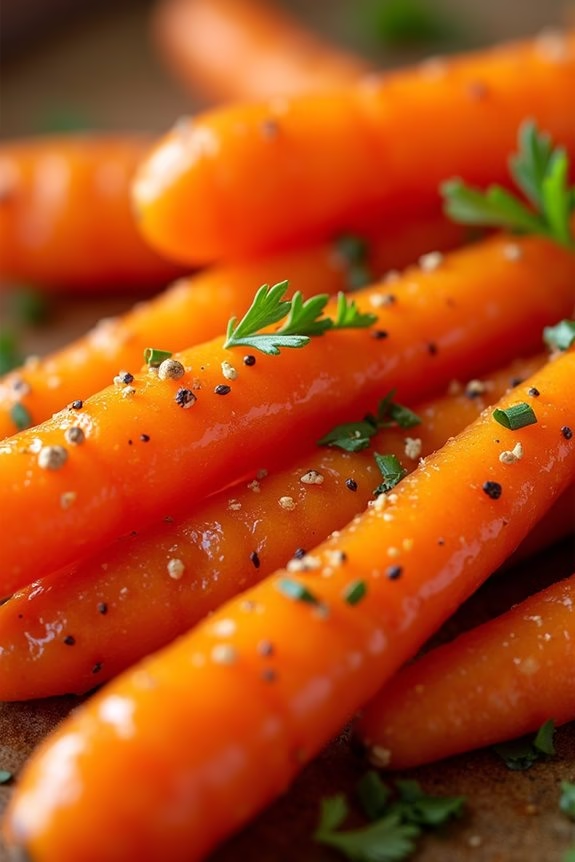
Honey Mustard Glazed Carrots are a delightful addition to any Christmas dinner table. Their vibrant color and sweet, tangy flavor make them a perfect complement to a traditional holiday feast. This dish not only highlights the natural sweetness of carrots but also elevates it with a luscious glaze made from honey and mustard.
It’s a simple yet elegant side dish that will impress your guests and add a touch of sophistication to your meal. Preparing Honey Mustard Glazed Carrots is straightforward, making it an ideal choice for both seasoned cooks and beginners looking to create something special for their festive gathering.
The key to this recipe is in balancing the sweetness of the honey with the tanginess of the mustard, creating a harmonious blend that coats the carrots beautifully. This dish serves 4-6 people, guaranteeing everyone gets a taste of this delicious side.
Ingredients:
- 2 pounds of carrots, peeled and cut into sticks
- 2 tablespoons olive oil
- 3 tablespoons honey
- 2 tablespoons Dijon mustard
- 1 tablespoon apple cider vinegar
- Salt and pepper to taste
- Fresh parsley, chopped, for garnish (optional)
Instructions:
- Prepare the Carrots: Preheat your oven to 400°F (200°C). Peel the carrots and cut them into uniform sticks, making sure they’re roughly the same size for even cooking.
- Mix the Glaze: In a small bowl, combine the honey, Dijon mustard, apple cider vinegar, olive oil, salt, and pepper. Whisk until the ingredients are well incorporated and smooth.
- Coat the Carrots: Place the carrot sticks in a large mixing bowl or directly on a baking sheet lined with parchment paper. Pour the glaze over the carrots and toss them until they’re evenly coated.
- Bake the Carrots: Spread the glazed carrots out on the baking sheet in a single layer to guarantee even roasting. Bake in the preheated oven for 25-30 minutes, or until the carrots are tender and slightly caramelized at the edges.
- Garnish and Serve: Once cooked, remove the carrots from the oven and transfer them to a serving dish. Sprinkle fresh chopped parsley over the top for a pop of color and fresh flavor before serving.
Extra Tips:
For a deeper flavor, you can roast the carrots at a slightly lower temperature for a longer period, which will enhance their sweetness. If you prefer a bit of heat, consider adding a pinch of cayenne pepper or a dash of red pepper flakes to the glaze.
Also, be sure to taste the glaze before coating the carrots to adjust seasoning to your preference. This dish can be prepared in advance; simply reheat gently in the oven before serving to keep the glaze intact.
Spinach and Feta Stuffed Chicken Breast
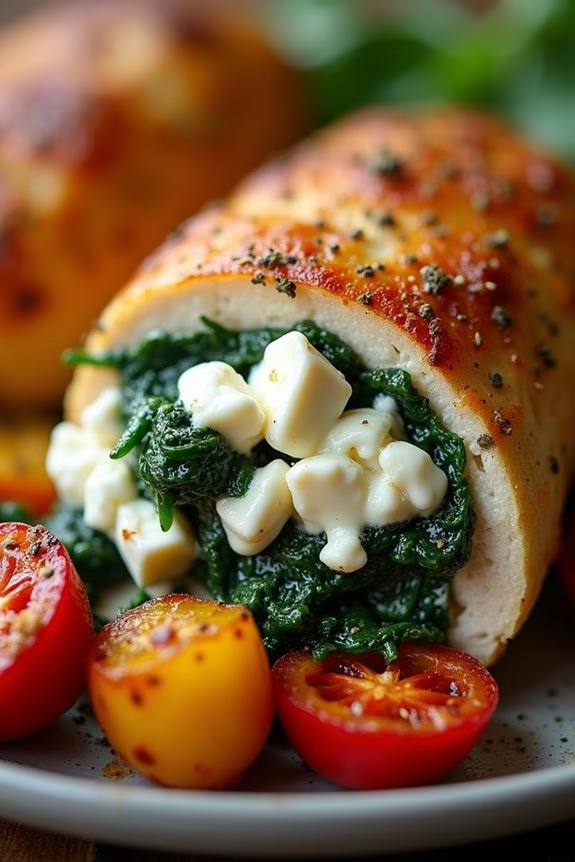
Spinach and Feta Stuffed Chicken Breast is a nutritious and flavorful dish that’s perfect for a healthier Christmas dinner. This dish combines the lean protein of chicken breast with the rich, savory flavors of spinach and feta cheese, making it a satisfying and festive main course. Ideal for those looking to indulge in a delicious holiday meal without compromising on their health goals, this recipe is sure to be a hit with family and friends.
The stuffed chicken breast isn’t only delicious but also visually appealing, with a vibrant filling that spills out when sliced open. The combination of wilted spinach, creamy feta, and a hint of garlic creates a flavorful stuffing that complements the tender chicken perfectly. Pair this dish with some roasted vegetables or a fresh salad for a well-rounded and wholesome meal that embodies the spirit of the holiday season.
Ingredients for 4-6 servings:
- 4 large boneless, skinless chicken breasts
- 1 tablespoon olive oil
- Salt and pepper, to taste
- 2 cups fresh spinach leaves
- 1 cup crumbled feta cheese
- 2 cloves garlic, minced
- 1 tablespoon lemon juice
- 1 teaspoon dried oregano
- 1 tablespoon olive oil or melted butter (for brushing)
Cooking Instructions:
- Prepare the Chicken Breasts:
- Preheat your oven to 375°F (190°C).
- Use a sharp knife to carefully cut a pocket into each chicken breast by slicing horizontally without cutting all the way through. Season the outside of each chicken breast with salt and pepper.
- Make the Spinach and Feta Filling:
- In a skillet, heat 1 tablespoon of olive oil over medium heat. Add the minced garlic and sauté for about 1 minute until fragrant.
- Add the spinach leaves to the skillet and cook until wilted, about 2-3 minutes.
- Remove the skillet from heat and stir in the crumbled feta cheese, lemon juice, and dried oregano. Mix until well combined.
- Stuff the Chicken Breasts:
- Carefully spoon the spinach and feta mixture into the pockets of each chicken breast, making sure not to overfill. Secure the open edges with toothpicks if necessary.
- Cook the Chicken:
- Place the stuffed chicken breasts in a baking dish. Brush the tops with olive oil or melted butter to help with browning.
- Bake in the preheated oven for 25-30 minutes, or until the chicken is cooked through and reaches an internal temperature of 165°F (74°C).
- Serve:
- Remove the toothpicks, if used, and let the chicken rest for a few minutes before slicing. Serve hot with your choice of side dishes.
Extra Tips:
When preparing Spinach and Feta Stuffed Chicken Breast, make sure the chicken breasts are of an even thickness for even cooking. If necessary, you can pound them slightly to achieve uniformity.
Experiment with the stuffing by adding sun-dried tomatoes or pine nuts for extra flavor. Keep an eye on the chicken while it bakes to avoid overcooking, as this can lead to dryness. If you find the chicken is browning too quickly, cover it loosely with foil while it finishes cooking.
Butternut Squash and Kale Salad With Cranberries
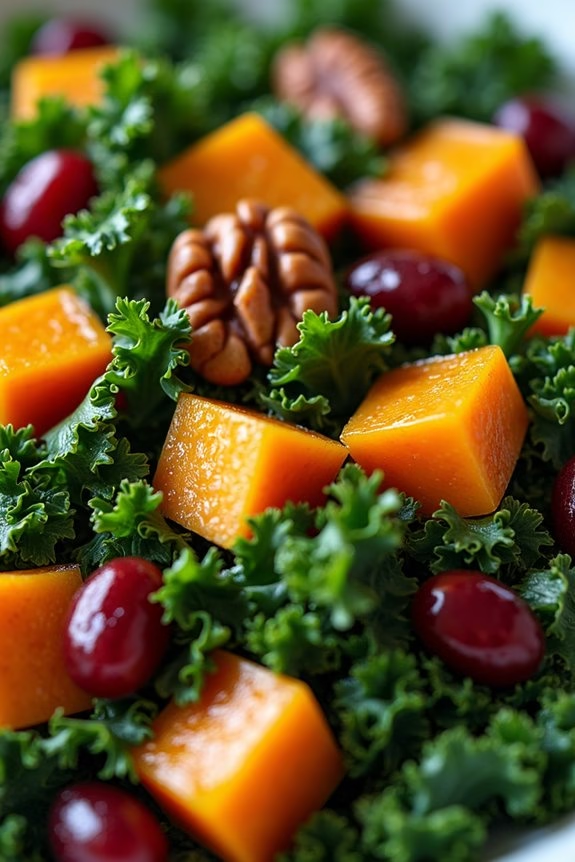
Butternut Squash and Kale Salad With Cranberries is a delightful and nutritious dish that brings together the rich flavors of roasted squash, the earthiness of kale, and the sweetness of cranberries. This salad is perfect as a side dish for your Christmas dinner, offering vibrant colors and a mix of textures that will impress your guests.
The combination of roasted butternut squash and fresh kale creates a hearty base, while the cranberries add a festive touch. It’s a healthy option that doesn’t compromise on taste, making it a great addition to any holiday feast.
This dish not only looks appealing but is also packed with nutrients, making it an excellent choice for those looking to maintain a balanced diet during the festive season. The butternut squash provides a good source of vitamins A and C, while kale adds a boost of fiber and antioxidants. Tossed with a light vinaigrette, this salad is both invigorating and satisfying.
Preparing this dish is straightforward, and with a few simple steps, you’ll have a delicious and healthy salad ready to serve.
Ingredients for 4-6 servings:
- 1 large butternut squash, peeled, seeded, and cubed
- 1 tablespoon olive oil
- Salt and pepper to taste
- 1 bunch kale, stems removed and leaves chopped
- 1/2 cup dried cranberries
- 1/4 cup toasted pecans, roughly chopped
- Juice of 1 lemon
- 1 tablespoon maple syrup
- 2 tablespoons apple cider vinegar
- 1/4 cup extra-virgin olive oil
Cooking Instructions:
- Preheat the Oven: Start by preheating your oven to 400°F (200°C). This will guarantee the oven is hot enough to roast the butternut squash evenly.
- Prepare the Butternut Squash: In a large bowl, toss the cubed butternut squash with 1 tablespoon of olive oil, salt, and pepper. Make sure each piece is well-coated to enhance the roasting process.
- Roast the Squash: Spread the seasoned squash cubes on a baking sheet in a single layer. Roast in the preheated oven for about 25-30 minutes, or until they’re tender and lightly caramelized, flipping halfway through for even cooking.
- Prepare the Kale: While the squash is roasting, place the chopped kale in a large salad bowl. Massage the kale with your hands for about 2-3 minutes to soften the leaves, which makes them more tender and less bitter.
- Make the Dressing: In a small bowl, whisk together the lemon juice, maple syrup, apple cider vinegar, and 1/4 cup of extra-virgin olive oil until well combined. Season with salt and pepper to taste.
- Assemble the Salad: Once the squash is done roasting, let it cool slightly. Add the roasted butternut squash, dried cranberries, and toasted pecans to the bowl of kale. Pour the dressing over the salad and toss everything together until the ingredients are evenly coated.
- Serve: Transfer the salad to a serving platter or individual plates, and enjoy your vibrant and nutritious Butternut Squash and Kale Salad With Cranberries.
Extra Tips:
When preparing this salad, you can experiment with additional toppings such as feta cheese or goat cheese for a creamy element. If you prefer a bit of spice, try adding a pinch of cayenne pepper to the squash before roasting.
For the best results, use fresh kale and plump cranberries. This salad can be made a few hours in advance and stored in the refrigerator, allowing the flavors to meld together beautifully. Just be sure to add the dressing closer to serving time to keep the kale crisp.
Whole Wheat Dinner Rolls
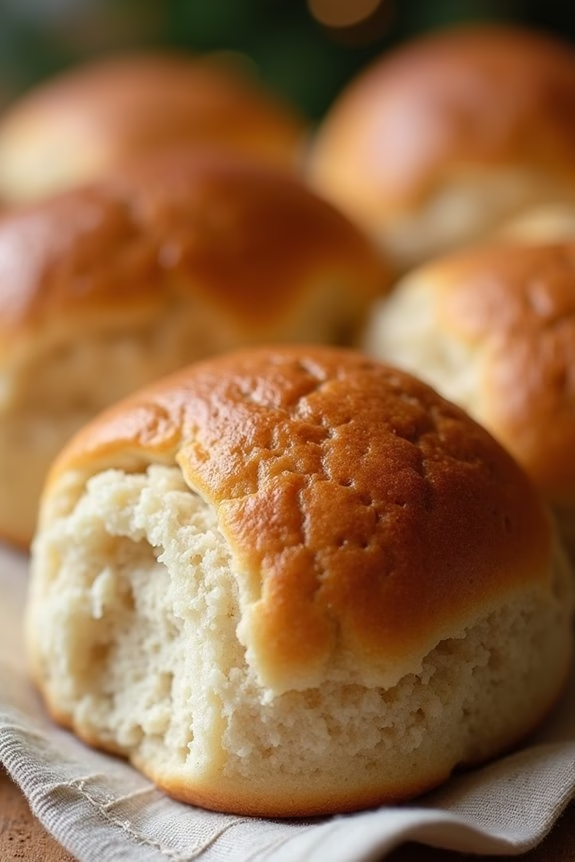
Whole Wheat Dinner Rolls are a delightful addition to any Christmas dinner, offering a healthy and delicious alternative to traditional white bread rolls. These rolls are made with wholesome whole wheat flour, which not only enhances the flavor but also boosts the nutritional content by adding fiber and essential nutrients.
Perfectly soft and fluffy, these dinner rolls are sure to complement any holiday meal, from roasted turkey to hearty vegetable dishes. Ideal for serving 4-6 people, these rolls are easy to make and require only a few basic ingredients.
The preparation involves mixing, kneading, and baking – a process that fills your kitchen with the comforting aroma of freshly baked bread. Whether you’re an experienced baker or a first-timer, this recipe is simple enough to follow and will result in light, airy rolls that everyone will love.
Ingredients:
- 2 cups whole wheat flour
- 1 cup all-purpose flour
- 1 packet (2 1/4 teaspoons) active dry yeast
- 1 cup warm water (110°F/45°C)
- 2 tablespoons honey
- 3 tablespoons unsalted butter, melted
- 1 teaspoon salt
- 1 egg
Cooking Instructions:
- Activate the Yeast: In a large mixing bowl, combine the warm water and honey. Stir until the honey is dissolved. Sprinkle the yeast over the mixture and let it sit for about 5-10 minutes until it becomes frothy and bubbly, indicating that the yeast is active.
- Mix the Dough: Add the melted butter, egg, and salt to the yeast mixture. Stir to combine. Gradually add the whole wheat flour and all-purpose flour, mixing continuously until a rough dough forms.
- Knead the Dough: Transfer the dough to a lightly floured surface and knead it for about 8-10 minutes until it becomes smooth and elastic. If the dough is too sticky, add a bit more all-purpose flour as needed.
- First Rise: Place the kneaded dough in a lightly oiled bowl, turning it to coat all sides with oil. Cover the bowl with a clean kitchen towel or plastic wrap and let the dough rise in a warm, draft-free area for about 1 to 1.5 hours, or until it has doubled in size.
- Shape the Rolls: Punch down the risen dough to release the air. Divide the dough into 12 equal portions and shape each portion into a ball. Place the balls on a parchment-lined baking sheet, spacing them a few inches apart.
- Second Rise: Cover the rolls with a kitchen towel and let them rise again for about 30 minutes until they’ve puffed up.
- Bake the Rolls: Preheat the oven to 375°F (190°C). Bake the rolls for 15-20 minutes or until they’re golden brown on top and sound hollow when tapped on the bottom.
- Cool and Serve: Remove the rolls from the oven and let them cool slightly on a wire rack. Serve warm or at room temperature as a side to your Christmas dinner.
Extra Tips:
For best results, verify that the water used to proof the yeast isn’t too hot, as this can kill the yeast and prevent the dough from rising.
If you prefer a slightly sweeter roll, you can increase the honey to 3 tablespoons. You can also add herbs such as rosemary or thyme to the dough for additional flavor.
To keep the rolls soft, store them in an airtight container at room temperature for up to two days, or freeze them for longer storage.
Sweet Potato Casserole With Pecan Topping
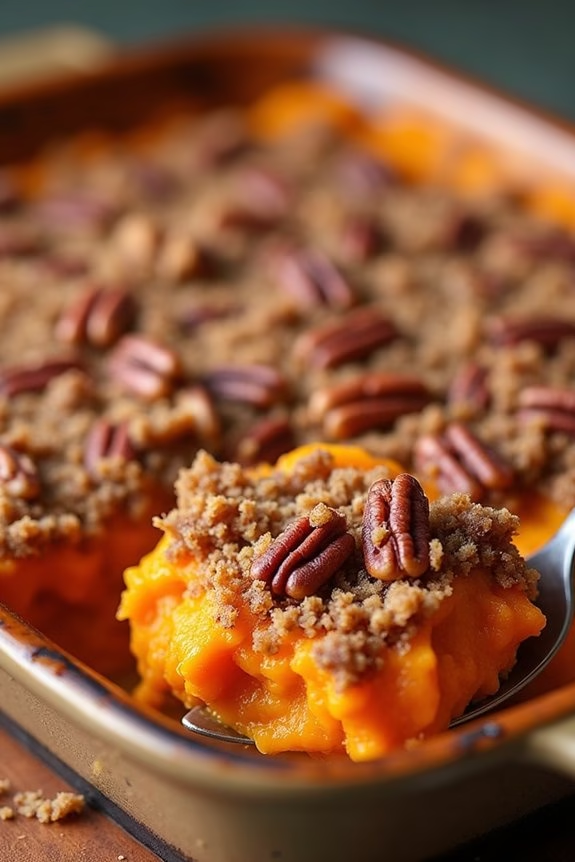
Sweet Potato Casserole With Pecan Topping is a delightful addition to any Christmas dinner table. This dish combines the natural sweetness of sweet potatoes with a crunchy pecan topping, creating a perfect balance of flavors and textures.
It’s a comforting and festive side dish that can complement a variety of main courses. Not only is it delicious, but it’s also packed with nutrients, making it a healthier alternative to traditional holiday casseroles.
The key to this recipe is to enhance the sweetness of the sweet potatoes without overpowering them. By using natural sweeteners like maple syrup and a touch of cinnamon, the casserole retains its rich taste. The pecan topping adds a satisfying crunch, while the hint of vanilla and nutmeg offers a warm, aromatic finish.
This recipe makes a serving size suitable for 4-6 people, guaranteeing everyone at the table gets to enjoy a generous portion.
Ingredients:
- 4 large sweet potatoes
- 1/3 cup maple syrup
- 1/4 cup unsalted butter, melted
- 1 teaspoon vanilla extract
- 1/2 teaspoon ground cinnamon
- 1/4 teaspoon ground nutmeg
- 1/4 teaspoon salt
- 1 cup chopped pecans
- 1/4 cup brown sugar
- 2 tablespoons all-purpose flour
- 2 tablespoons melted butter (for topping)
Cooking Instructions:
- Preheat the Oven: Start by preheating your oven to 350°F (175°C). This guarantees that it’s ready for baking once you’ve prepared the casserole.
- Prepare the Sweet Potatoes: Peel and cube the sweet potatoes into even chunks. This helps them cook evenly. Place the cubes in a large pot, cover them with water, and bring to a boil over medium-high heat. Cook until tender, about 15-20 minutes.
- Mash the Sweet Potatoes: Drain the cooked sweet potatoes and transfer them to a large mixing bowl. Use a potato masher or a fork to mash them until smooth.
- Mix the Sweet Potato Base: Add the maple syrup, melted butter, vanilla extract, cinnamon, nutmeg, and salt to the mashed sweet potatoes. Mix until well combined. This mixture should be smooth and creamy.
- Transfer to Baking Dish: Spread the sweet potato mixture evenly into a 9×13-inch baking dish. Confirm the surface is smooth for an even topping layer.
- Prepare the Pecan Topping: In a separate bowl, combine the chopped pecans, brown sugar, flour, and melted butter. Mix until the ingredients are well incorporated and the mixture resembles coarse crumbs.
- Add the Topping: Sprinkle the pecan mixture evenly over the sweet potato layer. This will create a crispy, sweet topping once baked.
- Bake: Place the baking dish in the preheated oven and bake for 25-30 minutes, or until the topping is golden brown and the casserole is heated through.
- Serve: Allow the casserole to cool for a few minutes before serving. This lets the flavors meld and makes it easier to serve.
Extra Tips: For an even richer flavor, try roasting the sweet potatoes instead of boiling them. This can be done by cutting them into wedges, drizzling them with a bit of olive oil, and roasting in the oven at 400°F (200°C) until tender.
Roasting caramelizes the natural sugars in the sweet potatoes, adding depth to the dish. If you prefer a less sweet version, adjust the amount of maple syrup and brown sugar to taste. Additionally, consider adding a pinch of cayenne pepper to the topping for a subtle kick. Enjoy your delicious and healthy Christmas side dish!
Roasted Beet and Goat Cheese Salad
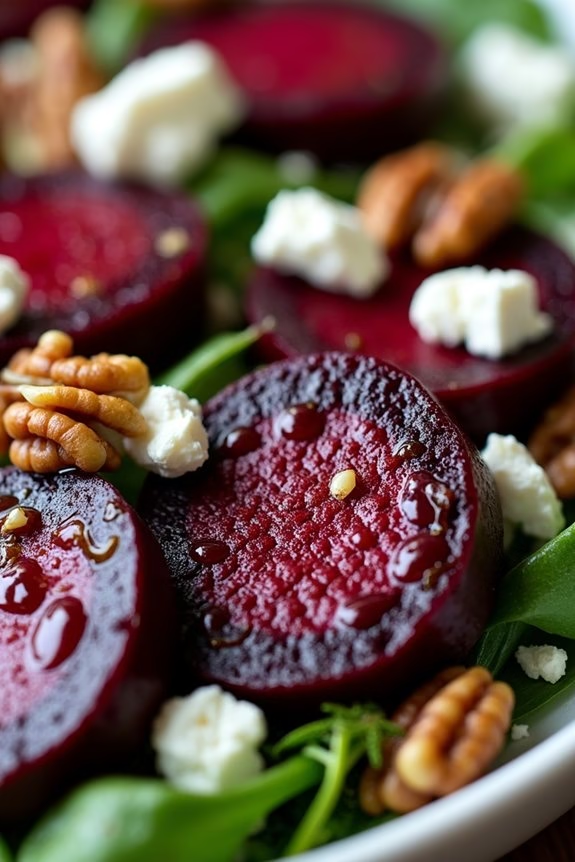
Roasted Beet and Goat Cheese Salad is a vibrant and healthy addition to your Christmas dinner table. This salad combines the earthy sweetness of roasted beets with the creamy tang of goat cheese, creating a delightful balance of flavors. The addition of toasted nuts and a fresh vinaigrette elevates this dish to a festive favorite, perfect for celebrating the holiday season.
Not only is it delicious, but it also adds a splash of color to your holiday spread, making it as beautiful as it’s tasty. This recipe is designed to serve 4-6 people and can be easily adjusted to suit your holiday gathering. The combination of flavors in this salad is sure to impress your guests, while also providing a nutritious option that won’t leave you feeling weighed down.
The freshness of the ingredients and the simplicity of the preparation make it a wonderful choice for a Christmas dinner side dish that complements your main course beautifully.
Ingredients:
- 6 medium-sized beets
- 4 oz goat cheese, crumbled
- 1/4 cup walnuts, toasted
- 1/4 cup pecans, toasted
- 6 cups mixed salad greens (such as arugula, spinach, or mesclun)
- 1/4 cup red onion, thinly sliced
- 1/4 cup balsamic vinegar
- 1/3 cup extra-virgin olive oil
- 1 tablespoon honey
- Salt and pepper to taste
Cooking Instructions:
- Preheat Oven: Preheat your oven to 400°F (200°C). This temperature is ideal for roasting the beets to achieve a tender texture and enhance their natural sweetness.
- Prepare Beets: Wash and scrub the beets thoroughly to remove any dirt. Trim off the tops and roots. Wrap each beet individually in aluminum foil to retain moisture during roasting.
- Roast Beets: Place the wrapped beets on a baking sheet and roast them in the preheated oven for about 45-60 minutes, or until they’re fork-tender. The size of the beets will determine the exact cooking time.
- Cool and Peel Beets: Once roasted, remove the beets from the oven and allow them to cool slightly. When they’re cool enough to handle, use a paper towel to gently rub off the skins.
- Slice Beets: Slice the peeled beets into wedges or rounds, depending on your preference. Aim for uniform slices for even presentation.
- Prepare Dressing: In a small bowl, whisk together the balsamic vinegar, olive oil, honey, salt, and pepper until well combined. Adjust the seasoning to your taste.
- Assemble Salad: In a large salad bowl, combine the mixed greens and sliced red onion. Drizzle a small amount of the dressing over the greens and toss gently to coat.
- Add Beets and Cheese: Arrange the beet slices on top of the salad greens. Sprinkle the crumbled goat cheese over the beets.
- Finish with Nuts: Add the toasted walnuts and pecans to the salad for a crunchy texture.
- Serve: Drizzle the remaining dressing over the entire salad just before serving, guaranteeing an even distribution of flavors.
Extra Tips:
Toasting the nuts enhances their flavor and adds a delightful crunch to the salad. You can toast them in a dry skillet over medium heat for a few minutes, stirring frequently, until they’re golden and fragrant.
When selecting beets, opt for ones that are similar in size to ensure even roasting. If you prefer a vegan version, you can substitute the goat cheese with a plant-based alternative and use maple syrup instead of honey in the dressing.
This Roasted Beet and Goat Cheese Salad can be prepared in advance, with the beets roasted and dressing made a day ahead to save time on the day of your Christmas dinner.
Zucchini Noodles With Pesto and Cherry Tomatoes
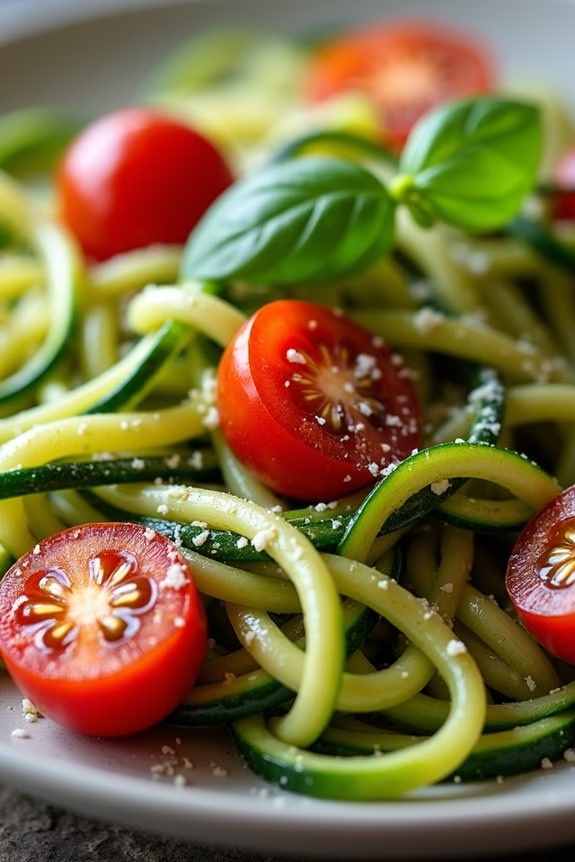
Celebrate the festive season with a revitalizing and healthy twist by serving Zucchini Noodles With Pesto and Cherry Tomatoes at your Christmas dinner. This dish combines the vibrant flavors of fresh basil pesto with the juicy sweetness of cherry tomatoes, all tossed together with spiralized zucchini noodles.
It’s a delightful, low-carb alternative to traditional pasta that isn’t only visually appealing but also packed with nutrients. Perfect for those looking to indulge in a guilt-free meal that doesn’t compromise on taste, this recipe is sure to be a hit with both adults and kids alike.
Preparing Zucchini Noodles With Pesto and Cherry Tomatoes is simple and quick, making it an ideal choice for a busy holiday season. The dish can be enjoyed as a light main course or served as a side dish to complement any festive spread.
With a few fresh ingredients and minimal cooking required, you’ll have a deliciously satisfying meal ready in no time. Whether you’re catering to guests with dietary restrictions or simply want to try something new, this recipe offers a wonderful balance of flavors and textures that everyone at the table will appreciate.
Ingredients (for 4-6 servings):
- 4 medium zucchinis
- 2 cups cherry tomatoes, halved
- 1 cup fresh basil leaves
- 1/2 cup grated Parmesan cheese
- 1/3 cup pine nuts
- 2 cloves garlic
- 1/2 cup extra-virgin olive oil
- Salt and pepper to taste
- Optional: red chili flakes for garnish
Cooking Instructions:
- Prepare Zucchini Noodles: Using a spiralizer, create noodles from the zucchinis. If you don’t have a spiralizer, you can use a vegetable peeler to create thin strips. Set aside.
- Make the Pesto: In a food processor, combine the basil leaves, Parmesan cheese, pine nuts, and garlic cloves. Pulse until the mixture is finely chopped. With the processor running, slowly drizzle in the olive oil and blend until the pesto is smooth. Add salt and pepper to taste.
- Cook the Noodles: In a large skillet, heat a tablespoon of olive oil over medium heat. Add the zucchini noodles and sauté for 2-3 minutes until just tender. Don’t overcook as they can become mushy.
- Combine Ingredients: Add the halved cherry tomatoes to the skillet with the zucchini noodles. Cook for an additional 1-2 minutes to warm through.
- Toss with Pesto: Remove the skillet from heat and add the prepared pesto to the zucchini noodles and cherry tomatoes. Toss gently to coat everything evenly.
- Serve: Transfer the prepared zucchini noodles with pesto and cherry tomatoes to a serving platter. Garnish with extra Parmesan cheese and optional red chili flakes for a bit of heat.
Extra Tips:
For best results, verify your zucchinis are firm and fresh for easy spiralizing. If you prefer a thicker pesto, you can adjust the amount of olive oil to your liking.
To enhance the flavor of the pine nuts, consider lightly toasting them in a dry skillet before using them in the pesto. This dish is best served immediately after preparation to enjoy the crispiness of the zucchini noodles, but leftovers can be stored in the refrigerator for up to two days.
If preparing in advance, keep the components separate and toss everything together just before serving to maintain freshness and texture.
Grilled Portobello Mushrooms With Balsamic Reduction
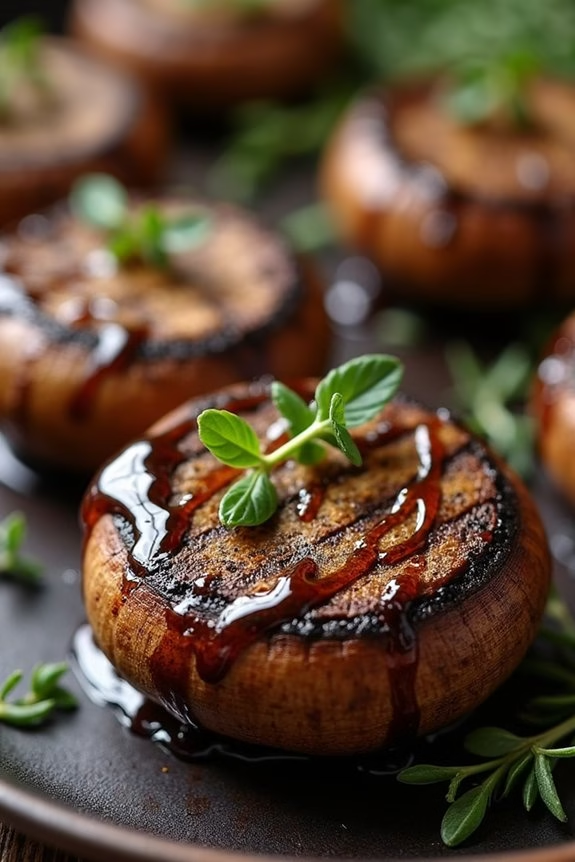
Grilled Portobello Mushrooms With Balsamic Reduction is a delightful and healthy addition to your Christmas dinner table. Bursting with flavor, these mushrooms serve as a hearty main course or a satisfying side dish. The rich umami taste of the portobello mushrooms pairs beautifully with the tangy sweetness of the balsamic reduction, making this dish a crowd-pleaser for both vegetarians and meat-lovers alike.
Not only are these mushrooms delicious, but they’re also packed with nutrients, making them a wholesome and guilt-free option for your festive feast.
These Grilled Portobello Mushrooms are easy to prepare and require minimal ingredients, allowing their natural flavors to shine. The balsamic reduction adds a touch of sophistication and is simple to make, but it elevates the dish to a new level of flavor. Perfect for serving 4-6 people, this recipe can easily be doubled or halved to suit your needs. Whether you’re hosting a large gathering or an intimate dinner, these mushrooms will surely be a hit.
Ingredients:
- 6 large portobello mushrooms
- 1/4 cup olive oil
- 3 tablespoons balsamic vinegar
- 2 cloves garlic, minced
- Salt and pepper to taste
- 1 cup balsamic vinegar (for reduction)
- 2 tablespoons honey or maple syrup
- Fresh thyme leaves for garnish (optional)
Instructions:
- Prepare the Mushrooms: Clean the portobello mushrooms by gently wiping them with a damp cloth or paper towel to remove any dirt. Carefully remove the stems for a nicer presentation and more even cooking.
- Make the Marinade: In a small bowl, whisk together olive oil, balsamic vinegar, minced garlic, salt, and pepper. This marinade will infuse the mushrooms with flavor and help them grill beautifully.
- Marinate the Mushrooms: Place the mushrooms in a shallow dish or a resealable plastic bag. Pour the marinade over the mushrooms, making sure each one is well coated. Let them marinate for at least 30 minutes, turning occasionally to guarantee even absorption.
- Prepare the Balsamic Reduction: In a small saucepan over medium heat, combine the balsamic vinegar and honey (or maple syrup). Bring to a gentle boil, then reduce the heat to low and simmer until the mixture has reduced by half and has a syrupy consistency, about 15-20 minutes. Stir occasionally and watch closely to avoid burning.
- Preheat the Grill: Heat your grill or grill pan to medium-high heat. Lightly oil the grates to prevent sticking.
- Grill the Mushrooms: Remove the mushrooms from the marinade and place them on the preheated grill, gill side up. Grill for about 5-7 minutes per side, or until the mushrooms are tender and have nice grill marks. Baste occasionally with the remaining marinade for extra flavor.
- Serve: Arrange the grilled portobello mushrooms on a serving platter. Drizzle the balsamic reduction over the top and garnish with fresh thyme leaves if desired. Serve hot as a main dish or side.
Extra Tips:
When grilling the portobello mushrooms, keep an eye on them to avoid overcooking, as they can become too soft and lose their texture.
If you prefer a more intense flavor, consider marinating the mushrooms for a few hours or overnight in the refrigerator.
For a vegan version, use maple syrup in the balsamic reduction instead of honey. This dish pairs wonderfully with roasted vegetables or a fresh green salad, making it versatile for any holiday menu.
Spaghetti Squash With Turkey Bolognese
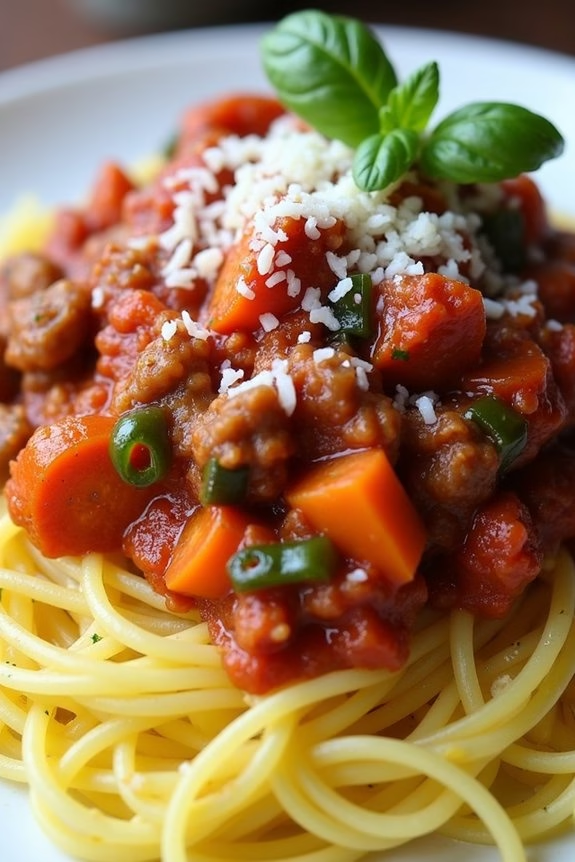
Spaghetti Squash With Turkey Bolognese is a delightful and nutritious twist on the classic Italian favorite. This dish combines the subtle sweetness of spaghetti squash with a rich, hearty turkey bolognese sauce, offering a meal that’s both satisfying and healthy.
It’s perfect for a festive Christmas dinner that won’t leave you feeling weighed down, allowing you to indulge without the guilt. The combination of lean ground turkey and fresh vegetables guarantees that this dish is packed with protein and nutrients, making it a wholesome option for the holiday season.
Spaghetti squash serves as a wonderful low-carb alternative to traditional pasta, while the turkey bolognese sauce provides a flavorful punch. The dish is easy to prepare and can be cooked in advance, allowing you to spend more time with your loved ones during the Christmas festivities.
Whether you’re catering to a health-conscious crowd or simply looking to try something new, this recipe is sure to impress your guests with its delicious taste and appealing presentation.
Ingredients (Serves 4-6):
- 2 medium spaghetti squashes
- 1 tablespoon olive oil
- 1 pound ground turkey
- 1 onion, chopped
- 3 cloves garlic, minced
- 1 carrot, diced
- 1 celery stalk, diced
- 1 red bell pepper, diced
- 1 can (28 ounces) crushed tomatoes
- 1 teaspoon dried oregano
- 1 teaspoon dried basil
- Salt and pepper to taste
- 1/4 cup grated Parmesan cheese (optional)
- Fresh basil leaves for garnish (optional)
Cooking Instructions:
- Prepare the Spaghetti Squash: Preheat your oven to 400°F (200°C). Cut each spaghetti squash in half lengthwise and remove the seeds. Drizzle the inside with olive oil and season with salt and pepper. Place the squash halves cut side down on a baking sheet and roast for 30-40 minutes or until the flesh is tender and can be easily scraped into strands with a fork.
- Cook the Turkey Bolognese: While the squash is roasting, heat olive oil in a large skillet over medium heat. Add the chopped onion, minced garlic, diced carrot, celery, and red bell pepper. Sauté for 5-7 minutes, until the vegetables are softened.
- Brown the Turkey: Add the ground turkey to the skillet, breaking it up with a spoon as it cooks. Cook until the turkey is no longer pink, about 6-8 minutes.
- Simmer the Sauce: Stir in the crushed tomatoes, dried oregano, dried basil, salt, and pepper. Bring the mixture to a simmer. Reduce the heat to low and let it cook for 20-25 minutes, allowing the flavors to meld together.
- Combine and Serve: Once the spaghetti squash is done, use a fork to scrape the strands into a large serving bowl. Top the squash strands with the turkey bolognese sauce. If desired, sprinkle with Parmesan cheese and garnish with fresh basil leaves before serving.
Extra Tips: When preparing the spaghetti squash, be cautious when cutting it in half as it can be tough; using a sharp knife and a sturdy cutting board will help.
If you’re short on time, you can microwave the squash instead of roasting it: place the halves cut side down in a microwave-safe dish with a bit of water and microwave on high for about 10-12 minutes. Additionally, feel free to adjust the seasoning to your taste, adding more herbs or spices as desired to enhance the flavor profile.
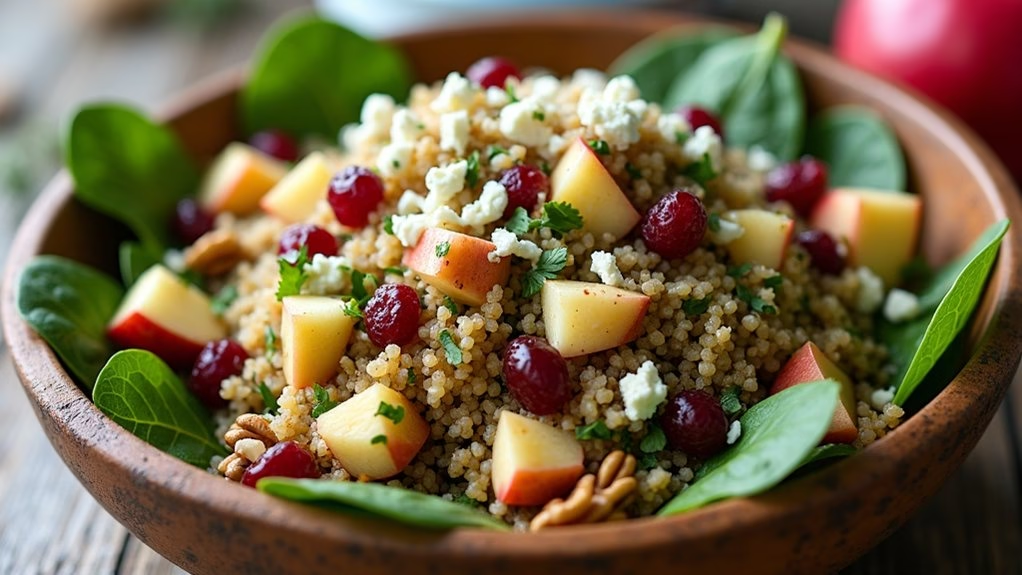
Cranberry Apple Quinoa Salad

Cranberry Apple Quinoa Salad is a delightful and nutritious dish that brings a festive touch to your Christmas dinner table. This vibrant salad combines the earthy flavors of quinoa with the sweet and tart notes of cranberries and apples, creating a harmonious blend that’s both flavorful and satisfying.
Perfect as a side dish or a light main course, this salad isn’t only delicious but also packed with essential nutrients, making it an excellent choice for those looking to maintain a balanced diet during the holiday season.
This recipe is ideal for serving 4-6 people and can be easily adapted to suit your taste preferences. The combination of textures and flavors in this salad makes it a revitalizing addition to any holiday feast. The quinoa provides a healthy base, while the cranberries and apples add a burst of color and flavor, and the nuts and greens offer a satisfying crunch.
With minimal preparation and cooking time, this salad is a stress-free option that you can prepare ahead of time, allowing you to focus on enjoying the festivities.
Ingredients (Serves 4-6):
- 1 cup quinoa
- 2 cups water
- 1/2 cup dried cranberries
- 1 medium apple, diced
- 1/4 cup chopped walnuts or pecans
- 1/4 cup chopped fresh parsley
- 3 cups baby spinach or mixed greens
- 1/4 cup feta cheese, crumbled (optional)
- 1/4 cup olive oil
- 2 tablespoons apple cider vinegar
- 1 tablespoon honey
- Salt and pepper to taste
Instructions:
- Cook the Quinoa: Rinse the quinoa under cold water in a fine mesh strainer. In a medium saucepan, bring 2 cups of water to a boil. Add the quinoa, reduce the heat to low, cover, and simmer for about 15 minutes or until the quinoa is tender and the water has been absorbed. Remove from heat and let it stand, covered, for 5 minutes. Fluff the quinoa with a fork and allow it to cool.
- Prepare the Dressing: In a small bowl, whisk together the olive oil, apple cider vinegar, honey, salt, and pepper until well combined. Adjust the seasoning to taste.
- Mix the Salad: In a large bowl, combine the cooked quinoa, dried cranberries, diced apple, chopped walnuts or pecans, and fresh parsley. Toss gently to mix the ingredients.
- Add the Greens: Add the baby spinach or mixed greens to the quinoa mixture. Pour the dressing over the salad and toss until everything is evenly coated.
- Serve: Transfer the salad to a serving platter or bowl. If using, sprinkle the crumbled feta cheese on top just before serving for an extra layer of flavor.
Extra Tips:
To save time, you can cook the quinoa a day ahead and store it in the refrigerator until you’re ready to assemble the salad.
If you prefer a nut-free version, simply omit the walnuts or pecans, or substitute them with sunflower seeds for a similar crunch.
For a vegan option, skip the feta cheese or replace it with a plant-based alternative. This salad is versatile and can be customized with additional ingredients like sliced avocado, pomegranate seeds, or roasted butternut squash to enhance its color and nutrition.