

Hosting a Halloween dinner is such a delightful opportunity to get creative with classic dishes. Picture serving Witch’s Brew Stew or Mummy Meatball Marinara at your table. Your guests will be enchanted by the spooky twists and the mouthwatering flavors. With vibrant ingredients and whimsical presentations, transforming a meal into a memorable Halloween feast is pure magic. Curious to see what else is on the menu? There’s so much more to explore.
Witch’s Brew Stew
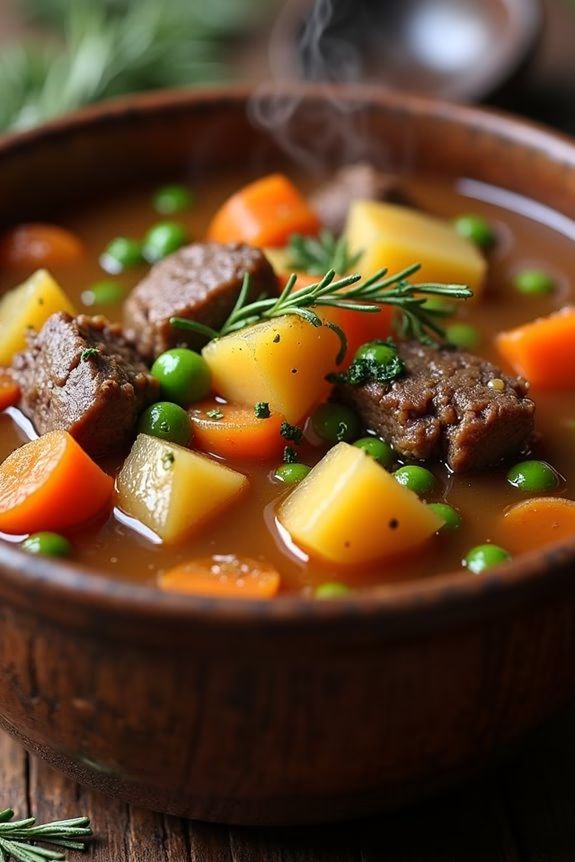
Witch’s Brew Stew is a hearty and flavorful dish perfect for any Halloween gathering. This stew is a magical concoction filled with tender chunks of beef, a medley of vegetables, and aromatic herbs and spices that will have your guests spellbound. The rich, savory broth is both comforting and satisfying, making it an ideal choice for those chilly autumn nights when you want to indulge in something warm and delicious.
This recipe serves 4-6 people, ensuring there’s enough for everyone to enjoy a generous portion. The vibrant colors and enticing aroma make it a feast for the senses, and the simplicity of its preparation allows you to spend more time enjoying the festivities and less time in the kitchen. Whether you’re hosting a Halloween party or simply want to treat your family to a special meal, Witch’s Brew Stew is sure to be a hit.
Ingredients:
- 2 pounds beef stew meat, cut into 1-inch cubes
- 2 tablespoons olive oil
- 1 large onion, chopped
- 3 cloves garlic, minced
- 4 cups beef broth
- 2 cups water
- 1 can (14.5 ounces) diced tomatoes, undrained
- 2 cups cubed potatoes
- 2 cups sliced carrots
- 1 cup chopped celery
- 1 cup chopped green bell pepper
- 1 tablespoon Worcestershire sauce
- 1 teaspoon dried thyme
- 1 teaspoon dried rosemary
- 1 bay leaf
- Salt and pepper to taste
- 1 cup frozen peas
Cooking Instructions:
- Prepare the Meat: In a large pot, heat the olive oil over medium-high heat. Add the beef stew meat and brown it on all sides. This should take about 5-7 minutes. Once browned, remove the meat from the pot and set it aside.
- Sauté Aromatics: In the same pot, add the chopped onion and garlic. Sauté until the onion is translucent and fragrant, about 3-4 minutes.
- Combine Ingredients: Return the beef to the pot. Add the beef broth, water, and diced tomatoes. Stir well to combine.
- Add Vegetables and Seasonings: Add the cubed potatoes, sliced carrots, chopped celery, and green bell pepper. Stir in the Worcestershire sauce, thyme, rosemary, bay leaf, and season with salt and pepper to taste.
- Simmer the Stew: Bring the mixture to a boil. Once boiling, reduce the heat to low, cover the pot, and let it simmer for about 1.5 to 2 hours, or until the beef is tender and the flavors have melded together.
- Finish with Peas: About 10 minutes before serving, add the frozen peas to the pot and stir. Allow them to heat through.
- Serve: Remove the bay leaf before serving. Ladle the Witch’s Brew Stew into bowls and serve hot.
Extra Tips:
To enhance the flavors of your Witch’s Brew Stew, consider preparing it a day in advance. Stews often taste better the next day as the ingredients have more time to meld together.
You can also use a slow cooker for this recipe by following the same steps and cooking on low for 6-8 hours. For a thicker stew, mix a tablespoon of cornstarch with cold water and stir it into the stew during the last 20 minutes of cooking. Enjoy your magical meal!
Mummy Meatball Marinara

Transform your Halloween dinner into a spooktacular affair with Mummy Meatball Marinara. This dish combines the classic flavors of Italian cuisine with a fun and festive twist, perfect for delighting both kids and adults. Juicy meatballs are wrapped in strips of crescent dough to resemble mummies and are served in a pool of rich marinara sauce. The combination of savory meat, flaky dough, and tangy sauce makes for a deliciously eerie meal that’s as entertaining as it’s tasty.
Mummy Meatball Marinara not only looks impressive but is also surprisingly easy to make. This recipe is perfect for a Halloween gathering, offering a creative and interactive dish that encourages everyone to dig in. The meatballs are seasoned to perfection, and the crescent dough wrapping adds a delightful texture and visual appeal.
Whether you’re hosting a Halloween party or simply enjoying a themed dinner with your family, this dish is sure to be a hit.
Ingredients (serves 4-6):
- 1 pound ground beef
- 1/2 cup breadcrumbs
- 1/4 cup grated Parmesan cheese
- 1 egg
- 1 teaspoon garlic powder
- 1 teaspoon onion powder
- Salt and pepper to taste
- 1 can (8 ounces) crescent roll dough
- 2 cups marinara sauce
- 1 tablespoon olive oil
- 24 small olive slices (for eyes)
- 1 tablespoon fresh parsley, chopped (optional, for garnish)
Cooking Instructions:
- Preheat the Oven: Begin by preheating your oven to 375°F (190°C). This guarantees that the oven is hot enough to cook the meatballs evenly and allows the crescent dough to become golden brown.
- Prepare the Meatballs: In a large mixing bowl, combine the ground beef, breadcrumbs, Parmesan cheese, egg, garlic powder, onion powder, salt, and pepper. Mix until all ingredients are thoroughly combined. Shape the mixture into small meatballs, around 1 inch in diameter.
- Cook the Meatballs: Heat the olive oil in a large skillet over medium heat. Add the meatballs to the skillet and cook them until they’re browned on all sides, which should take about 6-8 minutes. Remove them from the skillet and set aside.
- Wrap the Meatballs: Unroll the crescent roll dough and cut it into thin strips. Carefully wrap each meatball with the dough strips, leaving a small space for the olive slices to peek through as eyes.
- Bake the Mummy Meatballs: Place the wrapped meatballs on a baking sheet lined with parchment paper. Insert two olive slices into each meatball to resemble eyes. Bake in the preheated oven for 12-15 minutes, or until the dough is golden brown.
- Heat the Marinara Sauce: While the meatballs are baking, heat the marinara sauce in a saucepan over low heat until it’s warm.
- Serve: Pour the warm marinara sauce onto a serving platter and arrange the mummy meatballs on top. Garnish with fresh parsley if desired.
Extra Tips:
For an extra burst of flavor, consider adding Italian seasoning or freshly chopped herbs like basil or oregano into the meatball mixture. If you prefer a spicier kick, a pinch of red pepper flakes could be a great addition.
When wrapping the meatballs, try to keep the dough strips thin to guarantee even baking and a crispy finish. Finally, confirm the olive eyes are firmly placed, as they can shift during baking. Enjoy your hauntingly delicious meal!
Spooky Stuffed Peppers

Get ready to delight your family and friends with these Spooky Stuffed Peppers, the perfect Halloween-themed dinner recipe that combines taste and fun. These creepy yet delicious peppers are carved to resemble jack-o’-lanterns and filled with a savory mix of ground beef, rice, and vegetables.
Whether you’re hosting a Halloween party or just want to enjoy a festive meal, these stuffed peppers are guaranteed to be a hit with both kids and adults alike.
These Spooky Stuffed Peppers aren’t only visually appealing but also packed with flavor and nutrients. The combination of protein-rich beef, fiber-packed rice, and a variety of vegetables assures a hearty and satisfying meal.
The carved faces on the peppers add an element of fun, making this dish a great way to get into the Halloween spirit. So, gather your ingredients, roll up your sleeves, and let’s get cooking!
Ingredients (Serves 4-6):
- 6 large orange bell peppers
- 1 pound ground beef
- 1 cup cooked rice
- 1 medium onion, diced
- 2 cloves garlic, minced
- 1 cup canned diced tomatoes
- 1 cup shredded mozzarella cheese
- 2 tablespoons olive oil
- 1 teaspoon salt
- 1/2 teaspoon black pepper
- 1 teaspoon smoked paprika
- 1 teaspoon Italian seasoning
- 1/4 cup chopped fresh parsley
- 1/2 cup beef broth (optional)
Cooking Instructions:
1. Prepare the Peppers: Preheat your oven to 350°F (175°C). Begin by washing the bell peppers thoroughly. Carefully slice off the tops and remove the seeds and membranes inside.
Using a small knife, carve out jack-o’-lantern faces on one side of each pepper. Set them aside.
2. Cook the Filling****: In a large skillet, heat the olive oil over medium heat. Add the diced onion and minced garlic, sautéing until the onion becomes translucent, about 3-4 minutes.
Add the ground beef to the skillet, breaking it up with a wooden spoon, and cook until browned.
3. Mix the Ingredients: Once the beef is cooked, stir in the diced tomatoes, cooked rice, salt, black pepper, smoked paprika, and Italian seasoning.
Allow the mixture to simmer for about 5 minutes, then remove from heat. Stir in the chopped parsley and 3/4 cup of the shredded mozzarella cheese.
4. Stuff the Peppers: Place the hollowed-out peppers in a baking dish. Fill each pepper with the beef and rice mixture, pressing down lightly to guarantee they’re well-packed.
If using beef broth, pour it into the bottom of the baking dish to keep the peppers moist during baking.
5. Bake the Peppers: Cover the dish with aluminum foil and bake in the preheated oven for 30 minutes. Remove the foil, sprinkle the remaining mozzarella cheese over the tops of the peppers, and return to the oven.
Bake for an additional 10-15 minutes, or until the cheese is melted and bubbly.
6. Serve and Enjoy: Carefully remove the peppers from the oven and let them cool for a few minutes. Serve on a platter, allowing everyone to admire the spooky faces before digging in.
Extra Tips: For a vegetarian variation, substitute the ground beef with a mixture of black beans and mushrooms.
You can also experiment with different types of cheese or add a spicy kick by incorporating some chopped jalapeños into the filling. If you want to prepare the dish ahead of time, assemble the peppers and store them in the refrigerator until you’re ready to bake.
This dish is perfect for getting creative, so feel free to customize the faces and fillings to your liking!
Ghostly Gnocchi Alfredo
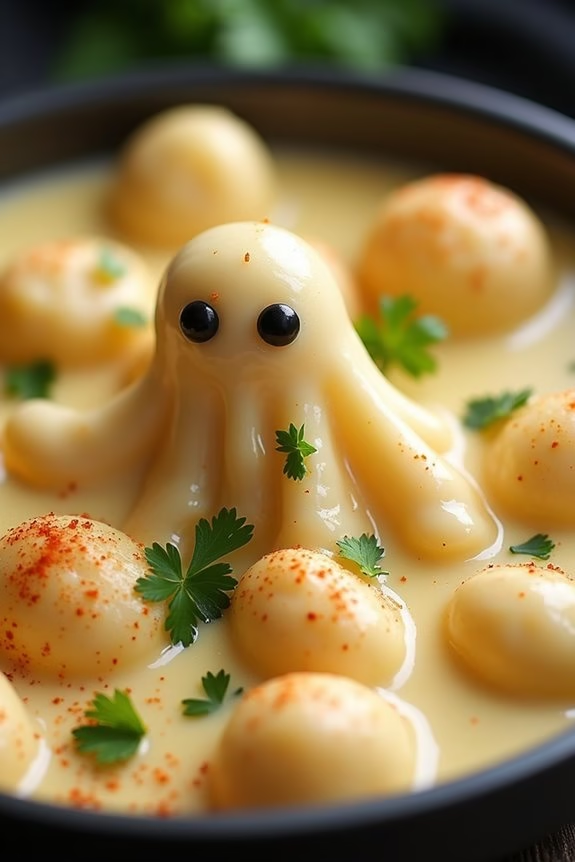
Ghostly Gnocchi Alfredo is a spooktacular dish that combines the creamy comfort of traditional Alfredo sauce with the light, fluffy texture of gnocchi. Perfect for a Halloween-themed dinner, this dish adds a haunting twist with the use of ghost-shaped gnocchi or by creatively arranging your gnocchi to resemble ghostly apparitions. The rich and savory Alfredo sauce clings to each piece, ensuring every bite is filled with cheesy, garlicky goodness.
Whether served as the main attraction or as a side dish, Ghostly Gnocchi Alfredo is sure to delight both kids and adults at your festive gathering. To enhance the Halloween ambiance, consider garnishing the dish with accents of fresh parsley for an eerie green touch, or dust with a sprinkle of paprika for a hint of fiery red. If you’re feeling adventurous, use black squid ink gnocchi to create an even more mysterious look. Regardless of your creative choices, the dish remains a warm and hearty option that brings together the best of Italian cuisine with a playful holiday twist.
Ingredients (Serves 4-6):
- 2 pounds potato gnocchi
- 2 tablespoons unsalted butter
- 2 cloves garlic, minced
- 1 1/2 cups heavy cream
- 1 cup grated Parmesan cheese
- Salt and black pepper, to taste
- Pinch of nutmeg
- Fresh parsley, chopped (for garnish)
- Optional: Squid ink for coloring gnocchi
Cooking Instructions:
- Prepare the Gnocchi:
- If making ghost-shaped gnocchi, roll out your gnocchi dough and use a small knife or cookie cutter to create ghost shapes. If using store-bought gnocchi, proceed to the cooking stage.
- Bring a large pot of salted water to a boil. Add the gnocchi and cook according to package instructions, usually until they float to the surface, about 2-3 minutes. Drain and set aside.
- Make the Alfredo Sauce:
- In a large skillet over medium heat, melt the butter. Add the minced garlic and sauté until fragrant, about 1 minute.
- Pour in the heavy cream, stirring continuously. Let the mixture simmer for about 5 minutes, allowing it to thicken slightly.
- Combine and Season:
- Gradually whisk in the grated Parmesan cheese until the sauce is smooth and creamy. Season with salt, black pepper, and a pinch of nutmeg to enhance the flavors.
- Add the cooked gnocchi to the skillet, gently tossing to coat each piece with the Alfredo sauce.
- Serve:
- Transfer the Ghostly Gnocchi Alfredo to a serving platter. Garnish with freshly chopped parsley for a touch of color.
- For an extra spooky presentation, arrange the gnocchi into ghostly shapes on the plate, or use squid ink-colored gnocchi to create a haunting effect.
Extra Tips:
When making Ghostly Gnocchi Alfredo, using freshly grated Parmesan cheese is key to achieving a smooth and rich sauce. Pre-grated cheese can often lead to a grainy texture.
If you’re short on time, store-bought gnocchi works perfectly well, but for a truly homemade touch, try crafting your own from scratch. Be cautious when adding squid ink to the gnocchi to avoid overpowering the dish with its distinct flavor.
Ultimately, if you prefer a lighter version, substitute half of the heavy cream with whole milk, adjusting the cooking time to allow the sauce to thicken properly.
Pumpkin Patch Pasta

Celebrate Halloween with a festive and delicious dish that embodies the essence of the season: Pumpkin Patch Pasta. This dish combines the rich, earthy flavors of pumpkin with the savory goodness of pasta, making it a perfect centerpiece for your Halloween-themed dinner.
The creamy pumpkin sauce, accented with sage and nutmeg, coats the pasta beautifully, while crispy sage leaves add a delightful crunch. Whether you’re hosting a spooky dinner party or simply enjoying a cozy meal at home, Pumpkin Patch Pasta is guaranteed to impress and satisfy.
This recipe serves 4-6 people, making it ideal for a small gathering or a family dinner. The preparation involves creating a luscious pumpkin sauce that’s both comforting and festive. The dish isn’t only visually appealing, with its autumnal colors, but also incredibly tasty, providing a unique twist on traditional pasta dishes. With just a few simple ingredients, you can whip up this Halloween treat in no time.
Ingredients:
- 1 pound (450g) of pasta (fettuccine or penne)
- 2 cups (480ml) of pumpkin puree
- 1 cup (240ml) of heavy cream
- 1/2 cup (120ml) of vegetable broth
- 1/2 cup (50g) of grated Parmesan cheese
- 2 tablespoons of olive oil
- 1 small onion, finely chopped
- 2 cloves of garlic, minced
- 1 teaspoon of dried sage
- 1/4 teaspoon of ground nutmeg
- Salt and pepper to taste
- Fresh sage leaves for garnish
- Optional: Toasted pumpkin seeds for topping
Instructions:
- Cook the Pasta: Begin by bringing a large pot of salted water to a boil. Add the pasta and cook according to package instructions until al dente. Drain the pasta and set it aside.
- Prepare the Pumpkin Sauce: In a large skillet, heat the olive oil over medium heat. Add the chopped onion and minced garlic, cooking until the onion becomes translucent and fragrant, about 3-4 minutes.
- Combine Ingredients: Stir in the pumpkin puree, heavy cream, and vegetable broth to the skillet with the onions and garlic. Mix well until the ingredients are combined.
- Season the Sauce: Add the dried sage, nutmeg, salt, and pepper. Allow the sauce to simmer gently for about 5 minutes, letting the flavors meld together.
- Integrate the Parmesan: Stir in the grated Parmesan cheese, allowing it to melt into the sauce. Adjust the seasoning if needed, adding more salt and pepper to taste.
- Mix the Pasta: Add the cooked pasta to the skillet with the pumpkin sauce. Toss well to guarantee the pasta is evenly coated with the sauce.
- Garnish: In a small pan, heat a little olive oil and fry the fresh sage leaves until crispy. Use them to garnish the pasta. Optionally, sprinkle toasted pumpkin seeds over the top for an added crunch.
Tips:
To enhance the flavor of your Pumpkin Patch Pasta, consider roasting a fresh pumpkin instead of using canned puree; this will add depth and a more robust pumpkin flavor.
If you prefer a lighter sauce, you can substitute the heavy cream with half-and-half or even milk, though the sauce will be less creamy. Remember not to overcook the pasta; it should be al dente to hold up well with the rich sauce.
Additionally, feel free to add a pinch of chili flakes for a hint of heat, or mix in some sautéed mushrooms for extra earthiness. Enjoy your Halloween feast!
Dracula’s Bloody Beet Risotto
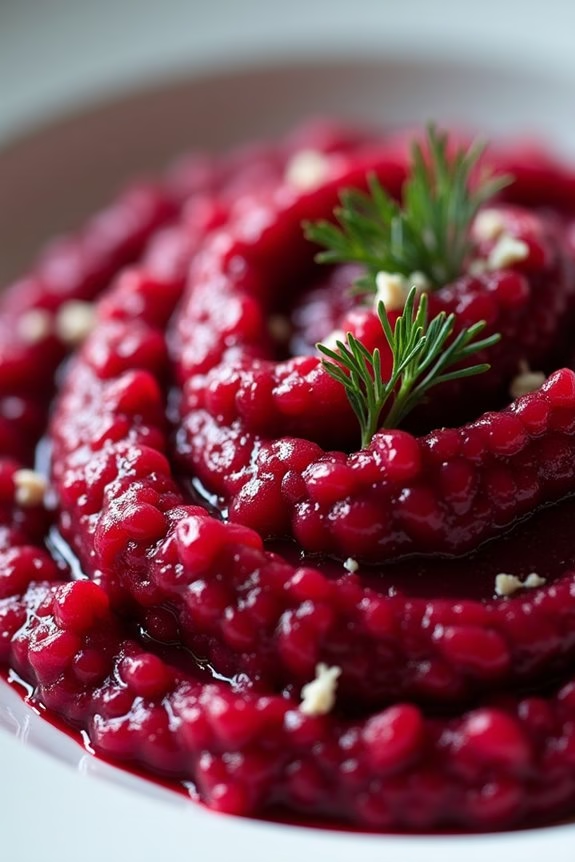
Dracula’s Bloody Beet Risotto is an enticing and vibrant dish perfect for a Halloween-themed dinner. This risotto isn’t only visually striking with its deep, blood-red hue but also rich in flavor, combining the earthiness of beets with the creaminess of arborio rice. It’s a meal that combines deliciousness with a touch of theatrical flair, making it an ideal centerpiece for a spooky yet sophisticated gathering.
Ideal for serving 4-6 people, this risotto’s preparation involves roasting beets to bring out their natural sweetness and using their juice to color the risotto. This dish will capture the imagination of your guests and delight their taste buds with its unique flavor profile. The addition of Parmesan cheese and a hint of garlic guarantees a harmonious blend of flavors, while the garnishing with fresh herbs adds a touch of freshness.
Ingredients (serving size 4-6):
- 2 large beets
- 2 tablespoons olive oil
- 1 small onion, finely chopped
- 2 cloves garlic, minced
- 1 1/2 cups arborio rice
- 1 cup dry white wine
- 4 cups vegetable broth
- 1/2 cup grated Parmesan cheese
- Salt and black pepper to taste
- Fresh dill or parsley for garnish
Cooking Instructions:
- Roast the Beets: Preheat your oven to 400°F (200°C). Wrap the beets in aluminum foil and place them on a baking sheet. Roast for about 45 minutes or until tender. Allow them to cool slightly, then peel and puree in a blender or food processor until smooth. Set aside.
- Prepare the Broth: Heat the vegetable broth in a saucepan over low heat. Keep it warm but not boiling, as you’ll need it throughout the cooking process.
- Cook the Aromatics: In a large pan, heat the olive oil over medium heat. Add the chopped onion and cook until translucent, about 5 minutes. Stir in the minced garlic and cook for another minute until fragrant.
- Toast the Rice: Add the arborio rice to the pan with the onions and garlic. Stir constantly for about 2 minutes until the rice is well-coated and slightly toasted.
- Deglaze with Wine: Pour in the white wine and stir continuously until the wine is mostly absorbed by the rice.
- Add Broth Gradually: Begin adding the warm vegetable broth to the rice, one ladleful at a time. Allow each addition to be absorbed before adding the next. Stir frequently to promote even cooking and prevent sticking.
- Incorporate the Beet Puree: Once the rice is almost cooked through and creamy, stir in the beet puree. Continue to cook, adding more broth if necessary, until the rice is al dente and the risotto is creamy.
- Finish with Cheese and Seasoning: Remove the pan from the heat and stir in the grated Parmesan cheese. Season with salt and black pepper to taste.
- Serve and Garnish: Spoon the risotto onto plates and garnish with fresh dill or parsley before serving.
For best results, make certain that the broth is kept warm throughout the cooking process to maintain a consistent temperature for the rice, which helps achieve a creamy texture.
Feel free to adjust the amount of beet puree used depending on the desired intensity of color and flavor. Additionally, when selecting beets, opt for fresh and firm ones to guarantee the best quality and taste in your risotto.
Enjoy your Dracula’s Bloody Beet Risotto as a visually stunning and delicious addition to your Halloween dinner menu!
Monster Mash Mashed Potatoes
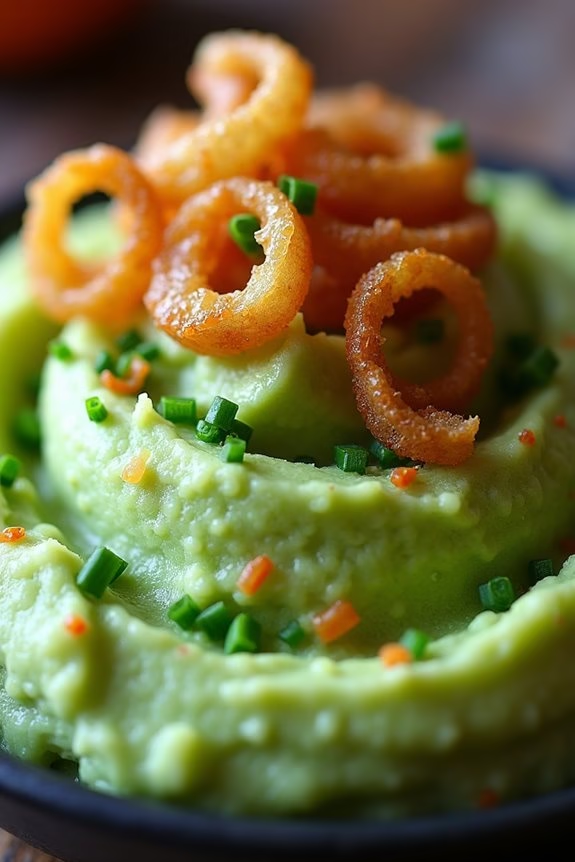
Monster Mash Mashed Potatoes is the perfect spooky side dish to complement your Halloween feast. This dish isn’t just about the taste but also about the presentation. The creamy mashed potatoes are transformed into a ghoulish delight with the addition of colorful vegetable dyes – creating a green, monster-like hue.
Kids and adults alike will enjoy digging their forks into this eerie creation, making it a fun and festive addition to your Halloween dinner table. The recipe combines the smooth texture and buttery flavor of traditional mashed potatoes with a playful twist.
By incorporating fresh herbs and a splash of food coloring, you can create a dish that’s as visually striking as it’s delicious. Whether you’re hosting a Halloween party or just want to surprise your family with a themed dinner, Monster Mash Mashed Potatoes is certain to be a hit.
Ingredients for 4-6 servings:
- 3 pounds of Yukon Gold potatoes
- 1/2 cup of whole milk
- 1/4 cup of unsalted butter
- Salt and pepper to taste
- 1/4 cup of sour cream
- 2 tablespoons of fresh chives, chopped
- Green food coloring
- Optional: crispy fried onions for topping
Cooking Instructions:
- Prepare the Potatoes: Start by peeling the potatoes and cutting them into uniform chunks. This guarantees even cooking. Place the potatoes in a large pot and cover them with cold water. Add a pinch of salt to the water.
- Cook the Potatoes: Bring the pot to a boil over medium-high heat. Once boiling, reduce the heat to maintain a simmer and cook for 15-20 minutes, or until the potatoes are fork-tender.
- Mash the Potatoes: Drain the potatoes and return them to the pot. Allow them to sit for a minute to let any excess moisture evaporate. Add the butter, milk, and sour cream to the potatoes. Use a potato masher or electric mixer to mash until smooth and creamy.
- Add Color and Season: Stir in the green food coloring a few drops at a time until you achieve your desired shade of green. Season with salt and pepper to taste. Mix in the chopped chives for added flavor and a touch of color.
- Serve: Transfer the mashed potatoes to a serving dish. For an extra monster touch, top with crispy fried onions. Serve warm as a side dish to your Halloween main course.
Extra Tips:
When making Monster Mash Mashed Potatoes, it’s important to taste as you go, especially when adding the food coloring. Start with a small amount and gradually increase until you reach the desired vibrant hue.
Be cautious with the green coloring to avoid an overpowering color that mightn’t look appetizing. If you’re looking to make the dish even more festive, consider using purple potatoes or adding a few drops of other food coloring to create a marbled effect.
Creepy Crawly Crab Cakes

Get ready to spook your guests with a Halloween-themed delight: Creepy Crawly Crab Cakes! These delicious crab cakes aren’t only scrumptious but are also crafted to add a touch of eerie elegance to your Halloween dinner table. The combination of succulent crab meat with a hint of spice and a crunchy exterior makes these crab cakes irresistible.
Plus, with a little creativity, you can transform them into creepy crawly treats by adding garnish that mimics the look of spider legs or bugs, making them perfect for your Halloween celebration.
To create these Creepy Crawly Crab Cakes, you’ll need fresh crab meat mixed with a medley of spices and herbs, bound together with a flavorful base. The cakes are then coated with a crispy breadcrumb mixture and fried to golden perfection. Serve them with a tangy dipping sauce to enhance their flavor, and watch as your guests delight in both the taste and the thematic presentation.
With this recipe, you can prepare a serving size for 4-6 people, making enough to satisfy a small gathering of friends or family.
Ingredients:
- 1 pound fresh crab meat
- 1/2 cup mayonnaise
- 1 tablespoon Dijon mustard
- 1 tablespoon Worcestershire sauce
- 1 teaspoon Old Bay seasoning
- 1/2 teaspoon cayenne pepper
- 1 tablespoon lemon juice
- 2 green onions, finely chopped
- 1/2 cup finely diced red bell pepper
- 1/4 cup fresh parsley, chopped
- 1 egg, beaten
- 1 cup panko breadcrumbs
- Salt and pepper to taste
- 1 cup all-purpose flour
- Vegetable oil for frying
- Black olives, thinly sliced (for garnish)
- Fresh chives or thin pretzel sticks (for garnish)
Cooking Instructions:
- Prepare the Crab Mixture: In a large bowl, combine the fresh crab meat, mayonnaise, Dijon mustard, Worcestershire sauce, Old Bay seasoning, cayenne pepper, lemon juice, green onions, red bell pepper, parsley, and the beaten egg. Mix carefully to guarantee all ingredients are evenly distributed without breaking up the crab meat.
- Form the Crab Cakes: Gently fold in 1/2 cup of the panko breadcrumbs into the crab mixture. Shape the mixture into 8-10 patties, about 1 inch thick, and set them aside on a lined baking sheet.
- Coat the Crab Cakes: Set up a dredging station with separate plates for flour and the remaining panko breadcrumbs. Lightly dust each crab cake with flour, then dip it into the panko breadcrumbs, ensuring each cake is evenly coated.
- Fry the Crab Cakes: In a large skillet, heat vegetable oil over medium-high heat. Once the oil is hot, carefully add the crab cakes in batches, being careful not to overcrowd the pan. Fry each side for about 3-4 minutes or until golden brown and crispy. Remove and drain on paper towels.
- Garnish for the Creepy Crawly Look: To create the creepy crawly effect, insert small slices of black olives into the sides of each crab cake to resemble eyes. Use chives or pretzel sticks as legs, arranging them in a spider-like fashion around the cakes.
- Serve: Pair with a tangy dipping sauce of your choice, such as tartar sauce or a spicy aioli, and serve immediately to enjoy at their freshest.
Extra Tips:
For the best results, use fresh crab meat over canned varieties to enhance the flavor and texture of your crab cakes. If the mixture feels too wet to form into patties, you can add a little more panko breadcrumbs until they hold their shape.
Adjust the cayenne pepper to suit your preferred spice level, and feel free to get creative with the garnishes to make your crab cakes as spooky as you like! Keep the crab cakes warm in a low oven if you need to fry them in batches, and remember, presentation is key for achieving that Halloween-themed effect.
Vampire Bat Wings

The key to these eerie wings is in the marination and the glaze, which is achieved with dark soy sauce and a touch of balsamic vinegar, giving them their signature dark hue.
When cooked to perfection, the wings will have a crispy skin and juicy interior, making them a crowd-pleaser at any gathering. Serve them as an appetizer or as part of a larger Halloween feast, and watch them disappear as quickly as a bat in the night.
Ingredients (serving size: 4-6 people):
- 3 pounds of chicken wings
- 1/4 cup of dark soy sauce
- 1/4 cup of balsamic vinegar
- 2 tablespoons of honey
- 3 garlic cloves, minced
- 1 teaspoon of smoked paprika
- 1 teaspoon of ground black pepper
- 1/2 teaspoon of cayenne pepper (optional, for heat)
- 2 tablespoons of olive oil
- Fresh parsley for garnish (optional)
Cooking Instructions:
- Prepare the Marinade: In a large mixing bowl, combine the dark soy sauce, balsamic vinegar, honey, minced garlic, smoked paprika, ground black pepper, and cayenne pepper. Stir until the honey is fully dissolved and the ingredients are well mixed.
- Marinate the Wings: Add the chicken wings to the bowl and toss them in the marinade until they’re completely coated. Cover the bowl with plastic wrap and refrigerate for at least 2 hours, or overnight for best results. This will allow the flavors to penetrate the meat thoroughly.
- Preheat the Oven: Preheat your oven to 400°F (200°C). Line a baking sheet with aluminum foil and place a wire rack on top. This will help the wings cook evenly and allow excess fat to drip away.
- Bake the Wings: Arrange the marinated chicken wings in a single layer on the wire rack. Brush them with olive oil to help them crisp up. Bake in the preheated oven for 35-40 minutes, turning halfway through to guarantee even cooking. The wings should be crispy and dark in color when done.
- Prepare the Glaze: While the wings are baking, pour the remaining marinade into a small saucepan. Bring it to a boil over medium heat and let it simmer for about 5 minutes, or until it thickens slightly into a glaze.
- Glaze and Serve: Once the wings are cooked, remove them from the oven and brush them with the prepared glaze. Garnish with freshly chopped parsley if desired, and serve hot.
Extra Tips:
For an even deeper flavor, try grilling the wings after baking them for a smoky finish.
Be mindful of the dark soy sauce, as it’s saltier and more intense than regular soy sauce; adjust the quantity if necessary to suit your taste.
If you prefer less heat, omit the cayenne pepper or reduce its amount. These wings pair well with a cool, creamy dip like ranch or blue cheese to complement their rich flavor.
Zombie Zucchini Boats

Are you ready to spook up your dinner table this Halloween? Our Zombie Zucchini Boats are the perfect addition to your eerie feast. These delicious and nutritious zucchini boats are filled with a savory blend of ground beef, vegetables, and spices, making them a hit with both adults and kids alike.
Designed to resemble ghoulish canoes, they’re sure to bring a festive and frightfully fun element to your holiday meal. Plus, they’re a great way to sneak some veggies into the mix!
With their creepy-crawly appearance and robust flavors, these Zombie Zucchini Boats are bound to be a favorite at your Halloween gathering. The recipe is easy to prepare, allowing you to focus on other party preparations while these bake away in the oven.
The combination of melted cheese and seasoned beef within a tender zucchini shell creates a satisfying dish that’s as fun to make as it’s to eat. Serve these boats as a main course or a hearty side dish to complement your Halloween spread.
Ingredients (Serving Size: 4-6 people):
- 4 medium zucchinis
- 1 pound ground beef
- 1 small onion, finely chopped
- 2 cloves garlic, minced
- 1 red bell pepper, diced
- 1 cup marinara sauce
- 1 teaspoon dried oregano
- 1 teaspoon dried basil
- Salt and pepper to taste
- 1 cup shredded mozzarella cheese
- ¼ cup grated Parmesan cheese
- 2 tablespoons olive oil
- Fresh parsley for garnish (optional)
Instructions:
1. Preheat the Oven: Start by preheating your oven to 375°F (190°C). This guarantees that it’s ready for the zucchini boats once they’re assembled.
2. Prepare the Zucchinis: Wash the zucchinis thoroughly, then slice them in half lengthwise. Use a spoon to carefully scoop out the flesh, leaving about ¼ inch thick shells. Chop the scooped-out flesh and set it aside for later use.
3. Cook the Filling: In a large skillet, heat the olive oil over medium heat. Add the chopped onion and garlic, sautéing them until they become translucent. Next, add the ground beef, breaking it apart with a spoon as it cooks.
Once the beef is browned, stir in the chopped zucchini flesh, red bell pepper, oregano, basil, salt, and pepper. Let the mixture cook until the vegetables are tender.
4. Add Marinara Sauce****: Pour the marinara sauce into the skillet, stirring to combine it with the beef and vegetable mixture. Let it simmer for about 5 minutes to allow the flavors to meld together.
5. Assemble the Zucchini Boats: Place the zucchini shells onto a baking sheet lined with parchment paper. Fill each shell generously with the beef mixture. Top each one with a sprinkle of mozzarella and Parmesan cheese.
6. Bake: Transfer the baking sheet to the preheated oven. Bake for about 20-25 minutes, or until the zucchinis are tender and the cheese is melted and bubbly.
7. Garnish and Serve: Once done, remove the zucchini boats from the oven and let them cool slightly. Garnish with fresh parsley before serving if desired.
Extra Tips:
For an extra spooky touch, consider cutting small jagged edges on the zucchini shells to give them a more “zombie-like” appearance.
You can also use different colored bell peppers to add a colorful twist to the filling. If you’d prefer a vegetarian version, substitute the ground beef with more vegetables or a meatless alternative like lentils or tofu.
Finally, feel free to experiment with different cheeses or add a spicy kick with a pinch of chili flakes if you enjoy a bit of heat. Enjoy your ghoulishly good meal!
Eerie Eyeball Egg Salad

Eerie Eyeball Egg Salad is a delightfully spooky dish perfect for a Halloween-themed dinner. This dish takes the classic egg salad and gives it a Halloween twist by transforming the eggs into eerie eyeballs. The combination of flavors from creamy egg yolks, tangy mayonnaise, and a hint of mustard creates a delicious base.
The addition of black olives and sliced pimentos adds the perfect touch to create the eyeball effect, making it both a fun and tasty centerpiece for your Halloween spread.
This recipe is designed to serve 4-6 people, making it an ideal choice for a small gathering or family dinner. The assembly is simple and creative, ensuring that even novice cooks can enjoy making this spooky dish.
Whether you’re hosting a Halloween party or just want to surprise your family with a themed dinner, Eerie Eyeball Egg Salad will surely become a favorite.
Ingredients:
- 8 large eggs
- 1/2 cup mayonnaise
- 1 tablespoon Dijon mustard
- 1 tablespoon lemon juice
- Salt and pepper to taste
- 1/4 cup chopped green onions
- 1/4 cup sliced black olives
- 1 jar of sliced pimentos
Cooking Instructions:
- Boil the Eggs: Place the eggs in a single layer in a saucepan and cover them with cold water. Bring the water to a rolling boil over medium-high heat. Once boiling, cover the pot with a lid, remove it from the heat, and let it sit for 10-12 minutes.
- Cool and Peel the Eggs: After the eggs have finished cooking, transfer them to a bowl of ice water to stop the cooking process and make them easier to peel. Once cooled, gently crack and peel the shells from the eggs.
- Prepare the Egg Salad Base: Cut the eggs in half lengthwise and carefully remove the yolks, placing them in a mixing bowl. Mash the yolks with a fork and mix in the mayonnaise, Dijon mustard, lemon juice, salt, and pepper until smooth. Stir in the chopped green onions.
- Assemble the Eyeballs: On a serving platter, arrange the egg white halves hollow side up. Using a spoon or piping bag, fill each egg white half with the yolk mixture. To create the eyeball effect, place a sliced black olive in the center of each filled egg half and add a small piece of pimento inside the olive to mimic the pupil.
- Serve and Enjoy: Arrange the eerie eyeball eggs on a bed of lettuce or alongside your favorite Halloween-themed sides. Serve immediately or refrigerate until ready to serve.
Extra Tips:
For a more dramatic effect, consider using food coloring to add a touch of green or red to the yolk mixture for an even more ghoulish appearance.
If you prefer a spicier kick, add a dash of hot sauce or a pinch of cayenne pepper to the yolk mixture before filling the egg whites.
To save time on the day of your event, you can prepare the egg salad mixture a day in advance and simply assemble the eyeballs just before serving. Enjoy your spooky culinary creation!
Frightful Fajita Fingers

Frightful Fajita Fingers are a ghoulishly delightful treat perfect for your Halloween dinner table. These spooky yet scrumptious fajita fingers will thrill both kids and adults alike, transforming a traditional favorite into a hauntingly festive dish.
With strips of chicken or beef, bell peppers, and onions wrapped in eerie green tortillas, this dish isn’t only visually appealing but also packed with flavor. Serve them with a side of ghostly guacamole or blood-red salsa to enhance the Halloween theme and create a memorable culinary experience for your guests.
The key to these Frightful Fajita Fingers is in the presentation. By using vibrant green spinach tortillas and arranging the filling to resemble skeletal fingers, you can easily elevate a simple dish into something that captures the spirit of Halloween.
The combination of spices, fresh vegetables, and tender meat guarantees that this dish is as delicious as it’s fun. Whether you’re hosting a spooky soiree or enjoying a family dinner with a Halloween twist, these fajita fingers are sure to be a hit.
Ingredients (Serves 4-6):
- 1 1/2 pounds chicken breast or beef strips
- 1 tablespoon olive oil
- 1 red bell pepper, sliced
- 1 green bell pepper, sliced
- 1 yellow onion, sliced
- 2 teaspoons chili powder
- 1 teaspoon cumin
- 1/2 teaspoon garlic powder
- 1/2 teaspoon paprika
- Salt and pepper to taste
- 6 large spinach tortillas
- 1 cup shredded cheese (optional)
- 1/2 cup sour cream (optional)
- Lime wedges, for serving
Cooking Instructions:
- Prepare the Meat: Begin by slicing the chicken breast or beef into thin strips. This will help them cook evenly and quickly. Set aside.
- Prepare the Vegetables: Slice the red and green bell peppers and the yellow onion into thin strips. This will allow them to cook at the same rate as the meat.
- Season the Meat: In a large bowl, combine the chili powder, cumin, garlic powder, paprika, salt, and pepper. Add the meat strips to the bowl, and toss them until they’re well-coated with the spice mixture.
- Cook the Meat and Vegetables: Heat the olive oil in a large skillet over medium-high heat. Add the seasoned meat strips to the skillet and cook for about 5-7 minutes, or until fully cooked. Remove the meat from the skillet and set aside.
- Sauté the Vegetables: In the same skillet, add the sliced bell peppers and onion. Sauté for about 5 minutes, or until the vegetables are tender and slightly charred.
- Assemble the Fajita Fingers: Warm the spinach tortillas in the microwave or a skillet until pliable. Lay a tortilla flat, and place a portion of the cooked meat and vegetables in the center. If desired, sprinkle with shredded cheese. Roll the tortilla tightly around the filling to create a finger-like shape.
- Serve: Arrange the Frightful Fajita Fingers on a platter. Serve with lime wedges, sour cream, and your choice of guacamole or salsa.
Extra Tips:
To make the Frightful Fajita Fingers even more festive, consider cutting small slits in the tortillas to resemble knuckles and adding almond slivers at the ends to mimic fingernails.
For added flavor, marinate the meat in the spice mixture for a few hours or overnight. This dish can easily be made vegetarian by substituting the meat with tofu or additional vegetables like mushrooms and zucchini.
Make sure to keep the tortillas slightly warm before assembling to prevent cracking. Enjoy this eerily delightful dish with family and friends for a memorable Halloween feast!
Skeleton Sausage Skewers

Skeleton Sausage Skewers are a fun and frightful addition to your Halloween feast! Perfectly spiced sausages are skewered and served with a side of smoky barbecue sauce, creating a spooky illusion of skeletons.
These skewers aren’t only visually appealing but also incredibly delicious, making them the perfect centerpiece for your Halloween-themed dinner party. Whether you’re hosting a large gathering or an intimate family meal, these skewers will certainly delight both kids and adults alike.
This recipe combines savory sausages with fresh vegetables to create a balanced and satisfying dish. The skewers can be prepped ahead of time, allowing you to spend more time with your guests instead of in the kitchen.
When served alongside other Halloween-themed dishes, Skeleton Sausage Skewers will certainly stand out as a crowd favorite. Now, let’s explore the ingredients and step-by-step instructions to bring this eerie delight to your table.
Ingredients (serves 4-6 people):
- 12 beef or pork sausages
- 1 red bell pepper
- 1 yellow bell pepper
- 1 green bell pepper
- 1 large red onion
- 12 cherry tomatoes
- 6 wooden or metal skewers
- 1 cup barbecue sauce
- 2 tablespoons olive oil
- Salt and pepper to taste
- 1 teaspoon smoked paprika
- 1 teaspoon garlic powder
Cooking Instructions:
1. Prepare the Ingredients: Start by soaking the wooden skewers in water for at least 30 minutes to prevent them from burning during cooking.
Meanwhile, slice the bell peppers and red onion into 1-inch pieces. Preheat your grill or oven to medium-high heat (around 375°F or 190°C).
2. Season the Sausages: In a large mixing bowl, combine the sausages with olive oil, smoked paprika, garlic powder, salt, and pepper. Toss them well until evenly coated with the seasoning.
3. Assemble the Skewers: Thread each skewer with alternating pieces of sausage, bell peppers, red onion, and cherry tomatoes. Confirm that the sausages are spaced evenly to create the appearance of skeleton ‘bones’.
4. Grill or Bake the Skewers: Place the assembled skewers on the grill or in the oven. Cook for about 10-12 minutes, turning occasionally, until the sausages are fully cooked and the vegetables are slightly charred and tender.
5. Serve: Remove the skewers from the grill or oven and brush them generously with barbecue sauce. Serve immediately while warm, with extra barbecue sauce on the side for dipping.
Extra Tips:
For an extra touch of Halloween flair, consider using black or orange skewers if you can find them. They’ll add to the festive theme!
You can also add more vegetables like mushrooms or zucchini to the skewers for additional flavor and color. Be sure to watch the skewers closely while grilling to prevent any burning.
If you’re serving a large crowd, feel free to double the recipe and keep cooked skewers warm in a low oven until ready to serve. Enjoy your spooky and delicious Skeleton Sausage Skewers!
Goblin Green Guacamole

Halloween is the perfect time to get creative in the kitchen, and what better way to kick off a spooky-themed dinner than with Goblin Green Guacamole? This vibrant and delicious dip not only adds a pop of color to your table but also provides a healthy and tasty option for your guests.
Avocados are the star of the show in this recipe, providing a creamy texture that pairs perfectly with various dippers like tortilla chips, veggie sticks, or even spooky-shaped crackers. The key to making this guacamole stand out is the addition of lime juice and fresh cilantro, which elevate the flavors and give it that extra zing.
The playful green hue is both festive and inviting, making it a sure hit for your Halloween gathering. Plus, it’s simple to prepare, allowing you to focus on other eerie elements of your dinner party.
Ingredients for 4-6 People:
- 4 ripe avocados
- 1 medium tomato, diced
- 1/2 cup red onion, finely chopped
- 1 jalapeño pepper, seeded and minced
- 1/4 cup fresh cilantro, chopped
- 2 tablespoons lime juice
- Salt to taste
- Black pepper to taste
- Tortilla chips or veggie sticks for serving
Cooking Instructions:
- Prepare the Avocados: Cut the avocados in half, remove the pits, and scoop the flesh into a large mixing bowl. Use a fork to mash the avocados to your desired consistency—chunky or smooth.
- Mix in Vegetables: Add the diced tomato, finely chopped red onion, and minced jalapeño to the bowl with the mashed avocados. Stir gently to combine.
- Add Seasonings: Stir in the fresh cilantro and lime juice. Season with salt and black pepper to taste. Mix until all ingredients are evenly distributed.
- Taste and Adjust: Taste the guacamole and adjust the seasoning if necessary. You can add more lime juice or salt depending on your preference.
- Serve: Transfer the goblin green guacamole to a serving dish. Pair it with tortilla chips or veggie sticks for a spooky, delicious starter.
Extra Tips:
To enhance the flavor, make the guacamole a couple of hours ahead of time and let it chill in the refrigerator. This allows the ingredients to meld together beautifully.
To prevent the guacamole from browning, press a piece of plastic wrap directly onto its surface before refrigerating. If you want to add an extra spooky touch, consider using Halloween-themed cookie cutters to shape your dippers. Enjoy your eerie yet appetizing creation!
Haunted Halloumi Burgers

Spice up your Halloween with a spooky twist on a classic favorite – Haunted Halloumi Burgers. Perfect for a festive dinner or a themed party, these burgers are sure to delight both kids and adults alike. With ghostly shapes and a tangy, savory taste, Haunted Halloumi Burgers offer a unique culinary experience. The crispy grilled halloumi provides a satisfying texture that pairs beautifully with the freshness of the vegetables and the zing of the special Halloween sauce.
This recipe isn’t only a feast for the palate but also a visual treat, making it a fantastic addition to your Halloween dinner table. The key to making a memorable Haunted Halloumi Burger lies in its presentation. Using a ghost-shaped cookie cutter, the halloumi slices are transformed into spooky specters, while the addition of vibrant toppings like arugula, tomatoes, and red onions adds a colorful contrast.
Served on toasted buns with a spread of spicy mayo sauce, these burgers are both flavorful and fun. Whether you’re hosting a large gathering or enjoying a cozy dinner with family, these Haunted Halloumi Burgers are bound to become a Halloween tradition.
Ingredients (Serves 4-6 people):
- 4-6 halloumi cheese slices, about 1 cm thick
- 4-6 burger buns
- 1 cup arugula
- 1 large tomato, sliced
- 1 red onion, thinly sliced
- 1/2 cup spicy mayonnaise
- 1 tablespoon olive oil
- Salt and pepper to taste
- 6 tablespoons unsalted butter, softened
- 4-6 slices of cheese (optional)
Cooking Instructions:
- Prepare the Halloumi: Start by slicing the halloumi cheese into 1 cm thick slices. Using a ghost-shaped cookie cutter, cut each slice into a ghostly shape. This will add a fun Halloween twist to your burgers.
- Toast the Buns: Preheat your grill or a large skillet over medium heat. Spread butter on the inside of each burger bun. Place the buns, buttered side down, on the grill or skillet until they’re lightly toasted and golden brown. Remove and set aside.
- Grill the Halloumi: Brush each halloumi ghost with a little olive oil to prevent sticking. Place the cheese on the grill or skillet and cook for about 2-3 minutes on each side until golden brown and crispy.
- Assemble the Burgers: Spread a generous amount of spicy mayonnaise on the bottom half of each toasted bun. Place a handful of arugula on top, followed by a slice of grilled halloumi. Add slices of tomato and red onion. If desired, add a slice of cheese for extra flavor.
- Finish and Serve: Top with the other half of the bun and serve immediately. Enjoy your Haunted Halloumi Burgers with a side of fries or a fresh salad for a complete Halloween-themed meal.
Extra Tips:
For an extra level of spookiness, consider using black sesame seeds on the bun tops for a “haunted” effect. You can also experiment with different types of sauces to suit your taste preferences, such as adding a hint of garlic to the spicy mayo or including some hot sauce for more heat.
Remember that halloumi tastes best when freshly cooked, so try to serve the burgers immediately after grilling the cheese. If you’re catering to a larger group, prepare the ingredients in advance to facilitate a smooth cooking process on the day of your Halloween event.