

Get ready to explore some spooktacular Halloween treats that are not only delicious but also serve as delightful activities for kids. Picture little hands eagerly crafting Monster Marshmallow Pops or assembling Witch Hat Cookies in the kitchen. These creative snacks are a wonderful way to encourage family bonding and spark joy. Curious to see how these tasty treats come to life? Join us on this deliciously spooky adventure.
Monster Marshmallow Pops
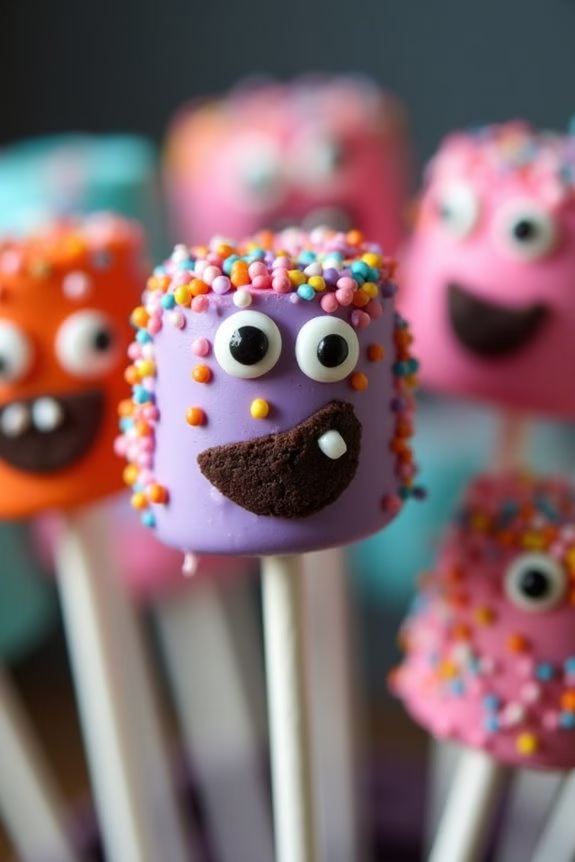
Halloween is the perfect time to get creative in the kitchen, and Monster Marshmallow Pops are a fun and easy treat that kids will love. These spooky snacks combine the sweetness of marshmallows with colorful candy coatings and imaginative decorations to create ghoulishly delightful monsters. Not only are they a hit at Halloween parties, but they also make for a fun activity for kids to express their creativity.
These monster treats are made by dipping marshmallows in melted candy and decorating them with a variety of candies and sprinkles to create unique monster faces. The process is simple enough for kids to join in, making it an ideal activity for family fun. Whether you’re hosting a Halloween party or simply want to enjoy a festive treat, Monster Marshmallow Pops are sure to be a crowd-pleaser. This recipe serves 4-6 people, making enough for everyone to enjoy.
Ingredients:
- 12 large marshmallows
- 1 cup of candy melts (assorted colors)
- 12 lollipop sticks
- 1/4 cup mini chocolate chips
- 1/4 cup assorted colorful sprinkles
- 1/4 cup mini candy eyeballs
- 1 tablespoon of vegetable oil
- Wax paper
Instructions:
1. Prepare the Workspace:
Set up your workspace by lining a baking sheet with wax paper. This will be used to place the finished Monster Marshmallow Pops on, allowing them to set without sticking.
2. Melt the Candy:
In a microwave-safe bowl, combine the candy melts and vegetable oil. Microwave in 30-second intervals, stirring after each interval, until the candy is fully melted and smooth.
3. Dip the Marshmallows:
Insert a lollipop stick into each marshmallow. Dip each marshmallow into the melted candy, using a spoon to help cover them completely if necessary. Allow the excess to drip off before placing them on the wax paper.
4. Decorate the Monsters:
While the candy coating is still wet, decorate each marshmallow with mini chocolate chips, sprinkles, and candy eyeballs to create unique monster faces. Be creative with your designs!
5. Allow to Set:
Let the decorated marshmallows sit at room temperature until the candy coating is completely set. This can take about 30 minutes to an hour.
6. Serve and Enjoy:
Once set, your Monster Marshmallow Pops are ready to be served. Arrange them on a platter and watch them disappear at your Halloween gathering!
Extra Tips:
For a more diverse array of monster designs, consider using various colors of candy melts. You can also use edible markers to draw additional features once the candy coating has set.
If you’re looking for a healthier option, you can substitute the candy eyeballs with small pieces of dried fruit. Remember, the key is to have fun and let your creativity run wild, making each Monster Marshmallow Pop a unique creation!
Witch Hat Cookies
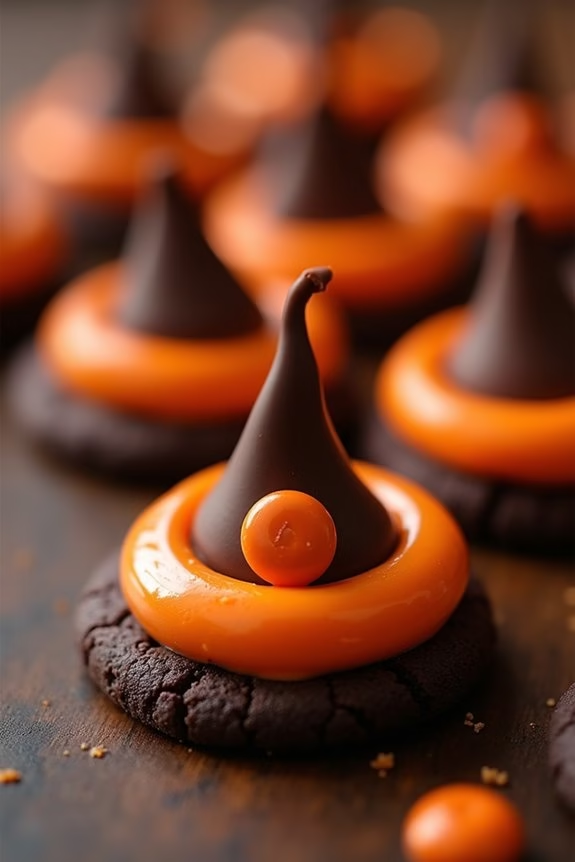
Witch Hat Cookies are a delightful treat that perfectly embodies the spooky spirit of Halloween. These whimsical cookies aren’t only fun to make but also a hit with kids and adults alike. With a base of sugary cookies topped with chocolate and a decorative “hat band,” these cookies are bound to enchant any Halloween party.
They’re also easy to prepare, making them a great option for involving children in the kitchen. The process of making Witch Hat Cookies involves assembling a few simple ingredients, many of which you might already have in your pantry.
The end result is a visually stunning and delicious snack that can be the centerpiece of your Halloween treats table. With their playful appearance and rich flavors, Witch Hat Cookies are a surefire way to add a touch of magic to your festive celebrations.
Ingredients (Serving Size: 4-6 People):
- 12 chocolate wafer cookies
- 12 Hershey’s Kisses chocolates
- 1/2 cup of orange icing (store-bought or homemade)
- 1/4 cup of mini M&M’s
Cooking Instructions:
- Prepare Your Workspace: Start by gathering all your ingredients and arranging them on a clean surface. This makes it easier to assemble the cookies efficiently.
- Attach the Kiss: Take a chocolate wafer cookie and place a small dollop of orange icing in the center. Unwrap a Hershey’s Kiss and press it gently onto the icing, making sure it sticks well. This forms the “hat” part of the cookie.
- Create the Hat Band: Use a piping bag fitted with a small round tip to pipe a thin line of orange icing around the base of the Hershey’s Kiss, where it meets the cookie. This acts as the decorative “hat band.”
- Add the Buckle: Carefully place a mini M&M on the orange icing line to resemble a buckle, adding a pop of color and completing the witch hat appearance.
- Allow to Set: Let the cookies sit for about 30 minutes at room temperature to allow the icing to set. This will help guarantee the Kiss remains attached to the cookie when served.
Extra Tips:
For an added twist, consider using different colored icings to match your Halloween theme or party colors. If you’re making these cookies with kids, let them get creative with the decorations by using various types of sprinkles or edible glitter.
Note that you can substitute the orange icing with other colors if orange isn’t available, and similarly, colored chocolates can be used in place of M&M’s for a unique look. Storing the cookies in an airtight container will keep them fresh for a couple of days, making them a perfect make-ahead treat for your Halloween festivities.
Mummy Hot Dogs

Mummy Hot Dogs are a spooktacular treat that kids will absolutely love, especially during the Halloween season. These fun snacks are fundamentally hot dogs wrapped in crescent roll dough, mimicking the appearance of a mummy. They aren’t only easy and quick to make, but they also provide a delightful twist on the classic hot dog, making them an excellent addition to any Halloween party spread.
Plus, they’re perfect for little hands to grab and enjoy, which makes them a hit among children.
When preparing Mummy Hot Dogs, it’s all about creativity and presentation. You can use edible eyes or small dollops of mustard or ketchup to create the mummy’s eyes, bringing these edible ghouls to life. They’re best served warm, straight out of the oven, and can be paired with a variety of dipping sauces such as ketchup, mustard, or even cheese sauce. This recipe is designed to serve 4-6 people, making it ideal for gatherings or a family night in.
Ingredients (serves 4-6):
- 1 package of crescent roll dough
- 8 hot dogs
- 1 tablespoon of mustard or ketchup (for eyes)
- Cooking spray or parchment paper
Instructions:
- Preheat the oven: Start by preheating your oven to 375°F (190°C) to guarantee it reaches the right temperature for baking the crescent roll dough evenly.
- Prepare the baking sheet: Line a baking sheet with parchment paper or spray it lightly with cooking spray to prevent sticking.
- Unroll the crescent dough: Open the package of crescent roll dough and unroll it onto a clean surface. Use a knife or pizza cutter to slice the dough into thin strips, about 1/4 inch wide.
- Wrap the hot dogs: Take a hot dog and begin wrapping it with the dough strips, leaving a small gap near one end for the ‘face’. Overlap the dough slightly to create the appearance of mummy bandages. Repeat with the remaining hot dogs.
- Place on the baking sheet: Arrange the wrapped hot dogs on the prepared baking sheet, ensuring they’re spaced apart to allow the dough to expand while baking.
- Bake the mummies: Place the baking sheet in the preheated oven and bake for 12-15 minutes, or until the dough is golden brown and cooked through.
- Add the eyes: Once baked, remove the mummies from the oven and let them cool slightly. Use a small dot of mustard or ketchup to create eyes on each mummy.
- Serve: Arrange the Mummy Hot Dogs on a platter and serve with your choice of dipping sauces.
Extra Tips:
For a more flavorful experience, consider using different types of hot dogs such as beef, turkey, or even vegetarian options to suit dietary preferences.
If you want to add some extra flair, you can incorporate cheese by wrapping a thin slice around the hot dog before adding the dough.
Be sure to keep an eye on the oven as baking times can vary depending on your oven’s efficiency.
Finally, if you’re preparing these in advance, you can wrap the hot dogs and store them in the refrigerator until you’re ready to bake them.
Ghostly Fruit Cups
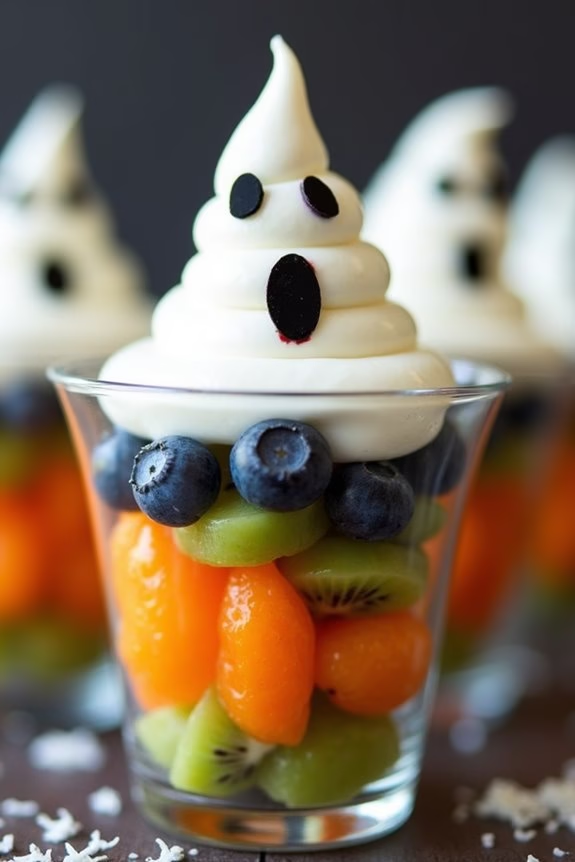
Halloween is a time for spooky fun and delicious treats, and Ghostly Fruit Cups are the perfect addition to your festive snack lineup. These cute and healthy snacks aren’t only kid-friendly but also incredibly easy to make. The fruity goodness combined with a touch of creativity turns ordinary fruit cups into playful Halloween delights that children will love.
Whether you’re hosting a Halloween party or just want to surprise your kids with a special treat, these Ghostly Fruit Cups are sure to be a hit.
The best part about Ghostly Fruit Cups is their versatility and the ability to customize them with your favorite fruits. With a few simple ingredients and a dash of imagination, you can transform ordinary fruit into a whimsical and healthy Halloween snack.
Plus, they’re a fantastic way to incorporate more fruit into your child’s diet without sacrificing the fun element. Let’s plunge into this easy recipe that serves 4-6 people and brings a touch of the supernatural to your snack table.
Ingredients (Serves 4-6):
- 4-6 small clear plastic cups
- 2 cups of peeled and segmented mandarin oranges
- 2 cups of peeled and sliced kiwi
- 1 cup of blueberries
- 1 cup of mini marshmallows
- 1 cup of whipped cream
- 1 small tube of black decorating gel
- 1/2 cup of shredded coconut (optional)
Instructions:
- Prepare the Fruit: Start by peeling and segmenting the mandarin oranges. Next, peel and slice the kiwis into small, manageable pieces. Wash the blueberries thoroughly and set them aside.
- Layer the Fruit: Take your clear plastic cups and start by placing a layer of mandarin oranges at the bottom of each cup. Follow this with a layer of sliced kiwi, and then add a layer of blueberries on top. This creates a colorful and appealing layered effect.
- Add the Topping: Place a generous dollop of whipped cream on top of the layered fruit in each cup. This will serve as the “ghostly” part of your fruit cups.
- Create the Ghost Faces: Using the black decorating gel, carefully draw two small circles for eyes and a larger oval for the mouth on the whipped cream to create a ghostly face. You can get creative with the expressions to make them more fun and spooky.
- Optional Coconut Topping: If desired, sprinkle a bit of shredded coconut on top of the whipped cream for added texture and flavor.
- Serve and Enjoy: Your Ghostly Fruit Cups are now ready to serve. They make a delightful addition to any Halloween gathering and are sure to be enjoyed by kids and adults alike.
Extra Tips:
To make your Ghostly Fruit Cups even more engaging, consider using different fruits for variety, such as strawberries or grapes, depending on your preferences and availability.
If you want to prepare these ahead of time, you can layer the fruits and keep them in the refrigerator. Add the whipped cream and draw the ghost faces just before serving to guarantee the whipped cream maintains its fluffy texture.
Remember to have fun with this recipe, as the kids will appreciate the creativity and effort that goes into making these Halloween snacks extra special.
Creepy Crawly Pretzel Sticks
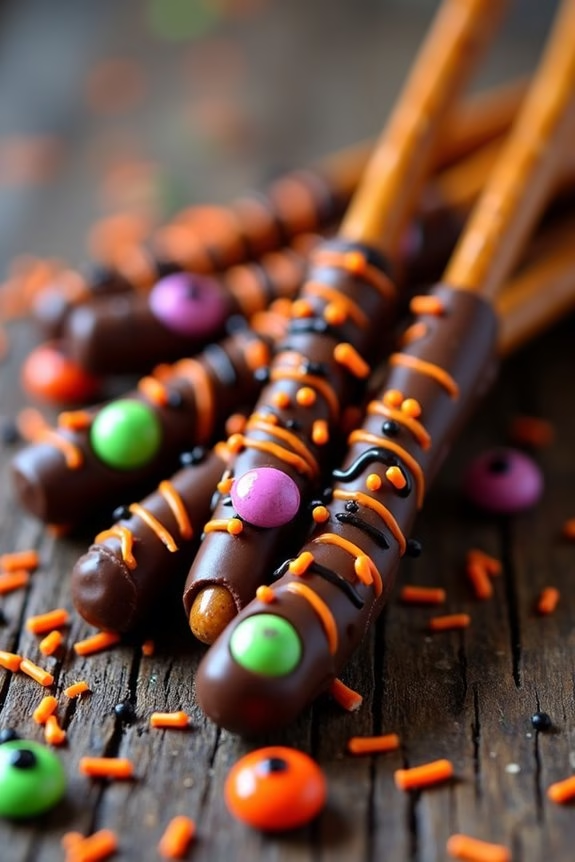
Creepy Crawly Pretzel Sticks are a fun and spooky treat perfect for Halloween parties or a festive snack to make with your children. These delightful treats combine salty pretzel rods with sweet chocolate and decorative candy to create a creepy crawly appearance that kids will adore. Not only are they easy to make, but they also provide a creative activity that encourages kids to get involved in the kitchen, making them an ideal choice for your Halloween festivities.
This recipe yields enough Creepy Crawly Pretzel Sticks to serve 4-6 people, making it perfect for a small gathering or family treat. The combination of chocolate and pretzels provides a satisfying mix of textures and flavors, while the candy decorations add a fun, colorful element. Whether you’re hosting a Halloween party or simply want to surprise your little ones with a themed snack, these pretzel sticks are sure to delight and entertain.
Ingredients:
- 12 large pretzel rods
- 1 cup semi-sweet chocolate chips
- 1 tablespoon coconut oil
- 1/2 cup mini candy-coated chocolates (e.g., M&Ms)
- 1/4 cup candy eyeballs
- 1/4 cup orange and black sprinkles
Instructions:
1. Prepare the Chocolate Coating:
Begin by melting the semi-sweet chocolate chips with the coconut oil. Place the chocolate chips and coconut oil in a microwave-safe bowl. Heat them in the microwave in 30-second increments, stirring between each interval, until the mixture is smooth and fully melted.
2. Coat the Pretzel Rods:
Dip each pretzel rod into the melted chocolate, using a spoon to help coat the rod evenly, leaving about 1-2 inches bare at one end for easy handling. Allow any excess chocolate to drip back into the bowl. Place the coated pretzel rods onto a baking sheet lined with parchment paper.
3. Decorate:
While the chocolate is still wet, sprinkle the orange and black sprinkles over the chocolate-coated portion. Press a few candy-coated chocolates and candy eyeballs onto each pretzel rod to create the “creepy crawly” effect. Be creative with the placement of the candy to give each stick a unique look.
4. Set the Chocolate:
Once all the pretzel rods are decorated, place the baking sheet in the refrigerator for about 20-30 minutes, or until the chocolate is set and firm to the touch.
5. Serve and Enjoy:
Once the chocolate has set, remove the pretzel sticks from the refrigerator and serve them on a festive platter. These treats are best enjoyed fresh but can be stored in an airtight container for up to a week.
Extra Tips:
For an even more colorful display, consider using a variety of candy colors and types to decorate your Creepy Crawly Pretzel Sticks. You can also switch up the chocolate type by using white or milk chocolate if preferred.
If you’re short on time, you can use pre-made chocolate dipping sauce instead of melting chocolate chips. Encourage kids to get creative with their designs, and don’t worry if some decorations fall off—imperfections add to the spooky charm of this Halloween treat!
Spooky Candy Apples
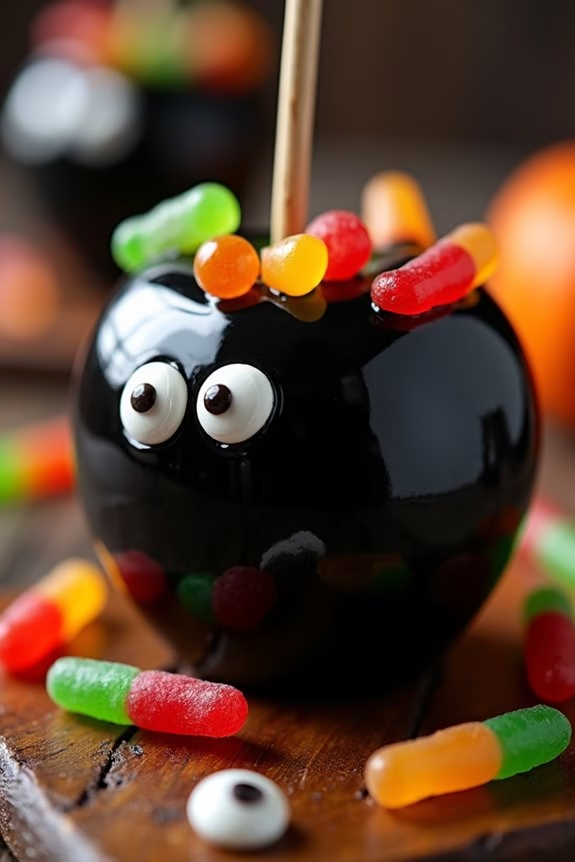
Spooky Candy Apples are a delightful treat that will add a touch of enchantment to your Halloween festivities. Perfect for kids and the young at heart, these candy apples combine the sweetness of crisp apples with a spooky twist. Ideal for Halloween parties, these treats aren’t only delicious but also fun to make, allowing kids to get creative with their decorations.
Whether you’re hosting a Halloween bash or simply looking for a fun family activity, Spooky Candy Apples are guaranteed to be a hit. Imagine biting into a juicy apple coated in a sweet, crisp candy shell with a hint of mystery from its eerie decorations.
These apples can be adorned with gummy worms, candy eyes, and even drizzled with chocolate to create a truly spine-chilling effect. Making Spooky Candy Apples is a great way to get into the Halloween spirit, and the best part is that they’re easy to make and customize with your favorite spooky candies.
Gather your ingredients and let’s create a Halloween treat that will leave everyone spellbound!
Ingredients (Serving Size: 4-6 people)
- 6 medium apples (Granny Smith or Honeycrisp recommended)
- 2 cups granulated sugar
- 1 cup light corn syrup
- 1/2 cup water
- 1/2 teaspoon black gel food coloring
- Assorted Halloween candies (e.g., gummy worms, candy eyes)
- 6 wooden sticks or candy apple sticks
- Parchment paper
Cooking Instructions
- Prepare the Apples: Wash and dry the apples thoroughly. Remove any wax coating by dipping them briefly in boiling water if necessary. Insert a wooden stick into the stem end of each apple and place them on a parchment-lined baking sheet.
- Make the Candy Coating: In a medium saucepan, combine the sugar, corn syrup, and water. Stir until the sugar has dissolved. Insert a candy thermometer into the mixture and bring it to a boil over medium-high heat.
- Add Color and Heat: Once the candy mixture reaches 300°F (hard crack stage) on the thermometer, remove it from the heat and stir in the black gel food coloring. Mix until the color is evenly distributed.
- Coat the Apples: Working quickly, dip each apple into the candy mixture, tilting the pan slightly to coat the apple entirely. Allow any excess to drip off before placing the apple back on the parchment-lined sheet. Rotate the apple to guarantee an even coating.
- Add the Decorations: Before the candy coating hardens completely, press Halloween candies into the surface of the apples. Be creative with your designs to make each apple unique and spooky.
- Let Them Set: Allow the candy apples to cool and harden completely at room temperature. This should take about 30 minutes.
Extra Tips
When making Spooky Candy Apples, it’s important to work quickly once the candy mixture reaches the desired temperature, as it hardens rapidly. If the mixture starts to thicken before you’ve finished coating all the apples, you can gently reheat it over low heat.
To make the experience more enjoyable for kids, set up a decorating station with a variety of candies and let them create their own spooky designs. Be sure to remind them to handle the hot candy mixture with care to avoid burns.
Enjoy your Spooky Candy Apples and have a frightfully fun Halloween!
Frankenstein Rice Krispie Treats
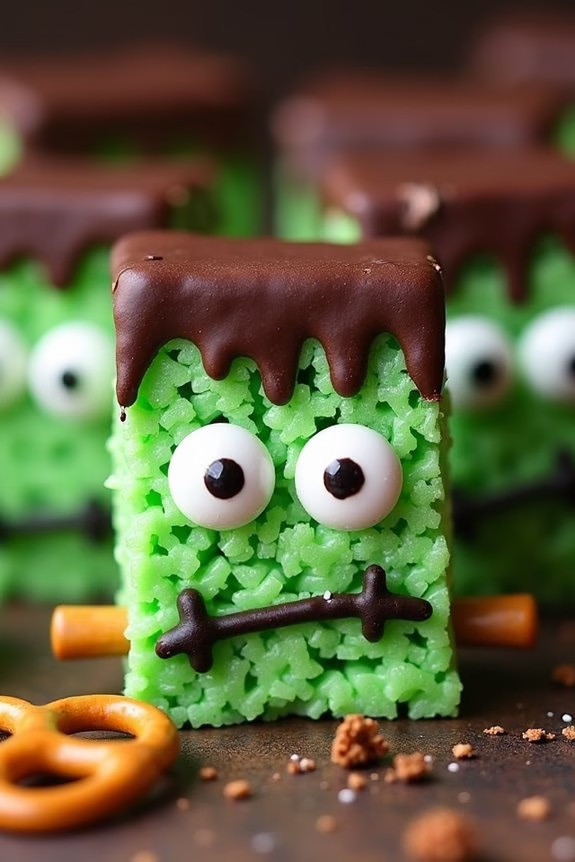
Frankenstein Rice Krispie Treats are a fun and festive Halloween snack that are sure to delight kids and adults alike. These treats take the classic, gooey Rice Krispie Treat to a spooky new level by transforming them into little green monsters with a face only a mad scientist could love. The combination of green-tinted marshmallows, chocolate decorations, and candy eyes make these treats not only delicious but also a show-stopper at any Halloween gathering.
Perfect for a party or a fun family baking activity, this recipe yields enough Frankenstein Rice Krispie Treats to serve 4-6 people. With just a few simple ingredients and a little creativity, you’ll have a batch of creepy creations ready in no time. Even if you’re short on time, these treats come together quickly and easily, making them an ideal choice for busy parents looking to whip up something special for the holiday.
Ingredients (serving size: 4-6 people):
- 3 tablespoons butter
- 1 package (10 oz) regular marshmallows or 6 cups mini marshmallows
- 6 cups Rice Krispies cereal
- Green food coloring
- 1 cup semi-sweet chocolate chips
- Assorted candy eyes
- Black decorating gel
- Mini pretzel sticks
Instructions:
- Prepare the Pan: Line a 9×13-inch baking dish with wax paper or lightly grease it with cooking spray to prevent sticking.
- Melt the Butter and Marshmallows: In a large saucepan, melt the butter over low heat. Add the marshmallows and stir continuously until fully melted and smooth. Remove from heat.
- Color the Marshmallow Mixture: Add several drops of green food coloring to the melted marshmallows, stirring until the color is evenly distributed and you achieve the desired shade of green.
- Combine with Cereal: Gradually add the Rice Krispies cereal to the marshmallow mixture, stirring well until the cereal is fully coated with the green marshmallow.
- Shape the Treats: Using a spatula, press the mixture evenly into the prepared baking dish. Allow it to cool for a few minutes, then use a sharp knife to cut the treats into rectangular shapes—these will be your Frankenstein “heads.”
- Melt the Chocolate: In a microwave-safe bowl, melt the chocolate chips in 30-second intervals, stirring between each interval until smooth.
- Decorate the Treats: Dip the top of each rectangle into the melted chocolate to create Frankenstein’s hair. Use the black decorating gel to draw a mouth and scars. Press candy eyes into the treats while the chocolate is still soft. Insert a mini pretzel stick into each side to resemble neck bolts.
- Let Them Set: Allow the decorated treats to set at room temperature until the chocolate is firm, about 15-20 minutes.
Extra Tips:
For an even spookier appearance, consider adding red gel for blood or using different colored gels to create unique expressions on your Frankenstein faces. If you’re working with kids, allow them to design their own monster faces for a personalized touch.
Be sure to store any leftovers in an airtight container to keep them fresh. If you’re making these treats ahead of time for a party, you can prepare them up to two days in advance.
Vampire Donuts
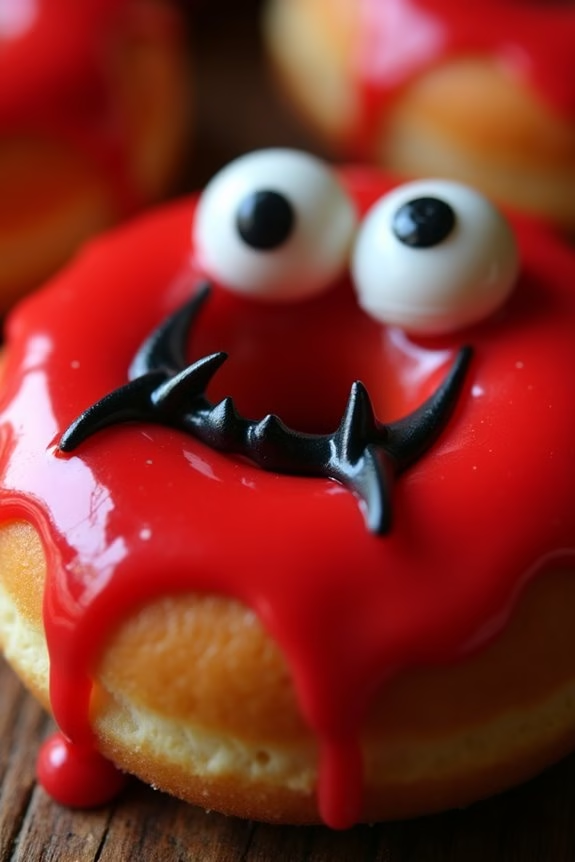
Vampire Donuts are a fun and spooky treat perfect for Halloween festivities, especially for kids who love a little fright with their bite. These donuts aren’t only delicious but also creatively designed to resemble a vampire’s face, complete with fangs and a scary look. The combination of soft, fluffy donuts and a sweet, vibrant glaze makes these snacks both visually appealing and tasty.
Perfect for a Halloween party or a spooky snack time, this recipe is crafted to serve 4-6 people, making it great for small gatherings or family fun. Kids can even join in on the decorating process, turning it into a fun and interactive activity. It’s a simple recipe that doesn’t require much time or baking prowess, guaranteeing that even novice bakers will find success in making these ghoulishly good treats.
Ingredients (Serves 4-6)
- 12 plain glazed donuts
- 1 cup powdered sugar
- 1-2 tablespoons milk
- Red food coloring
- 12 sets of plastic vampire fangs
- Edible eyes (24 pieces)
- Black decorating gel
Cooking Instructions
- Prepare the Glaze: In a small bowl, mix the powdered sugar with milk, starting with 1 tablespoon of milk and adding more if needed to achieve a thick but pourable consistency. Add a few drops of red food coloring until you reach the desired shade of red. This will be your “blood” glaze for the vampire mouths.
- Glaze the Donuts: Lay out the glazed donuts on a flat surface lined with parchment paper. Using a spoon, drizzle the red glaze over each donut, focusing on one side to mimic dripping blood. Let the glaze set slightly so it doesn’t run off completely.
- Attach the Fangs: Carefully insert a set of plastic vampire fangs into the center of each donut. Make sure they’re placed securely so they remain upright and visible.
- Add the Eyes: Place two edible eyes above the vampire fangs on each donut. Press them gently into the glaze so they stick properly.
- Create the Vampire Look: Use the black decorating gel to add extra details around the eyes or mouth if desired, enhancing the vampire expression. Let the donuts sit for a few minutes to allow all decorations to set.
Extra Tips
When making Vampire Donuts, opt for store-bought glazed donuts to save time and guarantee consistency. If you’re making your own donuts, make sure they’re completely cooled before applying the glaze to prevent it from melting off.
For a more dramatic effect, you can use different shades of red or even mix in a bit of black food coloring to create a darker, more sinister look. Finally, supervise young children when inserting the plastic fangs and decorating with gel to avoid any mess or mishaps.
Eyeball Cake Pops
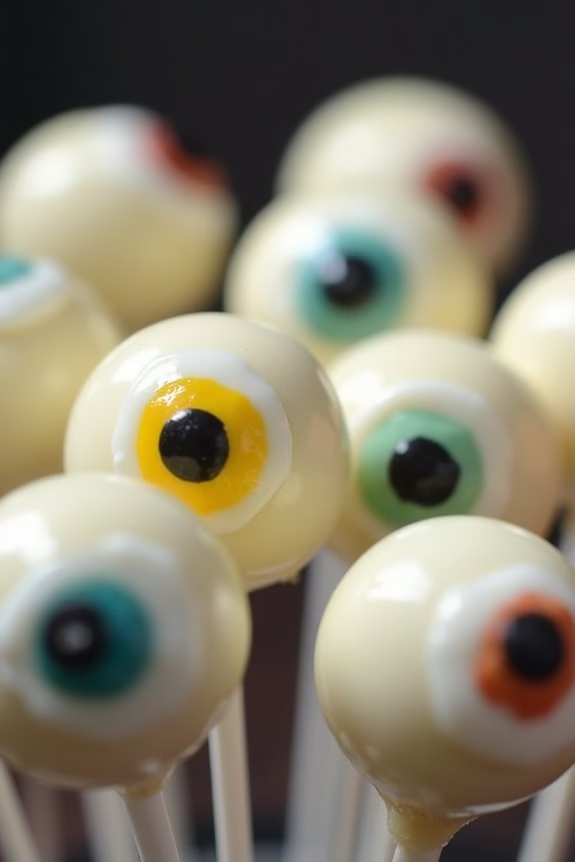
Eyeball Cake Pops are a fun and spooky addition to any Halloween party, perfect for delighting kids and adults alike. These eerie treats aren’t only visually appealing but also deliciously satisfying, combining the moistness of cake with the creamy sweetness of frosting, all encased in a decadent chocolate shell. The finishing touch? Candy eyes that give these cake pops their signature creepy-cute appearance.
Creating these Eyeball Cake Pops is a fantastic activity to involve kids in, turning a simple baking session into a memorable Halloween event. The recipe is straightforward, making it suitable for bakers of all skill levels. Plus, it’s easily adaptable with different cake and frosting flavors, allowing you to customize the cake pops to suit your taste preferences. This recipe yields 4-6 servings, making it ideal for a small gathering or as a special treat for your family.
Ingredients:
- 1 box of cake mix (any flavor)
- Ingredients required for cake mix (usually eggs, oil, and water)
- 1 cup of frosting (store-bought or homemade)
- 2 cups of white chocolate or candy melts
- 1 tablespoon of vegetable oil
- Candy eyeballs
- Lollipop sticks
Instructions:
- Prepare the Cake Mix: Begin by baking the cake according to the instructions on the box. Allow the cake to cool completely before moving on to the next step.
- Crumble the Cake: Once cooled, crumble the cake into fine crumbs in a large mixing bowl. Make sure there are no large pieces left, as they can affect the consistency of your cake pops.
- Mix with Frosting: Add the frosting to the crumbled cake, starting with half a cup and mixing thoroughly. Gradually add more frosting until the mixture reaches a dough-like consistency that holds together when rolled into balls.
- Shape the Cake Balls: Roll the cake and frosting mixture into small balls, roughly the size of a ping-pong ball, and place them on a baking sheet lined with parchment paper. Insert a lollipop stick into each ball and refrigerate for at least 30 minutes to firm up.
- Melt the Chocolate: While the cake balls are chilling, melt the white chocolate or candy melts in a microwave-safe bowl. Add the vegetable oil to the melted chocolate to achieve a smooth and glossy consistency.
- Coat the Cake Pops: Dip each chilled cake ball into the melted chocolate, ensuring it’s completely covered. Gently tap off any excess chocolate and place the cake pop back onto the parchment paper.
- Decorate with Candy Eyes: Before the chocolate sets, press a candy eyeball onto each cake pop to create the eyeball effect. Allow the chocolate to harden completely before serving.
Extra Tips:
When making Eyeball Cake Pops, feel free to get creative with the flavors and decorations. For added texture and flavor, consider rolling the coated cake pops in crushed nuts, sprinkles, or coconut before the chocolate sets.
If you prefer a more realistic look, use food coloring to tint the white chocolate and create bloodshot veins. Finally, always verify the cake pops are thoroughly chilled before dipping in chocolate to prevent them from falling apart. Enjoy your spooky and scrumptious creations!
Pumpkin Patch Dirt Cups
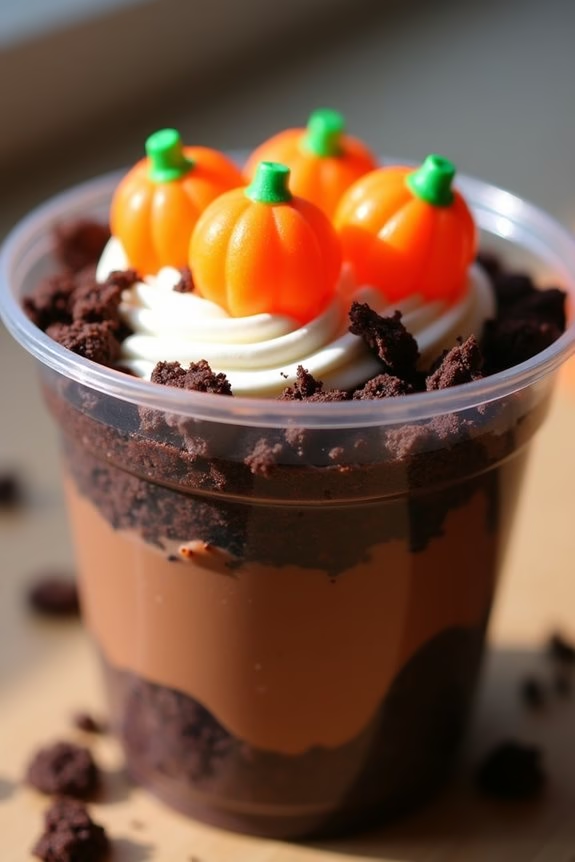
Pumpkin Patch Dirt Cups are the perfect Halloween treat for kids, combining the fun of a spooky theme with a deliciously sweet dessert. This no-bake recipe is simple to make and requires only a few ingredients, making it a great option for a Halloween party or a festive afternoon snack.
These dirt cups aren’t only visually appealing with their pumpkin patch theme but also offer a delightful mix of textures and flavors with their creamy filling, crunchy cookie topping, and candy accents.
The base of the dirt cups is made from a smooth and creamy pudding that mimics the rich, moist soil of a pumpkin patch. Crushed chocolate cookies serve as the “dirt,” while candy pumpkins sit atop, creating a miniature pumpkin patch scene. This recipe is designed to serve 4-6 people, making it perfect for a small gathering of young ghouls and goblins.
Ingredients (Serving Size: 4-6 people):
- 2 cups of milk
- 1 package (3.4 oz) instant chocolate pudding mix
- 1 package (14 oz) chocolate sandwich cookies
- 1 cup whipped topping
- 1 package of candy pumpkins or candy corn
- 4-6 clear plastic cups
Cooking Instructions:
1. Prepare the Pudding: In a medium-sized bowl, whisk together the milk and instant chocolate pudding mix until smooth and well-blended. Allow the pudding to set for about 5 minutes until it thickens.
2. Crush the Cookies: Place the chocolate sandwich cookies in a zip-top bag and crush them into fine crumbs using a rolling pin or a food processor. These crumbs will serve as the “dirt” for your pumpkin patch.
3. Layer the Cups: Begin assembling the dirt cups by adding a spoonful of cookie crumbs to the bottom of each clear plastic cup. Next, add a generous layer of chocolate pudding on top of the crumbs, followed by another layer of cookie crumbs.
Repeat the layers until the cups are nearly full, finishing with a top layer of cookie crumbs.
4. Add the Topping: Spoon a dollop of whipped topping onto each dirt cup, creating a fluffy cloud-like base for the candy pumpkins. Arrange the candy pumpkins on top to resemble a pumpkin patch scene.
5. Chill and Serve: Place the dirt cups in the refrigerator for at least 30 minutes to allow the flavors to meld and the pudding to firm up. Serve chilled to enjoy the full creamy and crunchy texture combination.
Extra Tips:
To make the Pumpkin Patch Dirt Cups even more festive, consider adding gummy worms or small edible eyes for an added Halloween twist.
You can also experiment with different pudding flavors, such as vanilla or butterscotch, to suit your preference. If you’re making these cups for a large party, consider setting up a “build your own dirt cup” station where kids can customize their toppings, making it a fun, interactive activity.
Remember to use clear cups so the layers are visible, enhancing the visual appeal of the dessert.