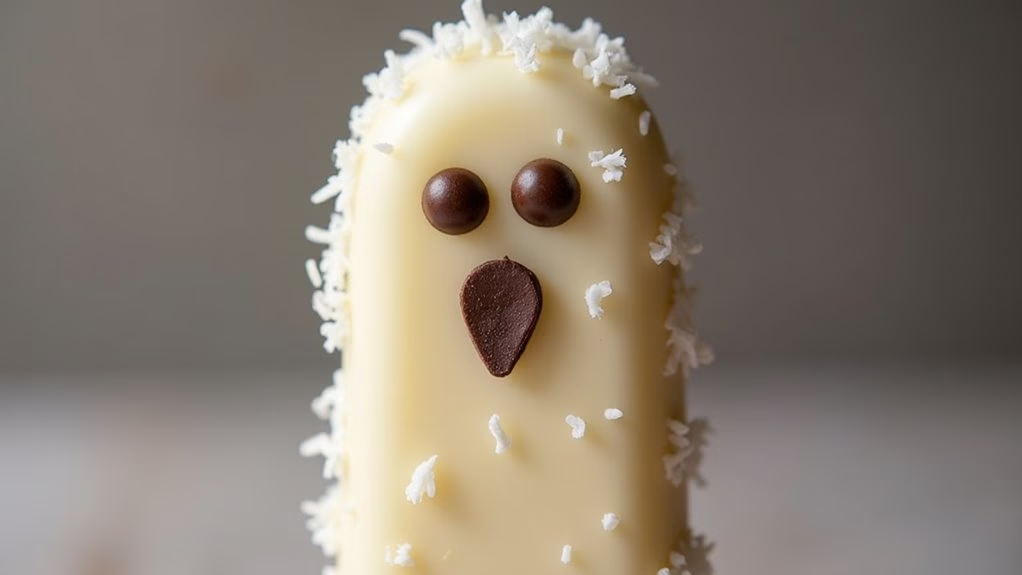
Hey there, fellow Halloween lovers! 🎃
If you’re anything like me, you’re busy dreaming up the perfect menu to enchant your party guests.
Picture a spread bursting with Spooky Spider Deviled Eggs and Monster Mouth Apple Slices.
From Ghostly Stuffed Peppers to Graveyard Dirt Cups, these dishes promise a hauntingly delicious time.
Ready to create a Halloween feast that’s all about treats?
Spooky Spider Deviled Eggs

Spooky Spider Deviled Eggs are a fun and eerie twist on the classic deviled eggs, perfect for adding a touch of Halloween spookiness to your party spread. These devilish treats aren’t only visually appealing but also incredibly delicious. The creamy filling, made from egg yolks mixed with mayonnaise and a hint of mustard, provides a rich base that contrasts beautifully with the salty olive “spiders” perched on top.
Whether you’re hosting a Halloween bash or a themed dinner, these deviled eggs will surely be a hit among your guests. This recipe serves 4-6 people, making it an ideal choice for small gatherings. The presentation is key in this dish, as the “spiders” are crafted from black olives and placed carefully on each egg half, adding a delightful touch of Halloween whimsy.
Not only are they simple to prepare, but they also offer a fun activity if you have little helpers enthusiastic to join in the kitchen. Let’s explore the ingredients and steps needed to create these spooky treats.
Ingredients:
- 6 large eggs
- 1/4 cup mayonnaise
- 1 teaspoon Dijon mustard
- 1/2 teaspoon white vinegar
- Salt and pepper to taste
- 1 can (3.8 oz) whole black olives
Instructions:
- Boil the Eggs: Place the eggs in a single layer in a saucepan and cover them with water. Bring the water to a rolling boil over medium-high heat. Once boiling, remove the saucepan from heat, cover, and let the eggs sit for 10-12 minutes. This will guarantee fully cooked yolks.
- Prepare the Eggs: After the eggs have finished cooking, transfer them to a bowl of ice water to cool. This step will make peeling them easier. Once cooled, peel the eggs and slice them in half lengthwise.
- Make the Filling: Carefully remove the yolks and place them in a mixing bowl. Add mayonnaise, Dijon mustard, white vinegar, salt, and pepper. Mash and mix until smooth and creamy. Adjust seasoning to taste.
- Fill the Egg Whites: Using a spoon or piping bag, fill each egg white half with the yolk mixture. You want a good mound of filling in each egg white.
- Create the Spiders: Cut the olives in half. Use one half for the body of the spider. Slice the other half into thin strips to create legs. Position one olive half in the center of each filled egg half, and arrange 8 legs around each body.
- Chill Before Serving: Place the completed deviled eggs in the refrigerator for about 30 minutes before serving. This will help the flavors meld together and the filling to firm up slightly.
Extra Tips: When creating the spider legs, make sure the olive strips are thin enough to look realistic but sturdy enough to handle. You can also get creative with the filling by adding a pinch of paprika or a dash of hot sauce for extra flavor.
If you’re short on time, you can prepare the eggs and filling the day before and assemble the spiders just before serving to keep them fresh.
Monster Mouth Apple Slices
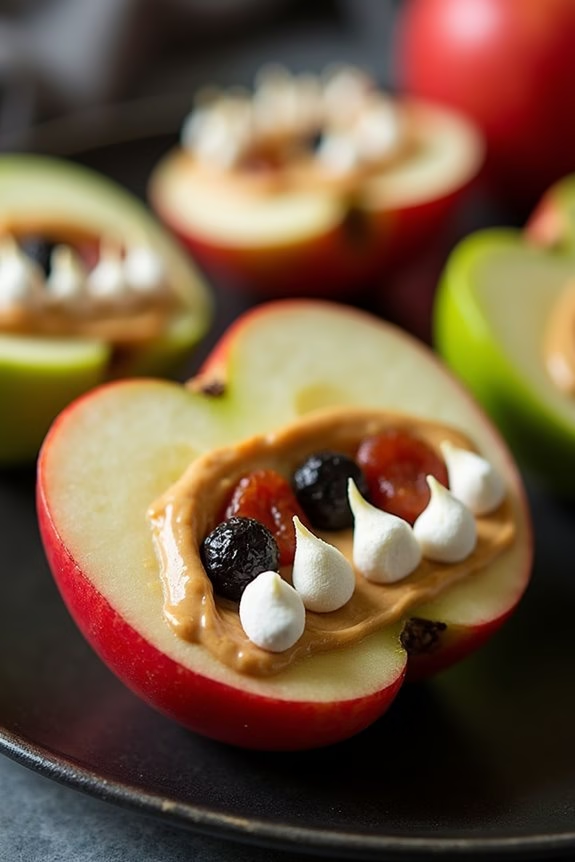
Transform your Halloween party into a spooktacular event with Monster Mouth Apple Slices, a fun and healthy treat that will delight guests of all ages. These creative snacks aren’t only visually appealing but also pack a nutritious punch.
Combining the natural sweetness of apples, the creaminess of peanut butter, and the crunch of almonds, these monster mouths are sure to be a hit at your Halloween gathering.
Monster Mouth Apple Slices are incredibly easy to make and perfect for involving kids in the kitchen. They provide a great balance of flavors and textures, making them a satisfying snack without the sugar overload.
The recipe is versatile, allowing for ingredient substitutions to accommodate dietary restrictions, which makes it an inclusive option for any party. Let’s plunge into the ingredients you’ll need for a serving size of 4-6 people, followed by detailed instructions to bring this spooky snack to life.
Ingredients:
- 4 medium-sized apples (Granny Smith or Red Delicious)
- 1 cup creamy peanut butter (or almond butter for an alternative)
- 1/2 cup slivered almonds
- 1/4 cup raisins or mini marshmallows (for teeth)
- 1 tablespoon lemon juice (optional, to prevent browning)
Instructions:
- Prepare the Apples: Start by washing and drying the apples thoroughly. Core the apples, then slice each one into quarters, creating eight slices per apple.
- Prevent Browning (Optional): To keep the apple slices from browning, lightly brush each slice with a small amount of lemon juice.
- Create the Mouth: Spread a generous layer of peanut butter on one side of each apple slice. This will act as the “glue” to hold the teeth in place.
- Assemble the Teeth: Press slivered almonds into the peanut butter on one apple slice to resemble teeth. You can mix and match using raisins or mini marshmallows for a more playful look.
- Form the Monster Mouth: Take another apple slice with peanut butter and place it on top of the almond-studded slice, peanut butter sides facing each other, to form a mouth. Press gently to confirm they stick together.
- Repeat: Repeat the process with the remaining apple slices until all your monster mouths are complete.
- Serve Immediately: Arrange the Monster Mouth Apple Slices on a platter and serve them fresh for the best taste and presentation.
Extra Tips:
For a nut-free version, try using sunflower seed butter or cream cheese as an alternative to peanut butter. If you’re preparing these in advance, consider storing them in an airtight container in the refrigerator and adding the slivered almonds just before serving to maintain their crunch.
Encourage creativity by offering additional toppings such as chocolate chips or dried cranberries for eyes. Monster Mouth Apple Slices are a great way to get kids excited about eating fruits while embracing the playful spirit of Halloween.
Witch’s Broomstick Cheese Snacks
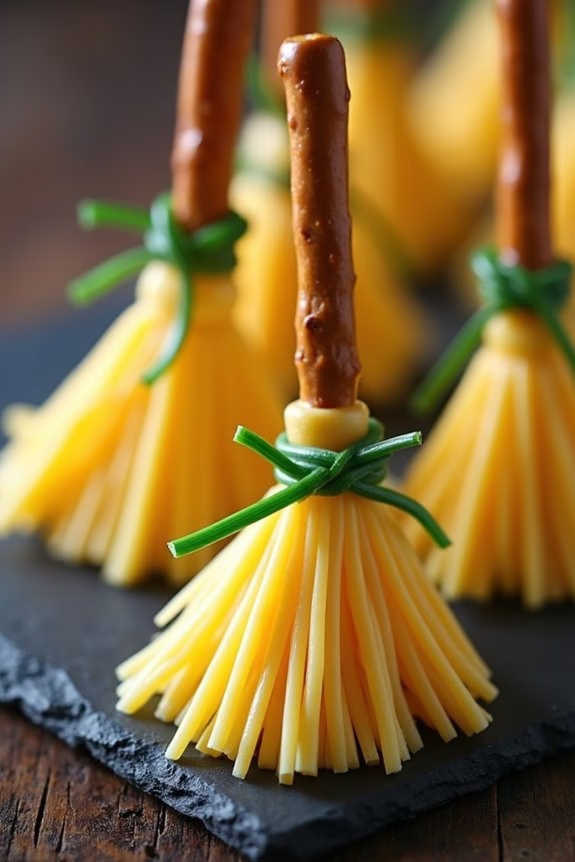
Witch’s Broomstick Cheese Snacks are a delightful and spooky addition to any Halloween party. Not only are they visually appealing, but they’re also incredibly easy to assemble, making them a perfect last-minute snack idea.
These snacks are designed to resemble miniature broomsticks, combining the flavors of cheese and pretzels with a touch of chive for added flavor and presentation. They aren’t only fun for kids but also a hit among adults who appreciate a clever and tasty treat.
The beauty of Witch’s Broomstick Cheese Snacks lies in their simplicity and versatility. They require minimal ingredients and can be prepared in just a few minutes. The cheese serves as the broom’s bristles, while the pretzel sticks form the handle, and a sprig of chive ties everything together.
This recipe is sure to be a crowd-pleaser at your Halloween gathering, offering a savory bite that balances out the sweetness of typical Halloween treats.
Ingredients for 4-6 servings:
- 12 string cheese sticks
- 12 pretzel sticks
- Fresh chives (about 12 strands)
Cooking Instructions:
- Prepare the Cheese: Begin by cutting each string cheese stick into thirds. This will create three smaller sections from each cheese stick, totaling 36 pieces for the broom bristles.
- Create the Bristles: Take one piece of the cut string cheese and carefully make several lengthwise cuts about halfway up the cheese. This will create the appearance of broom bristles. Repeat this process for each piece of cheese.
- Assemble the Broom: Insert a pretzel stick into the uncut end of each cheese piece. Push gently to verify the pretzel stick is securely embedded in the cheese, forming the broomstick handle.
- Tie the Broom: Take a piece of chive and wrap it around the top of the cheese piece, just below where it connects with the pretzel stick. Secure the chive by tying it in a simple knot. This adds an authentic touch and helps hold the cheese and pretzel together.
- Repeat and Serve: Repeat the assembly process for all pieces. Arrange the completed witch’s broomstick snacks on a platter for serving. They’re best served fresh but can be stored in the refrigerator for a short time if needed.
Extra Tips:
When preparing the chive ties, consider soaking them in warm water for a few minutes before use. This will make them more pliable and easier to tie without breaking.
Alternatively, if you find the chives too delicate, you can use thin strips of green onion as a substitute. To prevent the pretzels from softening, assemble these snacks as close to serving time as possible.
Remember to keep the cut string cheese wrapped or covered until you’re ready to assemble, as it can dry out quickly when exposed to air.
Ghostly Stuffed Peppers

Ghostly Stuffed Peppers are a delightfully spooky addition to any Halloween party spread. These delicious and festive peppers are carved to resemble grinning ghost faces, filled with a savory mixture that will satisfy both adults and children alike. The filling is a hearty blend of rice, ground beef, tomatoes, and spices, offering a comforting and flavorful experience that contrasts beautifully with the sweet and slightly crisp bell peppers. They not only serve as a tasty treat but also as a fantastic decorative element for your party table.
Creating Ghostly Stuffed Peppers is relatively easy and requires minimal preparation, making it an ideal dish for busy hosts. The combination of flavors is sure to please a crowd, and the creative presentation will certainly add a fun touch to your Halloween festivities. Whether you’re hosting a large gathering or a small get-together, these stuffed peppers will be a hit, providing both nourishment and entertainment. Best of all, you can make them ahead of time, allowing you to focus on enjoying the party.
Ingredients (Serves 4-6)
- 6 large bell peppers (preferably orange or white for a ghostly appearance)
- 1 pound ground beef
- 1 cup cooked rice
- 1 can (14.5 oz) diced tomatoes
- 1 small onion, finely chopped
- 2 cloves garlic, minced
- 1 teaspoon Italian seasoning
- Salt and pepper to taste
- 1 cup shredded mozzarella cheese
- 2 tablespoons olive oil
Instructions
- Prepare the Peppers: Begin by preheating your oven to 375°F (190°C). Wash the bell peppers thoroughly. Carefully cut off the tops and remove the seeds and membranes. Using a small, sharp knife, carve small ghost faces into the sides of each pepper, ensuring the cuts are large enough to be visible but not so large that the filling will fall out.
- Cook the Filling: In a large skillet, heat the olive oil over medium heat. Add the onion and garlic, sautéing until they become translucent. Add the ground beef, cooking until browned. Drain any excess fat.
- Combine Ingredients: Stir in the diced tomatoes, cooked rice, Italian seasoning, salt, and pepper. Allow the mixture to simmer for about 5-7 minutes, stirring occasionally. Once the mixture is well-combined and heated through, remove it from the heat.
- Stuff the Peppers: Place the carved peppers upright in a baking dish. Spoon the beef and rice mixture into each pepper, packing it tightly. Top each filled pepper with a generous amount of mozzarella cheese.
- Bake the Peppers: Cover the baking dish with aluminum foil and place it in the preheated oven. Bake for 25 minutes. After 25 minutes, remove the foil and bake for an additional 10-15 minutes, or until the peppers are tender and the cheese is bubbly and golden.
- Serve: Allow the peppers to cool slightly before serving. Arrange them on a platter to showcase their ghostly faces and enjoy!
Extra Tips
To save time on the day of your event, you can prepare the filling the night before and store it in the refrigerator. On the day of the party, simply stuff the peppers and bake them as directed.
If you prefer a vegetarian version, substitute the ground beef with black beans or mushrooms for a hearty alternative. Finally, for a spicier kick, mix in some chopped jalapeños with the filling. These peppers can also be served with a side of sour cream or marinara sauce for added flavor.
Eyeball Caprese Bites
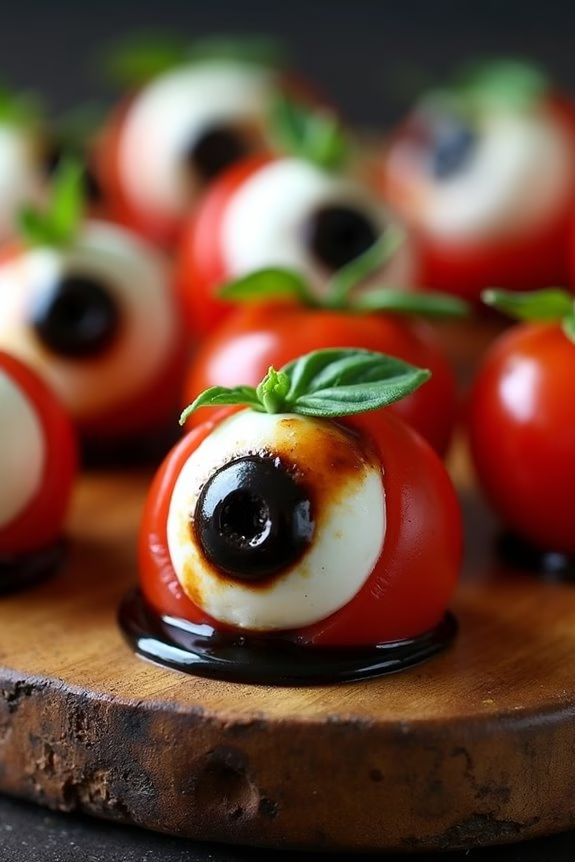
Ideal for a serving size of 4-6 people, Eyeball Caprese Bites are easy to assemble and require minimal ingredients. They aren’t only a great choice for Halloween parties but also a fun way to get kids involved in the kitchen.
These creepy yet charming appetizers can be prepared ahead of time, allowing you to enjoy your party without spending too much time in the kitchen. Let’s immerse ourselves in the recipe and bring these spooky snacks to life!
Ingredients:
- 20 cherry tomatoes
- 20 small fresh mozzarella balls (bocconcini)
- 20 fresh basil leaves
- 20 small black olives
- 20 toothpicks or small skewers
- Balsamic glaze
- Salt and pepper to taste
Instructions:
- Prepare the Ingredients: Rinse the cherry tomatoes and basil leaves under cold water, then pat them dry with a paper towel. Drain the mozzarella balls and black olives, ensuring they’re free from excess liquid.
- Create the Eyeballs: Take a mozzarella ball and place it on a toothpick. Push it down slightly, ensuring there’s space left at the top. Next, take a black olive, cut it in half, and place one half on top of the mozzarella ball to resemble a pupil.
- Assemble the Bites: Thread a basil leaf and a cherry tomato onto the toothpick, positioning the cherry tomato at the bottom to serve as the ‘eye socket,’ with the mozzarella and olive ‘eyeball’ on top.
- Season the Bites: Arrange the skewers on a serving platter. Drizzle lightly with balsamic glaze, and sprinkle with salt and pepper to enhance the flavor.
- Serve and Enjoy: Present the Eyeball Caprese Bites to your guests as a spooky and tasty appetizer. They can be served immediately or stored in the fridge for up to an hour before serving.
Extra Tips: For an extra eerie effect, use a sharp paring knife to carve small lines or ‘veins’ into the mozzarella balls before assembling.
You can also experiment with different types of olives, such as green or kalamata, to create varying ‘pupil’ colors. If you want a stronger basil flavor, you can use two leaves per skewer.
Finally, be sure to use fresh ingredients for the best flavor and presentation.
Franken-Guacamole Dip
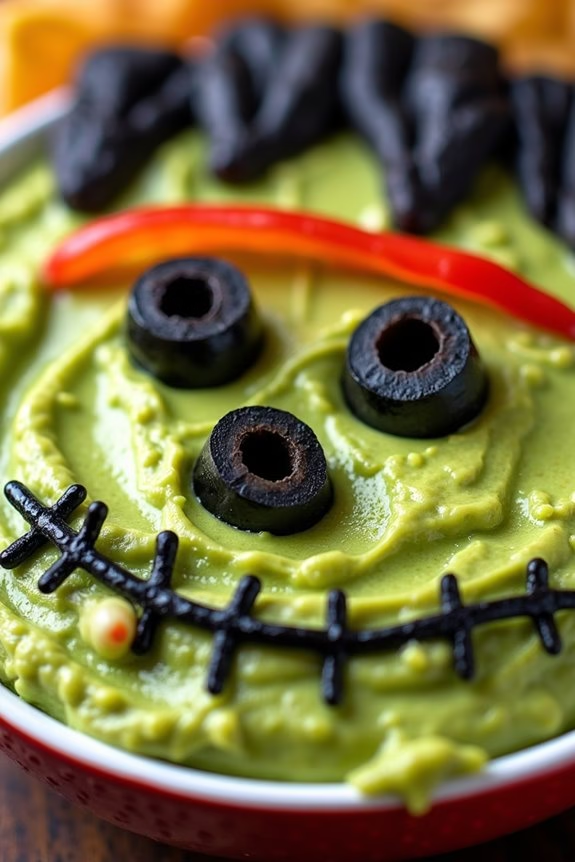
For a spine-chilling twist on a classic party favorite, try making Franken-Guacamole Dip. This recipe is perfect for Halloween gatherings, adding a ghoulish flair to your snack table. The vibrant green of the guacamole forms the perfect base for crafting a spooky Frankenstein face, complete with edible decorations that mimic the classic monster’s iconic look. Not only is this dip visually engaging, but it also offers the creamy, zesty flavors that guests will love.
This Franken-Guacamole Dip isn’t just about aesthetics. It brings the rich taste of ripe avocados, combined with fresh lime juice, onions, and a kick of jalapeño, offering a delightful blend of flavors. The fun part comes with the assembly, where your creativity can shine as you decorate the dip to resemble the beloved monster. It’s a fun, interactive dish that can engage partygoers, making it an excellent addition to your Halloween festivities.
Ingredients (Serving Size: 4-6 people):
- 4 ripe avocados
- 1 lime, juiced
- 1 small red onion, finely chopped
- 1 jalapeño, seeded and finely chopped
- 2 Roma tomatoes, diced
- Salt and pepper to taste
- 1/4 cup fresh cilantro, chopped
- 1/4 cup sour cream
- Black olives (for decoration)
- Tortilla chips (for serving)
Cooking Instructions:
- Prepare the Avocados: Cut the avocados in half, remove the pits, and scoop the flesh into a mixing bowl. Use a fork to mash the avocados to your desired consistency, leaving it slightly chunky for texture.
- Mix the Ingredients: Add the lime juice, chopped red onion, jalapeño, and diced tomatoes to the mashed avocados. Stir in the chopped cilantro and mix everything well. Season with salt and pepper to taste.
- Create the Face: Transfer the guacamole to a shallow dish and smooth the top. Use sour cream to draw the outline of Frankenstein’s face and features. Slice black olives to create eyes, a mouth, and hair, arranging them on top of the guacamole.
- Decorate: You can add additional decorations like a scar using sliced red bell pepper or tortilla chips for bolts on the side. Be creative with your edible embellishments!
- Serve: Serve immediately with a side of tortilla chips for dipping. Make sure the dip is kept cool to maintain its fresh taste.
Extra Tips:
To prevent the guacamole from browning, press a piece of plastic wrap directly onto the surface of the dip if you plan to prepare it in advance. This reduces exposure to air, which causes oxidation.
Additionally, adjusting the level of jalapeño can help you control the spiciness of the dip. For those who prefer a less spicy flavor, you can substitute jalapeños with bell peppers.
Finally, encourage guests to have fun with the dip, possibly even involving them in decorating their own portion of the Franken-Guacamole for an interactive party experience.
Mummy Hot Dogs

Mummy Hot Dogs are a delightful and spooky treat that adds a whimsical touch to any Halloween party. These tasty snacks aren’t only easy to make but also fun to eat, making them a hit with both kids and adults. The concept is simple: wrap hot dogs in strips of dough to resemble mummies, bake them until golden brown, and add eyes to complete the eerie effect. They’re the perfect finger food that can be served as an appetizer or a main dish, depending on the occasion.
The beauty of Mummy Hot Dogs lies in their versatility and ease of preparation. You can use store-bought dough or make your own if you’re feeling ambitious. The hot dogs can be traditional beef or turkey, or you can opt for plant-based alternatives to suit vegetarian or vegan guests.
Once baked, these mummies can be served with a variety of dipping sauces, such as ketchup, mustard, or a spicy aioli, adding an extra layer of flavor. Whether you’re hosting a Halloween gathering or simply enjoying a themed dinner, Mummy Hot Dogs are sure to be a crowd-pleaser.
Ingredients (for 4-6 people):
- 1 package of hot dogs (8-10 hot dogs)
- 1 can of refrigerated crescent roll dough or puff pastry
- 1 tablespoon of all-purpose flour (for dusting)
- Mustard or ketchup (for mummy eyes)
- Cooking spray or parchment paper
Cooking Instructions:
- Preheat the Oven: Start by preheating your oven to 375°F (190°C). This guarantees that the oven is hot enough to bake the dough evenly around the hot dogs.
- Prepare the Dough: Lightly dust a clean surface with flour and roll out the crescent roll dough or puff pastry. Use a sharp knife or a pizza cutter to slice the dough into thin strips about 1/4 inch wide.
- Wrap the Hot Dogs: Take each hot dog and begin wrapping it with the dough strips. Leave a small gap near the top to create the mummy’s face. Overlap the strips slightly to give the appearance of bandages.
- Arrange on Baking Sheet: Place the wrapped hot dogs on a baking sheet lined with parchment paper or lightly sprayed with cooking spray. This prevents them from sticking during baking.
- Bake: Put the baking sheet in the preheated oven and bake for 12-15 minutes, or until the dough is golden brown and the hot dogs are heated through.
- Add Eyes: Once baked, remove the mummies from the oven and let them cool slightly. Use a toothpick to dab small dots of mustard or ketchup onto the exposed hot dog to create eyes.
- Serve: Serve the Mummy Hot Dogs warm with your choice of dipping sauces. Encourage guests to pull apart the bandages to reveal their deliciously wrapped treat.
Extra Tips:
For a more pronounced mummy effect, try using different dough types like puff pastry for a flakier texture or phyllo dough for a more delicate appearance. If you want the eyes to stand out, consider using small edible candy eyes, which can be found in baking aisles around Halloween.
For a healthier twist, opt for whole wheat dough or turkey hot dogs. To prevent the dough from becoming too soft and difficult to handle, keep it chilled until you’re ready to use it. Finally, if you’re making these ahead of time, reheat them in the oven for a few minutes before serving to maintain their crispiness.
Vampire Bat Wings
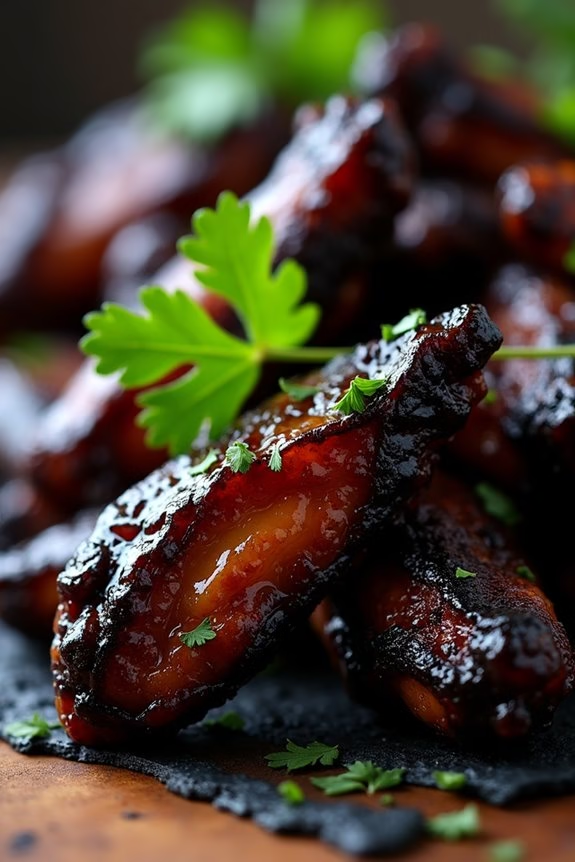
Halloween parties are the perfect occasion to bring creativity into the kitchen, and what better way to do that than with some deliciously spooky Vampire Bat Wings? These wings have a rich, dark, and slightly sweet glaze that adds a sense of mystery to your party spread. Not only do they look the part with their eerie color, but they’re also packed with flavor, making them a hit among guests of all ages.
Whether you’re hosting a big Halloween bash or a smaller family get-together, these wings will add a touch of spooky flair to your menu.
The secret to these Vampire Bat Wings lies in the marinade, which includes a mix of soy sauce, balsamic vinegar, and honey to create a balance of salty and sweet with a hint of tang. The addition of black food coloring gives these wings their signature dark appearance, while the seasoning blend guarantees they’re flavorful and addictive.
Serve these wings on a platter garnished with parsley and set the scene for a frightfully good time.
Ingredients for 4-6 People:
- 2 pounds chicken wings
- 1/2 cup soy sauce
- 1/4 cup balsamic vinegar
- 1/4 cup honey
- 2 tablespoons olive oil
- 2 cloves garlic, minced
- 1 teaspoon smoked paprika
- 1 teaspoon onion powder
- 1/2 teaspoon black pepper
- 1/2 teaspoon salt
- Black food coloring
- Fresh parsley for garnish (optional)
Cooking Instructions:
- Prepare the Marinade: In a large mixing bowl, combine the soy sauce, balsamic vinegar, honey, olive oil, minced garlic, smoked paprika, onion powder, black pepper, and salt. Mix well until the honey is fully dissolved and the ingredients are well incorporated.
- Add Food Coloring: Gradually add black food coloring to the marinade until you achieve the desired dark color. Be cautious with the amount; a little goes a long way.
- Marinate the Wings: Add the chicken wings to the bowl, making sure they’re fully coated in the marinade. Cover the bowl with plastic wrap or transfer the wings and marinade to a resealable plastic bag. Refrigerate for at least 2 hours, or overnight for the best flavor.
- Preheat the Oven: Preheat your oven to 400°F (200°C). Line a baking sheet with aluminum foil and place a wire rack on top. This will allow the wings to cook evenly and prevent them from sitting in excess oil.
- Bake the Wings: Arrange the marinated wings on the wire rack in a single layer. Bake in the preheated oven for 25-30 minutes, flipping halfway through, until the wings are fully cooked and the skin is crispy.
- Garnish and Serve: Once cooked, remove the wings from the oven and let them rest for a few minutes. Garnish with fresh parsley, if desired, and serve your Vampire Bat Wings warm.
Extra Tips:
For an even deeper flavor, consider grilling the wings instead of baking them. This will add a smoky taste that complements the marinade perfectly.
If you’re short on time, a quick marinade of about 30 minutes will still impart good flavor, but for the best results, marinate overnight.
Remember, when working with food coloring, especially black, it’s advisable to wear gloves to avoid staining your hands.
Finally, adjust the amount of honey based on your preference for sweetness; more honey will give the wings a stickier glaze.
Creepy Crawly Pasta Salad
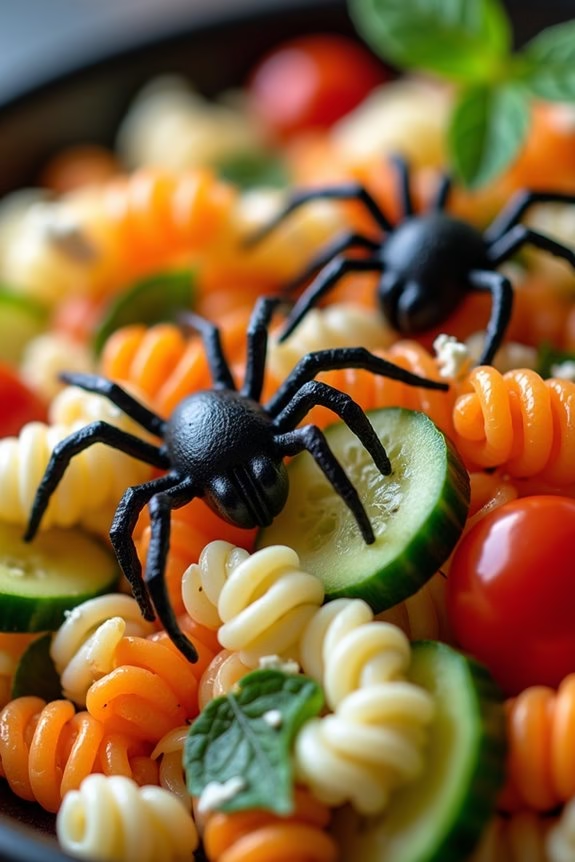
Halloween is a time for spooky fun and delightfully eerie treats, and this Creepy Crawly Pasta Salad is sure to be a hit at your party. This dish takes what’s commonly a light, invigorating meal and transforms it into a spine-tingling creation that will both amuse and delight your guests.
Imagine a bowl of pasta teeming with olive spiders and cucumber snakes, all nestled within swirls of vibrant, colorful veggies. The combination of flavors is as exciting as the presentation, making it an ideal addition to your Halloween spread.
This dish isn’t only visually enchanting but also simple to prepare, allowing you to focus more on enjoying the festivities. The Creepy Crawly Pasta Salad is made with ingredients that are easy to find and can be prepared in advance, giving you more time to focus on other Halloween preparations.
Whether you’re hosting a small gathering or a larger celebration, this pasta salad is sure to add a fun, spooky flair to your event.
Ingredients (Serving size: 4-6 people):
- 12 oz rotini pasta (preferably tri-color)
- 1 cup cherry tomatoes, halved
- 1 cup black olives, pitted
- 1 cucumber, sliced into thin rounds
- 1/2 cup bell peppers, chopped (red or orange)
- 1/4 cup red onion, finely diced
- 1 cup Italian dressing
- 1/2 cup feta cheese, crumbled
- 1 tablespoon olive oil
- Salt and pepper to taste
- Fresh basil leaves for garnish
Instructions:
1. Cook the Pasta: Begin by boiling a large pot of salted water. Add the rotini pasta and cook it according to the package instructions until it’s al dente.
Once cooked, drain the pasta and rinse it under cold water to stop the cooking process. Drizzle with a tablespoon of olive oil to prevent sticking and set aside.
2. Prepare the Creepy Elements: To create the olive spiders, slice several black olives in half lengthwise. Use one half for the body and slice the other half into thin strips to form the legs.
Arrange these pieces on a cutting board to form spider shapes. For cucumber snakes, use your imagination to carve out a snake-like pattern on the cucumber slices using a small knife.
3. Combine Salad Ingredients: In a large mixing bowl, combine the cooked pasta, cherry tomatoes, black olives (including your spider creations), cucumber slices, bell peppers, and red onion.
Toss the ingredients together to ensure they’re well mixed.
4. Dress the Salad: Pour the Italian dressing over the pasta mixture. Add the crumbled feta cheese and season with salt and pepper to taste.
Toss the salad gently to ensure all ingredients are well coated with the dressing.
5. Garnish and Serve: Transfer the pasta salad to a serving bowl and decorate the top with the creepy crawly elements like olive spiders and cucumber snakes.
Add fresh basil leaves for an additional pop of color and flavor. Serve immediately or refrigerate until ready to serve.
Extra Tips:
For an even spookier effect, consider using food coloring to dye parts of the pasta in shades of green or purple before mixing it with the other ingredients.
This will enhance the Halloween theme and make the dish even more eye-catching. You can also add other spooky elements like cheese cut into ghost shapes or use bell pepper rings to create pumpkin faces.
Feel free to get creative with the ingredients to suit your Halloween theme, and remember, the more eerie the presentation, the better!
Pumpkin Patch Brownies
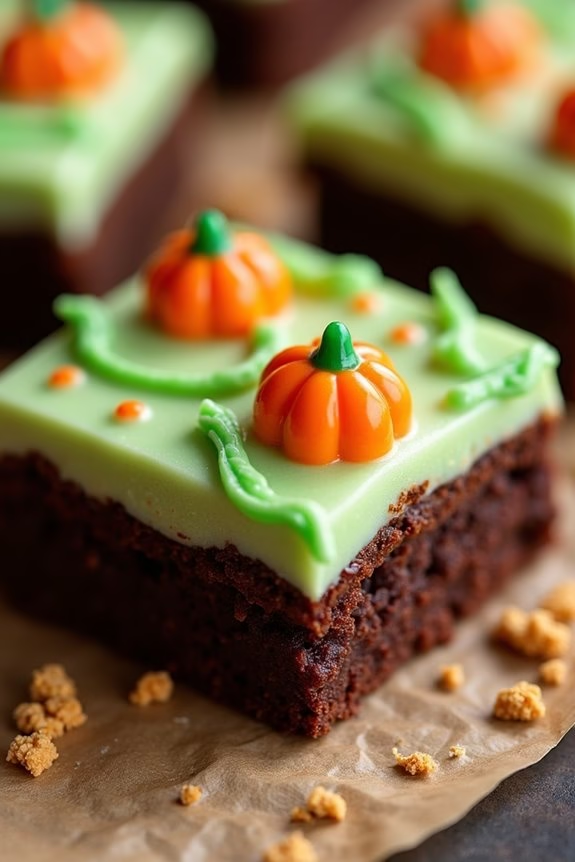
Pumpkin Patch Brownies are the perfect Halloween treat that combines the rich, fudgy goodness of chocolate brownies with a whimsical autumn twist. These delightful brownies are topped with a creamy pumpkin frosting and adorned with candy pumpkins, creating a charming edible pumpkin patch effect.
They’re not only delicious but also visually stunning, making them a fantastic centerpiece for any Halloween party spread. These brownies are easy to make and sure to be a hit with both kids and adults alike. The recipe serves 4-6 people, making it ideal for small gatherings.
Whether you’re hosting a Halloween party or simply looking for a fun and festive dessert to enjoy with family and friends, Pumpkin Patch Brownies are sure to impress.
Ingredients:
- 1 cup unsalted butter
- 2 cups granulated sugar
- 4 large eggs
- 1 teaspoon vanilla extract
- 1 cup all-purpose flour
- 1 cup unsweetened cocoa powder
- 1/2 teaspoon salt
- 1 teaspoon baking powder
- 1 cup pumpkin puree
- 1/2 cup cream cheese, softened
- 1 cup powdered sugar
- 1/2 teaspoon pumpkin pie spice
- Green food coloring
- Candy pumpkins
Cooking Instructions:
1. Preheat Oven and Prepare Pan****: Preheat your oven to 350°F (175°C). Grease a 9×13-inch baking pan and line it with parchment paper, allowing some overhang for easy removal.
2. Make Brownie Batter****: In a large saucepan, melt the butter over medium heat. Remove from heat and stir in the sugar, then beat in the eggs one at a time. Add the vanilla extract.
Sift together the flour, cocoa powder, salt, and baking powder, then gradually stir the dry ingredients into the wet mixture until just combined.
3. Bake the Brownies: Pour the brownie batter into the prepared pan and spread evenly. Bake in the preheated oven for 20-25 minutes or until a toothpick inserted into the center comes out with a few moist crumbs. Allow the brownies to cool completely in the pan.
4. Prepare Pumpkin Frosting: In a medium bowl, beat together the pumpkin puree, cream cheese, powdered sugar, and pumpkin pie spice until smooth and creamy. Adjust sweetness to taste.
5. Frost and Decorate: Once the brownies are cooled, spread the pumpkin frosting evenly over the top. Add a few drops of green food coloring to the remaining frosting to create a green “vine” effect.
Use a piping bag fitted with a small round tip to pipe the green frosting in a vine-like pattern across the brownies.
6. Add Candy Pumpkins: Place candy pumpkins on top of the frosted brownies to create a pumpkin patch effect. Press them gently into the frosting so they stay in place.
7. Serve: Cut the brownies into squares and Serve. Enjoy the delightful combination of rich chocolate and creamy pumpkin.
Extra Tips:
For an extra decorative touch, you can sprinkle some crushed graham crackers over the frosting to mimic dirt in the pumpkin patch. If you prefer a lighter frosting, you can fold in whipped cream into the pumpkin mixture for added fluffiness.
When storing leftovers, keep them in an airtight container in the refrigerator to maintain freshness. These brownies can also be made a day in advance, allowing the flavors to meld together beautifully.
Bloody Finger Cookies
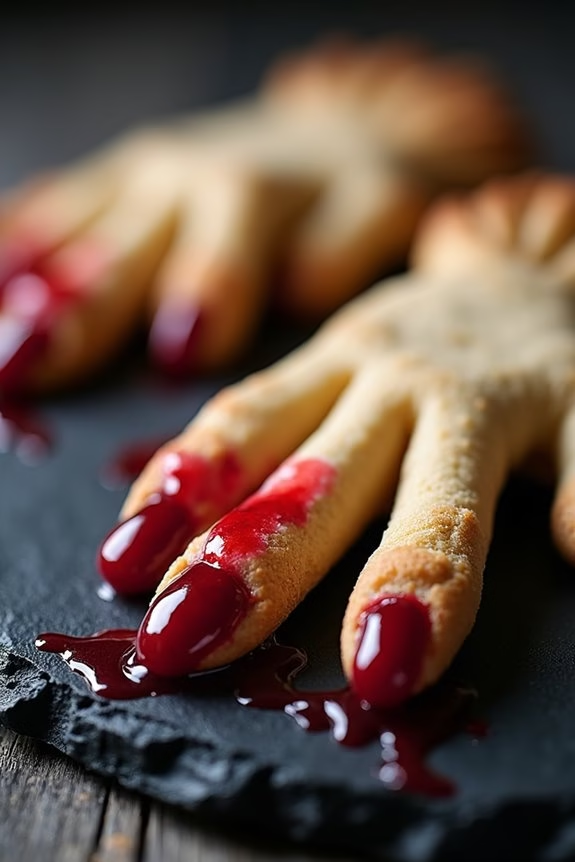
Bloody Finger Cookies are a spooky and delicious treat perfect for any Halloween party. These eerie cookies resemble severed fingers, complete with almond nails and raspberry jam “blood.” Not only are they visually striking, but they also taste incredible, with a buttery, crumbly texture that pairs perfectly with the tartness of the raspberry jam. Serve them as a centerpiece on your Halloween dessert table, and watch your guests get both thrilled and chilled by their creepy appearance.
Creating Bloody Finger Cookies is easier than it looks, and you can have a lot of fun shaping the dough and decorating each finger. This recipe makes enough for 4-6 people, providing plenty of eerie fingers to enjoy. Whether you’re hosting a Halloween party or simply in the mood for a festive treat, these cookies are sure to be a hit. Read on to discover how you can make these ghoulish goodies at home.
Ingredients:
- 1 cup unsalted butter, softened
- 1 cup powdered sugar
- 1 large egg
- 1 teaspoon vanilla extract
- 1 teaspoon almond extract
- 2 2/3 cups all-purpose flour
- 1 teaspoon baking powder
- 1 teaspoon salt
- 3/4 cup whole almonds, blanched
- 1/2 cup raspberry jam
- Red food coloring (optional)
Cooking Instructions:
- Preheat and Prepare: Preheat your oven to 325°F (163°C). Line two baking sheets with parchment paper to prevent the cookies from sticking and to make cleanup easier.
- Mix the Dough: In a large bowl, cream together the softened butter and powdered sugar until light and fluffy. Add the egg, vanilla extract, and almond extract, mixing thoroughly until combined.
- Combine Dry Ingredients: In a separate bowl, whisk together the flour, baking powder, and salt. Gradually add the dry ingredients to the butter mixture, stirring until a dough forms.
- Shape the Fingers: Take about a tablespoon of dough and roll it into a log shape about 3 inches long. Pinch it in two places to form knuckles and use a knife to create small lines on the knuckles to mimic the appearance of a real finger.
- Add the Nails: Press a blanched almond into one end of each cookie to resemble a fingernail.
- Bake the Cookies: Place the shaped fingers onto the prepared baking sheets and bake in the preheated oven for 18-20 minutes, or until lightly golden.
- Add the Jam: While the cookies are baking, gently heat the raspberry jam in a small saucepan over low heat. Optionally, add a few drops of red food coloring to enhance the blood-like appearance.
- Decorate the Fingers: Once the cookies have cooled slightly, remove the almond, place a small dab of jam in its place, and press the almond back onto the cookie. This will create the effect of blood oozing from beneath the nail. Use additional jam around the base of the fingers for a more gruesome look.
Extra Tips:
For a more realistic appearance, consider experimenting with different shapes and sizes for the fingers. You can also add a touch of cocoa powder to the dough to give the fingers a more sinister, aged look.
If your dough is too sticky, chill it in the refrigerator for about 10-15 minutes, which will make it easier to shape. Finally, remember that the cookies will expand slightly during baking, so make sure to leave enough space between them on the baking sheet.
Enjoy creating these frightful treats and have a ghoulishly good time at your Halloween party!
Graveyard Dirt Cups
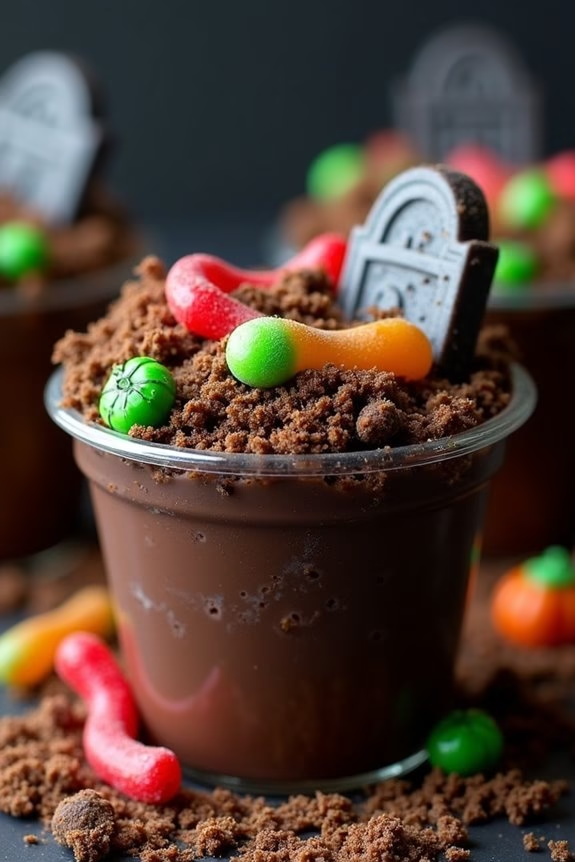
Graveyard Dirt Cups are a spooktacular treat perfect for any Halloween party. These deliciously eerie desserts combine the rich flavors of chocolate pudding, crushed cookies, and gummy candies to create a dessert that resembles a creepy graveyard scene.
Not only are these dirt cups delicious, but they’re also easy to make and can be prepared ahead of time, giving you more time to focus on other party details. Serve them in clear cups or jars to showcase the layered effect that mimics soil and rocks, and watch as both kids and adults delight in this ghoulishly fun treat.
This recipe is perfect for serving 4-6 people, making it an excellent option for small gatherings or as part of a larger dessert spread. With just a few simple ingredients and some creative decoration, you can turn a basic dessert into a frightful feast for the eyes and taste buds.
Get ready to impress your guests with these Graveyard Dirt Cups at your next Halloween bash.
Ingredients (serving size of 4-6 people):
- 2 cups of cold milk
- 1 package (3.9 ounces) of instant chocolate pudding mix
- 1 package (14.3 ounces) of chocolate sandwich cookies (such as Oreos)
- 1 container (8 ounces) of whipped topping, thawed
- 1 package of gummy worms
- Optional: Decorative items like candy tombstones, candy pumpkins, or edible grass
Cooking Instructions:
- Prepare the Pudding: In a large mixing bowl, pour the cold milk and add the instant chocolate pudding mix. Whisk together for about 2 minutes until the mixture thickens. Let it sit for 5 minutes to fully set.
- Crush the Cookies: While the pudding sets, place the chocolate sandwich cookies in a resealable plastic bag. Use a rolling pin to crush the cookies into fine crumbs. This will be used to create the ‘dirt’ layer of your graveyard cups.
- Assemble the Dirt Cups: Once the pudding is set, fold in the thawed whipped topping to create a smooth, creamy mixture. Begin layering the dessert by spooning a layer of the pudding mixture into the bottom of each cup.
- Add the Dirt Layer: Sprinkle a generous layer of the crushed cookie crumbs over the pudding, ensuring it covers the pudding completely. Repeat the layering process, adding another layer of pudding followed by another layer of cookie crumbs.
- Decorate the Graveyard: To give your dirt cups a spooky graveyard look, add gummy worms on top, pressing them slightly into the cookie crumbs to appear as if they’re emerging from the ‘soil’. Add any additional decorations like candy tombstones or pumpkins to complete the scene.
- Chill Before Serving: Place the completed dirt cups in the refrigerator for at least 1 hour before serving. This will allow the flavors to meld together and the layers to set beautifully.
Extra Tips:
For an extra touch of realism, consider using a food-safe pen to write on the candy tombstones or to personalize each cup with guests’ names.
If you’re making this dessert ahead of time, avoid adding the gummy worms and other decorations until just before serving to prevent them from becoming too soft.
Additionally, feel free to get creative with your decorations, using items like crushed graham crackers for a sandy grave look or adding green-tinted coconut flakes for grass. These small details can elevate your Graveyard Dirt Cups to the next level of Halloween fun!
Candy Corn Fruit Parfaits

Candy Corn Fruit Parfaits are a delightful and festive treat perfect for Halloween parties. These layered parfaits mimic the colors of classic candy corn, using vibrant fruit and creamy yogurt to create a healthy and visually appealing dessert. They’re quick to assemble and make for a revitalizing alternative to traditional Halloween sweets. Whether you’re hosting a spooky gathering or simply enjoying the holiday spirit with family, these parfaits are sure to be a hit.
The beauty of Candy Corn Fruit Parfaits lies in their simplicity and adaptability. You can easily swap ingredients to fit dietary preferences or to use seasonal fruits available in your area. The combination of sweet pineapple, juicy oranges, and creamy yogurt makes for an invigorating treat that balances both flavor and nutrition. This recipe is designed to serve 4-6 people, making it an ideal choice for small gatherings or family events.
Ingredients (serving size: 4-6 people):
- 2 cups of pineapple chunks
- 2 cups of mandarin orange slices or peeled orange segments
- 2 cups of vanilla or plain yogurt
- 1/2 cup of whipped cream (optional for topping)
- Candy corn pieces for garnish (optional)
- Clear plastic or glass cups
Cooking Instructions:
- Prepare the Ingredients: Begin by preparing all your ingredients. If you’re using fresh pineapple and oranges, peel and slice them into bite-sized chunks. For convenience, canned or pre-packaged fruit can also be used, but verify they’re drained well.
- Layer the Fruit: Take your clear cups and start by layering the bottom with pineapple chunks. Make sure to distribute the pineapple evenly among the cups so that each parfait has a substantial base layer.
- Add the Second Layer: Next, add a layer of mandarin orange slices on top of the pineapple. Again, ascertain that the orange layer is evenly distributed and covers the pineapple layer completely.
- Add the Yogurt: Spoon the yogurt over the fruit layers. The yogurt layer should be thick enough to cover the fruit entirely, creating a creamy contrast to the vibrant fruit colors beneath.
- Top with Whipped Cream: If you choose to add a touch of indulgence, add a dollop of whipped cream on top of the yogurt layer. This step is optional but adds a nice finish to the parfaits.
- Garnish with Candy Corn: For a final festive touch, place a few candy corn pieces on top of the whipped cream or yogurt. This not only enhances the Halloween theme but also adds a touch of sweetness.
- Serve and Enjoy: Your Candy Corn Fruit Parfaits are now ready to serve. Enjoy these delightful treats immediately, or keep them chilled in the refrigerator until you’re ready to serve.
Extra Tips: When making Candy Corn Fruit Parfaits, consider using Greek yogurt if you prefer a thicker consistency and a higher protein content. You can also experiment with different flavors of yogurt, such as coconut or lemon, to add an extra dimension of flavor.
If you’re making these parfaits ahead of time, layer the fruit and yogurt but wait to add the whipped cream and candy corn until just before serving to prevent them from becoming soggy. Finally, using clear cups allows the beautiful layers to be visible, enhancing the visual appeal of your Halloween dessert.
Haunted Haystack Treats
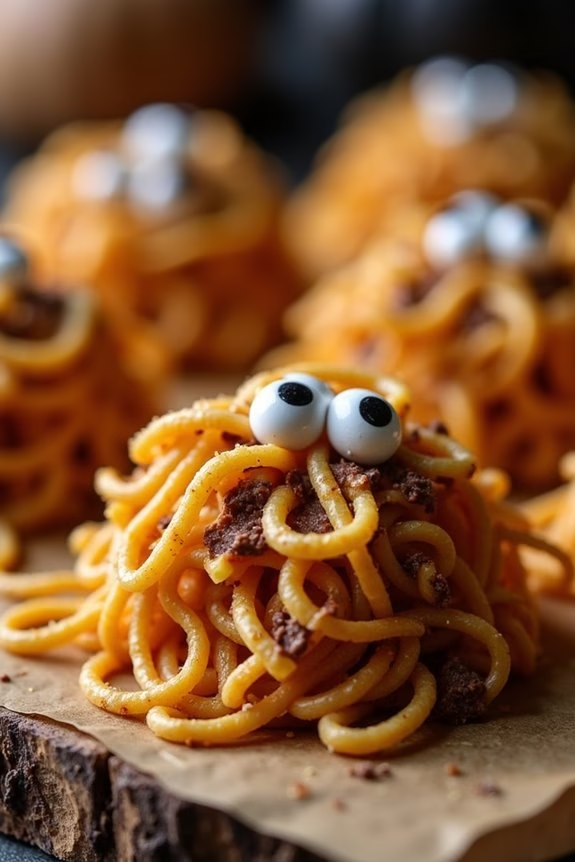
Transform your Halloween party into a spooktacular event with these Haunted Haystack Treats! Perfectly themed for the season, these deliciously sweet and crunchy treats aren’t only easy to make but also fun to assemble. The combination of crispy chow mein noodles and sweet melted chocolate make for a delightful texture that kids and adults alike will enjoy.
Decorate these haystacks with candy eyes to give them a spooky personality, making them the perfect addition to your Halloween dessert table. These treats aren’t only a crowd-pleaser but also an excellent option for those who love to get creative in the kitchen.
Whether you’re hosting a party or simply want a festive snack, Haunted Haystack Treats are sure to be a hit. They require minimal ingredients and effort, allowing you to focus on other party preparations while still delivering a memorable treat. Plus, the recipe is easy to double or triple if needed, guaranteeing you have plenty for all your ghoulish guests.
Ingredients for 4-6 servings:
- 2 cups chow mein noodles
- 1 cup butterscotch chips
- 1/2 cup milk chocolate chips
- 1/2 cup peanut butter
- 1/4 cup candy eyes
Cooking Instructions:
- Prepare the Melting Station: Set up a double boiler by bringing a pot of water to a simmer and placing a heat-proof bowl over it. Confirm the bottom of the bowl doesn’t touch the water.
- Melt the Butterscotch and Chocolate Chips: Add the butterscotch chips and milk chocolate chips to the bowl. Stir continuously until both are completely melted and smooth. This should take about 5 minutes. Be careful not to let any water get into the mixture, as it can cause the chocolate to seize.
- Add Peanut Butter: Once the chips are melted, stir in the peanut butter until the mixture is well combined and creamy. Remove from heat.
- Combine with Chow Mein Noodles: In a large mixing bowl, pour the melted mixture over the chow mein noodles. Use a spatula to gently fold the noodles into the mixture until they’re evenly coated.
- Form the Haystacks: Line a baking sheet with parchment paper. Using a spoon, drop small mounds of the noodle mixture onto the paper to form haystack shapes.
- Decorate with Candy Eyes: While the haystacks are still warm and slightly sticky, press candy eyes onto each mound to give them a haunted look.
- Set and Serve: Allow the haystacks to cool and set at room temperature for about 30 minutes before serving.
Extra Tips:
To make your Haunted Haystack Treats even more festive, consider adding a few drops of orange or green food coloring to the melted mixture before combining it with the noodles. This will give your treats a more Halloween-themed appearance.
If you want to make these treats nut-free, simply omit the peanut butter and use a nut-free chocolate spread instead. Additionally, if you prefer a less sweet version, you can replace some of the butterscotch chips with additional milk chocolate chips.
Enjoy your spooky creations and have a fang-tastic Halloween!
Boo-nana Popsicles
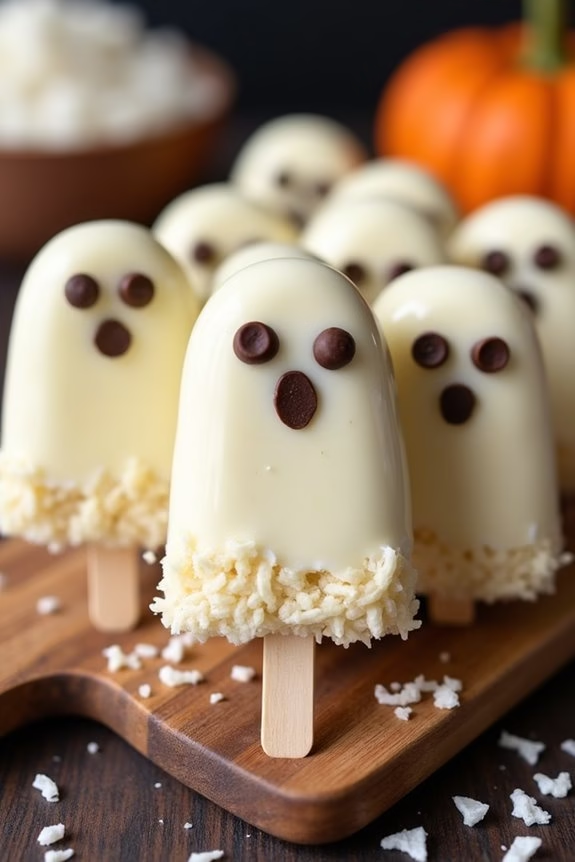
Boo-nana Popsicles are a fun and spooky treat perfect for any Halloween party. These ghostly snacks aren’t only delicious but also healthy, making them a great option for both kids and adults. The combination of creamy bananas, rich white chocolate, and a touch of coconut creates a delightful texture and taste that will surely be a hit at your gathering.
The adorable ghost faces on each popsicle add a playful element, guaranteeing they’re as enjoyable to look at as they’re to eat. Creating these Boo-nana Popsicles is simple, requiring minimal ingredients and time. This recipe provides a serving size for 4-6 people, ideal for a small party or family gathering.
With just a few steps, you can transform ordinary bananas into a Halloween-themed treat that’s both visually appealing and tasty. The popsicles can be made in advance, allowing you to focus on other party preparations on the day of the event.
Ingredients (Serving Size: 4-6 people)
- 3 large bananas
- 1 cup white chocolate chips
- 2 tablespoons coconut oil
- 1/4 cup shredded coconut
- 12 mini chocolate chips (for eyes and mouths)
- Popsicle sticks
Instructions
- Prepare the Bananas: Peel the bananas and cut them in half crosswise. Insert a popsicle stick into the cut end of each banana half, making sure it’s secure but not poking through the top.
- Melt the White Chocolate: In a microwave-safe bowl, combine the white chocolate chips and coconut oil. Microwave in 30-second intervals, stirring between each interval, until the chocolate is completely melted and smooth.
- Coat the Bananas: Dip each banana half into the melted white chocolate, using a spoon to help cover the banana evenly. Allow any excess chocolate to drip off before placing the banana on a parchment-lined baking sheet.
- Add Coconut and Eyes: Sprinkle shredded coconut over the chocolate-coated bananas to give a textured appearance resembling a ghostly shroud. Place two mini chocolate chips on each banana to create eyes, and use another chocolate chip to create a small mouth.
- Freeze the Popsicles: Once all the bananas are decorated, place the baking sheet in the freezer. Allow the popsicles to freeze for at least 1 hour or until the chocolate is firm and the bananas are frozen through.
- Serve and Enjoy: Once the popsicles are frozen, remove them from the freezer and serve immediately. They can be stored in the freezer for up to a week if made in advance.
Extra Tips
When preparing Boo-nana Popsicles, make sure to use ripe yet firm bananas to guarantee they hold their shape during the coating process.
If you find the white chocolate too thick, you can add a bit more coconut oil to thin it out for easier coating. For a more personalized touch, you can use food coloring to tint the white chocolate or add additional decorations like sprinkles, edible glitter, or colored sugar to enhance the spooky effect.

