
Halloween is just around the corner, and I’ve concocted some wickedly delightful desserts perfect for the grown-ups. Think spiked caramel apple tarts that satisfy your sweet tooth or rum-soaked pumpkin bread pudding that melts in your mouth. These treats boast a boozy twist, adding a sophisticated flair to your spooky celebrations. Curious about our ghostly vodka lemon mousse or dark and stormy gingerbread cookies? Stay tuned for a tasty surprise!
Spiked Caramel Apple Tarts
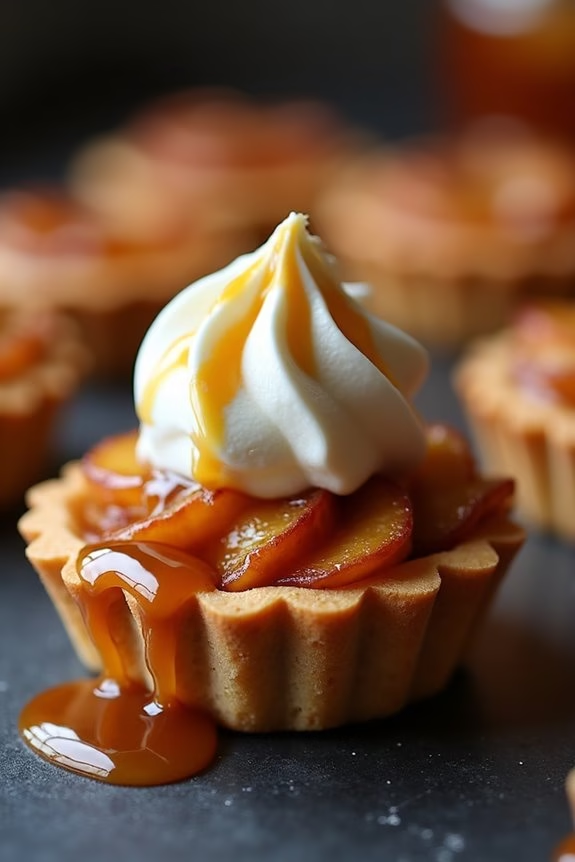
Indulge in the festive spirit of Halloween with these delightful Spiked Caramel Apple Tarts. This adult-friendly dessert combines the classic flavors of caramel and apple with a cheeky twist of alcohol, making it perfect for a Halloween gathering or a cozy night in. The sweet, buttery tart shells house a luscious filling of spiced apples infused with a hint of your favorite spirit, all topped off with a rich caramel drizzle.
These tarts aren’t only a treat for the taste buds but also a visually appealing addition to any Halloween dessert table. The beauty of these Spiked Caramel Apple Tarts lies in their sophisticated flavor profile and elegant presentation, which are sure to impress your guests. The combination of tender apples, warm spices, and a touch of alcohol creates a perfectly balanced filling that’s enveloped in a flaky, golden crust.
The caramel drizzle adds an extra layer of decadence, making these tarts a must-try this Halloween season. Follow the recipe below to create this delightful dessert for 4-6 people.
Ingredients:
- 1 1/2 cups all-purpose flour
- 1/4 cup granulated sugar
- 1/2 teaspoon salt
- 1/2 cup unsalted butter, chilled and cubed
- 1/4 cup iced water
- 3 large apples, peeled, cored, and thinly sliced
- 1/4 cup brown sugar
- 1 teaspoon ground cinnamon
- 1/4 teaspoon ground nutmeg
- 2 tablespoons unsalted butter
- 3 tablespoons of your preferred spirit (e.g., rum, brandy, or bourbon)
- 1/2 cup caramel sauce, store-bought or homemade
- Whipped cream or vanilla ice cream for serving (optional)
- Additional caramel sauce for drizzling (optional)
Instructions:
1. Prepare the Tart Dough: In a medium bowl, combine the flour, granulated sugar, and salt. Add the chilled, cubed butter and use a pastry cutter or your fingers to blend until the mixture resembles coarse crumbs. Gradually add the iced water, mixing until the dough just comes together.
Form the dough into a disk, wrap in plastic wrap, and refrigerate for at least 30 minutes.
2. Preheat the Oven: Preheat your oven to 375°F (190°C). Once the dough is chilled, roll it out on a lightly floured surface to about 1/8-inch thickness. Cut into circles that fit your tart pans. Gently press the dough into the pans, trimming any excess. Prick the base with a fork to prevent bubbling.
3. Bake the Tart Shells: Place the tart shells on a baking sheet and bake for 10-12 minutes or until lightly golden. Remove from oven and set aside to cool.
4. Prepare the Apple Filling: In a large skillet over medium heat, melt the butter. Add the sliced apples, brown sugar, cinnamon, and nutmeg. Cook, stirring occasionally, until the apples are tender and the sugar has dissolved, about 8-10 minutes.
Pour in the spirit and cook for an additional 2-3 minutes, allowing the alcohol to evaporate and the flavors to meld.
5. Assemble the Tarts: Spoon the apple mixture into the cooled tart shells, filling them generously. Drizzle with caramel sauce, ensuring each tart is well-coated.
6. Final Touches: Return the tarts to the oven for another 5 minutes to warm through. Serve warm, topped with a scoop of whipped cream or vanilla ice cream, and an extra drizzle of caramel sauce if desired.
Extra Tips:
When preparing the dough, make certain the butter is very cold, as this will help create a flakier crust. If you’re short on time, you can use pre-made tart shells to simplify the process.
For the filling, choose a spirit that complements the flavors of the apples and spices; dark rum or bourbon works particularly well. Adjust the amount of alcohol according to your taste preference, keeping in mind that a little goes a long way.
Finally, be careful not to overcook the apple filling, as you want the apples to maintain some texture and not become mushy. Enjoy these tarts fresh from the oven for the best taste experience.
Rum-Soaked Pumpkin Bread Pudding

Rum-Soaked Pumpkin Bread Pudding is a delightful dessert perfect for adult Halloween gatherings, combining the warm, comforting flavors of pumpkin with the rich, aromatic notes of rum. This dessert is a spookily sophisticated twist on traditional bread pudding, offering a balance of sweetness and spice that will have your guests indulging in the holiday spirit.
The combination of soft, custardy bread, spiced pumpkin, and the subtle kick of rum makes this an irresistible treat that pairs perfectly with a crisp autumn evening. Ideal for a serving size of 4-6 people, this recipe is designed to transform everyday ingredients into a decadent dessert experience.
Whether you’re hosting a Halloween party or simply looking to enjoy a festive treat, this Rum-Soaked Pumpkin Bread Pudding will impress with its complex flavors and comforting texture. With a few easy steps, you’ll be able to whip up this mouthwatering dish that’s sure to become a new seasonal favorite.
Ingredients:
- 6 cups day-old bread, cubed (such as brioche or challah)
- 1 cup canned pumpkin puree
- 1 cup whole milk
- 1 cup heavy cream
- 3/4 cup granulated sugar
- 1/4 cup brown sugar
- 4 large eggs
- 1/2 cup dark rum
- 1 teaspoon vanilla extract
- 1 teaspoon ground cinnamon
- 1/2 teaspoon ground nutmeg
- 1/4 teaspoon ground cloves
- 1/4 teaspoon ground ginger
- 1/4 teaspoon salt
- 1/2 cup raisins (optional)
- Butter for greasing the baking dish
Instructions:
- Preheat and Prepare: Start by preheating your oven to 350°F (175°C). Butter a 9×13-inch baking dish generously to prevent sticking.
- Cube and Soak the Bread: Place the cubed bread into a large mixing bowl. In a separate small bowl, combine the dark rum and raisins (if using) and let them soak while you prepare the custard.
- Make the Custard Mixture: In another large bowl, whisk together the pumpkin puree, whole milk, heavy cream, granulated sugar, brown sugar, eggs, vanilla extract, cinnamon, nutmeg, cloves, ginger, and salt. Verify everything is well combined and smooth.
- Combine Ingredients: Pour the custard mixture over the cubed bread, stirring gently to confirm the bread is thoroughly coated. Add the rum-soaked raisins to the mixture, including any remaining rum, and gently fold them in.
- Transfer to Baking Dish: Transfer the bread mixture into the prepared baking dish, spreading it evenly. Press down gently with a spatula to make sure the bread is submerged in the custard.
- Bake: Place the baking dish in the preheated oven and bake for 40-45 minutes, or until the pudding is set and the top is golden brown. A knife inserted into the center should come out clean.
- Cool and Serve: Allow the bread pudding to cool for about 15 minutes before serving. This will help the pudding set further and make it easier to slice.
Extra Tips:
To guarantee your Rum-Soaked Pumpkin Bread Pudding has the best texture, use day-old or slightly stale bread, as it will absorb the custard better. If you’re short on time, you can lightly toast fresh bread to dry it out.
For a richer flavor, consider using a spiced rum instead of dark rum. Additionally, if you prefer a non-alcoholic version, you can substitute the rum with apple cider for a seasonal twist. Serve warm with a scoop of vanilla ice cream or a dollop of whipped cream for an extra indulgent treat.
Witch’s Brew Sangria Jello Shots

Witch’s Brew Sangria Jello Shots are the perfect Halloween treat for adults looking to add a little spooky fun to their celebration. These jello shots combine the fruity, festive flavors of sangria with the whimsy of gelatin, creating a delightful and boozy dessert that’s bound to be a hit at any Halloween party.
Perfectly portioned for individual servings, these shots are easy to make and can be prepared in advance, leaving you more time to enjoy the festivities.
Crafted to serve 4-6 people, this recipe balances the sweetness of fruit juices with the boldness of red wine and a dash of brandy for an extra kick. The addition of fruit pieces not only adds to the aesthetic appeal but also enhances the flavor profile, making these jello shots a treat for the senses.
Whether you’re hosting a gathering or attending one, Witch’s Brew Sangria Jello Shots are bound to impress your guests and add a touch of magic to your Halloween night.
Ingredients (Serves 4-6):
- 1 cup red wine
- 1/2 cup brandy
- 1 cup cranberry juice
- 1/2 cup orange juice
- 2 packets unflavored gelatin
- 1/4 cup sugar
- 1/4 cup diced apples
- 1/4 cup diced oranges
- 1/4 cup blackberries
- 1/4 cup raspberries
Cooking Instructions:
- Prepare the Gelatin: In a medium saucepan, pour in the cranberry juice and sprinkle the unflavored gelatin over the surface. Allow it to sit for about 2 minutes to let the gelatin bloom.
- Dissolve the Gelatin: Place the saucepan over medium heat and stir continuously until the gelatin is completely dissolved, guaranteeing there are no lumps remaining. This should take about 5 minutes.
- Mix in the Sugar: Add the sugar to the saucepan and continue stirring until it’s fully dissolved. This will help sweeten the jello shots and balance the flavors.
- Combine with Alcohol: Remove the saucepan from heat and slowly stir in the red wine and brandy. This prevents the alcohol from evaporating too quickly, guaranteeing each shot retains its boozy kick.
- Add the Orange Juice: Pour in the orange juice and mix well, integrating all the flavors together for a cohesive sangria taste.
- Incorporate the Fruit: Evenly distribute the diced apples, oranges, blackberries, and raspberries into your chosen shot glasses or molds.
- Pour the Mixture: Carefully pour the gelatin mixture over the fruit in each shot glass, filling them almost to the top. Guarantee the fruit is evenly distributed in each shot.
- Chill the Shots: Transfer the shot glasses to the refrigerator and let them chill for at least 4 hours, or until the jello is firm and set.
Extra Tips:
For an even more festive presentation, consider using Halloween-themed molds or cups to set your jello shots.
If you prefer a sweeter shot, you can adjust the sugar or substitute the cranberry juice with a sweeter juice such as grape or pomegranate.
Additionally, you can make these jello shots a day ahead to allow the flavors to meld even more, making them taste even better.
Remember to serve them with small spoons or toothpicks for easy consumption. Enjoy responsibly!
Black Magic Chocolate Stout Cake
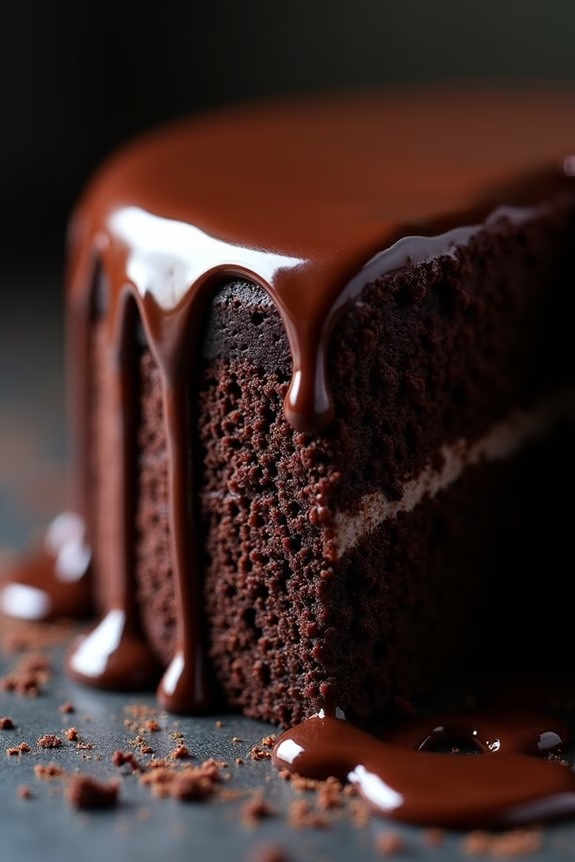
Indulge in the dark decadence of a Black Magic Chocolate Stout Cake, a bewitching dessert designed for the adult palate. This rich and moist cake is infused with the deep flavors of chocolate and stout beer, creating a harmonious blend that both excites and satisfies. The stout adds a subtle bitterness that enhances the chocolate’s richness, making each bite a spellbinding experience.
Perfect for a Halloween gathering, this cake is sure to captivate your guests with its rich taste and alluring appearance. This cake not only looks the part with its dark, luscious appearance but also delivers a sophisticated flavor profile that will leave a lasting impression. The Black Magic Chocolate Stout Cake is topped with a silky ganache that adds an extra layer of indulgence.
Whether you’re hosting a Halloween party or a cozy get-together with friends, this cake is a showstopper that’s bound to enchant all who taste it. Follow this recipe to conjure up a dessert that’s both magical and memorable.
Ingredients (Serves 4-6 people)
- 1 cup stout beer
- 1 cup unsalted butter
- 3/4 cup unsweetened cocoa powder
- 2 cups all-purpose flour
- 2 cups granulated sugar
- 1.5 teaspoons baking soda
- 3/4 teaspoon salt
- 2 large eggs
- 2/3 cup sour cream
- 1 teaspoon vanilla extract
For the Ganache:
- 8 ounces bittersweet chocolate, chopped
- 2/3 cup heavy cream
- 2 tablespoons stout beer
- 1 tablespoon unsalted butter
Instructions
- Prepare the Oven and Pan: Preheat your oven to 350°F (175°C). Grease a 9-inch round cake pan and line the bottom with parchment paper to guarantee easy release.
- Simmer the Stout Mixture: In a medium saucepan over medium heat, bring the stout beer and butter to a simmer. Once the butter is fully melted, remove from heat and whisk in the cocoa powder until smooth. Allow this mixture to cool slightly.
- Mix Dry Ingredients: In a large mixing bowl, combine the flour, sugar, baking soda, and salt. Stir together until evenly mixed.
- Combine Wet Ingredients: In another bowl, beat the eggs, sour cream, and vanilla extract until smooth. Gradually add the slightly cooled stout mixture to the egg mixture, stirring constantly to prevent the eggs from cooking.
- Combine and Mix: Pour the wet ingredients into the dry ingredients, whisking gently until the batter is smooth and fully combined. Be careful not to overmix.
- Bake the Cake: Pour the batter into the prepared cake pan. Bake in the preheated oven for 45-50 minutes, or until a toothpick inserted into the center comes out clean. Let the cake cool in the pan for 10 minutes, then transfer to a wire rack to cool completely.
- Prepare the Ganache: For the ganache, place the chopped chocolate in a heatproof bowl. In a small saucepan, heat the heavy cream until just simmering. Pour the hot cream over the chocolate and let it sit for 2 minutes. Add the stout beer and butter, then stir gently until smooth and glossy.
- Assemble the Cake: Once the cake is completely cool, pour the ganache over the top, allowing it to drip down the sides. Use a spatula to spread the ganache evenly if necessary. Let the ganache set for at least 30 minutes before serving.
Extra Tips
To enhance the chocolate flavor, consider using a high-quality cocoa powder and bittersweet chocolate with a cacao content of at least 70%. This will add depth and richness to the cake.
If you prefer a slightly sweeter ganache, you can adjust the sugar content by adding a tablespoon of powdered sugar to the ganache mixture. For a decorative touch, consider garnishing the cake with chocolate shavings or a sprinkle of sea salt to enhance the flavor profile.
Make sure the cake is completely cool before applying the ganache to prevent it from melting and running off the cake. Enjoy your Halloween treat!
Ghostly Vodka Lemon Mousse
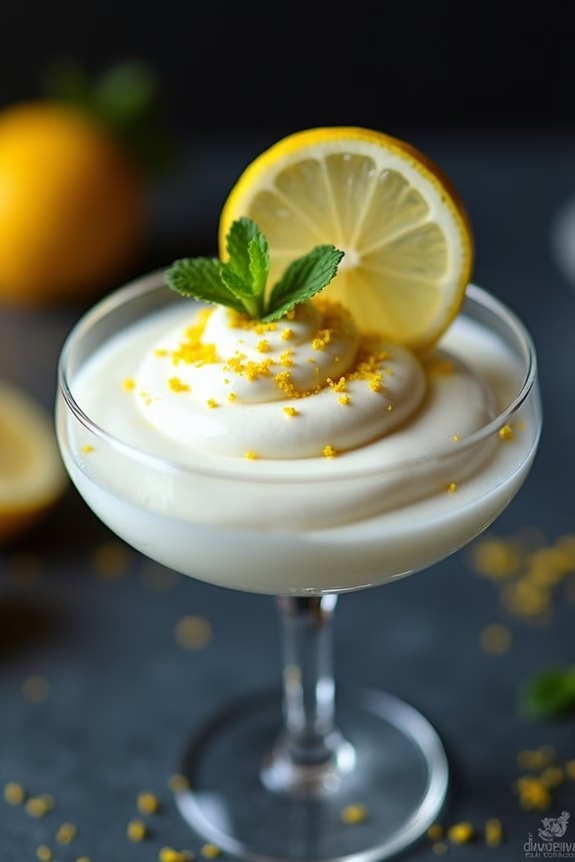
Looking for a spooky yet sophisticated dessert to elevate your Halloween gathering? Ghostly Vodka Lemon Mousse is the perfect choice. This elegant dessert combines the tangy brightness of lemon with the smooth, warming undertones of vodka, creating a delightful balance of flavors. The mousse is light and airy, making it an ideal finish to an indulgent meal.
Not only does it taste divine, but its ghostly white appearance makes it a fitting centerpiece for any adult Halloween party. The preparation is simple yet rewarding, allowing you to impress your guests with minimal effort. This dessert is best served chilled, offering a revitalizing contrast to the typically rich and hearty Halloween fare.
Plus, with a few creative garnishes, you can easily transform this mousse into a whimsical or eerie treat. Follow the recipe below to create a serving size for 4-6 people and delight your guests with this hauntingly delicious dessert.
Ingredients:
- 1 cup heavy cream
- 1/2 cup granulated sugar
- 1/4 cup lemon juice (freshly squeezed)
- 2 tablespoons lemon zest
- 1/4 cup vodka
- 3 large egg whites
- 1/4 teaspoon cream of tartar
- Pinch of salt
- Lemon slices or zest for garnish
- Mint leaves for garnish (optional)
Instructions:
- Prepare the Lemon Mixture: In a medium bowl, combine the freshly squeezed lemon juice, lemon zest, and vodka. Stir the mixture until well combined and set aside to allow the flavors to meld.
- Whip the Cream: In a large mixing bowl, pour in the heavy cream and beat it using an electric mixer at medium speed until soft peaks form. Gradually add in 1/4 cup of the sugar, continuing to beat until stiff peaks are reached. Be careful not to overbeat, as this can cause the cream to become grainy.
- Beat the Egg Whites: In another clean, dry bowl, add the egg whites, cream of tartar, and a pinch of salt. Beat with clean beaters on medium-high speed. Once the mixture becomes foamy, slowly add the remaining 1/4 cup of sugar, and continue to beat until stiff, glossy peaks form.
- Combine Mixtures: Gently fold the lemon-vodka mixture into the whipped cream until just combined. Next, carefully fold in the beaten egg whites, being cautious not to deflate the mixture. The result should be a light and airy mousse.
- Chill the Mousse: Spoon the mousse evenly into individual serving glasses or bowls. Cover them with plastic wrap and refrigerate for at least 2 hours, or until set.
- Garnish and Serve: Before serving, garnish each mousse with a slice of lemon or a sprinkle of lemon zest. For a touch of color, add a sprig of mint if desired. Serve chilled and enjoy the ghostly delight!
Extra Tips:
When whipping the cream and egg whites, make sure that your bowls and beaters are completely clean and dry for maximum volume. If you’re short on time, prepare the mousse a day in advance to allow the flavors to develop further.
For a non-alcoholic version, substitute the vodka with an equal amount of additional lemon juice. Finally, feel free to get creative with your garnishes to enhance the spooky aesthetic of your dessert.
Fireball Cider Donut Holes
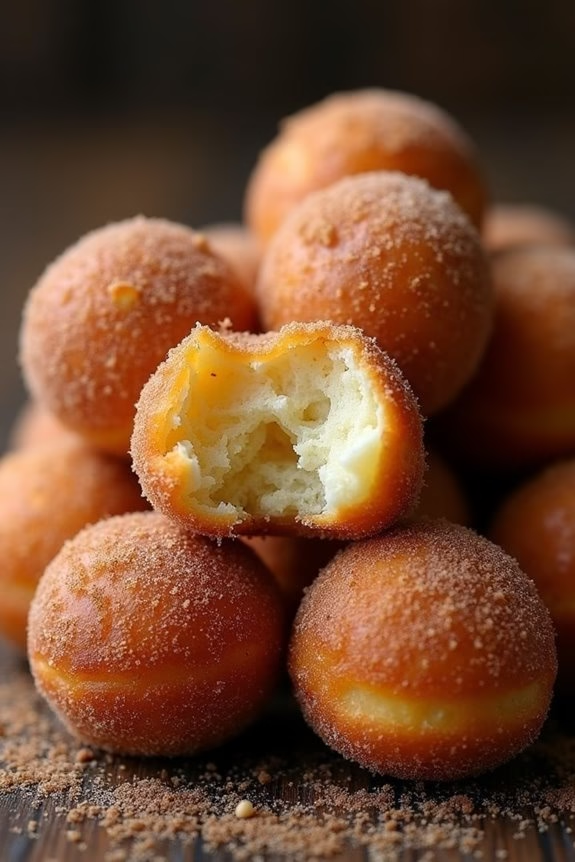
Fireball Cider Donut Holes are a festive and delicious treat perfect for an adult Halloween gathering. These donut holes are infused with the warm, spicy flavors of Fireball whiskey and apple cider, creating a tantalizing combination that’s certain to impress your guests. The sweetness of the apple cider pairs exceptionally well with the fiery cinnamon notes of the whiskey, making these treats a delectable indulgence for anyone who loves a little heat with their sweets.
Perfect for sharing, this recipe makes enough to serve 4-6 people and is bound to be a hit at any Halloween party. These donut holes are bite-sized and easy to enjoy, making them an ideal addition to your dessert table. Best of all, they’re straightforward to make, so you can whip them up quickly and focus on enjoying your spooky celebration.
Ingredients:
- 1 cup apple cider
- ¼ cup Fireball whiskey
- 2 tablespoons unsalted butter, melted
- 1 teaspoon vanilla extract
- 1 large egg
- 1 ½ cups all-purpose flour
- ½ cup granulated sugar
- 1 teaspoon baking powder
- ½ teaspoon baking soda
- ½ teaspoon salt
- 1 teaspoon ground cinnamon
- ¼ teaspoon ground nutmeg
- Oil for frying
- ½ cup granulated sugar (for coating)
- 1 teaspoon ground cinnamon (for coating)
Cooking Instructions:
1. Prepare the Wet Mixture: In a medium saucepan, bring the apple cider to a boil over medium-high heat. Reduce heat and let it simmer until it reduces to about ½ cup, roughly 10-15 minutes. Remove from heat and let it cool slightly.
Once cooled, mix in the Fireball whiskey, melted butter, vanilla extract, and egg. Whisk together until well combined.
2. Combine Dry Ingredients: In a large mixing bowl, whisk together the flour, sugar, baking powder, baking soda, salt, cinnamon, and nutmeg.
3. Mix Wet and Dry Ingredients: Gradually add the wet mixture to the dry ingredients, stirring until a thick dough forms. Be careful not to overmix, as this can make the donut holes tough.
4. Heat Oil for Frying: In a large, heavy-bottomed pot or deep fryer, heat oil to 350°F (175°C). It’s important to maintain this temperature for even cooking.
5. Shape and Fry Donut Holes: Using a small cookie scoop or a spoon, carefully drop tablespoon-sized balls of dough into the hot oil. Fry in batches, ensuring not to overcrowd the pot, until the donut holes are golden brown and cooked through, about 2-3 minutes per batch.
6. Drain and Cool: Use a slotted spoon to remove the donut holes from the oil, and transfer them to a plate lined with paper towels to drain excess oil.
7. Coat with Cinnamon Sugar: In a separate bowl, combine the ½ cup of sugar and 1 teaspoon of cinnamon. While the donut holes are still warm, roll them in the cinnamon sugar mixture until fully coated.
Extra Tips:
For the best results, verify your oil temperature stays consistent. If the oil is too hot, the donut holes will brown on the outside before they’re cooked through inside. Conversely, if the oil is too cool, they’ll absorb more oil and become greasy.
Always test one donut hole first to check for the right consistency and adjust the heat as needed. If you’d like to prepare these in advance, you can make the dough a day ahead and store it covered in the refrigerator until you’re ready to fry.
Haunted Rum Raisin Truffles
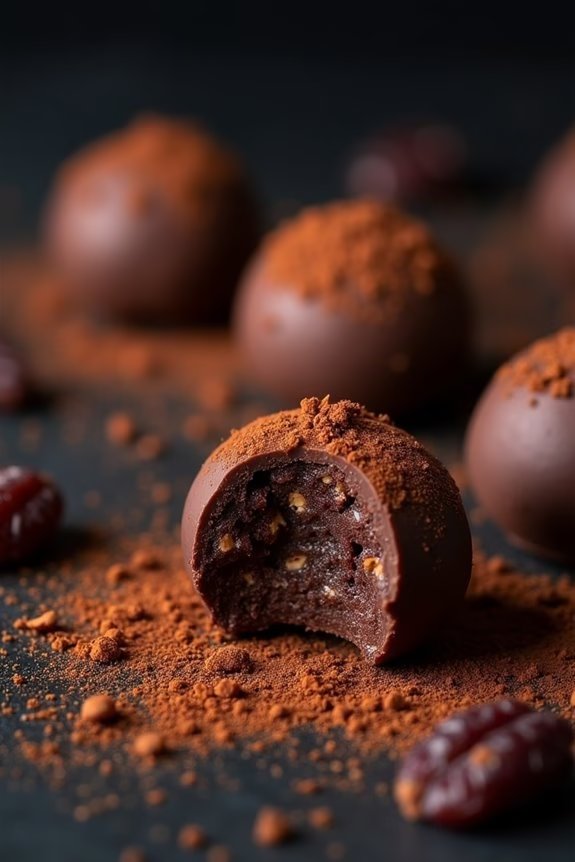
Haunted Rum Raisin Truffles are the perfect Halloween treat for those adults looking to indulge in something a bit more sophisticated than the typical candy corn. These decadent truffles combine the rich flavors of dark chocolate with the warm, spiced notes of rum-soaked raisins, creating a hauntingly delightful experience for your taste buds.
Serve them at your Halloween party to impress your guests or simply enjoy them as a spooky treat for yourself. The process of making these truffles is as enjoyable as eating them, with the intoxicating aroma of rum and chocolate filling your kitchen.
These truffles aren’t just for Halloween; they make a great treat year-round whenever you’re in the mood for a luxurious dessert. The following recipe yields enough to serve 4-6 people, perfect for a small gathering or for keeping them all to yourself.
Ingredients (Serves 4-6):
- 1 cup raisins
- 1/2 cup dark rum
- 8 oz dark chocolate, chopped
- 1/4 cup heavy cream
- 1 tablespoon unsalted butter
- 1/2 teaspoon cinnamon
- Cocoa powder, for dusting
Cooking Instructions:
1. Soak the Raisins: Start by placing the raisins in a small bowl and pouring the dark rum over them. Let them soak for at least 2 hours or overnight, allowing the raisins to fully absorb the rum’s flavor.
2. Melt the Chocolate: In a medium saucepan, combine the chopped dark chocolate, heavy cream, and butter. Heat this mixture over low heat, stirring constantly until the chocolate is completely melted and smooth.
Remove the saucepan from the heat and stir in the cinnamon for an added hint of warmth.
3. Combine and Chill: Drain the soaked raisins and gently fold them into the chocolate mixture, ensuring they’re evenly distributed. Pour the mixture into a shallow dish and refrigerate for at least 3 hours or until it’s firm enough to handle.
4. Shape the Truffles: Once the chocolate mixture is firm, use a teaspoon to scoop out small portions and roll them between your palms to form bite-sized balls.
5. Coat and Serve: Roll each truffle in cocoa powder until well coated. Arrange the truffles on a serving platter, and they’re ready to enjoy!
Extra Tips: For an extra touch of elegance, consider adding a pinch of sea salt to the cocoa powder before coating the truffles, which will enhance the chocolate’s flavor.
You can also experiment with different types of chocolate, like milk or white, if you prefer a sweeter truffle. If you don’t have time to let the raisins soak overnight, you can expedite the process by gently heating the rum and raisins together in a saucepan for about 5 minutes, then letting them cool before using.
Enjoy your Haunted Rum Raisin Truffles and have a spook-tacular Halloween!
Creepy Crawly Tequila Lime Cupcakes
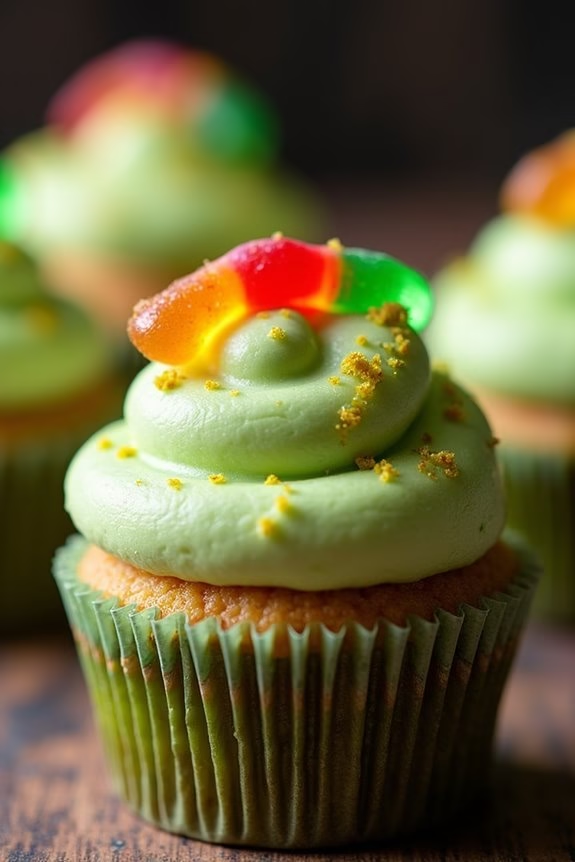
Creepy Crawly Tequila Lime Cupcakes are a deliciously spooky treat perfect for an adult Halloween gathering. These cupcakes combine the zesty tang of lime with a hint of tequila, making them a fun and sophisticated dessert option. The addition of creepy crawly decorations, like gummy worms or spiders, adds a festive and eerie touch.
These cupcakes offer a delightful balance of flavors that will surely impress your guests and get them into the Halloween spirit. The tequila lime flavor is perfectly complemented by a rich and creamy frosting that ties everything together. The alcohol in the tequila is cooked off during baking, leaving behind a subtle flavor that enhances the lime and makes these cupcakes uniquely delicious.
While the cupcakes are adult-themed, the decoration makes them fun and festive, suitable for any Halloween party. Whether you’re hosting a small gathering or a larger event, these cupcakes are sure to be a hit.
Ingredients (Serves 4-6):
- 1 ½ cups all-purpose flour
- 1 cup granulated sugar
- 1 ½ teaspoons baking powder
- ½ teaspoon salt
- ½ cup unsalted butter, softened
- 2 large eggs
- ¼ cup milk
- ¼ cup fresh lime juice
- 3 tablespoons tequila
- 1 tablespoon lime zest
- 1 teaspoon vanilla extract
For the Frosting:
- 1 cup unsalted butter, softened
- 3 cups powdered sugar
- 2 tablespoons lime juice
- 1 tablespoon tequila
- Lime zest, for garnish
- Green food coloring (optional)
For Decoration:
– Gummy worms or small candy spiders
Cooking Instructions:
- Preheat the Oven: Start by preheating your oven to 350°F (175°C). Line a muffin tin with cupcake liners to prepare for baking.
- Mix Dry Ingredients: In a medium-sized bowl, whisk together the all-purpose flour, baking powder, and salt. Set this mixture aside.
- Combine Wet Ingredients: In a large bowl, cream together the softened butter and granulated sugar until light and fluffy. Beat in the eggs one at a time, making certain each is well incorporated before adding the next.
- Add Flavors: Stir in the milk, lime juice, tequila, lime zest, and vanilla extract to the butter mixture. Mix until smooth and well combined.
- Combine Wet and Dry Ingredients: Gradually add the dry ingredients to the wet mixture, stirring until the batter is smooth and lump-free.
- Bake the Cupcakes: Spoon the batter evenly into the prepared cupcake liners, filling each about 2/3 full. Bake in the preheated oven for 18-20 minutes, or until a toothpick inserted into the center of a cupcake comes out clean. Allow the cupcakes to cool completely on a wire rack.
- Prepare the Frosting: In a separate bowl, beat the softened butter until creamy. Gradually add the powdered sugar, lime juice, and tequila, mixing until smooth and fluffy. Add green food coloring if desired to enhance the Halloween theme.
- Frost the Cupcakes: Once the cupcakes are completely cooled, use a piping bag or a spatula to frost them generously. Sprinkle lime zest over the top for added flavor and visual appeal.
- Decorate: Top each cupcake with gummy worms or candy spiders for a creepy crawly effect.
Extra Tips:
When making Creepy Crawly Tequila Lime Cupcakes, guarantee your ingredients are at room temperature for the best results. This helps the batter mix more evenly and results in a smoother texture.
If you’re worried about the tequila flavor being too strong, start with a smaller amount and adjust to taste. Remember, the alcohol content diminishes during baking, leaving behind just the essence.
For a more intense lime flavor, increase the amount of lime zest in the batter and frosting. Finally, have fun with decorations – the creepier, the better, to embrace the Halloween theme!
Boozy Maple Bourbon Pecan Pie Bars
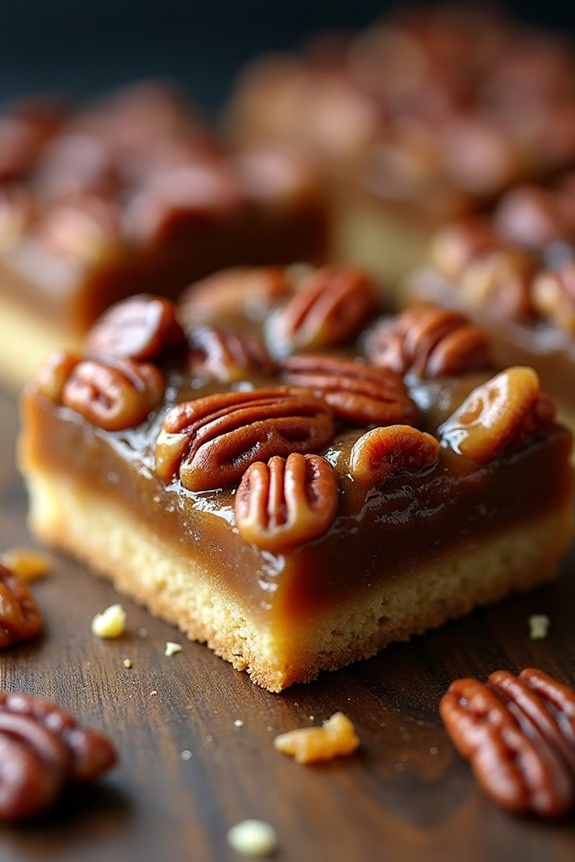
Boozy Maple Bourbon Pecan Pie Bars are the perfect Halloween dessert for adults, combining the rich flavors of maple syrup, bourbon, and pecans in a deliciously decadent treat.
These bars offer a sophisticated twist on the classic pecan pie, making them a delightful addition to any Halloween gathering. The bourbon adds a warming touch, while the maple syrup infuses the bars with a hint of autumn sweetness, perfect for celebrating the spooky season with a grown-up flair.
The bars are composed of a buttery shortbread crust, a gooey pecan filling, and a hint of bourbon that elevates the traditional pecan pie flavors. Preparing these bars is straightforward, and the result is a treat that balances sweetness with a subtle kick from the bourbon.
They’re ideal for a Halloween party or a cozy night in, paired with your favorite fall beverage.
Ingredients for 4-6 servings:
- 1 cup all-purpose flour
- 1/4 cup granulated sugar
- 1/2 cup unsalted butter, softened
- 1/4 teaspoon salt
- 1/2 cup packed brown sugar
- 1/2 cup maple syrup
- 1/4 cup bourbon
- 3 large eggs
- 1 tablespoon vanilla extract
- 1 1/2 cups pecan halves
Cooking Instructions:
- Preheat and Prepare the Pan: Preheat your oven to 350°F (175°C). Line a 9×9-inch baking pan with parchment paper, leaving some overhang on the sides for easy removal after baking.
- Make the Crust: In a mixing bowl, combine 1 cup of flour, 1/4 cup of granulated sugar, and 1/4 teaspoon of salt. Add in the softened butter and mix until the dough resembles coarse crumbs. Press this mixture evenly into the prepared baking pan to form the crust.
- Bake the Crust: Place the crust in the preheated oven and bake for 10-12 minutes, or until lightly golden. Remove from the oven and set aside to cool slightly.
- Prepare the Filling: In another bowl, whisk together the brown sugar, maple syrup, bourbon, eggs, and vanilla extract until well combined. Stir in the pecan halves, ensuring they’re thoroughly coated with the mixture.
- Assemble and Bake: Pour the pecan mixture over the baked crust, spreading it evenly. Return the pan to the oven and bake for 30-35 minutes, or until the filling is set and the top is golden brown.
- Cool and Serve: Remove the bars from the oven and allow them to cool completely in the pan. Once cooled, use the parchment overhang to lift the bars out of the pan. Cut into squares and serve.
Extra Tips:
When making Boozy Maple Bourbon Pecan Pie Bars, verify your butter is softened so it combines easily with the other crust ingredients.
If you prefer a stronger bourbon flavor, you can add an extra tablespoon of bourbon to the filling, but be cautious as too much liquid can affect the texture.
For a cleaner cut, chill the bars in the refrigerator for about an hour before slicing. This dessert can be made a day in advance, allowing the flavors to meld together beautifully, making it a stress-free option for entertaining.
Wicked Red Wine Poached Pears
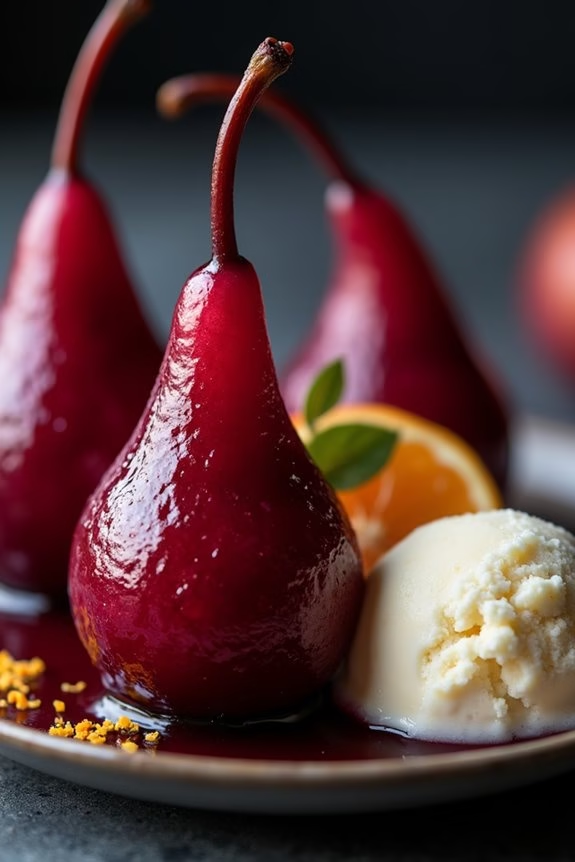
Wicked Red Wine Poached Pears are an elegant and hauntingly delicious dessert, perfect for an adult Halloween gathering. The deep, rich flavors of the red wine meld beautifully with the natural sweetness of the pears, creating a dish that’s both sophisticated and slightly sinister. The deep crimson hue of the wine-soaked pears adds a dramatic flair to any Halloween table, making them a show-stopping centerpiece as well as a delectable treat.
These pears are simmered gently in a spiced red wine mixture, allowing the fruit to absorb the aromatic flavors. The result is a tender, juicy pear that’s bursting with warmth and complexity. This dessert pairs excellently with a scoop of vanilla ice cream or a dollop of mascarpone, adding a creamy contrast to the intense flavors of the wine reduction.
Whether served as a finale to a dinner party or as part of a Halloween buffet, these Wicked Red Wine Poached Pears are certain to leave a lasting impression on your guests.
Ingredients (serving size: 4-6 people):
- 4-6 firm, ripe pears (such as Bosc or Anjou)
- 1 bottle (750ml) of dry red wine
- 1 cup granulated sugar
- 2 cinnamon sticks
- 4 whole cloves
- 1 vanilla bean, split and seeds scraped (or 1 teaspoon vanilla extract)
- Zest of 1 orange
- Juice of 1 orange
- 1 cup water
Cooking Instructions:
- Prepare the Pears: Peel the pears, leaving the stems intact. Trim the bottom slightly if needed, so they can stand upright. Set them aside.
- Create the Poaching Liquid: In a large saucepan, combine the red wine, sugar, cinnamon sticks, cloves, vanilla bean and seeds (or extract), orange zest, orange juice, and water. Stir to dissolve the sugar over medium heat.
- Simmer the Mixture: Bring the mixture to a gentle boil, then reduce the heat to low.
- Add the Pears: Carefully place the prepared pears into the poaching liquid, guaranteeing they’re fully submerged. If necessary, add more water to cover the pears.
- Poach the Pears: Cover the saucepan and allow the pears to simmer gently for 20-30 minutes, turning occasionally to guarantee even coloring, until the pears are tender when pierced with a knife.
- Remove the Pears: Once the pears are cooked, carefully remove them from the poaching liquid and set them aside to cool slightly.
- Reduce the Sauce: Increase the heat under the saucepan and bring the poaching liquid to a boil. Allow it to reduce to a syrupy consistency, about 15-20 minutes.
- Serve: Once the sauce has thickened, you can serve the pears warm or at room temperature. Drizzle the reduced wine sauce over the pears and, if desired, add a scoop of vanilla ice cream or a dollop of mascarpone.
Extra Tips:
To guarantee the best results, choose pears that are ripe but still firm, as overly ripe pears may fall apart during poaching.
Be sure to turn the pears occasionally to achieve an even color all around. If you’re preparing these pears in advance, you can poach them a day ahead and store them in their liquid in the refrigerator. Simply reheat gently before serving.
Adjust the sweetness of the sauce to your preference by varying the amount of sugar used. For a spicier touch, you can add a star anise or a small piece of ginger to the poaching liquid.
Zombie Brain Whiskey Cheesecake
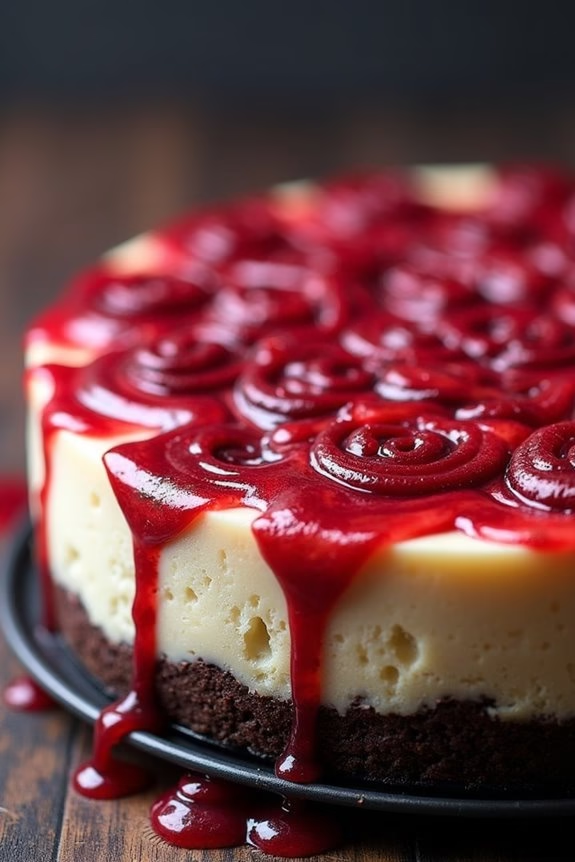
Zombie Brain Whiskey Cheesecake is the perfect Halloween treat for adults who want a little bit of spookiness in their dessert. This decadent and slightly eerie cheesecake combines the rich flavors of cream cheese and whiskey with a gruesome yet fun presentation that will surely impress your guests. The “zombie brain” effect is achieved by swirling a raspberry sauce into the cheesecake batter, giving it a blood-red appearance that adds to the overall theme of the dessert.
This cheesecake recipe isn’t only delicious but also surprisingly easy to make. The creamy texture of the cheesecake, enhanced by the bold notes of whiskey, pairs wonderfully with the tartness of the raspberry sauce. The crust is made from crushed chocolate cookies, providing a delightful contrast to the smooth filling. With some simple steps and a few creative touches, you can create a dessert that’s both visually striking and tantalizing to the taste buds.
Ingredients (Serves 4-6):
- 1 1/2 cups chocolate sandwich cookies, crushed
- 1/4 cup unsalted butter, melted
- 3 (8 oz) packages cream cheese, softened
- 1 cup granulated sugar
- 3 large eggs
- 1/4 cup whiskey
- 1 teaspoon vanilla extract
- 1/2 cup sour cream
- 1 cup fresh or frozen raspberries
- 2 tablespoons granulated sugar (for raspberry sauce)
- Red food coloring (optional, for enhanced effect)
Cooking Instructions:
- Prepare the Crust: Preheat your oven to 325°F (165°C). In a medium bowl, combine the crushed chocolate cookies with the melted butter. Mix until well combined. Press the mixture into the bottom of a 9-inch springform pan to form an even crust. Set aside.
- Make the Cheesecake Filling: In a large mixing bowl, beat the softened cream cheese and 1 cup of sugar together until smooth and creamy. Add the eggs one at a time, beating well after each addition. Stir in the whiskey and vanilla extract, followed by the sour cream. Mix until all ingredients are well incorporated.
- Prepare the Raspberry Sauce: In a small saucepan, combine the raspberries and 2 tablespoons of sugar. Cook over medium heat, stirring occasionally, until the raspberries break down and the mixture thickens slightly. Strain the sauce through a fine mesh sieve to remove seeds, pressing down with a spoon to extract as much liquid as possible. Stir in a few drops of red food coloring if desired for a more vibrant color.
- Assemble the Cheesecake: Pour the cheesecake filling over the prepared crust in the springform pan. Using a spoon, drop dollops of the raspberry sauce onto the surface of the cheesecake. Use a knife or skewer to gently swirl the sauce into the batter, creating a marbled “zombie brain” effect.
- Bake: Place the cheesecake in the oven and bake for 50-60 minutes, or until the center is set but still slightly jiggly. Remove the cheesecake from the oven and let it cool to room temperature, then refrigerate for at least 4 hours or overnight to fully set.
- Serve: Once the cheesecake is chilled and firm, remove it from the springform pan. Slice and serve, optionally with additional raspberry sauce drizzled on top for extra gore.
Extra Tips:
For the best results, make sure all your ingredients are at room temperature before you begin, as this will guarantee a smooth and creamy cheesecake texture.
If you want to intensify the “brain” effect, you can add more raspberry sauce or even use a piping bag to create more intricate patterns on the surface.
Additionally, if you don’t have a springform pan, you can use a regular cake pan lined with parchment paper for easy removal.
Finally, to prevent any cracks on the surface of your cheesecake, avoid overmixing the batter and confirm even baking by placing a shallow pan of water on the lower rack of the oven while the cheesecake bakes.
Enjoy your spooky, delicious creation!
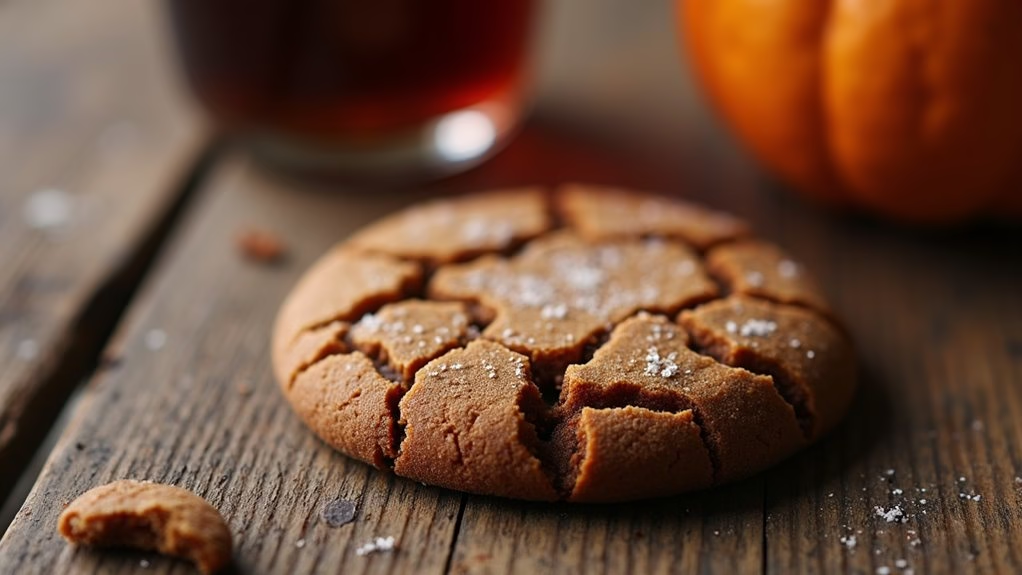
Dark and Stormy Gingerbread Cookies

Dark and Stormy Gingerbread Cookies are a sophisticated twist on the classic holiday treat, perfect for an adult Halloween gathering. These cookies are infused with the spicy warmth of ginger and the boldness of dark rum, providing a deliciously complex flavor profile. The addition of molasses and spices gives these cookies a delectable depth and richness, making them an indulgent treat for the fall season.
Whether you’re hosting a Halloween party or simply want to enjoy a cozy night in with a spiced cocktail, these cookies are a delightful complement. Designed to serve 4-6 people, these Dark and Stormy Gingerbread Cookies will fill your home with the inviting aroma of spices and rum.
The process involves creating a simple dough, chilling it to enhance the flavors, and then baking the cookies to perfection. They’re easy to make, yet offer an impressive presentation with their dark color and hint of spice. Enjoy them with a glass of dark rum or your favorite autumn beverage for a truly festive experience.
Ingredients:
- 2 3/4 cups all-purpose flour
- 1 tablespoon ground ginger
- 1 teaspoon ground cinnamon
- 1/2 teaspoon ground cloves
- 1/4 teaspoon ground nutmeg
- 1/2 teaspoon salt
- 1/2 teaspoon baking soda
- 1/2 cup unsalted butter, softened
- 1/2 cup dark brown sugar, packed
- 1 large egg
- 1/2 cup unsulfured molasses
- 2 tablespoons dark rum
- 1 teaspoon vanilla extract
- 1/4 cup granulated sugar (for rolling)
Instructions:
1. Prepare the Dry Ingredients:
In a medium-sized mixing bowl, whisk together the all-purpose flour, ground ginger, ground cinnamon, ground cloves, ground nutmeg, salt, and baking soda. Verify the spices are evenly distributed throughout the flour. Set aside.
2. Mix the Wet Ingredients:
In a large bowl, cream the softened butter and dark brown sugar together using an electric mixer on medium speed until the mixture is light and fluffy. Add the egg and mix well. Then, pour in the molasses, dark rum, and vanilla extract, and continue to beat until all ingredients are combined.
3. Combine the Mixtures:
Gradually add the dry ingredients to the wet ingredients, mixing on low speed until the dough forms. Verify there are no dry flour pockets in the dough; it should be smooth and slightly sticky.
4. Chill the Dough:
Wrap the dough in plastic wrap and refrigerate for at least 2 hours. Chilling the dough helps to firm it up and enhances the flavors of the spices and rum.
5. Shape the Cookies:
Preheat the oven to 350°F (175°C) and line two baking sheets with parchment paper. Use a tablespoon to scoop out the dough and roll it into balls. Roll each ball in granulated sugar to coat, then place them on the prepared baking sheets about 2 inches apart.
6. Bake the Cookies:
Bake in the preheated oven for 10-12 minutes, or until the edges are firm but the centers are still soft. Remove from the oven and allow the cookies to cool on the baking sheets for 5 minutes before transferring them to a wire rack to cool completely.
Extra Tips:
For an extra burst of flavor, you can add a pinch of cayenne pepper to the dough for a spicy kick. If you prefer softer cookies, slightly underbake them and allow them to cool on the baking sheet to finish cooking.
For more uniform cookie shapes, use a cookie scoop to measure out the dough before rolling it into balls. Store any leftover cookies in an airtight container to maintain their chewy texture; they’ll keep well for up to a week. Enjoy the cookies with a hot toddy or a glass of mulled wine for a full Halloween-themed experience.