
As someone who adores hosting festive gatherings, I understand the challenge of catering to everyone’s dietary needs without compromising on flavor. I’m excited to share my cherished gluten-free Christmas recipes that are bursting with taste. Think succulent herb-roasted turkey paired with honey-glazed ham, alongside savory sides like garlic and herb mashed potatoes. These dishes are sure to delight your taste buds and impress your guests. Ready to explore what’s next?
Herb-Roasted Turkey With Gluten-Free Gravy
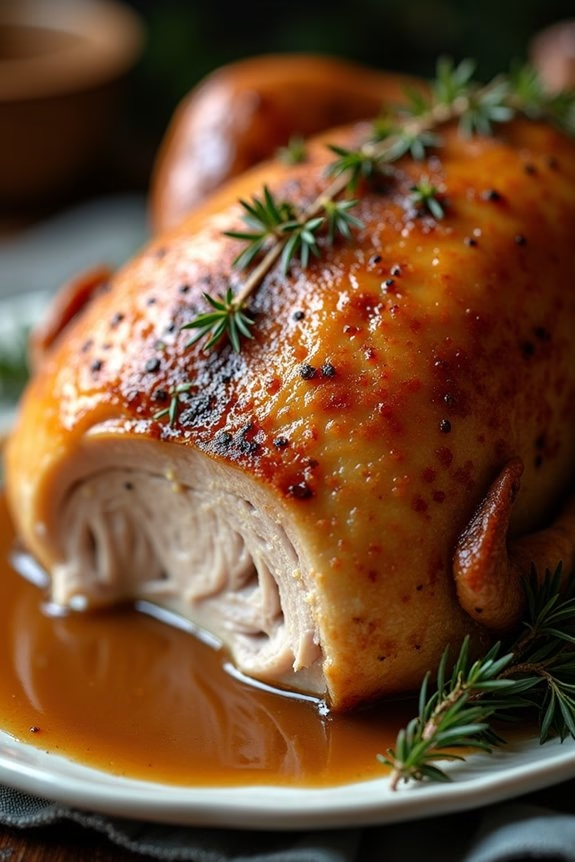
Herb-Roasted Turkey With Gluten-Free Gravy is a delightful main course option for a festive Christmas dinner that guarantees everyone, including those with gluten sensitivities, can enjoy a traditional holiday meal. This recipe focuses on infusing the turkey with aromatic herbs and creating a rich, savory gravy that will complement every bite.
Whether you’re hosting a small intimate gathering or a larger family affair, this dish promises to be the star of your dinner table.
The key to a perfectly roasted turkey is in the preparation and seasoning. By using a combination of fresh herbs, butter, and a few simple seasonings, you can create a beautifully browned and flavorful turkey. The gluten-free gravy is made using the turkey drippings and a gluten-free flour alternative, assuring it’s thick and delicious, without any gluten.
This recipe serves 4-6 people, making it perfect for a cozy holiday celebration.
Ingredients:
- 1 whole turkey (8-10 pounds)
- 1/2 cup unsalted butter, softened
- 1 tablespoon fresh rosemary, chopped
- 1 tablespoon fresh thyme, chopped
- 1 tablespoon fresh sage, chopped
- 1 teaspoon salt
- 1 teaspoon black pepper
- 1 lemon, halved
- 1 onion, quartered
- 4 cups chicken broth
- 1/4 cup gluten-free all-purpose flour
- 1/4 cup dry white wine (optional)
Cooking Instructions:
- Preheat and Prepare: Preheat your oven to 325°F (165°C). Remove the turkey from the refrigerator and let it sit at room temperature for about 30 minutes. This helps the turkey cook more evenly.
- Season the Turkey: In a small bowl, combine the softened butter, chopped rosemary, thyme, and sage. Mix well. Carefully loosen the skin on the turkey breast by inserting your fingers between the skin and the meat. Rub the herb butter mixture generously under the skin and all over the turkey. Season the entire turkey with salt and pepper.
- Stuff and Truss: Stuff the cavity of the turkey with the lemon halves and onion quarters. If desired, truss the turkey legs with kitchen twine to guarantee they cook evenly.
- Roast the Turkey: Place the turkey on a rack in a roasting pan. Add the chicken broth to the bottom of the pan. Roast the turkey in the preheated oven, basting occasionally with the pan juices, for about 2.5 to 3 hours, or until the internal temperature reaches 165°F (74°C) when checked with a meat thermometer in the thickest part of the thigh.
- Prepare the Gravy: Once the turkey is done, transfer it to a serving platter and let it rest for 20-30 minutes before carving. Meanwhile, pour the pan drippings into a saucepan. Skim off excess fat, and then place the saucepan over medium heat. Stir in the gluten-free flour, whisking continuously until smooth. Slowly add in the white wine (if using) and additional chicken broth as needed to reach your desired consistency. Simmer for 5-10 minutes, allowing the gravy to thicken.
- Serve: Slice the turkey and serve with the gluten-free gravy on the side. Enjoy your delicious herb-roasted turkey with family and friends!
Extra Tips:
For a crispier skin, you can dry the turkey skin with paper towels before applying the herb butter. If you don’t have fresh herbs, dried herbs can be substituted, but use about a third of the amount as dried herbs are more concentrated.
If you want to add extra flavor to your gravy, consider adding a splash of balsamic vinegar or a tablespoon of Dijon mustard. Remember, resting the turkey before carving is essential as it allows the juices to redistribute, resulting in a juicier turkey.
Honey-Glazed Ham With Dijon Mustard
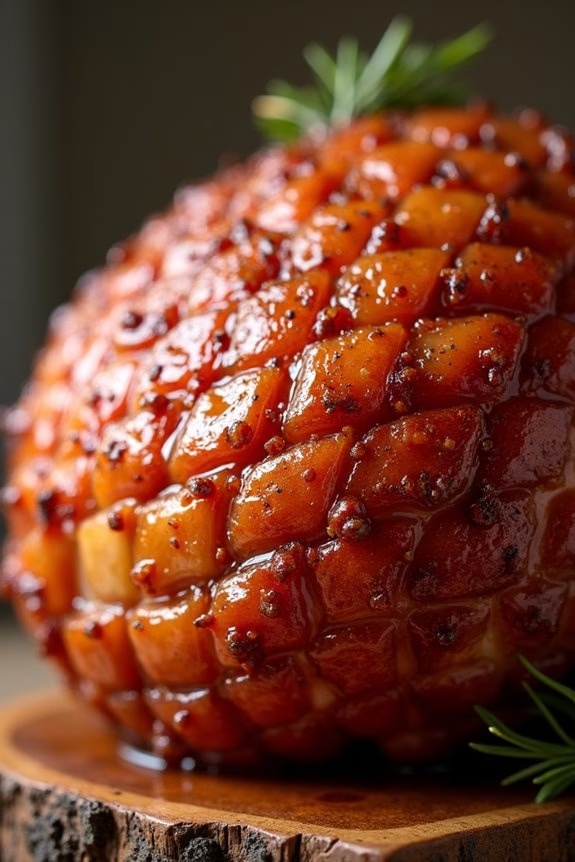
Indulge in a festive feast with this delightful Honey-Glazed Ham with Dijon Mustard, a perfect centerpiece for your gluten-free Christmas dinner. This recipe combines the savory richness of ham with a sweet and tangy glaze that’s bound to impress your guests. The honey and Dijon mustard blend seamlessly to create a beautiful caramelization on the ham, resulting in a mouth-watering dish that’s both simple to prepare and utterly delicious.
Crafting this dish involves a careful balance of flavors and a few hours of baking to achieve the perfect texture and taste. The glaze penetrates the ham, enhancing its natural flavors while keeping it moist and tender. This recipe is designed to serve 4-6 people, making it ideal for a small family gathering or an intimate holiday meal. Pair it with some gluten-free sides to complete your Christmas dinner spread.
Ingredients (Serving Size: 4-6 people):
- 1 (4-5 lbs) bone-in ham
- 1/2 cup honey
- 1/4 cup Dijon mustard
- 1/4 cup apple cider vinegar
- 1/4 cup brown sugar
- 1/2 teaspoon ground cloves
- 1/2 teaspoon ground black pepper
- 1/4 teaspoon salt
Cooking Instructions:
- Preheat the Oven: Begin by preheating your oven to 325°F (165°C). This temperature will guarantee that your ham cooks evenly and remains juicy.
- Prepare the Ham: Remove the ham from any packaging and place it on a rack in a shallow roasting pan. If the ham has a thick layer of fat, score it in a diamond pattern without cutting into the meat. This allows the glaze to penetrate more effectively.
- Mix the Glaze: In a medium-sized bowl, combine the honey, Dijon mustard, apple cider vinegar, brown sugar, ground cloves, black pepper, and salt. Stir until the ingredients are well incorporated, forming a smooth glaze.
- Apply the Glaze: Using a brush, generously coat the ham with half of the glaze mixture. Be sure to get the glaze into the scored pattern to maximize flavor absorption.
- Bake the Ham: Place the roasting pan in the preheated oven. Bake the ham for approximately 1.5 to 2 hours, or until the internal temperature reaches 140°F (60°C). Baste the ham with the remaining glaze every 30 minutes to enhance the flavor and maintain moisture.
- Rest the Ham: Once cooked, remove the ham from the oven and let it rest for about 15 minutes before slicing. This resting period allows the juices to redistribute throughout the meat, making it more tender.
Extra Tips:
When selecting a ham, consider a bone-in option, as it tends to have better flavor and moisture retention. If you prefer, you can use a spiral-cut ham to make slicing easier.
For an extra burst of flavor, you can add a bit of orange zest to the glaze mixture. Remember to keep an eye on the ham as it bakes to prevent the glaze from burning; if it starts to darken too much, loosely cover the ham with foil.
Enjoy your Honey-Glazed Ham with Dijon Mustard as a stunning gluten-free centerpiece for your Christmas dinner!
Stuffed Acorn Squash With Quinoa and Cranberries
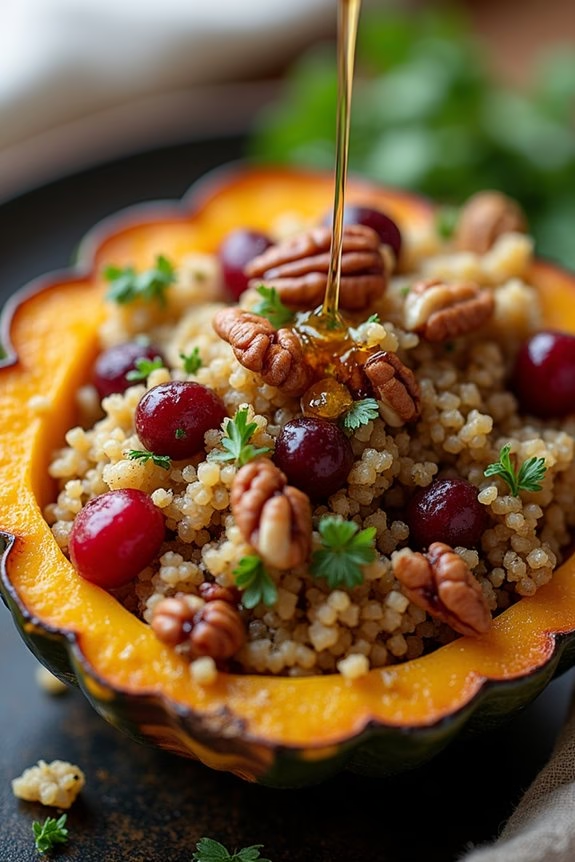
Stuffed Acorn Squash With Quinoa and Cranberries is a delightful gluten-free option that brings a festive touch to your Christmas dinner table. This dish combines the nutty flavor of quinoa with the tartness of cranberries, all wrapped in the sweet embrace of roasted acorn squash. The bright colors and rich flavors make it not only a feast for the palate but also a visually stunning centerpiece.
Perfect for those seeking a plant-based dish, this recipe is both nourishing and satisfying, ensuring that all your guests, regardless of dietary preferences, can enjoy the Christmas feast. The balance of flavors in this dish is enhanced by the addition of crunchy pecans, aromatic herbs, and a hint of maple syrup, resulting in a harmonious blend that captures the essence of the holiday season.
The acorn squash serves as an edible bowl, holding the savory stuffing that’s both hearty and wholesome. Not only is this dish easy to prepare, but it also allows you to get creative with the stuffing ingredients, making it versatile enough to suit any taste. Whether you’re accommodating gluten-free guests or just want to add something unique to your holiday spread, this stuffed acorn squash is an excellent choice.
Ingredients:
- 3 medium-sized acorn squashes
- 1 cup quinoa
- 2 cups vegetable broth
- 1 cup fresh cranberries
- 1/2 cup pecans, chopped
- 1 small onion, finely chopped
- 3 tablespoons olive oil
- 2 tablespoons maple syrup
- 1 teaspoon ground cinnamon
- 1/2 teaspoon salt
- 1/4 teaspoon black pepper
- 1 tablespoon fresh thyme leaves
- 1/4 cup fresh parsley, chopped
Instructions:
- Preheat and Prepare Squash: Preheat your oven to 400°F (200°C). Cut each acorn squash in half and scoop out the seeds. Lightly brush the cut sides with olive oil and place them cut side down on a baking sheet. Roast the squash in the oven for about 25-30 minutes, until they’re tender and golden.
- Cook Quinoa: While the squash is roasting, rinse the quinoa under cold water. In a medium saucepan, combine the quinoa and vegetable broth. Bring to a boil, then reduce to a simmer. Cover and cook for about 15 minutes, or until the quinoa is fluffy and all the liquid is absorbed.
- Prepare Stuffing: In a large skillet, heat the remaining olive oil over medium heat. Add the chopped onion and sauté for about 5 minutes until translucent. Stir in the cranberries, pecans, cinnamon, salt, and pepper. Cook until the cranberries begin to soften, about 3-5 minutes.
- Combine Ingredients: Add the cooked quinoa to the skillet with the cranberry mixture. Drizzle with maple syrup and sprinkle with thyme leaves. Stir well to combine all ingredients.
- Stuff the Squash: Remove the acorn squash from the oven and carefully turn them over. Fill each squash half with the quinoa mixture, pressing gently to pack the filling.
- Bake Again: Return the stuffed squash to the oven and bake for an additional 10-15 minutes, until everything is heated through and the tops are slightly crispy.
- Garnish and Serve: Remove from the oven and sprinkle with fresh parsley before serving. Enjoy your festive and flavorful Stuffed Acorn Squash with Quinoa and Cranberries.
Extra Tips:
When choosing acorn squash, look for ones that are firm and have a dull, rather than shiny, skin, as these tend to be sweeter. You can prepare the quinoa mixture a day in advance, making the day-of preparation quicker and easier.
If you prefer a bit more sweetness, consider adding a handful of raisins or chopped dried apricots to the stuffing. Feel free to experiment with other herbs like rosemary or sage to suit your taste preferences.
Garlic and Herb Mashed Potatoes
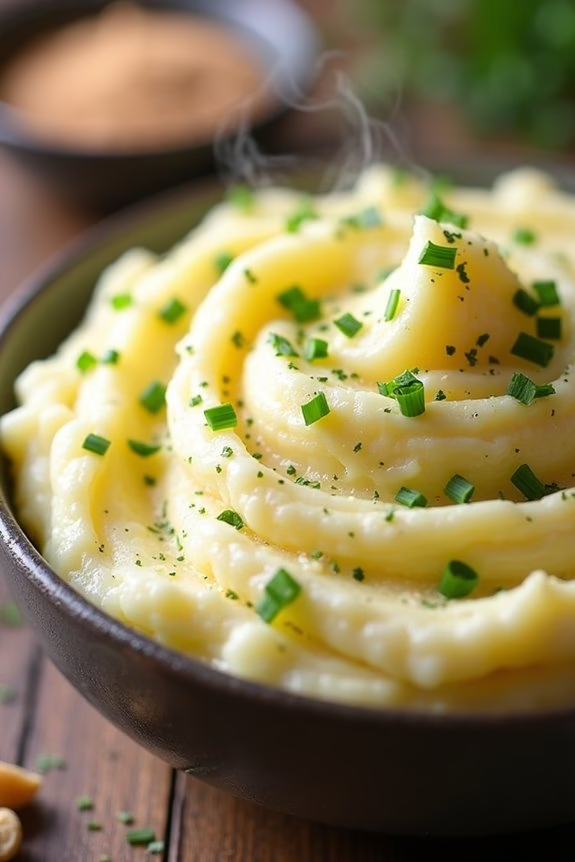
Garlic and Herb Mashed Potatoes are a delightful addition to any Gluten-Free Christmas Dinner. These mashed potatoes are infused with the aromatic flavors of garlic and fresh herbs, making them a flavorful side dish that complements any holiday main course. Not only are they delicious, but they’re also naturally gluten-free, making them a perfect choice for guests with dietary restrictions.
The creamy texture combined with the savory taste of garlic and herbs creates a comforting dish that’s sure to be a hit at your festive gathering. Preparing Garlic and Herb Mashed Potatoes is straightforward and requires only a few simple ingredients. The key to achieving the perfect consistency and flavor lies in the quality of the potatoes and the freshness of the herbs used.
This dish serves 4-6 people, making it an excellent option for family dinners or small holiday gatherings. With a little bit of preparation and attention to detail, you can create a memorable side dish that will leave your guests asking for seconds.
Ingredients:
- 3 pounds of Yukon Gold potatoes, peeled and diced
- 4 cloves of garlic, minced
- 1/3 cup of unsalted butter
- 1/2 cup of heavy cream
- 1/4 cup of fresh chives, chopped
- 1/4 cup of fresh parsley, chopped
- Salt and pepper to taste
Instructions:
- Prepare the Potatoes: Begin by peeling the Yukon Gold potatoes and cutting them into roughly 1-inch cubes. This guarantees they cook evenly. Place the diced potatoes in a large pot and fill it with enough cold water to cover them by about an inch.
- Cook the Potatoes: Bring the pot of water with potatoes to a boil over medium-high heat. Once boiling, reduce the heat to a simmer and cook for about 15-20 minutes, or until the potatoes are tender when pierced with a fork.
- Drain and Mash: Once the potatoes are cooked, drain them thoroughly in a colander. Return the drained potatoes to the pot. Use a potato masher or a ricer to mash the potatoes until they reach your desired consistency.
- Infuse with Garlic and Butter: In a small saucepan, melt the unsalted butter over medium heat. Add the minced garlic and cook for 1-2 minutes, or until fragrant. Be careful not to brown the garlic, as this can make it bitter.
- Combine and Season: Pour the garlic butter mixture over the mashed potatoes. Add the heavy cream, chopped chives, and parsley. Stir everything together gently until well combined. Season with salt and pepper to taste.
- Serve: Transfer the mashed potatoes to a serving dish and garnish with a few extra herbs if desired. Serve warm.
Extra Tips:
For an even creamier texture, consider using a potato ricer instead of a masher. This tool helps achieve a smooth consistency with minimal effort. Additionally, you can customize the herbs to your preference; rosemary or thyme can be excellent substitutes or additions.
If you prefer a lighter version, substitute half of the heavy cream with chicken or vegetable broth. Finally, making sure your potatoes are dry after draining will prevent the mashed potatoes from becoming watery.
Roasted Brussels Sprouts With Balsamic Glaze
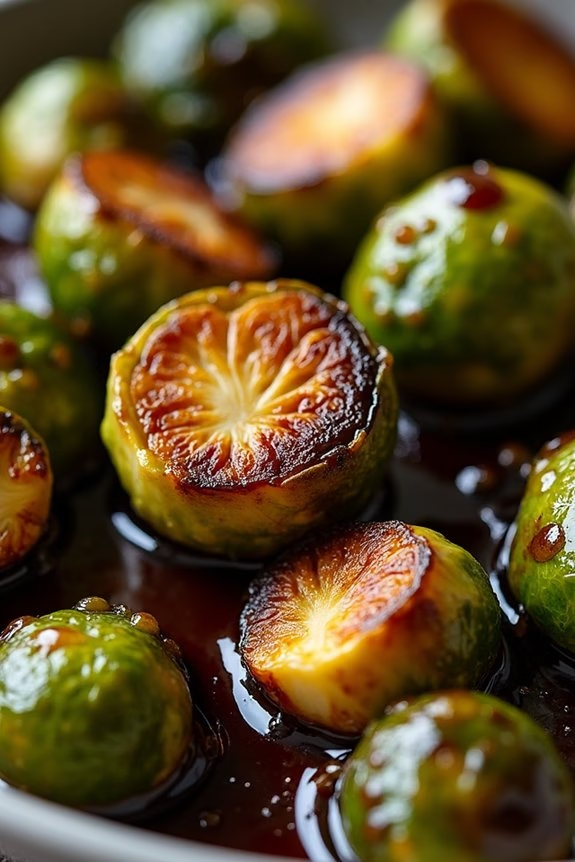
Roasted Brussels Sprouts With Balsamic Glaze is a delightful side dish perfect for your gluten-free Christmas dinner. The natural sweetness of the balsamic glaze complements the earthy flavor of the Brussels sprouts, creating a dish that’s both healthy and indulgent. This recipe is simple to prepare and certain to impress your guests with its vibrant flavors and beautiful presentation.
Brussels sprouts aren’t only delicious but also packed with nutrients. When roasted, they develop a crispy outer layer while remaining tender inside. The addition of balsamic glaze adds a tangy sweetness that elevates the dish to a whole new level. Whether you’re serving this at a festive gathering or a cozy family dinner, Roasted Brussels Sprouts With Balsamic Glaze is a must-try addition to your holiday menu.
Ingredients (Serves 4-6):
- 1 1/2 pounds Brussels sprouts, trimmed and halved
- 3 tablespoons olive oil
- Salt, to taste
- Pepper, to taste
- 1/4 cup balsamic vinegar
- 1 tablespoon honey
Instructions:
- Preheat the Oven: Preheat your oven to 400°F (200°C) to guarantee it’s hot enough to roast the sprouts to perfection.
- Prepare the Brussels Sprouts: Trim the ends and remove any yellow outer leaves from the Brussels sprouts. Cut them in half for even cooking.
- Season the Sprouts: In a large bowl, toss the halved Brussels sprouts with olive oil, salt, and pepper until evenly coated.
- Roast the Brussels Sprouts: Spread the seasoned Brussels sprouts in a single layer on a baking sheet. Roast in the preheated oven for 20-25 minutes, or until they’re golden brown and tender, stirring halfway through for even roasting.
- Make the Balsamic Glaze: While the Brussels sprouts are roasting, combine the balsamic vinegar and honey in a small saucepan over medium heat. Bring to a simmer and let it reduce for about 5-7 minutes until it thickens slightly. Remove from heat.
- Combine and Serve: Once the Brussels sprouts are done roasting, drizzle the balsamic glaze over them and toss gently to coat. Serve immediately while warm.
Extra Tips:
When preparing Roasted Brussels Sprouts With Balsamic Glaze, be sure to monitor the roasting process closely. Over-roasting can lead to a burnt and bitter taste, so aim for a golden brown finish.
You can prepare the balsamic glaze ahead of time and store it in the refrigerator; just warm it up before drizzling over the sprouts. For added flavor, consider sprinkling some freshly grated Parmesan cheese or toasted nuts over the dish before serving. Enjoy this gluten-free delight as part of your festive feast!
Gluten-Free Cornbread Stuffing

Celebrate the festive season with a deliciously hearty Gluten-Free Cornbread Stuffing. This dish is a perfect addition to your Christmas dinner table, allowing those with gluten sensitivities to enjoy a traditional holiday favorite. Made with rich, savory flavors, this stuffing combines gluten-free cornbread with aromatic herbs and vegetables for a delightful side dish that pairs beautifully with roasted turkey or ham.
It’s satisfyingly crisp on the outside and tender on the inside, making it a comforting and crowd-pleasing choice. The key to a successful Gluten-Free Cornbread Stuffing is starting with a flavorful gluten-free cornbread, which you can prepare in advance.
Combine it with a medley of vegetables sautéed in butter, enhanced with the earthy aroma of sage and thyme. The broth adds moisture, while the gentle baking process melds all the flavors together. This dish serves 4-6 people, making it perfect for intimate gatherings or as part of a larger holiday feast.
Ingredients:
- 6 cups gluten-free cornbread, cubed
- 1 cup celery, diced
- 1 cup onion, diced
- 1/2 cup butter
- 2 teaspoons fresh sage, chopped
- 1 teaspoon fresh thyme, chopped
- 1/2 teaspoon salt
- 1/2 teaspoon black pepper
- 1 1/2 cups gluten-free chicken or vegetable broth
- 2 eggs, beaten
Cooking Instructions:
- Prepare the Cornbread: If you haven’t done so already, start by baking a batch of gluten-free cornbread. Allow it to cool and then cube it into 1-inch pieces. Spread the cubes on a baking sheet and let them dry out overnight or toast them in a 300°F (150°C) oven for about 10-15 minutes until firm but not browned.
- Sauté Vegetables: In a large skillet, melt the butter over medium heat. Add the diced celery and onion, and sauté until the vegetables are softened, about 5-7 minutes. Stir in the chopped fresh sage, thyme, salt, and black pepper, and cook for an additional 2 minutes to release their flavors.
- Combine Ingredients: In a large mixing bowl, combine the dried cornbread cubes with the sautéed vegetables. Pour the beaten eggs over the mixture and gently toss to combine. Gradually add the broth, a little at a time, until the cornbread is moist but not soggy.
- Bake the Stuffing: Preheat your oven to 350°F (175°C). Transfer the cornbread mixture into a greased 9×13-inch baking dish, spreading it evenly. Cover the dish with aluminum foil and bake for 20 minutes. Remove the foil and bake for an additional 15-20 minutes, or until the top is golden brown and crispy.
- Serve: Remove the stuffing from the oven and let it cool for a few minutes before serving. This allows the flavors to set and makes it easier to scoop.
Extra Tips:
For added flavor, consider incorporating gluten-free sausage or diced apples into the stuffing mixture. Be sure to taste test the seasoning before baking, as the flavor can vary based on the type of cornbread and broth used.
If the stuffing appears dry before baking, add a bit more broth to achieve the desired consistency. Remember to use fresh herbs for the best flavor, but dried herbs can be substituted in a pinch—just use about a third of the fresh amount.
Cranberry Orange Relish
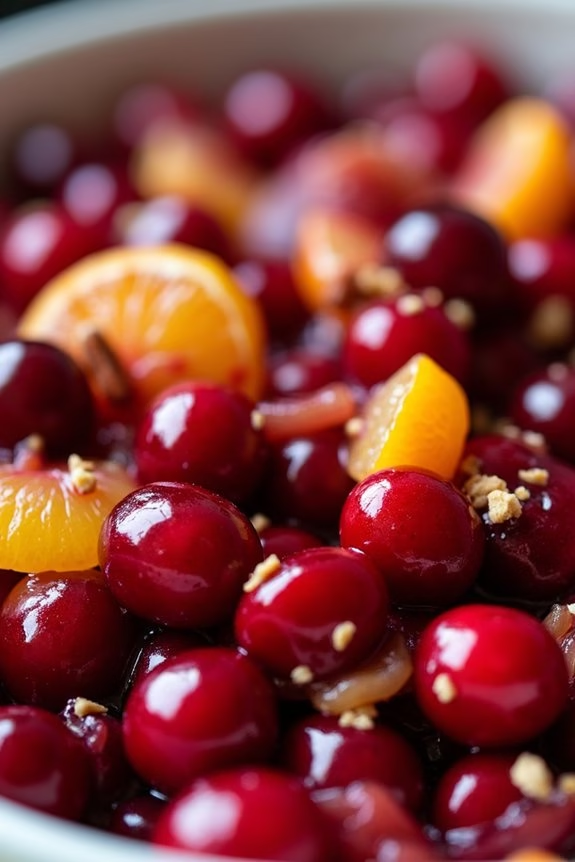
Cranberry Orange Relish is a delightful addition to any gluten-free Christmas dinner table. This fresh and tangy relish combines the tartness of cranberries with the sweet citrus flavor of oranges, creating a vibrant and festive accompaniment to your holiday meal. Perfectly balancing sweet and sour notes, it complements roasted meats beautifully and offers a revitalizing contrast to richer dishes.
This recipe is quick to prepare and can easily be made ahead of time, allowing the flavors to meld together for an even more delicious result. Not only is this relish gluten-free, but it also uses simple, wholesome ingredients that you can feel good about serving to your family and guests.
The bright colors and zesty flavors make it a standout side dish that’s sure to impress. Whether you’re hosting a large gathering or enjoying an intimate dinner, Cranberry Orange Relish is a must-have on your Christmas menu. Here’s how you can make it at home for 4-6 people:
Ingredients:
- 2 cups fresh cranberries
- 1 large orange, peeled and segmented
- 1/2 cup granulated sugar
- 1/4 cup orange juice
- 1 tablespoon orange zest
- 1/2 teaspoon ground cinnamon
- 1/4 teaspoon ground nutmeg
- 1/4 cup chopped pecans (optional)
Instructions:
- Prepare the Cranberries: Rinse the fresh cranberries under cold water and remove any stems or discolored berries. Pat them dry with a paper towel.
- Segment the Orange: Peel the orange and separate it into segments. Remove any seeds and white pith to guarantee a sweeter, less bitter flavor in your relish.
- Combine Ingredients: In a food processor, combine the cranberries, orange segments, granulated sugar, orange juice, orange zest, ground cinnamon, and ground nutmeg. Pulse until the mixture is finely chopped but not pureed, maintaining some texture.
- Incorporate Pecans: If desired, stir in the chopped pecans for added crunch and flavor. This step is optional, depending on your preference for nuts in the relish.
- Chill the Relish: Transfer the relish to a bowl and cover it. Refrigerate for at least 2 hours, or overnight, to allow the flavors to meld together. This chilling period will enhance the taste and texture of the relish.
- Serve: Before serving, give the relish a good stir and taste. Adjust sweetness by adding a bit more sugar if necessary. Serve chilled alongside your Christmas dinner.
Extra Tips:
For a more pronounced orange flavor, consider adding a few drops of pure orange extract. If you prefer a sweeter relish, you can adjust the sugar to taste, keeping in mind that the natural tartness of the cranberries will mellow as the relish sits.
Additionally, if you don’t have a food processor, you can finely chop the cranberries and orange by hand. This relish keeps well in the refrigerator for up to a week, so feel free to make it in advance to save time on your busy cooking day. Enjoy this colorful and flavorful condiment as part of your gluten-free holiday celebration!
Mixed Green Salad With Pomegranate Seeds and Walnuts
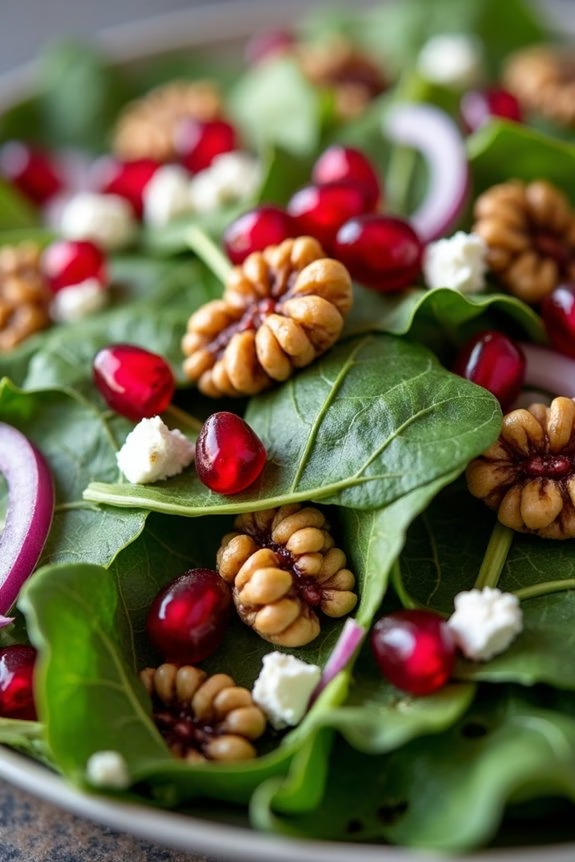
This Mixed Green Salad with Pomegranate Seeds and Walnuts is a vibrant and festive addition to your gluten-free Christmas dinner. The combination of crisp mixed greens, juicy pomegranate seeds, and crunchy walnuts creates a delightful blend of textures and flavors. The salad is topped with a light and tangy vinaigrette, enhancing each ingredient’s natural taste and adding a revitalizing zing to every bite.
This salad isn’t only simple to make but also visually appealing, making it a perfect starter or side dish for your holiday meal. Pomegranate seeds add a pop of color and a burst of sweetness, while the walnuts provide a satisfying crunch and a dose of healthy fats. The mixed greens offer a variety of nutrients and a fresh base for the other ingredients.
This salad can be prepared in under 20 minutes, allowing you more time to focus on other aspects of your holiday feast. It serves 4-6 people, making it an ideal choice for a family gathering or a small Christmas dinner party.
Ingredients (Serves 4-6):
- 6 cups mixed salad greens (arugula, spinach, and romaine)
- 1 cup pomegranate seeds
- 1 cup walnut halves, toasted
- 1/2 cup crumbled feta cheese (optional)
- 1/4 cup red onion, thinly sliced
- 1/4 cup olive oil
- 3 tablespoons balsamic vinegar
- 1 tablespoon Dijon mustard
- 1 tablespoon honey
- Salt and pepper to taste
Cooking Instructions:
- Prepare the Greens: Start by washing the mixed salad greens thoroughly under cold water. Use a salad spinner to remove any excess water, confirming the greens are dry. Place them in a large salad bowl.
- Toast the Walnuts: Preheat your oven to 350°F (175°C). Spread the walnut halves on a baking sheet in a single layer. Toast them in the oven for about 8-10 minutes, or until they’re golden brown and fragrant. Remove from the oven and allow them to cool.
- Make the Vinaigrette: In a small bowl, whisk together the olive oil, balsamic vinegar, Dijon mustard, and honey. Season with salt and pepper to taste. Adjust the seasoning if necessary, balancing the sweetness and acidity to your preference.
- Assemble the Salad: Add the cooled walnuts, pomegranate seeds, red onion slices, and crumbled feta cheese (if using) to the bowl with the salad greens. Toss gently to combine all the ingredients.
- Dress the Salad: Drizzle the prepared vinaigrette over the salad. Toss the salad gently to confirm all the ingredients are evenly coated with the dressing.
- Serve: Transfer the salad to a serving platter or individual plates. Serve immediately to enjoy the crispness of the greens and the freshness of the other ingredients.
Extra Tips:
For the best flavor, use high-quality olive oil and balsamic vinegar in your vinaigrette. If pomegranate seeds aren’t available, you can substitute with dried cranberries or chopped fresh apples for a similar sweetness.
Toasting the walnuts enhances their flavor, but be careful not to burn them—keep a close eye on them in the oven. If you prefer a dairy-free version, simply omit the feta cheese. This salad can be prepared a few hours in advance; just wait to add the dressing until right before serving to maintain the freshness of the greens.
Maple-Glazed Carrots With Thyme
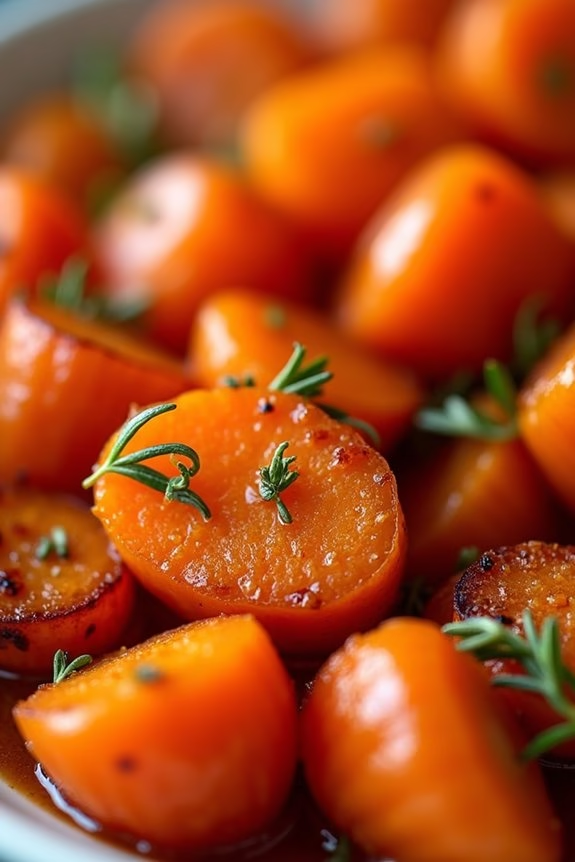
Maple-Glazed Carrots With Thyme is a delightful side dish that perfectly complements any Christmas dinner, especially for those adhering to a gluten-free diet. The natural sweetness of carrots is enhanced by a rich maple glaze, while the aromatic thyme adds a layer of earthiness that balances the flavors beautifully.
This dish not only adds vibrancy to your festive table with its bright orange hue but also satisfies the palate with its sweet-savory flavor profile, making it a crowd-pleaser for guests of all ages.
This recipe serves 4-6 people and is simple enough to prepare without taking too much time away from other holiday cooking duties. The key to success with this dish lies in the quality of ingredients; fresh carrots and pure maple syrup will yield the best results.
With a quick preparation and cooking process, Maple-Glazed Carrots With Thyme is an ideal choice for a stress-free addition to your Christmas menu.
Ingredients:
- 2 lbs carrots, peeled and cut into 2-inch pieces
- 2 tablespoons olive oil
- 1/4 cup pure maple syrup
- 1 tablespoon fresh thyme leaves, roughly chopped
- Salt and pepper to taste
- 1 tablespoon unsalted butter
Instructions:
- Preheat and Prepare: Preheat your oven to 400°F (200°C). While the oven is heating, prepare the carrots by peeling them and cutting them into 2-inch pieces for even cooking.
- Coat the Carrots: In a large mixing bowl, toss the carrot pieces with olive oil, ensuring each piece is well-coated. Sprinkle with salt and pepper to taste.
- Arrange for Roasting: Spread the carrots evenly on a baking sheet lined with parchment paper, ensuring they’re in a single layer for even roasting.
- Roast the Carrots: Place the baking sheet in the preheated oven and roast the carrots for 20 minutes. This initial roasting helps develop a nice caramelized exterior.
- Prepare the Glaze: While the carrots are roasting, combine the maple syrup and butter in a small saucepan over low heat. Stir until the butter has melted and the mixture is smooth. Add the fresh thyme leaves and mix well.
- Glaze the Carrots: After 20 minutes, remove the carrots from the oven. Drizzle the maple-thyme mixture over the carrots, using a spatula to toss and coat them evenly.
- Final Roasting: Return the glazed carrots to the oven and roast for an additional 10-15 minutes, or until they’re tender and slightly caramelized.
- Serve: Transfer the carrots to a serving platter and garnish with additional fresh thyme if desired. Serve warm for the best flavor.
Extra Tips:
When selecting carrots, opt for those that are firm, bright in color, and free from blemishes for the best texture and taste. If you prefer your carrots to have a bit of a crunch, reduce the second roasting time slightly.
Additionally, for a more robust flavor, consider adding a pinch of nutmeg or cinnamon to the glaze. Be sure to watch the carrots closely during the final roasting to prevent the maple syrup from burning.
Enjoy this festive dish that brings a perfect balance of sweetness and herby freshness to your Christmas table.
Gluten-Free Dinner Rolls
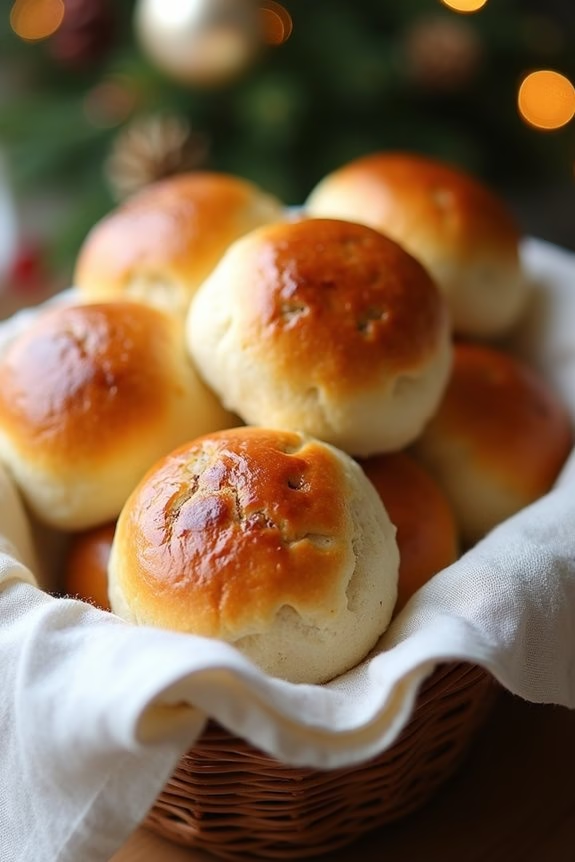
When it comes to a traditional Christmas dinner, few things can beat the allure of freshly baked dinner rolls. For those with gluten sensitivities, enjoying this classic side dish can often be a challenge. However, with this delightful recipe, everyone can partake in the joy of breaking bread together.
These Gluten-Free Dinner Rolls are soft, fluffy, and perfect for sopping up gravy or accompanying your favorite holiday dishes. Not only are they a delicious addition to your meal, but they’re also simple to prepare, guaranteeing that you can focus on the joy of the season rather than the stress of cooking.
This recipe yields enough rolls for a serving size of 4-6 people, making it perfect for a small family gathering or intimate holiday dinner. The use of gluten-free flour blend and other special ingredients guarantees that these rolls maintain their tender texture without sacrificing flavor.
With a few easy steps, you’ll have a warm basket of rolls ready to grace your festive table. Let’s explore the ingredients and steps needed to bring this gluten-free treat to life.
Ingredients:
- 2 cups gluten-free all-purpose flour
- 1 tablespoon xanthan gum (if not included in your flour blend)
- 2 teaspoons baking powder
- 1 teaspoon salt
- 1 tablespoon sugar
- 1 packet (2 1/4 teaspoons) active dry yeast
- 3/4 cup warm water (110°F)
- 2 tablespoons olive oil
- 1 large egg
- 1 teaspoon apple cider vinegar
- 2 tablespoons melted butter (optional, for brushing)
Cooking Instructions:
- Prepare the Yeast Mixture: In a small bowl, combine the warm water, sugar, and active dry yeast. Stir gently and let the mixture sit for about 5-10 minutes, or until it becomes frothy. This indicates that the yeast is active and ready to use.
- Mix the Dry Ingredients: In a large mixing bowl, whisk together the gluten-free all-purpose flour, xanthan gum, baking powder, and salt. Confirm that these dry ingredients are well combined to help create an even texture in the rolls.
- Combine Wet Ingredients: In a separate bowl, mix together the olive oil, egg, and apple cider vinegar. Whisk until they’re thoroughly combined, then add the frothy yeast mixture to this bowl.
- Form the Dough: Pour the wet ingredients into the bowl with the dry ingredients. Using a spatula or wooden spoon, mix until a sticky dough forms. Confirm there are no dry patches of flour remaining.
- Shape the Rolls: Lightly grease your hands with oil or butter to prevent sticking. Divide the dough into 8-10 equal portions and gently shape each portion into a ball. Place the shaped rolls onto a parchment-lined baking sheet, leaving a small amount of space between each roll to allow for rising.
- Let the Rolls Rise: Cover the rolls with a clean kitchen towel and place them in a warm, draft-free area. Let them rise for about 30-45 minutes, or until they’ve visibly increased in size.
- Preheat and Bake: Preheat your oven to 375°F (190°C). Once the rolls have risen, remove the towel and bake them in the preheated oven for 15-20 minutes, or until they’re golden brown and sound hollow when tapped on the bottom.
- Optional Butter Finish: If desired, brush the tops of the rolls with melted butter immediately after removing them from the oven. This will give them a beautiful sheen and enhance their flavor.
Extra Tips:
For the best texture, use a high-quality gluten-free all-purpose flour blend that includes xanthan gum, as it helps mimic the elasticity of gluten. If your blend doesn’t include it, adding a tablespoon of xanthan gum is essential.
Be sure to let the yeast mixture become frothy before incorporating it into the dough, as this step is vital for achieving the light and fluffy texture of the rolls. If you prefer a sweeter roll, you can increase the sugar slightly.
Finally, these rolls are best enjoyed fresh out of the oven, but they can be reheated gently in a warm oven before serving if made in advance.
Baked Butternut Squash Soup
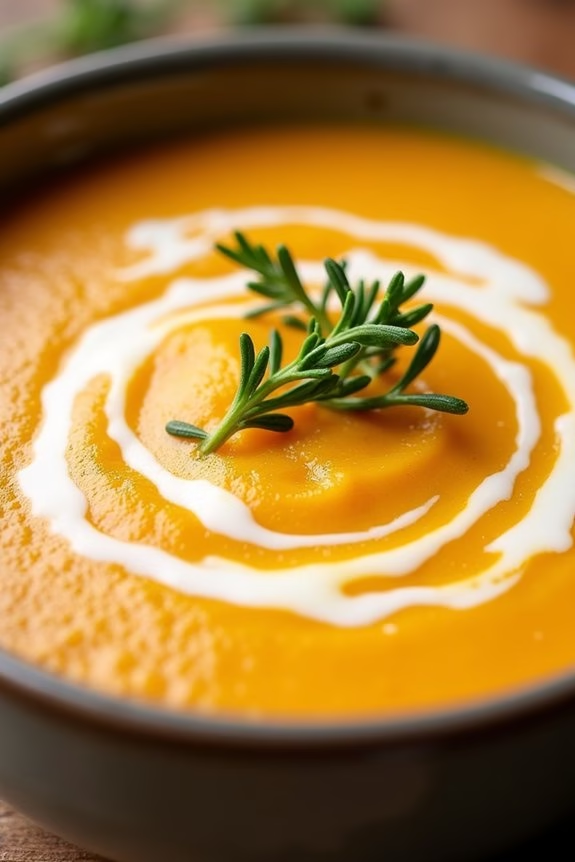
The Baked Butternut Squash Soup is a rich and creamy delight that perfectly complements the festive spirit of a gluten-free Christmas dinner. This dish isn’t only packed with flavor, but it’s also a nutritious option that can accommodate guests with dietary restrictions. The natural sweetness of the butternut squash is enhanced by the roasting process, bringing out its caramelized notes, which are then beautifully balanced with the savory flavors of garlic and onions.
This soup is heartwarming and comforting, making it an excellent addition to any Christmas menu. It’s a versatile dish that can be served as an appetizer or a main course, depending on your holiday plans. By using gluten-free ingredients and fresh produce, you guarantee that this dish maintains its wholesome integrity while keeping it safe for those with gluten sensitivities.
Ingredients (Serves 4-6):
- 1 large butternut squash (about 3 pounds)
- 2 tablespoons olive oil
- 1 large onion, chopped
- 3 cloves garlic, minced
- 4 cups vegetable broth
- 1 teaspoon salt
- 1/2 teaspoon black pepper
- 1/4 teaspoon ground nutmeg
- 1/2 cup coconut milk (or heavy cream for a non-vegan option)
- Fresh thyme or parsley, for garnish
Instructions:
- Preheat the Oven: Preheat your oven to 400°F (200°C). This temperature is ideal for roasting the butternut squash, guaranteeing it becomes tender and caramelized.
- Prepare the Squash: Cut the butternut squash in half lengthwise and remove the seeds. Brush the cut sides with a tablespoon of olive oil, then place the halves cut side down on a baking sheet.
- Roast the Squash: Roast the squash in the preheated oven for 45-50 minutes, or until the flesh is tender and easily pierced with a fork. Remove from the oven and let it cool slightly.
- Sauté the Aromatics: In a large pot, heat the remaining olive oil over medium heat. Add the chopped onion and sauté for about 5 minutes, or until softened. Add the minced garlic and cook for an additional 1-2 minutes, stirring frequently.
- Blend the Squash: Scoop the roasted squash flesh into the pot with the onions and garlic. Discard the skin. Stir to combine the ingredients.
- Simmer the Soup: Add the vegetable broth, salt, pepper, and nutmeg to the pot. Bring the mixture to a simmer and cook for 10 minutes to allow the flavors to meld together.
- Purée the Soup: Using an immersion blender, purée the soup until it’s smooth and creamy. Alternatively, you can transfer the soup in batches to a blender and blend until smooth, then return it to the pot.
- Add Creaminess: Stir in the coconut milk (or heavy cream) until fully incorporated. Heat the soup gently, making sure it doesn’t boil.
- Serve and Garnish: Ladle the soup into bowls and garnish with fresh thyme or parsley. Serve warm and enjoy!
Extra Tips:
When selecting butternut squash, look for ones that are firm and free from blemishes for the best flavor. If you prefer a thicker soup, reduce the amount of vegetable broth slightly.
For added depth, consider roasting a few cloves of garlic with the squash. If you opt for coconut milk, it provides a subtle sweetness and keeps the dish vegan-friendly, but heavy cream can be used if you prefer a richer, dairy-based soup.
Be sure to blend the soup thoroughly for the creamiest texture. Finally, if you find the soup too thick after blending, simply add more broth until it reaches your desired consistency.
Flourless Chocolate Cake

Indulge in a rich and decadent dessert this holiday season with a Flourless Chocolate Cake that’s perfect for a gluten-free Christmas dinner. This cake is incredibly moist and fudgy, with an intense chocolate flavor that will satisfy any chocolate lover’s cravings.
It’s a simple yet elegant dessert that can be dressed up with a dusting of powdered sugar or a scoop of vanilla ice cream for extra indulgence. The absence of flour not only makes it gluten-free but also enhances the dense, melt-in-your-mouth texture that makes this cake truly unforgettable.
This recipe yields a cake that serves 4-6 people, making it an ideal choice for a small family gathering or intimate holiday dinner. Using quality chocolate and fresh ingredients will elevate the flavors, making certain that this cake becomes a memorable centerpiece on your Christmas table.
Whether you’re accommodating dietary restrictions or simply looking to try something new, this Flourless Chocolate Cake will impress your guests with its luxurious taste and simplicity.
Ingredients:
- 8 ounces (227 grams) bittersweet or semisweet chocolate, chopped
- 1/2 cup (113 grams) unsalted butter, cut into pieces
- 3/4 cup (150 grams) granulated sugar
- 1/4 teaspoon salt
- 1 teaspoon vanilla extract
- 4 large eggs
- 1/2 cup (50 grams) unsweetened cocoa powder
Instructions:
- Preheat and Prepare: Preheat your oven to 375°F (190°C). Grease an 8-inch round cake pan and line the bottom with parchment paper for easy removal.
- Melt Chocolate and Butter: In a medium-sized heatproof bowl, combine the chopped chocolate and butter. Place over a pot of simmering water (double boiler method) and stir until completely melted and smooth. Remove from heat.
- Mix Sugar and Eggs: Stir in the granulated sugar, salt, and vanilla extract into the melted chocolate mixture until well combined. Allow the mixture to cool slightly.
- Incorporate Eggs: Add the eggs one at a time, whisking well after each addition. The mixture should be smooth and glossy.
- Add Cocoa Powder: Sift the cocoa powder over the chocolate mixture and gently fold it in using a spatula until fully incorporated and no streaks remain.
- Bake the Cake: Pour the batter into the prepared cake pan and smooth the top with a spatula. Bake in the preheated oven for 25-30 minutes or until the top has a thin crust and a toothpick inserted in the center comes out with a few moist crumbs.
- Cool and Serve: Allow the cake to cool in the pan on a wire rack for 10-15 minutes. Carefully run a knife around the edge of the pan, then invert the cake onto the rack to cool completely. Dust with powdered sugar before serving, if desired.
Extra Tips:
For the best results, use high-quality chocolate with a cocoa content of at least 60% to guarantee a rich flavor.
You can enhance the cake’s complexity by adding a teaspoon of espresso powder to the batter, which will intensify the chocolate flavor without adding a coffee taste.
If you find that the cake is sticking to the pan, gently warm the bottom of the pan over a stovetop flame or in the oven for a few seconds to help release it.
Serve the cake with fresh berries or a dollop of whipped cream to add a revitalizing contrast to the dense chocolate cake.
Gluten-Free Pumpkin Pie With Almond Crust

Gluten-Free Pumpkin Pie With Almond Crust is a delightful and festive dessert that perfectly complements a Christmas dinner. This recipe combines the warm, spicy flavors of pumpkin with a nutty, buttery almond crust that’s entirely gluten-free, guaranteeing that everyone at your holiday table can indulge without worry.
The smooth, creamy pumpkin filling is spiced with cinnamon, nutmeg, and ginger, creating a rich and comforting taste that evokes the spirit of the season. The almond crust adds a unique touch, offering a subtle sweetness and crunch that traditional crusts often lack.
This pie isn’t only a treat for those with gluten sensitivities but also a delicious option for anyone looking to try something new this holiday season. It’s a perfect make-ahead dessert that will impress your guests and leave them asking for seconds.
Ingredients for 4-6 servings:
- 1 1/2 cups almond flour
- 1/4 cup coconut sugar
- 1/4 teaspoon salt
- 1/4 cup melted coconut oil
- 1 tablespoon water
- 1 can (15 ounces) pumpkin puree
- 3/4 cup coconut milk
- 2/3 cup packed brown sugar
- 2 large eggs
- 1 1/2 teaspoons ground cinnamon
- 1/2 teaspoon ground ginger
- 1/4 teaspoon ground nutmeg
- 1/4 teaspoon ground cloves
- 1/2 teaspoon salt
- Whipped cream (optional, for serving)
Instructions:
- Preheat the Oven: Start by preheating your oven to 350°F (175°C). This guarantees that the oven is at the right temperature when you’re ready to bake the pie.
- Prepare the Almond Crust: In a medium bowl, combine almond flour, coconut sugar, and salt. Stir in the melted coconut oil and water until the mixture is well combined and forms a dough-like consistency.
- Form the Crust: Press the almond mixture evenly into the bottom and up the sides of a 9-inch pie pan. Make sure the crust is uniformly thick. Place the crust in the preheated oven and bake for 10 minutes. Remove from the oven and let it cool slightly while you prepare the filling.
- Mix the Pumpkin Filling: In a large bowl, whisk together the pumpkin puree, coconut milk, brown sugar, eggs, cinnamon, ginger, nutmeg, cloves, and salt until smooth and well blended.
- Fill the Crust: Pour the pumpkin mixture into the pre-baked almond crust, spreading it out evenly with a spatula.
- Bake the Pie: Return the pie to the oven and bake for 50-60 minutes, or until the filling is set and slightly puffed. A knife inserted near the center should come out clean.
- Cool the Pie: Allow the pie to cool completely at room temperature, then refrigerate for at least 2 hours before serving. This helps the filling to set fully and makes slicing easier.
- Serve: Serve chilled or at room temperature, optionally topped with a dollop of whipped cream.
Extra Tips:
When making Gluten-Free Pumpkin Pie With Almond Crust, it’s important to use canned pumpkin puree, not pumpkin pie filling, as the latter contains added sugars and spices that can alter the final taste of your pie.
If you prefer a slightly sweeter crust, you can increase the coconut sugar to 1/3 cup. To guarantee the pie filling sets properly, avoid opening the oven door frequently during baking, as this can cause the temperature to fluctuate.
Finally, make sure to refrigerate the pie for a few hours before serving to achieve the best texture and flavor.
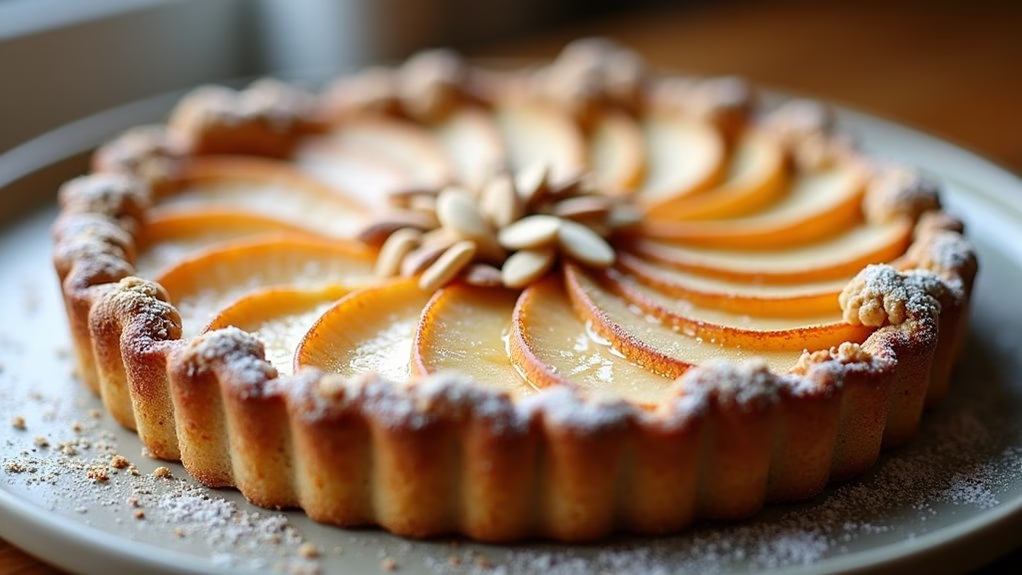
Spiced Pear and Almond Tart
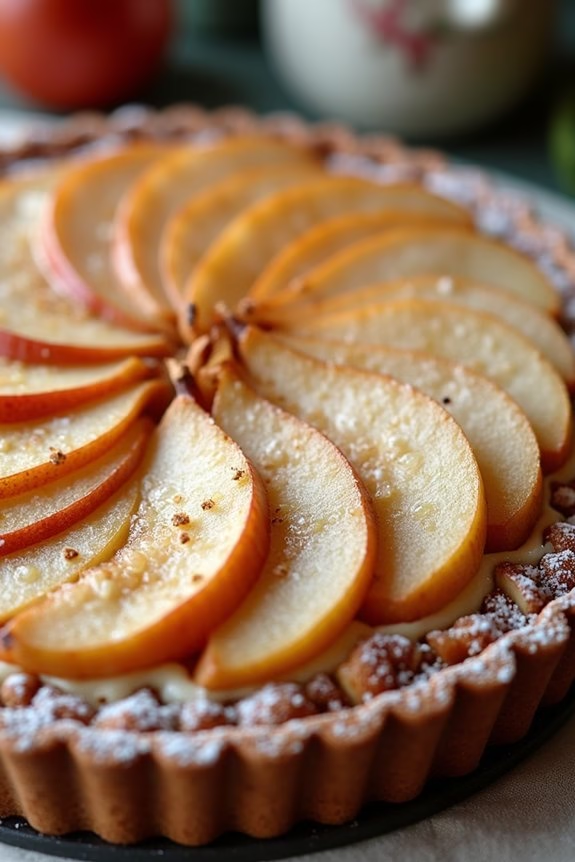
Delight your taste buds with this elegant and flavorful Spiced Pear and Almond Tart, a perfect gluten-free dessert for your Christmas dinner. This tart features a rich almond filling, delicately spiced pears, and a crisp gluten-free crust that will make your holiday table extra special. The blend of warm spices like cinnamon and nutmeg, combined with the natural sweetness of ripe pears, creates a symphony of flavors that’s both comforting and indulgent.
Not only is this tart a treat for the senses, but it also caters to those with gluten sensitivities, guaranteeing that everyone at your festive gathering can enjoy a slice. The creamy almond layer adds a velvety texture that pairs beautifully with the juicy, spiced pears. This recipe will serve 4-6 people, making it an ideal choice for an intimate holiday meal or as a delightful addition to a larger spread of gluten-free Christmas dinner recipes.
Ingredients:
- 1 ½ cups almond flour
- ¼ cup granulated sugar
- ¼ teaspoon salt
- ½ cup unsalted butter, chilled and diced
- 1 large egg
- 1 teaspoon vanilla extract
- 3 ripe pears, peeled, cored, and thinly sliced
- 2 tablespoons lemon juice
- 1 teaspoon ground cinnamon
- ½ teaspoon ground nutmeg
- ¼ cup honey
- ½ cup almond paste, crumbled
- 2 tablespoons sliced almonds
- 1 tablespoon powdered sugar (for dusting)
Instructions:
1. Prepare the Crust: Preheat your oven to 350°F (175°C). In a mixing bowl, combine the almond flour, granulated sugar, and salt. Add the chilled butter pieces and use a pastry cutter or your fingers to blend until the mixture resembles coarse crumbs.
Add the egg and vanilla extract, mixing until a dough forms. Press the dough into a 9-inch tart pan evenly across the bottom and up the sides. Refrigerate for 15 minutes to firm up.
2. Bake the Crust: Once chilled, place the tart pan on a baking sheet and bake in the preheated oven for 10-12 minutes, or until the edges are lightly golden. Remove from the oven and let cool.
3. Prepare the Pear Filling: In a large bowl, toss the sliced pears with lemon juice, cinnamon, and nutmeg to coat evenly. Arrange the pear slices over the cooled crust in an overlapping pattern.
4. Add Almond Layer: Crumble the almond paste over the arranged pears. Drizzle the honey over the top, guaranteeing even coverage. Sprinkle the sliced almonds on top for added texture.
5. Bake the Tart: Place the tart back in the oven and bake for another 25-30 minutes, or until the pears are tender and the almond topping is golden brown.
6. Finish and Serve: Allow the tart to cool slightly before dusting with powdered sugar. Serve warm or at room temperature for an invitingly sweet and spiced dessert.
Extra Tips:
For the best results, choose pears that are ripe but still firm to guarantee they hold their shape during baking. If almond paste is unavailable, you can substitute with a mixture of finely ground almonds and a touch of sugar.
Feel free to experiment with different spices or add a dash of ginger or cardamom for a unique twist. This tart pairs wonderfully with a scoop of vanilla ice cream or a dollop of whipped cream for an extra indulgent treat. Enjoy your gluten-free Spiced Pear and Almond Tart as a highlight of your Christmas dinner!