
Christmas mornings are the perfect time to enjoy a special gluten-free breakfast with loved ones. Seeing everyone’s faces light up over fluffy pancakes with maple syrup or savory casseroles is truly heartwarming. These recipes are not only gluten-free but also feel indulgent. I’ve gathered some wonderful recipes that are sure to become favorites. Let’s get those aprons on and explore these festive breakfast delights!
Fluffy Gluten-Free Pancakes With Maple Syrup
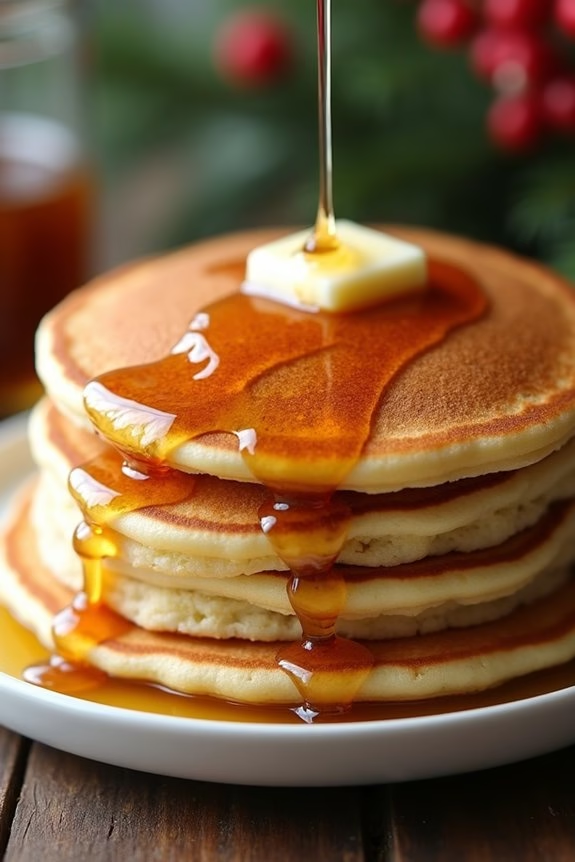
Start your Christmas morning with a delightful stack of fluffy gluten-free pancakes drizzled with rich maple syrup. These pancakes are perfect for a festive breakfast, offering a light and airy texture that will please both gluten-free eaters and those without dietary restrictions.
The key to achieving the perfect pancake lies in the blend of gluten-free flour and the right balance of wet and dry ingredients to guarantee they’re soft and tender with every bite.
These pancakes aren’t only delicious but also simple to make with ingredients you likely already have in your pantry. Serve them hot with a pat of butter on top, and let everyone drizzle their preferred amount of maple syrup for a truly comforting and celebratory breakfast experience.
Whether you’re gathering with family or hosting a holiday brunch, these gluten-free pancakes will surely become a new Christmas tradition.
Ingredients (Serves 4-6):
- 2 cups gluten-free all-purpose flour
- 2 tablespoons sugar
- 1 tablespoon baking powder
- 1/2 teaspoon salt
- 1 3/4 cups milk
- 2 large eggs
- 1/4 cup melted butter
- 1 teaspoon vanilla extract
- Butter or oil for cooking
- Maple syrup, for serving
Cooking Instructions:
- Mix Dry Ingredients: In a large bowl, whisk together the gluten-free all-purpose flour, sugar, baking powder, and salt. Confirm the ingredients are well incorporated and there are no lumps.
- Combine Wet Ingredients: In a separate bowl, beat together the milk, eggs, melted butter, and vanilla extract until smooth. This will create a smooth and consistent base for the wet ingredients.
- Combine Mixtures: Pour the wet ingredients into the bowl with the dry ingredients. Gently stir until the batter is just combined. Be careful not to overmix; some small lumps are okay, as they’ll dissolve during cooking.
- Preheat the Griddle: Heat a non-stick griddle or large skillet over medium heat. Add a small amount of butter or oil to lightly coat the surface.
- Cook the Pancakes: Pour about 1/4 cup of batter onto the griddle for each pancake. Cook until bubbles form on the surface and the edges look set, about 2-3 minutes. Flip the pancakes and cook for an additional 1-2 minutes, until golden brown and cooked through.
- Serve: Transfer the pancakes to a plate and repeat with the remaining batter. Serve the pancakes warm, topped with a pat of butter and a generous drizzle of maple syrup.
Extra Tips:
For the fluffiest pancakes, make sure not to overmix the batter; a few lumps will guarantee they stay light and airy. If the batter seems too thick, you can add a little more milk to reach the desired consistency.
Adjust the heat as needed while cooking to prevent the pancakes from burning. If preparing for a crowd, keep the cooked pancakes warm in a low oven until ready to serve. Enjoy your gluten-free pancakes with fresh fruits, nuts, or even a dusting of powdered sugar for an added festive touch.
Savory Gluten-Free Breakfast Casserole

Start your Christmas morning with a delicious and hearty Savory Gluten-Free Breakfast Casserole that will leave everyone at the table satisfied and ready for a day of festivities. This casserole is packed with nutritious ingredients and flavors that blend perfectly together, creating a dish that’s not only tasty but also gluten-free, making it a great choice for those with dietary restrictions.
With a combination of eggs, vegetables, cheese, and gluten-free bread, this casserole is both filling and delightful, guaranteeing that your holiday breakfast is a memorable one. Not only is this casserole easy to prepare, but it also allows you to make it ahead of time, giving you more time to enjoy the Christmas morning with family and friends.
The preparation includes simple steps and uses ingredients that are easily available, making it a convenient choice for a festive breakfast. The savory flavors of this dish will appeal to all ages, and its pleasing textures will have everyone coming back for seconds. Prepare to delight your loved ones with this scrumptious, gluten-free breakfast option.
Ingredients (Serves 4-6):
- 8 large eggs
- 1 cup milk (dairy or non-dairy)
- 1 teaspoon salt
- 1/2 teaspoon black pepper
- 1/2 teaspoon garlic powder
- 1/2 teaspoon onion powder
- 1 cup shredded cheddar cheese
- 1/2 cup diced bell peppers (red, green, or a mix)
- 1/2 cup diced onions
- 1 cup chopped spinach
- 1 cup cooked and crumbled gluten-free sausage or bacon
- 4 slices gluten-free bread, cubed
- 2 tablespoons olive oil
Instructions:
- Preheat the Oven: Start by preheating your oven to 350°F (175°C). This will guarantee that the casserole cooks evenly once it’s placed inside.
- Prepare the Baking Dish: Lightly grease a 9×13 inch baking dish with olive oil to prevent the casserole from sticking.
- Cook the Sausage/Bacon: In a skillet over medium heat, cook the gluten-free sausage or bacon until fully cooked and crispy. Drain any excess fat and set aside.
- Sauté Vegetables: In the same skillet, add the olive oil and sauté the diced onions, bell peppers, and chopped spinach until they’re tender. This should take about 5 minutes.
- Mix the Egg Mixture: In a large bowl, whisk together the eggs, milk, salt, black pepper, garlic powder, and onion powder until well combined.
- Assemble the Casserole: In the prepared baking dish, layer the cubed gluten-free bread. Evenly distribute the cooked sausage or bacon, sautéed vegetables, and shredded cheddar cheese over the bread.
- Pour the Egg Mixture: Carefully pour the egg mixture over the layered ingredients in the baking dish, guaranteeing everything is evenly covered.
- Bake the Casserole: Place the baking dish in the preheated oven and bake for 30-35 minutes, or until the eggs are set and the top is golden brown.
- Rest and Serve: Once baked, allow the casserole to rest for about 5 minutes before slicing and serving. This will make it easier to cut and serve.
Extra Tips: For an added burst of flavor, consider adding a dash of hot sauce or red pepper flakes to the egg mixture. You can also prepare this casserole the night before and refrigerate it overnight, allowing the flavors to meld together even more. Just make sure to bring it to room temperature before baking the next morning. Additionally, feel free to experiment with other vegetables or cheeses to tailor this dish to your family’s taste preferences.
Gluten-Free Cinnamon Roll Muffins
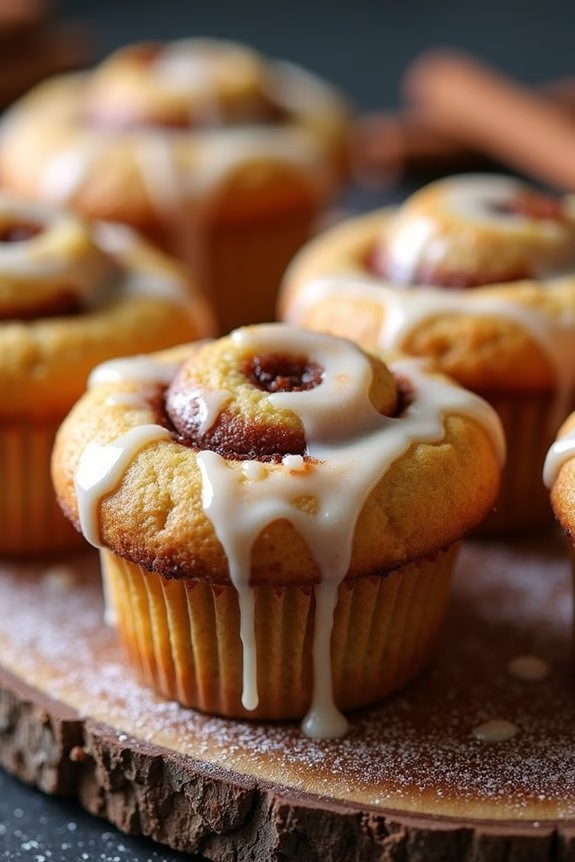
Indulge in the warm, comforting flavors of cinnamon rolls with a delightful twist by preparing Gluten-Free Cinnamon Roll Muffins for your Christmas breakfast.
These muffins capture the essence of cinnamon rolls with their soft, fluffy texture and sweet, spiced filling, but are conveniently baked in muffin form. Perfect for those following a gluten-free diet, these treats are sure to become a favorite holiday tradition. Enjoy them fresh from the oven, drizzled with a creamy icing that perfectly complements the rich cinnamon flavors.
Ideal for serving a family of 4-6, these muffins are both satisfying and easy to prepare. Whether you’re hosting a festive breakfast or simply want to treat yourself to a special morning meal, this recipe offers a delicious, gluten-free option that everyone will enjoy.
With simple ingredients and straightforward steps, you’ll find that creating these charming muffins is both fun and rewarding.
Ingredients:
- 2 cups gluten-free all-purpose flour blend
- 1/2 cup granulated sugar
- 1 tablespoon baking powder
- 1/2 teaspoon salt
- 1 teaspoon ground cinnamon
- 1/2 cup unsalted butter, melted
- 2 large eggs
- 1 cup milk (dairy or non-dairy)
- 2 teaspoons vanilla extract
- 1/2 cup packed brown sugar
- 1 tablespoon ground cinnamon (for filling)
- 1/4 cup unsalted butter, softened (for filling)
- 1 cup powdered sugar
- 2 tablespoons milk (for icing)
- 1/2 teaspoon vanilla extract (for icing)
Instructions:
- Preheat the oven: Start by preheating your oven to 350°F (175°C). Line a muffin tin with paper liners or lightly grease with cooking spray to prevent sticking.
- Mix dry ingredients: In a large mixing bowl, whisk together the gluten-free all-purpose flour, granulated sugar, baking powder, salt, and ground cinnamon until well combined.
- Combine wet ingredients: In a separate bowl, whisk together the melted butter, eggs, milk, and vanilla extract. Pour the wet ingredients into the dry ingredients, stirring until just combined. Be careful not to overmix.
- Prepare cinnamon filling: In a small bowl, mix together the brown sugar, ground cinnamon, and softened butter until it forms a smooth paste.
- Assemble muffins: Spoon a tablespoon of the muffin batter into each prepared muffin cup. Add a spoonful of the cinnamon filling on top, then cover with more muffin batter, filling each cup about three-quarters full.
- Bake muffins: Place the muffin tin in the preheated oven and bake for 18-22 minutes, or until a toothpick inserted into the center of a muffin comes out clean. Remove from the oven and let the muffins cool in the tin for a few minutes before transferring to a wire rack.
- Prepare icing: While the muffins are cooling, whisk together the powdered sugar, milk, and vanilla extract in a small bowl until smooth. Adjust the consistency by adding more milk if too thick, or more powdered sugar if too thin.
- Drizzle icing: Once the muffins are slightly cooled, drizzle the icing over the top of each muffin. Serve warm for the best flavor and texture.
Extra Tips:
For a more pronounced cinnamon flavor, consider adding a pinch of nutmeg or cloves to the cinnamon filling.
If you’re preparing these muffins ahead of time, store them in an airtight container at room temperature for up to two days, or freeze them for longer storage. To reheat, simply warm them in the oven for a few minutes to restore their fresh-baked texture.
Chocolate Chip Gluten-Free Waffles

Start your Christmas morning with a delightful treat that everyone at the table can enjoy — Chocolate Chip Gluten-Free Waffles. These waffles aren’t only fluffy and delicious, but they’re also perfect for those who need to steer clear of gluten.
With a perfect balance of sweetness from the chocolate chips and the comforting texture of waffles, this dish is sure to become a holiday favorite. Whether you’re hosting a large family breakfast or just want to enjoy a cozy morning meal, these waffles are an ideal choice that caters to a variety of dietary needs.
The secret to these delectable waffles lies in the use of gluten-free flour blends, which guarantee a light and airy texture. Pair these waffles with a drizzle of maple syrup, a dollop of whipped cream, or fresh berries to elevate the dish. Not only are they easy to make, but they also provide a satisfying and indulgent start to your festive day.
Prepare to impress your guests with a breakfast that’s both inclusive and delicious, making the holiday season even more special.
Ingredients (Serves 4-6):
- 2 cups gluten-free all-purpose flour
- 1 tablespoon baking powder
- 1/2 teaspoon salt
- 1/4 cup granulated sugar
- 2 large eggs
- 1 3/4 cups milk (dairy or non-dairy)
- 1/3 cup vegetable oil or melted butter
- 1 teaspoon vanilla extract
- 3/4 cup mini chocolate chips
Cooking Instructions:
- Preheat the Waffle Iron: Begin by preheating your waffle iron according to the manufacturer’s instructions. This guarantees that it’s hot enough to cook the waffles evenly.
- Mix Dry Ingredients: In a large mixing bowl, combine the gluten-free all-purpose flour, baking powder, salt, and granulated sugar. Mix these dry ingredients together until they’re well incorporated.
- Prepare Wet Ingredients: In a separate bowl, whisk together the eggs, milk, vegetable oil or melted butter, and vanilla extract. Make sure the mixture is smooth and well-blended.
- Combine Mixtures: Gradually add the wet ingredients to the dry ingredients, stirring until just combined. Be careful not to overmix the batter, as this can result in denser waffles.
- Fold in Chocolate Chips: Gently fold the mini chocolate chips into the batter, distributing them evenly throughout the mixture.
- Cook the Waffles: Lightly grease the preheated waffle iron with cooking spray or a small amount of oil. Pour the appropriate amount of batter onto the waffle iron (refer to your waffle iron’s instructions for guidance). Close the lid and cook until the waffles are golden brown and crisp.
- Serve: Once cooked, carefully remove the waffles from the iron and serve immediately. Top with your favorite toppings, such as maple syrup, fresh fruit, or whipped cream.
Extra Tips:
For best results, allow the waffle batter to rest for about 5-10 minutes before cooking. This gives the baking powder time to activate, resulting in fluffier waffles.
If you’re preparing these for a larger group, keep the cooked waffles warm in a low oven (around 200°F) until all the batter is cooked. Additionally, if you want to make these waffles dairy-free, simply substitute the milk with almond milk, soy milk, or any other dairy-free alternative you prefer.
Enjoy your festive breakfast!
Gluten-Free Quiche With Spinach and Feta

If you’re looking for a savory and satisfying breakfast to share with family and friends on Christmas morning, this Gluten-Free Quiche with Spinach and Feta is a perfect choice. The combination of rich, creamy eggs, savory feta cheese, and nutritious spinach makes for a dish that isn’t only delicious but also wholesome.
Plus, with a gluten-free crust, it’s suitable for those with dietary restrictions, guaranteeing everyone at your breakfast table can indulge in this festive treat. This quiche is perfect for serving 4-6 people, making it an ideal dish for a cozy holiday breakfast.
The recipe is straightforward, allowing you to enjoy the morning without spending all your time in the kitchen. Whether served warm from the oven or at room temperature, this quiche is a versatile dish that pairs well with a variety of sides, such as a fresh fruit salad or crispy bacon.
Let’s plunge into what you’ll need and how to prepare this delightful breakfast dish.
Ingredients (serves 4-6):
- 1 gluten-free pie crust
- 1 tablespoon olive oil
- 1 small onion, finely chopped
- 2 cloves garlic, minced
- 5 ounces fresh spinach, roughly chopped
- 4 large eggs
- 1 cup half-and-half or milk
- ½ teaspoon salt
- ¼ teaspoon black pepper
- ¼ teaspoon nutmeg
- 1 cup crumbled feta cheese
Instructions:
- Preheat the Oven: Preheat your oven to 375°F (190°C). Position the oven rack in the middle of the oven.
- Prepare the Crust: If using a store-bought gluten-free pie crust, place it in a 9-inch pie dish. If making from scratch, roll it out and fit it into the pie dish, crimping the edges as desired. Set aside.
- Cook the Vegetables: Heat olive oil in a large skillet over medium heat. Add the chopped onion and sauté for about 3-4 minutes until translucent. Add the minced garlic and sauté for another minute until fragrant. Stir in the spinach and cook until wilted, about 2-3 minutes. Remove from heat and let cool slightly.
- Prepare the Egg Mixture: In a large mixing bowl, whisk together the eggs, half-and-half, salt, black pepper, and nutmeg until well combined.
- Assemble the Quiche: Spread the cooked spinach mixture evenly over the bottom of the prepared pie crust. Sprinkle the crumbled feta cheese on top of the spinach. Pour the egg mixture over the spinach and feta, guaranteeing an even distribution.
- Bake the Quiche: Place the quiche in the preheated oven and bake for 35-40 minutes, or until the egg mixture is set and the top is lightly golden. Check for doneness by inserting a knife into the center; it should come out clean.
- Cool and Serve: Allow the quiche to cool for about 10 minutes before slicing and serving. This will help it set further and make slicing easier.
Extra Tips: To guarantee your quiche has the best flavor and texture, use fresh spinach and good quality feta cheese. You can prepare the spinach mixture a day in advance to save time on Christmas morning.
If you prefer a richer flavor, substitute the half-and-half with heavy cream. For added variety, consider incorporating other ingredients such as sun-dried tomatoes or roasted red peppers. If the crust edges are browning too quickly during baking, cover them with foil.
Enjoy your delicious, gluten-free quiche as a delightful start to your festive day!
Sweet Potato and Sausage Hash

Sweet Potato and Sausage Hash is a vibrant and hearty dish perfect for a cozy gluten-free Christmas breakfast. This recipe combines the natural sweetness of sweet potatoes with the savory flavors of sausage, creating a satisfying and balanced meal. The addition of colorful bell peppers and onions not only enhances the taste but also adds a festive touch to your breakfast spread.
This dish isn’t only delicious but also packed with nutrients, making it a great way to start your holiday morning. The beauty of this hash lies in its simplicity and adaptability. You can easily adjust the ingredients to accommodate your taste preferences or dietary restrictions.
Whether you’re hosting a family brunch or enjoying a quiet morning at home, this Sweet Potato and Sausage Hash is sure to delight everyone at the table. The recipe serves 4-6 people, guaranteeing there’s enough to go around for everyone to enjoy.
Ingredients (serves 4-6):
- 2 large sweet potatoes, peeled and diced
- 1 pound (about 450g) of gluten-free sausage, sliced
- 1 red bell pepper, diced
- 1 green bell pepper, diced
- 1 medium onion, diced
- 2 tablespoons olive oil
- 1 teaspoon garlic powder
- 1 teaspoon smoked paprika
- Salt and pepper to taste
- 4-6 eggs (optional, for serving)
- Fresh parsley, chopped (optional, for garnish)
Cooking Instructions:
- Prepare the Sweet Potatoes: Peel and dice the sweet potatoes into small, even-sized cubes. This guarantees they cook evenly and develop a nice caramelized exterior.
- Cook the Sausage: In a large skillet, heat 1 tablespoon of olive oil over medium heat. Add the sliced sausage and cook until browned and cooked through, about 5-7 minutes. Remove the sausage from the skillet and set aside.
- Sauté Vegetables: In the same skillet, add the remaining tablespoon of olive oil. Add the diced onions and bell peppers. Sauté until the onions are translucent and the peppers are tender, about 5 minutes.
- Cook Sweet Potatoes: Add the diced sweet potatoes to the skillet with the vegetables. Season with garlic powder, smoked paprika, salt, and pepper. Stir to combine all ingredients evenly. Cover the skillet with a lid and cook for about 10-12 minutes, stirring occasionally, until the sweet potatoes are tender.
- Combine Sausage and Vegetables: Once the sweet potatoes are cooked, return the sausage to the skillet. Stir everything together and cook for another 2-3 minutes to heat through and combine flavors.
- Serve: If you wish to add eggs, you can either fry or poach them separately and serve on top of the hash. Garnish with freshly chopped parsley if desired before serving.
Extra Tips:
For a more robust flavor, consider using different types of gluten-free sausage, such as spicy Italian or smoked varieties. You can also experiment with adding other vegetables like zucchini or mushrooms for additional texture and flavor.
If you prefer a spicier hash, feel free to add a pinch of crushed red pepper flakes. Make sure your pan is large enough to prevent overcrowding, which can cause the ingredients to steam rather than brown. Enjoy this dish fresh, as the sweet potatoes and sausage are best when served hot and crispy.
Gluten-Free Cranberry Orange Scones
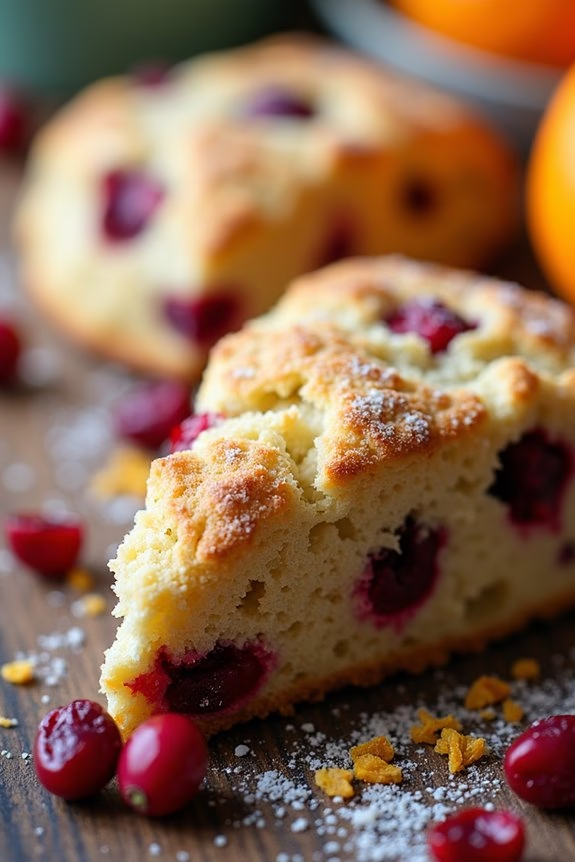
Celebrate Christmas morning with a delightful batch of Gluten-Free Cranberry Orange Scones. These scones are a perfect combination of tart cranberries and zesty orange, giving your breakfast table a festive and flavorful touch. Not only are they delicious, but they’re also a wonderful gluten-free option for those who need to avoid gluten in their diet.
These scones are light, slightly crumbly, and best enjoyed fresh out of the oven, providing a warm and comforting start to your holiday. The Gluten-Free Cranberry Orange Scones are easy to make and can be prepared in advance, allowing you to spend more time with your loved ones on Christmas morning.
The recipe yields 4-6 scones, making it ideal for a small family gathering. By using gluten-free flour, you can guarantee that everyone at the table can indulge in this festive treat without worry. Pair these scones with a hot cup of coffee or tea for a truly cozy and delightful breakfast experience.
Ingredients (Serves 4-6):
- 2 cups gluten-free all-purpose flour
- 1/3 cup granulated sugar
- 2 teaspoons baking powder
- 1/2 teaspoon baking soda
- 1/4 teaspoon salt
- 1/2 cup unsalted butter, cold and cubed
- 1/2 cup dried cranberries
- Zest of 1 orange
- 1/2 cup buttermilk
- 1 large egg
- 1 teaspoon vanilla extract
- 2 tablespoons milk (for brushing)
- 2 tablespoons turbinado sugar (for sprinkling)
Cooking Instructions:
- Preheat the Oven: Begin by preheating your oven to 400°F (200°C). Line a baking sheet with parchment paper to prevent sticking.
- Mix the Dry Ingredients: In a large bowl, whisk together the gluten-free all-purpose flour, granulated sugar, baking powder, baking soda, and salt until well combined.
- Cut in the Butter: Add the cold, cubed butter to the dry ingredients. Using a pastry cutter or your fingers, work the butter into the flour mixture until it resembles coarse crumbs.
- Add the Flavorings: Stir in the dried cranberries and orange zest, distributing them evenly throughout the flour mixture.
- Combine the Wet Ingredients: In a separate bowl, whisk together the buttermilk, egg, and vanilla extract until smooth.
- Form the Dough: Pour the wet ingredients into the dry ingredients, stirring gently until just combined. Be careful not to overmix the dough.
- Shape the Scones: Turn the dough out onto a lightly floured surface. Gently pat it into a circle about 1 inch thick. Cut the circle into wedges using a sharp knife or a bench scraper.
- Prepare for Baking: Place the scone wedges onto the prepared baking sheet. Brush the tops with milk and sprinkle with turbinado sugar for added sweetness and crunch.
- Bake the Scones: Bake in the preheated oven for 15-20 minutes, or until the scones are golden brown and a toothpick inserted into the center comes out clean.
- Cool and Serve: Allow the scones to cool slightly on a wire rack before serving warm.
Extra Tips:
For best results, confirm that your butter is very cold, as this will help create the flaky texture that scones are known for. If you find your dough too sticky, add a little more gluten-free flour as needed, but be cautious not to add too much to maintain the scone’s tender crumb.
These scones can be stored in an airtight container at room temperature for up to two days, but they’re best enjoyed fresh on the day they’re baked. Feel free to experiment by adding chopped nuts or a drizzle of orange glaze for an extra festive touch.
Almond Flour Banana Bread
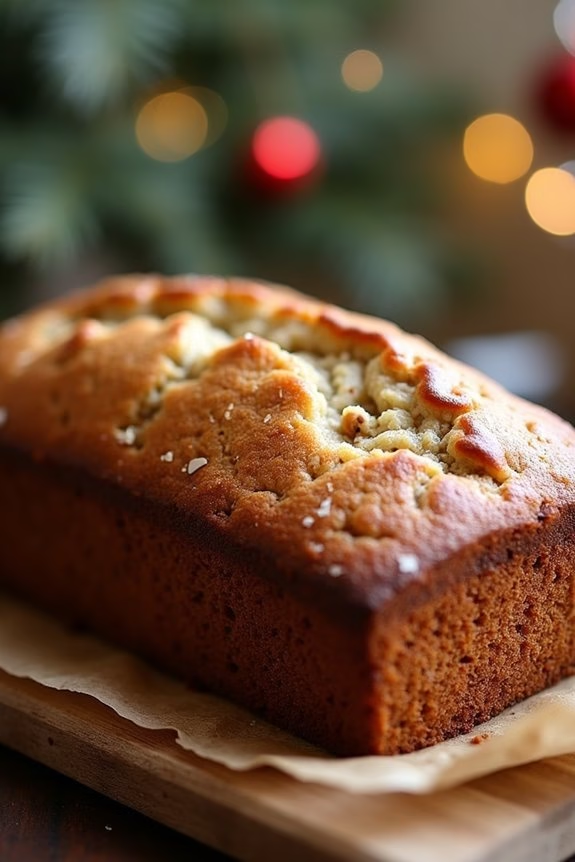
Almond Flour Banana Bread is a delightful gluten-free option perfect for a cozy Christmas breakfast. This bread is moist, flavorful, and offers a wonderful balance of sweetness from ripe bananas and nuttiness from almond flour. It’s a treat that will surely be appreciated by both those who need to avoid gluten and those who simply love a good slice of banana bread.
Plus, it’s easy to prepare and fills the home with a comforting aroma that adds to the festive spirit.
This recipe uses almond flour as a base, which not only makes it gluten-free but also adds a rich, nutty flavor and a dense texture that’s incredibly satisfying. The natural sweetness of ripe bananas means you can keep added sugars to a minimum, while a touch of cinnamon provides a hint of warmth and spice.
This banana bread is perfect served warm, perhaps with a pat of butter or a drizzle of honey, and makes for a delightful start to Christmas morning.
Ingredients for 4-6 servings:
- 3 ripe bananas
- 3 large eggs
- 1 teaspoon vanilla extract
- 2 cups almond flour
- 1/2 cup almond butter
- 1/4 cup honey or maple syrup
- 1 teaspoon baking soda
- 1 teaspoon ground cinnamon
- 1/2 teaspoon salt
- 1/4 cup chopped walnuts (optional)
Cooking Instructions:
- Preheat and Prepare: Preheat your oven to 350°F (175°C). Lightly grease a 9×5-inch loaf pan or line it with parchment paper for easy removal.
- Mash the Bananas: In a large mixing bowl, mash the ripe bananas thoroughly using a fork or potato masher until smooth. Confirm there are no large lumps as this will affect the bread’s texture.
- Combine Wet Ingredients: Add the eggs, vanilla extract, almond butter, and honey (or maple syrup) to the mashed bananas. Whisk together until well combined and smooth.
- Mix Dry Ingredients: In a separate bowl, combine the almond flour, baking soda, ground cinnamon, and salt. Stir until evenly mixed.
- Combine Wet and Dry Mixtures: Gradually add the dry ingredients to the wet mixture, stirring gently until just combined. Be careful not to overmix, as this can make the bread dense.
- Add Nuts (Optional): If using, fold in the chopped walnuts. This step is optional but adds a nice crunch and additional flavor to the bread.
- Pour and Bake: Pour the batter into the prepared loaf pan and smooth the top with a spatula. Bake in the preheated oven for 45-50 minutes, or until a toothpick inserted into the center comes out clean.
- Cool and Serve: Allow the banana bread to cool in the pan for about 10 minutes before transferring it to a wire rack to cool completely. Slice and serve warm or at room temperature.
Extra Tips:
For best results, use bananas that are very ripe with plenty of brown spots, as they’re sweeter and mash more easily. If you prefer a sweeter bread, you can increase the honey or maple syrup slightly, but remember that the bananas add a lot of natural sweetness.
Almond flour can be substituted with other nut flours if needed, but keep in mind that texture and taste might vary slightly. Finally, storing the bread in an airtight container helps maintain its moisture, guaranteeing it remains delicious for several days.
Gluten-Free Apple Cinnamon Oatmeal
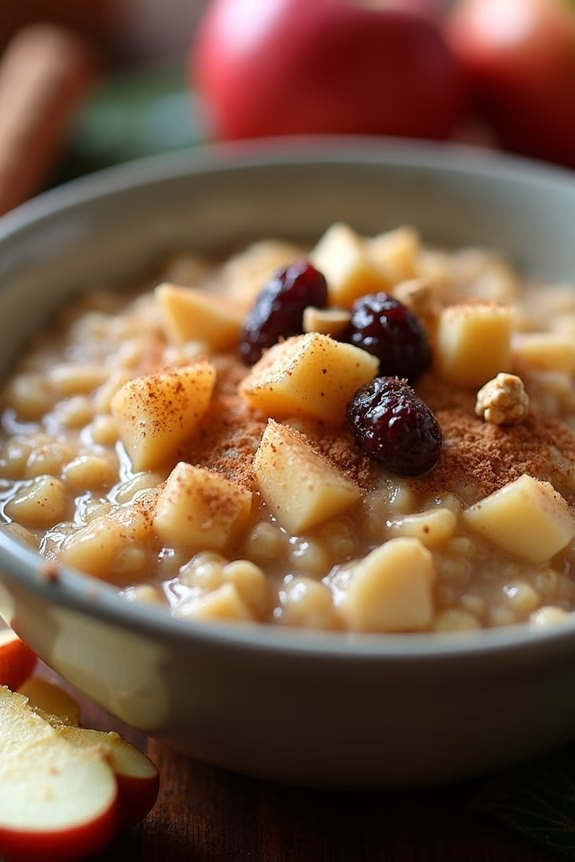
Start your Christmas morning with a warm and comforting bowl of Gluten-Free Apple Cinnamon Oatmeal. This dish is perfect for the festive season, combining the sweet and spicy flavors of apple and cinnamon with the nourishing goodness of oats.
It’s an ideal breakfast for those who are gluten intolerant, allowing everyone to partake in the holiday spirit without worry. The aroma of cinnamon and cooked apples will fill your home, creating a cozy and inviting atmosphere.
This recipe isn’t only delicious but also quick and easy to prepare, making it perfect for a busy holiday morning. In just 30 minutes, you can whip up a hearty breakfast that will keep everyone satisfied until lunch.
The combination of creamy oats, crunchy apples, and a hint of cinnamon will make this dish a family favorite. Plus, it’s easily customizable – feel free to add your favorite toppings for an extra special touch!
Ingredients for 4-6 servings:
- 2 cups gluten-free rolled oats
- 4 cups water
- 2 cups almond milk (or milk of choice)
- 2 large apples, peeled, cored, and diced
- 2 teaspoons ground cinnamon
- 1/4 teaspoon salt
- 2 tablespoons maple syrup (optional)
- 1/2 cup chopped walnuts or pecans (optional)
- 1/4 cup raisins (optional)
Cooking Instructions:
- Prepare the Oats: In a large saucepan, combine the gluten-free rolled oats, water, and almond milk. Stir to mix the ingredients well.
- Cook the Oats: Place the saucepan over medium heat and bring it to a gentle boil. Reduce the heat to low and let the oats simmer, stirring occasionally, for about 10 minutes or until they’re tender and creamy.
- Add Apples and Spices: Stir in the diced apples, ground cinnamon, and salt. Continue to cook for an additional 5-7 minutes, allowing the apples to soften and the flavors to meld together.
- Sweeten the Oatmeal: If desired, add the maple syrup to the oatmeal and stir well. Taste and adjust sweetness to your preference.
- Add Optional Ingredients: If you like, stir in the chopped walnuts or pecans and raisins, allowing them to warm through for about 2 minutes.
- Serve: Remove the saucepan from heat and let the oatmeal sit for a few minutes to thicken. Serve the oatmeal in bowls, and top with additional apple slices, nuts, or a sprinkle of cinnamon if desired.
Extra Tips:
For the best results, use certified gluten-free oats to make sure the dish is completely gluten-free. If you prefer a creamier oatmeal, use more almond milk or less water.
To add a bit more texture and flavor, consider toasting the nuts before adding them to the oatmeal. If you’re serving this dish to guests with various dietary preferences, you can set up a toppings bar with additional options like fresh berries, chia seeds, or coconut flakes.
Adjust the level of sweetness according to your taste, keeping in mind that the natural sweetness of the apples will enhance the dish.
Smoked Salmon and Avocado Toast
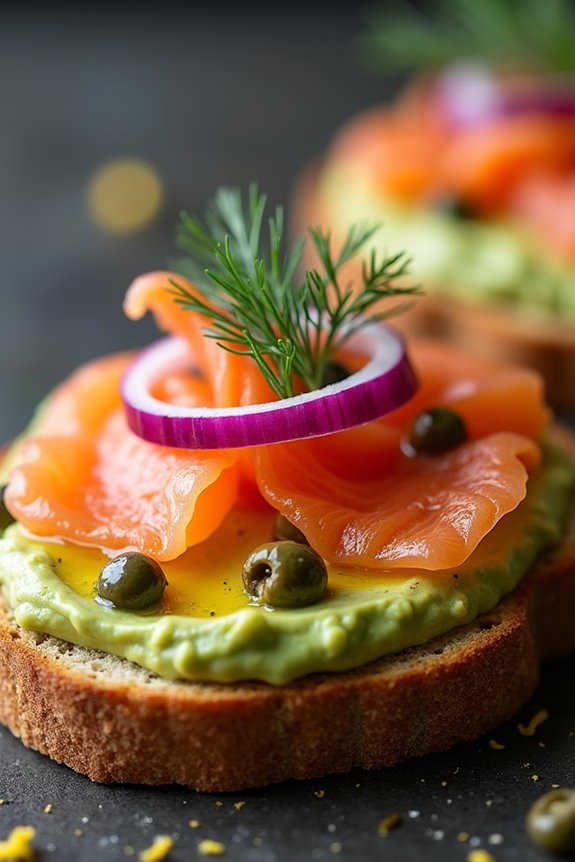
For those seeking a festive yet simple gluten-free Christmas breakfast, Smoked Salmon and Avocado Toast is an excellent choice. This dish combines the creamy richness of avocado with the delicate, smoky flavor of salmon, all sitting atop a perfectly toasted slice of gluten-free bread. The result is a luxurious, health-conscious breakfast that feels indulgent yet is quick and straightforward to prepare.
Ideal for a holiday morning when you want to enjoy something special without spending hours in the kitchen, this recipe guarantees you can savor each bite while still having time for the day’s festivities.
Whether you’re catering to guests with dietary restrictions or simply want to provide a variety of options, this Smoked Salmon and Avocado Toast will satisfy even the most discerning palates. The combination of textures and flavors is both invigorating and satisfying, making it a standout addition to any breakfast spread.
Plus, it’s packed with nutrients and healthy fats, assuring your morning starts on a nourishing note. Perfect for a serving size of 4-6 people, this recipe can easily be adjusted to accommodate more or fewer guests depending on your needs.
Ingredients (Serves 4-6):
- 6 slices of gluten-free bread
- 2 ripe avocados
- 1 lemon
- 200g smoked salmon
- 1 small red onion
- 2 tablespoons capers
- Fresh dill, for garnish
- Salt and pepper, to taste
- Olive oil, for drizzling
Cooking Instructions:
- Prepare the Avocados: Slice the avocados in half, remove the pit, and scoop the flesh into a bowl. Add the juice of half a lemon to prevent browning and mash with a fork until you reach your desired texture. Season with salt and pepper to taste.
- Toast the Bread: While you prepare the avocado, toast the gluten-free bread slices until they’re golden brown and crisp. You can use a toaster or grill them in a pan with a little olive oil for extra flavor.
- Assemble the Toasts: Once the bread is toasted, generously spread the mashed avocado mixture over each slice. Make sure the avocado covers the bread evenly for a stable base.
- Add the Salmon: Arrange slices of smoked salmon on top of the avocado. Use about 30-40g of salmon per slice, depending on preference.
- Garnish: Thinly slice the red onion and distribute the slices evenly over the salmon. Sprinkle capers for an additional burst of flavor. Finish with a sprig of fresh dill on each piece for a festive touch.
- Final Touch: Drizzle a small amount of olive oil over the assembled toasts and squeeze a little more lemon juice if desired.
Extra Tips:
To enhance the flavor profile of your Smoked Salmon and Avocado Toast, consider adding a sprinkle of chili flakes for a slight kick or a dusting of lemon zest for added freshness.
Make sure your avocados are ripe for the best texture and taste; they should yield slightly when pressed gently. If preparing ahead of time, keep the assembled toasts covered in the refrigerator to maintain freshness but add the final garnishes just before serving to guarantee they remain vibrant and appealing.
If serving to a larger group, you can lay out the ingredients buffet-style, allowing guests to customize their toasts.
Gluten-Free Pumpkin Spice Pancakes
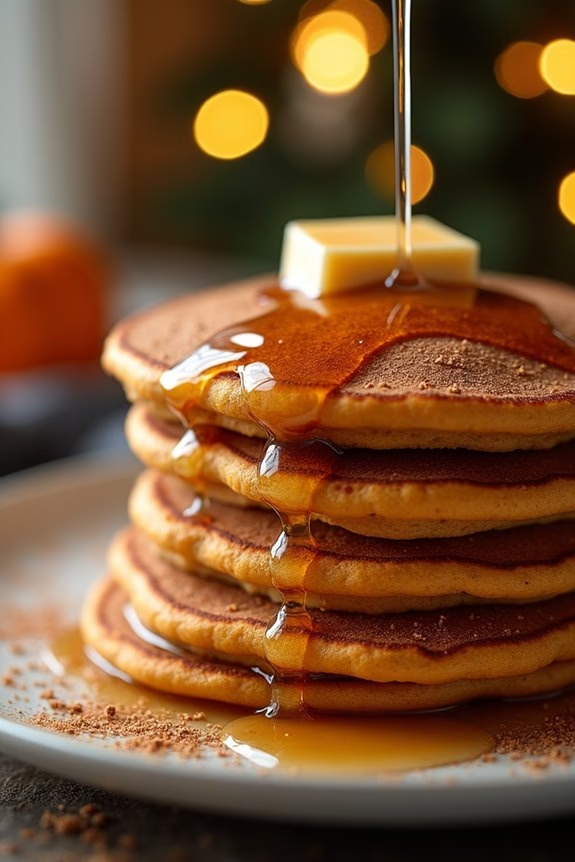
Start your Christmas morning with a delightful and comforting breakfast that everyone can enjoy, including those who are gluten-sensitive. Gluten-Free Pumpkin Spice Pancakes offer a seasonal twist to the traditional pancake, combining the rich flavors of pumpkin with the warming spices of cinnamon, nutmeg, and ginger.
These pancakes are fluffy, moist, and perfect for a holiday breakfast. They’re easy to prepare and will fill your kitchen with a delightful aroma that will have everyone keenly awaiting breakfast.
These pancakes not only cater to gluten-free diets but also incorporate the goodness of pumpkin, which is packed with vitamins and nutrients. The pumpkin puree adds moisture and a subtle sweetness, while the spices bring a festive warmth to the dish.
Whether you top them with maple syrup, a dusting of powdered sugar, or a dollop of whipped cream, these pancakes are sure to be a hit. Serve these pancakes to a group of 4-6 people, and watch as they become a new holiday tradition.
Ingredients:
- 1 ½ cups gluten-free all-purpose flour
- 1 tablespoon baking powder
- ½ teaspoon baking soda
- ¼ teaspoon salt
- 1 teaspoon ground cinnamon
- ½ teaspoon ground nutmeg
- ¼ teaspoon ground ginger
- 1 cup pumpkin puree
- 2 tablespoons brown sugar
- 1 teaspoon vanilla extract
- 2 large eggs
- 1 ¼ cups milk (dairy or non-dairy)
- 2 tablespoons melted butter or coconut oil
Instructions:
- Mix Dry Ingredients: In a large mixing bowl, whisk together the gluten-free flour, baking powder, baking soda, salt, cinnamon, nutmeg, and ginger. Confirm all the dry ingredients are well combined to avoid clumps.
- Prepare Wet Ingredients: In another bowl, combine the pumpkin puree, brown sugar, vanilla extract, and eggs. Mix until smooth. Gradually add the milk and melted butter, stirring until all wet ingredients are well incorporated.
- Combine Mixtures: Gently pour the wet ingredients into the dry ingredients. Stir just until combined. Be careful not to overmix; a few lumps are okay and will help keep the pancakes fluffy.
- Heat the Griddle: Preheat a non-stick griddle or frying pan over medium heat. Lightly grease with butter or oil.
- Cook Pancakes: Pour ¼ cup of batter onto the hot griddle for each pancake. Cook until bubbles form on the surface, and the edges begin to look set, about 2-3 minutes. Flip the pancakes and cook for an additional 2 minutes, or until golden brown and cooked through.
- Serve: Remove the pancakes from the griddle and keep them warm in a preheated oven (200°F) until ready to serve. Top with your favorite toppings like maple syrup or fresh fruit.
Extra Tips:
For perfectly fluffy pancakes, avoid overmixing the batter; this can make the pancakes dense. If you’re using canned pumpkin puree, confirm it’s 100% pure pumpkin and not pumpkin pie filling, which contains added sugars and spices.
If you prefer thinner pancakes, simply add a little more milk to the batter. These pancakes freeze well, so consider making a double batch to enjoy later in the holiday season. Just reheat them in the oven or toaster for a quick breakfast.
Cheesy Gluten-Free Egg Bites

Cheesy Gluten-Free Egg Bites are the perfect way to start your Christmas morning with a delicious, protein-packed breakfast that caters to those with gluten sensitivities.
These savory bites aren’t only easy to make, but they’re also incredibly versatile, allowing you to customize them with your favorite cheeses, meats, and vegetables.
Whether you’re hosting a festive brunch or simply looking for a quick and satisfying breakfast option, these egg bites are sure to please everyone at the table.
Light, fluffy, and bursting with cheesy goodness, these egg bites provide a satisfying and nutritious start to the day.
They’re baked in muffin tins, making them a convenient grab-and-go option for busy mornings.
By using high-quality ingredients and your choice of gluten-free cheese, you can guarantee that these bites aren’t only tasty but also cater to dietary restrictions.
Serve them hot out of the oven, or make them ahead and reheat for a quick breakfast solution.
Ingredients (Serves 4-6):
- 8 large eggs
- 1/4 cup milk (or dairy-free alternative)
- 1 cup shredded cheddar cheese
- 1/2 cup shredded mozzarella cheese
- 1/4 cup diced cooked bacon
- 1/4 cup chopped bell peppers
- 1/4 cup chopped spinach
- 1/2 teaspoon salt
- 1/4 teaspoon black pepper
- Cooking spray or olive oil for greasing
Cooking Instructions:
1. Preheat the Oven: Start by preheating your oven to 350°F (175°C). This guarantees your egg bites will cook evenly and develop a nice golden color.
2. Prepare the Muffin Tin: Generously grease a 12-cup muffin tin with cooking spray or olive oil to prevent the egg bites from sticking.
3. Mix the Eggs: In a large mixing bowl, whisk together the eggs and milk until well combined. This will form the base of your egg bites.
4. Add the Fillings: Stir in the shredded cheddar cheese, mozzarella cheese, cooked bacon, bell peppers, spinach, salt, and black pepper.
Mix until all ingredients are evenly distributed throughout the egg mixture.
5. Fill the Muffin Cups: Evenly distribute the egg mixture into the prepared muffin cups, filling each about three-quarters full.
This allows room for the egg bites to puff up as they bake.
6. Bake the Egg Bites: Place the muffin tin in the preheated oven and bake for 20-25 minutes, or until the egg bites are set and lightly golden on top.
7. Cool Before Serving: Once baked, remove the egg bites from the oven and let them cool in the muffin tin for about 5 minutes before gently removing them with a spatula.
Extra Tips:
For a smoother texture, consider blending the egg mixture in a blender for a few seconds before adding the other ingredients.
This will give your egg bites a more uniform texture.
Feel free to experiment with different types of cheese or add-ins like mushrooms or tomatoes to suit your taste preferences.
If you’re short on time, you can make these egg bites a day in advance and store them in an airtight container in the refrigerator; simply reheat them in the microwave or oven before serving.
Gluten-Free Berry and Yogurt Parfait
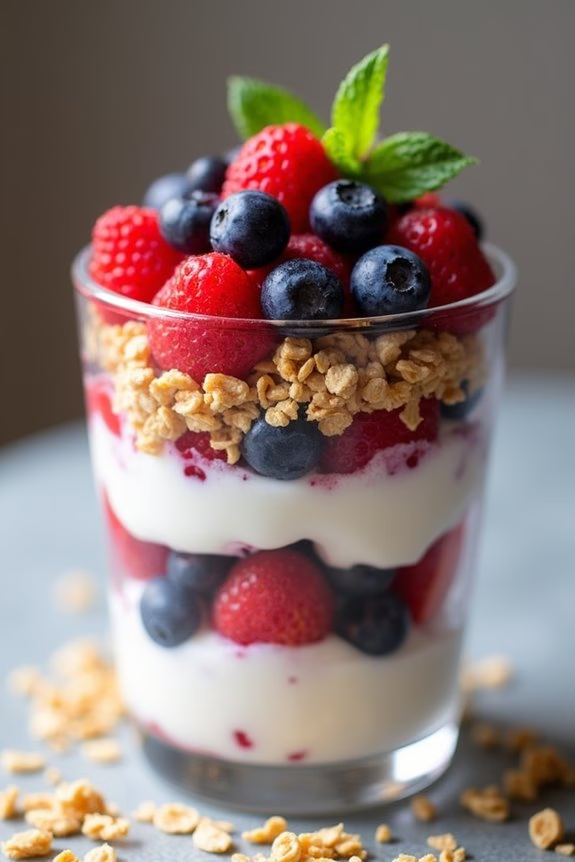
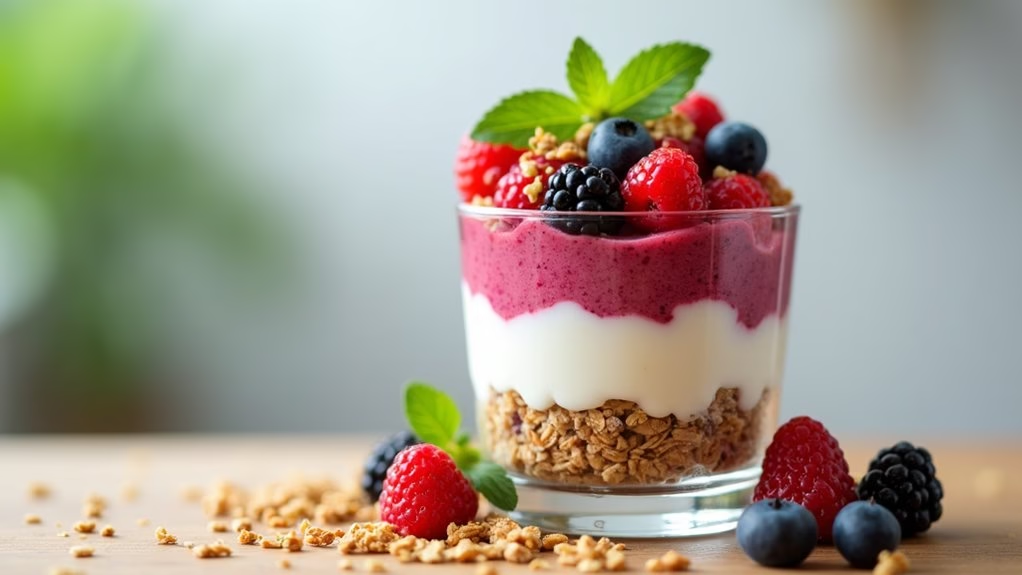
Start your Christmas morning with a delightful and healthy Gluten-Free Berry and Yogurt Parfait. This festive dish is a perfect blend of creamy yogurt, sweet and tart berries, and crunchy granola, making it both a nutritious and satisfying breakfast option. Not only is it quick and easy to prepare, but it also caters to those following a gluten-free diet, guaranteeing everyone at the table can indulge.
The vibrant colors of the berries add a festive touch to your holiday breakfast table, making it a visually appealing dish that’s sure to impress your family and guests. The parfait can be prepared in individual servings or in a large trifle dish for a stunning presentation. The combination of fresh berries, creamy yogurt, and gluten-free granola creates layers of texture and flavor that are delightful with every spoonful.
It’s an excellent make-ahead option, allowing you to enjoy the morning festivities without being stuck in the kitchen. Whether you’re hosting a large gathering or having a cozy breakfast with your immediate family, this parfait is a delicious way to celebrate Christmas morning.
Ingredients (Serves 4-6):
- 3 cups plain Greek yogurt (or any gluten-free yogurt of your choice)
- 2 cups mixed berries (strawberries, blueberries, raspberries)
- 1/2 cup gluten-free granola
- 2 tablespoons honey or maple syrup
- 1 teaspoon vanilla extract
- Fresh mint leaves for garnish (optional)
Instructions:
- Prepare the Yogurt Mixture: In a medium bowl, combine the Greek yogurt, honey or maple syrup, and vanilla extract. Stir well until the mixture is smooth and the ingredients are fully incorporated.
- Wash and Prepare the Berries: Rinse the mixed berries thoroughly under cold water. Pat them dry with a paper towel. If using strawberries, hull them and slice them into halves or quarters, depending on their size.
- Layer the Parfait: Begin by adding a layer of yogurt mixture to the bottom of each serving glass or dish. Follow with a layer of mixed berries, and then a sprinkle of gluten-free granola. Repeat the layers until the glasses are filled, finishing with a layer of yogurt on top.
- Garnish and Serve: Top each parfait with a few berries and a sprinkle of granola for garnish. Add a fresh mint leaf for an extra touch of color and flavor, if desired.
- Chill or Serve Immediately: You can serve the parfaits immediately or cover them with plastic wrap and chill in the refrigerator for up to 1 hour before serving.
Extra Tips:
For an extra burst of flavor, consider mixing a little lemon zest into the yogurt mixture. If you prefer a sweeter parfait, adjust the amount of honey or maple syrup to your taste. Confirm the granola you choose is certified gluten-free to avoid any cross-contamination.
To save time on Christmas morning, you can prepare the yogurt mixture and wash the berries the night before, then assemble the parfaits just before serving. This dish is versatile, so feel free to substitute your favorite seasonal fruits or add nuts for additional crunch.