Creating a festive spread that excludes gluten doesn’t mean sacrificing flavor. Picture serving bacon-wrapped dates stuffed with creamy goat cheese or refreshing smoked salmon cucumber bites. These gluten-free appetizers are sure to impress. Vibrant Caprese salad skewers and prosciutto-wrapped asparagus can add a touch of elegance to any gathering. Ready to explore more delicious options that ensure everyone feels included?
Bacon-Wrapped Dates With Goat Cheese

Bacon-wrapped dates with goat cheese make for a perfect gluten-free Christmas appetizer that’s both simple and incredibly satisfying. The sweet and savory combination of the dates and bacon is enhanced by the creamy, tangy goat cheese filling, creating a delightful bite-sized treat.
These appetizers aren’t only delicious but also easy to prepare, making them an excellent choice for any festive gathering. Whether you’re hosting a small dinner party or a larger holiday celebration, these bacon-wrapped dates are sure to impress your guests.
The ingredients are straightforward, and the preparation is minimal, allowing you to focus on enjoying the company of your friends and family. Plus, their irresistible flavor and beautiful presentation make them a culinary highlight of any table spread.
Ingredients for 4-6 servings:
- 24 Medjool dates, pitted
- 4 ounces goat cheese
- 12 slices of bacon, cut in half
- Toothpicks
Cooking Instructions:
- Preheat the oven: Start by preheating your oven to 375°F (190°C). This guarantees that the oven is hot enough to cook the bacon evenly once the dates are ready to be baked.
- Prepare the dates: Using a small knife, make a slit in each date along one side. Be careful not to cut all the way through. Remove the pit from each date if they aren’t already pitted.
- Stuff the dates: Take a small amount of goat cheese and stuff it into each date. Fill each date generously but avoid overstuffing, which could cause the cheese to overflow during baking.
- Wrap with bacon: Take a half slice of bacon and wrap it around each stuffed date. Secure the bacon with a toothpick, making sure it holds the bacon tightly in place.
- Bake: Arrange the bacon-wrapped dates on a baking sheet lined with parchment paper or a silicone baking mat. Bake them in the preheated oven for 15-20 minutes or until the bacon is crispy and golden brown. Turn the dates halfway through the cooking time to guarantee even cooking.
- Serve: Once baked, remove the dates from the oven and let them cool for a few minutes. Transfer them to a serving platter and serve warm.
Extra Tips:
For an extra layer of flavor, consider brushing the bacon with a small amount of maple syrup or balsamic glaze before baking. This will add a slight sweetness and a hint of tanginess that complements the overall taste.
Additionally, you can prepare these appetizers a day in advance and store them in the refrigerator until you’re ready to bake them. Just make sure to bring them to room temperature before placing them in the oven for even cooking. Enjoy your festive, gluten-free treat!
Smoked Salmon Cucumber Bites
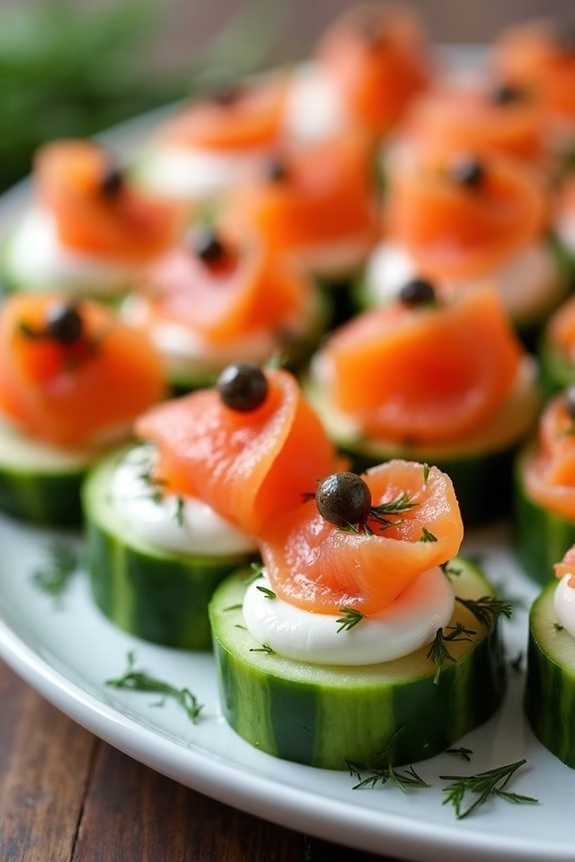
Smoked Salmon Cucumber Bites are a delightful gluten-free appetizer that are perfect for any Christmas gathering. These bite-sized treats aren’t only visually appealing but also packed with flavor, combining the freshness of cucumbers with the rich, smoky taste of salmon.
They’re easy to prepare, making them an ideal choice for hosts who want to impress their guests without spending hours in the kitchen. The combination of textures and flavors in this dish will surely leave a lasting impression on your guests.
This recipe is designed to serve 4-6 people, making it perfect for small gatherings or as part of a larger spread. The ingredients are simple yet elegant, ensuring that the natural flavors of each component shine through.
With just a few steps, you can create a stunning and delicious appetizer that will be the talk of your holiday party. Follow the instructions below to create your own Smoked Salmon Cucumber Bites.
Ingredients (serving size: 4-6 people):
- 2 large cucumbers
- 8 oz smoked salmon
- 8 oz cream cheese, softened
- 1 tablespoon lemon juice
- 1 tablespoon fresh dill, chopped
- Salt and pepper to taste
- Capers, for garnish
Cooking Instructions:
- Prepare the Cucumbers: Wash the cucumbers thoroughly and slice them into 1/2-inch thick rounds. Arrange them neatly on a serving platter.
- Make the Cream Cheese Mixture: In a medium bowl, combine the softened cream cheese, lemon juice, and fresh dill. Mix until smooth and well combined. Season with salt and pepper to taste.
- Assemble the Bites: Spread a generous dollop of the cream cheese mixture onto each cucumber slice. Make sure the cream cheese is evenly distributed and covers most of the cucumber surface.
- Add the Smoked Salmon: Cut the smoked salmon into small pieces that can neatly fit on top of the cucumber slices. Place a piece of smoked salmon on top of the cream cheese layer on each cucumber slice.
- Garnish: Top each smoked salmon cucumber bite with a caper for an extra burst of flavor. You can also sprinkle a little more fresh dill over the top for added color and taste.
Extra Tips:
To enhance the flavor of your Smoked Salmon Cucumber Bites, consider using flavored cream cheese, such as chive or garlic, for a different twist. If you prefer a bit of heat, add a small slice of jalapeño on top of the salmon for a spicy kick.
Make sure to use high-quality smoked salmon for the best taste. These bites can be prepared a few hours in advance and stored in the fridge until serving, making them an excellent option for stress-free entertaining.
Caprese Salad Skewers
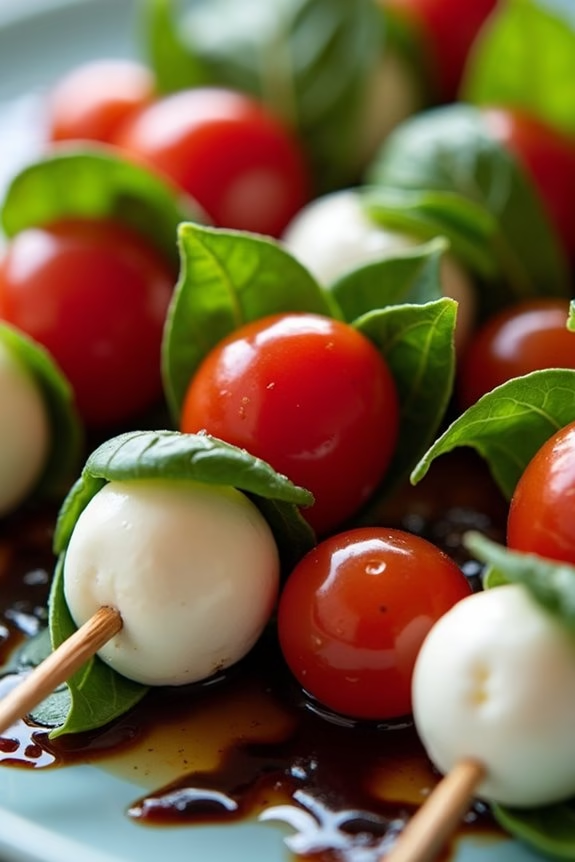
Caprese Salad Skewers are a delightful gluten-free appetizer perfect for adding a touch of elegance to your Christmas gatherings.
These colorful skewers are an easy-to-make dish that combines the fresh flavors of ripe cherry tomatoes, creamy mozzarella, fragrant basil, and a drizzle of balsamic glaze. Not only are they visually appealing, but they also offer a burst of flavor with every bite, making them a crowd-pleaser at any festive occasion.
Ideal for serving 4-6 people, these skewers aren’t only delicious but also quick to assemble, allowing you more time to enjoy your holiday festivities. The combination of ingredients in Caprese Salad Skewers offers a rejuvenating contrast of textures and tastes that highlight the natural sweetness of the tomatoes and the rich creaminess of the mozzarella.
Whether you’re planning an intimate family dinner or a larger holiday party, these skewers are sure to impress your guests and cater to those who are gluten-sensitive.
Ingredients:
- 24 cherry tomatoes
- 24 small mozzarella balls (bocconcini)
- 24 fresh basil leaves
- 2 tablespoons extra-virgin olive oil
- 1 tablespoon balsamic glaze
- Salt and pepper to taste
- 12 wooden skewers (6-inch)
Instructions:
- Prepare the Ingredients:
- Rinse the cherry tomatoes and basil leaves under cold water, and pat them dry with a paper towel.
- Drain the mozzarella balls from their liquid and pat them dry as well. This helps the olive oil and balsamic glaze adhere better.
- Assemble the Skewers:
- Take a wooden skewer and thread one cherry tomato followed by a basil leaf, and then a mozzarella ball. Repeat this sequence one more time so there are two sets of tomato, basil, and mozzarella on each skewer. Repeat with the remaining skewers.
- Season the Skewers:
- Arrange the skewers on a serving platter. Drizzle them with extra-virgin olive oil and balsamic glaze. Sprinkle with salt and pepper to taste.
- Serve:
- Serve the skewers immediately as a rejuvenating appetizer.
Extra Tips:
To enhance the flavor profile of your Caprese Salad Skewers, consider using high-quality balsamic glaze for a richer taste.
If you prefer a more intense flavor, marinate the mozzarella balls in olive oil, salt, and pepper for about 30 minutes before assembling the skewers. Additionally, you can experiment with colorful heirloom cherry tomatoes for a more vibrant presentation.
Remember to soak wooden skewers in water for about 10 minutes before assembling to prevent them from splitting.
Deviled Eggs With a Twist
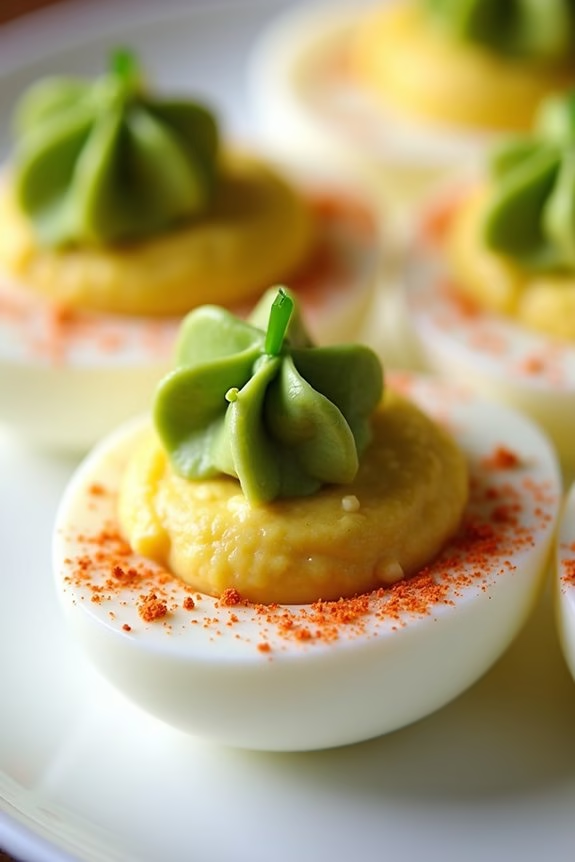
Deviled eggs are a classic appetizer perfect for any holiday gathering, but with a festive twist, they can add a special flair to your Christmas spread. This gluten-free recipe reinvents the traditional deviled egg by incorporating unique flavors and garnishes that will delight your guests. By using ingredients like avocado, smoked paprika, and chive, these deviled eggs not only taste fantastic but also look beautiful on the plate.
The added creaminess from the avocado pairs perfectly with the tanginess of the mustard and the subtle heat of the paprika, making each bite a memorable experience. This recipe is designed to serve 4-6 people, making it ideal for small gatherings or as an addition to a larger buffet. Prepare these deviled eggs ahead of time to reduce stress on the day of your event. Not only are they simple to make, but they also allow for creativity in presentation.
Whether you’re hosting a cozy family dinner or a lively Christmas party, these deviled eggs with a twist are sure to be a crowd-pleaser.
Ingredients for 4-6 servings:
- 6 large eggs
- 1 ripe avocado
- 2 tablespoons mayonnaise
- 1 tablespoon Dijon mustard
- 1 teaspoon lemon juice
- Salt and pepper to taste
- 1/2 teaspoon smoked paprika
- 1 tablespoon finely chopped fresh chives
- Optional: additional smoked paprika and chives for garnish
Cooking Instructions:
- Boil the Eggs: Place the eggs in a saucepan and cover them with water. Bring the water to a boil over medium-high heat. Once boiling, cover the pan with a lid, turn off the heat, and let the eggs sit for 10-12 minutes.
- Prepare an Ice Bath: While the eggs are cooking, prepare an ice bath by filling a large bowl with ice and cold water. Once the eggs have finished cooking, transfer them immediately to the ice bath to cool for about 5 minutes. This will make peeling easier.
- Peel the Eggs: Gently crack the eggshells and peel them under running water to remove the shells easily. Pat the eggs dry with a paper towel.
- Cut and Scoop: Slice each egg in half lengthwise. Carefully remove the yolks and place them in a mixing bowl. Place the egg whites on a serving platter, hollow side up.
- Make the Filling: In the mixing bowl with the yolks, add the avocado, mayonnaise, Dijon mustard, lemon juice, salt, and pepper. Mash and mix the ingredients together until smooth and creamy. Adjust seasoning to taste.
- Fill the Egg Whites: Using a spoon or a piping bag, fill each egg white half with the avocado mixture. You can use a star piping tip for a decorative touch.
- Garnish and Serve: Sprinkle the filled eggs with smoked paprika and chopped chives. For extra flair, add a small dollop of avocado on top of each egg. Serve immediately or refrigerate until ready to serve.
Extra Tips:
For the best results, use ripe avocados that are soft but not overly mushy. If you don’t have a piping bag, you can use a zip-top bag with a small corner cut off to pipe the filling into the egg whites.
Feel free to experiment with other toppings, such as crumbled bacon or diced red bell pepper, to customize the flavors to your liking. If preparing in advance, store the eggs in the refrigerator and add garnishes just before serving to keep them fresh and vibrant.
Prosciutto-Wrapped Asparagus
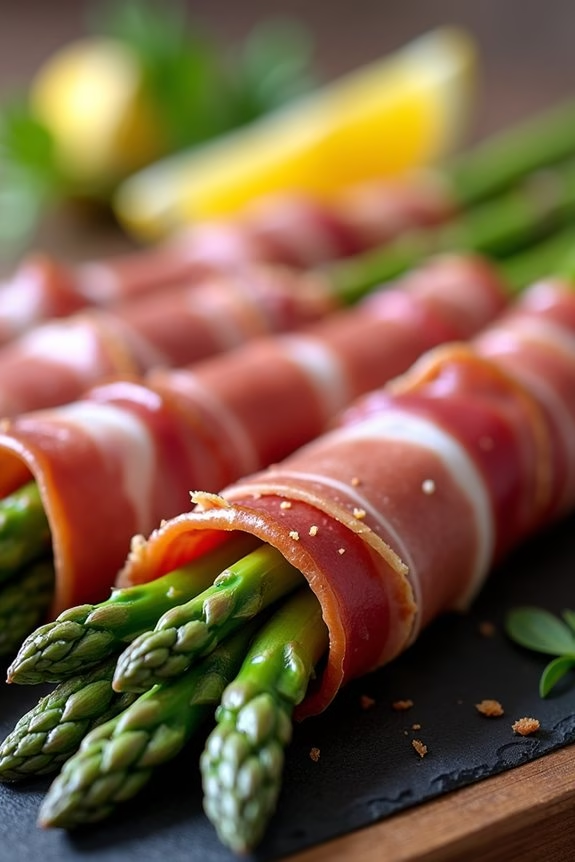
Prosciutto-wrapped asparagus is a delightful and elegant appetizer that fits perfectly into any gluten-free Christmas spread. The combination of tender asparagus spears enveloped in savory, salty prosciutto creates a harmonious blend of flavors and textures that’s certain to please your guests. This appetizer isn’t only delicious but also simple to prepare, making it an excellent choice for a busy holiday season.
The vibrant green of the asparagus contrasts beautifully with the rich pink of the prosciutto, adding a touch of festive color to your table. Asparagus spears are known for their delicate flavor and nutritional benefits, offering a good source of vitamins A, C, and K. When wrapped in prosciutto, they become a decadent treat that’s both satisfying and nutritious.
This dish can be prepared ahead of time and served warm or at room temperature, allowing for versatility in your holiday meal planning. Whether you’re hosting a large gathering or a small family dinner, prosciutto-wrapped asparagus is a guaranteed way to impress your guests with minimal effort.
Ingredients for 4-6 servings:
- 1 pound of fresh asparagus spears
- 1 tablespoon of olive oil
- Salt and pepper, to taste
- 1/2 pound of thinly sliced prosciutto
- Optional: lemon wedges for serving
Cooking Instructions:
- Prepare the Asparagus: Rinse the asparagus spears under cold running water and pat them dry with a clean kitchen towel. Trim the tough, woody ends of the asparagus, typically about an inch from the bottom.
- Season the Asparagus: Place the prepared asparagus in a large bowl. Drizzle with olive oil and season with salt and pepper. Toss the spears gently to confirm they’re evenly coated with the oil and seasoning.
- Wrap with Prosciutto: Take one asparagus spear and wrap a slice of prosciutto around it in a spiral manner, leaving the tip and end of the spear exposed. Repeat this process with the remaining asparagus and prosciutto slices.
- Preheat the Oven: Preheat your oven to 400°F (200°C). Line a baking sheet with parchment paper or aluminum foil for easy cleanup.
- Bake the Asparagus: Arrange the prosciutto-wrapped asparagus spears in a single layer on the prepared baking sheet. Bake in the preheated oven for 10-12 minutes, or until the asparagus is tender and the prosciutto is crispy.
- Serve: Remove the baking sheet from the oven and let the asparagus cool for a few minutes. Transfer to a serving platter and optionally serve with lemon wedges for an added zest.
Extra Tips:
For added flavor, consider sprinkling grated Parmesan cheese over the wrapped asparagus before baking. If you prefer a smokier taste, you can also grill the prosciutto-wrapped asparagus on a barbecue or grill pan instead of baking. Confirm the prosciutto slices are thinly sliced for easier wrapping and a crispier texture once cooked.
You can prepare this appetizer a few hours in advance and store it in the refrigerator until you’re ready to bake, making it an excellent choice for stress-free holiday entertaining.
Roasted Red Pepper Hummus With Veggie Sticks

Roasted Red Pepper Hummus With Veggie Sticks is a delightful gluten-free appetizer that will add a colorful and flavorful touch to your Christmas gathering. This dish combines the creamy texture of traditional hummus with the sweet, smoky taste of roasted red peppers.
Paired with an assortment of fresh vegetable sticks, it provides a healthy and satisfying option for guests who are looking for something both delicious and nutritious. Whether you’re hosting a festive party or simply enjoying a cozy holiday meal with family, this appetizer is sure to be a hit.
The recipe for Roasted Red Pepper Hummus With Veggie Sticks is straightforward and can be prepared in advance, allowing you to enjoy more time with your guests. The hummus is made by blending chickpeas with roasted red peppers, tahini, lemon juice, and a hint of garlic to create a smooth, creamy dip.
The vibrant colors and flavors of this dish are complemented by a variety of veggie sticks such as carrots, celery, and cucumber, making it an appealing choice for those avoiding gluten. This recipe serves 4-6 people and is perfect for any holiday occasion.
Ingredients (Serves 4-6):
- 1 can (15 oz) chickpeas, drained and rinsed
- 2 large red bell peppers
- 3 tablespoons tahini
- 2 tablespoons olive oil
- 2 tablespoons lemon juice
- 2 cloves garlic, minced
- 1 teaspoon cumin
- Salt and pepper to taste
- Fresh parsley for garnish (optional)
- Carrot sticks
- Celery sticks
- Cucumber sticks
Cooking Instructions:
- Roast the Red Peppers: Preheat your oven to 450°F (230°C). Place the red bell peppers on a baking sheet lined with parchment paper. Roast them for 20-25 minutes, turning occasionally until the skins are charred and the peppers are soft.
- Peel the Peppers: Once roasted, remove the peppers from the oven and place them in a bowl. Cover the bowl with plastic wrap and let them steam for about 10 minutes. This process will make peeling the skin easier. Once cooled, peel off the skin and remove the seeds.
- Blend Ingredients: In a food processor, combine the peeled red peppers, chickpeas, tahini, olive oil, lemon juice, minced garlic, and cumin. Blend until smooth and creamy. If the mixture is too thick, you can add a bit more olive oil or water to reach your desired consistency.
- Season the Hummus: Taste the hummus and season it with salt and pepper to your preference. Blend again briefly to ascertain the seasoning is evenly distributed.
- Prepare Veggie Sticks: While the hummus is blending, wash and cut your carrots, celery, and cucumber into sticks for dipping.
- Serve: Transfer the hummus to a serving bowl and garnish with fresh parsley if desired. Arrange the veggie sticks on a platter around the hummus for a beautiful presentation.
Extra Tips:
For the best flavor, prepare the hummus a few hours in advance and let it chill in the refrigerator. This will allow the flavors to meld together beautifully.
If you’re looking for a bit of extra zest, consider adding a pinch of smoked paprika or a dash of cayenne pepper to the hummus. For a different presentation, you can also serve the hummus with gluten-free pita chips or toasted gluten-free bread slices alongside the veggie sticks.
Enjoy your festive gluten-free appetizer!
Stuffed Mushrooms With Herbs and Cheese

Stuffed mushrooms are a classic appetizer that can easily be made gluten-free, creating a delightful start to any festive meal. When combined with fragrant herbs and rich, creamy cheese, these bite-sized delights won’t only satisfy your guests’ taste buds but also accommodate those with dietary restrictions.
Whether you’re hosting a Christmas dinner or simply looking for a tasty snack to serve at a holiday gathering, these stuffed mushrooms with herbs and cheese are sure to impress.
This recipe focuses on using fresh ingredients to bring out the natural flavors of the mushrooms while guaranteeing a gluten-free experience. The use of gluten-free breadcrumbs provides the perfect texture, while a blend of cheeses and herbs adds a depth of flavor that’s both comforting and sophisticated.
With a serving size of 4-6 people, these mushrooms can be easily scaled up or down depending on the size of your gathering, making them a versatile choice for any occasion.
Ingredients for 4-6 servings:
- 24 large button mushrooms
- 2 tablespoons olive oil
- 1 medium onion, finely chopped
- 3 cloves garlic, minced
- 1/4 cup gluten-free breadcrumbs
- 1/2 cup cream cheese, softened
- 1/4 cup grated Parmesan cheese
- 1/4 cup shredded mozzarella cheese
- 2 tablespoons fresh parsley, chopped
- 1 tablespoon fresh thyme, chopped
- Salt and pepper to taste
Cooking Instructions:
- Preheat and Prepare Mushrooms: Preheat your oven to 375°F (190°C). Gently clean the mushrooms with a damp paper towel, remove the stems, and set the caps aside. Finely chop the stems as they’ll be used in the filling.
- Cook Aromatics: Heat olive oil in a skillet over medium heat. Add the chopped onion and sauté for about 5 minutes until soft and translucent. Stir in the minced garlic and chopped mushroom stems, cooking for another 2-3 minutes until fragrant and the stems are tender.
- Combine Filling Ingredients: In a mixing bowl, combine the cooked onion mixture with gluten-free breadcrumbs, cream cheese, Parmesan cheese, mozzarella cheese, parsley, thyme, salt, and pepper. Mix well until everything is fully combined into a cohesive filling.
- Stuff Mushrooms: Arrange the mushroom caps on a baking sheet, cavity side up. Spoon the filling generously into each mushroom cap, pressing slightly to guarantee it’s well-packed.
- Bake: Place the stuffed mushrooms in the preheated oven and bake for 20-25 minutes, or until the tops are golden brown and the mushrooms are tender.
- Serve: Remove the mushrooms from the oven and let them cool for a few minutes before serving. Garnish with additional chopped parsley if desired.
Extra Tips:
For the best results, choose mushrooms that are uniform in size to guarantee even cooking. When removing the stems, take care not to damage the caps, as this will help keep the filling in place.
If you prefer a spicier kick, consider adding a pinch of red pepper flakes to the filling mixture. Additionally, feel free to experiment with different cheese combinations or herbs according to your taste preferences.
These stuffed mushrooms can also be prepared ahead of time and baked just before serving, making them a convenient option for busy holiday schedules.
Sweet Potato Rounds With Avocado
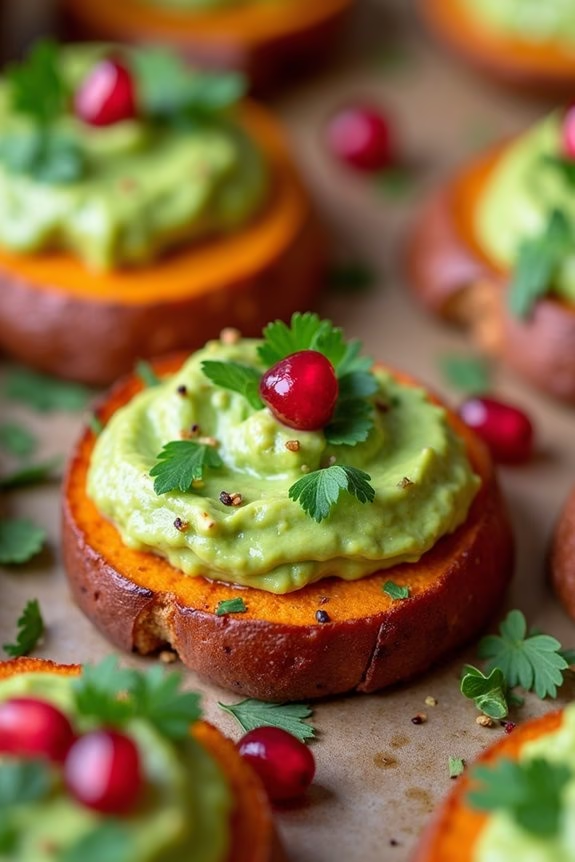
Sweet Potato Rounds With Avocado are a delightful and healthy appetizer perfect for your gluten-free Christmas celebration. This dish brings together the natural sweetness of roasted sweet potatoes with the creamy, rich texture of avocado. The combination is both visually appealing and delicious, making it a wonderful addition to any festive spread.
The best part is that it’s simple to prepare, making it ideal for hosts who want to spend more time enjoying the festivities rather than being stuck in the kitchen.
This recipe is designed to serve 4-6 people, providing a generous portion for everyone to enjoy. The sweet potato rounds act as a flavorful base, providing both texture and a subtle sweetness that pairs beautifully with the creamy avocado topping.
With just a few additional ingredients, such as lime juice and fresh herbs, this appetizer becomes an elegant and tasty treat that will impress your guests and satisfy various dietary needs.
Ingredients for 4-6 servings:
- 2 large sweet potatoes
- 2 ripe avocados
- 2 tablespoons olive oil
- 1 tablespoon lime juice
- Salt and pepper to taste
- 1/4 cup fresh cilantro, chopped
- 1/4 cup pomegranate seeds (optional, for garnish)
Cooking Instructions:
1. Preheat the Oven: Start by preheating your oven to 400°F (200°C). This will guarantee that your sweet potato rounds cook evenly and develop a nice, roasted flavor.
2. Prepare the Sweet Potatoes: Wash the sweet potatoes thoroughly and slice them into 1/4-inch thick rounds. Try to keep the slices as uniform as possible to guarantee even cooking.
3. Season and Roast: Arrange the sweet potato slices in a single layer on a baking sheet lined with parchment paper. Drizzle olive oil over the slices and season with salt and pepper. Use your hands or a brush to make sure each round is evenly coated.
Roast in the preheated oven for 20-25 minutes, flipping halfway through, until the rounds are tender and slightly browned.
4. Prepare the Avocado Mixture: While the sweet potatoes are roasting, cut the avocados in half, remove the pits, and scoop the flesh into a bowl. Add lime juice, salt, and pepper, and mash until smooth and creamy. For an extra creamy texture, you can blend it using a hand mixer.
5. Assemble the Appetizer: Once the sweet potato rounds are done, remove them from the oven and let them cool slightly. Top each round with a generous spoonful of the avocado mixture.
6. Garnish and Serve: Sprinkle the chopped cilantro and pomegranate seeds over the avocado-topped sweet potato rounds for a pop of color and flavor. Serve immediately while the sweet potatoes are warm.
Extra Tips:
For added flavor, consider adding a pinch of smoked paprika or cayenne pepper to the sweet potatoes before roasting. If you prefer a bit of crunch, finely chopped red onion or radish slices can be used as an additional topping.
For a make-ahead option, you can roast the sweet potatoes and prepare the avocado mixture a few hours in advance, keeping them separate until just before serving to maintain the best texture and flavor.
Cranberry and Brie Tartlets
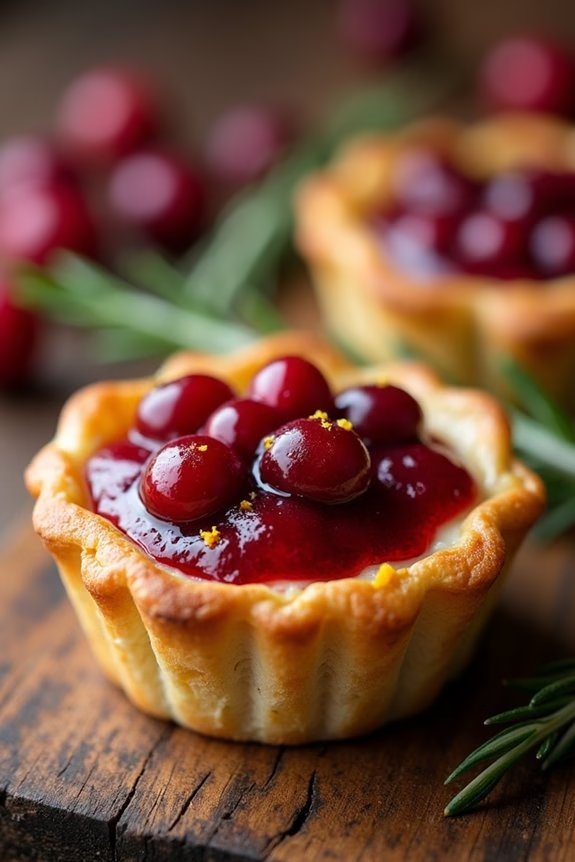
Cranberry and Brie Tartlets are a delightful addition to any Christmas appetizer spread, offering a perfect balance of sweet and savory flavors. These bite-sized treats feature a flaky gluten-free pastry crust filled with creamy Brie cheese and topped with a tangy cranberry sauce. They aren’t only visually appealing but also incredibly delicious, making them a crowd-pleaser for guests with dietary restrictions and those without.
To guarantee that everyone can enjoy these festive tartlets, we’ve crafted a recipe that’s entirely gluten-free without compromising on taste or texture. The combination of the rich, buttery Brie and the tart cranberries makes for a sophisticated appetizer that pairs beautifully with holiday drinks. With a serving size of 4-6 people, this recipe is perfect for a small gathering or can easily be doubled for larger celebrations.
Ingredients (for 4-6 servings):
- 1 sheet of gluten-free puff pastry
- 8 oz Brie cheese, rind removed and cut into small cubes
- 1 cup fresh cranberries
- 1/4 cup granulated sugar
- 1 tablespoon orange juice
- 1/2 teaspoon orange zest
- 1/4 teaspoon ground cinnamon
- 1/4 teaspoon salt
- 1 egg (for egg wash)
- Fresh rosemary sprigs for garnish (optional)
Instructions:
- Preheat the Oven: Start by preheating your oven to 375°F (190°C). This guarantees that the tartlets bake evenly and achieve a golden-brown crust.
- Prepare the Cranberry Sauce: In a small saucepan, combine the fresh cranberries, granulated sugar, orange juice, orange zest, ground cinnamon, and salt. Cook over medium heat, stirring occasionally, until the cranberries burst and the mixture thickens slightly, about 10 minutes. Remove from heat and let it cool.
- Roll Out the Puff Pastry: Lightly flour your work surface and roll out the gluten-free puff pastry sheet. Cut it into 12 equal squares, approximately 3×3 inches each. This will form the base of your tartlets.
- Assemble the Tartlets: Place each pastry square into the cups of a mini muffin tin, gently pressing down to form a well. Add a cube of Brie cheese into each pastry cup. Top with a spoonful of the prepared cranberry sauce.
- Apply Egg Wash: In a small bowl, beat the egg and brush the edges of the pastry with the egg wash. This will give the tartlets a nice sheen and help them brown beautifully.
- Bake the Tartlets: Place the muffin tin in the preheated oven and bake for 15-20 minutes or until the pastry is golden and crispy, and the cheese is bubbly.
- Cool and Garnish: Allow the tartlets to cool slightly before removing them from the tin. Garnish with fresh rosemary sprigs if desired, which adds an aromatic touch.
Extra Tips:
When working with gluten-free puff pastry, it’s important to keep it chilled as it can become sticky and difficult to manage at room temperature. Plan to roll and work with the pastry quickly to maintain its structure.
Additionally, feel free to experiment with different cheeses if Brie isn’t your favorite; goat cheese or camembert can also work wonderfully in this recipe. For a more robust flavor, consider adding a sprinkle of crushed pecans or walnuts on top before baking.
These versatile tartlets can be made a few hours in advance and gently reheated in the oven just before serving, making them a convenient option for holiday hosting.
Spinach and Artichoke Dip With Gluten-Free Crackers
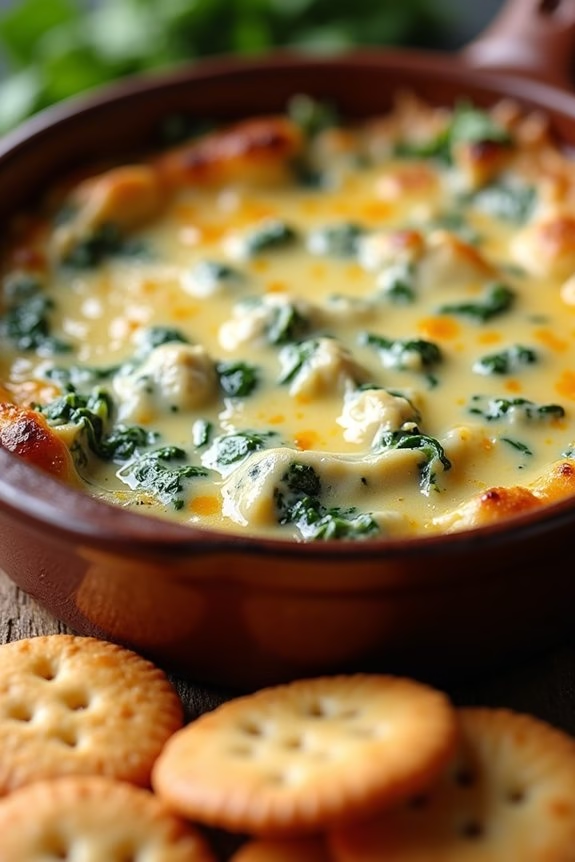
Spinach and Artichoke Dip With Gluten-Free Crackers is a delightful appetizer that’s perfect for holiday gatherings. This creamy, savory dip combines the rich flavors of spinach and artichokes with a blend of cheeses for a satisfying treat. Pair it with gluten-free crackers to cater to all your guests, guaranteeing everyone can enjoy this festive starter.
Whether you’re hosting a Christmas party or looking for a snack to enjoy while wrapping gifts, this dip is sure to please. The combination of fresh spinach, tangy artichokes, and a medley of cheeses creates a warm and inviting dish that’s both comforting and sophisticated.
The gluten-free crackers add a delightful crunch that complements the creamy dip perfectly. This recipe is designed to serve 4-6 people, making it an ideal addition to your holiday spread. The simplicity of the preparation allows you to focus on other holiday tasks while still delivering a memorable dish.
Ingredients:
- 1 cup fresh spinach, chopped
- 1 can (14 oz) artichoke hearts, drained and chopped
- 1 cup cream cheese, softened
- 1/2 cup sour cream
- 1/4 cup mayonnaise
- 1 cup mozzarella cheese, shredded
- 1/2 cup Parmesan cheese, grated
- 2 cloves garlic, minced
- 1/2 teaspoon salt
- 1/4 teaspoon black pepper
- Gluten-free crackers for serving
Instructions:
- Preheat the Oven: Begin by preheating your oven to 350°F (175°C). This will guarantee the dip bakes evenly and achieves a bubbly, golden top.
- Prepare the Spinach and Artichoke: In a large mixing bowl, combine the chopped spinach and artichoke hearts. Make sure the artichokes are well-drained to prevent excess moisture in the dip.
- Mix the Cream Base: Add the cream cheese, sour cream, and mayonnaise to the bowl. Use a spatula to mix these ingredients until smooth and well combined.
- Incorporate the Cheeses and Seasoning: Stir in the mozzarella cheese, Parmesan cheese, minced garlic, salt, and black pepper. Guarantee all ingredients are evenly distributed throughout the mixture.
- Transfer to Baking Dish: Spoon the mixture into a baking dish, spreading it out evenly. A medium-sized dish, such as an 8×8 inch, works perfectly for this quantity.
- Bake the Dip: Place the dish in the preheated oven and bake for 20-25 minutes, or until the top is golden brown and the cheese is bubbly.
- Serve with Crackers: Once baked, remove the dish from the oven and let it cool slightly. Serve warm with gluten-free crackers on the side for dipping.
Extra Tips:
For a bit of extra flavor, consider adding a pinch of red pepper flakes or a squeeze of lemon juice to the dip mixture before baking.
You can also prepare the dip a day in advance and store it in the refrigerator; simply bake it just before serving. If you prefer a bit more texture, try using a mix of chopped fresh spinach and frozen spinach (thawed and drained).
The dish can also be reheated in the oven or microwave, making it an easy make-ahead option for busy holiday schedules.
Zucchini Fritters With Dill Sauce

Zucchini Fritters With Dill Sauce are a delightful gluten-free appetizer perfect for your Christmas gathering. These crispy, golden fritters are made with fresh zucchini, combined with aromatic herbs and spices, and then pan-fried to perfection. The accompanying dill sauce, made with a creamy base and infused with fresh dill, adds a rejuvenating zing that compliments the fritters beautifully.
Whether you’re hosting a large party or an intimate dinner, these fritters will surely impress your guests with their delicious flavor and elegant presentation. The recipe isn’t only gluten-free but also quite versatile, allowing you to experiment with the seasonings to suit your taste preferences.
The zucchini fritters are easy to make, requiring simple ingredients that you might already have in your kitchen. The secret to achieving the perfect texture lies in properly draining the zucchini, guaranteeing the fritters are crispy on the outside while remaining tender inside. Paired with the dill sauce, these fritters make for an irresistible appetizer that even those without dietary restrictions will enjoy.
Ingredients for Zucchini Fritters With Dill Sauce (Serves 4-6):
- 3 medium zucchinis
- 1 teaspoon salt
- 2 large eggs
- 1/2 cup gluten-free all-purpose flour
- 1/4 cup grated Parmesan cheese
- 2 cloves garlic, minced
- 1/4 teaspoon black pepper
- 1/4 teaspoon paprika
- 2 tablespoons fresh parsley, chopped
- 2 tablespoons olive oil
For Dill Sauce:
- 1 cup plain Greek yogurt
- 1 tablespoon fresh dill, chopped
- 1 tablespoon lemon juice
- 1 clove garlic, minced
- Salt and pepper to taste
Cooking Instructions:
- Prepare the Zucchini: Grate the zucchinis using a box grater. Place the grated zucchini in a colander set over a bowl. Sprinkle with salt and let it sit for 10 minutes to draw out excess moisture.
- Drain the Zucchini: After 10 minutes, use your hands or a clean kitchen towel to squeeze out as much liquid as possible from the zucchini. This step is essential for achieving crispy fritters.
- Mix the Batter: In a large bowl, combine the drained zucchini, eggs, gluten-free flour, Parmesan cheese, minced garlic, black pepper, paprika, and chopped parsley. Stir until well combined.
- Form the Fritters: Heat olive oil in a large skillet over medium heat. Scoop about 2 tablespoons of the zucchini mixture into your hands and shape it into a small patty. Place it in the skillet and flatten slightly. Repeat with the remaining mixture.
- Cook the Fritters: Fry the fritters for about 3-4 minutes on each side or until golden brown and crispy. You may need to do this in batches to avoid overcrowding the skillet. Transfer the cooked fritters to a plate lined with paper towels to absorb excess oil.
- Make the Dill Sauce: In a small bowl, mix together the Greek yogurt, fresh dill, lemon juice, minced garlic, salt, and pepper until well combined. Adjust seasoning to taste.
- Serve: Arrange the zucchini fritters on a serving platter and serve warm with the dill sauce on the side.
Extra Tips:
When making Zucchini Fritters With Dill Sauce, make sure you don’t skip the step of draining the zucchini thoroughly; this is key to achieving a crispy texture. If the batter seems too wet, add a little more gluten-free flour to help bind it.
When frying, maintain a medium heat to guarantee the fritters cook through without burning. For an extra touch, try adding a pinch of cayenne pepper to the batter for a bit of heat, or sprinkle some lemon zest into the dill sauce for a citrusy note.
Enjoy these fritters as an appetizer, or even as a light lunch or snack!
Mini Quinoa-Stuffed Bell Peppers
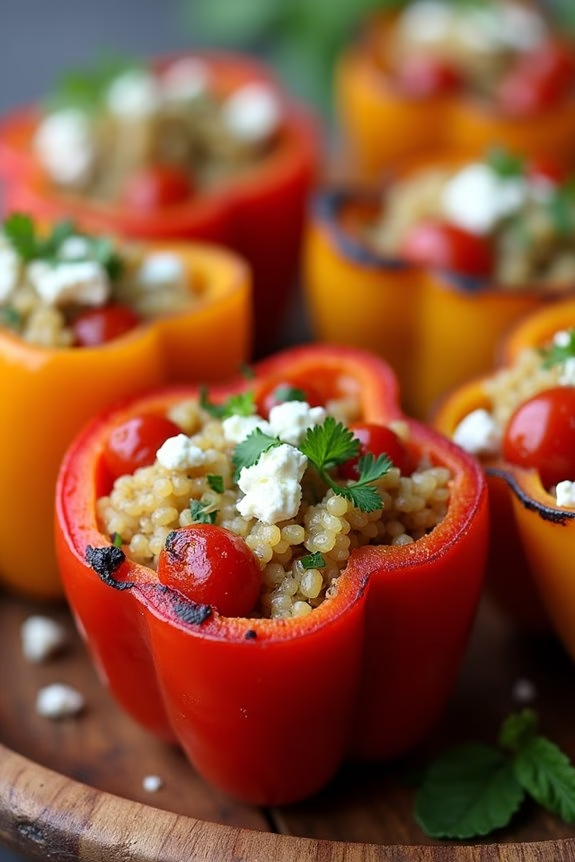
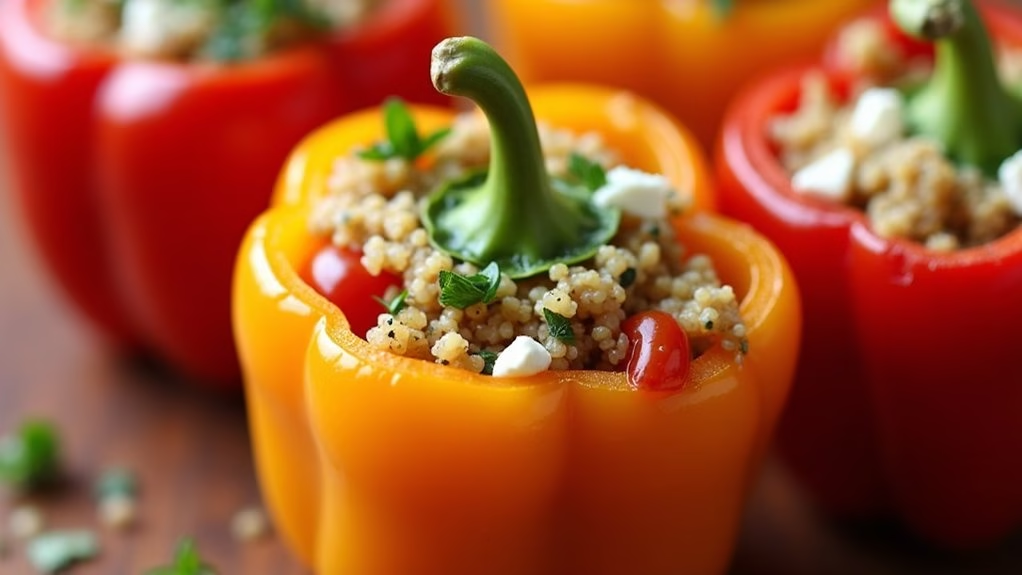
Mini Quinoa-Stuffed Bell Peppers are a delightful gluten-free appetizer that will add a pop of color and a burst of flavor to your Christmas spread. These bite-sized treats are perfect for holiday gatherings, offering a satisfying combination of textures and tastes. The sweetness of the miniature bell peppers complements the savory quinoa filling, which is packed with herbs, spices, and a hint of cheese for a deliciously festive treat.
These stuffed peppers aren’t only easy to prepare but also make for a healthy appetizer option, guaranteeing that your guests have a nutritious start to their meal. The quinoa provides a good source of protein and fiber, while the fresh vegetables and herbs add vitamins and minerals. Whether you’re catering to gluten-free diets or simply looking for a fresh addition to your holiday menu, these Mini Quinoa-Stuffed Bell Peppers are sure to impress.
Ingredients for 4-6 servings:
- 12 mini bell peppers
- 1 cup quinoa, rinsed
- 2 cups vegetable broth
- 1 tablespoon olive oil
- 1 small onion, finely chopped
- 2 cloves garlic, minced
- 1 teaspoon ground cumin
- 1 teaspoon smoked paprika
- 1/2 teaspoon salt
- 1/4 teaspoon black pepper
- 1 cup cherry tomatoes, quartered
- 1/2 cup feta cheese, crumbled
- 1/4 cup fresh parsley, chopped
- 2 tablespoons fresh basil, chopped
- Juice of 1 lemon
Cooking Instructions:
- Prepare the Quinoa: In a medium saucepan, combine the rinsed quinoa and vegetable broth. Bring to a boil over medium-high heat. Once boiling, reduce the heat to low, cover the pan, and let it simmer for about 15 minutes or until the quinoa is tender and the liquid has been absorbed. Fluff the quinoa with a fork and set aside.
- Prepare the Bell Peppers: While the quinoa is cooking, preheat your oven to 375°F (190°C). Cut the mini bell peppers in half lengthwise and remove the seeds and membranes. Arrange the bell pepper halves on a baking sheet, cut side up.
- Cook the Aromatics: In a large skillet, heat the olive oil over medium heat. Add the chopped onion and sauté for about 5 minutes until translucent. Add the minced garlic and cook for another minute until fragrant.
- Combine the Filling: To the skillet, add the cooked quinoa, cumin, smoked paprika, salt, and black pepper. Stir well to combine all the ingredients. Then, add the cherry tomatoes, crumbled feta cheese, parsley, basil, and lemon juice. Stir gently until everything is well mixed and heated through.
- Stuff the Peppers: Spoon the quinoa mixture into each bell pepper half, pressing lightly to guarantee the filling stays in place. Drizzle a little olive oil over the stuffed peppers for added moisture.
- Bake the Peppers: Place the baking sheet in the preheated oven and bake for about 15-20 minutes, or until the peppers are tender and the tops are slightly golden.
- Serve and Enjoy: Once baked, remove the peppers from the oven and let them cool slightly before serving. These can be enjoyed warm or at room temperature.
Extra Tips:
To guarantee the peppers cook evenly, try to select mini bell peppers that are similar in size. If you prefer a spicier kick, consider adding a pinch of cayenne pepper to the quinoa mixture. For a vegan version, simply omit the feta cheese or replace it with a plant-based alternative.
These stuffed peppers can be prepared a day in advance and stored in the refrigerator; just reheat them briefly before serving to recapture their warm flavors. Enjoy these delightful bites as a starter or as part of a holiday buffet spread.

