
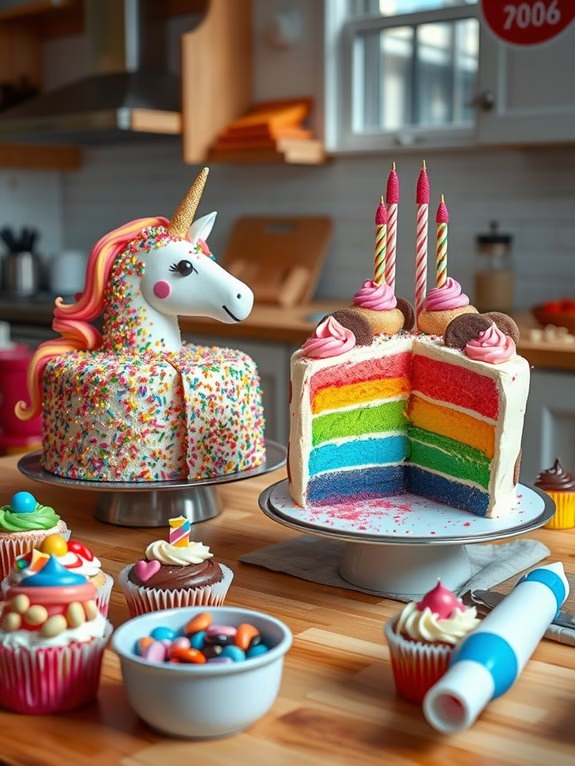
There’s something truly magical about crafting a birthday cake that lights up a child’s eyes with pure joy.
Whether it’s a Rainbow Layer Cake bursting with vibrant colors or a Chocolate Dinosaur Cake that adds a dash of adventure, these creations turn any celebration into a memorable occasion. Each cake is a delightful journey, adding a sprinkle of wonder to their special day.
Don’t forget the Unicorn Fantasy Cake, gleaming with enchanting charm. Let’s explore these whimsical cake ideas that promise to make birthday wishes come true.
Rainbow Layer Cake
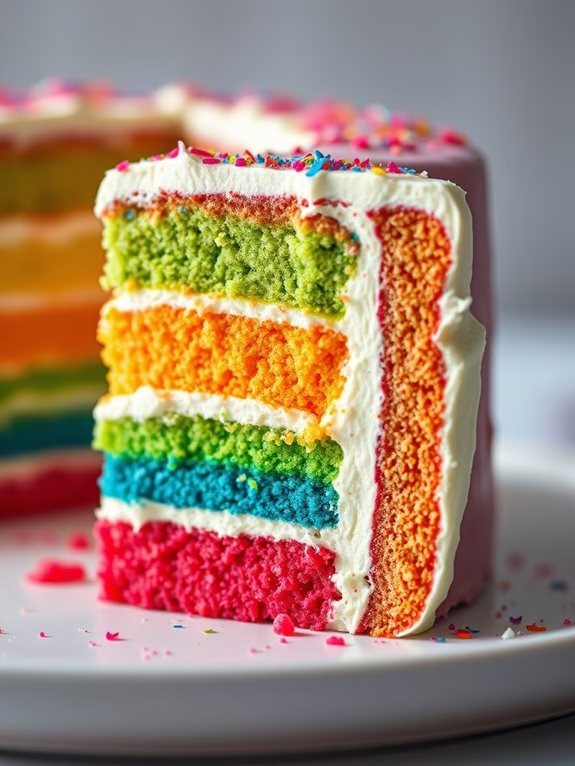
Rainbow Layer Cake is a delightful and visually stunning dessert that’s sure to be the highlight of any child’s birthday celebration. This colorful cake features multiple layers, each tinted with vibrant food coloring, stacked together to create a mesmerizing rainbow effect. Not only does it look impressive, but it also offers a deliciously moist and fluffy texture that kids will adore. The cake is typically frosted with a creamy vanilla buttercream that complements the colors perfectly.
Creating a Rainbow Layer Cake can seem like an intimidating task, but with a little patience and preparation, it’s a fun and rewarding baking project. It’s important to make certain that each layer is evenly baked and cooled before assembling the cake. This guarantees that the layers stack neatly and don’t collapse under the weight of the frosting. Additionally, using gel food coloring helps achieve bright and vivid colors without altering the cake’s texture. Here’s how you can create a Rainbow Layer Cake to serve 4-6 people.
Ingredients:
- 2 ½ cups all-purpose flour
- 2 ½ tsp baking powder
- ½ tsp salt
- 1 cup unsalted butter, at room temperature
- 1 ¾ cups granulated sugar
- 4 large eggs, at room temperature
- 1 tbsp vanilla extract
- 1 cup whole milk, at room temperature
- Gel food coloring (red, orange, yellow, green, blue, purple)
- 3 cups powdered sugar
- 1 cup unsalted butter, at room temperature (for frosting)
- 3-4 tbsp heavy cream (for frosting)
- 1 tsp vanilla extract (for frosting)
Cooking Instructions:
- Preheat the Oven: Set your oven to 350°F (175°C) and grease six 8-inch round cake pans. Line the bottoms with parchment paper for easy removal.
- Mix Dry Ingredients: In a medium bowl, whisk together the flour, baking powder, and salt. Set aside.
- Cream Butter and Sugar: In a large bowl, beat the butter and sugar together using an electric mixer until light and fluffy, about 5 minutes.
- Add Eggs and Vanilla: Add the eggs one at a time, beating well after each addition. Mix in the vanilla extract.
- Combine Ingredients: Gradually add the dry ingredients to the wet mixture, alternating with the milk, starting and ending with the flour mixture. Mix just until combined.
- Divide and Color the Batter: Divide the batter evenly among six bowls. Add a few drops of gel food coloring to each bowl to create red, orange, yellow, green, blue, and purple batter. Stir until fully incorporated.
- Bake the Layers: Pour each colored batter into the prepared cake pans and smooth the tops with a spatula. Bake for 15-20 minutes, or until a toothpick inserted into the center comes out clean.
- Cool the Cakes: Allow the cakes to cool in the pans for 10 minutes, then turn them out onto wire racks to cool completely.
- Make the Frosting: In a large bowl, beat the butter until creamy. Gradually add the powdered sugar and beat until smooth. Mix in the vanilla extract and heavy cream until the frosting is light and fluffy.
- Assemble the Cake: Place the purple cake layer on a cake stand and spread a thin layer of frosting over it. Continue layering the cakes in order of the rainbow, adding frosting between each layer.
- Frost the Cake: Once all the layers are stacked, cover the entire cake with a crumb coat of frosting. Refrigerate for 30 minutes, then apply a final layer of frosting.
Extra Tips:
For the best results, make certain that your ingredients are at room temperature before starting. This helps the batter mix smoothly and results in a more even bake.
If you don’t have six cake pans, bake the layers in batches, allowing the pans to cool and washing them between uses.
When layering and frosting the cake, use a long serrated knife to trim the tops of the cakes if necessary to make sure they’re flat. This will help the cake to stack evenly.
Finally, feel free to decorate the finished cake with sprinkles or edible glitter for an extra touch of magic.
Chocolate Dinosaur Cake

Chocolate Dinosaur Cake
Creating a Chocolate Dinosaur Cake is a fantastic way to add a touch of adventure and excitement to a child’s birthday celebration. This cake combines the rich, moist flavors of chocolate with a fun dinosaur theme that’s sure to capture the imagination of any young dinosaur enthusiast.
With its lush chocolate layers and colorful dinosaur decorations, this cake not only tastes delicious but also serves as a centerpiece that will bring smiles and joy to the party.
This recipe is designed to serve 4-6 people, making it perfect for a small gathering or at-home celebration. The Chocolate Dinosaur Cake features a classic chocolate sponge with a creamy chocolate buttercream frosting, all topped with playful dinosaur decorations that are easy to make with simple ingredients.
Whether you’re a seasoned baker or a novice, you’ll find this recipe straightforward and rewarding as you create a memorable treat for your little one’s special day.
Ingredients (serving size: 4-6 people):
- 1 cup all-purpose flour
- 1 cup granulated sugar
- 1/2 cup unsweetened cocoa powder
- 1 teaspoon baking powder
- 1/2 teaspoon baking soda
- 1/4 teaspoon salt
- 1/2 cup unsalted butter, softened
- 2 large eggs
- 1 teaspoon vanilla extract
- 1/2 cup whole milk
- 1 cup semi-sweet chocolate chips
- 1/2 cup heavy cream
- Dinosaur-shaped candy or cake toppers
- Green food coloring (optional for frosting)
Cooking Instructions:
- Preheat the Oven: Begin by preheating your oven to 350°F (175°C). Grease and flour an 8-inch round cake pan to prevent the cake from sticking.
- Mix Dry Ingredients: In a large bowl, whisk together the flour, sugar, cocoa powder, baking powder, baking soda, and salt until well combined.
- Cream Butter and Sugar: In a separate bowl, beat the softened butter with an electric mixer until creamy. Gradually add the sugar, continuing to beat until the mixture is light and fluffy.
- Add Eggs and Vanilla: Add the eggs one at a time, beating well after each addition. Mix in the vanilla extract until fully incorporated.
- Combine Wet and Dry Ingredients: Gradually add the dry ingredient mixture to the creamed butter mixture, alternating with the milk. Mix until the batter is smooth and all ingredients are well blended.
- Bake the Cake: Pour the batter into the prepared cake pan and smooth the top with a spatula. Bake in the preheated oven for 30-35 minutes, or until a toothpick inserted into the center comes out clean. Allow the cake to cool in the pan for 10 minutes, then transfer to a wire rack to cool completely.
- Prepare the Chocolate Frosting: In a small saucepan, heat the heavy cream over medium heat until it begins to simmer. Remove from heat and stir in the chocolate chips until melted and the mixture is smooth. Allow the frosting to cool slightly.
- Frost the Cake: Once the cake is completely cool, spread the chocolate frosting evenly over the top and sides of the cake. If desired, add a few drops of green food coloring to a portion of the frosting for a grassy effect.
- Decorate with Dinosaur Toppers: Arrange dinosaur-shaped candy or cake toppers on the frosted cake, creating a playful prehistoric scene.
Extra Tips:
When making the Chocolate Dinosaur Cake, verify that all ingredients are at room temperature for smoother mixing and better texture.
If you want to add an extra layer of excitement, consider using a variety of dinosaur cake toppers to create a dynamic scene.
You can also experiment with different colors of frosting by adding food coloring to match the party theme.
Finally, for a more intense chocolate flavor, use high-quality cocoa powder and chocolate chips.
Unicorn Fantasy Cake

Unicorn Fantasy Cake Recipe
Unleash the magic of a Unicorn Fantasy Cake that will captivate children’s imaginations and delight their taste buds. This enchanting cake is perfect for birthday parties or any special occasion where you want to add a touch of whimsy and color. With layers of vibrant cake and dreamy frosting, topped with a rainbow of sprinkles and a unicorn horn, this cake is as delightful to look at as it’s to eat.
Get ready to create a centerpiece that will have kids and adults alike in awe. The Unicorn Fantasy Cake is a multi-layered creation that combines fluffy cake layers with a creamy, pastel-hued frosting. You’ll be using food coloring to achieve the signature rainbow effect, along with a few decorative elements to complete the unicorn theme.
While this cake might look complex, it’s a fun project that’s sure to be a hit. Follow our detailed instructions, and you’ll be able to whip up a magical cake that serves 4-6 people, perfect for a small gathering or family celebration.
Ingredients (Serving Size: 4-6 people):
- 1 ½ cups all-purpose flour
- 1 ½ teaspoons baking powder
- ¼ teaspoon salt
- ½ cup unsalted butter, softened
- 1 cup granulated sugar
- 2 large eggs
- 2 teaspoons vanilla extract
- ½ cup whole milk
- Food coloring (pink, blue, purple, yellow)
- 2 cups powdered sugar
- 1 cup unsalted butter, softened (for frosting)
- 2 tablespoons heavy cream
- 1 teaspoon vanilla extract (for frosting)
- Edible glitter or sprinkles
- Unicorn horn and ear cake toppers (optional)
Instructions:
- Preheat and Prep: Preheat your oven to 350°F (175°C). Grease and flour two 6-inch round cake pans. This guarantees the cake doesn’t stick and bakes evenly.
- Mix Dry Ingredients: In a bowl, whisk together the flour, baking powder, and salt. Set aside. This step guarantees that the dry ingredients are evenly distributed.
- Cream Butter and Sugar: In a large mixing bowl, beat ½ cup softened butter and 1 cup sugar until light and fluffy. This should take about 3-4 minutes and is essential for a light cake texture.
- Add Eggs and Vanilla: Beat in the eggs, one at a time, followed by 2 teaspoons of vanilla extract. Mix until just combined.
- Combine with Milk: Gradually add the dry ingredients to the wet mixture, alternating with the milk. Start and end with the dry ingredients. Mix until just combined, being careful not to overmix.
- Divide and Color: Divide the batter evenly into four bowls. Add a few drops of food coloring to each bowl to create four different colored batters (pink, blue, purple, yellow).
- Bake: Pour each colored batter into the prepared cake pans and bake for 18-22 minutes, or until a toothpick inserted in the center comes out clean. Allow cakes to cool in pans for 10 minutes, then transfer to a wire rack to cool completely.
- Prepare Frosting: In a large bowl, beat 1 cup softened butter until creamy. Gradually add 2 cups powdered sugar, beating until smooth. Add 2 tablespoons heavy cream and 1 teaspoon vanilla extract. Beat until the frosting is fluffy and spreadable.
- Assemble Cake: Once cakes are completely cool, level them if necessary. Place the first layer on a cake stand, spread a layer of frosting, and repeat with remaining layers. Frost the top and sides of the cake.
- Decorate: Use a piping bag to add decorative swirls of frosting on top. Sprinkle with edible glitter or sprinkles. Add unicorn horn and ear toppers, if using, to complete the look.
Extra Tips:
When making the Unicorn Fantasy Cake, verify all your ingredients are at room temperature, especially the butter and eggs, as this helps blend them smoothly into the batter.
If you’re using gel food coloring, remember that a little goes a long way, so add gradually to achieve your desired shade. Allow the cake layers to completely cool before frosting to prevent the frosting from melting.
Finally, for a more professional finish, consider using a crumb coat—a thin layer of frosting—before your final frosting layer to keep crumbs from mixing in.
Confetti Sprinkle Cake
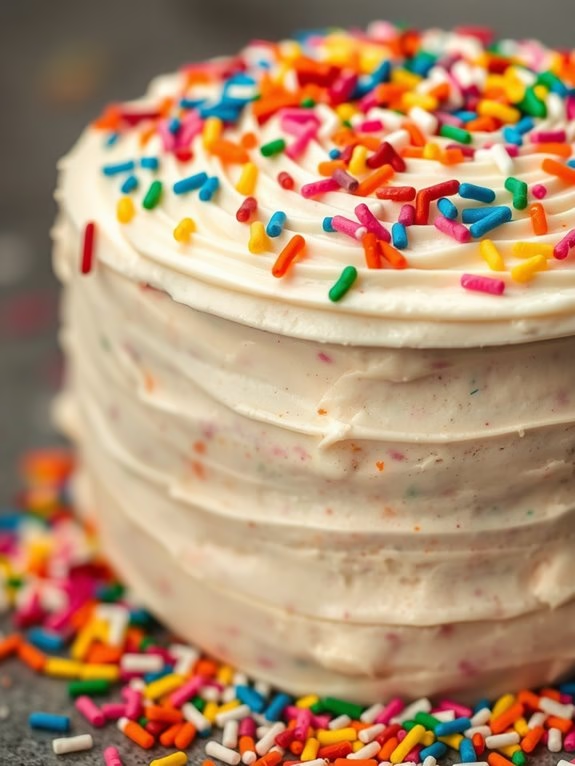
Confetti Sprinkle Cake is a delightful and colorful treat that’s perfect for any child’s birthday celebration. This cake isn’t only visually appealing with its vibrant sprinkles scattered throughout, but it also offers a moist and fluffy texture that kids will love. The funfetti effect is achieved by incorporating rainbow sprinkles into the cake batter, which melt slightly during baking, creating a beautiful burst of color in every slice. Topped with a creamy and smooth vanilla frosting, this cake is sure to be a hit at any birthday party.
Creating a Confetti Sprinkle Cake is a fun and rewarding experience that can be enjoyed by the whole family. It’s simple enough for beginners to make but offers enough excitement to engage more experienced bakers. The key to this cake’s success is using the right type of sprinkles and avoiding overmixing the batter, which can lead to a denser texture.
Once baked and frosted, the cake can be decorated with additional sprinkles, allowing you to customize it to match the party’s theme or the birthday child’s favorite colors.
Ingredients (serving size: 4-6 people):
- 1 cup granulated sugar
- 1/2 cup unsalted butter, softened
- 2 large eggs
- 1 tablespoon pure vanilla extract
- 1 1/2 cups all-purpose flour
- 1 1/2 teaspoons baking powder
- 1/2 teaspoon salt
- 1/2 cup whole milk
- 1/2 cup rainbow sprinkles
- 1 cup unsalted butter, softened (for frosting)
- 3 1/2 cups powdered sugar (for frosting)
- 2 teaspoons pure vanilla extract (for frosting)
- 3 tablespoons heavy cream (for frosting)
- Additional sprinkles for decoration
Cooking Instructions:
- Preheat the Oven and Prepare Pans: Preheat your oven to 350°F (175°C). Grease and flour two 8-inch round cake pans, making sure the cakes will release easily once baked.
- Cream Butter and Sugar: In a large mixing bowl, cream together 1/2 cup of softened butter and 1 cup of granulated sugar until light and fluffy, about 3-4 minutes using an electric mixer.
- Add Eggs and Vanilla: Beat in the eggs, one at a time, making sure each egg is fully incorporated before adding the next. Mix in 1 tablespoon of vanilla extract until combined.
- Mix Dry Ingredients: In a separate bowl, whisk together 1 1/2 cups of flour, 1 1/2 teaspoons of baking powder, and 1/2 teaspoon of salt.
- Combine Wet and Dry Ingredients: Gradually add the dry ingredients to the wet mixture, alternating with the 1/2 cup of milk, beginning and ending with the dry ingredients. Mix until just combined.
- Fold in Sprinkles: Gently fold in 1/2 cup of rainbow sprinkles, being careful not to overmix, which could lead to color bleeding.
- Bake the Cake Layers: Divide the batter evenly between the prepared cake pans. Bake in the preheated oven for 25-30 minutes or until a toothpick inserted into the center comes out clean.
- Cool the Cakes: Allow the cakes to cool in the pans for 10 minutes, then carefully remove them from the pans and transfer to a wire rack to cool completely.
- Make the Frosting: In a large bowl, beat 1 cup of softened butter until creamy. Gradually add 3 1/2 cups of powdered sugar, mixing until smooth. Beat in 2 teaspoons of vanilla extract and 3 tablespoons of heavy cream until the frosting is fluffy and spreadable.
- Assemble and Decorate the Cake: Place one cake layer on a serving plate and spread a layer of frosting on top. Place the second cake layer on top and frost the entire cake. Decorate with additional sprinkles as desired.
Extra Tips:
For the best results, use jimmies-type sprinkles, as nonpareils or sanding sugars can bleed color into the batter. Make sure all ingredients are at room temperature to help them blend more smoothly.
If you prefer a taller cake, consider doubling the recipe and using three cake pans. To achieve clean slices, use a serrated knife and wipe it clean between cuts. Enjoy the process and encourage kids to help with the decorating for a fun activity.
Cartoon Character Cake
Cartoon Character Cake
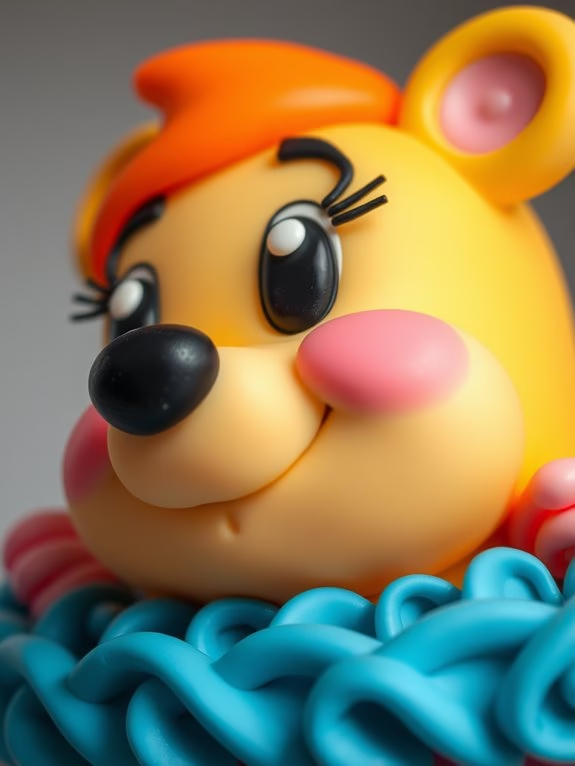
Creating a cartoon character cake is a delightful way to bring a smile to your child’s face on their special day. This cake captures the joy and excitement of their favorite cartoon character, turning a birthday celebration into an unforgettable event. Whether it’s Mickey Mouse, SpongeBob SquarePants, or Peppa Pig, these cakes aren’t only fun to look at but also delicious to eat.
With a little creativity and some baking skills, you can craft a cake that’s both a visual masterpiece and a tasty treat. This recipe is designed to serve 4-6 people and is perfect for a small gathering. It involves baking a basic sponge cake as the base and then using fondant and icing to create the cartoon character design. This project is a bit more intricate, requiring patience and a steady hand for the decoration, but the end result is worth the effort.
Let’s explore the ingredients and steps needed to make your child’s birthday cake dreams come true.
Ingredients (Serves 4-6):
- 1 ½ cups all-purpose flour
- 1 cup granulated sugar
- ½ cup unsalted butter, softened
- 2 large eggs
- 1 teaspoon vanilla extract
- ½ cup milk
- 1 ½ teaspoons baking powder
- ¼ teaspoon salt
- Various colors of fondant
- 2 cups buttercream icing
- Food coloring (optional, for buttercream)
- Edible markers or gels (for detailing)
Cooking Instructions:
- Preheat the Oven: Begin by preheating your oven to 350°F (175°C). Grease and line a 9-inch round cake pan with parchment paper to prevent sticking.
- Prepare the Cake Batter: In a large mixing bowl, cream together the softened butter and granulated sugar until light and fluffy. Beat in the eggs one at a time, then stir in the vanilla extract.
- Combine Dry Ingredients: In a separate bowl, whisk together the flour, baking powder, and salt. Gradually add this dry mixture to the wet mixture, alternating with the milk, until everything is well combined.
- Bake the Cake: Pour the batter into the prepared cake pan and smooth the top with a spatula. Bake in the preheated oven for 25-30 minutes, or until a toothpick inserted into the center of the cake comes out clean. Let the cake cool in the pan for 10 minutes, then turn it out onto a wire rack to cool completely.
- Prepare the Decorations: While the cake is cooling, roll out the fondant in various colors that match the cartoon character’s appearance. Use a template or freehand cut the shapes you’ll need for the character’s features.
- Assemble the Cake: Once the cake has cooled, apply a thin layer of buttercream icing over the entire surface to create a smooth base for the fondant. Cover the cake with a base layer of fondant, smoothing it down with your hands.
- Create the Character: Carefully place the prepared fondant shapes onto the cake, using a small amount of water to adhere them. Add any additional details with edible markers or gels for fine lines and features.
- Final Touches: Use additional buttercream, tinted with food coloring if desired, to add extra character details or embellishments around the cake.
Extra Tips:
When working with fondant, it’s important to keep it covered with plastic wrap or in an airtight container when you’re not using it, as it can dry out quickly.
If you’re new to working with fondant, practice rolling and shaping it on a clean surface dusted with a little powdered sugar to prevent sticking. Additionally, if possible, prepare the fondant decorations a day in advance to save time on the day of the event and allow them to set properly.
Always verify the cake is completely cooled before you start decorating to avoid melting the fondant and buttercream.
Under the Sea Cake
Under the Sea Cake
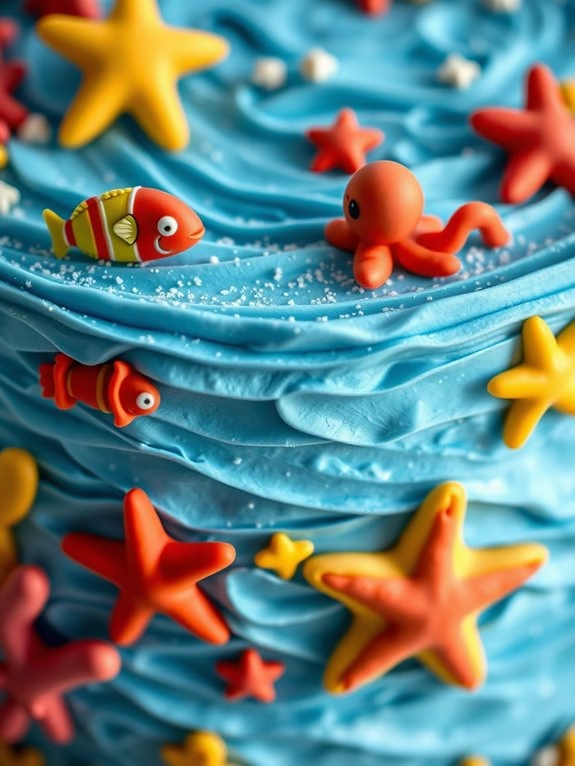
Bring a splash of ocean fun to your child’s birthday party with this delightful Under the Sea Cake. This cake isn’t just a treat for the taste buds but also a feast for the eyes, featuring colorful sea creatures and ocean waves that will make your little one’s party unforgettable. Ideal for a party of 4-6 people, this cake is designed to be both delicious and creative, encouraging kids to immerse themselves in the world of imagination as they enjoy their special day.
Creating an Under the Sea Cake involves a bit of artistry, but it’s a rewarding endeavor that will leave a lasting impression. The cake layers are made with a fluffy vanilla sponge, while the frosting is a smooth buttercream tinted in shades of blue to mimic the ocean. The sea decorations can be made using fondant or marzipan, shaped into adorable sea creatures like fish, octopuses, and starfish, offering a vibrant and playful aesthetic.
Ingredients (serves 4-6):
- 2 cups all-purpose flour
- 1 ½ cups granulated sugar
- 1 tablespoon baking powder
- ½ teaspoon salt
- ½ cup unsalted butter, softened
- 3 large eggs
- 1 cup whole milk
- 2 teaspoons vanilla extract
- 1 cup unsalted butter (for frosting)
- 4 cups powdered sugar (for frosting)
- 2 tablespoons heavy cream (for frosting)
- Blue food coloring
- 1 package of white fondant
- Assorted food colorings for fondant (red, yellow, green)
- Edible glitter (optional)
Cooking Instructions:
- Prepare the Cake Batter: Preheat your oven to 350°F (175°C). Grease and flour two 8-inch round cake pans. In a large mixing bowl, combine the flour, sugar, baking powder, and salt. Add the softened butter, eggs, milk, and vanilla extract. Beat the mixture on medium speed until smooth and creamy.
- Bake the Cake: Divide the batter evenly between the prepared cake pans. Bake in the preheated oven for 25-30 minutes, or until a toothpick inserted in the center comes out clean. Allow the cakes to cool in the pans for 10 minutes before transferring them to a wire rack to cool completely.
- Prepare the Buttercream Frosting: In a large bowl, beat the butter with a hand mixer until creamy. Gradually add powdered sugar, beating continuously. Add the heavy cream and continue beating until the frosting is light and fluffy. Divide the frosting into two bowls. Color one part with blue food coloring to create ocean waves and leave the other part white.
- Assemble the Cake: Place one cake layer on a serving plate and spread a layer of blue buttercream on top. Place the second cake layer on top and cover the entire cake with blue frosting, smoothing it out to resemble ocean waves.
- Create Fondant Decorations: Roll out the white fondant and use food coloring to tint it in various colors. Shape the fondant into sea creatures such as fish, octopuses, and starfish. Attach the fondant decorations to the cake using small dabs of buttercream.
- Finishing Touches: For a magical touch, lightly dust the cake with edible glitter to give it a shimmering, underwater effect.
Extra Tips:
When working with fondant, keep it well-covered and work quickly to prevent it from drying out. If you’re new to fondant shaping, consider using cookie cutters to help create sea creature shapes for a more uniform look.
Additionally, if you want to add another layer of visual interest, consider using different shades of blue for the frosting to create an ombre effect that mimics the deepening colors of the ocean. Enjoy crafting this beautiful and whimsical cake!
Candy Explosion Cake

Candy Explosion Cake
A Candy Explosion Cake is an exciting and delightful treat perfect for any kid’s birthday celebration. This cake isn’t just a feast for the taste buds but also a visual spectacle, filled with a surprise of colorful candies that spill out when sliced. Imagine the joy and surprise on a child’s face when they cut into a cake bursting with their favorite candies!
This cake isn’t only about the delicious flavors but also about creating a magical and memorable experience for your child and their friends. The cake consists of layers of moist, fluffy cake with a central cavity filled with a variety of candies. The exterior is typically decorated with buttercream frosting and more candies for that extra pop of color and sweetness.
This recipe serves 4-6 people, making it perfect for a small birthday party or family gathering. The combination of textures and flavors from the cake, frosting, and candies makes every bite a delightful adventure.
Ingredients:
- 2 ½ cups all-purpose flour
- 2 ½ teaspoons baking powder
- ½ teaspoon baking soda
- ½ teaspoon salt
- ¾ cup unsalted butter, softened
- 1 ¾ cups granulated sugar
- 3 large eggs
- 1 tablespoon vanilla extract
- 1 ¼ cups buttermilk
- 2 cups assorted candies (e.g., M&Ms, Skittles, gummy bears)
- 2 cups buttercream frosting
- Additional candies for decoration
Cooking Instructions:
- Preheat the Oven: Start by preheating your oven to 350°F (175°C). Grease and flour two 9-inch round cake pans.
- Prepare the Dry Ingredients: In a medium bowl, whisk together the flour, baking powder, baking soda, and salt. Set aside.
- Mix Wet Ingredients: In a large bowl, cream the softened butter and sugar until light and fluffy, about 3-5 minutes. Add the eggs one at a time, mixing well after each addition. Stir in the vanilla extract.
- Combine Ingredients: Gradually add the dry ingredients to the wet ingredients, alternating with the buttermilk. Begin and end with the dry ingredients, mixing until just combined.
- Bake the Cakes: Divide the batter evenly between the prepared cake pans. Bake in the preheated oven for 25-30 minutes, or until a toothpick inserted into the center comes out clean. Let the cakes cool in the pans for 10 minutes, then transfer them to a wire rack to cool completely.
- Assemble the Cake with Candy Surprise: Once cooled, use a round cutter or a knife to remove a circle from the center of one of the cake layers. Fill the cavity with assorted candies, making sure it’s packed but not overflowing.
- Frost the Cake: Place the uncut cake layer on a serving plate. Spread a layer of buttercream frosting on top. Carefully place the candy-filled layer over the frosted one. Use the remaining buttercream to frost the top and sides of the cake.
- Decorate: Decorate the cake with additional candies, pressing them gently into the frosting to secure.
Extra Tips: When baking the cake layers, make sure they’re completely cool before assembling to prevent the candies from melting. To make the cake even more festive, consider using themed candies or matching the colors to your child’s favorite characters or party theme.
If you want to add more texture, mix in some crunchy elements like chocolate chips or nuts with the candies. For a neat presentation, use a serrated knife to cut the cake and reveal the candy explosion inside.
Space Adventure Cake

Space Adventure Cake
Take your kids on an intergalactic journey with this delightful Space Adventure Cake! Designed to captivate young imaginations, this cake combines fun, creativity, and deliciousness into one stellar dessert. Perfect for birthdays or any special occasion, this cake isn’t just a treat for the taste buds but also a visual delight. Imagine a vibrant galaxy with colorful planets, twinkling stars, and maybe even a rocket swirling around the surface of the cake. This recipe isn’t only about baking but also about creating an adventure, allowing you and your little ones to explore the cosmos right from your kitchen.
This Space Adventure Cake is made up of moist, fluffy cake layers, frosted with rich buttercream, and adorned with edible decorations reminiscent of outer space. The decorations can be as simple or as elaborate as you desire, making it an excellent opportunity for kids to get involved in decorating their own little universe. This recipe is suitable for serving 4-6 people and is sure to make any child’s birthday celebration out of this world.
Ingredients:
- 1 ½ cups all-purpose flour
- 1 cup granulated sugar
- ½ cup unsalted butter, softened
- 2 large eggs
- ½ cup milk
- 2 teaspoons baking powder
- 1 teaspoon vanilla extract
- ¼ teaspoon salt
- Food coloring (blue, purple, and black)
- 1 ½ cups buttercream frosting
- Edible glitter or star sprinkles
- Assorted candy or fondant for planets and rockets
Cooking Instructions:
- Preheat the Oven: Start by preheating your oven to 350°F (175°C). Grease and flour two 8-inch round cake pans.
- Prepare the Cake Batter: In a large mixing bowl, cream together the softened butter and granulated sugar until light and fluffy. Add the eggs one at a time, mixing well after each addition. Stir in the vanilla extract.
- Combine Dry Ingredients: In another bowl, sift together the all-purpose flour, baking powder, and salt. Gradually add the dry ingredients to the wet mixture, alternating with the milk, beginning and ending with the flour mixture. Mix until just combined.
- Color the Batter: Divide the batter evenly between three bowls. Add a few drops of blue food coloring to one bowl, purple to the second, and black to the third. Mix until each portion is evenly colored.
- Layer the Batter: Pour the colored batters into the prepared cake pans, creating a marbled effect by swirling the colors gently with a toothpick or skewer.
- Bake the Cake: Bake in the preheated oven for 25-30 minutes, or until a toothpick inserted into the center of the cake comes out clean. Allow the cakes to cool in the pans for 10 minutes before transferring them to a wire rack to cool completely.
- Frost the Cake: Once cooled, place one cake layer on a serving plate and spread a layer of buttercream frosting on top. Place the second cake layer on top and frost the entire cake with the remaining buttercream.
- Decorate: Let your imagination run wild! Use edible glitter or star sprinkles to create a starry effect on the frosting. Shape candy or fondant into planets and rockets and place them around the cake.
Extra Tips:
For a more vibrant galaxy effect, consider using gel food coloring as it provides a more intense color without altering the consistency of the batter.
When marbling the cake, avoid over-swiping the colors to maintain distinct swirls. If you’re using fondant for decoration, make sure to prepare it in advance so it has time to set.
When involving kids in the decorating process, encourage them to use their creativity and have fun with the design.
Finally, for added flavor, consider adding a hint of almond or lemon extract to the cake batter. Enjoy your cosmic creation!
Jungle Safari Cake

Jungle Safari Cake Recipe
Creating a Jungle Safari Cake is an exciting and fun way to celebrate your child’s birthday with a unique and adventurous theme. This delicious and visually appealing cake will surely be a hit at any kid’s party. With its vibrant colors and playful decorations, the Jungle Safari Cake will transport your little ones into the heart of the jungle, complete with edible animals and tropical foliage. Not only does this cake look fantastic, but it also tastes delightful, combining moist sponge layers with creamy frosting to satisfy both kids and adults alike.
Before diving into the creation of this jungle-themed masterpiece, it’s important to plan your time and gather all the necessary ingredients and decorations. This recipe is designed for a serving size of 4-6 people, making it perfect for small gatherings or parties. Whether you’re a seasoned baker or a novice, this recipe will guide you through each step with ease, guaranteeing that your Jungle Safari Cake turns out beautifully and deliciously.
Ingredients:
- 2 cups all-purpose flour
- 1 ½ cups granulated sugar
- ½ cup unsalted butter, softened
- 1 cup milk
- 3 large eggs
- 2 teaspoons baking powder
- 1 teaspoon vanilla extract
- ½ teaspoon salt
- 2 cups buttercream frosting
- Green food coloring
- Assorted edible jungle animal toppers
- Edible wafer leaves or green fondant
- Chocolate chips or chocolate sprinkles for dirt effect
Instructions:
- Preheat the Oven: Begin by preheating your oven to 350°F (175°C). Grease and flour two 8-inch round cake pans to prevent the cake from sticking.
- Make the Cake Batter: In a large mixing bowl, combine the flour, sugar, baking powder, and salt. Add the softened butter, milk, eggs, and vanilla extract. Mix on medium speed with an electric mixer until the batter is smooth and well combined.
- Bake the Cake: Divide the batter evenly between the prepared cake pans. Bake in the preheated oven for 25-30 minutes, or until a toothpick inserted into the center comes out clean. Allow the cakes to cool in the pans for 10 minutes, then transfer them to a wire rack to cool completely.
- Prepare the Frosting: While the cakes are cooling, tint the buttercream frosting with green food coloring to achieve a jungle-like hue. Mix thoroughly to guarantee even coloring.
- Assemble the Cake: Place one cake layer on a serving platter. Spread a layer of green buttercream frosting on top, then place the second cake layer on top. Frost the top and sides of the cake with the remaining green frosting.
- Decorate the Cake: Use the chocolate chips or sprinkles to create a dirt effect around the base of the cake. Arrange the edible jungle animal toppers on top of the cake, and place edible wafer leaves or green fondant around the animals to simulate jungle foliage.
- Finishing Touches: Confirm all decorations are securely in place and adjust as needed for balance. Refrigerate the cake for at least 30 minutes before serving to allow the frosting to set.
Extra Tips:
When making the Jungle Safari Cake, feel free to get creative with the decorations. You can use additional candies or colored icing to add more detail to your jungle scene.
If you’re short on time, consider using store-bought cake mix and frosting to simplify the process. Remember to check with parents about any potential allergies to ingredients like nuts or dairy in the decorations.
Finally, confirm the cake is fully cooled before frosting to prevent the frosting from melting and your jungle creations from sliding off. Enjoy the adventure of baking and decorating with your little ones!
Fairy Tale Castle Cake

Fairy Tale Castle Cake Recipe
Creating a Fairy Tale Castle Cake is the perfect way to add a touch of magic to your child’s birthday celebration. This enchanting cake not only looks like a mini castle but also brings out the joy of fairy tales and whimsical adventures. The process involves baking a delicious cake and decorating it to resemble a charming castle, complete with towers, flags, and a moat of icing. It’s a delightful project that offers both a visual treat and a mouth-watering experience.
This cake is designed to serve 4-6 people, making it an ideal centerpiece for a small gathering. The recipe involves using basic cake ingredients and adding a creative twist with decorations to bring your fairy tale vision to life. Whether you’re an experienced baker or a beginner, this recipe is straightforward and fun, promising smiles and delight as your little ones see their dream castle come to life.
Ingredients:
- 2 cups all-purpose flour
- 1 ½ cups granulated sugar
- 1 cup unsalted butter, softened
- 4 large eggs
- 1 cup milk
- 2 teaspoons vanilla extract
- 1 tablespoon baking powder
- ½ teaspoon salt
- 2 cans of vanilla frosting
- Food coloring (various colors)
- Ice cream cones (for towers)
- Decorative candies (for windows and doors)
- Sprinkles (for added decor)
- Toothpicks (for holding decorations)
- Small decorative flags
Cooking Instructions:
- Preheat the Oven: Start by preheating your oven to 350°F (175°C). Grease and flour two 8-inch round cake pans to guarantee easy removal of the cakes.
- Prepare the Cake Batter: In a large mixing bowl, cream together the softened butter and granulated sugar until light and fluffy. Add the eggs one at a time, beating well after each addition. Stir in the vanilla extract.
- Combine Dry Ingredients: In a separate bowl, whisk together the flour, baking powder, and salt. Gradually add the dry mixture to the wet ingredients, alternating with the milk, and mix until just combined.
- Bake the Cakes: Divide the batter evenly between the prepared cake pans. Bake in the preheated oven for 25-30 minutes or until a toothpick inserted into the center comes out clean. Allow the cakes to cool in the pans for about 10 minutes, then transfer them to a wire rack to cool completely.
- Prepare the Frosting: Divide the vanilla frosting into separate bowls and tint each with your desired food coloring. You’ll need at least one bowl of frosting for the base color of the castle and additional colors for accents and details.
- Assemble the Castle: Once the cakes are completely cool, stack them with a layer of frosting in between. Use the remaining frosting to cover the entire surface of the cake, smoothing it out with a spatula for a neat finish.
- Create the Towers: Trim the tops of the ice cream cones to your desired height for the towers. Cover them with frosting and attach them to the cake using toothpicks. You can place one cone on each side and one on top for a central tower.
- Decorate the Castle: Use decorative candies to create windows and doors on the castle walls. Add sprinkles for extra color and texture. Attach small flags to the tops of the towers using toothpicks.
- Final Touches: Carefully inspect the cake for any areas that need additional frosting or decorations. Make sure everything is secure and visually appealing.
Extra Tips:
When creating your Fairy Tale Castle Cake, don’t hesitate to get creative with the decorations. You can use additional elements like edible glitter or colored sugar to add sparkle to the castle.
If you’re short on time, consider using store-bought cake mixes and frostings to speed up the process. For added stability, consider refrigerating the cake for a short time after the initial frosting layer to set the structure before adding the decorations.
This cake isn’t only a treat for the eyes but also a delicious dessert that will leave a lasting impression on your little guests. Enjoy the process and have fun bringing a piece of a fairy tale to life!
Pirate Treasure Cake

Pirate Treasure Cake is an imaginative and delightful birthday cake perfect for little adventurers. This cake won’t only capture the attention of the young ones with its vibrant and exciting design but also tempt their taste buds with its delicious flavors.
The Pirate Treasure Cake is designed to look like a treasure chest bursting with candy, chocolate coins, and other delectable treasures, making it a fantastic center-piece for a pirate-themed birthday party. Whether you’re a baking novice or an experienced cake decorator, this recipe will guide you through creating a cake that’s both fun to make and delightful to eat.
This cake consists of a moist chocolate sponge base, layered with a creamy filling, and decorated with a variety of sugary treasures. You’ll need some basic cake-making skills to prepare the base, and a bit of creativity to decorate it into a treasure chest. The list of ingredients is straightforward, guaranteeing that the cake isn’t only visually appealing but also scrumptious.
The recipe serves 4-6 people, making it perfect for a small gathering of young pirates ready to dig into their treasure.
Ingredients (serving size: 4-6 people):
- 1 1/2 cups all-purpose flour
- 1 cup granulated sugar
- 3/4 cup unsweetened cocoa powder
- 1 teaspoon baking powder
- 1/2 teaspoon baking soda
- 1/2 teaspoon salt
- 2 large eggs
- 1 cup whole milk
- 1/2 cup vegetable oil
- 2 teaspoons vanilla extract
- 1 cup boiling water
- 1 cup buttercream frosting (store-bought or homemade)
- Chocolate coins
- Assorted candy (gummy worms, jelly beans, etc.)
- Edible glitter or gold dust
Cooking Instructions:
- Preheat the Oven: Start by preheating your oven to 350°F (175°C). Grease and flour a rectangular cake pan to prevent the cake from sticking.
- Mix Dry Ingredients: In a large mixing bowl, combine the flour, sugar, cocoa powder, baking powder, baking soda, and salt. Stir until all dry ingredients are well-combined.
- Add Wet Ingredients: Add the eggs, milk, vegetable oil, and vanilla extract to the dry ingredients. Mix using an electric mixer on medium speed until the batter is smooth and well-blended.
- Incorporate Boiling Water: Carefully add the boiling water to the batter. This will thin the batter, but it’s essential for a moist cake. Mix until fully combined.
- Bake the Cake: Pour the batter into the prepared cake pan and bake in the preheated oven for 30-35 minutes, or until a toothpick inserted into the center comes out clean.
- Cool and Prepare for Decoration: Allow the cake to cool completely in the pan. Once cooled, remove the cake from the pan and place it on a sturdy surface or a cake board for decorating.
- Decorate: Spread an even layer of buttercream frosting over the top of the cake. Position the chocolate coins and assorted candies on top of the frosting to mimic a treasure chest. Sprinkle with edible glitter or gold dust for a shimmering effect.
- Final Touches: Consider adding small pirate flags or other pirate-themed decorations to enhance the theme.
Extra Tips:
When creating your Pirate Treasure Cake, verify that the cake is completely cooled before applying the frosting; this prevents the frosting from melting and sliding.
For a more authentic treasure chest look, you can carve the cake into a chest shape before frosting. Additionally, using gel food colors to dye the frosting can add even more vibrancy to your creation.
Feel free to use your child’s favorite candies to personalize the treasure, making it a truly special birthday treat.
Superhero Power Cake
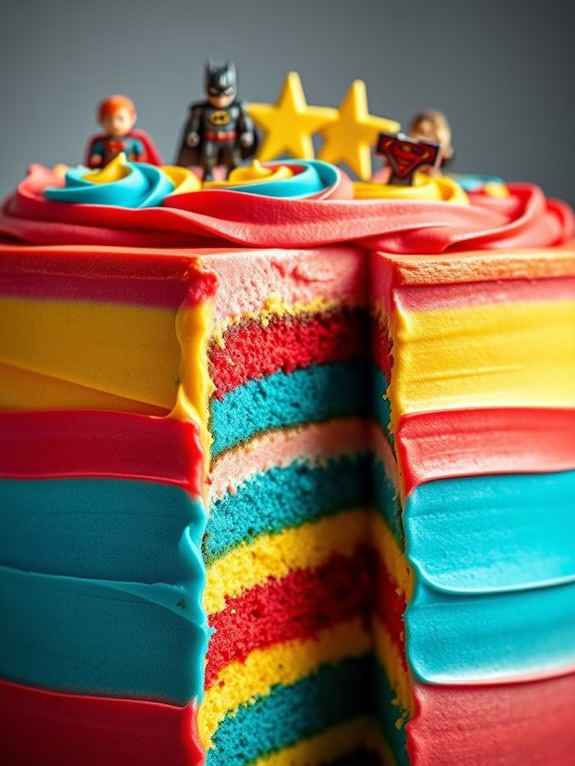
Superhero Power Cake is the perfect birthday cake for kids who dream of being their favorite superheroes. This vibrant and exciting cake isn’t only visually stunning but also deliciously rich, making it a hit at any birthday party. With layers of colorful sponge cake covered in smooth buttercream frosting, this cake will surely energize the little heroes at your celebration.
The design of the cake can be customized with superhero logos, colors, and decorations to match your child’s favorite superhero or theme. This recipe is designed for 4-6 servings, making it ideal for a small birthday gathering. The preparation of the Superhero Power Cake involves creating a moist, fluffy cake base and decorating it with an array of colorful frostings and superhero-themed toppers.
Whether you’re a baking novice or an experienced cake artist, this recipe provides clear, step-by-step instructions to guarantee a successful and fun baking experience. Get ready to release your creativity and make a cake that will light up your kid’s birthday party!
Ingredients (Serving Size: 4-6 people):
- 2 cups all-purpose flour
- 1 1/2 cups granulated sugar
- 1/2 cup unsalted butter, softened
- 3 large eggs
- 1 cup milk
- 2 teaspoons baking powder
- 1 teaspoon vanilla extract
- 1/4 teaspoon salt
- Assorted food coloring (red, blue, yellow)
- 1 cup unsalted butter, softened (for frosting)
- 4 cups powdered sugar (for frosting)
- 2 teaspoons vanilla extract (for frosting)
- 2-3 tablespoons heavy cream (for frosting)
- Superhero-themed cake toppers and decorations
Cooking Instructions:
- Prepare the Cake Batter: Preheat your oven to 350°F (175°C). Grease and flour three 8-inch round cake pans. In a large mixing bowl, cream together the softened butter and granulated sugar until light and fluffy. Add the eggs one at a time, beating well after each addition. Mix in the vanilla extract.
- Combine Dry Ingredients: In a separate bowl, sift together the flour, baking powder, and salt. Gradually add these dry ingredients to the butter mixture, alternating with the milk, starting and ending with the flour mixture. Beat until just combined.
- Color the Batter: Divide the batter equally into three separate bowls. Add a few drops of red food coloring to one, blue to another, and yellow to the third, mixing each until you achieve the desired color intensity.
- Bake the Cakes: Pour each colored batter into the prepared cake pans. Tap the pans gently to eliminate air bubbles. Bake in the preheated oven for 20-25 minutes or until a toothpick inserted into the center comes out clean. Allow the cakes to cool in the pans for 10 minutes, then transfer them to wire racks to cool completely.
- Prepare the Frosting: In a large bowl, beat the softened butter until creamy. Gradually add the powdered sugar, beating until smooth. Mix in the vanilla extract and heavy cream. Beat the frosting until light and fluffy. Divide the frosting into three portions and color each portion with the same food colors used for the cakes.
- Assemble the Cake: Place one cake layer on a serving plate. Spread a layer of matching colored frosting on top. Repeat with the second and third layers. Frost the top and sides of the cake with the remaining frosting, smoothing it out with an offset spatula.
- Decorate the Cake: Use superhero-themed cake toppers and decorations to finish the cake. You can also use extra frosting to pipe superhero symbols or add edible glitter for a magical touch.
Extra Tips:
For the best results, verify all your ingredients are at room temperature before you begin baking. This helps in achieving a smooth and even batter.
If you want to add more flavors, consider using flavored extracts like almond or lemon in the cake batter or frosting. When adding food coloring, start with a small amount and gradually increase until you reach the desired shade to avoid overly intense colors.
Finally, allow the cake layers to cool completely before frosting to prevent the frosting from melting. Enjoy the process, and remember that creativity is key to making your Superhero Power Cake a memorable birthday delight!
Princess Dream Cake
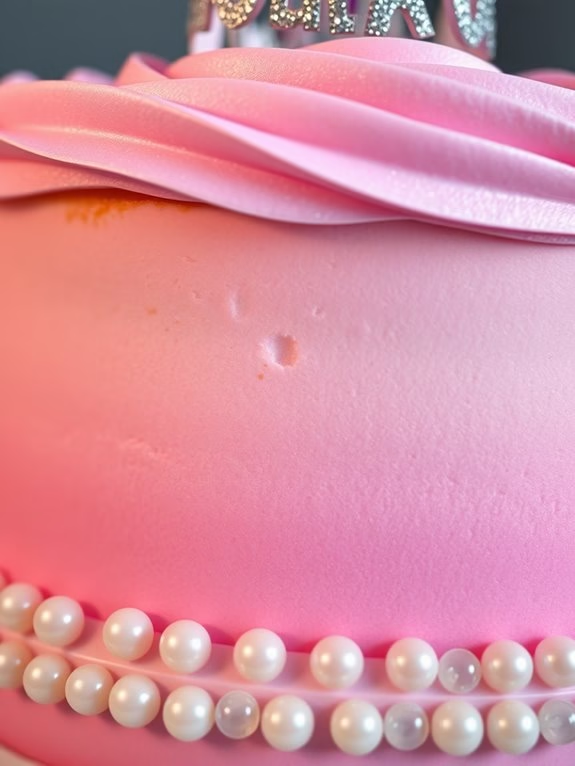
Princess Dream Cake
There’s nothing quite as magical as a Princess Dream Cake to make a child’s birthday celebration unforgettable. This enchanting cake is perfect for your little royal’s special day. Imagine layers of soft, fluffy vanilla cake stacked high and adorned with a creamy, pastel-colored buttercream frosting. Topped with shimmering edible glitter and candy pearls, this cake won’t only delight the taste buds but also captivate the imagination of every child present.
The Princess Dream Cake is designed to be as delightful to make as it’s to eat, providing a wonderful opportunity for parents and kids to bond over baking. This recipe is tailored for a serving size of 4-6 people, making it an ideal choice for a small birthday party. The cake is simple yet elegant, guaranteeing that even novice bakers can achieve a stunning result.
With some basic ingredients and a few special touches, you can create a cake that looks like it came straight out of a fairy tale. So, gather your ingredients, preheat your oven, and get ready to craft a cake that’s sure to make your child’s birthday a truly magical experience.
Ingredients for Princess Dream Cake (Serving Size: 4-6)
- 1 ½ cups all-purpose flour
- 1 cup granulated sugar
- ½ cup unsalted butter, softened
- 2 large eggs
- 1 teaspoon vanilla extract
- 1 teaspoon baking powder
- ½ teaspoon salt
- ½ cup whole milk
- 2 cups buttercream frosting
- Pink and purple food coloring
- Edible glitter
- Candy pearls
Cooking Instructions
- Preheat the Oven: Start by preheating your oven to 350°F (175°C). Grease and flour two 6-inch round cake pans to prevent the cake from sticking.
- Prepare the Batter: In a large mixing bowl, cream together the softened butter and sugar until light and fluffy. Beat in the eggs one at a time, making sure each is fully incorporated before adding the next. Mix in the vanilla extract.
- Combine Dry Ingredients: In a separate bowl, whisk together the flour, baking powder, and salt. Gradually add the dry ingredients to the butter mixture, alternating with the milk. Begin and end with the dry ingredients. Mix until just combined.
- Bake the Cakes: Divide the batter evenly between the prepared cake pans. Smooth the tops with a spatula and bake in the preheated oven for 25-30 minutes, or until a toothpick inserted into the center comes out clean. Allow the cakes to cool in the pans for 10 minutes before transferring to a wire rack to cool completely.
- Prepare the Frosting: Divide the buttercream frosting into two bowls. Add a few drops of pink food coloring to one bowl and purple to the other, mixing until the colors are vibrant and even.
- Assemble the Cake: Once the cakes are completely cool, place one layer on a cake stand or serving plate. Spread a generous amount of pink frosting over the top, then place the second cake layer on top.
- Decorate the Cake: Use the purple frosting to cover the entire cake, smoothing it with a spatula. Decorate with edible glitter and arrange candy pearls around the base and top of the cake for a royal touch.
Extra Tips
To guarantee your Princess Dream Cake stays moist and flavorful, make sure not to overmix the batter, as this can lead to a dense texture. For a more even bake, rotate the cake pans halfway through baking.
If you find the frosting too thick to spread easily, you can thin it with a tablespoon of milk. Finally, if you want to add an extra layer of fun, consider using a cake topper shaped like a tiara or other princess-themed decorations to further enhance the magical theme.
Monster Mash Cake
Monster Mash Cake Recipe
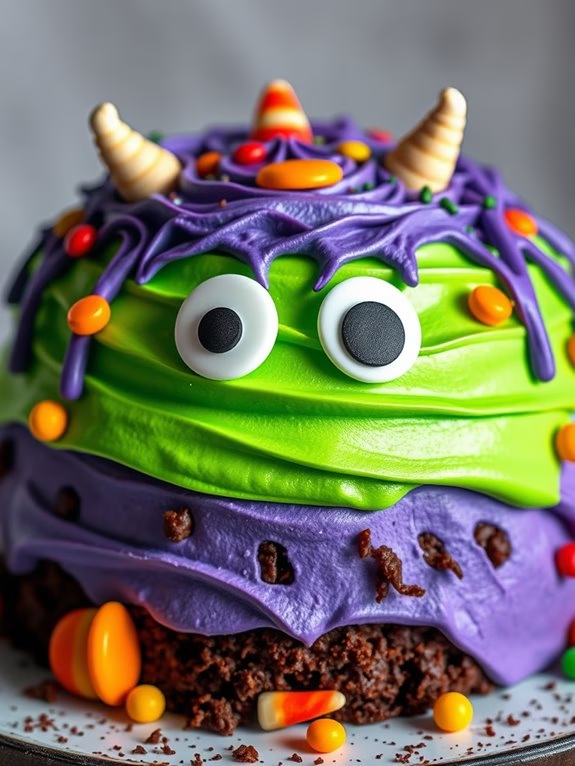
Get ready to ignite your child’s imagination and taste buds with the whimsical Monster Mash Cake! This delightful cake is perfect for adventurous kids who love a good surprise. With vibrant colors and playful decorations, this cake will be the star of any birthday party. Made with simple ingredients, it’s not only fun to make but also a delicious treat for everyone to enjoy.
Designed to serve 4-6 people, this Monster Mash Cake combines chocolatey goodness with colorful frosting and quirky decorations that make it look like a friendly monster right out of a storybook. Whether you’re a seasoned baker or a kitchen novice, this recipe is straightforward and easy to follow, guaranteeing a monstrously good time for all involved.
So gather your ingredients and prepare to create a cake that’s as fun to make as it’s to eat!
Ingredients (serves 4-6 people):
- 1 1/2 cups all-purpose flour
- 1 cup granulated sugar
- 1/2 cup unsweetened cocoa powder
- 1 teaspoon baking soda
- 1/2 teaspoon salt
- 1 cup water
- 1/3 cup vegetable oil
- 1 tablespoon white vinegar
- 1 teaspoon vanilla extract
- 2 cups buttercream frosting (various colors)
- Edible googly eyes
- Assorted candy for decoration (e.g., gummy worms, candy corn)
Instructions:
- Preheat the Oven: Start by preheating your oven to 350°F (175°C). Grease and flour a 9-inch round cake pan to guarantee the cake doesn’t stick.
- Mix Dry Ingredients: In a large mixing bowl, whisk together the flour, sugar, cocoa powder, baking soda, and salt until well combined.
- Combine Wet Ingredients: In a separate bowl, combine the water, vegetable oil, vinegar, and vanilla extract. Stir until everything is well mixed.
- Create the Batter: Gradually add the wet ingredients to the dry ingredients, stirring constantly until you achieve a smooth batter with no lumps.
- Bake the Cake: Pour the batter into the prepared cake pan. Bake for 30-35 minutes, or until a toothpick inserted in the center comes out clean. Let the cake cool in the pan for 10 minutes before transferring it to a wire rack to cool completely.
- Prepare the Frosting: While the cake cools, divide the buttercream frosting into separate bowls and color each with your choice of food coloring. Mix thoroughly until you achieve vibrant hues.
- Decorate the Cake: Once the cake is completely cool, spread a base layer of frosting over the entire cake. Use different colors to create a monster-like appearance. Add edible googly eyes and assorted candies to bring your monster to life.
- Final Touches: Allow the decorated cake to set for about 15 minutes before serving, guaranteeing the frosting holds its shape.
Extra Tips:
When coloring the frosting, start with a small amount of food coloring and gradually add more to achieve the desired shade. This helps prevent the colors from becoming too intense.
If you’re working with kids, let them take charge of the decorating – it’s a fantastic way to get them involved and excited about baking. Additionally, be creative with the decorations; there’s no right or wrong way to make your monster, so let your imagination run wild!
Finally, if you want to make this cake ahead of time, you can bake the cake a day in advance and store it in the fridge, then decorate it on the day of the celebration.
Sports Theme Cake
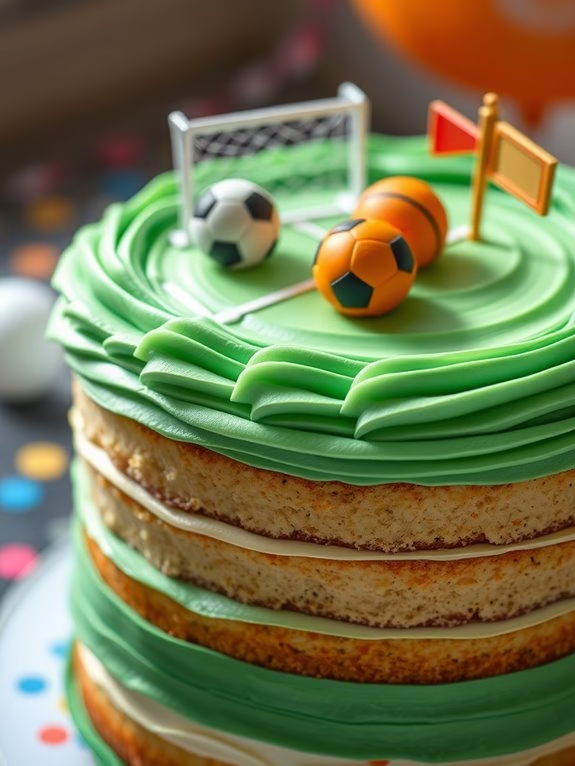
Sports Theme Cake
Creating a sports theme cake for your child’s birthday is a fantastic way to celebrate their love for their favorite sport while also indulging in a delicious treat. This cake is perfect for any young sports enthusiast, whether they adore soccer, basketball, football, or baseball. The cake isn’t only visually appealing with its vibrant sports decor but also moist and flavorful, making it a hit with both children and adults alike.
The sports theme cake can be customized to reflect your child’s favorite sport, using different designs and colors to match the theme. Whether you’re planning a small gathering or a larger party, this recipe is suited for a serving size of 4-6 people, making it an ideal choice for a fun and memorable birthday celebration. By following the steps below, you can create a cake that’s sure to bring a smile to your child’s face and delight all the guests at the party.
Ingredients:
- 2 cups all-purpose flour
- 1 ½ cups granulated sugar
- ½ cup unsalted butter, softened
- 1 cup whole milk
- 3 large eggs
- 2 teaspoons vanilla extract
- 2 ½ teaspoons baking powder
- ½ teaspoon salt
- 1 ½ cups buttercream frosting
- Food coloring (various colors depending on the sport theme)
- Edible sports-themed cake toppers or decorations
Cooking Instructions:
- Preheat the Oven: Begin by preheating your oven to 350°F (175°C). Grease and flour two 8-inch round cake pans to prevent the cake from sticking.
- Mix Dry Ingredients: In a medium-sized bowl, whisk together the all-purpose flour, baking powder, and salt. Set this mixture aside.
- Cream Butter and Sugar: In a large mixing bowl, cream the softened butter and granulated sugar until it becomes light and fluffy. This should take about 3-4 minutes using an electric mixer on medium speed.
- Add Eggs and Vanilla: Add the eggs one at a time to the creamed mixture, beating well after each addition. Then, mix in the vanilla extract.
- Combine Wet and Dry Ingredients: Gradually add the dry ingredient mixture to the creamed mixture, alternating with the milk. Begin and end with the dry ingredients, mixing until just combined after each addition.
- Divide and Bake: Evenly divide the cake batter between the prepared cake pans. Smooth the tops with a spatula. Bake in the preheated oven for 25-30 minutes, or until a toothpick inserted into the center of the cakes comes out clean.
- Cool the Cakes: Allow the cakes to cool in the pans for about 10 minutes before transferring them to a wire rack to cool completely.
- Decorate the Cake: Once the cakes are completely cool, spread a layer of buttercream frosting on top of one cake and place the second cake on top. Use the remaining buttercream to frost the top and sides of the cake. Use food coloring to tint portions of the frosting as needed for your sports theme, and decorate the cake with edible sports-themed toppers or decorations to complete the look.
Extra Tips:
For a more dynamic sports theme, consider using fondant to create specific sports equipment or logos that your child loves. You can also use a piping bag with different nozzles to add intricate designs or messages on the cake.
If you’re short on time, pre-made edible sports decorations can add a professional touch with minimal effort. Don’t forget to adjust the colors of your frosting to match team colors or the colors associated with the specific sport.
Enjoy the process, and remember that the imperfections often add charm to a homemade creation!