
There’s something truly magical about baking a fudge chocolate cake from scratch, isn’t there?
The way the rich chocolate aroma fills the kitchen is simply enchanting.
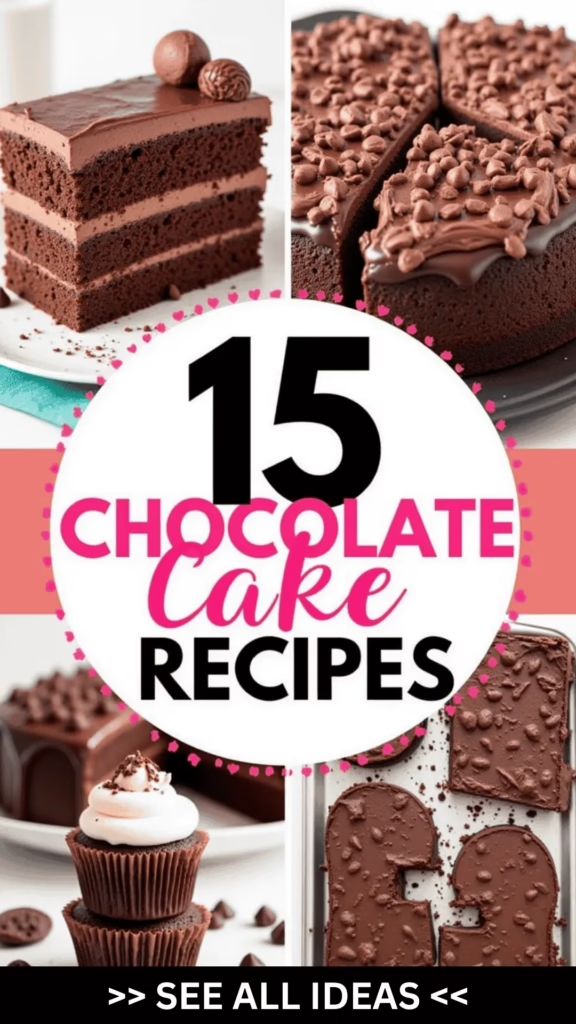
I’ve gathered 15 delightful recipes that are sure to satisfy any chocolate lover’s cravings.
From easy one-bowl mixes to elegant layered creations, each cake is a treat waiting to be savored.
Whether you’re just starting your baking journey or have years of experience, there’s a recipe here that’ll make your heart (and taste buds) sing.
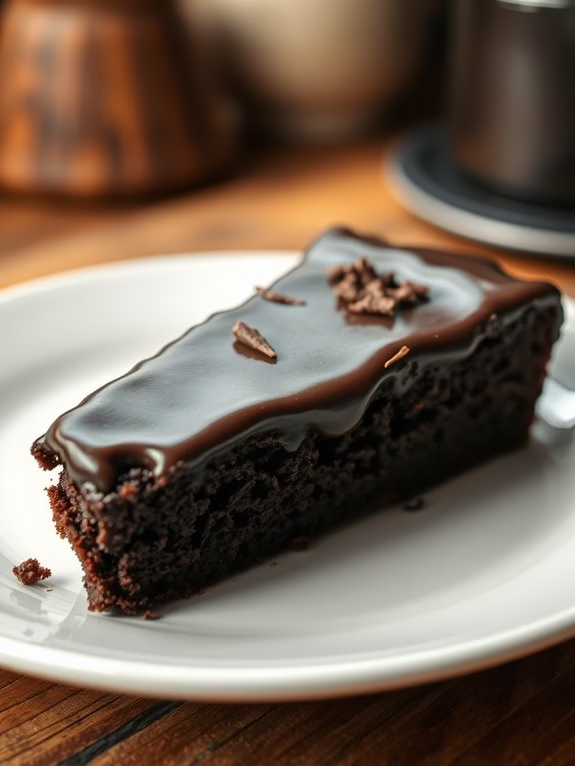
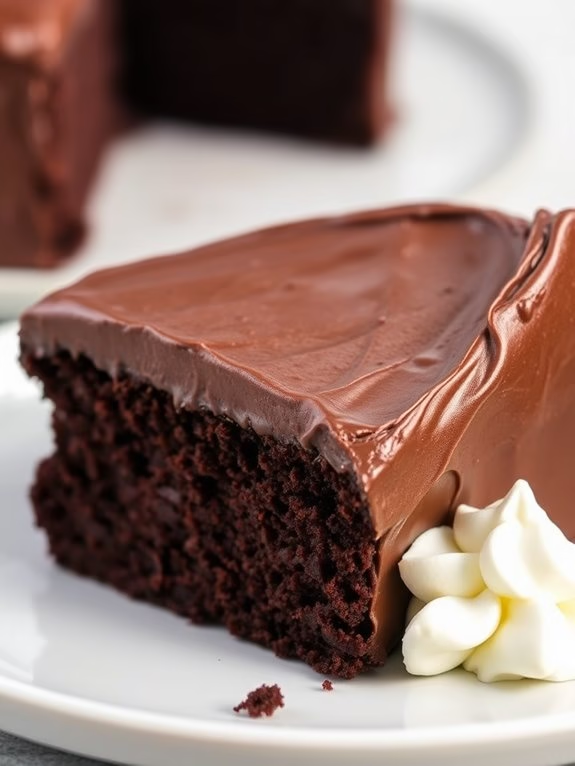
Classic Fudge Chocolate Cake
Classic Fudge Chocolate Cake is a timeless favorite that never fails to impress. This rich and moist cake is perfect for any occasion, whether it’s a birthday, a holiday, or just a regular day that calls for a sweet treat. The deep chocolate flavor is enhanced by a smooth and luscious fudge frosting, making every bite a decadent experience.
With a few simple ingredients and easy-to-follow steps, this cake is a delightful project for bakers of any skill level. The beauty of Classic Fudge Chocolate Cake lies in its simplicity. The ingredients are pantry staples, and the preparation process is straightforward. This cake can be made in advance, allowing the flavors to deepen and develop, and can be served with a variety of accompaniments such as whipped cream or fresh berries.
Whether you’re baking for family, friends, or just yourself, this cake is sure to bring joy and satisfaction to everyone who tastes it.
Ingredients (Serving Size: 4-6 people)
- 1 and 3/4 cups all-purpose flour
- 3/4 cup unsweetened cocoa powder
- 2 cups granulated sugar
- 1 and 1/2 teaspoons baking powder
- 1 and 1/2 teaspoons baking soda
- 1 teaspoon salt
- 2 large eggs
- 1 cup whole milk
- 1/2 cup vegetable oil
- 2 teaspoons vanilla extract
- 1 cup boiling water
Fudge Frosting Ingredients
- 1/2 cup unsalted butter
- 2/3 cup unsweetened cocoa powder
- 3 cups powdered sugar
- 1/3 cup whole milk
- 1 teaspoon vanilla extract
Cooking Instructions
- Preheat the oven and prepare cake pans: Preheat your oven to 350°F (175°C). Grease and flour two 9-inch round cake pans or line them with parchment paper to prevent sticking.
- Mix the dry ingredients: In a large bowl, whisk together the flour, cocoa powder, sugar, baking powder, baking soda, and salt until well combined.
- Add wet ingredients: Add the eggs, milk, oil, and vanilla extract to the dry ingredients. Mix on medium speed with an electric mixer until the batter is smooth and well blended.
- Incorporate boiling water: Slowly stir in the boiling water until the mixture is smooth. The batter will be thin, but this is normal.
- Bake the cakes: Pour the batter evenly into the prepared cake pans. Bake in the preheated oven for 30-35 minutes, or until a toothpick inserted into the center comes out clean.
- Cool the cakes: Allow the cakes to cool in the pans for about 10 minutes, then carefully remove them from the pans and let them cool completely on a wire rack.
- Prepare the fudge frosting: In a medium saucepan, melt the butter over low heat. Stir in the cocoa powder until smooth. Remove from heat and gradually add the powdered sugar and milk, beating until the frosting is smooth and spreadable. Stir in the vanilla extract.
- Assemble the cake: Once the cakes are completely cool, place one layer on a serving plate. Spread a generous amount of fudge frosting on top, then place the second layer on top. Spread the remaining frosting evenly over the top and sides of the cake.
Extra Tips
For the best results, make sure all your ingredients are at room temperature before you start. This helps them combine more easily and results in a smoother batter.
If you find that your frosting is too thick, add a little more milk, a tablespoon at a time, until you reach the desired consistency. Conversely, if your frosting is too thin, add a little more powdered sugar.
And remember, cakes are always more delicious when made a day ahead, as it allows the flavors to meld together beautifully. Enjoy your Classic Fudge Chocolate Cake with a glass of cold milk or a cup of hot coffee for a delightful treat!
One-Bowl Chocolate Cake
One-Bowl Chocolate Cake is the perfect dessert for those who crave a rich and decadent treat without the hassle of a complicated recipe. This cake is known for its simplicity and the ability to whip it up using just a single bowl, making cleanup a breeze.
Perfect for any occasion, this chocolate delight offers a moist and fluffy texture with an intense chocolate flavor that will satisfy any sweet tooth. Whether you’re an experienced baker or just starting out, this recipe is designed to be approachable for everyone.
This recipe serves 4-6 people, making it an ideal choice for family gatherings or small parties. The beauty of the One-Bowl Chocolate Cake is that it doesn’t require any special equipment or techniques. All you need is a whisk or a spatula to bring the ingredients together. In no time, you’ll have a delicious cake that can be served on its own or enhanced with your favorite frosting or toppings.
Ingredients:
- 1 and 3/4 cups all-purpose flour
- 3/4 cup unsweetened cocoa powder
- 2 cups granulated sugar
- 1 and 1/2 teaspoons baking powder
- 1 and 1/2 teaspoons baking soda
- 1 teaspoon salt
- 2 large eggs
- 1 cup whole milk
- 1/2 cup vegetable oil
- 2 teaspoons vanilla extract
- 1 cup boiling water
Instructions:
- Preheat and Prepare: Preheat your oven to 350°F (175°C). Grease and flour a 9×13-inch baking pan to prevent the cake from sticking.
- Mix Dry Ingredients: In a large mixing bowl, combine the flour, cocoa powder, sugar, baking powder, baking soda, and salt. Whisk together until well mixed and all lumps are removed.
- Add Wet Ingredients: Add the eggs, milk, vegetable oil, and vanilla extract to the dry mixture. Stir well with a whisk or spatula until the batter is smooth and the ingredients are fully incorporated.
- Incorporate Boiling Water: Carefully pour in the boiling water. The batter will be thin, but this is normal. Mix until the water is fully integrated into the batter.
- Bake the Cake: Pour the batter into the prepared baking pan. Tap the pan gently on the counter to remove any air bubbles. Bake in the preheated oven for 30-35 minutes, or until a toothpick inserted into the center of the cake comes out clean.
- Cool and Serve: Once baked, remove the cake from the oven and let it cool in the pan for about 10 minutes. Then, transfer it to a wire rack to cool completely. Serve plain or with your choice of frosting.
Extra Tips:
For an even more intense chocolate flavor, consider adding a handful of chocolate chips to the batter before baking. If you prefer a lighter cake, you can substitute half of the cocoa powder with Dutch-processed cocoa for a milder chocolate taste.
To enhance the cake’s moisture, try adding a tablespoon of espresso powder to the boiling water; it will deepen the chocolate flavor without making the cake taste like coffee. When serving, a dollop of whipped cream or a scoop of vanilla ice cream can complement the rich chocolatey goodness beautifully.
Gluten-Free Chocolate Fudge Cake
Gluten-Free Chocolate Fudge Cake is a decadent and rich dessert that will satisfy any chocolate lover’s cravings. This cake is perfect for those who’ve gluten sensitivities but still want to indulge in a classic chocolate treat. Made with a blend of gluten-free flour and cocoa powder, this cake maintains the moist and fudgy texture that’s often difficult to achieve in gluten-free baking.
Whether you’re serving it at a birthday party or a casual family dinner, this cake is sure to impress your guests with its intense chocolate flavor and luxurious texture.
Not only is this cake delicious, but it’s also quite easy to make. You don’t need any special equipment or ingredients that are hard to find. With just a few simple steps, you’ll have a mouthwatering cake that everyone will enjoy.
Plus, the frosting is made with real chocolate, which enhances the cake’s overall chocolatey goodness. Serve it with a scoop of vanilla ice cream or a dollop of whipped cream for an extra treat.
Ingredients for 4-6 servings:
- 1 cup gluten-free all-purpose flour
- 1 cup granulated sugar
- 1/2 cup unsweetened cocoa powder
- 1 teaspoon baking powder
- 1/2 teaspoon baking soda
- 1/4 teaspoon salt
- 2 large eggs
- 1/2 cup vegetable oil
- 1/2 cup milk (dairy or non-dairy)
- 1 teaspoon vanilla extract
- 1/2 cup boiling water
Frosting Ingredients:
- 1/2 cup unsalted butter
- 2/3 cup unsweetened cocoa powder
- 3 cups powdered sugar
- 1/3 cup milk (dairy or non-dairy)
- 1 teaspoon vanilla extract
Instructions:
- Preheat the Oven: Begin by preheating your oven to 350°F (175°C). Grease and flour a 9-inch round cake pan with gluten-free flour to prevent sticking.
- Mix Dry Ingredients: In a large mixing bowl, combine the gluten-free flour, sugar, cocoa powder, baking powder, baking soda, and salt. Stir thoroughly until all the dry ingredients are well combined.
- Combine Wet Ingredients: In a separate bowl, whisk together the eggs, vegetable oil, milk, and vanilla extract until smooth. Gradually add this mixture to the dry ingredients, stirring until just combined.
- Add Boiling Water: Carefully stir in the boiling water until the batter is smooth and well incorporated. The batter will be thin, but this is normal.
- Bake the Cake: Pour the batter into the prepared cake pan. Bake in the preheated oven for 30-35 minutes, or until a toothpick inserted into the center of the cake comes out clean.
- Cool the Cake: Once baked, allow the cake to cool in the pan for about 10 minutes before transferring it to a wire rack to cool completely.
- Prepare the Frosting: In a medium saucepan over low heat, melt the butter. Stir in the cocoa powder until smooth. Remove from heat and alternately add powdered sugar and milk, beating to spreading consistency. Stir in the vanilla extract.
- Frost the Cake: Once the cake is completely cool, spread the frosting evenly over the top and sides of the cake.
Extra Tips:
For the best results, verify all ingredients are at room temperature before mixing, which helps them blend more evenly. When adding the boiling water, do so gradually to prevent splashing and to help the batter come together smoothly.
If you prefer a more intense chocolate flavor, you can add a teaspoon of espresso powder to the dry ingredients. Additionally, this cake can be made a day in advance and stored in an airtight container at room temperature, allowing the flavors to meld beautifully.
Vegan Chocolate Cake
Vegan Chocolate Cake
Indulging in a rich and moist Vegan Chocolate Cake doesn’t have to be a distant fantasy. This easy homemade recipe guarantees that everyone, including those following a vegan lifestyle, can enjoy a slice of chocolate heaven.
By using plant-based ingredients that are easily available, this cake isn’t only kind to animals but also to your palate. Whether you’re celebrating a special occasion or simply craving a dessert, this recipe will have you covered with a scrumptious treat that’s simple to prepare.
This Vegan Chocolate Cake is perfect for a serving size of 4-6 people. It boasts a deep chocolate flavor, thanks to the cocoa powder, and a tender crumb that stays moist, making it a crowd-pleaser at any gathering.
The use of plant milk and apple cider vinegar mimics the richness and texture of traditional cakes, while the addition of vanilla extract enhances the overall flavor profile. Follow the steps below to create this delightful cake that proves you don’t need eggs or dairy to make a masterpiece.
Ingredients:
- 1 ½ cups all-purpose flour
- 1 cup granulated sugar
- ⅓ cup unsweetened cocoa powder
- 1 tsp baking soda
- ½ tsp salt
- 1 cup unsweetened almond milk (or any plant-based milk)
- ⅓ cup vegetable oil
- 1 tbsp apple cider vinegar
- 2 tsp vanilla extract
- ⅓ cup boiling water
Instructions:
- Preheat the Oven: Begin by preheating your oven to 350°F (175°C). Grease a 9-inch round cake pan or line it with parchment paper to prevent sticking.
- Mix Dry Ingredients: In a large bowl, combine the all-purpose flour, granulated sugar, cocoa powder, baking soda, and salt. Whisk them together until well mixed, making sure no lumps remain.
- Prepare Wet Ingredients: In a separate bowl or large measuring cup, mix the almond milk, vegetable oil, apple cider vinegar, and vanilla extract. Allow this mixture to sit for a minute, which will help the vinegar to slightly curdle the milk, enhancing the cake’s texture.
- Combine and Mix: Gradually pour the wet ingredients into the bowl of dry ingredients. Stir until just combined. Be careful not to overmix as it can make the cake dense.
- Add Boiling Water: Carefully stir in the boiling water until you have a smooth batter. The batter will be quite thin, but this is normal.
- Bake the Cake: Pour the batter into the prepared cake pan and smooth the top with a spatula. Bake in the preheated oven for about 30-35 minutes, or until a toothpick inserted into the center comes out clean.
- Cool and Serve: Allow the cake to cool in the pan for about 10 minutes before transferring it to a wire rack to cool completely. Once cooled, you can frost it with your favorite vegan frosting or simply dust it with powdered sugar.
Extra Tips:
For the best results, confirm all ingredients are at room temperature before starting. This helps in achieving a consistent texture.
If you prefer a deeper chocolate flavor, consider adding a teaspoon of instant coffee granules to the dry ingredients. Always remember that the batter should be smooth and lump-free before baking, but avoid overmixing.
Finally, if you don’t have apple cider vinegar, white vinegar can be an effective substitute. Enjoy your vegan creation with a scoop of plant-based ice cream or fresh berries for an extra special treat.
Microwave Mug Chocolate Cake

Microwave Mug Chocolate Cake Recipe
Microwave Mug Chocolate Cake is the perfect solution for those times when you crave a sweet treat but don’t want to go through the hassle of baking an entire cake. This quick and easy recipe allows you to whip up a delicious chocolate cake in a matter of minutes, using simple ingredients that you likely already have in your pantry.
The best part? You can make this cake in individual mugs, making it a fun and personalized dessert that’s sure to satisfy your sweet tooth.
Whether you’re looking for a quick dessert for your family or hosting a casual get-together, this Microwave Mug Chocolate Cake is an ideal choice. The recipe is designed to serve 4-6 people, so you can easily adjust the number of servings based on your needs. Each mug cake is rich, moist, and full of chocolatey goodness, making it hard to resist.
Plus, cleanup is a breeze since you’ll only need a few mugs and a bowl!
Ingredients for 4-6 servings:
- 1 cup all-purpose flour
- 1 cup granulated sugar
- 1/2 cup unsweetened cocoa powder
- 1 teaspoon baking powder
- 1/2 teaspoon salt
- 1/2 cup milk
- 1/4 cup vegetable oil
- 1 teaspoon vanilla extract
- 1/2 cup boiling water
- 1/2 cup chocolate chips (optional)
- Whipped cream or ice cream for topping (optional)
Cooking Instructions:
- Prepare the Dry Ingredients: In a large mixing bowl, combine the flour, sugar, cocoa powder, baking powder, and salt. Stir the ingredients together until well blended.
- Add Wet Ingredients: Create a well in the center of the dry ingredients. Pour in the milk, vegetable oil, and vanilla extract. Mix until the batter is smooth and all ingredients are well incorporated.
- Incorporate Boiling Water: Gradually add the boiling water to the batter, stirring continuously. The batter will be thin, but that’s perfectly normal. Make sure everything is mixed thoroughly.
- Divide the Batter: Pour the batter evenly into 4-6 microwave-safe mugs, filling each mug about half full to allow space for rising. If desired, sprinkle a few chocolate chips on top of each mug for extra chocolate flavor.
- Microwave the Cakes: Place one mug in the microwave and cook on high for about 90 seconds to 2 minutes. The cake should rise and be firm to the touch but still slightly gooey in the center. Cooking times may vary depending on your microwave’s power.
- Cool and Serve: Allow the mug cake to cool for a minute or two before indulging. Top with whipped cream or a scoop of ice cream if desired, and serve immediately.
Extra Tips:
For an even richer flavor, consider adding a tablespoon of instant coffee granules to the batter. This enhances the chocolate flavor without adding a noticeable coffee taste.
If you prefer a more gooey center, reduce the cooking time slightly. Always verify your mugs are microwave-safe to prevent any accidents.
Finally, keep an eye on the cakes as they cook, as microwaves vary in power and the cakes can quickly overcook. Enjoy your quick and delicious microwave mug chocolate cake!
Chocolate Lava Cake
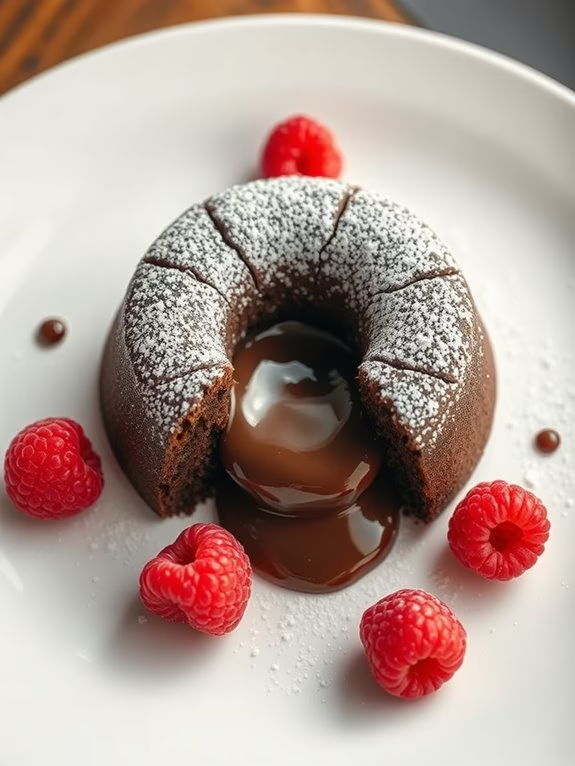
Chocolate Lava Cake is an indulgent dessert that combines the richness of a traditional chocolate cake with a luscious, molten center. This treat is perfect for chocolate lovers who desire a dessert that’s both decadent and simple to prepare. With its gooey core and tender outer cake, Chocolate Lava Cake offers an exquisite experience that can be enjoyed by family and friends alike.
Whether served at a dinner party or as a special treat, this dessert is sure to impress with its elegant presentation and irresistible flavor.
Creating a perfect Chocolate Lava Cake at home is easier than you might think. By using high-quality chocolate and following a few simple steps, you can achieve a restaurant-quality dessert in the comfort of your own kitchen. The key to this recipe is timing; making certain that the cakes are baked just enough to hold their shape while maintaining a molten center.
With a little practice and attention to detail, you can master the art of making this delectable dish, delighting your guests with each and every bite.
Ingredients for 4-6 servings:
- 1 cup (170g) semisweet chocolate chips or chopped dark chocolate
- 1/2 cup (115g) unsalted butter
- 1 cup (120g) powdered sugar
- 2 large eggs
- 2 large egg yolks
- 1 teaspoon vanilla extract
- 1/4 cup (30g) all-purpose flour
- A pinch of salt
- Butter and cocoa powder for preparing ramekins
Cooking Instructions:
- Prepare the ramekins: Preheat your oven to 425°F (220°C). Grease 4 to 6 ramekins with butter, then dust the insides with cocoa powder to prevent the cakes from sticking. This will also add an extra layer of chocolate flavor to your cakes.
- Melt chocolate and butter: In a medium microwave-safe bowl, combine the chocolate chips and butter. Microwave in 30-second intervals, stirring after each interval, until the mixture is completely melted and smooth. Alternatively, you can melt them in a heatproof bowl over a pot of simmering water.
- Mix the batter: Stir the powdered sugar into the melted chocolate mixture until well combined. Add the eggs, egg yolks, and vanilla extract, mixing thoroughly. Gradually incorporate the flour and a pinch of salt, stirring until the batter is smooth and free of lumps.
- Fill the ramekins: Evenly distribute the batter into the prepared ramekins, filling each about three-quarters full. Place the ramekins on a baking sheet to make them easier to transfer in and out of the oven.
- Bake the cakes: Bake in the preheated oven for 12-14 minutes, or until the edges are firm but the center is still slightly soft. The tops should appear set with a slight jiggle in the middle.
- Serve immediately: Remove the ramekins from the oven and allow them to cool for 1 minute. Carefully invert each ramekin onto a serving plate, tapping gently to release the cake. Serve immediately, optionally garnished with powdered sugar, fresh berries, or a scoop of vanilla ice cream.
Extra Tips:
For best results, make certain that your ingredients are at room temperature before starting the recipe, as this helps them blend more easily.
It’s essential to monitor the baking time closely, as overbaking can result in a fully cooked center rather than the desired molten texture. If you prefer a slightly different flavor, consider adding a pinch of instant coffee or cinnamon to the batter for a unique twist.
Finally, if you’re preparing these cakes in advance, you can refrigerate the unbaked batter in the ramekins, then bake them directly from the refrigerator, adding an extra minute to the bake time.

Dark Chocolate Espresso Cake
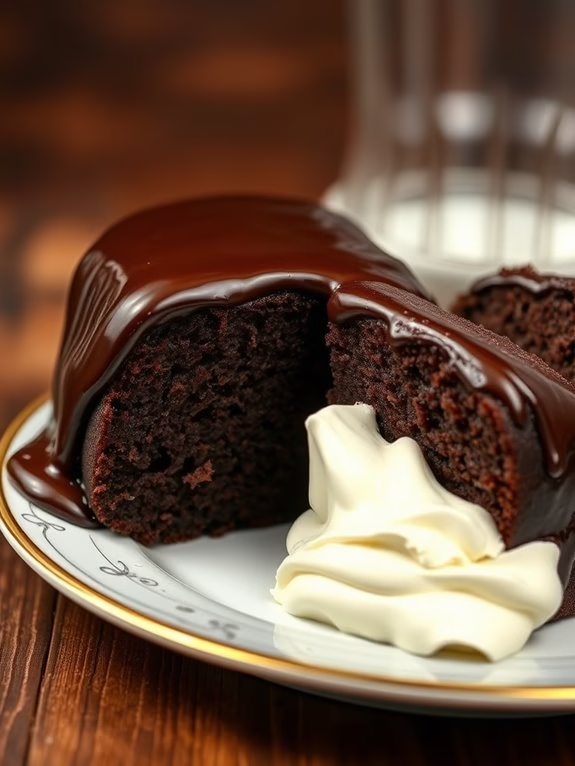
Dark Chocolate Espresso Cake is a decadent and rich dessert that combines the deep flavors of dark chocolate with the boldness of espresso. This cake is perfect for a sophisticated dinner party or a cozy night in with friends. The smooth, velvety texture of the dark chocolate pairs beautifully with the espresso, creating a harmonious blend that chocolate and coffee lovers will adore.
Not only is this cake delicious, but it’s also surprisingly easy to make, requiring just a few simple ingredients and a bit of time in the kitchen. This cake serves 4-6 people, making it ideal for a small gathering or family dessert. The combination of dark chocolate and espresso creates a luxurious flavor profile that will impress any guest.
Whether you’re an experienced baker or a novice in the kitchen, this recipe is straightforward and forgiving, guaranteeing a delightful result every time. Prepare to indulge in a slice of heaven with this Dark Chocolate Espresso Cake.
Ingredients:
- 1 cup all-purpose flour
- 1 cup granulated sugar
- 1/3 cup unsweetened cocoa powder
- 1 tsp baking soda
- 1/2 tsp baking powder
- 1/2 tsp salt
- 1/2 cup buttermilk
- 1/4 cup vegetable oil
- 1 large egg
- 1 tsp vanilla extract
- 1/2 cup freshly brewed strong espresso, cooled
- 4 oz dark chocolate, chopped
- 1/2 cup heavy cream
Instructions:
- Preheat and Prepare: Preheat your oven to 350°F (175°C). Grease and flour a 9-inch round cake pan, or line it with parchment paper to prevent sticking.
- Mix Dry Ingredients: In a large bowl, sift together the flour, sugar, cocoa powder, baking soda, baking powder, and salt. Mix until well combined.
- Combine Wet Ingredients: In a separate bowl, whisk together the buttermilk, vegetable oil, egg, and vanilla extract until smooth. Gradually add the cooled espresso, stirring continuously to blend.
- Create Batter: Pour the wet ingredients into the dry ingredients, mixing gently until just combined. Be careful not to overmix, as this can lead to a dense cake.
- Bake the Cake: Pour the batter into the prepared cake pan and spread it evenly. Bake in the preheated oven for 25-30 minutes, or until a toothpick inserted into the center comes out clean.
- Make Ganache: While the cake is baking, heat the heavy cream in a small saucepan over medium heat until it begins to simmer. Remove from heat and add the chopped dark chocolate, stirring until smooth and glossy. Allow to cool slightly.
- Cool and Frost: Once the cake is done, let it cool in the pan for about 10 minutes before transferring it to a wire rack to cool completely. Spread the chocolate ganache over the cooled cake, allowing it to drip down the sides for a rustic look.
- Serve: Slice the cake and serve with a dollop of whipped cream or a scoop of vanilla ice cream for an extra indulgent treat.
Extra Tips:
For an even deeper espresso flavor, consider adding a teaspoon of instant espresso powder to the batter. If you don’t have buttermilk on hand, you can make a quick substitute by mixing 1/2 cup of milk with 1/2 tablespoon of lemon juice or vinegar and letting it sit for 5 minutes.
Confirm the espresso is cooled before adding to the batter to prevent curdling the eggs. If you prefer a sweeter ganache, you can add a tablespoon of sugar to the cream while heating. Enjoy your deliciously rich and sophisticated Dark Chocolate Espresso Cake!
Chocolate Peanut Butter Cake

Indulge in the rich, decadent world of chocolate with this easy-to-make Chocolate Peanut Butter Cake. This delightful dessert combines the classic flavors of chocolate and peanut butter, creating a harmonious balance that’s sure to satisfy any sweet tooth. Perfect for birthdays, gatherings, or simply to treat yourself, this cake isn’t only delicious but also straightforward to prepare, making it an ideal choice even for novice bakers.
The Chocolate Peanut Butter Cake boasts a moist chocolate base complemented by a creamy peanut butter frosting. The layers of chocolate cake are rich and dense, creating a perfect contrast with the light and fluffy peanut butter frosting. Whether you’re a fan of chocolate, peanut butter, or both, this cake is sure to delight your taste buds and leave you and your guests craving more.
Ingredients (Serves 4-6):
- 1 3/4 cups all-purpose flour
- 1 1/2 cups granulated sugar
- 3/4 cup unsweetened cocoa powder
- 1 1/2 teaspoons baking powder
- 1 1/2 teaspoons baking soda
- 1 teaspoon salt
- 2 large eggs
- 1 cup whole milk
- 1/2 cup vegetable oil
- 2 teaspoons vanilla extract
- 1 cup boiling water
- 1/2 cup creamy peanut butter
- 1/2 cup unsalted butter, softened
- 2 cups powdered sugar
- 1/4 cup heavy cream
- 1/2 teaspoon vanilla extract for frosting
Instructions:
- Preheat and Prepare Pans: Preheat your oven to 350°F (175°C). Grease and flour two 9-inch round cake pans, or line them with parchment paper to prevent sticking.
- Mix Dry Ingredients: In a large bowl, combine the flour, sugar, cocoa powder, baking powder, baking soda, and salt. Mix well to confirm all dry ingredients are evenly distributed.
- Combine Wet Ingredients: In a separate bowl, whisk together the eggs, milk, vegetable oil, and vanilla extract until smooth.
- Create Cake Batter: Gradually add the wet mixture to the dry ingredients, stirring until just combined. Pour in the boiling water, and mix until the batter is smooth and has a thin consistency.
- Bake the Cake: Divide the batter evenly between the prepared cake pans. Bake in the preheated oven for 30-35 minutes, or until a toothpick inserted into the center comes out clean. Allow the cakes to cool in the pans for 10 minutes before transferring them to a wire rack to cool completely.
- Prepare Peanut Butter Frosting: In a medium bowl, beat the peanut butter and softened butter together until creamy. Gradually add the powdered sugar, heavy cream, and vanilla extract, beating until smooth and fluffy.
- Assemble the Cake: Once the cake layers are completely cool, spread a layer of peanut butter frosting on top of one cake layer. Place the second cake layer on top and frost the top and sides of the entire cake with the remaining frosting.
- Serve and Enjoy: Slice the cake into pieces and serve. Enjoy the rich combination of chocolate and peanut butter with each delicious bite.
Extra Tips:
To confirm a super moist cake, don’t over-mix the batter once the wet and dry ingredients are combined. Additionally, the boiling water is essential for achieving the cake’s rich texture, so don’t skip this step.
If you prefer a more intense chocolate flavor, consider adding a handful of chocolate chips to the batter. For added texture, you can sprinkle chopped peanuts or chocolate shavings on top of the frosted cake.
Store any leftovers in an airtight container to keep the cake fresh.
Nutella Chocolate Cake
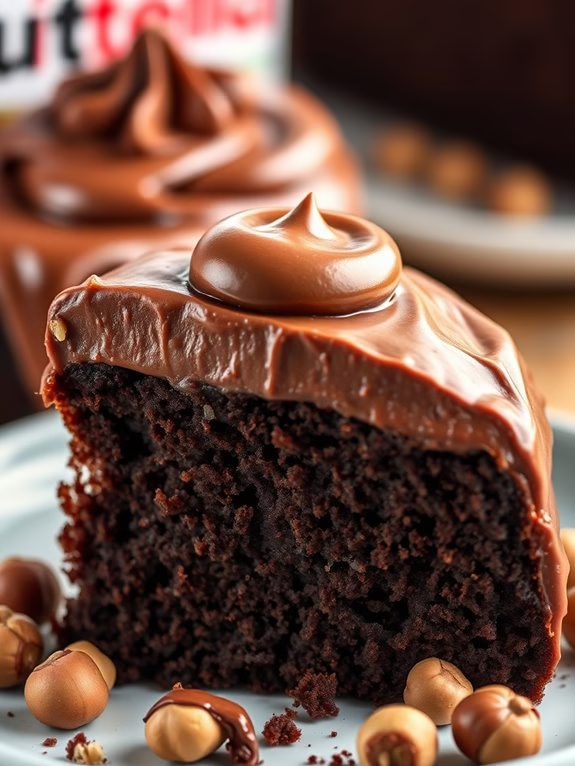
Nutella Chocolate Cake
Indulge your sweet tooth with this decadent Nutella Chocolate Cake, a perfect treat for chocolate and hazelnut lovers. This rich and moist cake is infused with the creamy goodness of Nutella, offering a delightful experience with every bite.
Whether it’s a birthday party, a casual gathering, or just a day when you crave something sweet, this cake is sure to be a hit. Easy to make and even easier to devour, it’s a must-try for anyone who enjoys the luscious combination of chocolate and hazelnut flavors.
This Nutella Chocolate Cake recipe is designed to serve 4-6 people, making it an ideal choice for small gatherings or family dinners. With its soft, tender crumb and a generous layer of Nutella frosting, this cake is a comforting dessert that never fails to impress.
The ingredients are simple, and the steps are straightforward, allowing even beginner bakers to create a mouthwatering masterpiece. Follow this easy recipe to bake a cake that’s both delicious and memorable.
Ingredients:
- 1 1/2 cups all-purpose flour
- 1 cup granulated sugar
- 1/2 cup unsweetened cocoa powder
- 1 teaspoon baking powder
- 1/2 teaspoon baking soda
- 1/4 teaspoon salt
- 2 large eggs
- 1/2 cup vegetable oil
- 1 teaspoon vanilla extract
- 1/2 cup buttermilk
- 3/4 cup Nutella
- 1/2 cup hot water
Cooking Instructions:
- Preheat the Oven: Begin by preheating your oven to 350°F (175°C). Grease and flour a 9-inch round cake pan to prevent the cake from sticking.
- Mix Dry Ingredients: In a large bowl, combine the flour, sugar, cocoa powder, baking powder, baking soda, and salt. Whisk together until the ingredients are evenly distributed.
- Prepare Wet Ingredients: In another bowl, beat the eggs with the vegetable oil and vanilla extract. Once thoroughly mixed, add the buttermilk and 1/2 cup of Nutella, and stir until smooth.
- Combine Mixtures: Gradually add the wet ingredients to the dry ingredients, mixing on medium speed until just combined. Be careful not to overmix, as this can make the cake dense.
- Add Hot Water: Slowly pour in the hot water, a little at a time, while stirring continuously. The batter will be thin, but this is normal, and it will result in a moist cake.
- Bake the Cake: Pour the batter into the prepared cake pan. Bake in the preheated oven for 30-35 minutes, or until a toothpick inserted into the center comes out clean.
- Cool and Frost: Allow the cake to cool in the pan for about 10 minutes, then remove it from the pan and let it cool completely on a wire rack. Once cooled, spread the remaining Nutella over the top as frosting.
Extra Tips:
For an even richer flavor, consider adding a handful of chopped hazelnuts to the batter or as a garnish on top of the frosting.
If you don’t have buttermilk on hand, you can make a substitute by mixing 1/2 cup of milk with 1/2 tablespoon of lemon juice or vinegar and letting it sit for a few minutes.
To enhance the presentation, dust the top of the cake lightly with powdered sugar or cocoa powder. Enjoy your Nutella Chocolate Cake with a scoop of vanilla ice cream or a dollop of whipped cream for an extra special treat.
Moist Zucchini Chocolate Cake

Moist Zucchini Chocolate Cake is a delicious and unique twist on a classic dessert. This cake is perfect for those who want to sneak in some extra veggies without sacrificing flavor. The zucchini adds moisture to the cake, making it incredibly soft and tender, while the rich chocolate flavor satisfies your sweet tooth. A slice of this cake is perfect for any occasion, whether it’s a birthday, a dinner party, or just a regular weekday treat.
This recipe is easy to follow and results in a cake that’s both decadent and nutritious. The combination of cocoa and zucchini creates a rich and moist texture that’s hard to resist. The sweetness is balanced perfectly, guaranteeing that every bite is as delightful as the final one. Best of all, this cake can be whipped up in no time, making it an ideal choice for busy bakers who still want to impress their family and friends.
Ingredients for 4-6 servings:
- 1 ½ cups all-purpose flour
- ½ cup unsweetened cocoa powder
- 1 teaspoon baking soda
- ½ teaspoon baking powder
- ½ teaspoon salt
- 2 large eggs
- 1 cup granulated sugar
- ½ cup vegetable oil
- 1 teaspoon vanilla extract
- 2 cups grated zucchini
- ½ cup semi-sweet chocolate chips
Cooking Instructions:
- Preheat the Oven: Start by preheating your oven to 350°F (175°C). Grease a 9×9 inch baking pan with butter or non-stick cooking spray, and set it aside.
- Mix Dry Ingredients: In a large bowl, sift together the flour, cocoa powder, baking soda, baking powder, and salt. Confirm they’re fully combined and free of lumps.
- Combine Wet Ingredients: In another bowl, beat the eggs and sugar together until the mixture is light and fluffy. Gradually add the vegetable oil and vanilla extract, mixing until well combined.
- Incorporate Zucchini: Gently fold the grated zucchini into the wet ingredient mixture. Make sure the zucchini is evenly distributed throughout the batter.
- Combine Mixtures: Gradually add the dry ingredient mixture to the wet ingredients, stirring until just combined. Don’t overmix, as this could result in a dense cake.
- Add Chocolate Chips: Fold in the chocolate chips, ensuring they’re evenly distributed throughout the batter.
- Bake the Cake: Pour the batter into the prepared baking pan. Smooth the top with a spatula, and place the pan in the preheated oven. Bake for 25-30 minutes, or until a toothpick inserted into the center comes out clean.
- Cool and Serve: Once baked, remove the cake from the oven and let it cool in the pan for about 10 minutes. Then, transfer it to a wire rack to cool completely before serving.
Extra Tips:
For added depth of flavor, try using dark chocolate chips instead of semi-sweet. If you want to make the cake even more decadent, consider adding a chocolate ganache or a simple dusting of powdered sugar on top before serving.
When grating the zucchini, there’s no need to peel it, as the skin adds extra nutrients and moisture to the cake. Finally, make sure to squeeze out any excess moisture from the zucchini before adding it to the batter to prevent the cake from becoming too soggy.
Red Wine Chocolate Cake
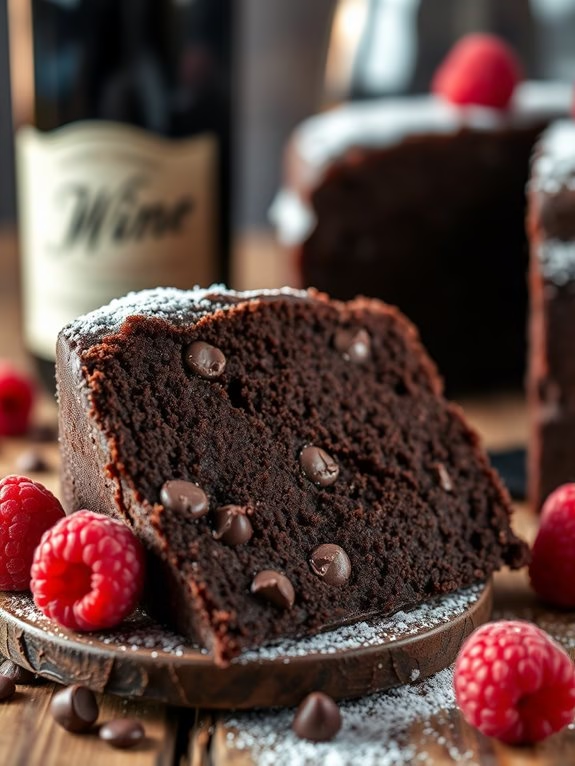
Red Wine Chocolate Cake is a delightful fusion of rich, dark chocolate and the deep, fruity notes of red wine, creating a cake that’s perfect for special occasions or simply when you’re in the mood for something indulgent. This cake isn’t too sweet, allowing the flavors of the cocoa and wine to shine through, offering a sophisticated taste that’s sure to impress your guests.
The moist texture and the unique combination of ingredients make it a memorable dessert that pairs beautifully with a glass of red wine or a scoop of vanilla ice cream. This recipe serves 4-6 people, making it an ideal choice for small gatherings or an intimate dinner party.
The cake is relatively simple to prepare, with a straightforward process that even novice bakers can follow. By using quality ingredients, such as good cocoa powder and a full-bodied red wine, you guarantee that each bite delivers a rich and satisfying experience. The following ingredients and instructions will guide you through making this delectable Red Wine Chocolate Cake.
Ingredients:
- 1 cup all-purpose flour
- 1/2 cup unsweetened cocoa powder
- 1 teaspoon baking soda
- 1/4 teaspoon salt
- 1/2 cup unsalted butter, softened
- 1 cup granulated sugar
- 1 large egg
- 1 teaspoon vanilla extract
- 3/4 cup red wine
- 1/2 cup semi-sweet chocolate chips
Instructions:
- Preheat and Prepare Baking Dish: Preheat your oven to 350°F (175°C). Lightly grease a 9-inch round cake pan with butter or cooking spray and line the bottom with parchment paper for easy removal.
- Mix Dry Ingredients: In a medium-sized bowl, sift together the flour, cocoa powder, baking soda, and salt. This guarantees that the dry ingredients are well combined and free of lumps.
- Cream Butter and Sugar: In a large mixing bowl, beat the softened butter and granulated sugar together until the mixture is light and fluffy, about 3-5 minutes. This step is essential as it helps to aerate the batter, leading to a lighter cake.
- Add Egg and Vanilla: Beat in the egg and vanilla extract until fully incorporated. The mixture should be smooth and creamy.
- Incorporate Dry Ingredients and Wine: Gradually add the dry ingredients to the butter mixture, alternating with the red wine, beginning and ending with the dry ingredients. Mix on low speed until just combined, being careful not to overmix.
- Fold in Chocolate Chips: Gently fold in the semi-sweet chocolate chips with a spatula, guaranteeing they’re evenly distributed throughout the batter.
- Bake the Cake: Pour the batter into the prepared cake pan and smooth the top with a spatula. Bake in the preheated oven for 25-30 minutes, or until a toothpick inserted into the center comes out clean.
- Cool and Serve: Allow the cake to cool in the pan for about 10 minutes before transferring it to a wire rack to cool completely. Once cooled, slice and serve with your choice of toppings.
Extra Tips:
For the best flavor, choose a red wine that you enjoy drinking, as the taste will be prominent in the cake. A full-bodied wine like a Cabernet Sauvignon or Merlot works wonderfully.
If you prefer a more intense chocolate flavor, you can increase the cocoa powder slightly and reduce the flour by the same amount. Additionally, for a touch of elegance, dust the top of the cake with powdered sugar or garnish with fresh berries before serving.
Make sure not to overmix the batter as it can lead to a dense cake. Enjoy your Red Wine Chocolate Cake with a side of whipped cream or a scoop of your favorite ice cream for an extra indulgent treat.
Chocolate Almond Cake
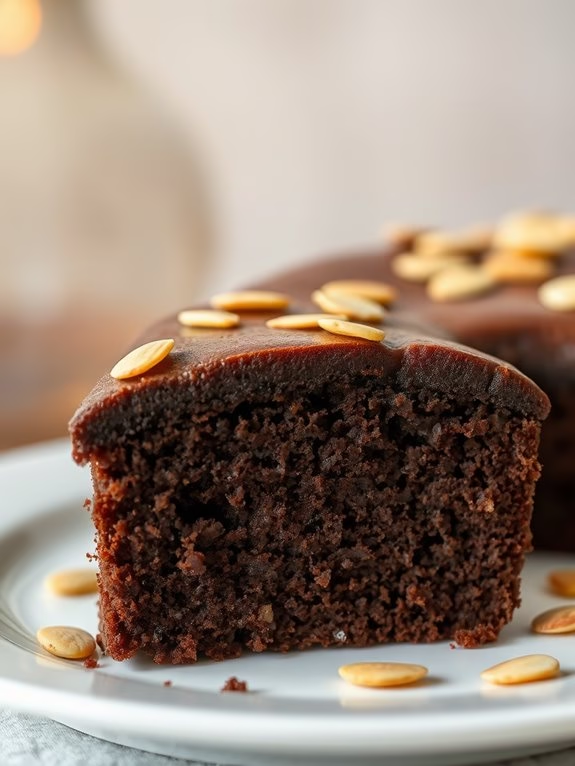
Chocolate Almond Cake
Indulge in the rich and decadent delight of a Chocolate Almond Cake, a perfect dessert for any special occasion or simply to satisfy your chocolate cravings. This cake combines the deep flavors of chocolate with the subtle nuttiness of almonds, creating a harmonious blend that will leave your taste buds singing.
Whether you’re an experienced baker or a novice in the kitchen, this recipe is straightforward to follow and will yield a moist, delicious cake that’s certain to impress your family and friends.
The Chocolate Almond Cake isn’t only luscious but also versatile, making it an excellent choice for serving at dinner parties, birthdays, or even as a comforting weeknight dessert. The combination of high-quality cocoa powder and ground almonds guarantees that each bite is packed with flavor, while the addition of almond extract elevates the cake with its delicate aroma.
With this recipe, you’ll have a delightful dessert ready to serve 4-6 people, perfect for sharing or indulging in a little extra for yourself.
Ingredients (for 4-6 servings):
- 1 cup all-purpose flour
- 1 cup granulated sugar
- 1/2 cup unsweetened cocoa powder
- 1/2 cup ground almonds
- 1 teaspoon baking powder
- 1/2 teaspoon baking soda
- 1/4 teaspoon salt
- 2 large eggs
- 1/2 cup unsalted butter, melted
- 1 teaspoon vanilla extract
- 1/2 teaspoon almond extract
- 3/4 cup buttermilk
- 1/2 cup hot water
- 1/4 cup sliced almonds (optional, for topping)
Cooking Instructions:
- Preheat the Oven: Begin by preheating your oven to 350°F (175°C). Grease and flour a 9-inch round cake pan, making sure all sides are covered to prevent sticking.
- Mix Dry Ingredients: In a large mixing bowl, combine the flour, sugar, cocoa powder, ground almonds, baking powder, baking soda, and salt. Stir well to blend all the dry ingredients evenly.
- Combine Wet Ingredients: In a separate bowl, whisk together the eggs, melted butter, vanilla extract, almond extract, and buttermilk until smooth.
- Incorporate Wet and Dry Ingredients: Gradually add the wet mixture into the dry ingredients, stirring gently until just combined. Be careful not to overmix as this can result in a dense cake.
- Add Hot Water: Slowly mix in the hot water, stirring until the batter is smooth. This step guarantees that the cake will be moist and tender.
- Pour and Bake: Pour the batter into the prepared cake pan. If desired, sprinkle sliced almonds on top for added texture and flavor. Bake for 30-35 minutes or until a toothpick inserted into the center of the cake comes out clean.
- Cool and Serve: Allow the cake to cool in the pan for about 10 minutes before transferring it to a wire rack to cool completely. Once cooled, slice and serve your delicious Chocolate Almond Cake.
Extra Tips:
For an even more indulgent treat, consider serving the Chocolate Almond Cake with a scoop of vanilla ice cream or a dollop of whipped cream.
If you prefer a stronger almond flavor, you can increase the almond extract up to 1 teaspoon. Additionally, make sure that all ingredients are at room temperature before starting, as this helps the batter blend more smoothly and results in a more even bake.
Enjoy your cake with a hot cup of coffee or a cold glass of milk for the perfect dessert experience.
Chocolate Chip Bundt Cake
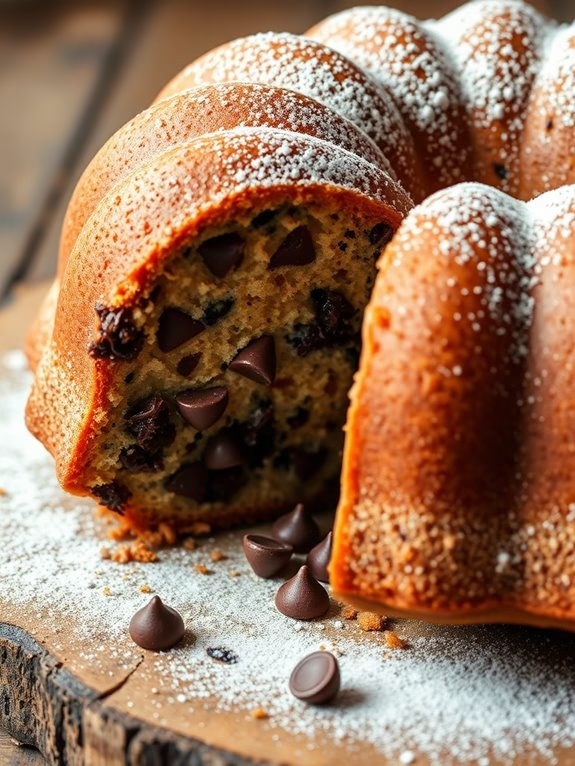
Chocolate Chip Bundt Cake
If you’re looking for an easy homemade chocolate cake recipe that impresses and delights, this Chocolate Chip Bundt Cake is a perfect choice. This cake is a delicious combination of rich chocolate flavors and the delightful surprise of chocolate chips in every bite.
It’s the perfect dessert for any occasion, whether it’s a family gathering, a special celebration, or simply a treat on a lazy afternoon. The Bundt shape adds an elegant touch while guaranteeing even baking, resulting in a cake that’s not only delicious but visually appealing as well.
This Chocolate Chip Bundt Cake is designed to serve 4-6 people, making it ideal for small gatherings or family dinners. With its moist texture and mouthwatering taste, it’s bound to be a hit with chocolate lovers. The recipe is straightforward and doesn’t require any complicated techniques, making it suitable for both novice and experienced bakers.
By following the simple instructions below, you’ll have a scrumptious cake ready to enjoy in no time.
Ingredients (serves 4-6):
- 1 1/2 cups all-purpose flour
- 1 cup granulated sugar
- 1/2 cup unsweetened cocoa powder
- 1 teaspoon baking powder
- 1/2 teaspoon baking soda
- 1/4 teaspoon salt
- 1/2 cup unsalted butter, softened
- 2 large eggs
- 1 teaspoon vanilla extract
- 1 cup buttermilk
- 1 cup semi-sweet chocolate chips
- Powdered sugar, for dusting (optional)
Instructions:
- Preheat the Oven: Start by preheating your oven to 350°F (175°C). This guarantees that your cake bakes evenly throughout.
- Prepare the Bundt Pan: Grease a Bundt pan thoroughly with butter or non-stick spray, making sure to cover all the grooves to prevent sticking. Lightly flour the pan, tapping out any excess flour.
- Mix Dry Ingredients: In a large mixing bowl, whisk together the flour, sugar, cocoa powder, baking powder, baking soda, and salt until well combined. This guarantees an even distribution of all dry ingredients.
- Combine Wet Ingredients: In another bowl, beat the softened butter with an electric mixer until creamy. Add the eggs one at a time, beating well after each addition. Stir in the vanilla extract.
- Incorporate Buttermilk and Dry Mixture: Gradually add the dry ingredients to the wet mixture, alternating with the buttermilk. Begin and end with the dry ingredients, mixing just until combined. Be careful not to overmix to keep the cake tender.
- Add Chocolate Chips: Gently fold in the chocolate chips with a spatula, ensuring they’re evenly distributed throughout the batter.
- Pour Batter into Pan: Pour the prepared batter into the greased and floured Bundt pan, spreading it evenly with a spatula.
- Bake: Place the Bundt pan in the preheated oven and bake for 35-40 minutes, or until a toothpick inserted into the center of the cake comes out clean.
- Cool and Serve: Allow the cake to cool in the pan for about 10 minutes. Then, carefully invert the cake onto a wire rack to cool completely. Once cooled, dust with powdered sugar if desired before serving.
Extra Tips:
For an enhanced chocolate flavor, consider using dark chocolate chips or a mix of semi-sweet and milk chocolate chips.
Guarantee the butter is at room temperature before beating, as this helps in achieving a smooth and creamy texture. If you don’t have buttermilk on hand, you can make a substitute by adding one tablespoon of white vinegar or lemon juice to one cup of milk and letting it sit for a few minutes.
This cake can also be stored in an airtight container at room temperature for up to three days, retaining its moistness and delicious flavor.
Instant Pot Chocolate Cake
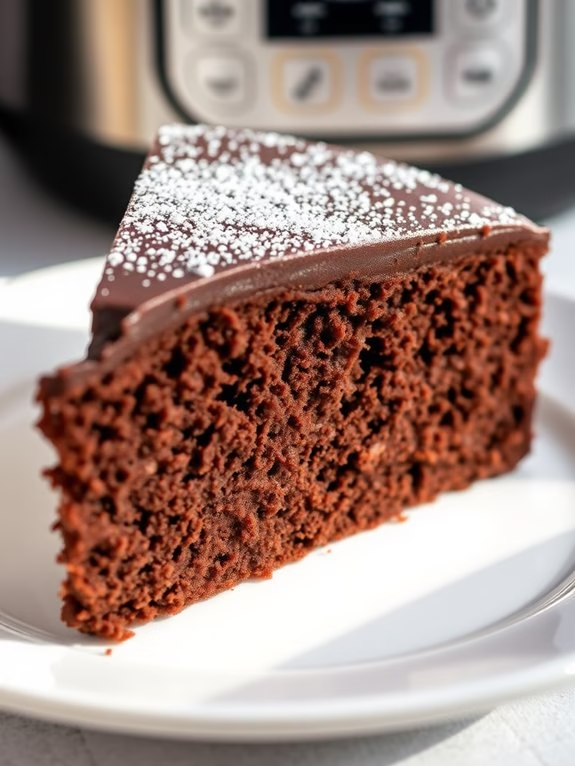
Instant Pot Chocolate Cake****
Indulging in a rich, moist chocolate cake doesn’t always have to be a time-consuming process. With the Instant Pot, you can whip up a decadent dessert in a fraction of the time it takes to bake in a conventional oven. This Instant Pot Chocolate Cake is perfect for those who crave delicious homemade chocolate cake but are short on time. The pressure cooking method guarantees a moist texture and intense chocolate flavor, making this cake a go-to recipe for chocolate lovers.
The beauty of this recipe lies in its simplicity. With just a few ingredients and minimal preparation, you can create a dessert that will impress your family and friends. Whether you’re making it for a special occasion or just because you have a sweet tooth, this Instant Pot Chocolate Cake is sure to become a staple in your dessert repertoire. The following ingredients list and instructions will guide you in making this delightful cake for 4-6 people.
Ingredients:
- 1 cup all-purpose flour
- 1 cup granulated sugar
- 1/3 cup unsweetened cocoa powder
- 1 teaspoon baking powder
- 1/2 teaspoon baking soda
- 1/4 teaspoon salt
- 1/2 cup unsalted butter, melted
- 1/2 cup whole milk
- 2 large eggs
- 1 teaspoon vanilla extract
- 1/2 cup boiling water
- Non-stick cooking spray
Instructions:
- Prepare the Instant Pot: Start by placing a trivet inside the Instant Pot and adding 1 cup of water to the bottom. This will create the necessary steam for cooking the cake.
- Mix the Dry Ingredients: In a medium-sized mixing bowl, whisk together the flour, sugar, cocoa powder, baking powder, baking soda, and salt until well combined. This guarantees that all the dry ingredients are evenly distributed.
- Combine Wet Ingredients: In a separate bowl, whisk the melted butter, milk, eggs, and vanilla extract until smooth. It’s important to guarantee the eggs are fully beaten into the mixture for a uniform batter.
- Create the Batter: Gradually add the wet ingredients to the dry ingredients, stirring continuously until a smooth batter forms. Then, carefully stir in the boiling water. The batter will be thin, which contributes to the moist texture of the cake.
- Prepare the Cake Pan: Lightly spray a 7-inch round cake pan with non-stick cooking spray. Pour the batter into the prepared pan, ensuring it’s evenly distributed.
- Cook the Cake: Cover the cake pan tightly with aluminum foil to prevent water from seeping in. Place the cake pan on the trivet inside the Instant Pot. Secure the lid and set the valve to the sealing position. Cook on high pressure for 35 minutes.
- Release and Cool: Once the cooking time is up, allow the pressure to naturally release for 10 minutes, then perform a quick release for any remaining pressure. Carefully remove the cake pan from the Instant Pot and let it cool on a wire rack before serving.
Extra Tips:
To enhance the chocolate flavor, consider adding a tablespoon of instant coffee granules to the boiling water before mixing it into the batter. This will intensify the chocolate taste without adding a coffee flavor.
Additionally, make sure all ingredients are at room temperature before you start, as this helps in achieving a smooth batter. For a more festive touch, top the cooled cake with a dusting of powdered sugar or a rich chocolate ganache. Enjoy your Instant Pot Chocolate Cake with a scoop of vanilla ice cream or a dollop of whipped cream for an extra indulgent treat.
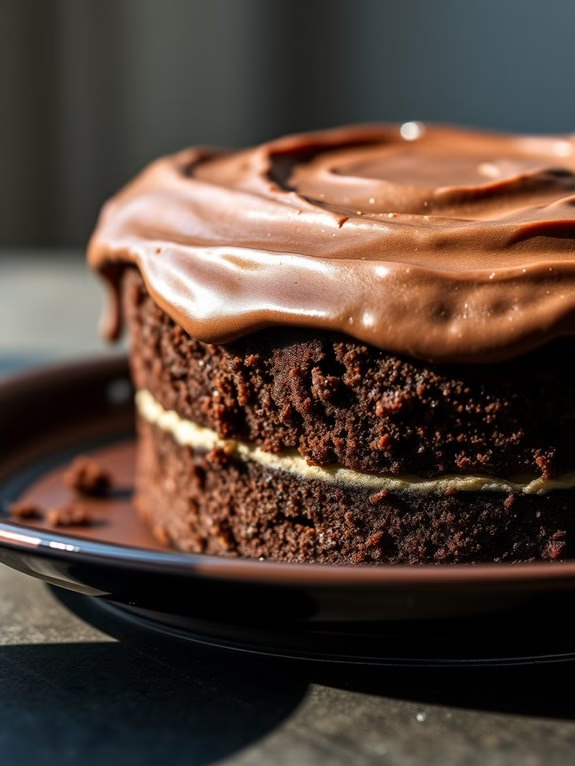
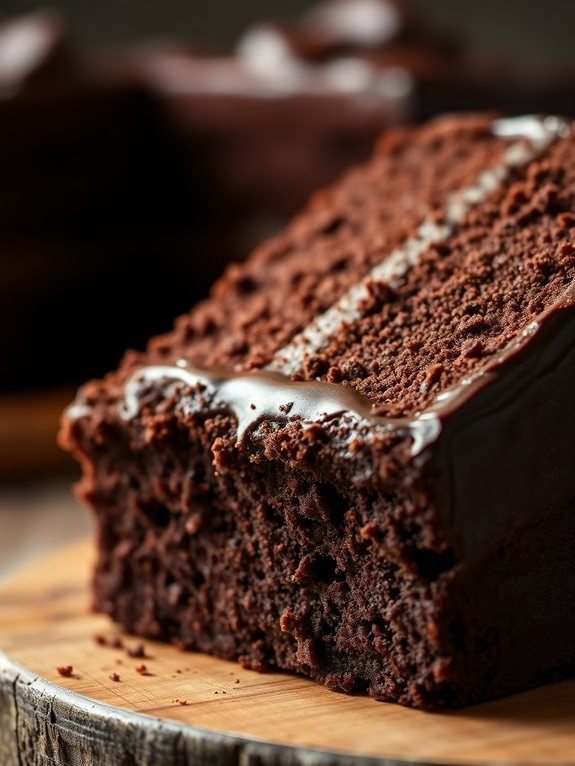
Double Layer Chocolate Cake

Double Layer Chocolate Cake Recipe
Indulge in the rich, decadent taste of a homemade Double Layer Chocolate Cake that’s sure to satisfy every chocolate lover’s craving. This cake is perfect for special occasions, birthdays, or simply as a delightful treat to enjoy with family and friends.
With its moist layers and creamy frosting, it’s a classic dessert that never fails to impress. Whether you’re an experienced baker or just starting out, this recipe is straightforward and guarantees a deliciously satisfying result.
To achieve the perfect Double Layer Chocolate Cake, it’s important to use high-quality cocoa powder and fresh ingredients. This recipe serves 4-6 people, making it ideal for a small gathering or family dessert.
Follow the instructions closely, and you’ll be rewarded with a beautifully layered cake that’s both visually appealing and deliciously rich in flavor.
Ingredients:
- 1 and 3/4 cups all-purpose flour
- 3/4 cup unsweetened cocoa powder
- 2 cups granulated sugar
- 1 and 1/2 teaspoons baking powder
- 1 and 1/2 teaspoons baking soda
- 1 teaspoon salt
- 2 large eggs
- 1 cup whole milk
- 1/2 cup vegetable oil
- 2 teaspoons vanilla extract
- 1 cup boiling water
- 1/2 cup unsalted butter (for frosting)
- 2/3 cup unsweetened cocoa powder (for frosting)
- 3 cups powdered sugar (for frosting)
- 1/3 cup milk (for frosting)
- 1 teaspoon vanilla extract (for frosting)
Cooking Instructions:
- Preheat the Oven: Begin by preheating your oven to 350°F (175°C). Grease and flour two 9-inch round cake pans to prevent sticking.
- Mix Dry Ingredients: In a large mixing bowl, combine the flour, cocoa powder, sugar, baking powder, baking soda, and salt. Whisk together until well blended.
- Add Wet Ingredients: Add the eggs, milk, vegetable oil, and vanilla extract to the dry ingredients. Mix using an electric mixer on medium speed for about 2 minutes until the batter is smooth and well combined.
- Incorporate Boiling Water: Carefully stir in the boiling water. The batter will be thin, but this step is essential for a moist cake.
- Bake the Cake: Divide the batter evenly between the two prepared cake pans. Bake for 30-35 minutes or until a toothpick inserted in the center comes out clean.
- Cool the Cakes: Allow the cakes to cool in the pans for about 10 minutes. Then, remove them from the pans and let them cool completely on a wire rack.
- Prepare the Frosting: While the cakes are cooling, prepare the frosting. In a medium bowl, beat the butter until creamy. Gradually add the cocoa powder and powdered sugar alternately with the milk. Beat until the mixture is smooth and creamy. Stir in the vanilla extract.
- Assemble the Cake: Once the cakes are completely cool, place one layer on a serving plate. Spread a generous amount of frosting on top. Place the second cake layer on top, and spread frosting over the top and sides of the entire cake.
- Decorate: Optionally, you can decorate the cake with chocolate shavings, sprinkles, or fresh berries for an added touch.
Extra Tips:
For an exceptionally moist cake, confirm that the boiling water is added just before transferring the batter to the pans. This helps the batter to rise evenly.
If you prefer a richer chocolate flavor, consider using Dutch-process cocoa powder. Also, make sure the cakes are completely cool before frosting to prevent the frosting from melting.
If you wish to add more depth to the frosting, a pinch of salt or a tablespoon of espresso powder can enhance the chocolate flavor greatly. Enjoy your delicious homemade Double Layer Chocolate Cake!