
Looking for ways to simplify your morning routine without sacrificing a wholesome breakfast? Breakfast freezer meals might just be your new best friend. From savory egg muffins to sweet oatmeal cups, these meals are perfect for busy mornings. They’re not only convenient but also packed with nutrients to keep you feeling full and satisfied. Let’s explore how to make these delicious options a part of your daily routine.
Savory Egg Muffins

Savory Egg Muffins are a perfect breakfast option for those who are always on the go. These delightful, protein-packed muffins aren’t only easy to make but also incredibly versatile, allowing you to mix and match your favorite ingredients to suit your taste.
Ideal for busy mornings, Savory Egg Muffins can be made in advance and stored in the freezer for a quick, nutritious meal that can be reheated in just minutes.
Designed to serve 4-6 people, this recipe provides a balanced meal that combines eggs, vegetables, and cheese for a satisfying breakfast. Whether you prefer them plain or with a kick of spice, these muffins are bound to become a staple in your breakfast routine. Simply prepare a batch on the weekend, and you’ll have breakfast ready for the entire week.
Ingredients for Savory Egg Muffins (serving size: 4-6 people):
- 12 large eggs
- 1 cup diced bell peppers
- 1 cup chopped spinach
- 1/2 cup diced onion
- 1 cup shredded cheddar cheese
- 1/2 cup cooked and crumbled bacon (optional)
- Salt and pepper to taste
- Non-stick cooking spray or muffin liners
Cooking Instructions:
1. Preheat the Oven: Begin by preheating your oven to 350°F (175°C). This guarantees that the oven is hot enough to cook the egg muffins evenly.
2. Prepare the Muffin Tin: Lightly spray a 12-cup muffin tin with non-stick cooking spray or line with muffin liners to prevent sticking and make cleaning easier.
3. Mix the Ingredients: In a large mixing bowl, crack the eggs and whisk them until they’re well blended. Add the diced bell peppers, chopped spinach, diced onion, shredded cheddar cheese, and bacon if using.
Season with salt and pepper, then stir everything together until evenly combined.
4. Fill the Muffin Cups: Carefully pour the egg mixture into each muffin cup, filling them about three-quarters full to allow room for the muffins to rise as they bake.
5. Bake the Muffins: Place the muffin tin in the preheated oven and bake for 20-25 minutes, or until the egg muffins are set and lightly golden on top. You can check for doneness by inserting a toothpick into the center of a muffin; it should come out clean.
6. Cool and Store: Once baked, remove the muffins from the oven and allow them to cool in the tin for about 5 minutes. Then, transfer them to a wire rack to cool completely.
If you plan to freeze them, place the muffins in a single layer on a baking sheet to freeze individually before transferring them to a freezer-safe container.
Extra Tips:
For added flavor, consider incorporating a variety of herbs such as chives, parsley, or dill into the egg mixture. If you prefer a spicier muffin, add a pinch of red pepper flakes or a dash of hot sauce.
When reheating from frozen, simply microwave each muffin for 1-2 minutes or until thoroughly heated. These muffins are also perfect for using up leftover vegetables or cheeses, making them both economical and customizable.
Hearty Breakfast Burritos

Start your day with a burst of flavor by preparing Hearty Breakfast Burritos, a perfect make-ahead meal that guarantees you have a delicious and satisfying breakfast ready in minutes.
These burritos are packed with protein, veggies, and cheese, wrapped snugly in a tortilla, and are ideal for those hectic mornings or when you want a hearty breakfast without the hassle. You can prepare a batch over the weekend, freeze them, and simply reheat on a busy weekday morning.
The beauty of Hearty Breakfast Burritos lies in their versatility and ease of preparation. Customize the filling according to your taste preferences; add more vegetables, different types of cheese, or even switch up the protein.
Whether you enjoy them on the go or leisurely at home, these burritos are designed to keep you energized and satisfied until lunchtime. Below is a full recipe for 4-6 people, guaranteeing everyone in your household starts their day with a nutritious meal.
Ingredients (Serves 4-6):
- 6 large flour tortillas
- 8 large eggs
- 1 cup shredded cheddar cheese
- 1 cup cooked breakfast sausage, crumbled
- 1 cup diced bell peppers (any color)
- 1 cup diced onions
- 1 tablespoon olive oil
- Salt and pepper to taste
- Optional: salsa, avocado, or hot sauce for serving
Cooking Instructions:
- Prepare the Filling: Start by heating the olive oil in a large skillet over medium heat. Add the diced onions and bell peppers, sautéing them until they’re tender and the onions are translucent, about 5 minutes.
- Cook the Sausage: If your breakfast sausage isn’t already cooked, add it to the skillet with the vegetables. Cook until the sausage is browned and fully cooked, breaking it into crumbles with a spatula as it cooks.
- Scramble the Eggs: In a separate bowl, whisk together the eggs with a pinch of salt and pepper. Pour the eggs into the skillet with the sausage and vegetables, stirring constantly until the eggs are fully cooked and scrambled.
- Assemble the Burritos: Lay a tortilla flat on a clean surface. Spoon a portion of the egg, sausage, and vegetable mixture onto the center of the tortilla. Sprinkle some shredded cheddar cheese over the top.
- Roll the Burritos: Fold the sides of the tortilla over the filling, then roll it tightly from the bottom up. Repeat with the remaining tortillas and filling.
- Wrap and Freeze: Wrap each burrito individually in aluminum foil or plastic wrap. Place them in a freezer-safe bag or container, and store in the freezer for up to 3 months.
- Reheat and Serve: To reheat, remove the burrito from the foil or plastic wrap, and microwave on high for 1-2 minutes until heated through. Alternatively, you can bake them in a preheated oven at 350°F (175°C) for 10-15 minutes. Serve with optional salsa, avocado, or hot sauce.
Extra Tips:
For a healthier version, consider using whole wheat tortillas and adding more vegetables like spinach or tomatoes to the filling.
If you prefer a bit of spice, add chopped jalapeños or a dash of cayenne pepper to the egg mixture.
To prevent the burritos from becoming soggy when reheating, make sure to wrap them tightly to avoid moisture build-up during freezing.
Enjoy customizing your Hearty Breakfast Burritos to match your palate and start your day off right!
Sweet Oatmeal Cups
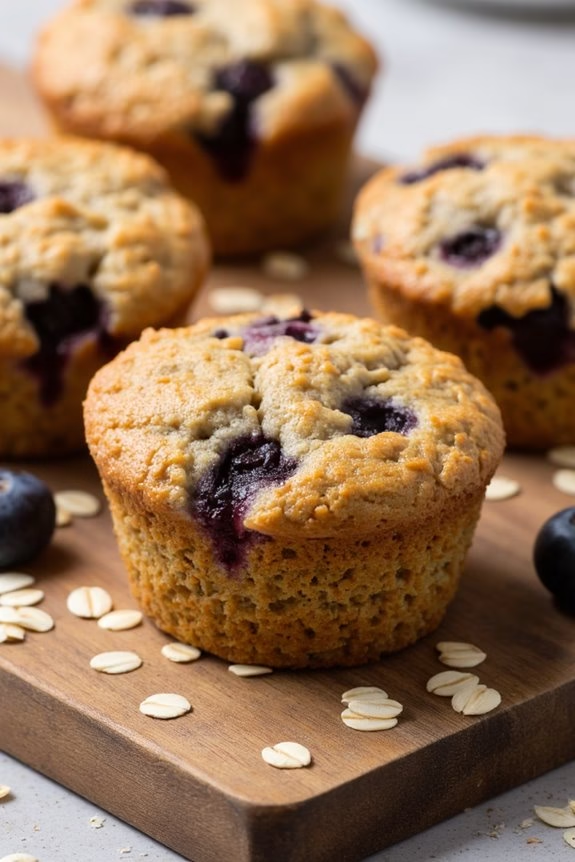
Sweet Oatmeal Cups are a delightful and nutritious breakfast option that can be prepared in advance and stored in the freezer for those busy mornings. These oatmeal cups are perfect for meal prepping, allowing you to enjoy a wholesome breakfast without the hassle of cooking every day. Packed with the goodness of oats, sweetened with natural ingredients, and customizable with your favorite toppings, Sweet Oatmeal Cups are a versatile and convenient breakfast choice.
The beauty of Sweet Oatmeal Cups lies in their simplicity and adaptability. You can prepare a batch over the weekend and freeze them, guaranteeing you have a healthy, grab-and-go breakfast ready for the week. Whether you like your oatmeal with fruits, nuts, or a hint of spice, these cups can be tailored to suit your taste preferences.
Let’s explore the recipe for Sweet Oatmeal Cups that will serve 4-6 people.
Ingredients:
- 2 cups rolled oats
- 1 teaspoon baking powder
- 1/2 teaspoon cinnamon
- 1/4 teaspoon salt
- 1 1/2 cups milk
- 2 large eggs
- 1/4 cup honey
- 1 teaspoon vanilla extract
- 1/2 cup applesauce
- 1/2 cup blueberries (or your choice of fruit)
- 1/4 cup chopped nuts (optional)
Cooking Instructions:
- Preheat the Oven: Preheat your oven to 350°F (175°C) to guarantee it’s ready for baking the oatmeal cups.
- Prepare the Muffin Tin: Grease a muffin tin or line it with paper muffin liners to prevent sticking and make cleaning up easier after baking.
- Mix Dry Ingredients: In a large bowl, combine the rolled oats, baking powder, cinnamon, and salt. Stir well to guarantee the ingredients are evenly distributed.
- Combine Wet Ingredients: In a separate bowl, whisk together the milk, eggs, honey, vanilla extract, and applesauce until well combined.
- Mix Ingredients Together: Pour the wet ingredients into the dry ingredients and stir until just combined. Be careful not to overmix, as this can make the oatmeal cups dense.
- Add Fruit and Nuts: Gently fold the blueberries and chopped nuts into the mixture, distributing them evenly throughout the batter.
- Fill the Muffin Tin: Spoon the mixture into the prepared muffin tin, filling each cup about 3/4 full. This allows room for the oatmeal cups to expand as they bake.
- Bake: Place the muffin tin in the preheated oven and bake for 25-30 minutes, or until the oatmeal cups are set and lightly golden on top.
- Cool: Allow the oatmeal cups to cool in the pan for a few minutes before transferring them to a wire rack to cool completely.
- Freeze: Once cooled, place the oatmeal cups in a single layer on a baking sheet and freeze them. Once frozen, transfer the cups to a freezer-safe bag or container for storage.
Extra Tips:
When preparing Sweet Oatmeal Cups, consider doubling the recipe if you have a large family or if you want to guarantee a longer supply.
These cups can be reheated directly from the freezer; simply microwave for about 30-60 seconds, or until heated through. Feel free to experiment with different combinations of fruits and nuts for variety.
Adding a sprinkle of flaxseeds or chia seeds can boost the nutritional value. Remember to label the freezer bags with the date to keep track of freshness.
Enjoy your delicious, homemade Sweet Oatmeal Cups anytime you need a quick and easy breakfast!
Veggie-Packed Frittata Slices

Breakfast is often touted as the most important meal of the day, and for good reason. A nutritious start can set the tone for the rest of your day, providing energy and focus. For those busy mornings when time is short but you still want to enjoy a flavorful, wholesome meal, Veggie-Packed Frittata Slices are the perfect solution. Easy to prepare and packed with colorful vegetables, this dish can be made in advance and stored in the freezer, making it a convenient option for a quick breakfast or even a light lunch.
The beauty of this recipe is its versatility. You can customize it with your favorite vegetables, herbs, and cheeses, making it a staple that never gets old. It’s a great way to use up leftover produce and reduce food waste. Plus, the frittata slices are loaded with protein and fiber, keeping you full and satisfied for hours. Whether you’re rushing out the door or enjoying a leisurely weekend brunch, these frittata slices will certainly become a family favorite.
Ingredients (serving size: 4-6 people):
- 10 large eggs
- 1 cup milk
- 1 tablespoon olive oil
- 1 medium onion, diced
- 1 bell pepper, diced
- 1 zucchini, sliced
- 1 cup spinach, chopped
- 1 cup cherry tomatoes, halved
- 1 cup shredded cheese (cheddar or your choice)
- Salt and pepper to taste
- 1 teaspoon dried oregano
- 1 teaspoon garlic powder
Instructions:
- Preheat the Oven: Begin by preheating your oven to 375°F (190°C). This guarantees that the frittata is cooked evenly and thoroughly.
- Prepare the Vegetables: In a large skillet, heat the olive oil over medium heat. Add the diced onion and bell pepper, sautéing until they’re soft and translucent, about 5 minutes. Add the zucchini slices and chopped spinach, cooking for an additional 3 minutes until the spinach is wilted. Stir in the cherry tomatoes and remove from heat.
- Beat the Eggs: In a large bowl, whisk together the eggs and milk until well combined. Season the mixture with salt, pepper, dried oregano, and garlic powder.
- Combine Ingredients: Grease a 9×13-inch baking dish. Spread the sautéed vegetables evenly across the bottom of the dish. Sprinkle the shredded cheese over the vegetables. Pour the egg mixture over the top, making sure everything is evenly covered.
- Bake the Frittata: Place the baking dish in the preheated oven and bake for 25-30 minutes, or until the eggs are set and the top is slightly golden. You can check the doneness by inserting a knife into the center; it should come out clean.
- Cool and Slice: Allow the frittata to cool for 10 minutes before slicing it into portions. This resting time helps the slices hold their shape when cut.
Extra Tips:
To make these frittata slices even more convenient, consider portioning them out and wrapping each piece individually in plastic wrap before freezing. This makes it easy to grab a slice and reheat it in the microwave or oven on hectic mornings.
Feel free to experiment with different cheese types or add cooked bacon or sausage for extra flavor. When reheating from frozen, let the slice thaw overnight in the refrigerator for best results, then warm it up in the oven to maintain its texture.
Protein-Packed Breakfast Sandwiches
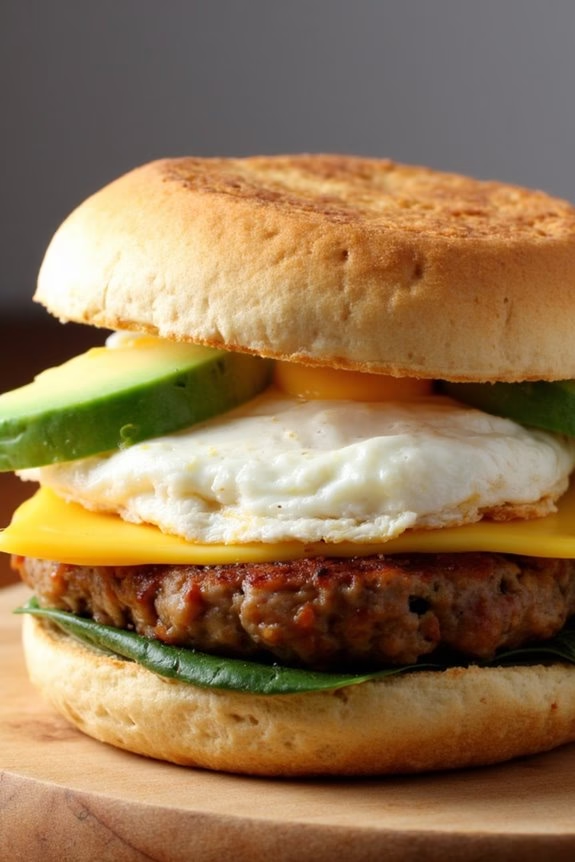
Start your morning with a hearty and delicious Protein-Packed Breakfast Sandwich that’s perfect for those busy mornings.
These sandwiches aren’t only satisfying but also easy to make and store in your freezer for a quick grab-and-go meal. Packed with protein from eggs and turkey sausage, these sandwiches will keep you full and energized throughout the morning.
Freezing these sandwiches makes them convenient for meal prep, allowing you to enjoy a nutritious breakfast even on your busiest days. Simply pop one in the microwave or toaster oven, and you’ll have a hot breakfast ready in minutes. Perfect for the whole family, this recipe serves 4-6 people.
Ingredients (serves 4-6):
- 6 English muffins
- 6 large eggs
- 6 turkey sausage patties
- 6 slices of cheddar cheese
- Salt and pepper to taste
- Cooking spray or oil
- Optional: spinach leaves or sliced avocado
Cooking Instructions:
- Preheat the Oven: Set your oven to 350°F (175°C). This will be used to cook the eggs evenly.
- Cook the Sausage Patties: Heat a skillet over medium heat and cook the turkey sausage patties until fully cooked through, about 6-8 minutes per side. Set aside.
- Prepare and Cook the Eggs: Spray a muffin tin with cooking spray or lightly oil it. Crack an egg into each muffin cup, add salt and pepper to taste, and bake in the preheated oven for about 10-12 minutes, or until the egg whites are set.
- Assemble the Sandwiches: Split the English muffins and lightly toast them if desired. Place a slice of cheddar cheese on the bottom half of each muffin. Then add a cooked sausage patty, a baked egg, and any optional toppings like spinach or avocado. Top with the other half of the muffin.
- Wrap and Freeze: Wrap each sandwich individually in aluminum foil or plastic wrap. Place them in a freezer-safe bag or container and store in the freezer.
- Reheat: When ready to eat, remove the wrapping and reheat the sandwich in the microwave for 1-2 minutes or in a toaster oven until heated through.
Extra Tips:
For added flavor, consider adding a dash of hot sauce or your favorite herbs into the eggs before baking.
If you prefer a different type of cheese or meat, feel free to customize the sandwiches to your taste.
When reheating, make sure the sandwich is fully defrosted if using a toaster oven to avoid uneven heating.
Finally, if you want to keep the sandwiches fresh for a longer period, confirm they’re sealed tightly to prevent freezer burn.
Blueberry Banana Pancake Bites
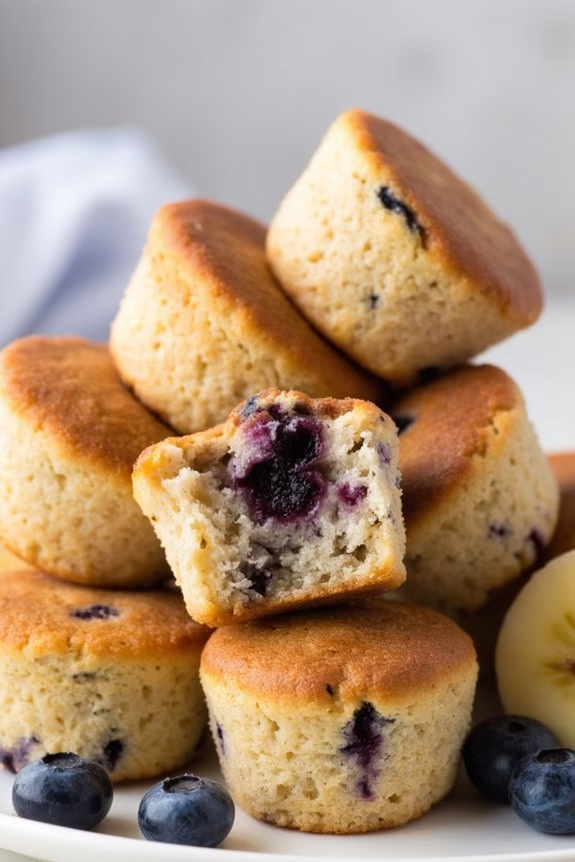
Blueberry Banana Pancake Bites are a delightful and convenient breakfast option, perfect for those hectic mornings when you’re rushing out the door. These bite-sized pancakes are packed with the natural sweetness of bananas and the tart burst of blueberries, making them a hit with both kids and adults. Not only are they delicious, but they can also be made ahead of time and stored in the freezer for a quick and easy breakfast solution. Simply pop them in the microwave or toaster oven for a warm, satisfying start to your day.
The beauty of these pancake bites lies in their versatility. You can enjoy them plain, drizzled with maple syrup, or even paired with a dollop of yogurt or a smear of nut butter. They’re also a great way to sneak in some extra fruit into your diet. Whether you’re serving them for a weekend brunch or prepping them for busy weekday mornings, Blueberry Banana Pancake Bites are sure to become a family favorite.
Ingredients (Serves 4-6):
- 1 cup all-purpose flour
- 1 tablespoon granulated sugar
- 1 teaspoon baking powder
- 1/2 teaspoon baking soda
- 1/4 teaspoon salt
- 1 large egg
- 3/4 cup buttermilk
- 1 large ripe banana, mashed
- 1 teaspoon vanilla extract
- 1 tablespoon melted butter
- 1 cup fresh or frozen blueberries
- Cooking spray or additional melted butter for greasing
Cooking Instructions:
- Preheat the Oven: Preheat your oven to 350°F (175°C). Lightly grease a mini muffin tin with cooking spray or melted butter to prevent sticking.
- Mix Dry Ingredients: In a large mixing bowl, whisk together the flour, sugar, baking powder, baking soda, and salt until well combined.
- Combine Wet Ingredients: In a separate bowl, beat the egg and then stir in the buttermilk, mashed banana, vanilla extract, and melted butter. Mix until all wet ingredients are fully incorporated.
- Combine Mixtures: Gradually add the wet mixture to the dry ingredients, stirring gently until just combined. Be careful not to overmix; the batter should be slightly lumpy.
- Add Blueberries: Gently fold in the blueberries into the batter, ensuring they’re evenly distributed throughout.
- Fill the Muffin Tin: Spoon the batter into the prepared mini muffin tin, filling each cup about 3/4 full to allow room for rising.
- Bake: Place the muffin tin in the preheated oven and bake for 12-15 minutes, or until the pancake bites are golden brown and a toothpick inserted into the center comes out clean.
- Cool and Serve: Allow the pancake bites to cool in the tin for a few minutes before transferring them to a wire rack to cool completely. Serve warm or store for later.
Extra Tips: For a dairy-free version, substitute the buttermilk with almond milk mixed with a teaspoon of lemon juice or vinegar. This will help achieve the same tangy flavor and consistency.
If using frozen blueberries, don’t thaw them before adding to the batter to prevent bleeding and discoloration. To freeze the pancake bites, let them cool completely, place them in a single layer on a baking sheet, and freeze until solid.
Once frozen, transfer them to a ziplock bag or airtight container for up to three months. Reheat in the microwave or oven as needed.
Cheesy Sausage Biscuits

Cheesy Sausage Biscuits are a delightful and savory breakfast option that are perfect for those busy mornings when you need a quick, satisfying meal.
These biscuits are loaded with flavorful sausage and gooey cheese, making them a hit for both adults and kids. Not only do they taste amazing, but they’re also incredibly convenient as they can be made ahead of time and stored in the freezer for those hectic days when you don’t have time to cook from scratch.
Preparing a batch of Cheesy Sausage Biscuits is simple and straightforward. This recipe is designed to serve 4-6 people, making it ideal for family breakfasts or brunches. With just a few ingredients and some basic kitchen tools, you’ll have a delicious breakfast option ready to go.
These biscuits can be enjoyed on their own or paired with your favorite breakfast sides for a complete meal.
Ingredients (for 4-6 servings):
- 2 cups all-purpose flour
- 1 tablespoon baking powder
- 1/2 teaspoon baking soda
- 1/2 teaspoon salt
- 1/2 cup unsalted butter, cold and diced
- 1 cup shredded cheddar cheese
- 1/2 pound cooked sausage, crumbled
- 1 cup buttermilk
Cooking Instructions:
- Preheat the Oven: Begin by preheating your oven to 425°F (220°C). This guarantees that the biscuits will bake evenly and achieve a nice golden brown color.
- Prepare the Dry Ingredients: In a large mixing bowl, combine the all-purpose flour, baking powder, baking soda, and salt. Mix well to guarantee that the leavening agents are evenly distributed throughout the flour.
- Incorporate the Butter: Add the cold, diced butter to the dry ingredients. Using a pastry cutter or your fingers, work the butter into the flour mixture until it resembles coarse crumbs. This will help create a flaky texture in the biscuits.
- Add Cheese and Sausage: Stir in the shredded cheddar cheese and cooked, crumbled sausage into the flour mixture. Make sure the cheese and sausage are evenly distributed throughout the mixture.
- Mix in the Buttermilk: Pour the buttermilk into the bowl and gently stir until a dough forms. Be careful not to overmix, as this can result in tough biscuits.
- Shape the Biscuits: Turn the dough out onto a lightly floured surface and gently knead it a few times until it comes together. Pat or roll the dough to about 1-inch thickness and use a biscuit cutter to cut out rounds.
- Bake the Biscuits: Place the biscuits onto a baking sheet lined with parchment paper, making sure they’re close together. Bake in the preheated oven for 12-15 minutes or until the tops are golden brown.
- Cool and Freeze: Allow the biscuits to cool completely on a wire rack. Once cooled, wrap them individually in plastic wrap and store in a freezer-safe bag for up to 3 months.
Extra Tips:
For the best results, make sure your butter is very cold when you incorporate it into the flour mixture. This helps in achieving a flaky texture.
You can customize your Cheesy Sausage Biscuits by adding herbs like chives or spices like black pepper to enhance the flavor.
When you’re ready to enjoy your frozen biscuits, simply reheat them in a preheated oven at 350°F (175°C) for about 10-12 minutes or until warmed through. If you prefer, you can also use pre-cooked sausage patties instead of crumbled sausage for a more uniform distribution in each biscuit.
Spinach and Cheese Quiche Squares

Spinach and Cheese Quiche Squares are a delicious and convenient breakfast option that can be prepared ahead of time and stored in the freezer for those busy mornings. This dish combines the rich flavors of spinach and cheese in a creamy egg base, all nestled into a flaky pastry crust.
It’s perfect for serving a family or a small group, making it an ideal choice for breakfast gatherings or weekend brunches. This recipe serves 4-6 people, making it a great size for a hearty breakfast or light lunch. The combination of fresh spinach, savory cheese, and a hint of spices creates a delightful balance of flavors that’s sure to satisfy.
Best of all, these quiche squares can be easily reheated in the oven straight from the freezer, making them a convenient option for those who are always on the go.
Ingredients (serves 4-6):
- 1 pre-made pie crust
- 1 tablespoon olive oil
- 1 small onion, finely chopped
- 2 cups fresh spinach, chopped
- 4 large eggs
- 1 cup milk
- 1 cup shredded cheese (cheddar or your choice)
- 1/2 teaspoon salt
- 1/4 teaspoon black pepper
- 1/4 teaspoon nutmeg
Cooking Instructions:
- Preheat the Oven: Begin by preheating your oven to 375°F (190°C). This guarantees that the quiche will cook evenly and the crust will become golden brown.
- Prepare the Pie Crust: Roll out the pre-made pie crust and fit it into a 9×9 inch baking dish. Trim any excess dough from the edges and prick the bottom with a fork to prevent bubbling.
- Cook the Vegetables: Heat the olive oil in a skillet over medium heat. Add the chopped onion and sauté until translucent, about 3-4 minutes. Add the chopped spinach and cook until wilted, approximately 2 minutes. Remove from heat and set aside.
- Prepare the Egg Mixture: In a large bowl, whisk together the eggs, milk, salt, black pepper, and nutmeg until well combined.
- Assemble the Quiche: Spread the cooked spinach and onion mixture evenly over the bottom of the pie crust. Sprinkle the shredded cheese over the top. Pour the egg mixture over the filling, allowing it to seep into all the layers.
- Bake the Quiche: Place the baking dish in the preheated oven and bake for 30-35 minutes, or until the egg mixture is set and the top is lightly golden brown.
- Cool and Slice: Remove the quiche from the oven and allow it to cool for about 10 minutes. Once cooled, slice it into squares and serve warm, or let it cool completely before freezing.
Extra Tips:
When freezing the quiche squares, allow them to cool completely before wrapping each piece individually in plastic wrap and then placing them in a freezer-safe bag. This prevents freezer burn and makes it easy to take out only the amount you need.
To reheat, simply remove the plastic wrap and bake the squares in a preheated oven at 350°F (175°C) for about 20 minutes or until heated through. You can also add your favorite herbs or extra vegetables to the filling for added flavor and nutrition.
Apple Cinnamon French Toast Sticks

Apple Cinnamon French Toast Sticks are a delightful breakfast treat that combines the warmth of cinnamon with the natural sweetness of apples, all wrapped up in a crispy French toast exterior. Perfect for busy mornings or a leisurely weekend brunch, these sticks can be made ahead of time and stored in the freezer for a quick and easy meal solution. Not only are they kid-friendly, but they’re also a great way to use up any leftover bread you might have.
This recipe provides a serving size for 4-6 people, guaranteeing everyone gets their fair share of this delicious breakfast option. The apple cinnamon filling adds a unique twist to the traditional French toast, making it a flavorful and satisfying dish. Whether you serve them with maple syrup, a dusting of powdered sugar, or simply enjoy them on their own, these French toast sticks are sure to become a family favorite.
Ingredients:
- 8 slices of thick bread (such as brioche or Texas toast)
- 3 large eggs
- 1 cup milk
- 2 teaspoons ground cinnamon
- 1 teaspoon vanilla extract
- 2 tablespoons sugar
- 1 apple, peeled and finely diced
- 2 tablespoons butter
- 1 tablespoon brown sugar
- Pinch of salt
- Non-stick cooking spray
Instructions:
- Prepare the Apple Filling:
- In a small saucepan, melt the butter over medium heat. Add the diced apple, brown sugar, and a pinch of salt. Cook for about 5 minutes, stirring occasionally, until the apples are soft and caramelized. Remove from heat and let cool slightly.
- Make the Egg Mixture:
- In a shallow dish, whisk together the eggs, milk, ground cinnamon, vanilla extract, and sugar until well combined.
- Assemble the French Toast Sticks:
- Trim the crusts off the bread slices and cut each slice into 3 equal strips. Spread a small amount of the apple filling on one side of each bread strip.
- Coat the Bread:
- Dip each apple-filled bread stick into the egg mixture, making sure it’s fully coated but not saturated. Allow excess mixture to drip off before placing it on a plate.
- Cook the French Toast Sticks:
- Spray a large skillet or griddle with non-stick cooking spray and heat over medium heat. Place the coated bread sticks in the skillet, leaving space between each. Cook for 2-3 minutes on each side, or until golden brown and crispy.
- Serve:
- Remove the French toast sticks from the skillet and let them cool slightly before serving. They can be enjoyed plain, with a drizzle of maple syrup, or a sprinkling of powdered sugar.
Extra Tips:
To guarantee the French toast sticks freeze well, allow them to cool completely on a wire rack before transferring them to a baking sheet lined with parchment paper. Place the baking sheet in the freezer for about an hour, then transfer the sticks to a freezer-safe bag or container.
When you’re ready to eat, simply reheat them in the oven at 350°F (175°C) for 10-12 minutes or until heated through. This method guarantees the sticks remain crispy on the outside while soft and flavorful on the inside.
Ham and Cheese Breakfast Quesadillas

Ham and Cheese Breakfast Quesadillas are a delicious and convenient option for those hectic mornings when time is of the essence. These quesadillas aren’t only easy to prepare but can also be made in advance and stored in the freezer, guaranteeing a hearty breakfast is always within reach. Filled with savory ham and gooey cheese, these quesadillas offer a satisfying start to your day, providing the energy you need to tackle any challenges ahead.
This recipe yields a serving size suitable for 4-6 people, making it perfect for family breakfasts or meal prepping for the week. The combination of ingredients creates a balance of flavors and textures that will leave everyone asking for more. Whether you’re a fan of traditional breakfast foods or looking for a new twist on the classic quesadilla, this dish is sure to become a staple in your morning routine.
Ingredients for 4-6 servings:
- 8 large flour tortillas
- 2 cups of shredded cheese (cheddar, mozzarella, or a blend)
- 1 cup of diced cooked ham
- 6 large eggs
- 1/4 cup of milk
- Salt and pepper to taste
- 2 tablespoons of butter or oil
- Optional toppings: salsa, sour cream, chopped green onions
Cooking Instructions:
- Prepare the Egg Mixture: In a medium-sized bowl, whisk together the eggs, milk, salt, and pepper until well combined. This mixture will be the base for the filling, so make sure it’s smooth and well-mixed.
- Cook the Eggs: Heat a large non-stick skillet over medium heat and add 1 tablespoon of butter or oil. Pour in the egg mixture and cook, stirring occasionally, until the eggs are just set. Remove from the heat and set aside.
- Assemble the Quesadillas: Lay out the tortillas on a clean surface. Evenly distribute the cooked eggs over half of each tortilla. Sprinkle the diced ham and shredded cheese over the eggs. Fold the tortillas in half to enclose the filling.
- Cook the Quesadillas: In a large skillet or griddle over medium heat, melt the remaining butter or add more oil if needed. Place the folded quesadillas onto the skillet and cook for 3-4 minutes on each side, or until the tortillas are golden brown and the cheese is melted.
- Cool and Freeze: If preparing for the freezer, allow the quesadillas to cool completely. Once cooled, wrap each quesadilla individually in plastic wrap or aluminum foil, then place them in a freezer-safe bag. Label the bag with the date and contents before freezing.
- Reheat and Serve: To enjoy, remove a quesadilla from the freezer and unwrap it. Reheat in a skillet over medium heat or in the oven at 350°F (175°C) until warmed through. Serve with your choice of optional toppings.
Extra Tips:
For best results, make sure the quesadillas are completely cooled before freezing to prevent sogginess. When reheating, using a skillet or oven instead of a microwave helps maintain a crispy texture. Feel free to customize the filling by adding vegetables like bell peppers or spinach for extra nutrition. These quesadillas can be stored in the freezer for up to two months, making them a convenient option for busy mornings.
Peanut Butter and Jelly Overnight Oats
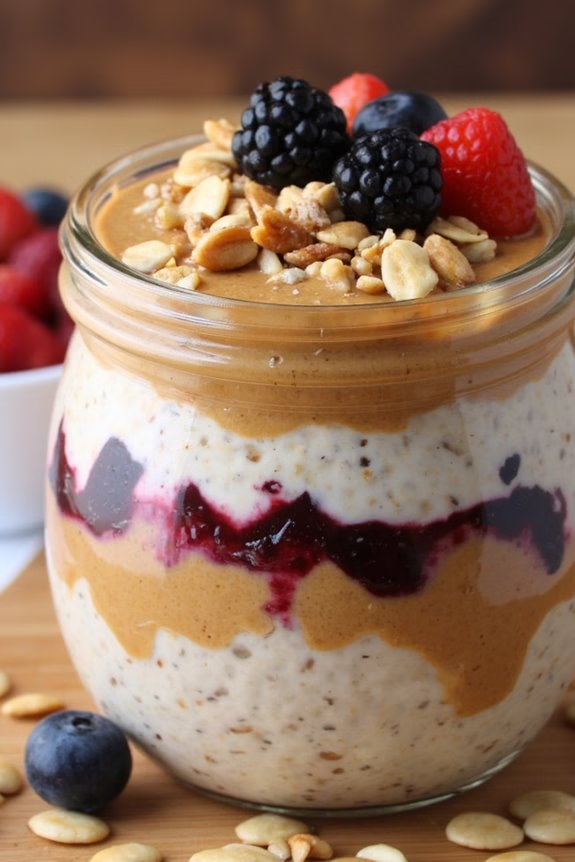
Peanut Butter and Jelly Overnight Oats are a delightful and nutritious breakfast option that can be easily prepared in advance, making them perfect for busy mornings. This dish brings together the classic flavors of peanut butter and jelly in a wholesome oat base, offering a balanced combination of protein, fiber, and healthy fats.
By preparing these oats the night before, you can enjoy a delicious and convenient breakfast with no morning hassle. This recipe is ideal for those who love the convenience of grab-and-go meals without compromising on taste or nutrition.
By making a batch that serves 4-6 people, you can have breakfast ready for the entire family or prepare meals for several days. The oats soak up the flavors overnight, resulting in a creamy texture that’s both satisfying and filling.
Ingredients (Serves 4-6):
- 3 cups rolled oats
- 3 cups milk (or any non-dairy alternative)
- 1 cup Greek yogurt (optional for added creaminess)
- 1/2 cup peanut butter
- 1/2 cup fruit preserves or jelly (your choice of flavor)
- 2 tablespoons chia seeds
- 1 teaspoon vanilla extract
- 2 tablespoons honey or maple syrup (optional for sweetness)
- Fresh berries or banana slices (for topping)
- Chopped nuts (for topping)
Cooking Instructions:
- Prepare the Base: In a large mixing bowl, combine the rolled oats, milk, and Greek yogurt (if using). Stir until the oats are well coated with the liquid, guaranteeing there are no clumps.
- Add Flavor: Mix in the peanut butter, fruit preserves or jelly, chia seeds, and vanilla extract. Stir thoroughly to incorporate the flavors evenly throughout the mixture.
- Sweeten to Taste: If you prefer a sweeter breakfast, add honey or maple syrup to the mixture. Stir well to guarantee the sweetener is evenly distributed.
- Refrigerate: Divide the mixture evenly into individual jars or airtight containers. Cover and refrigerate overnight, or for at least 6 hours, to allow the oats to absorb the liquid and flavors.
- Serve: In the morning, give the oats a good stir before serving. Top each portion with fresh berries, banana slices, and chopped nuts for added texture and flavor.
Extra Tips:
You can customize these overnight oats to suit your taste preferences or dietary needs. For a vegan version, use non-dairy milk and omit the Greek yogurt, or replace it with a plant-based alternative.
If you like a bit of crunch, consider adding granola as a topping. Remember that the thicker you want your oats, the less liquid you should use, so feel free to adjust the milk to achieve your desired consistency.
Overnight oats can be stored in the refrigerator for up to five days, making them a perfect meal prep option for the week.
Mexican-Inspired Breakfast Tacos

Start your day with a burst of flavor by preparing these Mexican-Inspired Breakfast Tacos. Perfect for a busy morning, these tacos aren’t only delicious but also easy to make in advance and store in the freezer for a quick breakfast solution. The combination of scrambled eggs, spicy chorizo, and fresh toppings wrapped in a warm tortilla will surely make breakfast the favorite meal of the day for everyone at home.
These breakfast tacos are designed to serve 4-6 people, making them ideal for a family breakfast or a brunch gathering. Whether you’re enjoying them fresh or reheating from the freezer, the vibrant flavors of Mexican cuisine will shine through. With a few simple steps, you’ll have a hearty and satisfying meal that’s certain to please every palate at the table.
Ingredients (Serves 4-6):
- 12 small flour or corn tortillas
- 8 large eggs
- 1/4 cup milk
- 1 teaspoon salt
- 1 teaspoon black pepper
- 1 tablespoon olive oil
- 1/2 pound chorizo sausage, casing removed
- 1 cup shredded cheddar cheese
- 1/2 cup chopped fresh cilantro
- 1 avocado, diced
- 1/2 cup salsa
- Lime wedges (for serving)
Cooking Instructions:
- Prepare the Chorizo: In a large skillet over medium heat, cook the chorizo sausage until fully cooked and browned, breaking it apart with a spatula as it cooks. This should take about 7-10 minutes. Once cooked, transfer the chorizo to a paper towel-lined plate to drain excess fat.
- Scramble the Eggs: In a bowl, whisk together the eggs, milk, salt, and black pepper. In the same skillet used for the chorizo, add olive oil and heat over medium-low. Pour in the egg mixture and gently stir with a spatula until the eggs are softly scrambled and cooked through. This should take about 4-5 minutes. Remove from heat.
- Assemble the Tacos: Lay out the tortillas on a clean surface. Evenly distribute the scrambled eggs and cooked chorizo across the tortillas. Sprinkle each with shredded cheddar cheese and a little bit of chopped cilantro.
- Freeze or Serve: If freezing, wrap each taco individually in foil and place them in a freezer-safe bag. They can be stored for up to 3 months. If serving immediately, warm the tortillas in the microwave or in a dry skillet for a few seconds until pliable.
- Garnish and Enjoy: Top each taco with diced avocado and a spoonful of salsa. Serve with lime wedges on the side for an extra burst of freshness.
Extra Tips:
For the best results when freezing, make sure that the tacos are completely cooled before wrapping them in foil. When you’re ready to eat, reheat the frozen tacos in the oven at 350°F (175°C) for about 15 minutes or until heated through. You can also microwave them for a quicker option, but the oven will help maintain the tortilla’s texture.
Feel free to customize the tacos with your favorite toppings such as jalapeños or sour cream for an added kick.
Sweet Potato and Black Bean Breakfast Bowls
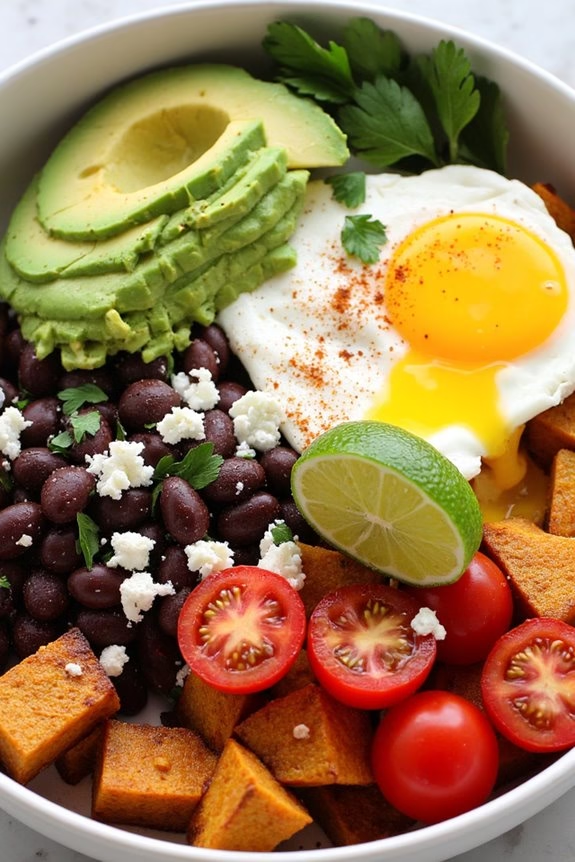
Sweet Potato and Black Bean Breakfast Bowls are a nutritious and delicious way to start your day. These bowls are a perfect blend of sweet and savory flavors, packed with protein, fiber, and a variety of essential nutrients. The combination of roasted sweet potatoes, seasoned black beans, and fresh toppings not only satisfies your hunger but also fuels your body with the energy needed for a productive morning.
This recipe is also convenient for meal prep, allowing you to enjoy a healthy breakfast even on your busiest days. You can prepare the ingredients in advance, freeze them, and simply reheat when you’re ready to eat. This makes it an ideal option for those who want to spend less time in the kitchen during the week while still enjoying a wholesome, homemade breakfast.
Ingredients (serves 4-6):
- 3 large sweet potatoes
- 2 tablespoons olive oil
- 1 teaspoon salt
- 1/2 teaspoon black pepper
- 1 teaspoon smoked paprika
- 2 cans (15 ounces each) black beans, drained and rinsed
- 1 teaspoon ground cumin
- 1/2 teaspoon chili powder
- 1/4 cup chopped fresh cilantro
- 1 avocado, diced
- 1/2 cup crumbled feta cheese
- 1 cup cherry tomatoes, halved
- 4-6 eggs (optional)
- 1 lime, cut into wedges
Instructions:
- Preheat the Oven: Preheat your oven to 400°F (200°C) to prepare for roasting the sweet potatoes.
- Prepare the Sweet Potatoes: Peel the sweet potatoes and chop them into bite-sized cubes. Spread them evenly on a baking sheet, drizzle with olive oil, and sprinkle with salt, black pepper, and smoked paprika. Toss to coat evenly.
- Roast the Sweet Potatoes: Place the baking sheet in the preheated oven and roast for 25-30 minutes, or until the sweet potatoes are tender and slightly caramelized, stirring halfway through.
- Prepare the Black Beans: While the sweet potatoes are roasting, heat a skillet over medium heat. Add the drained black beans, cumin, and chili powder. Cook for about 5 minutes, stirring occasionally, until the beans are warmed through and fragrant.
- Prepare the Toppings: While the beans are heating, prepare your toppings. Chop the cilantro, dice the avocado, crumble the feta cheese, and halve the cherry tomatoes. Set aside.
- Cook the Eggs (Optional): If you prefer, cook the eggs to your liking (poached, scrambled, or fried) to top each bowl with extra protein.
- Assemble the Bowls: Divide the roasted sweet potatoes and black beans among 4-6 bowls. Top each with avocado, feta cheese, cherry tomatoes, and cilantro. Add an egg to each bowl if using, and serve each with a lime wedge for squeezing over.
Extra Tips:
For an even more flavorful experience, consider adding a dollop of Greek yogurt or a drizzle of hot sauce to your bowls. You can also customize these bowls by adding other toppings like sliced jalapeños for heat, or swap out the feta cheese for a dairy-free option if preferred.
To freeze, portion the sweet potatoes and beans into individual containers, leaving out the fresh toppings and eggs; these can be added fresh after reheating. Enjoy these versatile breakfast bowls on busy mornings or as a hearty brunch option.
Coconut Chia Pudding Parfaits
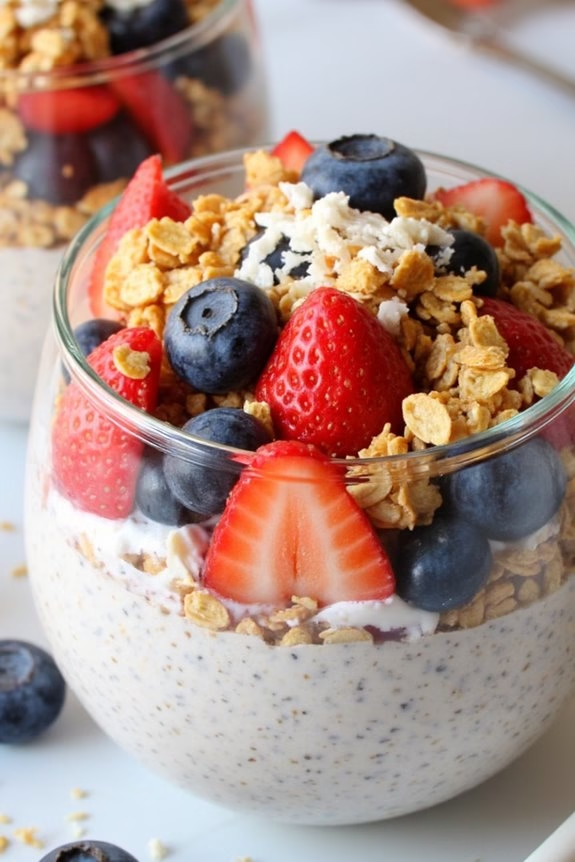
Coconut Chia Pudding Parfaits are a delightful and nutritious breakfast option that can be prepared in advance, making them perfect for busy mornings. This dish combines the creamy texture of coconut milk with the health benefits of chia seeds, creating a satisfying and filling meal.
The parfaits are layered with fresh fruits and granola, adding a burst of flavor and crunch to each bite. Not only are these parfaits delicious, but they’re also vegan and gluten-free, catering to a variety of dietary preferences.
Preparing Coconut Chia Pudding Parfaits is simple and requires minimal ingredients. Once the chia pudding is made, it can be stored in the freezer, allowing you to enjoy a quick and convenient breakfast throughout the week.
The versatility of this recipe allows you to customize the parfaits with your favorite fruits and toppings, guaranteeing that each serving is a unique and enjoyable experience.
Ingredients (Serves 4-6 people):
- 1 cup chia seeds
- 4 cups coconut milk
- 1/4 cup maple syrup
- 1 teaspoon vanilla extract
- 1 cup strawberries, sliced
- 1 cup blueberries
- 1 cup granola
- 1/2 cup shredded coconut
Instructions:
- Prepare the Chia Pudding: In a large mixing bowl, combine the chia seeds, coconut milk, maple syrup, and vanilla extract. Stir well until the mixture is thoroughly combined.
- Let it Sit: Cover the bowl with a lid or plastic wrap and place it in the refrigerator. Allow the mixture to sit for at least 4 hours or overnight. This will give the chia seeds time to absorb the liquid and create a pudding-like consistency.
- Assemble the Parfaits: Once the chia pudding is set, gather 4-6 serving cups or jars. Begin by adding a layer of chia pudding to each cup, followed by a layer of sliced strawberries and blueberries.
- Add Granola and Coconut: Sprinkle a layer of granola and shredded coconut over the fruit. Continue layering with more chia pudding, fruit, granola, and coconut until the cups are filled to your desired amount.
- Freeze or Serve: If you plan to enjoy the parfaits immediately, serve them as is. For freezer storage, cover each parfait with a lid or plastic wrap and freeze. When ready to eat, thaw in the refrigerator overnight.
Extra Tips:
To enhance the flavor of your Coconut Chia Pudding Parfaits, consider adding a pinch of cinnamon or nutmeg to the chia mixture. You can also experiment with different fruits, such as mango, kiwi, or raspberries, to keep the parfaits exciting and varied.
If you prefer a sweeter pudding, adjust the amount of maple syrup to taste. Remember to stir the chia seed mixture well before refrigerating to prevent clumping and facilitate an even texture.
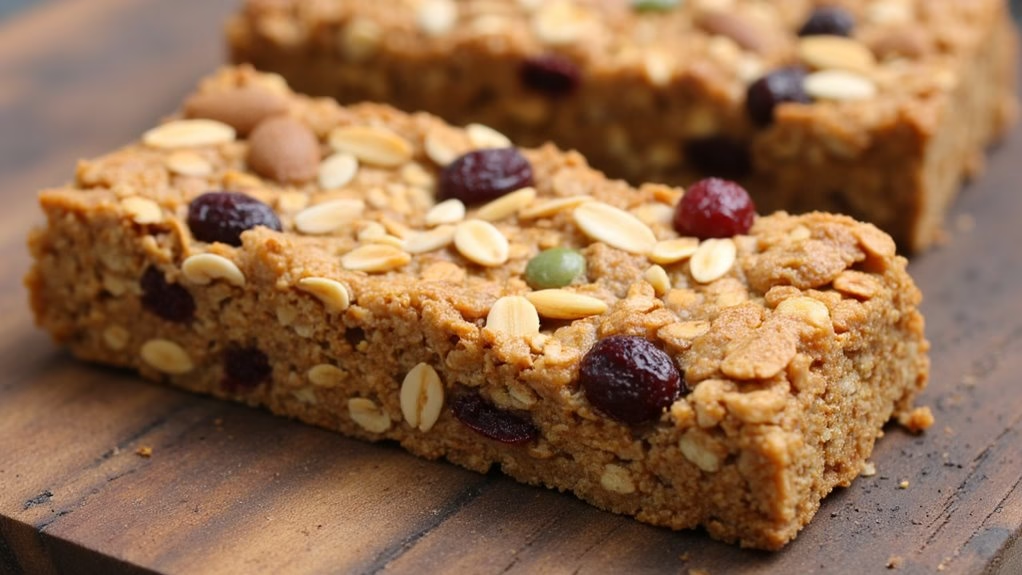
Homemade Granola Bars
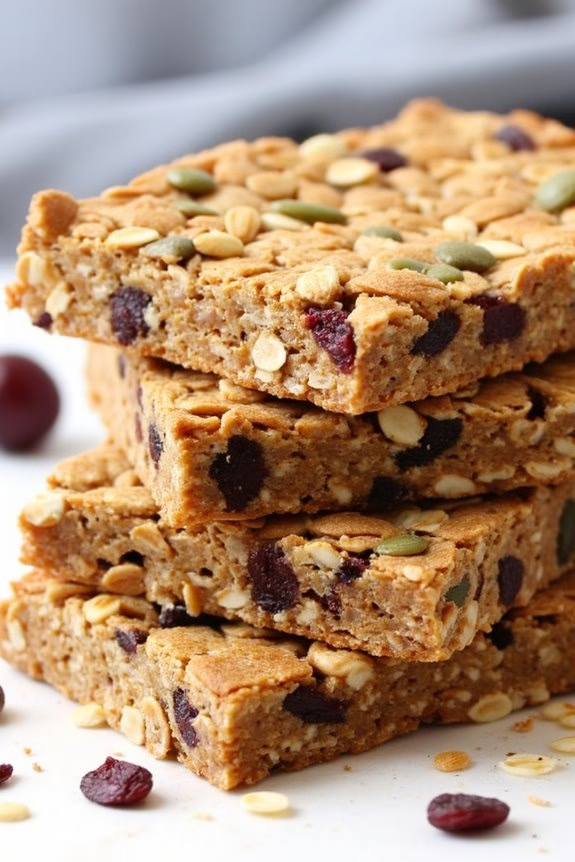
Homemade granola bars are a delightful and nutritious breakfast option that you can prepare in advance and store in the freezer for a quick grab-and-go meal. These bars are perfect for busy mornings when time is of the essence, but you still want to guarantee you and your family start the day with something wholesome. The combination of oats, nuts, and dried fruits not only provides a satisfying crunch but also offers a good balance of carbohydrates, healthy fats, and protein to keep you energized throughout the morning.
Making your own granola bars at home allows you to customize the ingredients to suit your taste preferences and dietary needs. You can experiment with different nuts, seeds, and dried fruits, or even add a touch of sweetness with honey or maple syrup. This recipe yields a batch of 12-16 bars, which is perfect for serving 4-6 people, depending on how many bars each person prefers. With a little preparation, you can have a stash of homemade granola bars ready in your freezer for whenever you need a quick breakfast or snack.
Ingredients (Serves 4-6):
- 3 cups rolled oats
- 1 cup almonds, chopped
- 1/2 cup sunflower seeds
- 1/2 cup pumpkin seeds
- 1 cup dried cranberries
- 1/2 cup honey
- 1/4 cup coconut oil
- 1 teaspoon vanilla extract
- 1/2 teaspoon salt
- 1 teaspoon cinnamon
Instructions:
- Preheat the Oven: Start by preheating your oven to 350°F (175°C). This will guarantee your granola bars bake evenly.
- Prepare the Dry Ingredients: In a large mixing bowl, combine the rolled oats, chopped almonds, sunflower seeds, pumpkin seeds, dried cranberries, salt, and cinnamon. Mix them well to guarantee that the ingredients are evenly distributed.
- Heat the Wet Ingredients: In a small saucepan over low heat, combine the honey and coconut oil. Stir continuously until the coconut oil is completely melted and the mixture is smooth. Remove from heat and stir in the vanilla extract.
- Combine Mixtures: Pour the honey and coconut oil mixture over the dry ingredients. Use a spatula to thoroughly mix everything until the dry ingredients are well coated with the wet mixture.
- Press the Mixture: Line a 9×13-inch baking dish with parchment paper. Transfer the granola mixture into the dish and press it down firmly with the back of a spoon or your hands to guarantee it’s tightly packed.
- Bake the Granola Bars: Place the baking dish in the preheated oven and bake for 25-30 minutes, or until the edges are golden brown. This will help the bars hold together once cooled.
- Cool and Cut: Allow the granola bars to cool completely in the baking dish. Once cooled, lift them out using the parchment paper and cut them into bars of your desired size.
- Freeze the Bars: If you’re planning to freeze the bars, wrap each one individually in plastic wrap or parchment paper and place them in an airtight container or freezer bag. They can be stored in the freezer for up to 3 months.
Extra Tips:
When making homemade granola bars, it’s important to press the mixture firmly into the baking dish before baking. This step guarantees the bars hold together well after baking and cooling.
If you’re sensitive to certain nuts or seeds, feel free to substitute them with your preferred ingredients. Additionally, if you prefer a sweeter taste, you can increase the amount of honey or add a few chocolate chips before pressing the mixture into the pan.
Remember to adjust the baking time if you make the bars thicker or thinner than the standard size. Enjoy the convenience of having a healthy breakfast option ready at any time!