
There’s something so magical about Easter, isn’t there?
From the pastel colors to the cheerful gatherings, it’s a time that brings joy to our homes and kitchens.
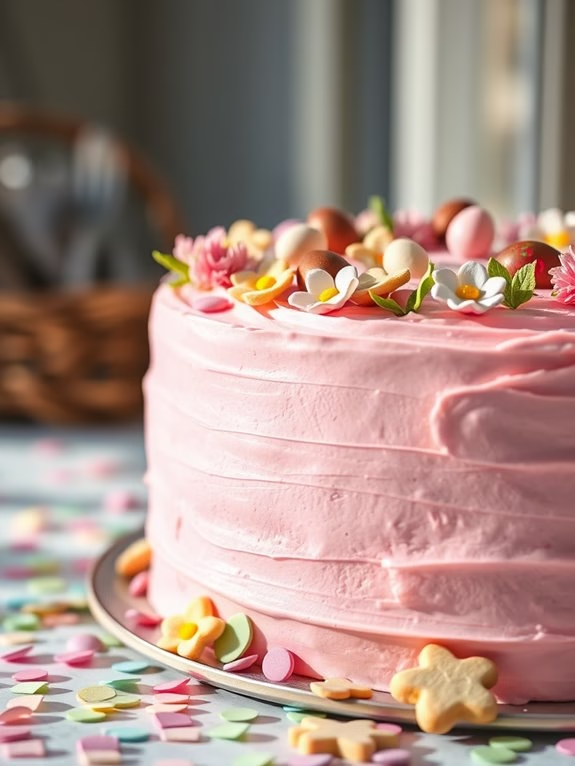
This year, let’s make it even more special with a table full of delightful cakes that are as beautiful as they are delicious.
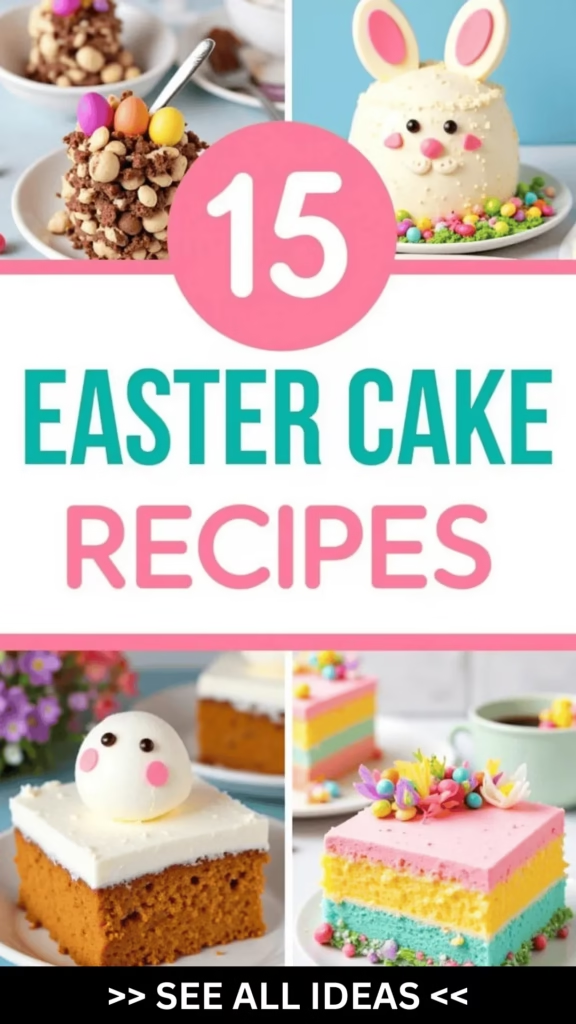
Think classic carrot cake with a tangy cream cheese frosting or a whimsical coconut bunny cake that will enchant everyone.
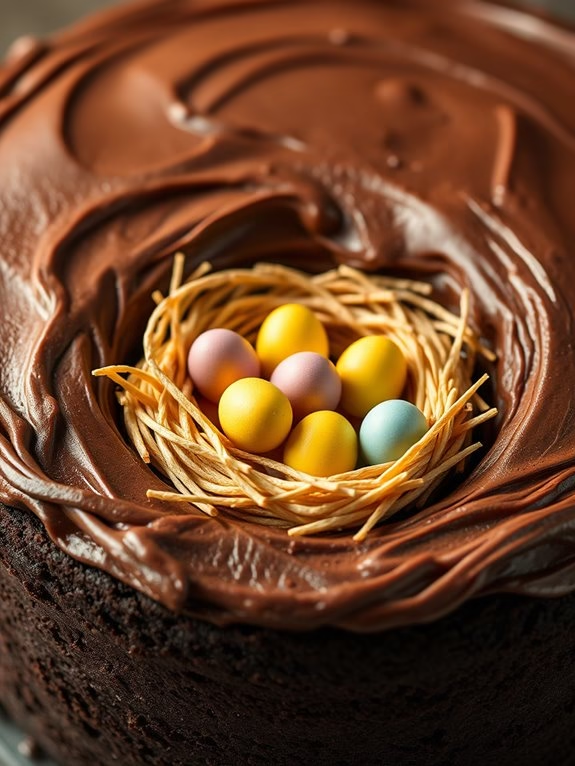
And don’t miss out on the Chocolate Egg Nest Cake, which has a charming surprise that’s sure to impress.
Classic Carrot Cake

Classic Carrot Cake
Carrot cake is a beloved dessert, especially popular during Easter celebrations. Its moist texture, warm spices, and creamy frosting make it a delightful treat for family gatherings. The beauty of a classic carrot cake lies in its simplicity and the natural sweetness of the carrots, complemented by a hint of cinnamon and the indulgence of a rich cream cheese frosting. This recipe will guide you through creating a traditional carrot cake that serves 4-6 people, perfect for a small Easter get-together.
The history of carrot cake dates back to medieval times, where carrots were used in sweet cakes due to their natural sweetness, as sugar was a rare and expensive commodity. Over the years, this dessert has evolved to become a favorite in many households. The modern version often includes walnuts or pecans and raisins for added texture and flavor. This recipe keeps it classic, focusing on the essential ingredients to bring out the best flavors in each bite.
Ingredients (serving size: 4-6 people):
- 1 1/4 cups all-purpose flour
- 1 tsp baking powder
- 1/2 tsp baking soda
- 1/2 tsp salt
- 1 tsp cinnamon
- 1/2 cup vegetable oil
- 1 cup granulated sugar
- 2 large eggs
- 1 tsp vanilla extract
- 1 1/2 cups grated carrots
- 1/2 cup chopped walnuts (optional)
- 1/2 cup raisins (optional)
- 1/2 cup unsalted butter, softened
- 8 oz cream cheese, softened
- 2 cups powdered sugar
- 1 tsp vanilla extract
Cooking Instructions:
- Preheat the Oven: Begin by preheating your oven to 350°F (175°C). Grease and flour a 9-inch round cake pan to prevent the cake from sticking.
- Mix Dry Ingredients: In a bowl, whisk together the flour, baking powder, baking soda, salt, and cinnamon. Set aside. This guarantees that the dry ingredients are evenly distributed in the batter.
- Combine Wet Ingredients: In a separate large bowl, beat together the vegetable oil and granulated sugar until well combined. Add the eggs one at a time, mixing well after each addition. Stir in the vanilla extract.
- Incorporate Carrots: Gradually add the grated carrots to the wet mixture, stirring until evenly distributed. If using, fold in the walnuts and raisins at this stage.
- Combine Mixtures: Slowly add the dry ingredients to the wet mixture, stirring gently until just combined. Be careful not to overmix the batter as this can result in a dense cake.
- Bake the Cake: Pour the batter into the prepared cake pan and smooth the top with a spatula. Bake for 30-35 minutes, or until a toothpick inserted into the center comes out clean. Allow the cake to cool in the pan for 10 minutes before transferring it to a wire rack to cool completely.
- Prepare the Frosting: While the cake cools, make the cream cheese frosting. In a bowl, beat the softened butter and cream cheese together until smooth. Gradually add the powdered sugar and vanilla extract, beating until light and fluffy.
- Frost the Cake: Once the cake is completely cool, spread the cream cheese frosting evenly over the top and sides. Decorate with additional walnuts if desired.
Extra Tips:
To guarantee your carrot cake is exceptionally moist, consider using freshly grated carrots. Pre-packaged grated carrots tend to be drier and less flavorful.
When frosting, make sure the cake is completely cool to prevent the frosting from melting. For extra flavor, try adding a pinch of nutmeg or a splash of orange zest to the batter.
If you prefer a layered cake, double the recipe and bake in two separate pans. Enjoy your classic carrot cake with a hot cup of tea or coffee for a perfect Easter treat.
Lemon Drizzle Bundt
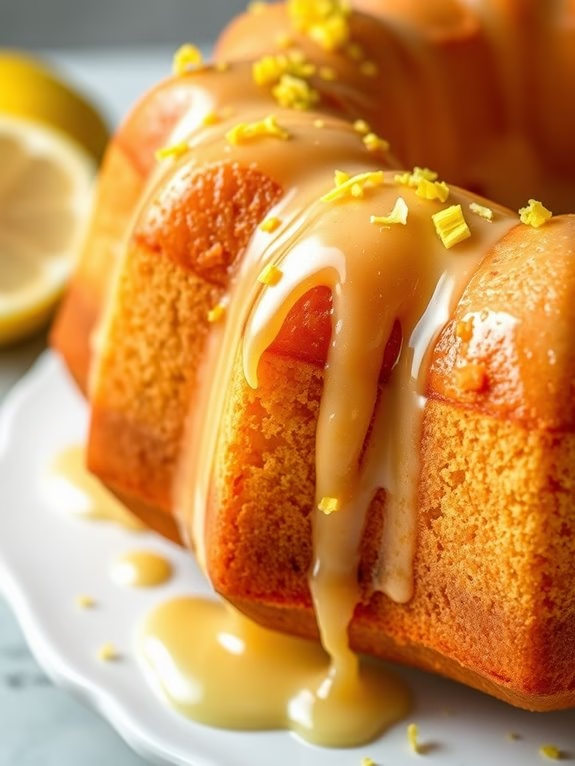
Lemon Drizzle Bundt cake is a delightful addition to any Easter celebration, combining the tangy brightness of lemon with the sweet indulgence of a moist cake. This beautiful cake is baked in a Bundt pan, creating an elegant presentation that’s sure to impress your guests. Its zesty flavor profile is perfect for spring, and the drizzle of lemon glaze adds a rejuvenating finish that enhances the cake’s natural citrus notes.
This recipe serves 4-6 people, making it an ideal choice for a cozy family gathering or a small party. It’s simple to prepare, yet its intricate appearance makes it seem as though you’ve spent hours in the kitchen. The key to a perfect Lemon Drizzle Bundt cake is using fresh lemons, both for the juice and the zest, guaranteeing every bite is packed with vibrant flavor. Follow this easy recipe to create a show-stopping dessert that everyone will love.
Ingredients:
- 1 ½ cups all-purpose flour
- 1 cup granulated sugar
- ½ cup unsalted butter, softened
- 2 large eggs
- 1 teaspoon vanilla extract
- 1 teaspoon baking powder
- ½ teaspoon baking soda
- ¼ teaspoon salt
- ¼ cup whole milk
- ¼ cup fresh lemon juice
- Zest of 2 lemons
For the Lemon Drizzle:
- 1 cup powdered sugar
- 2-3 tablespoons fresh lemon juice
Cooking Instructions:
- Prepare the Oven and Pan: Preheat your oven to 350°F (175°C). Grease a Bundt pan thoroughly with butter or a non-stick spray to make sure the cake doesn’t stick. Lightly dust with flour, tapping out the excess.
- Mix the Dry Ingredients: In a medium-sized bowl, whisk together the flour, baking powder, baking soda, and salt. Set aside for later use.
- Cream the Butter and Sugar: In a large mixing bowl, beat the softened butter and granulated sugar with an electric mixer on medium speed until light and fluffy. This should take about 3-4 minutes.
- Add Eggs and Vanilla: Add the eggs one at a time, beating well after each addition. Stir in the vanilla extract until fully incorporated.
- Combine Wet Ingredients: In a small bowl, mix the milk, lemon juice, and lemon zest.
- Combine All Ingredients: Gradually add the dry ingredients to the butter mixture in three parts, alternating with the milk mixture, beginning and ending with the dry ingredients. Mix until just combined, taking care not to overmix.
- Bake the Cake: Pour the batter evenly into the prepared Bundt pan. Smooth the top with a spatula. Bake in the preheated oven for 35-40 minutes, or until a toothpick inserted into the center of the cake comes out clean.
- Cool and Prepare the Drizzle: Allow the cake to cool in the pan for about 10 minutes before inverting it onto a wire rack to cool completely. While the cake is cooling, prepare the lemon drizzle by mixing powdered sugar and lemon juice in a bowl until smooth.
- Drizzle the Cake: Once the cake is completely cooled, drizzle the lemon glaze evenly over the top, allowing it to drip down the sides.
Extra Tips:
For an extra burst of lemon flavor, consider adding a bit of lemon extract to the cake batter. If you prefer a more intense glaze, adjust the consistency by adding more powdered sugar for thickness or more lemon juice for a thinner drizzle.
When zesting lemons, be careful to avoid the white pith beneath the zest, as it can impart a bitter taste. Serve the cake with a dollop of whipped cream or a scoop of vanilla ice cream for an added touch of decadence.
Coconut Bunny Cake

Coconut Bunny Cake
Celebrate Easter with a delightful Coconut Bunny Cake that’s as charming as it’s delicious. This whimsical cake is a fun project that the whole family can enjoy making together. With a moist, fluffy texture and a tropical coconut flavor, it serves as the perfect centerpiece for your holiday table. The cake is decorated to resemble a cute bunny, complete with ears and a face, making it a hit with both kids and adults alike.
This Coconut Bunny Cake recipe serves 4 to 6 people and is crafted using simple ingredients that come together to create a spectacular dessert. Whether you’re an experienced baker or a novice, this recipe provides straightforward instructions to help you create a beautiful and tasty Easter treat. Gather your family and enjoy the process of baking and decorating this adorable cake!
Ingredients (serving size: 4-6 people):
- 2 cups all-purpose flour
- 1 ½ cups granulated sugar
- 1 cup unsweetened shredded coconut
- ¾ cup unsalted butter, softened
- 1 cup coconut milk
- 4 large eggs
- 1 tablespoon baking powder
- 1 teaspoon vanilla extract
- ½ teaspoon salt
- 1 package (8 oz) cream cheese, softened
- 4 cups powdered sugar
- 1 teaspoon coconut extract
- Pink food coloring
- Candy eyes
- Jelly beans
- Shredded coconut for garnish
Cooking Instructions:
- Preheat and Prepare Pans: Preheat your oven to 350°F (175°C). Grease and flour two 9-inch round cake pans. This will guarantee the cake doesn’t stick and releases easily from the pans.
- Mix Dry Ingredients: In a medium bowl, whisk together the flour, baking powder, shredded coconut, and salt. Set aside.
- Cream Butter and Sugar: In a large mixing bowl, beat the softened butter and granulated sugar with an electric mixer on medium speed until light and fluffy, about 3 minutes.
- Add Wet Ingredients: Add the eggs, one at a time, beating well after each addition. Mix in the vanilla extract and coconut milk until fully incorporated.
- Combine Mixtures: Gradually add the dry ingredients to the wet ingredients, mixing on low speed until just combined. Be careful not to overmix, as this can lead to a dense cake.
- Bake the Cakes: Divide the batter evenly between the prepared pans. Smooth the tops with a spatula and bake for 25-30 minutes, or until a toothpick inserted into the center comes out clean.
- Cool and Frost: Allow the cakes to cool in the pans for 10 minutes, then transfer to a wire rack to cool completely. While cooling, prepare the frosting by beating cream cheese and coconut extract in a bowl until smooth. Gradually add powdered sugar, mixing until creamy.
- Shape the Bunny: Cut one of the round cakes in half. Stand the halves upright on a serving platter, flat sides down, to form the bunny’s ears. Place the whole round cake in front of the ears to form the face.
- Frost and Decorate: Frost the entire cake with the cream cheese frosting. Press shredded coconut into the frosting to cover the cake completely. Use candy eyes for the bunny’s eyes and jelly beans for the nose. Add pink food coloring to a small amount of frosting for the inner ears and mouth.
- Final Touches: Arrange more coconut around the base of the cake for a fluffy tail effect. Add additional decorations as desired to personalize your bunny.
Extra Tips:
For a more intense coconut flavor, consider toasting the shredded coconut before adding it to the cake batter or using it as a garnish. This will provide a nutty and rich taste.
Additionally, if you don’t have coconut milk, you can substitute with whole milk or almond milk, although the flavor may be slightly less coconutty.
When cutting and arranging the cake, a serrated knife helps to make cleaner cuts and reduces crumbling.
Finally, make certain the cake is completely cool before frosting to prevent the frosting from melting or sliding off.
Enjoy your Coconut Bunny Cake, and happy Easter!
Chocolate Egg Nest Cake
Chocolate Egg Nest Cake
Easter is the perfect occasion to indulge in delightful treats, and a Chocolate Egg Nest Cake is just the right dessert to elevate your celebrations. This cake not only tastes heavenly with its rich chocolate flavors but also looks adorable with its nest-like topping, which is sure to be a hit with both kids and adults alike.
The cake features a moist chocolate base, topped with a creamy chocolate frosting, and adorned with a charming nest made from shredded wheat and filled with colorful mini chocolate eggs. It’s a visual and culinary delight that embodies the playful spirit of Easter.
Creating this show-stopping cake at home is simpler than you might think. With a few ingredients and some creativity, you can craft a dessert that’s as beautiful as it’s delicious. This recipe is designed to serve 4-6 people, making it perfect for a small family gathering or intimate celebration. Gather your ingredients and let’s get started on making this festive treat that will surely impress your guests and leave them asking for seconds.
Ingredients (Serves 4-6):
- 1 cup all-purpose flour
- 1 cup granulated sugar
- 1/2 cup unsweetened cocoa powder
- 1 teaspoon baking powder
- 1/2 teaspoon baking soda
- 1/4 teaspoon salt
- 1/2 cup milk
- 1/4 cup vegetable oil
- 1 large egg
- 1 teaspoon vanilla extract
- 1/2 cup boiling water
- 1 cup heavy cream
- 8 oz semi-sweet chocolate, chopped
- 1 cup shredded wheat
- 1 tablespoon unsalted butter
- 1 tablespoon golden syrup
- 1 cup mini chocolate eggs
Instructions:
- Preheat and Prepare: Preheat your oven to 350°F (175°C). Grease and flour an 8-inch round cake pan to prevent the cake from sticking.
- Mix Dry Ingredients: In a large mixing bowl, sift together the flour, sugar, cocoa powder, baking powder, baking soda, and salt. Mix until well combined.
- Combine Wet Ingredients: In a separate bowl, whisk together the milk, vegetable oil, egg, and vanilla extract until smooth.
- Form Cake Batter: Gradually add the wet ingredients to the dry ingredients, mixing until just combined. Stir in the boiling water until the batter is smooth and thin.
- Bake the Cake: Pour the batter into the prepared cake pan. Bake for 30-35 minutes, or until a toothpick inserted into the center comes out clean. Let the cake cool completely on a wire rack.
- Make Chocolate Frosting: In a small saucepan, heat the heavy cream over medium heat until it begins to simmer. Pour the hot cream over the chopped chocolate in a heatproof bowl. Let it sit for a minute, then stir until smooth. Allow the frosting to cool slightly until it thickens to a spreadable consistency.
- Frost the Cake: Spread the chocolate frosting evenly over the cooled cake, covering the top and sides.
- Create the Nest: In a saucepan, melt the butter and golden syrup together. Remove from heat and stir in the shredded wheat, breaking it into smaller pieces to resemble twigs. Shape the mixture into a nest on top of the frosted cake.
- Decorate with Eggs: Place the mini chocolate eggs in the center of the nest. Let the chocolate set before serving.
Extra Tips:
For an even more decadent cake, you can add a layer of chocolate ganache between two cake layers if you prefer a taller cake.
Be sure to handle the shredded wheat gently to maintain its shape and texture when forming the nest. If you want to add a touch of color, consider using pastel-colored mini eggs or edible flowers to decorate the nest.
Finally, allow the cake to sit for a few hours before serving to let the flavors meld beautifully together.
Vanilla Confetti Cake
Vanilla Confetti Cake
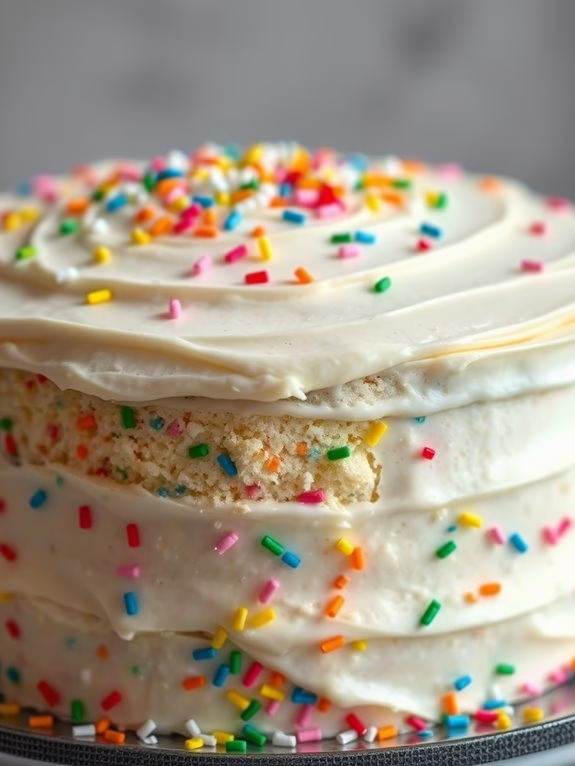
Celebrate Easter with a delightful Vanilla Confetti Cake that’s as fun to look at as it’s delicious to eat. This festive cake, with its speckles of colorful confetti-like sprinkles throughout the batter, is perfect for your Easter gathering. The moist vanilla sponge is complemented by a luscious layer of frosting, creating a sweet and vibrant centerpiece for your holiday table. Enjoy this simple yet joyful cake that will surely be a hit with both kids and adults alike.
Baking a Vanilla Confetti Cake is a wonderful way to infuse your Easter celebration with a touch of whimsy and color. This cake isn’t only visually appealing but also easy to make, using ingredients that are likely already in your pantry. The cake batter is enriched with a generous amount of vanilla extract and filled with rainbow sprinkles, creating a cheerful and festive dessert.
Whether served as part of an Easter brunch or as a dessert after dinner, this cake is sure to bring smiles and delight to your loved ones.
Ingredients:
- 2 1/2 cups all-purpose flour
- 1 tablespoon baking powder
- 1/2 teaspoon salt
- 1 cup unsalted butter, room temperature
- 1 1/2 cups granulated sugar
- 4 large eggs
- 1 tablespoon vanilla extract
- 1 cup whole milk
- 1/2 cup rainbow sprinkles
For the frosting:
- 1 cup unsalted butter, room temperature
- 4 cups powdered sugar
- 1/4 cup heavy cream
- 2 teaspoons vanilla extract
- Pinch of salt
Cooking Instructions:
- Preheat and Prepare Pans: Preheat your oven to 350°F (175°C). Grease and flour two 9-inch round cake pans, or line them with parchment paper for easy removal after baking.
- Mix Dry Ingredients: In a medium bowl, whisk together the all-purpose flour, baking powder, and salt. Set aside for later use.
- Cream Butter and Sugar: In a large mixing bowl, beat the butter and granulated sugar together using an electric mixer until light and fluffy, about 3-4 minutes.
- Add Eggs and Vanilla: Add the eggs one at a time, beating well after each addition. Stir in the vanilla extract, making sure everything is well combined.
- Combine Wet and Dry Ingredients: Gradually add the dry ingredients to the butter mixture alternately with the milk, beginning and ending with the dry ingredients. Mix until just combined. Be careful not to overmix.
- Fold in Sprinkles: Gently fold in the rainbow sprinkles, being careful not to overmix as the colors may bleed into the batter.
- Bake the Cake: Divide the batter evenly between the prepared cake pans and smooth the tops with a spatula. Bake in the preheated oven for 25-30 minutes or until a toothpick inserted into the center of the cakes comes out clean.
- Cool the Cakes: Allow the cakes to cool in the pans for 10 minutes before transferring them to a wire rack to cool completely.
- Prepare the Frosting: In a large bowl, beat the butter until creamy. Gradually add the powdered sugar, heavy cream, vanilla extract, and salt, mixing until smooth and fluffy.
- Assemble the Cake: Once the cakes are completely cool, spread a layer of frosting over the top of one cake layer. Place the second layer on top and cover the entire cake with the remaining frosting. Decorate with additional sprinkles if desired.
Extra Tips:
For the best results, make sure that all ingredients are at room temperature before beginning the baking process. This helps the batter to mix more evenly and the cake to bake uniformly.
When folding in the sprinkles, be gentle to prevent the colors from bleeding too much into the batter. If you prefer a more vibrant appearance, consider using jimmies instead of nonpareils as they tend to hold their color better when mixed into batter.
Finally, if you’re looking to save time, the cake layers can be baked a day in advance and stored in an airtight container until ready to frost.
Strawberry Shortcake Delight
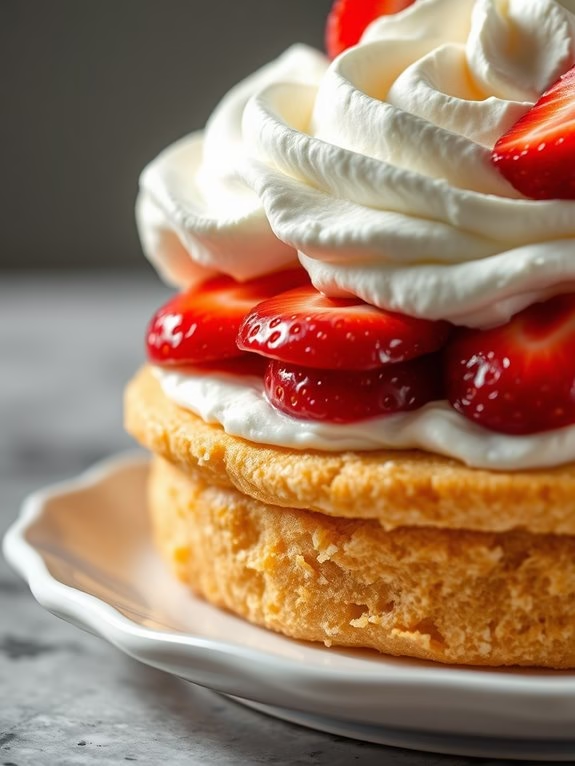
Strawberry Shortcake Delight is the quintessential springtime dessert, perfect for celebrating Easter with family and friends. This delicious cake combines the lightness of sponge cake with the sweet, fresh flavors of ripe strawberries and a rich, creamy whipped topping. The layers of soft cake and juicy strawberries create a delightful texture that’s sure to please any crowd. This recipe is straightforward, making it an excellent choice for both novice and experienced bakers alike.
Whether you’re hosting an Easter brunch or simply want to enjoy a lovely dessert after a family dinner, Strawberry Shortcake Delight is a crowd-pleaser. It combines classic dessert elements in an elegant yet approachable way, ensuring everyone can enjoy a slice of this delightful cake. The following recipe is designed to serve 4-6 people, making it ideal for small gatherings or family dinners.
Ingredients (Serving Size: 4-6 people):
- 1 1/2 cups all-purpose flour
- 1 tablespoon baking powder
- 1/4 teaspoon salt
- 1/2 cup unsalted butter, softened
- 1 cup granulated sugar
- 2 large eggs
- 1 teaspoon vanilla extract
- 1/2 cup whole milk
- 2 cups fresh strawberries, hulled and sliced
- 2 tablespoons granulated sugar (for strawberries)
- 1 cup heavy cream
- 2 tablespoons powdered sugar
- 1 teaspoon vanilla extract (for whipped cream)
Instructions:
- Preheat the Oven: Start by preheating your oven to 350°F (175°C). Grease and flour a 9-inch round cake pan to prevent the cake from sticking.
- Prepare the Cake Batter: In a medium bowl, whisk together the flour, baking powder, and salt. In a separate large bowl, cream the butter and sugar until light and fluffy. Add the eggs one at a time, beating well after each addition, then mix in the vanilla extract.
- Combine Ingredients: Gradually add the dry ingredients to the butter mixture, alternating with the milk, starting and ending with the flour mixture. Mix until just combined, being careful not to overmix.
- Bake the Cake: Pour the batter into the prepared cake pan, smoothing the top with a spatula. Bake for 25-30 minutes or until a toothpick inserted into the center comes out clean. Allow the cake to cool in the pan for 10 minutes, then transfer it to a wire rack to cool completely.
- Prepare the Strawberries: While the cake is cooling, place the sliced strawberries in a bowl and sprinkle with 2 tablespoons of sugar. Stir gently and let them macerate for at least 15 minutes to release their juices.
- Make the Whipped Cream: In a chilled bowl, whip the heavy cream with the powdered sugar and vanilla extract until soft peaks form. Be careful not to over-whip, as you want a light, airy texture.
- Assemble the Cake: Once the cake is completely cool, slice it horizontally into two layers. Place the bottom layer on a serving plate. Spread half of the whipped cream over the layer, then top with half of the macerated strawberries. Place the second cake layer on top and repeat with the remaining whipped cream and strawberries.
- Chill Before Serving: Allow the assembled cake to chill in the refrigerator for at least 30 minutes before serving. This helps the flavors meld together and makes slicing easier.
Extra Tips: For a beautiful presentation, reserve a few whole strawberries to garnish the top of the cake. To enhance the flavor, consider adding a tablespoon of lemon zest to the cake batter. If you want a more decadent version, you can add a layer of strawberry jam between the cake layers. For best results, use fresh, ripe strawberries as they provide the sweetest and juiciest flavor. Enjoy your Strawberry Shortcake Delight with a cup of tea or coffee for a perfect Easter celebration.
Almond Cream Cake

Almond Cream Cake
If you’re looking for a delightful and elegant dessert to serve this Easter, the Almond Cream Cake is the perfect choice. Its rich, nutty flavor combined with a light and fluffy texture makes it a standout on any dessert table. This cake isn’t only pleasing to the palate but also visually stunning with its creamy frosting and almond embellishments.
With its balanced sweetness and a hint of almond aroma, this cake is sure to bring a touch of sophistication to your Easter celebration.
The Almond Cream Cake is a wonderful blend of almond-infused sponge cake layered with a luscious almond cream. The recipe is straightforward, making it accessible to both novice and experienced bakers alike. This cake serves 4-6 people and can be prepared in advance, allowing you more time to enjoy the festivities with your loved ones.
Follow this easy recipe to create a memorable dessert that everyone will adore.
Ingredients (serves 4-6):
- 1 cup all-purpose flour
- 1 cup granulated sugar
- 1/2 cup unsalted butter, softened
- 3 large eggs
- 1/2 cup almond milk
- 1 teaspoon almond extract
- 1 teaspoon baking powder
- 1/4 teaspoon salt
- 1 cup heavy cream
- 1/4 cup powdered sugar
- 1/4 cup sliced almonds, toasted
Cooking Instructions:
- Preheat and Prepare: Preheat your oven to 350°F (175°C). Grease and flour an 8-inch round cake pan to guarantee easy removal of the cake after baking.
- Make the Cake Batter: In a large mixing bowl, cream together the softened butter and granulated sugar until light and fluffy. This should take about 3-4 minutes using an electric mixer on medium speed. Add the eggs one at a time, beating well after each addition. Stir in the almond extract.
- Combine Dry Ingredients: In a separate bowl, whisk together the flour, baking powder, and salt. Gradually add these dry ingredients to the butter mixture, alternating with the almond milk. Begin and end with the dry ingredients, mixing just until combined after each addition.
- Bake the Cake: Pour the batter into the prepared cake pan and smooth the top with a spatula. Bake in the preheated oven for 25-30 minutes, or until a toothpick inserted in the center comes out clean. Allow the cake to cool in the pan for 10 minutes before turning it out onto a wire rack to cool completely.
- Prepare the Almond Cream: While the cake is cooling, whip the heavy cream with the powdered sugar until stiff peaks form. This will take about 3-5 minutes. Gently fold in the toasted sliced almonds.
- Assemble the Cake: Once the cake has cooled, cut it horizontally into two equal layers. Spread a generous amount of the almond cream on the bottom layer. Place the second layer on top and cover the entire cake with the remaining almond cream.
- Decorate and Serve: Decorate the cake with additional toasted almonds or a sprinkle of powdered sugar if desired. Serve immediately, or refrigerate for up to 24 hours before serving.
Extra Tips:
For the best results, verify that all your ingredients are at room temperature before you start baking. This helps the ingredients to blend more evenly, resulting in a smoother batter and a more tender cake.
If you prefer a stronger almond flavor, you can add a few drops more of almond extract. Be sure to toast the sliced almonds beforehand to bring out their natural oils and enhance their flavor.
Finally, for a more festive touch, consider adding a few pastel-colored candies or edible flowers as decoration.
Raspberry Swirl Cheesecake
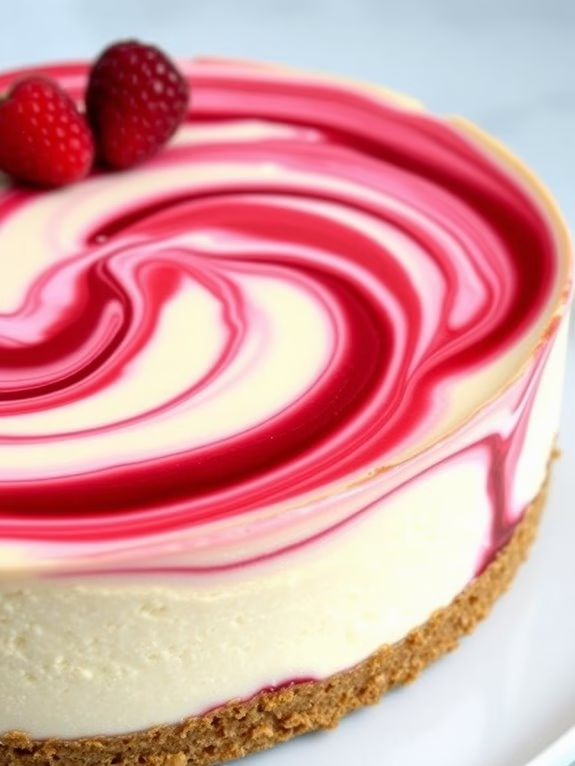
Raspberry Swirl Cheesecake is a delightful treat that combines the creamy texture of cheesecake with the tartness of raspberries, resulting in a beautiful dessert that’s perfect for Easter celebrations.
This cheesecake has a rich, velvety base with a stunning raspberry swirl that not only adds a burst of flavor but also creates an eye-catching design. The combination of textures and flavors makes it a favorite among cheesecake lovers and a standout dessert on any festive table.
This recipe is designed to serve 4-6 people, making it an ideal size for a small family gathering or a modest Easter feast. The process is straightforward, involving a simple cheesecake batter with a raspberry sauce that swirls through it to create a marbled effect.
Whether you’re an experienced baker or a beginner, this Raspberry Swirl Cheesecake is bound to impress your guests with both its taste and appearance.
Ingredients:
- 1 1/2 cups graham cracker crumbs
- 1/4 cup granulated sugar
- 1/2 cup unsalted butter, melted
- 2 cups fresh raspberries
- 1/4 cup granulated sugar (for raspberry sauce)
- 1 tablespoon cornstarch
- 1 tablespoon lemon juice
- 3 (8 oz) packages cream cheese, softened
- 1 cup granulated sugar (for cheesecake filling)
- 1 teaspoon vanilla extract
- 3 large eggs
- 1/2 cup sour cream
Cooking Instructions:
- Prepare the Crust: Preheat your oven to 325°F (163°C). In a medium bowl, combine the graham cracker crumbs, 1/4 cup of granulated sugar, and melted butter. Mix until the crumbs are evenly moistened. Press the mixture firmly into the bottom of a 9-inch springform pan. Bake the crust for 10 minutes, then remove it from the oven and let it cool.
- Make the Raspberry Sauce: In a small saucepan over medium heat, combine the raspberries, 1/4 cup of sugar, cornstarch, and lemon juice. Cook while stirring until the mixture thickens and the raspberries break down, about 5-7 minutes. Strain the sauce through a fine mesh sieve to remove the seeds and set it aside to cool.
- Prepare the Cheesecake Batter: In a large mixing bowl, beat the softened cream cheese with a hand mixer or stand mixer until smooth and creamy. Gradually add 1 cup of sugar and mix until combined. Add the vanilla extract and eggs, one at a time, mixing well after each addition. Finally, blend in the sour cream until the mixture is smooth and uniform.
- Assemble the Cheesecake: Pour the cheesecake batter over the cooled crust in the springform pan. Drop spoonfuls of the raspberry sauce onto the surface of the cheesecake batter. Use a toothpick or a skewer to swirl the sauce into the batter, creating a marbled effect.
- Bake the Cheesecake: Place the springform pan on a baking sheet to catch any drips. Bake in the preheated oven for 50-60 minutes, or until the edges are set but the center still has a slight jiggle. Turn off the oven and leave the cheesecake inside with the door ajar for 1 hour to cool gradually.
- Chill the Cheesecake: Remove the cheesecake from the oven and let it cool completely at room temperature. Once cooled, refrigerate for at least 4 hours, preferably overnight, to allow it to set fully.
Extra Tips:
For the perfect Raspberry Swirl Cheesecake, ascertain that your cream cheese is at room temperature before mixing to avoid lumps in the batter.
When swirling the raspberry sauce, avoid over-mixing to maintain the distinct marbled design. Additionally, run a knife around the edge of the cheesecake after baking to prevent cracking as it cools.
For easy removal from the springform pan, line the bottom with parchment paper before adding the crust. Enjoy your cheesecake chilled, and garnish with fresh raspberries for an extra touch of elegance.
Pistachio Layer Cake
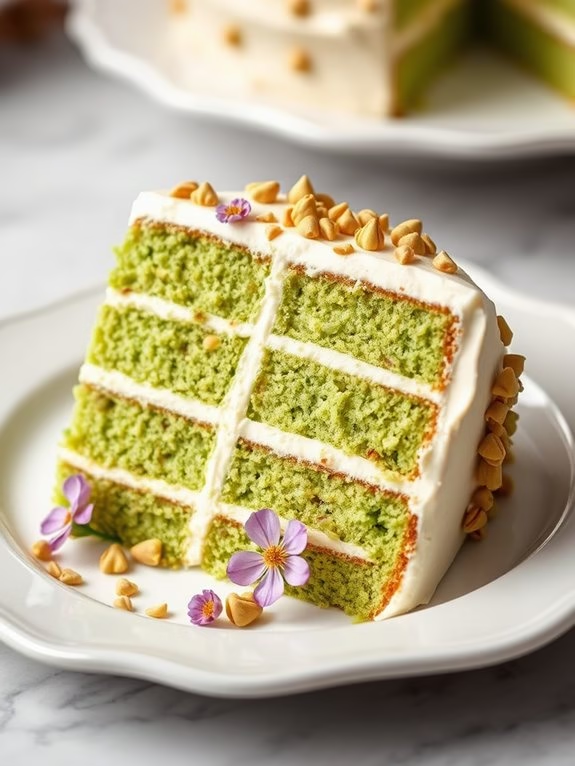
Pistachio Layer Cake
Celebrate Easter with a delightful Pistachio Layer Cake that showcases the nutty flavor of pistachios wrapped in layers of moist, tender cake. This visually stunning dessert isn’t only a feast for the eyes with its vibrant green hue but also a treat for the taste buds with its subtle sweetness and creamy frosting. Perfect for a family gathering or a special Easter brunch, this cake is sure to impress your guests and become a holiday favorite.
The Pistachio Layer Cake begins with a simple cake batter enriched with ground pistachios, lending the cake its signature flavor and texture. Each layer is then stacked and smothered with a luscious cream cheese frosting that complements the pistachio flavor beautifully. Garnished with crushed pistachios and a touch of edible flowers, if desired, this cake not only tastes amazing but also makes a stunning centerpiece for your Easter celebration.
Ingredients for 4-6 servings:
- 1 cup unsalted shelled pistachios
- 1 1/2 cups all-purpose flour
- 1 1/2 teaspoons baking powder
- 1/4 teaspoon salt
- 1/2 cup unsalted butter, room temperature
- 1 cup granulated sugar
- 2 large eggs
- 1 teaspoon vanilla extract
- 1/2 cup whole milk
- Green food coloring (optional)
- 8 oz cream cheese, softened
- 1/2 cup unsalted butter, softened
- 3 cups powdered sugar
- 1 teaspoon vanilla extract
- Additional shelled pistachios, for garnish
Cooking Instructions:
- Preheat and Prepare: Preheat your oven to 350°F (175°C). Grease and flour two 8-inch round cake pans, then line the bottoms with parchment paper to facilitate easy cake removal.
- Make Pistachio Flour: In a food processor, pulse the pistachios until they form a fine powder. Be careful not to over-process, as they can turn into pistachio butter.
- Mix Dry Ingredients: In a medium bowl, combine the pistachio flour, all-purpose flour, baking powder, and salt. Whisk together to incorporate the ingredients evenly.
- Cream Butter and Sugar: In a large mixing bowl, beat the butter and granulated sugar on medium-high speed until light and fluffy, about 3-4 minutes.
- Add Eggs and Vanilla: Add the eggs one at a time, mixing well after each addition. Stir in the vanilla extract until combined.
- Incorporate Dry and Wet Ingredients: Gradually add the dry ingredients to the butter mixture, alternating with the milk, beginning and ending with the dry ingredients. Mix until just combined. If desired, add a few drops of green food coloring to achieve a vibrant green cake batter.
- Bake the Cakes: Divide the batter evenly between the prepared cake pans. Bake for 25-30 minutes, or until a toothpick inserted into the center comes out clean. Allow the cakes to cool in the pans for 10 minutes before transferring to a wire rack to cool completely.
- Prepare Frosting: In a mixing bowl, beat the cream cheese and butter together until smooth. Gradually add the powdered sugar and vanilla extract, mixing until fluffy and well combined.
- Assemble the Cake: Once the cakes are completely cool, place one layer on a serving plate and spread a generous amount of frosting over the top. Place the second cake layer on top and frost the top and sides of the cake.
- Garnish and Serve: Decorate the cake with additional crushed pistachios and edible flowers, if using. Slice and serve your Pistachio Layer Cake to delighted guests.
Extra Tips:
When making the pistachio flour, verify that the pistachios are fully shelled and unsalted to avoid altering the taste of your cake.
If you prefer a more vibrant green color for your cake, a natural food coloring is a great option to achieve the desired hue without artificial additives.
Additionally, chilling the cake layers slightly before frosting can help in achieving a smoother finish and prevent the cake from crumbling during assembly.
Enjoy the process of decorating—this cake allows for creativity with garnishes to suit your Easter theme.
Blueberry Lemon Loaf
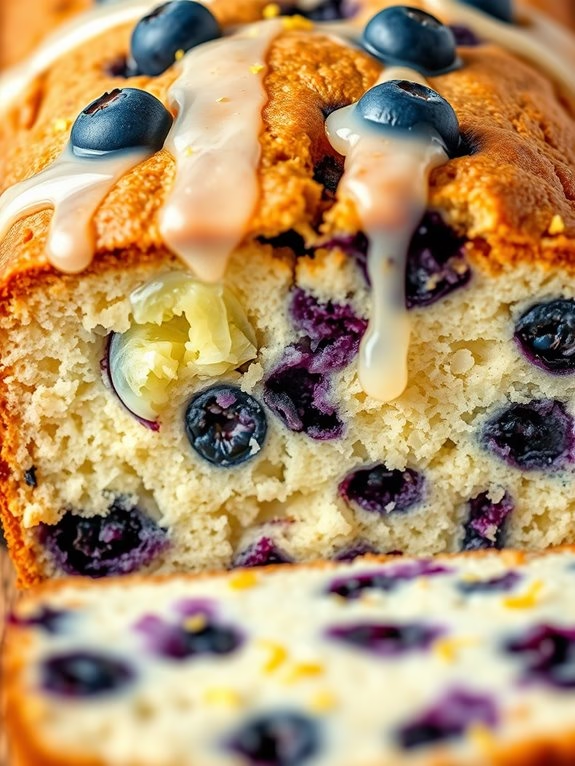
Blueberry Lemon Loaf is a delightful dessert that perfectly balances the sweet and tangy flavors of fresh blueberries and zesty lemon. This loaf is an ideal treat for Easter celebrations, offering a burst of springtime freshness that complements any festive gathering. The moist and tender crumb of the cake is sure to impress your family and friends, making it a memorable addition to your holiday spread.
This easy-to-make loaf isn’t only delicious but also visually appealing, with its vibrant blueberries and a light drizzle of lemon glaze that adds a touch of elegance. Whether you’re serving it as a dessert, enjoying it with a cup of tea, or gifting it to loved ones, this Blueberry Lemon Loaf is bound to become a favorite recipe in your kitchen. The ingredients listed below will serve 4-6 people, providing generous slices that everyone can savor.
Ingredients:
- 1 and 1/2 cups all-purpose flour
- 1 teaspoon baking powder
- 1/2 teaspoon salt
- 1/2 cup unsalted butter, room temperature
- 1 cup granulated sugar
- 2 large eggs
- 1 tablespoon lemon zest
- 1/4 cup fresh lemon juice
- 1/2 cup milk
- 1 cup fresh blueberries
- 1 tablespoon all-purpose flour (for coating blueberries)
Lemon Glaze:
- 1 cup powdered sugar
- 2 tablespoons fresh lemon juice
Cooking Instructions:
- Preheat and Prepare Pan: Preheat your oven to 350°F (175°C). Grease and flour a 9×5-inch loaf pan, or line it with parchment paper for easy removal.
- Mix Dry Ingredients: In a medium-sized bowl, whisk together the 1 and 1/2 cups of all-purpose flour, baking powder, and salt until well combined. Set aside.
- Cream Butter and Sugar: In a large mixing bowl, cream together the room-temperature butter and granulated sugar until light and fluffy, about 2-3 minutes using an electric mixer.
- Add Eggs and Lemon: Beat in the eggs, one at a time, making certain each is fully incorporated before adding the next. Mix in the lemon zest and lemon juice until combined.
- Combine Wet and Dry Ingredients: Gradually add the flour mixture to the butter mixture in three parts, alternating with the milk, starting and ending with the flour mixture. Mix until just combined, being careful not to overmix.
- Prepare Blueberries: In a small bowl, toss the blueberries with 1 tablespoon of flour to coat them. This helps prevent them from sinking to the bottom of the loaf during baking.
- Fold in Blueberries: Gently fold the coated blueberries into the batter using a spatula, ensuring even distribution without crushing the berries.
- Bake the Loaf: Pour the batter into the prepared loaf pan, smoothing the top with a spatula. Bake in the preheated oven for 55-65 minutes, or until a toothpick inserted into the center comes out clean.
- Cool and Glaze: Allow the loaf to cool in the pan for 10 minutes before transferring it to a wire rack to cool completely. Once cooled, whisk together the powdered sugar and lemon juice to make the glaze, then drizzle it over the loaf.
Extra Tips:
For the best texture and flavor, make certain your butter is at room temperature before you begin. If you prefer a more intense lemon flavor, consider adding a teaspoon of lemon extract to the batter.
When zesting the lemon, be cautious to zest only the yellow skin and avoid the bitter white pith underneath. Feel free to substitute fresh blueberries with frozen ones if fresh are unavailable; just be sure to thaw and drain them thoroughly to prevent excess moisture in the batter.
White Chocolate Raspberry Cake
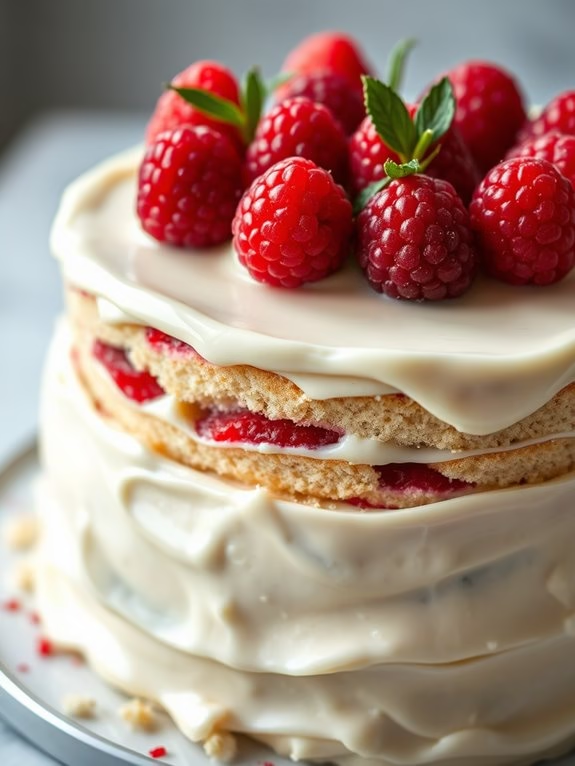
White Chocolate Raspberry Cake
Celebrate Easter with a delightful White Chocolate Raspberry Cake that’s sure to impress your family and friends. This cake combines the rich, creamy flavor of white chocolate with the invigorating tartness of raspberries, creating a harmonious balance that’s both indulgent and invigorating. Perfect for a springtime gathering, this cake features layers of moist vanilla sponge, a luscious white chocolate ganache, and a vibrant raspberry filling, all topped with a smooth white chocolate frosting and garnished with fresh raspberries.
Whether you’re hosting a holiday brunch or looking for a show-stopping dessert to conclude your Easter dinner, this White Chocolate Raspberry Cake is an excellent choice. Not only does it taste incredible, but it also looks stunning with its elegant white and pink hues. This recipe will guide you through creating this masterpiece, ensuring that even novice bakers can achieve a professional result.
Ingredients for 4-6 people:
- 1 ½ cups all-purpose flour
- 1 ½ teaspoons baking powder
- ½ teaspoon salt
- ½ cup unsalted butter, room temperature
- 1 cup granulated sugar
- 2 large eggs
- 1 teaspoon vanilla extract
- ½ cup whole milk
- ½ cup fresh raspberries
- 1 cup white chocolate chips
- ½ cup heavy cream
- ½ cup raspberry jam
- Fresh raspberries for garnish
Cooking Instructions:
- Preheat and Prepare: Preheat your oven to 350°F (175°C). Grease and flour two 8-inch round cake pans, ensuring that they’re lined with parchment paper for easy removal.
- Mix Dry Ingredients: In a medium bowl, whisk together the flour, baking powder, and salt. Set aside.
- Cream Butter and Sugar: In a large bowl, use an electric mixer to cream the butter and sugar together until light and fluffy, about 3-4 minutes.
- Incorporate Eggs and Vanilla: Add the eggs one at a time, beating well after each addition. Mix in the vanilla extract until combined.
- Combine Wet and Dry: Gradually add the dry ingredients to the butter mixture, alternating with the milk. Begin and end with the dry ingredients. Mix until just combined.
- Fold in Raspberries: Gently fold in the fresh raspberries, being careful not to crush them.
- Bake the Cake: Divide the batter evenly between the prepared pans. Bake for 25-30 minutes, or until a toothpick inserted in the center comes out clean. Allow the cakes to cool in the pans for 10 minutes, then turn them out onto wire racks to cool completely.
- Make White Chocolate Ganache: In a small saucepan, heat the heavy cream over medium heat until it begins to simmer. Remove from heat and pour over the white chocolate chips in a bowl. Let sit for 2 minutes, then stir until smooth. Allow to cool slightly.
- Assemble the Cake: Place one cake layer on a serving plate. Spread a thin layer of raspberry jam over the top, followed by half of the white chocolate ganache. Place the second cake layer on top.
- Frost the Cake: Spread the remaining white chocolate ganache over the top and sides of the cake. Use a spatula to smooth it out evenly.
- Garnish and Serve: Garnish the cake with fresh raspberries. Chill the cake for at least 30 minutes before serving to allow the ganache to set.
Extra Tips:
For a more intense raspberry flavor, consider adding a layer of raspberry jam between the cake layers along with the white chocolate ganache. If your ganache becomes too thick, gently reheat it over a double boiler or in the microwave for a few seconds, stirring to reach the desired consistency.
Additionally, for a more polished look, you can pipe some of the ganache around the edges or top of the cake using a piping bag fitted with a decorative tip. Enjoy this delightful cake with a cup of tea or coffee for the perfect Easter treat!
Orange Blossom Cake
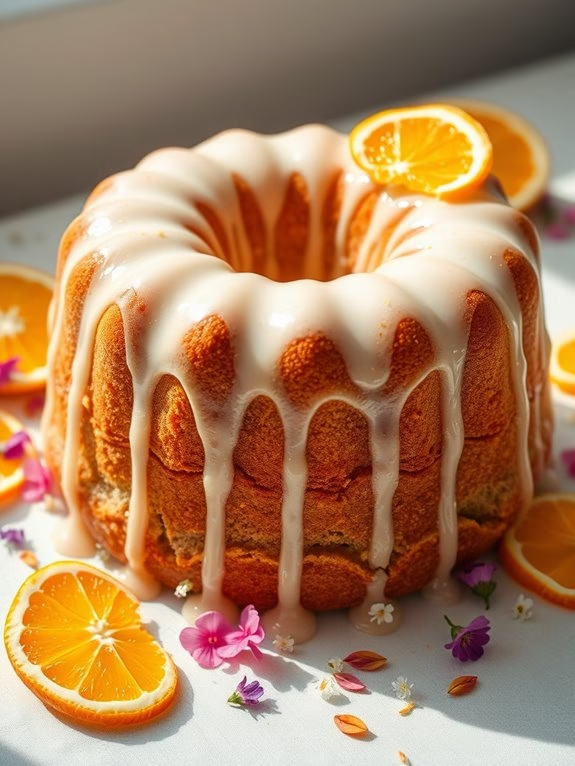
Orange Blossom Cake is a delightful Easter dessert that captures the essence of spring with its light and rejuvenating flavors. The cake is infused with the subtle fragrance of orange blossom water, lending it a unique and aromatic touch that pairs beautifully with a moist and tender crumb.
Perfect for a festive gathering, this cake is sure to impress your guests not only with its taste but also with its elegant appearance. This cake recipe is designed to serve 4-6 people, making it an ideal choice for a small Easter celebration. The combination of fresh orange zest and orange blossom water provides a delicate flavor profile that’s both invigorating and comforting.
Topped with a simple glaze or frosting, the Orange Blossom Cake is a showstopper that requires minimal effort but delivers maximum impact.
Ingredients:
- 1 1/2 cups all-purpose flour
- 1 1/2 teaspoons baking powder
- 1/4 teaspoon salt
- 1/2 cup unsalted butter, softened
- 3/4 cup granulated sugar
- 2 large eggs
- 1 teaspoon vanilla extract
- 1 tablespoon orange blossom water
- Zest of 1 orange
- 1/2 cup whole milk
For the Glaze:
- 1 cup powdered sugar
- 2 tablespoons orange juice
- 1 teaspoon orange blossom water
Instructions:
- Preheat and Prepare Pan: Preheat your oven to 350°F (175°C). Grease and flour an 8-inch round cake pan or line it with parchment paper to facilitate easy removal of the cake.
- Mix Dry Ingredients: In a medium bowl, whisk together the flour, baking powder, and salt. Set aside.
- Cream Butter and Sugar: In a large mixing bowl, use an electric mixer to cream the softened butter and granulated sugar together until light and fluffy, about 3-5 minutes.
- Add Eggs and Flavorings: Beat in the eggs one at a time, verifying each egg is well incorporated before adding the next. Mix in the vanilla extract, orange blossom water, and orange zest until combined.
- Combine Wet and Dry Ingredients: Gradually add the dry ingredients to the butter mixture, alternating with the milk, starting and ending with the dry ingredients. Mix just until everything is combined and the batter is smooth.
- Bake the Cake: Pour the batter into the prepared cake pan and smooth the top with a spatula. Bake in the preheated oven for 25-30 minutes, or until a toothpick inserted into the center comes out clean.
- Cool the Cake: Allow the cake to cool in the pan for about 10 minutes before transferring it to a wire rack to cool completely.
- Prepare the Glaze: While the cake cools, mix together the powdered sugar, orange juice, and orange blossom water in a small bowl until smooth and slightly thickened.
- Glaze the Cake: Once the cake is completely cooled, drizzle the glaze over the top, allowing it to drip down the sides. Let the glaze set for a few minutes before serving.
Extra Tips: When making the Orange Blossom Cake, it’s important not to overmix the batter once the flour is added, as this could result in a dense cake. Additionally, verify all ingredients are at room temperature before starting to achieve the best texture.
For an added decorative touch, consider garnishing the cake with thin slices of fresh orange or a sprinkle of edible flowers that complement the orange blossom theme.
Hummingbird Cake

Hummingbird Cake is a delicious and flavorful dessert that’s perfect for celebrating Easter with family and friends. This Southern classic is known for its moist texture and sweet, fruity flavors, combining ingredients like ripe bananas, crushed pineapple, and pecans. The cake is often layered with a rich cream cheese frosting, making it an indulgent treat that will impress your guests. It’s a cake that not only delights the taste buds but also adds a touch of elegance to your Easter table.
Preparing a Hummingbird Cake is relatively simple, yet the result is spectacular. It requires basic baking skills and common ingredients you probably already have in your pantry. The combination of fruit and nuts not only adds flavor but also makes the cake moist and rich.
Once baked, the cake can be decorated with a classic cream cheese frosting, and for an added touch, you can garnish it with extra pecans or a sprinkle of shredded coconut. This recipe will serve 4 to 6 people, making it ideal for a small Easter gathering.
Ingredients (serves 4-6):
- 1 1/2 cups all-purpose flour
- 1 teaspoon baking soda
- 1/2 teaspoon ground cinnamon
- 1/4 teaspoon salt
- 1/2 cup granulated sugar
- 1/2 cup packed brown sugar
- 2 large eggs
- 1/2 cup vegetable oil
- 1 teaspoon vanilla extract
- 1 cup mashed ripe bananas (about 2 bananas)
- 1/2 cup crushed pineapple, drained
- 1/2 cup chopped pecans
- For the frosting:
- 8 ounces cream cheese, softened
- 1/4 cup unsalted butter, softened
- 2 cups powdered sugar
- 1 teaspoon vanilla extract
Cooking Instructions:
- Preheat the Oven: Start by preheating your oven to 350°F (175°C). Grease and flour two 8-inch round cake pans, then set them aside.
- Mix Dry Ingredients: In a medium-sized bowl, whisk together the flour, baking soda, cinnamon, and salt. This guarantees that the dry ingredients are evenly distributed.
- Combine Wet Ingredients: In a large mixing bowl, beat together the granulated sugar, brown sugar, and eggs until well combined. Gradually add the oil and vanilla extract, continuing to mix until smooth.
- Incorporate Bananas and Pineapple: Add the mashed bananas and crushed pineapple to the wet mixture, stirring until they’re fully combined.
- Combine Wet and Dry Mixtures: Gradually add the dry ingredients to the wet mixture, stirring gently until just combined. Be careful not to overmix, as this can make the cake dense.
- Add Pecans: Fold the chopped pecans into the batter, guaranteeing they’re evenly distributed throughout.
- Bake the Cakes: Divide the batter evenly between the prepared cake pans. Bake in the preheated oven for 25-30 minutes, or until a toothpick inserted into the center comes out clean.
- Cool the Cakes: Allow the cakes to cool in the pans for about 10 minutes, then transfer them to wire racks to cool completely.
- Prepare the Frosting: In a medium bowl, beat the cream cheese and butter together until smooth. Gradually add the powdered sugar and vanilla extract, beating until the frosting is creamy and spreadable.
- Assemble the Cake: Once the cakes are completely cool, spread a layer of cream cheese frosting on top of one cake layer. Place the second cake layer on top, then frost the top and sides of the cake with the remaining frosting.
- Decorate: Garnish the cake with additional pecans or shredded coconut if desired.
Extra Tips:
For best results, confirm that your bananas are very ripe, as this will enhance the sweetness and moisture of the cake. If you prefer a nut-free version, you can omit the pecans without affecting the overall texture of the cake.
To make the cake even more festive, consider adding a sprinkle of edible flowers or colorful sprinkles on top of the frosting for an extra Easter touch. Make sure your cream cheese and butter are at room temperature before making the frosting to achieve the smoothest consistency.
Red Velvet Mini Cakes

Red Velvet Mini Cakes
Easter is the perfect time to showcase your baking skills with delightful desserts that are as festive as they’re delicious. Red Velvet Mini Cakes are an excellent choice for this special occasion, combining the classic flavors of red velvet with a cream cheese frosting that everyone loves.
These charming little cakes are perfect for serving at family gatherings, Easter brunches, or as a sweet treat to tuck into an Easter basket. Their vibrant color and rich taste make them a standout dessert that will surely be the highlight of your Easter celebration.
Not only are these Red Velvet Mini Cakes visually appealing, but they’re also incredibly easy to prepare. With a simple recipe and a few key ingredients, you can create a batch of these delightful mini cakes that serve 4-6 people. The moistness of the red velvet cake paired with the creamy frosting creates a delectable combination that’s hard to resist.
Follow the steps below to make your own batch of these beautiful and delicious mini cakes.
Ingredients (Serves 4-6):
- 1 1/4 cups all-purpose flour
- 1 cup granulated sugar
- 1/2 teaspoon baking soda
- 1/2 teaspoon salt
- 1 tablespoon unsweetened cocoa powder
- 1/2 cup vegetable oil
- 1 egg
- 1/2 cup buttermilk
- 1 tablespoon red food coloring
- 1/2 teaspoon vanilla extract
- 1/2 teaspoon white vinegar
- 4 ounces cream cheese (softened)
- 1/2 cup unsalted butter (softened)
- 2 cups powdered sugar
- 1 teaspoon vanilla extract
Instructions:
- Preheat the Oven: Start by preheating your oven to 350°F (175°C). Prepare a mini cake pan by greasing it with butter or lining it with paper liners for easy removal.
- Mix the Dry Ingredients: In a medium bowl, whisk together the all-purpose flour, sugar, baking soda, salt, and cocoa powder until well combined. This will guarantee that your dry ingredients are evenly distributed.
- Combine Wet Ingredients: In a separate large bowl, beat together the vegetable oil and egg until smooth. Add in the buttermilk, red food coloring, vanilla extract, and vinegar. Mix until everything is well incorporated and the color is vibrant.
- Combine All Ingredients: Gradually add the dry ingredients to the wet ingredients, stirring constantly until you achieve a smooth batter. Be careful not to overmix, as this can make the cakes dense.
- Fill the Cake Pan: Pour the batter into the prepared mini cake pan, filling each cavity about two-thirds full to allow room for the cakes to rise during baking.
- Bake: Place the cake pan in the preheated oven and bake for about 15-20 minutes, or until a toothpick inserted into the center of a cake comes out clean. Allow the cakes to cool in the pan for a few minutes before transferring them to a wire rack to cool completely.
- Prepare the Frosting: While the cakes are cooling, prepare the cream cheese frosting. In a medium bowl, beat the softened cream cheese and unsalted butter together until creamy and smooth. Gradually add the powdered sugar and vanilla extract, continuing to beat until the frosting is light and fluffy.
- Frost the Mini Cakes: Once the cakes are completely cool, spread a generous layer of cream cheese frosting on each mini cake. Use a piping bag for a more decorative touch if desired.
Extra Tips:
When making Red Velvet Mini Cakes, make sure that the ingredients are at room temperature before beginning. This helps in achieving a smooth batter and even baking.
If you don’t have buttermilk, you can make a substitute by adding a tablespoon of lemon juice or vinegar to a half-cup of milk and letting it sit for a few minutes.
Finally, be cautious with the red food coloring, as different brands can vary in intensity, and you may need to adjust the amount to achieve your desired color.
Enjoy these mini cakes, and have a wonderful Easter!
Rainbow Sprinkle Cake

Rainbow Sprinkle Cake is a delightful and vibrant dessert that’s perfect for celebrating Easter or any festive occasion. This cake isn’t only visually appealing but also incredibly delicious, with a moist and fluffy texture complemented by a rich buttercream frosting. The cheerful colors of the rainbow sprinkles add a whimsical touch, making it a hit with both kids and adults alike.
Creating this Rainbow Sprinkle Cake is a fun and rewarding experience, especially when shared with family or friends. This recipe yields a cake that serves 4-6 people, making it ideal for small gatherings or as a centerpiece for your Easter dessert table. The combination of vanilla cake and sprinkles makes it a timeless classic that everyone will enjoy.
Ingredients for 4-6 people:
- 1 ½ cups all-purpose flour
- 1 ½ teaspoons baking powder
- ¼ teaspoon salt
- ½ cup unsalted butter, softened
- 1 cup granulated sugar
- 2 large eggs
- 1 teaspoon vanilla extract
- ½ cup whole milk
- ½ cup rainbow sprinkles
- 1 ½ cups buttercream frosting
- Additional rainbow sprinkles for decoration
Cooking Instructions:
- Preheat the Oven: Begin by preheating your oven to 350°F (175°C). Grease and flour two 6-inch round cake pans and set them aside.
- Mix Dry Ingredients: In a medium-sized bowl, whisk together the all-purpose flour, baking powder, and salt. This will guarantee that the baking powder is evenly distributed throughout the flour.
- Cream Butter and Sugar: In a large bowl, use an electric mixer to cream the softened butter and sugar together until the mixture is light and fluffy. This should take about 3-4 minutes.
- Add Eggs and Vanilla: Beat in the eggs one at a time, making sure each egg is fully incorporated before adding the next. Stir in the vanilla extract.
- Combine Wet and Dry Ingredients: Gradually add the dry ingredients to the creamed mixture, alternating with the milk. Begin and end with the dry ingredients. Mix until just combined.
- Fold in Sprinkles: Gently fold the rainbow sprinkles into the batter, being careful not to over-mix as this can cause the colors to bleed.
- Bake the Cakes: Divide the batter evenly between the prepared cake pans. Smooth the tops with a spatula and bake in the preheated oven for 25-30 minutes, or until a toothpick inserted into the center comes out clean.
- Cool the Cakes: Allow the cakes to cool in the pans for about 10 minutes, then turn them out onto a wire rack to cool completely.
- Frost the Cake: Once the cakes are completely cool, spread a layer of buttercream frosting on top of one of the cakes. Place the second cake on top, and frost the top and sides with the remaining buttercream.
- Decorate with Sprinkles: Finish by generously decorating the top and sides of the cake with additional rainbow sprinkles for a festive touch.
Extra Tips:
When making the Rainbow Sprinkle Cake, be sure to use quality sprinkles that are designed for baking, as some types can bleed color into the batter.
When folding the sprinkles into the batter, do so gently to maintain the vibrant colors.
If you want to add an extra layer of flavor, consider using a flavored extract such as almond or lemon in place of the vanilla.
Finally, for a more even rise, guarantee your oven is fully preheated before baking and rotate the cake pans halfway through the baking time.