

The holiday season is upon us, and with it comes the joy of gathering around the table with loved ones. I’ve put together a selection of festive Christmas potluck recipes that are sure to impress. From Cranberry Brie Bites to Maple-Glazed Roasted Carrots, there’s a dish for every palate. These recipes will bring both elegance and flavor to your holiday celebrations. Let’s get cooking and make this holiday season extra special!
Classic Deviled Eggs With a Holiday Twist
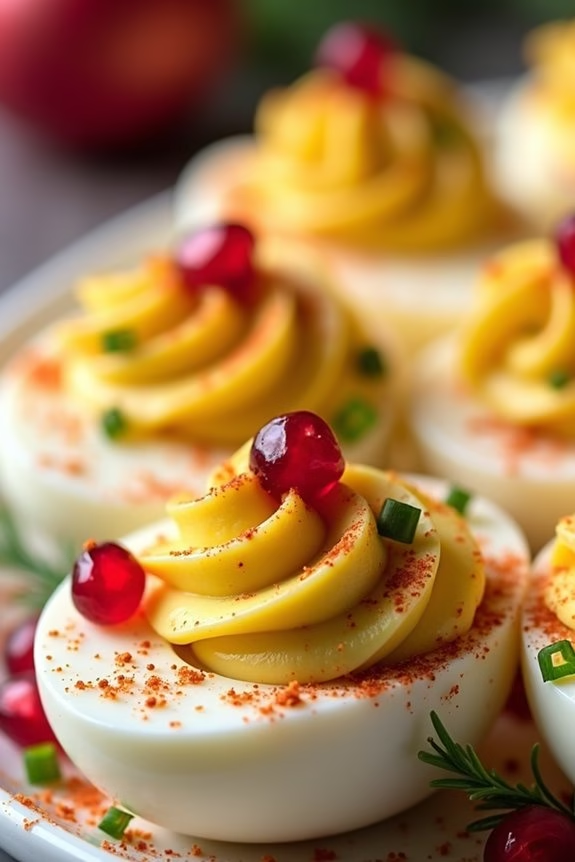
Deviled eggs are a timeless favorite at any gathering, but adding a festive touch can elevate them to a must-have dish at your Christmas potluck. This recipe takes the classic deviled egg and introduces a holiday twist, incorporating unique flavors that evoke the warmth and joy of the season. Perfect for serving 4-6 people, these deviled eggs are easy to prepare, beautifully presented, and guaranteed to be a crowd-pleaser.
The holiday twist comes from incorporating ingredients like Dijon mustard, a hint of nutmeg, and a sprinkle of pomegranate seeds for a burst of color and flavor. The creamy yolk filling is enriched with mayonnaise and seasoned to perfection, while the garnishes add both visual appeal and a delightful taste. Not only are these deviled eggs delicious, but they also bring a festive flair to your holiday table.
Ingredients:
- 6 large eggs
- 1/4 cup mayonnaise
- 1 teaspoon Dijon mustard
- 1/4 teaspoon ground nutmeg
- Salt and pepper to taste
- 1 tablespoon fresh chives, finely chopped
- 2 tablespoons pomegranate seeds
- Paprika for garnish
Cooking Instructions:
- Boil the Eggs: Place the eggs in a medium saucepan and cover them with cold water. Bring the water to a boil over medium-high heat. Once boiling, remove the saucepan from the heat and cover it with a lid. Let the eggs sit in the hot water for 10-12 minutes.
- Cool and Peel: Carefully transfer the eggs to a bowl of ice water to cool for at least 5 minutes. Once cooled, gently tap each egg on the counter to crack the shell, then peel under running water for ease.
- Prepare the Filling: Slice each egg in half lengthwise and gently scoop out the yolks into a mixing bowl. Arrange the egg whites on a serving platter.
- Mix the Filling: Mash the egg yolks with a fork until smooth. Add mayonnaise, Dijon mustard, ground nutmeg, salt, and pepper. Mix until the filling is creamy and well combined.
- Fill the Egg Whites: Spoon or pipe the yolk mixture back into the hollowed egg whites, mounding it slightly. Use a piping bag for a more decorative look.
- Garnish the Eggs: Sprinkle the tops with fresh chives and a light dusting of paprika. Add a few pomegranate seeds on top of each egg for a festive touch.
Extra Tips:
For perfectly cooked eggs, make sure that you don’t overcook them, as this can lead to a sulfuric smell and a green ring around the yolks.
If you’re looking to save time, you can prepare the eggs up to a day in advance and store them in the refrigerator. Just wait to add the garnishes until just before serving to keep them fresh and vibrant.
Feel free to experiment with other seasonal garnishes, such as a sprig of dill or a dash of cayenne pepper for added heat.
Cranberry Brie Bites
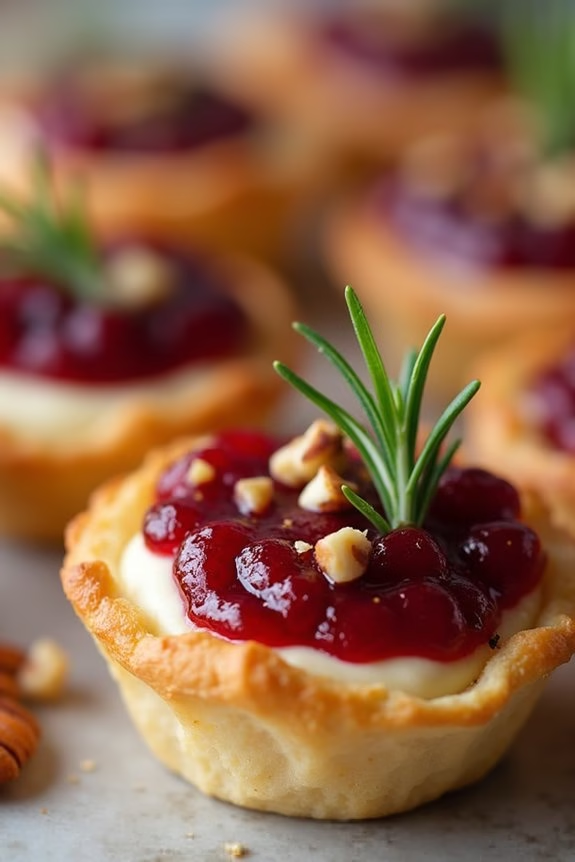
Cranberry Brie Bites are the perfect holiday appetizer that combines the creamy richness of Brie cheese with the sweet-tart flavor of cranberry sauce, all encased in a flaky puff pastry.
These delightful bites aren’t only delicious but also incredibly easy to make, making them ideal for festive gatherings and Christmas potlucks. The combination of flavors and textures in these bites is sure to impress your guests and leave them reaching for more.
This recipe yields enough for 4-6 people, making it a great option for intimate gatherings or as part of a larger spread. The bites can be made in advance, allowing you to spend more time enjoying the festivities with your friends and family.
With minimal ingredients and a straightforward preparation process, Cranberry Brie Bites are certain to become a holiday favorite.
Ingredients:
- 1 sheet of puff pastry, thawed
- 1/2 cup cranberry sauce (homemade or store-bought)
- 8 ounces Brie cheese, cut into small cubes
- 1/4 cup chopped pecans (optional)
- 1 tablespoon fresh rosemary, finely chopped
- 1 egg, beaten (for egg wash)
Instructions:
- Prepare the Puff Pastry: Preheat your oven to 375°F (190°C). On a lightly floured surface, roll out the puff pastry sheet to smooth out any creases. Cut the pastry into 12 equal squares using a sharp knife or a pastry cutter.
- Fill the Pastry: Place each puff pastry square into the well of a mini muffin tin, gently pressing down to create a cup shape. Place a cube of Brie into each pastry cup, followed by a teaspoon of cranberry sauce. Sprinkle a few chopped pecans and a pinch of fresh rosemary on top of each.
- Apply Egg Wash: Brush the edges of the pastry with the beaten egg. This will give the bites a beautiful golden color once baked.
- Bake the Bites: Place the muffin tin in the preheated oven and bake for 15-18 minutes, or until the pastry is golden brown and puffed. The cheese should be melted and bubbly.
- Cool and Serve: Remove the bites from the oven and let them cool in the tin for about 5 minutes before transferring them to a serving platter. Serve warm for the best flavor.
Extra Tips:
If you want to save time, you can prepare the bites ahead of time and store them in the refrigerator until you’re ready to bake them. Just make sure to cover the muffin tin with plastic wrap to prevent the pastry from drying out.
If you’re using a homemade cranberry sauce, consider adding a pinch of orange zest for a bright, citrusy note that complements the Brie fantastically.
Finally, feel free to experiment with different toppings such as walnuts or almonds if pecans aren’t available.
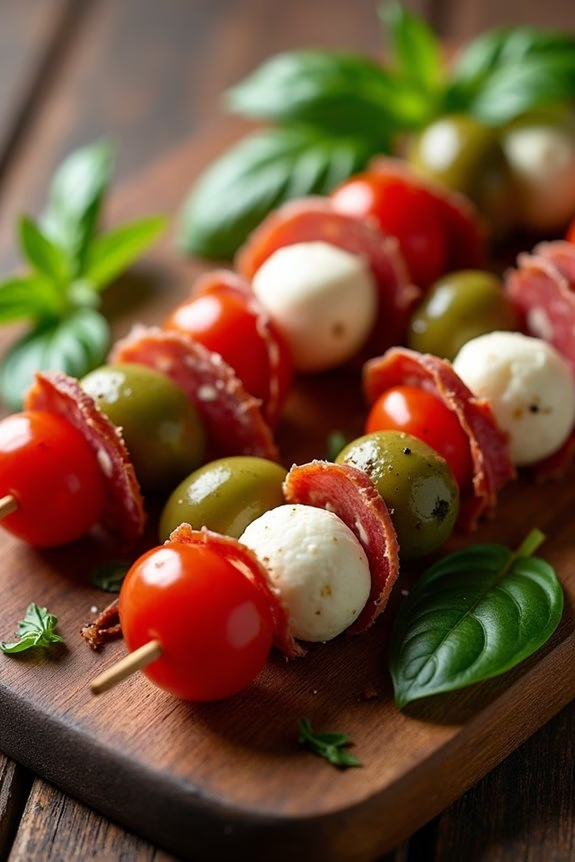
Festive Antipasto Skewers
Festive Antipasto Skewers are the perfect appetizer for any Christmas potluck, offering a delightful mix of flavors and textures that are sure to satisfy your guests.
These skewers aren’t only visually appealing with their vibrant colors but also easy to assemble and serve, making them a stress-free addition to your holiday spread. Combining the classic antipasto ingredients of cured meats, cheeses, olives, and vegetables, this dish encapsulates the essence of a traditional Italian antipasto platter in a convenient, single-serving form.
Whether you’re hosting a gathering or attending one, these Festive Antipasto Skewers are a crowd-pleasing option that requires minimal preparation and no cooking. The beauty of these skewers lies in their versatility; you can tailor the ingredients to suit your preferences or dietary needs.
They offer a rejuvenating, savory bite that pairs wonderfully with a variety of beverages, from a crisp white wine to a sparkling cocktail, making them a versatile and elegant choice for any festive occasion.
Ingredients for 4-6 Servings:
- 12 slices of salami
- 12 cherry tomatoes
- 12 small mozzarella balls (bocconcini)
- 12 pitted green olives
- 12 pitted black olives
- 1 small jar of marinated artichoke hearts, drained
- 12 fresh basil leaves
- 12 small wooden skewers or toothpicks
Cooking Instructions:
- Prepare the Ingredients: Begin by gathering all your ingredients and placing them on a clean cutting board. Drain the artichoke hearts and mozzarella balls if needed. Rinse the cherry tomatoes and basil leaves under cool water and pat them dry with a paper towel.
- Assemble the Skewers: Take a wooden skewer and start by threading a slice of salami, folding it in half if necessary. Follow with a cherry tomato, a mozzarella ball, a green olive, a black olive, a piece of artichoke heart, and a fresh basil leaf. Continue this process with the remaining skewers until all ingredients are used.
- Arrange and Serve: Once all the skewers are assembled, arrange them neatly on a serving platter. You can garnish the platter with extra basil leaves or sprinkle with a little olive oil and balsamic glaze for added flavor and presentation.
- Chill (Optional): If not serving immediately, cover the platter with plastic wrap and refrigerate for up to an hour. This will allow the flavors to meld together but isn’t essential if you’re short on time.
Extra Tips:
To guarantee your Festive Antipasto Skewers are a hit, consider using high-quality ingredients, especially for the cheeses and cured meats. Freshness is key, so opt for fresh basil and ripe tomatoes.
Feel free to experiment by adding other ingredients like roasted red peppers or prosciutto for variety. If you’re preparing these in advance, assemble them a few hours before serving to maintain their freshness and vibrant appearance.
Holiday Stuffed Mushrooms
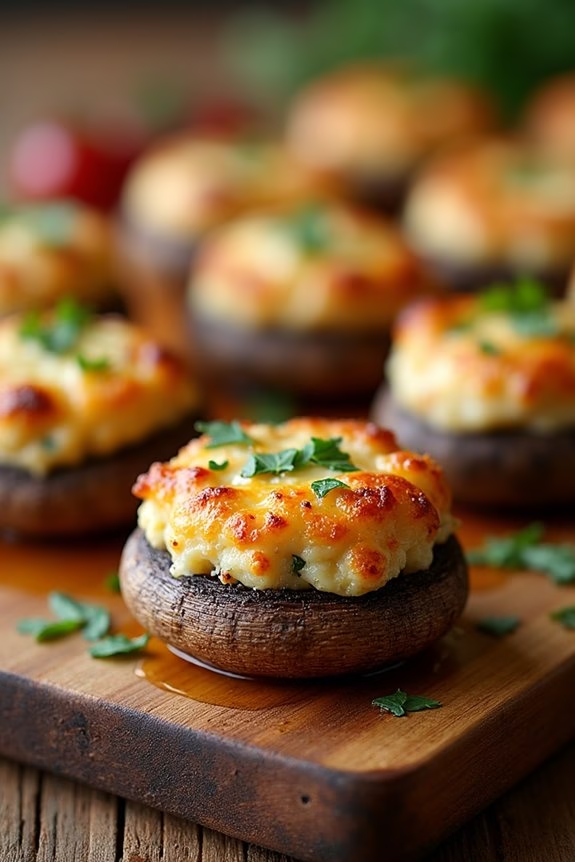
Holiday Stuffed Mushrooms are a delightful appetizer that brings a touch of elegance to any festive gathering. These bite-sized treats are packed with savory flavors that will have your guests reaching for seconds. The earthy taste of the mushrooms pairs wonderfully with the creamy, cheesy filling, making them a perfect addition to your Christmas potluck spread.
Whether you’re hosting a large party or an intimate family dinner, these stuffed mushrooms are bound to impress. This recipe serves 4-6 people, making it ideal for a small gathering. The mushrooms are filled with a delicious mixture of cream cheese, garlic, herbs, and breadcrumbs, then baked to golden perfection.
The combination of textures and flavors in this dish will surely make it a holiday favorite. Plus, they’re easy to prepare, allowing you to spend more time enjoying the company of your loved ones.
Ingredients:
- 16 large button mushrooms
- 1 tablespoon olive oil
- 1 small onion, finely chopped
- 2 cloves garlic, minced
- 1/2 cup cream cheese, softened
- 1/4 cup grated Parmesan cheese
- 1/4 cup breadcrumbs
- 2 tablespoons fresh parsley, chopped
- Salt and pepper to taste
- 1/4 cup shredded mozzarella cheese
Cooking Instructions:
- Preheat the Oven: Preheat your oven to 375°F (190°C) to guarantee it reaches the right temperature by the time you’re ready to bake the mushrooms.
- Prepare the Mushrooms: Carefully clean the mushrooms with a damp cloth, then remove the stems and set them aside. Be sure to hollow out the caps gently to make room for the filling.
- Make the Filling: In a skillet over medium heat, add the olive oil. Once heated, sauté the chopped onion and minced garlic until they’re soft and fragrant, about 3-4 minutes.
- Combine Ingredients: In a mixing bowl, combine the sautéed onion and garlic with cream cheese, Parmesan cheese, breadcrumbs, and chopped parsley. Season the mixture with salt and pepper to taste, then mix until well combined.
- Stuff the Mushrooms: Spoon the filling into each mushroom cap, packing it slightly to confirm they’re generously filled. Place the stuffed mushrooms on a baking sheet lined with parchment paper.
- Bake the Mushrooms: Sprinkle shredded mozzarella cheese over each mushroom. Bake in the preheated oven for 20-25 minutes, or until the mushrooms are tender and the tops are golden brown.
- Serve: Allow the mushrooms to cool for a few minutes before serving. They’re best enjoyed warm.
Extra Tips:
When preparing Holiday Stuffed Mushrooms, it’s important to choose mushrooms of similar size to guarantee even cooking. If you prefer a richer flavor, consider adding cooked and crumbled sausage to the filling.
You can also prepare the filling a day in advance and store it in the refrigerator, making assembly quick and easy on the day of your event. Be mindful not to overstuff the mushrooms, as the filling will expand slightly during baking. Enjoy this delightful appetizer as part of your festive celebration!
Maple-Glazed Roasted Carrots
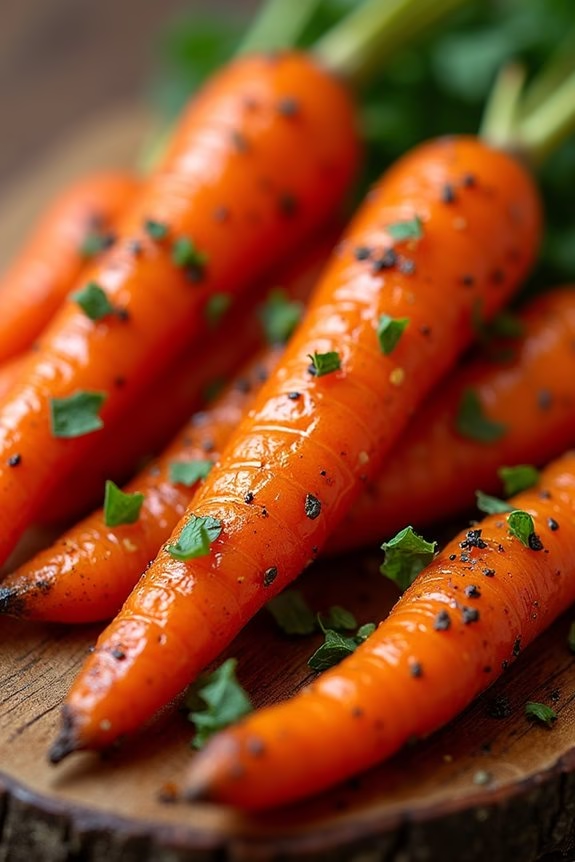
Maple-Glazed Roasted Carrots are a delightful addition to any festive Christmas potluck. Their vibrant color and sweet, earthy flavor make them the perfect side dish to accompany a variety of main courses. The natural sweetness of the carrots is enhanced with a rich maple glaze, offering a beautiful balance of flavors that both adults and children will enjoy.
The roasting process brings out the natural sugars in the carrots, giving them a caramelized exterior while keeping the inside tender and moist. This recipe is simple yet elegant, ideal for the busy holiday season when you want to impress without spending hours in the kitchen.
The combination of maple syrup, butter, and a hint of thyme creates a glaze that coats the carrots beautifully, adding depth and warmth to the dish. With just a few ingredients and minimal preparation time, Maple-Glazed Roasted Carrots will quickly become a holiday favorite, looked forward to year after year.
Ingredients (Serves 4-6):
- 2 pounds of carrots, peeled and cut into sticks
- 3 tablespoons of olive oil
- 1/4 cup of pure maple syrup
- 2 tablespoons of unsalted butter, melted
- 1 teaspoon of salt
- 1/2 teaspoon of black pepper
- 1 teaspoon of fresh thyme leaves
- 1 tablespoon of chopped fresh parsley (for garnish)
Cooking Instructions:
- Preheat the Oven: Start by preheating your oven to 400°F (200°C). This temperature is ideal for roasting the carrots to the desired tenderness and caramelization.
- Prepare the Carrots: Peel the carrots and cut them into uniform sticks, approximately 3 inches long. This guarantees even cooking. Place the carrot sticks in a large mixing bowl.
- Make the Glaze: In a small bowl, combine the olive oil, melted butter, maple syrup, salt, pepper, and thyme leaves. Whisk together until fully blended.
- Coat the Carrots: Pour the maple glaze over the carrots in the mixing bowl. Toss the carrots until they’re evenly coated with the glaze.
- Roast the Carrots: Spread the glazed carrots in a single layer on a baking sheet lined with parchment paper. This prevents sticking and makes for easy cleanup. Place the baking sheet in the preheated oven.
- Bake the Carrots: Roast the carrots for 25-30 minutes, or until they’re tender and slightly caramelized. Stir the carrots halfway through the cooking time to guarantee even roasting.
- Garnish and Serve: Once done, remove the carrots from the oven and transfer them to a serving platter. Garnish with chopped fresh parsley before serving to add a touch of color and freshness.
Extra Tips:
For even more flavor, you can add a sprinkle of cinnamon or nutmeg to the maple glaze for a warm, spiced aroma. If you prefer a bit of heat, a pinch of red pepper flakes can add a subtle kick.
When selecting carrots, opt for those that are firm and brightly colored, as they tend to have the best flavor and texture. If you want to prepare this dish in advance, you can roast the carrots and then reheat them in the oven at 350°F (175°C) for about 10 minutes before serving.
Christmas Tree Cheese Board

Celebrate the holiday season with a delightful and visually stunning Christmas Tree Cheese Board. This festive appetizer isn’t only delicious but also a perfect centerpiece for your holiday potluck gatherings.
The Christmas Tree Cheese Board is designed to resemble a charming Christmas tree, complete with a variety of cheeses, fruits, nuts, and charcuterie that will cater to every palate. It’s an ideal addition to your festive spread and can be easily customized to suit your guests’ preferences.
Crafting a Christmas Tree Cheese Board is as fun as it’s delicious. Not only does it allow you to release your creativity, but it’s also an interactive experience for your guests as they pick and choose their favorite bites. This recipe serves 4-6 people and is sure to impress with its vibrant colors and delightful flavors.
Whether you’re a cheese connoisseur or just love the festive spirit, this cheese board will add a touch of holiday magic to your table.
Ingredients (Serves 4-6):
- 8 oz. sharp cheddar cheese, cubed
- 8 oz. brie cheese, sliced
- 8 oz. gouda cheese, cubed
- 4 oz. blue cheese, crumbled
- 6 oz. salami, sliced
- 6 oz. prosciutto slices
- 1 cup green grapes
- 1 cup red grapes
- 1/2 cup dried cranberries
- 1/2 cup almonds
- 1/2 cup pistachios
- 1/2 cup olives (green and black mixed)
- 1 fresh rosemary sprig (for garnish)
- Crackers or sliced baguette for serving
Cooking Instructions:
- Prepare the Ingredients: Start by cubing the cheddar and gouda cheese into bite-sized pieces. Slice the brie cheese into wedges and crumble the blue cheese. Arrange the sliced salami and prosciutto into small rolls.
- Create the Tree Base: On a large serving board or platter, arrange the cubes of cheddar and gouda at the base in a triangular shape to form the trunk of the tree. Confirm the base is wide enough to support the rest of the tree structure.
- Build the Tree Layers: Working upwards, layer the brie slices and crumbled blue cheese to form the middle section of the tree. Alternate with clusters of green and red grapes to add a pop of color and sweetness.
- Add Charcuterie and Nuts: Tuck the rolled salami and prosciutto slices into the tree layers. Sprinkle the dried cranberries, almonds, and pistachios throughout to add texture and flavor.
- Decorate with Olives: Place the olives sporadically over the cheese tree to resemble ornaments. This not only adds a festive touch but also enhances the overall flavor profile.
- Garnish and Serve: Use the fresh rosemary sprig as the “tree topper” by placing it at the peak of your cheese tree. Arrange crackers or sliced baguette around the tree for serving.
Extra Tips:
When assembling your Christmas Tree Cheese Board, consider using a mix of soft and hard cheeses to offer a variety of textures.
If you prefer a different selection of meats or cheeses, feel free to substitute them based on your taste or dietary preferences. To keep the board fresh, prepare it just before serving, and if you need to make it ahead, cover it with plastic wrap and store it in the refrigerator.
Finally, for a more festive appearance, consider adding a few sprigs of fresh herbs like thyme or additional rosemary around the platter for a fragrant touch.
Spiced Sweet Potato Casserole
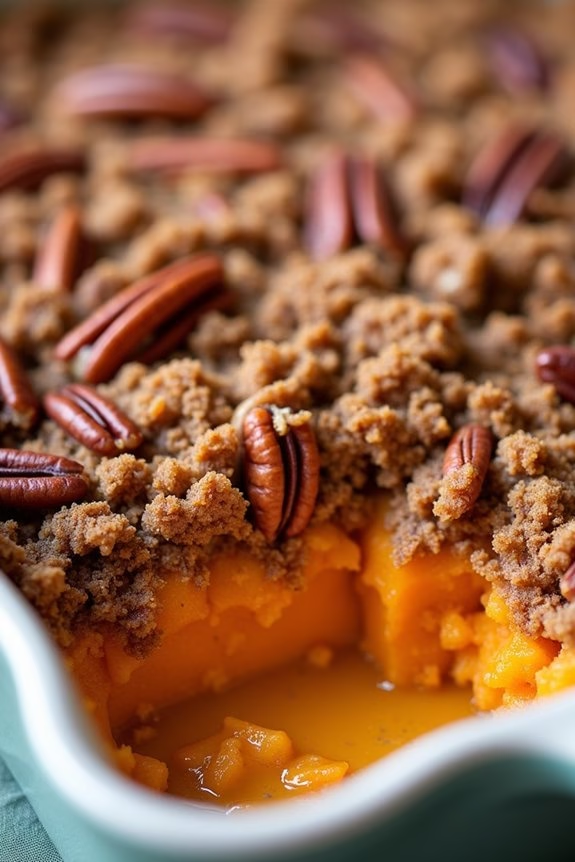
The Spiced Sweet Potato Casserole is a delightful addition to any festive Christmas potluck table. This dish combines the natural sweetness of sweet potatoes with a warm blend of spices, creating a comforting and aromatic side dish that complements any holiday spread.
The creamy texture of the sweet potatoes is perfectly balanced with a crunchy pecan topping, adding a delightful contrast and making it a crowd-pleaser for both adults and children alike.
Perfectly suited for serving 4-6 people, this casserole is easy to prepare and can be made ahead of time, freeing up your schedule for other holiday preparations. Whether you’re hosting a large family gathering or a small intimate dinner, this dish is sure to impress your guests with its festive flavors and beautiful presentation.
Ingredients:
- 4 large sweet potatoes
- 1/2 cup unsalted butter, melted
- 1/2 cup brown sugar
- 1/4 cup milk
- 2 large eggs
- 1 teaspoon vanilla extract
- 1 teaspoon ground cinnamon
- 1/2 teaspoon ground nutmeg
- 1/4 teaspoon ground ginger
- 1/4 teaspoon salt
- 1 cup chopped pecans
- 1/2 cup all-purpose flour
- 1/2 cup brown sugar (for topping)
- 1/4 cup unsalted butter, melted (for topping)
Cooking Instructions:
- Preheat the oven and prepare the sweet potatoes: Preheat your oven to 350°F (175°C). Peel and cube the sweet potatoes, then place them in a large pot of water. Bring to a boil and cook until tender, about 15-20 minutes. Drain and transfer to a large mixing bowl.
- Mash and mix the sweet potato base: Using a potato masher or electric mixer, mash the cooked sweet potatoes until smooth. Add the melted butter, brown sugar, milk, eggs, vanilla extract, cinnamon, nutmeg, ginger, and salt. Mix until thoroughly combined and smooth.
- Prepare the pecan topping: In a separate bowl, combine the chopped pecans, flour, brown sugar, and melted butter. Mix until the ingredients are well combined and the mixture is crumbly.
- Assemble the casserole: Spread the sweet potato mixture evenly into a greased 9×13-inch baking dish. Sprinkle the pecan topping evenly over the sweet potato base.
- Bake: Place the casserole in the preheated oven and bake for 25-30 minutes, or until the topping is golden brown and the casserole is heated through.
- Serve: Allow the casserole to cool for a few minutes before serving. This dish can be enjoyed warm or at room temperature.
Extra Tips:
To make your Spiced Sweet Potato Casserole even more special, consider adding a dash of maple syrup to the sweet potato mixture for an extra hint of sweetness.
If you prefer a less sweet topping, you can reduce the amount of brown sugar or substitute with a sugar substitute. For a nut-free option, replace the pecans with a crunchy oat topping.
This casserole can be made a day in advance and stored in the refrigerator; simply reheat in the oven before serving. Enjoy the festive flavors and the wonderful aroma that will fill your kitchen!
Honey-Glazed Ham Sliders

Honey-Glazed Ham Sliders are a delightful addition to any festive Christmas potluck, bringing together the perfect balance of sweet and savory flavors. These bite-sized treats aren’t only easy to make but also incredibly satisfying, making them a favorite among guests of all ages.
The combination of succulent ham, a sticky honey glaze, and soft rolls creates a symphony of flavors that’s perfect for sharing during the holiday season. These sliders are perfect for serving as an appetizer or as part of the main spread, and they’re sure to be a hit at any gathering.
The preparation requires minimal effort, yet the result is a gourmet experience that leaves a lasting impression. This recipe serves 4-6 people, making it ideal for small to medium-sized gatherings.
Ingredients:
- 12 Hawaiian sweet rolls
- 1 1/2 pounds of cooked ham, thinly sliced
- 1/2 cup honey
- 1/4 cup Dijon mustard
- 1/4 cup unsalted butter, melted
- 1 tablespoon brown sugar
- 1 teaspoon Worcestershire sauce
- 6 slices of Swiss cheese
- 1 tablespoon poppy seeds (optional)
Cooking Instructions:
- Prepare the Rolls: Preheat your oven to 350°F (175°C). Carefully slice the Hawaiian rolls in half horizontally without separating them. This will make it easier to assemble the sliders while keeping them intact.
- Make the Honey Glaze: In a small saucepan over low heat, combine the honey, Dijon mustard, melted butter, brown sugar, and Worcestershire sauce. Stir continuously until the mixture is smooth and slightly thickened. Set aside a portion of the glaze for brushing on top of the sliders.
- Assemble the Sliders: Place the bottom halves of the rolls in a baking dish. Layer half of the ham slices evenly over the rolls, followed by the Swiss cheese slices. Add another layer of the remaining ham slices. Place the top halves of the rolls over the ham and cheese layers.
- Glaze the Sliders: Pour the honey glaze over the assembled sliders, making certain that the glaze drips down the sides and covers the tops evenly. If using, sprinkle the poppy seeds on top for added texture and flavor.
- Bake the Sliders: Cover the baking dish with aluminum foil and bake in the preheated oven for 15 minutes. Remove the foil and bake for an additional 10 minutes, or until the cheese is melted and the tops of the rolls are golden brown.
- Serve: Remove the sliders from the oven and let them cool slightly before slicing them into individual pieces. Serve warm and enjoy the delightful combination of flavors.
Extra Tips:
For the best flavor, use high-quality ham that’s freshly sliced. If you prefer a bit of a kick, you can add a dash of hot sauce to the glaze. Ascertain the sliders are baked just until the cheese melts to avoid drying out the ham.
For a more festive presentation, garnish with fresh parsley or thyme before serving. These sliders can be prepared a few hours in advance and baked just before serving, making them a convenient option for busy holiday gatherings.
Rosemary Parmesan Roasted Potatoes
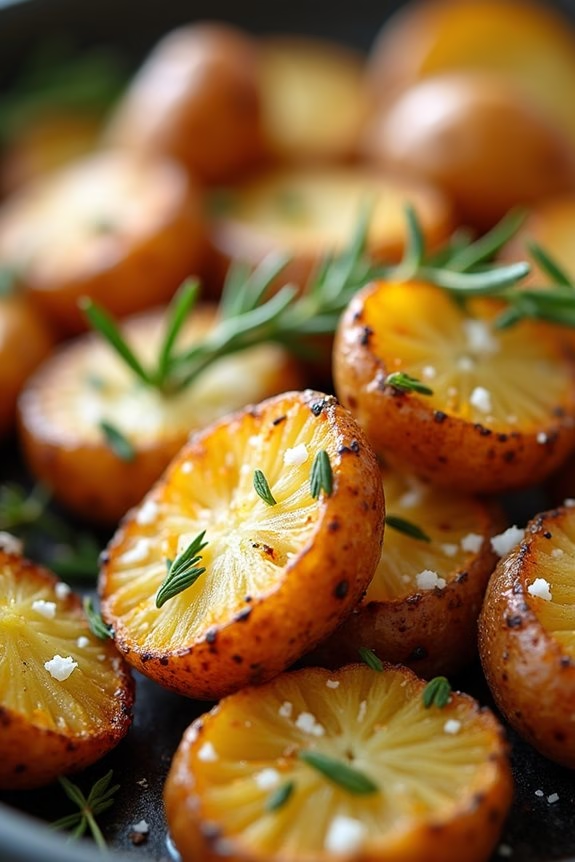
Rosemary Parmesan Roasted Potatoes are a delightful addition to any festive Christmas potluck. This dish combines the earthy aroma of fresh rosemary with the nutty, savory flavor of parmesan cheese, creating a perfect balance that’s both comforting and delicious. The crispy outer layer and tender interior of the potatoes make them an irresistible side dish that complements a wide variety of main courses.
Not only is this recipe simple to prepare, but it also requires minimal ingredients, making it an ideal choice for busy holiday gatherings. The beauty of Rosemary Parmesan Roasted Potatoes lies in their versatility and ease of preparation. With just a few fresh ingredients and simple steps, you can create a dish that will have your guests coming back for seconds.
The secret to achieving perfectly roasted potatoes is in the combination of the right oven temperature and the use of quality ingredients. These potatoes are best served hot, directly from the oven, to preserve their crispiness and enhance their flavors. Whether you’re hosting a large group or attending a small gathering, this recipe is sure to impress.
Ingredients (Serving size: 4-6 people):
- 2 pounds of baby potatoes
- 3 tablespoons of olive oil
- 1 tablespoon of fresh rosemary, chopped
- 1 teaspoon of garlic powder
- Salt and pepper to taste
- 1/2 cup of grated Parmesan cheese
Instructions:
- Preheat the oven: Begin by preheating your oven to 425°F (220°C). A hot oven is essential for achieving that crisp exterior on your roasted potatoes.
- Prepare the potatoes: Wash the baby potatoes thoroughly under cold water to remove any dirt. Pat them dry with a clean kitchen towel. Cut each potato in half to guarantee even cooking.
- Season the potatoes: In a large mixing bowl, combine the halved potatoes with olive oil, chopped rosemary, garlic powder, and a generous pinch of salt and pepper. Toss the potatoes until they’re evenly coated with the seasoning mixture.
- Arrange on baking sheet: Spread the seasoned potatoes in a single layer on a baking sheet lined with parchment paper or lightly greased with olive oil. Making sure the potatoes aren’t overcrowded will help them roast evenly and develop a crispy texture.
- Roast the potatoes: Place the baking sheet in the preheated oven and roast the potatoes for 25-30 minutes. Halfway through the cooking time, use a spatula to turn the potatoes to guarantee they roast evenly on all sides.
- Add Parmesan cheese: Once the potatoes are golden brown and crispy, remove them from the oven and sprinkle the grated Parmesan cheese generously over the top. Return the baking sheet to the oven for an additional 5 minutes, or until the cheese is melted and slightly browned.
- Serve immediately: Transfer the roasted potatoes to a serving platter and enjoy them while they’re hot for the best flavor and texture.
Extra Tips:
To elevate the flavor profile of your Rosemary Parmesan Roasted Potatoes, consider adding a squeeze of lemon juice or a sprinkle of lemon zest just before serving. This will enhance the freshness of the dish and complement the rich flavors of the parmesan and rosemary.
Additionally, if you prefer a spicier kick, a pinch of red pepper flakes can be added to the seasoning mixture. Remember, the key to crispy potatoes is making sure they’re dry before seasoning and spreading them out in a single layer on the baking sheet. Enjoy experimenting with these variations to suit your taste preferences!
Winter Harvest Salad With Pomegranate
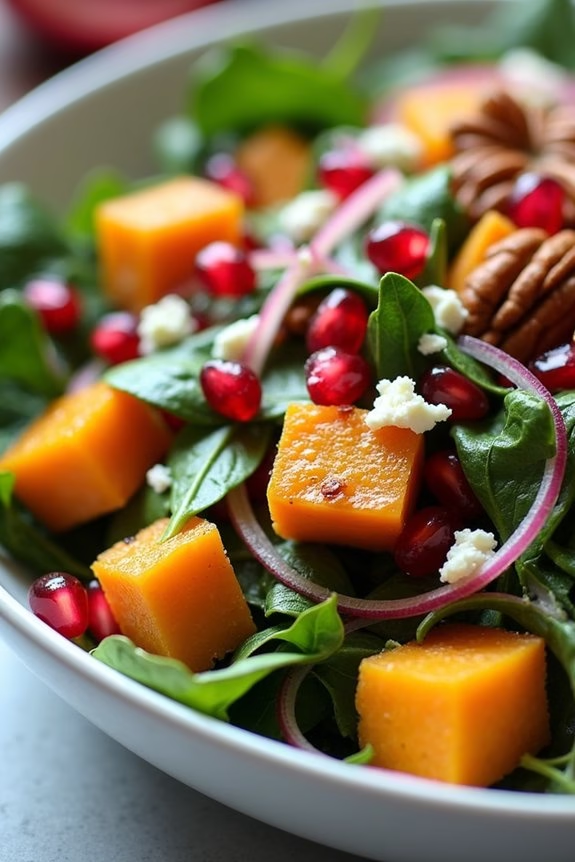
Celebrate the festivities with a vibrant and invigorating Winter Harvest Salad that brings the colors and flavors of the season to your table. This salad combines the crispness of mixed greens and the sweet-tart burst of pomegranate seeds, creating a delightful contrast to the typical rich dishes of the season.
Perfect for a Christmas potluck or any holiday gathering, this salad isn’t only a feast for the eyes but also a healthy addition to your meal. The combination of roasted butternut squash, crunchy pecans, creamy feta cheese, and tangy pomegranate seeds makes this salad a crowd-pleaser.
The Winter Harvest Salad is designed to serve 4-6 people, making it ideal for small family gatherings or as a side dish at larger celebrations. The preparation is straightforward, allowing you to spend more time enjoying the festive season with your loved ones.
The variety of textures and flavors in the salad will guarantee that it stands out on any buffet table, leaving your guests asking for the recipe.
Ingredients (Serves 4-6):
- 1 medium butternut squash, peeled and cubed
- 2 tablespoons olive oil
- Salt and pepper to taste
- 6 cups mixed salad greens (such as spinach, arugula, and kale)
- 1 cup pomegranate seeds
- 1/2 cup pecans, toasted
- 1/2 cup crumbled feta cheese
- 1/4 cup red onion, thinly sliced
- 1/4 cup balsamic vinaigrette dressing
Instructions:
1. Preheat and Prepare Butternut Squash:
Preheat your oven to 400°F (200°C). On a baking sheet, toss the cubed butternut squash with olive oil, salt, and pepper. Spread them evenly on the sheet.
2. Roast Butternut Squash:
Place the baking sheet in the preheated oven and roast the squash for 25-30 minutes, or until they’re tender and lightly browned. Stir halfway through cooking to guarantee even roasting. Once done, remove from oven and let them cool slightly.
3. Prepare Salad Base:
In a large salad bowl, combine the mixed salad greens to create a fresh base. Add the thinly sliced red onion on top of the greens for an extra crunch.
4. Assemble the Salad:
Once the butternut squash has cooled slightly, add it to the salad bowl along with the pomegranate seeds, toasted pecans, and crumbled feta cheese. Gently toss the mixture to combine all the ingredients.
5. Dress the Salad:
Drizzle the balsamic vinaigrette over the salad. Toss gently to ensure that the dressing is evenly distributed throughout the salad.
6. Final Touch:
Taste the salad and adjust seasoning with additional salt and pepper if needed. Serve immediately to enjoy the freshness of the ingredients.
Extra Tips:
To make certain your Winter Harvest Salad with Pomegranate is the star of your potluck, consider preparing the components ahead of time. Roast the butternut squash and toast the pecans a day in advance. Keep them stored in airtight containers once cooled.
Assemble the salad just before serving to keep the greens crisp and fresh. If pomegranate seeds aren’t readily available, you can substitute them with dried cranberries for a similar sweet-tart flavor.
Don’t forget to offer the dressing on the side if you’re preparing this salad for a buffet to cater to individual taste preferences.
Gingerbread Trifle
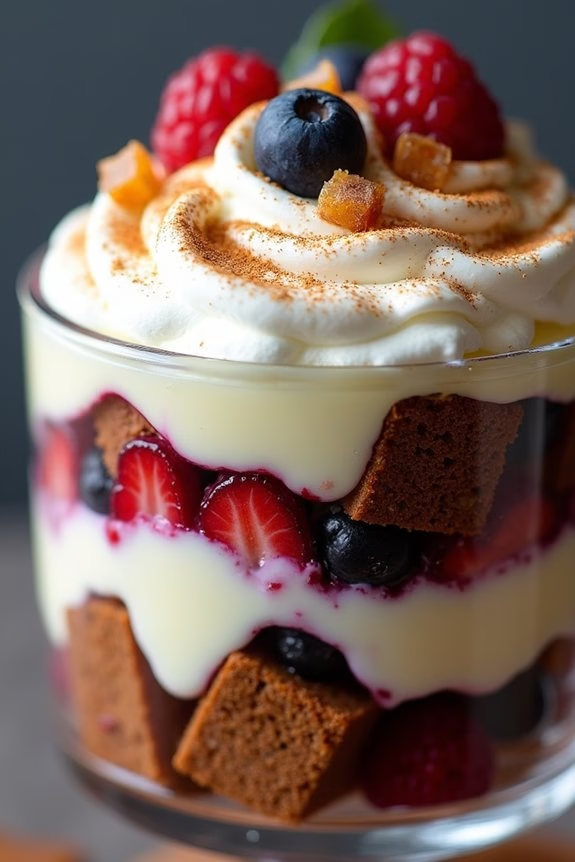
Gingerbread Trifle is a delightful festive dessert that brings together the rich flavors of gingerbread, creamy custard, and tangy berries in a beautiful layered presentation. Ideal for a Christmas potluck, this trifle not only tastes amazing but also adds a touch of elegance to your holiday table.
As the layers meld together, each spoonful offers a perfect balance of spice, sweetness, and tartness that will have your guests coming back for seconds. Creating this trifle is a wonderful way to showcase the classic taste of gingerbread in a new, exciting form.
The dessert isn’t only visually stunning but also incredibly easy to assemble, allowing you to spend more time enjoying the festivities. Designed to serve 4-6 people, this gingerbread trifle will surely be a star at your Christmas gathering, impressing both family and friends with its festive charm and delicious taste.
Ingredients (Serving Size: 4-6 people):
- 1 loaf of gingerbread cake (homemade or store-bought)
- 2 cups of vanilla custard
- 1 cup of whipped cream
- 1 cup of mixed berries (such as raspberries, blueberries, and blackberries)
- 1/4 cup of crystallized ginger, chopped
- 1/4 cup of brandy or orange juice (optional)
- 1 teaspoon of ground cinnamon
- 1/2 teaspoon of ground nutmeg
Cooking Instructions:
- Prepare the Gingerbread: If using a store-bought gingerbread cake, verify it’s fresh and moist. Cut the gingerbread cake into 1-inch cubes. If you wish to add a boozy twist, lightly drizzle brandy or orange juice over the cubes to moisten them slightly.
- Make the Custard Layer: If you prefer homemade custard, prepare it in advance and allow it to cool completely before using. Otherwise, store-bought custard is perfectly suitable for this recipe.
- Assemble the Trifle: In a large trifle bowl or individual serving glasses, start by placing a layer of gingerbread cubes at the bottom. Follow with a layer of vanilla custard, then a layer of mixed berries. Repeat the layers until the ingredients are used up, finishing with a layer of whipped cream on top.
- Add the Finishing Touches: Sprinkle the top of the trifle with chopped crystallized ginger, ground cinnamon, and nutmeg for added flavor and decoration. You can also reserve a few berries to place on top for an extra pop of color.
- Chill the Trifle: Cover the trifle with plastic wrap and allow it to chill in the refrigerator for at least 2 hours before serving. This helps the flavors meld together and the trifle to set perfectly.
Extra Tips:
To enhance the flavor of your gingerbread trifle, consider making the gingerbread cake a day in advance, allowing the spices to develop further.
When assembling the trifle, verify each layer is evenly distributed for a balanced taste in every bite. If you’re preparing the trifle for a larger group, you can easily double the ingredients and use a larger trifle dish.
Finally, for a non-alcoholic version, substitute the brandy with orange juice or simply omit it. This dish is versatile and can be adjusted to fit your preferences, making it a perfect addition to any Christmas celebration.
White Chocolate Peppermint Bark

White Chocolate Peppermint Bark is a festive and delightful treat that perfectly encapsulates the holiday spirit, making it an ideal addition to any Christmas potluck. This simple yet elegant recipe combines the creamy richness of white chocolate with the revitalizing crunch of peppermint, creating a harmonious blend of flavors that are both indulgent and invigorating.
Perfect for sharing, this bark isn’t only a crowd-pleaser but also a breeze to make, requiring minimal ingredients and effort. Whether you’re looking to impress your guests with a homemade treat or simply enjoy a festive snack, White Chocolate Peppermint Bark is the perfect choice.
Preparing a batch allows you to savor the magic of the season with every bite, as the peppermint’s coolness beautifully complements the sweet, smooth white chocolate. The bark is also visually appealing, with its snow-like white base speckled with vibrant red peppermint pieces, making it a charming addition to any holiday dessert table.
Ingredients (Serves 4-6):
- 12 ounces of high-quality white chocolate chips
- 1/2 teaspoon of peppermint extract
- 1/2 cup of crushed candy canes or peppermint candies
- Optional: Red and green sprinkles for garnish
Cooking Instructions:
- Prepare the Baking Sheet: Line a baking sheet with parchment paper or a silicone baking mat. This will prevent the bark from sticking and make it easier to remove once set.
- Melt the White Chocolate: In a microwave-safe bowl, melt the white chocolate chips in 30-second intervals, stirring between each interval to verify even melting. This should take about 1.5 to 2 minutes. Alternatively, you can use a double boiler method for a gentler melting process.
- Add Peppermint Extract: Once the chocolate is fully melted and smooth, stir in the peppermint extract. Mix well to evenly distribute the flavor throughout the chocolate.
- Spread the Chocolate: Pour the melted chocolate onto the prepared baking sheet and spread it into an even layer, about 1/4 inch thick, using a spatula or the back of a spoon.
- Add Crushed Peppermint: Immediately sprinkle the crushed candy canes or peppermint candies evenly over the melted chocolate. Gently press them into the chocolate to make sure they stick once the chocolate sets.
- Garnish (Optional): For added festive flair, sprinkle red and green sprinkles over the top of the bark.
- Set the Bark: Place the baking sheet in the refrigerator or a cool area for about 30 minutes to 1 hour, or until the chocolate is completely set and firm.
- Break into Pieces: Once the chocolate is set, remove it from the refrigerator and break it into pieces of your desired size using your hands or a sharp knife.
Extra Tips:
For the best results, use high-quality white chocolate, as this will greatly impact the flavor and texture of your bark. If you prefer a more intense peppermint flavor, you can increase the peppermint extract slightly, but be careful not to overpower the chocolate’s sweetness.
When crushing candy canes, aim for a mix of fine and coarse pieces for varied texture in each bite. Store the bark in an airtight container at room temperature for up to two weeks, or refrigerate for longer freshness. Enjoy sharing this delightful holiday treat with friends and family, or package it beautifully as a homemade gift.
Eggnog Cheesecake Bars
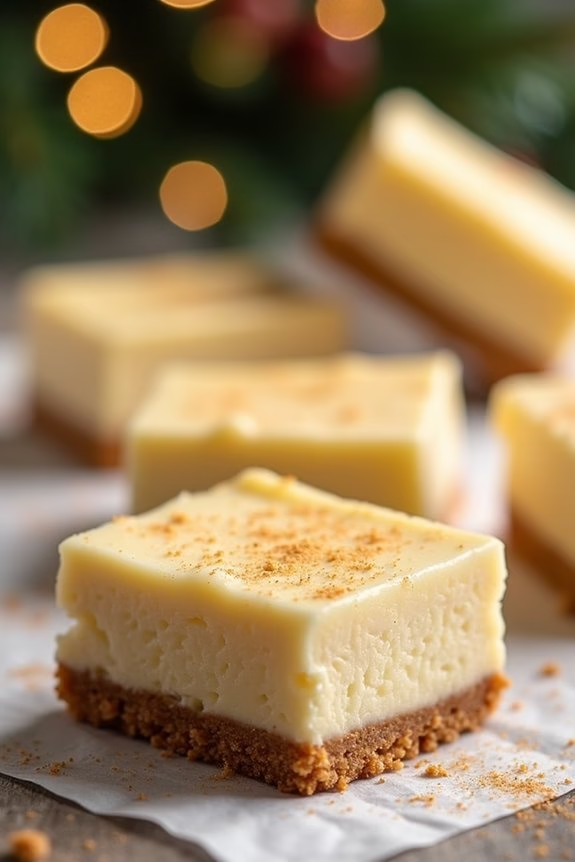
Eggnog Cheesecake Bars are a delightful addition to any Christmas potluck, combining the rich, creamy texture of cheesecake with the festive flavors of eggnog. These bars are perfect for serving a crowd and provide a sweet conclusion to your holiday meals.
With a buttery graham cracker crust, a luscious eggnog-infused cheesecake filling, and a hint of nutmeg, these bars capture the essence of the season in every bite. This recipe yields a serving size of 4-6 people, making it an ideal choice for smaller gatherings or as part of a larger dessert spread.
The process is straightforward, allowing you to focus on enjoying the festive spirit with your loved ones while still providing a homemade touch to your dessert table.
Ingredients:
- 1 cup graham cracker crumbs
- 1/4 cup unsalted butter, melted
- 2 tablespoons granulated sugar
- 2 (8-ounce) packages cream cheese, softened
- 1/2 cup granulated sugar
- 2 tablespoons all-purpose flour
- 1/2 cup eggnog
- 2 large eggs
- 1 teaspoon vanilla extract
- 1/2 teaspoon ground nutmeg
- Whipped cream (optional, for serving)
Cooking Instructions:
1. Preheat the Oven: Preheat your oven to 325°F (163°C). Line an 8×8-inch baking pan with parchment paper, leaving some overhang on the sides for easy removal later.
2. Prepare the Crust: In a medium bowl, combine the graham cracker crumbs, melted butter, and 2 tablespoons of sugar. Mix until the crumbs are evenly coated with butter. Press the mixture firmly into the bottom of the prepared baking pan to form an even layer.
Bake the crust for 8-10 minutes, then remove from the oven and set aside to cool slightly.
3. Make the Cheesecake Filling: In a large mixing bowl, beat the softened cream cheese until smooth. Gradually add the 1/2 cup of sugar and flour, beating until well combined.
Add the eggnog, mixing until smooth, then beat in the eggs one at a time. Stir in the vanilla extract and ground nutmeg until fully incorporated.
4. Assemble and Bake: Pour the cheesecake filling over the pre-baked crust, spreading it evenly. Tap the pan gently on the counter to remove any air bubbles.
Bake in the oven for 35-40 minutes, or until the edges are set and the center jiggles slightly when moved.
5. Cool and Chill: Remove the bars from the oven and let them cool completely in the pan. Once cooled, cover the pan with plastic wrap and refrigerate for at least 3 hours or overnight to allow the bars to fully set.
6. Serve: Use the parchment paper overhang to lift the cheesecake out of the pan. Cut into bars and Serve with a dollop of whipped cream, if desired.
For extra tips, confirm that your cream cheese is fully softened to avoid lumps in the cheesecake filling. This can be achieved by leaving it out at room temperature for about an hour before starting the recipe.
Also, to achieve a smooth and even filling, avoid over-mixing to prevent incorporating too much air, which can cause the cheesecake to crack. Finally, use a sharp knife dipped in hot water to cut the bars cleanly, wiping the knife between cuts for neat slices.
Spiced Mulled Wine

Spiced Mulled Wine is the ultimate festive drink that brings warmth and cheer to any holiday gathering. This aromatic beverage is made by gently simmering red wine with a blend of spices, citrus, and a touch of sweetness. The result is a comforting drink that’s perfect for sipping by the fire or sharing with friends and family at your Christmas potluck. Not only does it taste divine, but the scent of it simmering on the stove will fill your home with the most delightful holiday aroma.
The beauty of Spiced Mulled Wine is its versatility and ease of preparation. It can be made ahead of time and kept warm in a slow cooker, allowing you to enjoy the company of your guests without being stuck in the kitchen. Whether you’re an experienced cook or a beginner, this recipe is straightforward and forgiving, making it a stress-free addition to your holiday menu. Gather your favorite spices and a good bottle of red wine, and get ready to create a drink that’s sure to become a cherished holiday tradition.
Ingredients (Serves 4-6 people):
- 1 bottle (750 ml) of red wine (such as Merlot or Cabernet Sauvignon)
- 1/4 cup brandy
- 1/4 cup honey or sugar
- 2 cinnamon sticks
- 4 whole cloves
- 3 star anise
- 1 orange, sliced
- 1 lemon, sliced
- 1 vanilla pod, split
- 1/4 teaspoon freshly grated nutmeg
- Optional garnishes: orange slices, cinnamon sticks, star anise
Cooking Instructions:
- Prepare the Ingredients: Begin by slicing the orange and lemon into thin rounds. Split the vanilla pod lengthwise to release its fragrant seeds.
- Combine Ingredients: In a large saucepan over medium heat, combine the red wine, brandy, honey, cinnamon sticks, cloves, star anise, sliced orange and lemon, vanilla pod, and nutmeg.
- Heat the Mixture: Stir the mixture occasionally and heat until just below a simmer. Avoid boiling as it can cook off the alcohol and alter the flavor profile of the mulled wine.
- Infuse the Flavors: Once heated, reduce the heat to low and let the mixture infuse for at least 15-20 minutes. For a stronger flavor, let it steep longer, up to 1 hour.
- Strain and Serve: Strain the mulled wine through a fine-mesh sieve to remove the spices and fruit. Serve warm in heatproof mugs or glasses, garnishing with optional orange slices, cinnamon sticks, or star anise if desired.
- Keep Warm: If serving over a longer period, transfer the mulled wine to a slow cooker set to the warm setting to maintain its temperature.
Extra Tips:
For a non-alcoholic version, substitute the wine with grape juice and omit the brandy. You can also experiment with different spices like cardamom or ginger to suit your taste. Taste as you go and adjust the sweetness or spices to your preference.